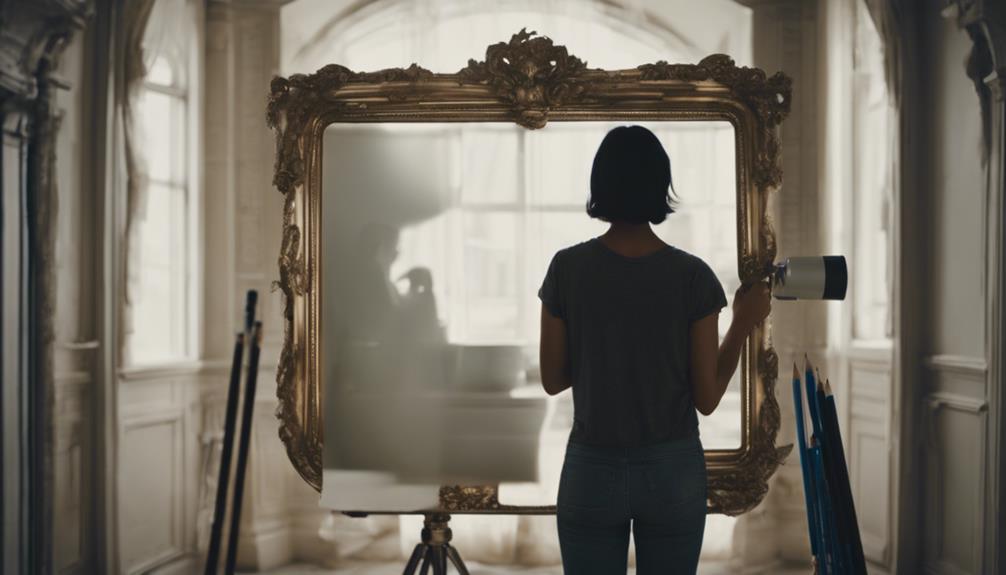
When you paint a mirror, the key to a professional-looking finish lies in meticulous surface preparation, which begins with thoroughly cleaning the mirror with a dampened microfiber cloth to guarantee a smooth surface for painting. Apply white gesso to enhance paint adhesion, letting it dry for at least 24 hours, then prime with a white acrylic base coat before applying chosen paint colors. Use enamel or acrylic paint formulated for glass surfaces, and paint in thin, even coats, allowing each to dry completely before adding the next. By following these steps, you'll be well on your way to creating a beautifully painted mirror that's both durable and visually stunning – and there's more to explore when it comes to achieving a flawless finish.
Key Takeaways
• Clean the mirror thoroughly with a dampened microfiber cloth to ensure a smooth surface for painting.
• Apply white gesso to the mirror to enhance paint adhesion and let it dry for at least 24 hours.
• Use high-quality enamel or acrylic paint specifically formulated for glass surfaces to ensure durability and vibrancy.
• Apply paint in thin, even coats, allowing each coat to dry completely before adding the next to achieve a smooth finish.
• Seal the painted mirror with a compatible sealant in thin, even coats to protect the finish and ensure long-lasting durability.

Nicpro 18 Colors Stained Glass Paint Set, 1oz / 30ml Waterproof Acrylic Enamel & Ceramic Glass Painting Kit for Arts on Transparent Wine Glasses Jars Windows with 6 Brushes & 1 Palette, Opaque Finish
- Complete 18-Color Set: Includes 1 oz bottles of vibrant colors
- Bonus Painting Tools: 6 brushes and 1 palette included
- Smooth, Glossy Finish: Dries to a permanent, streak-free gloss
As an affiliate, we earn on qualifying purchases.
As an affiliate, we earn on qualifying purchases.
Preparing the Mirrored Surface
Before you begin painting, thoroughly clean the mirror with a dampened microfiber cloth to remove dirt and grime that might affect paint adhesion. This step is important, as any dirt or grime left on the mirror's surface can cause the paint to peel off or not stick properly.
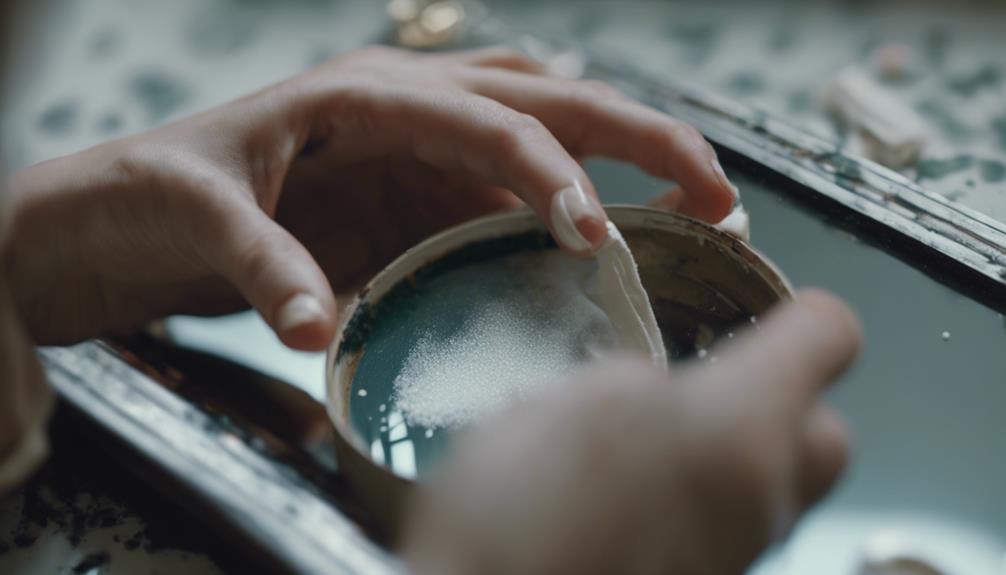
Once the mirror is clean, you'll be ready to move on to the next step. Now, it's vital to create a smooth surface for painting. You'll need to apply a white gesso to the areas you plan to paint, which will help the paint adhere better. Make sure to let the gesso dry for at least 24 hours before proceeding with painting the mirror. This will establish a strong bond between the paint and the mirror's surface.
With a smooth, primed surface, you'll be ready to start painting. Remember to use a white acrylic base coat before applying your chosen paint colors to enhance their vibrancy and coverage. With these steps, you'll be well on your way to transforming your mirror into a beautiful work of art.
Tracing and Priming the Mirror
As you move forward with tracing and priming your mirror, you'll need to tackle three essential steps: removing old coatings, cleaning the surface, and applying a primer coat.
You'll want to start by stripping away any existing coatings or residue, making sure the surface is smooth and even.
Next, you'll clean the mirror thoroughly, wiping away any grime or fingerprints that might interfere with the painting process.
Removing Old Coatings
You'll need to remove any old coatings from the mirror's surface to guarantee a strong bond between the glass and your new design. This step is important, as it ensures that your paint adheres properly and lasts longer. If you're working with an old mirror, it's likely to have a layer of old varnish or other coatings that need to be removed.
| Step | Description |
|---|---|
| 1 | Remove old coatings |
| 2 | Clean the surface |
| 3 | Apply white gesso |
| 4 | Paint your design |
Once you've removed the old coatings, you can proceed to clean the surface of the mirror. This will give you a smooth, even surface to work with. After cleaning, apply a thin layer of white gesso to the mirrored surface. This will create a base for your paint and prevent peeling. Now you're ready to start painting your mirror! Remember to use enamel or acrylic paint specifically formulated for glass surfaces for better adhesion and durability.
Cleaning the Surface
Clean the mirror's surface thoroughly with a soft cloth and window cleaner to remove any fingerprints, grime, or residue left behind from the old coatings. This step is vital to guarantee a smooth painting process.
Any dirt or grime left on the surface can affect the adhesion of the paint, leading to peeling or flaking.
Before you start painting, make sure to:
- Clean the mirror's surface with a soft cloth and window cleaner
- Trace the area to be painted with a water-soluble pencil, white crayon, or fabric pencil for accuracy
- Prime the mirror using white gesso to ensure proper adhesion of the paint and prevent peeling
- Let the gesso dry overnight before proceeding with painting to achieve the best results
Applying Primer Coat
With the mirror's surface now clean and ready, take the next step by tracing the area you plan to paint with a water-soluble pencil, guaranteeing an accurate outline for your design. This will help you visualize your design and prevent any mistakes during the painting process.
Next, it's time to apply a primer coat to the mirror. For painting on mirrors, a primer coat is crucial to secure paint adhesion and prevent peeling. You'll need white gesso, a water-based primer that acts as a base layer, similar to thin white acrylic paint. You can easily find white gesso at art supply stores or online.
Apply a thin, even layer of gesso to the mirror, making sure to cover the entire area you plan to paint. Allow the gesso to dry overnight before proceeding with painting. This will establish a strong bond between the gesso and the paint, resulting in a beautiful, long-lasting finish.
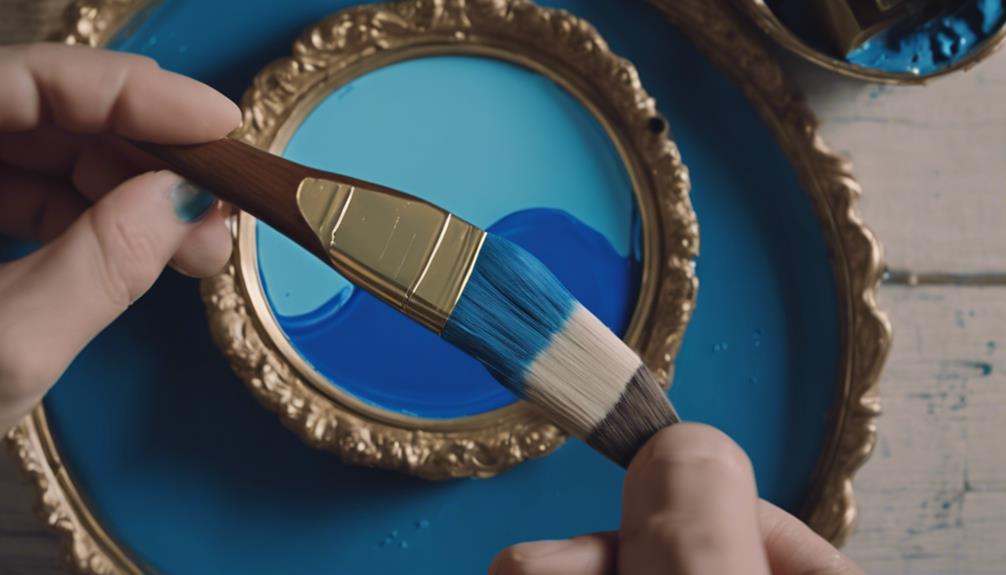
Painting the Mirror With Enamel
As you prepare to paint your mirror with enamel, it's crucial to keep in mind a few key considerations.
You'll want to focus on preparation tips, such as applying a layer of white acrylic paint on gesso, to guarantee a smooth and durable finish.
Additionally, you'll need to choose the right type of enamel paint, like Deco Art, and master the correct application techniques to achieve a beautiful, long-lasting result.
Preparation Tips
You'll need to prime your mirror's surface with white gesso before applying enamel paint to guarantee a strong bond and a durable finish. Proper surface preparation is essential for a long-lasting result.
Enamel paint is a great choice for painting mirrors, offering a softer and subtler finish compared to acrylic paint. However, it requires a well-prepared surface to adhere properly.
Here are some essential preparation tips to keep in mind:
- Use white gesso to prime your mirror's surface, ensuring a strong bond between the mirror and the enamel paint.
- Apply a layer of white acrylic paint as a base to enhance the vibrancy of the enamel paint.
- Make sure the surface is clean and free of dust, oil, or wax, which can affect paint adhesion.
- Avoid spray painting, as it can create uneven surfaces and affect the finish.
Enamel Types Matter
What type of enamel paint is best suited for your mirror's unique design and functionality?
When it comes to painting a mirror, enamel paint is an excellent choice. Not only does it provide a glossy finish, but it's also incredibly durable and resistant to chipping, making it perfect for high-traffic areas.
You'll have a wide range of colors and finishes to choose from, allowing you to customize your mirror's design to fit your personal style. One thing to keep in mind is that enamel paint typically requires longer drying times compared to acrylic paint, so be patient and plan accordingly.
With enamel paint, you can rest assured that your mirror will maintain its vibrant appearance for years to come. Its excellent adhesion and longevity make it a top recommendation for mirrors.
Application Techniques
Using a high-quality enamel paint specifically formulated for glass surfaces, such as Deco Art, paint the mirror in thin, even coats to achieve a smooth, long-lasting finish. This is essential, as enamel paint can be prone to dripping or pooling if applied too thickly.
To guarantee a professional-looking result, follow these application techniques:
- Apply enamel paint in thin, even layers, allowing each coat to dry completely before adding the next.
- Consider layering enamel paint over a base of white acrylic paint to enhance color vibrancy.
- Allow ample drying time between coats to prevent a rough, uneven finish.
- Work in a well-ventilated area, and use a foam brush or high-quality paintbrush to minimize streaks and bubbles.
Applying Acrylic Paint Layers
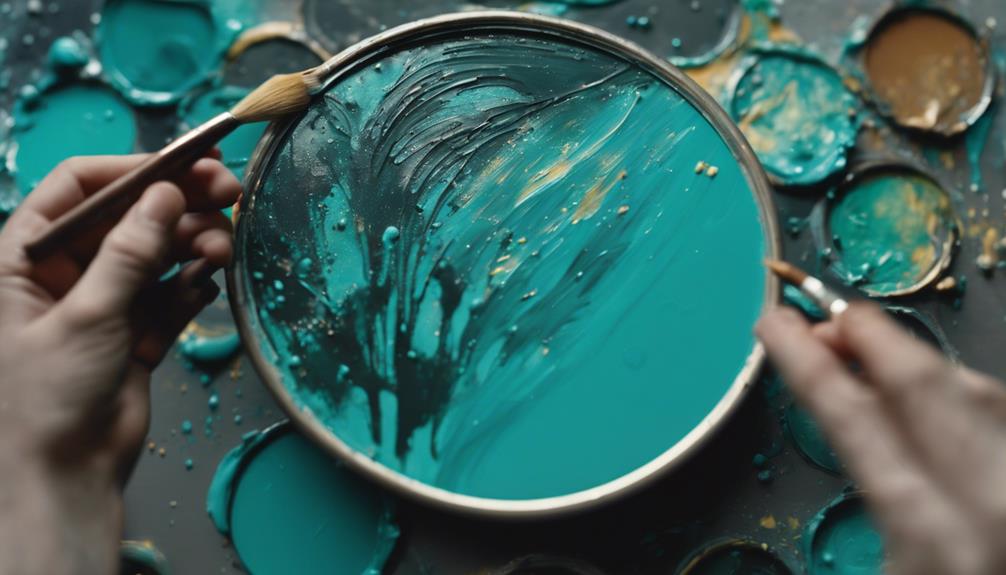
As you begin applying acrylic paint layers, start with the darkest shades first, gradually building up to lighter hues to achieve depth and dimension on your mirror's surface. This technique allows you to create a sense of dimensionality and visual interest on your mirrored surface.
When applying layers, use a variety of brush sizes to achieve different textures and details. For instance, you can use larger brushes for broad strokes and smaller ones for finer details.
Remember to allow each layer of acrylic paint to dry completely before adding another layer. This is essential for best results, as it prevents the paint from becoming muddy or uneven. By doing so, you'll achieve a durable and vibrant finish on your mirrored surface.
As you work through the layers, you'll start to see your design come to life. With acrylic paint, you can rest assured that your design will be long-lasting and resistant to fading.
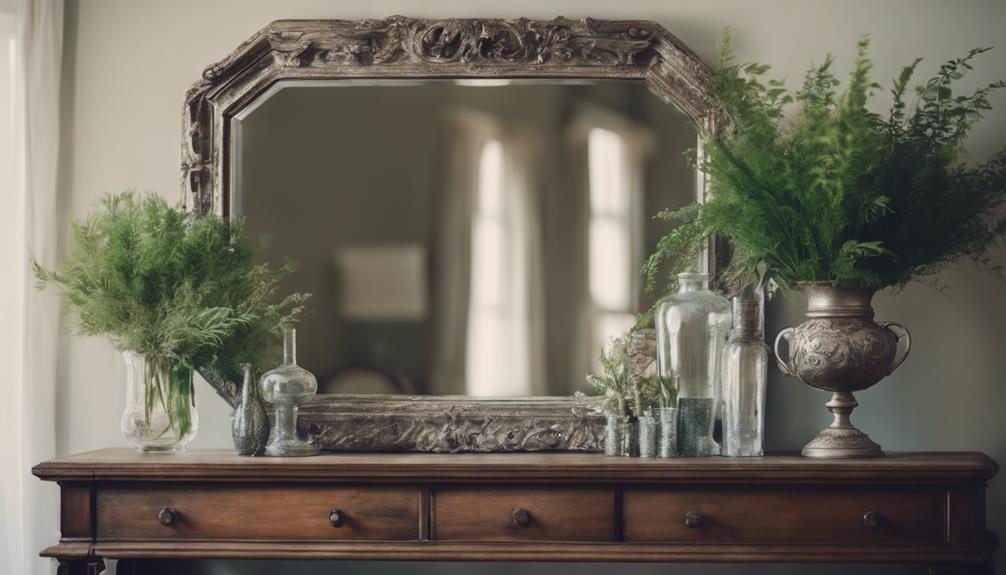
Sealing the Painted Mirror
You'll want to seal your beautifully painted mirror with a clear varnish to protect it from scratches and wear. This step is important in preserving your hard work and guaranteeing your mirror remains stunning for years to come. When choosing a sealant, make sure it's compatible with the type of paint you used on your mirror frame.
Here are some essential tips to keep in mind when sealing your painted mirror:
- Apply the sealant in thin, even coats to avoid drips or uneven coverage.
- Ensure the sealant is fully dry according to the manufacturer's instructions before handling the mirror.
- Regularly inspect the sealed mirror for any signs of damage or wear, and reapply sealant as needed.
- Remember to follow the manufacturer's instructions for the recommended number of coats and drying time.
Removing Excess Paint Safely
To safeguard damage to your mirror's surface, remove excess paint promptly and carefully. When working with spray paint, it's especially important to act quickly, as it can dry fast and become difficult to remove.
Start by wiping off excess paint with a soft cloth or paper towel, being cautious not to scratch the glass. For more stubborn paint, use a razor scraper with glass cleaner to gently remove the excess. If you're working with oil-based paint, consider using a non-toxic solvent like Chelsea Classical Studio to help with removal.
For acrylic paint, a cotton swab can be a useful tool in fixing mistakes and removing excess paint. Remember to work carefully around the frame around the mirror, as you don't want to get paint on it.
Distressing the Painted Mirror
With your painted mirror now free of excess paint, take a sanding block or scraper in hand and start distressing the surface to achieve a beautifully weathered look. This process adds character and depth to the mirror, enhancing its overall appearance.
Using sandpaper, gently distress the edges and corners of the mirror frame for a vintage effect. Consider using a candle or Vaseline on strategic areas before painting to easily distress the paint later.
Here are some tips to keep in mind when distressing your mirror:
- Use painters tape to protect areas you don't want to distress
- Experiment with different distressing techniques to achieve the desired level of antiquity or shabby chic style
- Sandpaper is your friend – use it to smooth out rough edges and create a soft, worn look
- Don't be afraid to get creative and try new things – distressing is all about experimentation and having fun!
Tips for a Flawless Finish
Now that you've achieved a beautifully distressed look, it's time to focus on perfecting the finish of your painted mirror. To guarantee a flawless finish, you'll need to prime, paint, and seal your mirror surface correctly.
| Step | Product | Purpose |
|---|---|---|
| 1 | White gesso | Primer to prevent paint peeling |
| 2 | Acrylic paint | Bold, vibrant color |
| 3 | Acrylic paint | Additional coats for desired color |
| 4 | Varnish | Seal and protect the finish |
When applying paint, remember to allow each layer to dry completely before adding another coat. This will prevent unevenness and ensure a smooth finish. Using acrylic paint will provide a bold, vibrant look, while enamel paint offers durability. Apply a layer of white acrylic paint over the gesso primer for better adhesion. Finally, seal the painted areas with varnish for long-lasting protection and a professional finish. By following these steps, you'll achieve a beautifully painted mirror that will last for years to come.
Common Mistakes to Avoid
Your painted mirror's success depends on sidestepping common pitfalls that can ruin the finish, and being aware of these mistakes is the first step to a flawless outcome.
To avoid a disastrous DIY project, steer clear of these common mistakes:
- Failing to make sure the surface is clean before applying paint, which can lead to poor adhesion and a subpar finish.
- Skipping the essential step of priming with gesso, which helps the paint adhere to the mirror's surface.
- Not allowing the first coat to dry before applying another, resulting in a smudged or uneven finish.
- Using specialized paint without proper preparation, which can lead to a lackluster finish that's prone to fading and scratches.
Frequently Asked Questions
Can I Use Regular Household Paint on a Mirrored Surface?
You might be tempted to use regular household paint on a mirrored surface, but it's not the best idea. Household paint isn't formulated to adhere well to mirror coatings, and it may not provide a durable, long-lasting finish.
In fact, it may even damage the mirror's reflective surface. You'll get better results with specialized mirror paint or a primer specifically designed for mirrors, which will guarantee a strong bond and a professional-looking finish.
Will Painting a Mirror Affect Its Reflective Quality?
When you paint a mirror, you're likely wondering if it'll affect its reflective quality. The good news is that, generally, painting a mirror won't compromise its reflective properties.
The mirrored surface is typically made of aluminum or silver, which is coated with a protective layer. As long as you properly prepare the surface and use the right paint, the reflective quality should remain intact.
However, it's essential to note that the type of paint and application process can impact the outcome.
Can I Paint Over a Mirror With a Glossy Finish?
When you're considering painting over a mirror with a glossy finish, you're likely wondering if the result will be a distorted reflection or a beautifully painted surface.
Rest assured, you can paint over a glossy mirror, but proper preparation of the surface is crucial. Make sure to clean the mirror thoroughly, then lightly sand the glossy finish to create a surface for the paint to adhere to.
How Long Does It Take for the Paint to Fully Cure?
As you wait for your newly painted mirror to dry, you're likely wondering, 'How long until it's fully cured?'
Think of the paint as a slow-cooked meal, needing time to simmer and set. Typically, it takes 24 hours for the paint to fully cure, but this timeline can vary depending on factors like environmental conditions, paint type, and thickness of application.
Can I Use a Hair Dryer to Speed up the Drying Process?
When you're anxious to speed up the drying process, you might consider using a hair dryer to hasten the cure time. However, it's important to exercise caution: direct heat can cause the paint to blister or become uneven.
Instead, try increasing the room's temperature or using a fan to circulate the air, which can help the paint dry faster without compromising the finish.
Conclusion
As you step back to admire your handiwork, you can't help but feel a sense of pride and accomplishment. Coincidentally, the same meticulous attention to detail that made you hesitant to tackle this project in the first place is what ultimately led to its success.
By following these steps, you've not only transformed a mundane mirror, but also developed a newfound confidence in your DIY skills.