Connect with us

Wall Art and Decor

How Much Cost Paint Interior Door

Pondering the price of painting your interior door?

Published

on

estimating interior door painting

When painting your interior door, consider factors like size, type, and finish. Labor costs vary, and different paint types and finishes come at varied prices. Door size influences material and labor needs; types like French doors can be pricier. Specialized paint or techniques may be required for certain finishes. Factor in door size, type, and material before estimating costs accurately. You can explore various cost-saving tips like painting multiple doors together or choosing simpler designs. By understanding these aspects, you can better plan for the total cost of painting your interior door.

Key Takeaways

  • Door size, type, and material influence painting costs.
  • Labor expenses range from $20 to $50 per hour.
  • Different paint types and finishes have varying prices.
  • Opt for cost-effective choices like single colors and simple designs.
  • Proper preparation ensures a durable finish and cost savings.
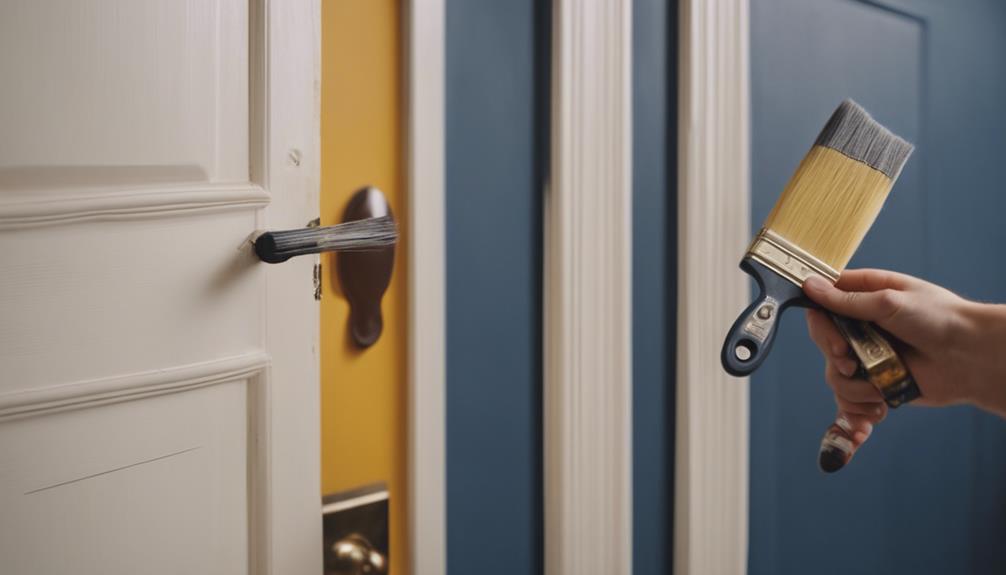
Factors Affecting Interior Door Painting Costs

interior door painting factors

When determining the cost of painting an interior door, various factors significantly influence the overall painting expenses. The size of the door plays an important role in determining the amount of materials needed for the project, which in turn affects the total cost. Larger doors require more paint and additional labor, raising the overall price.

The type of door also impacts the cost, with French doors typically costing more to paint due to their intricate design compared to simpler bifold doors. Additionally, the finish of the door, whether it requires a more specialized paint or technique, can increase the painting expenses. Different types of paint and finishes come with varying price points, affecting the overall cost of the project.

Labor costs also play a significant role in the total cost of painting an interior door, as the complexity of the job and the time required influence the final price.

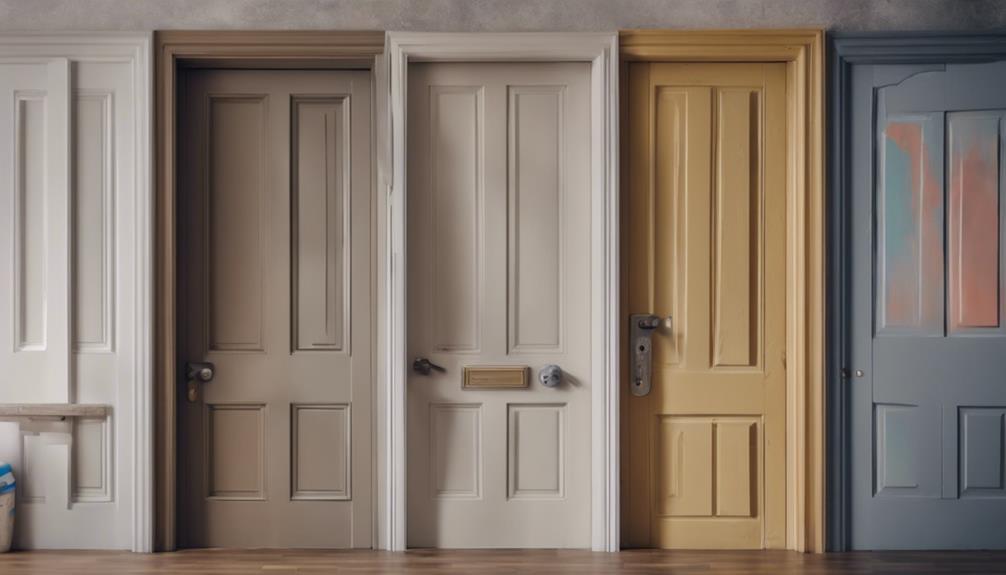
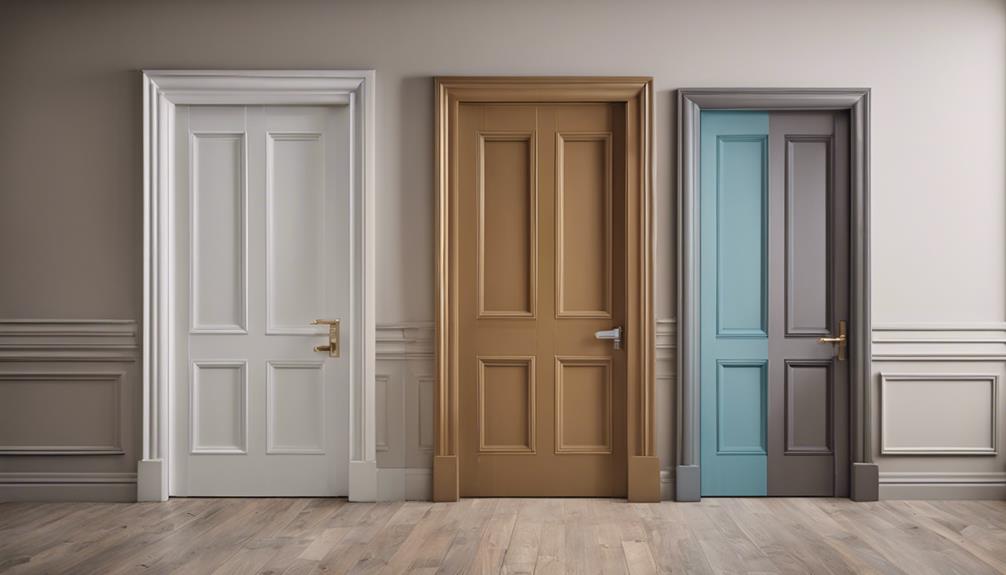
Average Cost for Different Door Types

comparing door installation prices

The average cost of painting different types of interior doors varies depending on the size and design complexity. For smaller doors like a 24 x 80, painting can range from $25 to $75. If you have a slightly larger door, such as a 28 x 80, expect to pay between $40 and $100 for painting. Moving up in size to a 32 x 80 door, the cost typically falls between $50 and $200. Larger doors like a 36 x 90 can have painting costs ranging from $100 to $300.

When it comes to different door types, such as bifold doors, 6-panel doors, sliding doors, and louvered doors, the painting cost varies based on the size and intricacy of the design. Each type may have a different cost range, so it's crucial to take into account the specific dimensions and style of your interior door before estimating the painting expenses.

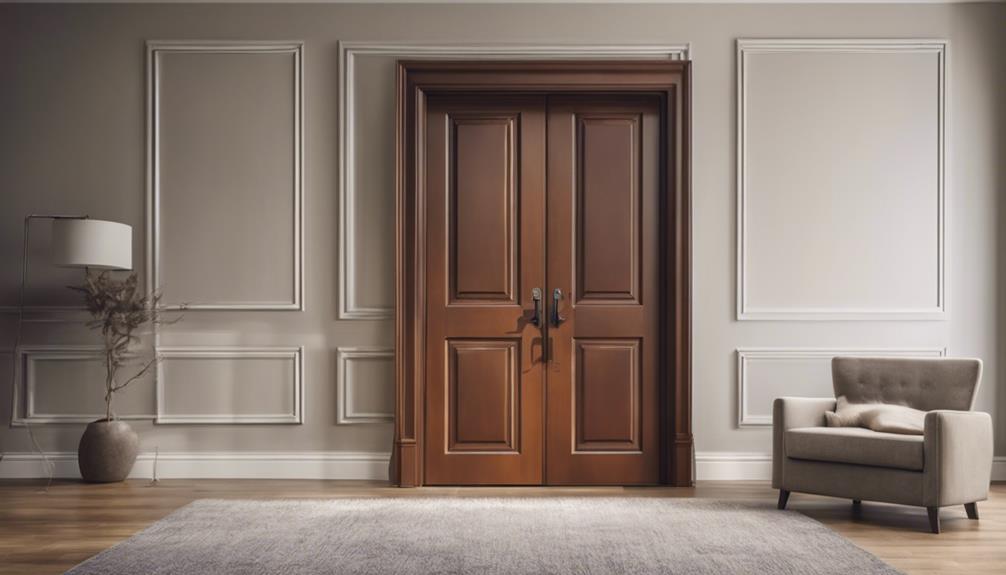
Material Specific Painting Costs

cost estimates for painting

To accurately estimate the cost of painting your interior door, consider the specific painting expenses associated with the material used and the type of paint selected. Different door materials such as MDF, vinyl, composite, metal, wood, and fiberglass have varying painting costs depending on factors like surface condition and the type of paint you choose. For instance, using a water-based primer on MDF doors might be more cost-effective compared to applying high-quality paint on a metal door due to differing surface absorption rates. Oil-based products are often more expensive than water-based options but may be necessary for certain materials. Below is a table outlining how material choice and paint type can impact painting costs:

Material Recommended Paint Type Additional Cost Considerations
MDF Water-based primer Surface condition
Vinyl High-quality paint Type of paint finish
Metal Oil-based products Primer requirements
Wood High-quality paint Sealant needs
Fiberglass Water-based primer Surface preparation

Paint Type and Finish Pricing

customized paint pricing guide

When considering painting your interior door, keep in mind that different paint types and finishes can affect the overall cost. Water-based, oil-based, and chalk paints have varying prices per gallon.

Finishes like matte, eggshell, and high-gloss also come with specific cost considerations. Understanding the price ranges for different paint types and finishes is essential in planning the budget for your interior door painting project.

Advertisement

Paint Type Options

Considering the various paint type options available for interior doors, you can explore a range of finishes and pricing to suit your desired look and budget.

Water-based paint, ranging from $15 to $40 per gallon, offers a budget-friendly choice. Oil-based paint, priced between $20 and $60 per gallon, provides a durable and traditional option. If you prefer a trendy and versatile look, chalk paint could be a great choice at $25 to $50 per gallon.

Matte finish paint, ranging from $15 to $40 per gallon, gives a subtle and elegant appearance. For a modern and sophisticated touch, high-gloss paint priced at $30 to $60 per gallon offers a shiny and reflective finish.

Each type caters to different styles and preferences, allowing you to select the best fit for your interior doors.

Impact of Finish

Exploring the impact of different finishes on your interior door painting project reveals how the choice of paint type and finish pricing directly influences the overall aesthetics and durability of the painted surface.

Advertisement

Finish options such as matte, eggshell, satin, semi-gloss, and high-gloss come with varied cost per gallon, ranging from $15 to $60. Opting for a semi-gloss finish, for instance, may increase the overall cost but provides a more durable and glossy look compared to matte options.

The selection of a specific finish not only affects the aesthetic appeal of your interior door but also plays an important role in determining its longevity. Understanding the impact of finish choices on cost and quality is essential for achieving the desired outcome in your interior door painting project.

Labor Costs and Additional Services

managing labor expenses effectively

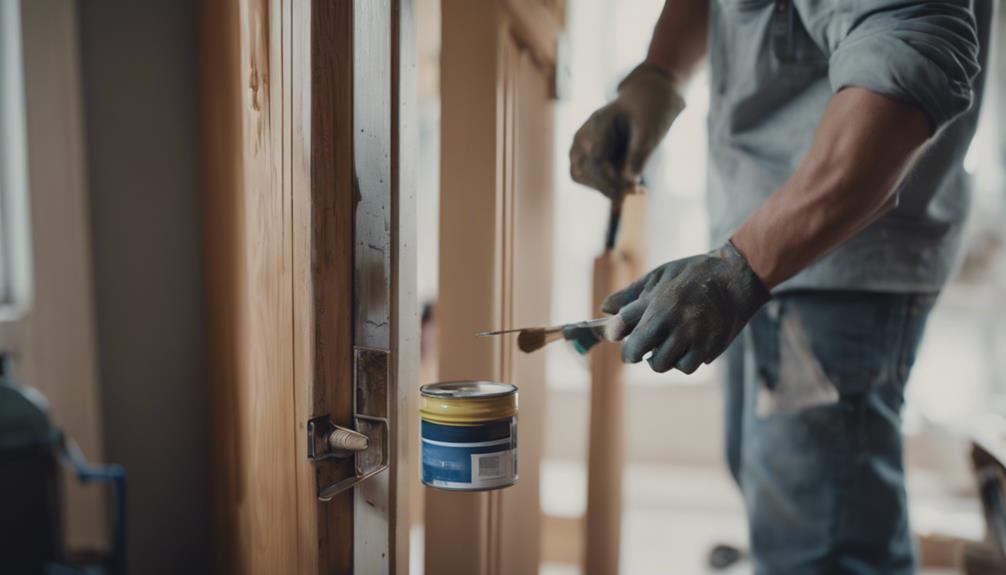
To calculate the total cost of painting an interior door, factor in labor costs and any additional services that may be required. Labor costs for painting an interior door typically range from $20 to $50 per hour, with the average total cost falling between $75 to $150.

Professional painters may charge more for intricate designs or custom work, impacting the overall cost. Additionally, if you need the trim, frame, or jambs painted along with the door, this can also increase the total cost. Labor expenses usually make up a significant portion, around 50% to 70%, of the total cost of painting an interior door.

Keep in mind that the complexity of the job, such as custom work or intricate designs, can influence the final price. Be sure to discuss all your requirements with the painter to get an accurate estimate that includes labor and any additional services you may need.

Tips for Cost-Effective Door Painting

efficient door painting techniques

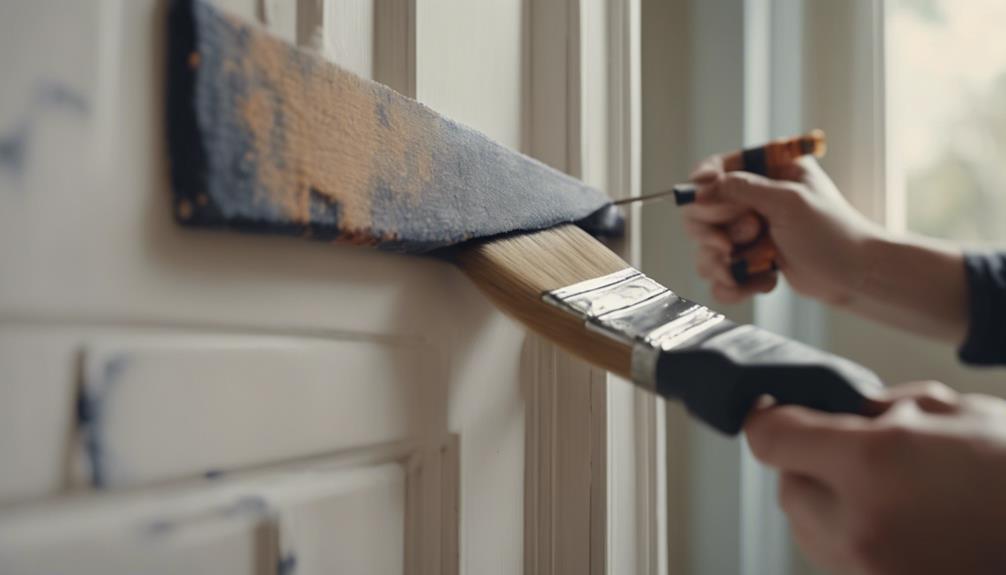
For a more budget-friendly approach to painting your interior doors, consider these cost-effective tips. When planning your project, aim to paint multiple doors at once to benefit from lower average costs per door. Opt for simple door designs like flat-panel doors to streamline the painting process and reduce expenses.

Choosing a single color or minimizing color changes can also help you save on overall painting costs. If you're undertaking a larger home improvement project, include door painting to leverage cost savings on labor and materials. Prioritize proper preparation by lightly sanding the doors and using high-quality paint and primer for a durable finish.

Advertisement

Frequently Asked Questions

How Much Does It Cost to Have an Interior Door Painted?

To have an interior door painted, the cost generally ranges from $75 to $150. This price includes both the materials and labor needed for both sides of the door. If you're painting French doors, it can cost between $200 to $400.

For bifold doors, the cost typically falls between $75 to $150. Labor costs by professionals range from $20 to $50 per hour, with door paint prices ranging from $15 to $60 per gallon.

How Much Does It Cost to Have an Internal Door Painted?

To paint an internal door, the cost typically ranges from $75 to $150. This includes both materials and labor. Door paint prices can vary from $15 to $60 per gallon for interior doors. Labor costs by professionals can range from $20 to $50 per hour.

For complex doors like French doors, the cost may increase to around $200 to $400. Painting kitchen cabinet doors can be pricier, ranging from $900 to $3,800 depending on size and material.

How Much Paint for an Interior Door?

To paint an interior door, you typically need about 1 to 2 gallons of paint. Factors like door material, size, texture, and color can affect the amount required. Professional painters often use this range for standard doors. Consult with a painting expert for accurate estimates based on your door's specifics.

Advertisement

Consider budgeting between $15 to $60 per gallon for paint. Choose wisely to guarantee a smooth and durable finish.

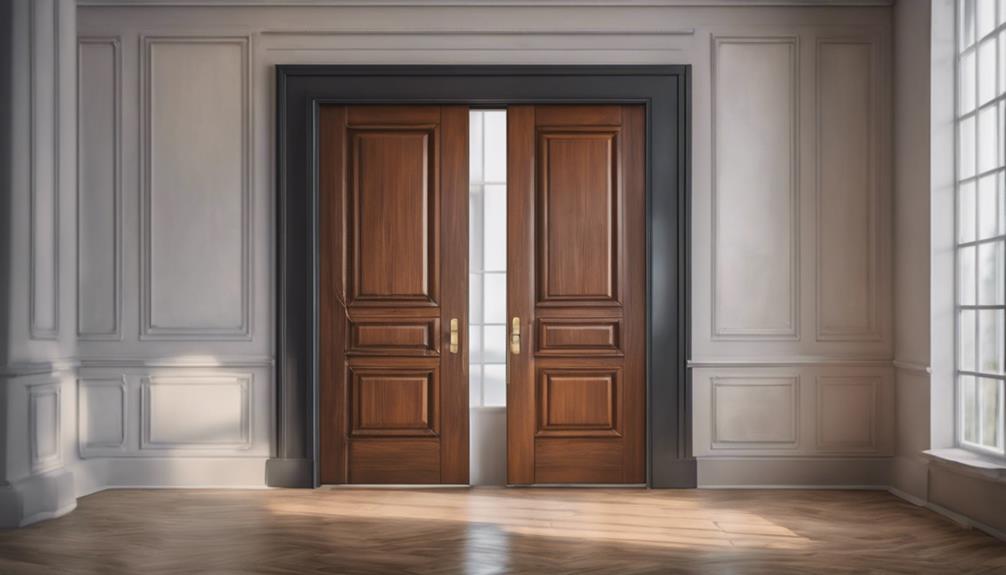
Is It Worth Painting Interior Doors?

Painting interior doors can be worth it for a fresh look. It can enhance your home's overall appearance without breaking the bank.

Consider DIY for cost savings, but hiring a professional guarantees a polished finish. The price varies based on door type and complexity, so weigh the cost against the desired outcome.

Ultimately, a freshly painted door can revitalize your space and add a touch of style.

Conclusion

So, when it comes to painting your interior doors, remember that costs can vary depending on factors like door type, materials, paint type, finish, labor, and additional services.

Advertisement

To keep your expenses in check, consider these tips: choose cost-effective materials, do some of the work yourself, and shop around for the best deals.

With a little planning and savvy decision-making, you can give your doors a fresh new look without breaking the bank.

Continue Reading
Advertisement

Wall Art and Decor

Is It Easy to Paint Interior Doors

Nail your interior door painting project with these easy steps for a flawless finish – find out how!

Published

on

By

painting interior doors effectively

Painting interior doors is relatively easy and cost-effective, offering a way to spruce up your space. You'll need tools like paintbrushes, rollers, and sandpaper. Prep by removing knobs, filling imperfections, and sanding with 120-grit paper. Priming after sanding guarantees a smooth finish and enhances paint adhesion. Choose paint colors that complement your trim and apply multiple thin coats for a professional look. Use long, even strokes and allow each coat to dry thoroughly. For more tips on painting interior doors, discover techniques and tools for a flawless finish.

Key Takeaways

  • Painting interior doors is easy with proper tools and techniques.
  • Prepping, sanding, priming, and choosing paint color are key steps.
  • Using quality tools and materials ensures a professional finish.
  • Following step-by-step instructions simplifies the painting process.
  • Practice and patience lead to successful interior door painting.

Benefits of Painting Interior Doors

enhancing home d cor with painted interior doors

Painting your interior doors can quickly revitalize the ambiance of any room in your home. The color scheme you choose for your doors can greatly impact the overall aesthetic of your living space.

By updating the paint on your interior doors, you can easily customize and personalize your home without breaking the bank. Applying a coat of primer before painting will help the new color adhere better and last longer.

When painting, use a high-quality brush for the edges and a roller for the flat surfaces to guarantee a smooth finish. Opt for latex paint, as it dries quickly and is easy to clean up.

Make sure to paint not only the door but also the door frame for a cohesive look. Well-painted interior doors can tie together the design scheme of your home, creating a sense of harmony and cohesion throughout the space.

Necessary Tools for Door Painting

essential tools for painting

Updating the paint on your interior doors can be made easier with the right tools at your disposal. Essential tools for painting your doors include paintbrushes, rollers, painter's tape, sandpaper, and a drop cloth to protect your floors.

A high-quality paint pail will make the painting process smoother, while using wood shims can provide stability when painting. A utility knife is handy for precise cutting and trimming. Consider using a brush with a magnet to tackle intricate areas and door hardware with accuracy.

Advertisement

After use, wrap your tools in Saran Wrap to maintain their condition and prevent dried paint buildup. Remember, investing in durable door hardware from reputable suppliers can enhance the quality and longevity of your painted doors. Having these tools ready will ensure a successful door painting project.

Prepping Your Interior Doors

optimizing your interior doors

To prep your interior doors for painting, start by removing or taping off any knobs. Fill in any imperfections with wood filler and sand the surface with 120-grit sandpaper for a smooth finish.

Cleaning the door with a degreasing cleaner will guarantee the paint adheres well for long-lasting results.

Sanding for Smooth Finish

Before applying paint to your interior doors, ensure a smooth finish by sanding them using sandpaper with a grit of 120 or higher. Sanding is essential for prepping the surface, ensuring it's free of imperfections and creating an even surface for the paint to adhere to.

A 120-grit sandpaper or higher will help you achieve a professional-looking finish by smoothing out any rough spots. This process is vital to improving the overall quality and durability of your paint job.

Priming for Better Adhesion

After sanding your interior doors for a smooth finish, the next step is priming to enhance adhesion before painting. A primer is important for better paint adhesion to the surface. It seals the door, preventing stains from bleeding through and ensuring a smooth base for the paint.

Advertisement

Choosing the right primer based on the door material and paint type is necessary for best results. Skipping this step may lead to uneven coverage and poor adhesion, requiring additional coats of paint. Make sure to apply the primer evenly and allow it to dry thoroughly before painting.

This preparation step sets the foundation for a professional-looking finish on your interior doors.

Choosing the Right Paint Color

selecting the perfect paint

When selecting the perfect paint color for your interior doors, consider experimenting with shades that complement your existing trim for a cohesive and stylish look. Here are some tips to guide your choice:

  1. Consider Classic Whites: Benjamin Moore's Cloud White or Simply White in semi-gloss or satin finishes can provide a timeless appeal to your doors.
  2. Test in Small Areas: Before committing to a color, test it on a small area of your door to see how it interacts with the lighting in your space.
  3. Match Your Trim: Opt for a paint color that either matches or complements the color of your existing trim to maintain a harmonious appearance.

Customizing your door colors can help create a unique style that fits your personal taste and complements your home décor. Whether you prefer bold hues for a striking effect or muted tones for a more relaxing ambiance, the right paint color can enhance the overall look of your interior doors.

Techniques for Painting Doors

door painting best practices

To achieve a professional finish when painting doors, use long, even strokes for best coverage. Start by applying a coat of primer to prepare the door surface.

Then, using a high-quality brush or roller, begin painting the door with latex paint. Make sure to smooth out any brush marks or roller lap marks as you go along for a polished look. It's best to apply multiple thin coats of paint rather than one thick coat to guarantee better coverage and a smoother finish.

Consider adding a paint additive to the latex paint for improved application and durability. Allow each coat of paint to dry completely before applying the next one to prevent any issues with drying time.

Tips for a Professional Finish

crafting a polished appearance

You can enhance the professional finish of your painted interior doors by paying attention to key details, such as using long, even strokes and applying multiple thin coats of paint. To achieve a flawless result, follow these tips:

  1. Use Long, Even Strokes: When painting your interior doors, opt for long, smooth strokes to prevent visible brush marks and guarantee a seamless finish.
  2. Apply Multiple Thin Coats: Rather than trying to cover the door in one thick coat, apply several thin coats of paint. This technique helps prevent drips, uneven coverage, and provides a smoother appearance.
  3. Smoothing Out Roller Marks: After each coat, inspect the door for roller lap marks and gently sand them down to maintain a uniform and professional look.

Frequently Asked Questions

What Is the Easiest Way to Paint Interior Doors?

To paint interior doors easily, follow these steps:

  • Choose the right paint type and prep the surface.
  • Use painter's tape to protect surroundings and apply primer for adhesion.
  • Paint with a brush, roller, or sprayer in even strokes for a pro finish.
  • Let coats dry between applications, applying multiple thin layers for full coverage.
  • Keep the door in its frame to save time, starting with the frame/casing.

These steps simplify the painting process for you.

Is It a Good Idea to Paint Interior Doors?

Painting interior doors is a wise decision. It allows for personalization and can transform the aesthetic of a room. With the right color choice, you can enhance the ambiance and create a visual impact. Plus, it's a cost-effective way to update your space.

Advertisement

Is It Better to Paint a Door With a Brush or Roller?

When painting a door, using a brush for detailed areas and a roller for larger sections is key. Brushes offer precision for intricate designs, while rollers cover flat surfaces efficiently.

To achieve a smooth finish, consider using both tools. Applying multiple light coats with a brush or roller can help you achieve a professional look.

Do Interior Doors Need to Be Sanded Before Painting?

Yes, sanding interior doors before painting is vital. It creates a smooth surface for better paint adhesion by removing imperfections and rough areas. Properly sanded doors prevent paint from peeling and guarantee long-lasting results.

Sanding helps paint adhere evenly, reducing streaks and ensuring a professional finish. It's an essential step for achieving a flawless and durable paint job on interior doors. Sanding is key to a successful painting project.

Conclusion

So there you have it, painting interior doors may seem like a challenging task at first, but with the right tools, preparation, and techniques, it can actually be quite easy.

Advertisement

Just remember to choose the right paint color, prep your doors properly, and use the right painting techniques for a professional finish.

With a little patience and attention to detail, you'll have beautifully painted interior doors in no time!

Continue Reading

Wall Art and Decor

Is It Easy to Paint Interior

With the right tools and techniques, painting the interior of your home can be a rewarding experience – find out the key to success!

Published

on

By

painting interior walls well

Painting the interior of your home is achievable when you have the right tools and know-how. Invest in quality paint supplies like rollers and brushes, use drop cloths to protect surfaces, and prep the room by cleaning walls and moving furniture. Applying multiple thin coats, starting from the top, and using proper techniques will lead to a professional finish. Remember to take your time, avoid common mistakes, and clean up carefully for a successful project. With the right preparation and techniques, painting your interior can be a rewarding and satisfying experience.

Key Takeaways

  • Proper tools and preparation make interior painting easier and more successful.
  • Choosing the right paint type and finish simplifies the painting process.
  • Following best painting techniques ensures a smooth and professional outcome.
  • Avoiding common mistakes like overworking paint leads to an easier painting experience.
  • Completing final touches and clean-up properly marks the end of an easy interior painting project.

Key Tools for Interior Painting

interior painting essentials guide

When starting an interior painting project, you'll find that having the right tools is essential for achieving professional results. To paint your walls efficiently, invest in high-quality paint rollers that can cover large areas smoothly. These rollers come in various sizes to suit different wall surfaces.

Additionally, using drop cloths to protect your floors and furniture from paint spills is important. These cloths can easily be spread out to catch any paint drips, keeping your surroundings clean and mess-free.

Having the right tools, like quality brushes and paint trays, guarantees that your paint application is even and consistent. Paint edgers are also necessary for creating clean lines along edges and corners, giving your walls a polished look.

Investing in these tools may seem like an added expense, but they make the painting process easier and more efficient in the long run. Remember, the right tools can greatly impact the final outcome of your interior painting project.

Choosing the Right Paint Color

selecting the perfect paint

Selecting the perfect paint color for your space involves considering factors like natural light, room size, and desired ambiance. When painting a room, take into account the amount of natural light it receives throughout the day. Lighter colors can make a small room feel more spacious, while darker hues can create a cozy atmosphere.

Utilize color psychology to evoke specific emotions in different rooms; for instance, calming blues work well in bedrooms, while energizing yellows are great for kitchens. Test paint samples on the walls to see how they look in various lighting conditions before making your final decision.

Advertisement

Additionally, consider the existing furniture and decor in the room to guarantee a cohesive look. Consult color wheel principles to create harmonious color schemes, such as using complementary or analogous colors, for a visually pleasing result. By paying attention to these details, you can select the right paint color that enhances the overall feel of your space.

Preparing the Room for Painting

room ready for painting

To properly prepare the room for painting, begin by clearing all furniture and covering the floors with drop cloths to safeguard against any paint spills or splatters.

Here are some essential steps to make sure your room is ready for a successful painting project:

  • Lay down drop cloths to protect the floors from paint drips and splashes.
  • Use painter's tape to protect trim, edges, and fixtures from accidental paint marks.
  • Clean the walls to remove dirt, dust, and grease that can impact the paint's finish.

Proper Wall Preparation Techniques

prepping walls for painting

To properly prepare your walls for painting, start by thoroughly cleaning them to remove any dirt or grime.

Next, make sure to repair any damage by filling in holes or cracks with spackle for a smooth finish.

Remember to sand the walls to create an even surface that will help the paint adhere better.

Clean Walls Thoroughly

Prior to painting, guarantee a smooth and long-lasting finish by thoroughly cleaning your walls. To effectively prepare your walls for painting, follow these steps:

Advertisement
  • Wash the walls with a mild detergent solution to remove surface contaminants like dust and grease.
  • Rinse the walls well to make certain all the cleaning solution is removed.
  • For tougher stains or residues, consider using a TSP (trisodium phosphate) solution to clean the walls effectively.

Repair Any Damage

Repairing any damage on your walls before painting is important to achieve a smooth and professional finish. Prior to painting, it's vital to fill in any holes, cracks, or imperfections using spackle and a spackle knife. Smooth out rough spots with sandpaper and guarantee a clean surface with a tack cloth. If needed, spot prime the repaired areas for proper adhesion and paint coverage.

Best Painting Techniques for Interior Walls

optimal interior wall painting

For achieving a professional look on interior walls, using a 'W' or 'M' pattern while painting guarantees consistent coverage.

To guarantee a successful interior painting project, consider the following techniques:

  • Multiple Thin Coats: Apply multiple thin coats of paint rather than one thick coat for a smoother finish on interior walls.
  • Top to Bottom Painting: Start painting from the top of the wall and work your way down to catch drips and achieve a more even application.
  • Proper Drying Time: Allow each coat of paint to dry properly before applying the next layer to prevent smudges and ensure a durable finish.

Tips for Achieving Smooth Paint Application

achieving smooth paint application

To achieve a smooth paint application, start by thoroughly prepping the surface through cleaning, sanding, and fixing imperfections.

Make sure to select quality paint and tools specifically designed for interior painting to attain a professional-looking finish.

Remember to apply primer before painting and utilize techniques like cutting in and rolling in a 'W' or 'M' pattern for even coverage.

Proper Surface Preparation

Prepare your surfaces meticulously before painting to achieve a flawless and smooth finish. To guarantee successful surface preparation, consider these essential steps:

  • Start by scraping off any loose paint or debris.
  • Sand the surface to create a smooth and even base for the paint to adhere to.
  • Fill in any cracks or holes with spackling compound for a seamless finish.

Overlooking these steps can lead to visible imperfections like roller marks or paint not adhering properly. Additionally, determining how much paint you'll need beforehand can prevent interruptions during the painting process. Covering areas you don't intend to paint with plastic sheeting will safeguard them from accidental splatters.

Choosing the Right Tools

Before you begin painting, making sure you have the right tools is key to achieving a smooth and professional-looking finish on your interior walls. Invest in high-quality brushes and rollers for even paint application. Use a paint tray to access paint easily, guaranteeing a consistent finish. Consider a paint edger for clean lines at edges and corners, enhancing the room's appearance.

Advertisement

Apply multiple thin coats of paint rather than one thick coat to prevent drips and achieve a polished result. Follow the top-to-bottom painting technique to catch drips and ensure thorough coverage on interior surfaces. By using these tools and techniques, you can achieve a smooth paint application and elevate the overall look of your space.

Common Mistakes to Avoid While Painting

painting pitfalls to avoid

One essential step in achieving a successful paint job is ensuring you properly prepare the surfaces before starting. To help you avoid common mistakes while painting, consider the following tips:

  • Don't rush the process: Allow each coat to dry completely before applying the next one to prevent uneven coverage and potential damage to the paint.
  • Avoid overworking the paint: Applying too many coats or using excessive amounts of paint can result in drips, runs, and an uneven finish.
  • Use the right tools: Opt for high-quality brushes and rollers to avoid streaks, brush marks, and an overall unsatisfactory painting experience.

Final Touches and Clean-Up

final preparations and tidying

When finishing up your painting project, remember to carefully remove painter's tape to maintain clean lines and avoid peeling off fresh paint. Clean brushes and rollers immediately after use to prevent dried paint buildup and maintain their quality.

Dispose of drop cloths properly to avoid spreading paint residue and keep your work area clean. Reinstall furniture and decor in the room only after the paint has fully cured to prevent accidental damage.

Allow the paint to cure completely before exposing the walls and ceilings to heavy traffic to guarantee a durable finish. Remember to pay attention to details like painting the ceiling to achieve a cohesive look throughout the room.

Frequently Asked Questions

How Hard Is It to Paint Your Own House Interior?

Painting your house interior can seem challenging, but with the right tools and knowledge, it's manageable. Learning basic techniques and seeking advice can simplify the process.

Understanding paint selection and application methods is key. With practice, attention to detail, and patience, you can achieve a successful DIY project.

Advertisement

Prepare, plan, and take your time for a rewarding painting experience.

Is It Difficult to Paint Interior Walls?

Painting interior walls can be straightforward with the right approach. Proper preparation, tools, and techniques are key to making the process easier. By planning ahead, prepping the walls thoroughly, and selecting the appropriate paint, you can simplify the task.

With practice and patience, most homeowners find painting interior walls to be a manageable DIY project. So, roll up your sleeves and give it a try – you might just surprise yourself!

Should I Paint My Interior Myself?

You should definitely consider painting your interior yourself. It's a cost-effective way to personalize your space and gain valuable DIY skills. With the right tools and guidance, the project is manageable and rewarding.

Many homeowners successfully paint their interiors, and you can too. By learning basic painting techniques, you'll feel empowered to take on future home improvement projects with confidence.

Advertisement

Is It Cheaper to Paint Your Own House Interior?

Painting your own house interior is usually cheaper than hiring a professional. For a 10×12 room, DIY costs about $200 to $600, while a professional job can set you back $380 to $790.

By doing it yourself, you control the quality and choose the colors you want. Even though you'll need tools and materials upfront, like brushes and paint, the savings can be significant.

If you're willing to learn and put in the effort, DIY painting is a budget-friendly option.

Conclusion

To sum up, painting the interior of your home can be a straightforward task with the right tools and techniques.

By choosing the correct paint color, preparing the room properly, and using the best painting techniques, you can achieve a smooth and professional finish.

Advertisement

Remember to avoid common mistakes and take care of final touches for a polished look.

With a little patience and attention to detail, you can transform your space with a fresh coat of paint.

Continue Reading

Wall Art and Decor

Is Garage Paint Interior or Exterior

Intrigued about whether garage paint is interior or exterior? Uncover the best paint types, finishes, and colors for your garage transformation.

Published

on

By

garage paint type clarification

Garage paint is generally interior for walls and ceilings. It dries fast with less smell, fitting for enclosed spaces like garages. Opt for satin finish for easy cleaning and hiding flaws. Light shades such as white, gray, or neutrals can brighten up the area. Before painting, prep the surface thoroughly. For garage floors, epoxy coatings endure well with a shiny finish and resist chemicals. Concrete stains are long-lasting and decorative. Interior paint may not handle humidity as exterior paint. Longevity and quality improve when surfaces are spotless. Proper prep boosts durability and professionalism of the finish. Further details enhance your understanding.

Key Takeaways

  • Garage paint is typically interior due to quicker drying time and odor considerations.
  • Exterior paint is more suitable for humid environments in garages.
  • Interior latex paint is ideal for garage walls and ceilings.
  • Exterior paint is more durable and moisture-resistant.
  • Proper surface preparation is crucial for both interior and exterior garage paints.

Garage Paint for Walls and Ceiling

transforming garage with paint

When painting your garage walls and ceiling, opt for interior latex paint over exterior options for a faster drying time and minimal odor. Interior latex paint is the go-to choice for garage walls and ceilings due to its quick drying properties, low odor, and easy cleanup. Opt for a satin finish for these surfaces as it provides a cleanable surface and can hide imperfections well. Before you start painting, make sure to prepare the surfaces properly by cleaning them thoroughly and potentially applying a primer for a smooth and long-lasting finish.

Light colors like white, gray, beige, or neutral blues are popular options for garage walls and ceilings as they can make the space feel bright and spacious. These colors can also help in reflecting light and brightening up the garage. Remember, the key to a successful garage painting project lies in selecting the right interior latex paint, choosing the appropriate finish, and ensuring thorough surface preparation before diving into the painting process.

Paint Types for Garage Floors

garage floor paint options

For your garage floors, you have two main paint options to ponder: epoxy coatings and concrete stains.

Epoxy coatings are renowned for their durability and resistance to chemicals and heavy traffic.

On the other hand, concrete stains offer a different aesthetic appeal while still providing protection for your garage floor.

Epoxy Coatings

Consider using epoxy coatings for your garage floor if you're looking for a durable and visually appealing solution. Epoxy coatings are a popular choice due to their durability, high-gloss finish, and non-slip surface, making them ideal for garage floors.

Advertisement

These coatings resist chemicals, stains, and abrasions, providing a seamless and easy-to-clean surface. Customizable with various colors and patterns, epoxy coatings can enhance the aesthetic appeal of your garage floor.

Proper surface preparation is essential for the successful application of epoxy coatings, ensuring a long-lasting and professional finish. With their practicality and safety features, epoxy coatings offer a reliable solution for both protecting and beautifying your garage floor.

Concrete Stains

Opt for concrete stains as a durable and decorative paint choice for your garage floors. These stains penetrate the surface, creating a long-lasting and attractive finish that resists chipping and peeling.

With various colors and finishes available, you can customize your garage floor to match your style. Concrete stains are also chemical resistant, making them perfect for areas with high traffic, like your garage.

To guarantee a professional and resilient outcome, it's important to follow proper preparation techniques when applying these stains. By choosing concrete stains for your garage floors, you not only enhance the appearance of your space but also invest in a durable solution that will withstand the demands of daily use.

Advertisement

Choosing the Right Paint Sheen

selecting the perfect paint

When choosing the right paint sheen for your garage, consider the lighting conditions in the space. Different sheens, like semi-gloss or satin, can impact how light reflects off the walls.

This choice can influence the overall look and durability of your garage paint job.

Paint Sheen Options

Selecting the appropriate paint sheen for your garage walls is essential in ensuring both aesthetic appeal and long-lasting durability. For garage walls, semi-gloss or satin finishes are recommended due to their cleanable surface and ability to hide imperfections.

Primer may be necessary, especially when painting over unfinished drywall, to guarantee proper adhesion of the paint. Semi-gloss or satin finishes offer easy maintenance and wipeability, making them ideal for garage walls that may face wear and tear.

The sheen choice, such as satin or semi-gloss, can greatly impact the final look and durability of the paint job in your garage, so choosing the right one is vital for a successful and long-lasting finish.

Consider Lighting Conditions

Enhancing the visibility and light reflection in your garage can be achieved by choosing a semi-gloss or satin finish for the walls. These finishes are ideal for garage walls with varying lighting conditions. They strike a balance between hiding imperfections and reflecting light, creating a bright space.

Advertisement

Opting for a semi-gloss sheen can make the garage feel more spacious and well-lit. Consider how different sheens interact with lighting to create the desired ambiance in the garage.

Considerations for Humidity Resistance

protecting against moisture damage

For better durability in humid conditions, opt for exterior paint on your garage walls. Exterior paint is a durable option that resists humidity better than interior paint. Garage walls exposed to moisture require a paint that can withstand these conditions.

The higher resin content in exterior paint makes it more suitable for humid environments compared to interior paint. Interior paint may peel or bubble in high humidity, which can be problematic for garage walls.

Choosing exterior paint for your garage can guarantee better longevity and performance, especially in areas with high moisture levels. The formulation of exterior paint is specifically designed to handle moisture, making it a more reliable choice for humid garage settings.

Prepping Garage Surfaces for Painting

preparing garage floor surface

Before painting your garage surfaces, make sure they are thoroughly cleaned to remove dust and dirt for best paint adhesion and a professional finish. A clean surface is crucial for the paint to adhere properly and for the final result to look polished. Use a shop vac, damp sponge, or broom to eliminate any debris. Once cleaned, ensure the walls are completely dry before applying any paint to promote better adhesion and a smoother appearance. Remember, the cleanliness of the surface directly impacts the quality and longevity of the paint on your garage walls. Following these prepping steps diligently will not only enhance the durability of the paint job but also contribute to a more professional finish.

Prepping Garage Surfaces
Thoroughly Clean Surfaces Remove Dust and Dirt Ensure Dryness Before Painting
Promote Paint Adhesion Professional Finish Longer-lasting Paint Job

Factors for Long-Lasting Garage Paint

garage paint durability factors

To guarantee long-lasting garage paint, prioritize selecting exterior paint for its superior durability against moisture and harsh conditions.

Exterior paint is designed to withstand the wear and tear that garage walls are exposed to, including moisture and dirt. Its resilience against temperature changes and environmental elements makes it a practical choice for long-term protection.

The high resin content in exterior paint enhances its resistance to wear, ensuring that your garage walls maintain their fresh appearance for years. By choosing exterior paint specifically formulated for exterior surfaces, you can achieve a durable finish that requires minimal maintenance.

Advertisement

Investing in quality exterior paint for your garage walls not only enhances their aesthetic appeal but also provides a protective barrier that prolongs the lifespan of your paint job. Prioritizing durability and resistance to moisture are key factors in ensuring that your garage paint remains in top condition for an extended period.

Frequently Asked Questions

Should Garage Paint Be Interior or Exterior?

You can use interior paint for your garage if it won't face extreme conditions like direct sunlight or heavy moisture. However, exterior paint is more robust against temperature fluctuations and water, making it ideal for unheated garage walls.

Exterior paint has more resin for better stain resistance and durability. Interior paint might lack mildewcide, so choose based on your garage's specific needs for long-lasting performance.

How Do I Know if My Paint Is Interior or Exterior?

Wondering if your paint is interior or exterior? Look for labels on the can or check for weather-resistant additives in exterior paint. Higher VOC levels in exterior paint are also indicators.

Interior paint is for indoor use and may not hold up outdoors. Exterior paint is designed to handle UV rays, moisture, and temperature changes. Make sure to pick the right type to suit your needs and environment.

Advertisement

Can You Paint a Garage Interior?

Yes, painting your garage interior is a great way to freshen up the space. It can make the area look cleaner and more inviting. Plus, it's an opportunity to personalize and protect the walls.

Choosing the right type of paint is important for durability and ease of maintenance. Remember to properly ventilate the area while painting to guarantee safety. Consider using interior paint for its quick drying time and low odor.

Can You Paint Garage Exterior?

When painting a garage exterior, it's crucial to use exterior paint designed to withstand outdoor elements like rain and UV exposure.

Exterior paint provides a durable finish that can endure tough conditions, ensuring longevity and protection for your garage's exterior surfaces.

Conclusion

To sum up, when it comes to painting your garage, it's important to use the right type of paint for each surface. Remember, garage paint can be used for both interior and exterior applications.

Advertisement

So, whether you're tackling the walls, ceiling, or floors, make sure to choose a paint that's durable, moisture-resistant, and long-lasting.

Don't let your garage be just another dull space – transform it into a vibrant and functional area with the right paint choice.

Continue Reading

Trending