Connect with us

Wall Art and Decor

How Much Do I Charge to Paint Interior of House

Mull over factors like room size and surface type to determine how much to charge for painting the interior of a house – the key to fair pricing awaits!

Published

on

pricing for interior painting

When deciding how much to charge for painting the interior of a house, take into account factors such as room size and surface type, which can greatly affect the total cost. Prices vary depending on the room: bedrooms usually range from $375 to $800, while living rooms can cost between $600 and $2,000. Square footage pricing typically falls between $3 to $7 per square foot. Additional services like high ceilings or wall repairs can raise the overall cost. Have a clear plan in mind before setting your price, ensuring accuracy and fair compensation. Explore further for detailed insights into pricing considerations.

Key Takeaways

  • Consider square footage pricing between $3 to $7 per sq ft.
  • Factor in additional costs like high ceilings or wall repairs.
  • Determine labor rates and quality of paint for accurate pricing.
  • Estimate materials needed such as brushes and drop cloths.
  • Compare DIY costs starting at $300 to professional costs up to $28,000.
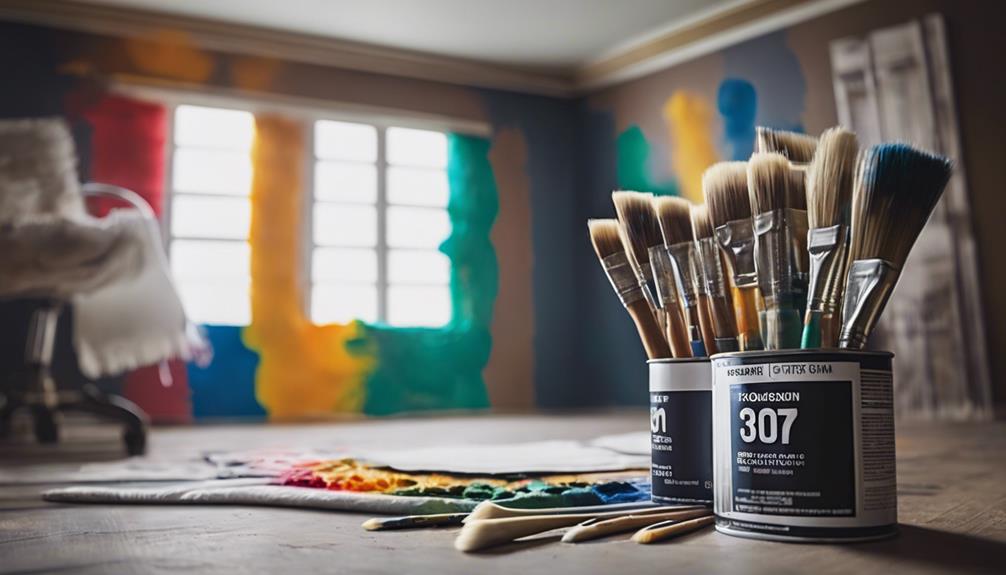
Average Cost to Paint by Room Size

estimating painting costs accurately

When considering the average cost to paint by room size, it's important to note the varying price ranges depending on the specific room you're looking to paint.

Painting an interior room in your home can come with different costs. For example, to paint a bedroom professionally, you might expect to pay between $375 to $800.

If you're looking to freshen up your living room with a new coat of paint, the average cost ranges from $600 to $2,000.

Bathrooms can be painted for approximately $200 to $600, while kitchens may cost $600 to $1,000 for painting services.

Dining rooms, on the other hand, have an average painting cost of $400 to $800.

Advertisement

These costs can vary based on the size of the room, the quality of paint chosen, and any additional services you may require from a professional painter.

Interior Painting Cost Factors

cost factors for painting

Curious about the factors that influence the cost of interior painting? When determining the cost of painting the interior of your house, several key elements come into play. The square footage of the area to be painted is a significant factor, with prices typically ranging from $3 to $7 per square foot. However, certain aspects such as high ceilings, extensive wall repairs, or specific features can push the cost up to $8 or more per square foot. Labor rates, quality of paint, finishes, and materials used also impact the overall cost. Professional painters may charge differently based on the type of surface being painted, whether by square foot or linear foot. To give you a clearer picture, here's a breakdown of some essential cost factors:

Factors Impact on Cost Examples
Labor Rates High Experienced painters
Quality of Paint Medium Premium brands
Materials High Brushes, rollers, drop cloths

Understanding these factors can help you estimate the cost of your interior painting project more accurately.

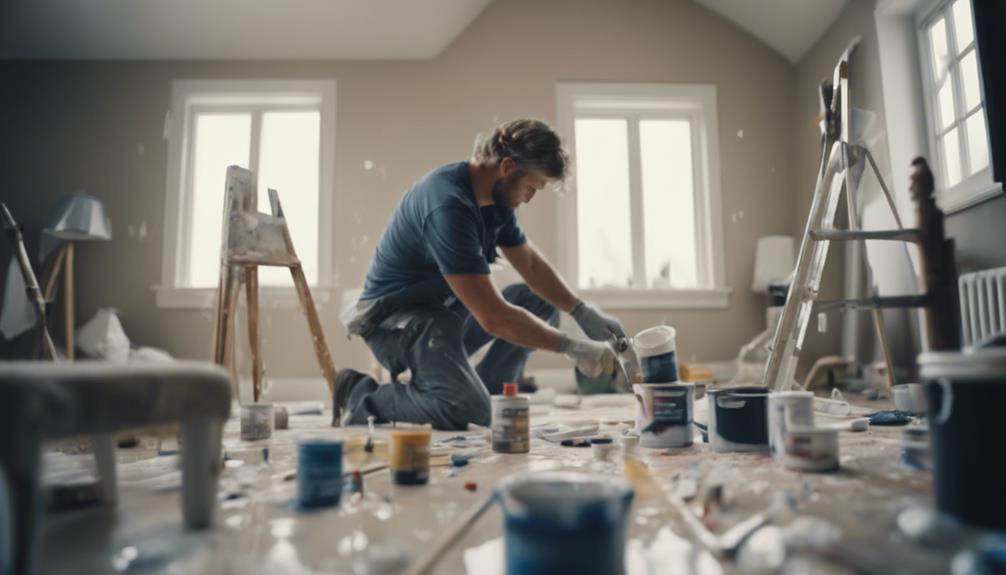
DIY Vs Professional Painting Costs

comparing painting costs options

Considering the cost implications, weighing DIY painting against hiring a professional is essential for your interior painting project. DIY interior painting can be as low as $300, offering potential savings, whereas a professional painting company may charge up to $28,000 for a 3,500-square-foot home.

The materials used and the desired quality of the outcome play significant roles in the cost to paint interior spaces. While DIY painting may save money, professional results often yield superior quality but at a higher cost.

When deciding between DIY and professional painting, consider the scope of the project, your skill level, and the desired finish for cost considerations. Keep in mind that the quality of the outcome might vary based on whether you choose to tackle the project yourself or hire a professional painting company.

Additional Cost Considerations

contemplating budget implications further

Wondering how certain factors can impact the total cost of painting the interior of your house beyond just the basic services? Here are some additional cost considerations to keep in mind for your painting project:

  1. Accent Walls: Adding accent walls can increase the budget by 20% to 30% due to the extra work involved in painting them.
  2. Textured Walls: Textured walls may result in up to a 50% increase in the overall cost of painting the interior due to the additional labor required.
  3. Wallpaper Removal: Removing wallpaper can cost around $3 per square foot, adding to the total expenses of the job.
  4. Ceiling Work: Popcorn ceiling removal typically ranges from $1 to $2 per square foot, impacting the total cost of painting the interior depending on the size of the ceilings.

These factors, along with the size of the room, trim work, and any unique architectural features, can all contribute to the total square footage cost of your interior painting project.

Cost to Paint by Square Footage

estimating painting costs accurately

If you're planning to paint the interior of your house, understanding the cost to paint by square footage is crucial for budgeting your project effectively. Interior painting costs typically range from $3 to $7 per square foot. Factors like high ceilings or wall repairs can increase this to $8 or more per square foot.

Different rooms may have varying costs; bedrooms may cost differently than kitchens or bathrooms. For a 1,500-square-foot house, the average cost is around $7,500. Professional painters may charge per square foot or linear foot for specific features, impacting the overall cost.

Advertisement

It's important to estimate the total square footage that needs painting, including any special considerations like high ceilings or extensive wall repairs, to get an accurate cost estimate. Be sure to factor in these variations when planning your budget to guarantee a smooth and cost-effective painting project.

Interior Surface Painting Costs

home interior painting expenses

When estimating the cost of painting the interior surfaces of a house, it's essential to factor in varying expenses for wall, ceiling, and trim painting, along with additional costs for doors, cabinets, countertops, and floors. To calculate the total cost effectively, consider the following breakdown:

  1. Wall Painting: Costs range from $1 to $2 per square foot.
  2. Ceiling Painting: Typically ranges from $1 to $2 per square foot.
  3. Trim Painting: Expenses can vary from $1 to $3 per square foot.
  4. Additional Surfaces: Extra costs may apply for painting doors, cabinets, countertops, and floors.

Cost Savings Tips for Painting

painting cost saving advice tips

Looking to save on your interior painting project?

Consider painting during the off-season, using low-VOC paints, and ensuring proper ventilation.

These budget-friendly techniques, efficient supplies, and DIY strategies can help you manage costs effectively.

Budget-Friendly Painting Techniques

Consider opting for off-season painting, low-VOC or No-VOC paint products, and DIY techniques to save costs on your interior painting projects. When painting, guarantee proper ventilation to reduce fumes and odors, especially during winter projects. Utilize the Unit Cost Method for accurate estimates and budget management.

Explore DIY painting options for potential savings, but for larger or complex projects, hiring professional painters may be more efficient. By selecting off-season times, eco-friendly paints, and cost-effective methods, you can achieve a budget-friendly interior paint job while maintaining indoor air quality. Remember, proper planning and smart choices lead to both economic and environmental benefits in your painting endeavors.

Advertisement

Efficient Paint Supplies

To achieve cost savings while painting, prioritize investing in high-quality paint brushes and rollers for a smoother finish and reduced need for additional coats. Consider using paint sprayers for larger wall surfaces to save time and guarantee an even application.

Purchase paint in bulk or during sales to reduce the cost per gallon and minimize waste. Invest in essential supplies like painter's tape and drop cloths to protect surfaces and prevent costly mistakes during Home Interior Painting.

Properly clean and maintain your paint brushes and rollers to prolong their lifespan and avoid the need for frequent replacements. By using efficient paint supplies and techniques, you can enhance the quality of your work while keeping the cost estimate under control.

DIY Painting Strategies

When tackling DIY painting projects, essential strategies can help you save on costs while achieving a professional finish. Here are some tips to keep in mind:

  1. Properly prime walls before painting to guarantee better adhesion and a longer-lasting finish.
  2. Calculate paint material costs and choose quality paint to enhance the overall result.
  3. Factor in the cost of supplies and equipment such as brushes, rollers, and ladders when budgeting for your project.
  4. Careful planning and preparation are vital for achieving a professional-looking finish and cutting down on labor costs, providing potential savings for your DIY painting endeavors.

Finding Local Painters for Hire

hiring painters in your area

You can easily discover local painters for hire by utilizing online platforms like Angie's List, Thumbtack, and HomeAdvisor. These websites provide a convenient way to browse through profiles, read reviews, and compare quotes from different painters in your area.

Asking for referrals from friends, family, or neighbors is another effective method to find reliable local painters who've been tried and tested. Checking with local paint stores or hardware stores can also lead you to reputable professionals they may recommend.

Advertisement

If you prefer a more direct approach, contacting painting contractors in your area and requesting quotes for your interior painting project can help you assess the costs and services offered. Additionally, visiting local painting associations or organizations can provide you with a list of accredited painters available for hire in your community.

Frequently Asked Questions

How to Estimate Labor Cost for Interior Painting?

To estimate labor costs for interior painting, consider factors like room size, surface type, and project complexity. Prep work time, number of coats, and special techniques also impact costs. Professional painters may charge per hour or per square foot. Obtain multiple quotes for comparison.

Labor rates typically range from $20 to $50 per hour. Understanding these factors will help you determine a reasonable labor cost for painting the interior of a house.

What Is the Average Cost to Paint the Inside of a 1500 Square Foot Home?

When painting the inside of a 1500 square foot home, costs typically range from $3,000 to $7,000. This estimate covers painting walls, ceilings, and trim.

Many factors, like wall height and paint quality, can influence the final price. Professional painters often charge between $2.25 to $5.75 per square foot for interior painting.

Advertisement

To get an accurate price, it's best to request an estimate from a professional painter.

How Much Does It Cost to Paint a 12X12 Room and Ceiling?

When painting a 12×12 room and ceiling, costs can range from $400 to $900 due to room height, wall condition, and paint quality. Professionals usually charge $2 to $6 per square foot for interior painting. Additional expenses may include primer, supplies, and any necessary repairs.

While DIY can save money, hiring pros guarantees quality. Factors like prep work and finishing details impact the final price.

How Much Should I Charge to Paint?

When determining your painting charges, consider factors like square footage, room size, and surface type. Additional costs may apply for ceilings, trim, doors, and unique features like accent walls. Other factors impacting pricing include prep work, materials, labor, and location.

Professional painters typically charge between $20 to $50 per hour for interior painting services.

Advertisement

Conclusion

To sum up, when it comes to painting the interior of your house, the cost will vary depending on the size of the room, the quality of paint, and whether you choose to hire a professional or do it yourself.

Remember, 'you get what you pay for' – investing in a skilled painter may result in a higher upfront cost but can save you time and guarantee a quality finish that lasts.

Consider these factors when deciding how much to charge for your painting project.

Continue Reading
Advertisement

Wall Art and Decor

Is It Easy to Paint Interior

With the right tools and techniques, painting the interior of your home can be a rewarding experience – find out the key to success!

Published

on

By

painting interior walls well

Painting the interior of your home is achievable when you have the right tools and know-how. Invest in quality paint supplies like rollers and brushes, use drop cloths to protect surfaces, and prep the room by cleaning walls and moving furniture. Applying multiple thin coats, starting from the top, and using proper techniques will lead to a professional finish. Remember to take your time, avoid common mistakes, and clean up carefully for a successful project. With the right preparation and techniques, painting your interior can be a rewarding and satisfying experience.

Key Takeaways

  • Proper tools and preparation make interior painting easier and more successful.
  • Choosing the right paint type and finish simplifies the painting process.
  • Following best painting techniques ensures a smooth and professional outcome.
  • Avoiding common mistakes like overworking paint leads to an easier painting experience.
  • Completing final touches and clean-up properly marks the end of an easy interior painting project.

Key Tools for Interior Painting

interior painting essentials guide

When starting an interior painting project, you'll find that having the right tools is essential for achieving professional results. To paint your walls efficiently, invest in high-quality paint rollers that can cover large areas smoothly. These rollers come in various sizes to suit different wall surfaces.

Additionally, using drop cloths to protect your floors and furniture from paint spills is important. These cloths can easily be spread out to catch any paint drips, keeping your surroundings clean and mess-free.

Having the right tools, like quality brushes and paint trays, guarantees that your paint application is even and consistent. Paint edgers are also necessary for creating clean lines along edges and corners, giving your walls a polished look.

Investing in these tools may seem like an added expense, but they make the painting process easier and more efficient in the long run. Remember, the right tools can greatly impact the final outcome of your interior painting project.

Choosing the Right Paint Color

selecting the perfect paint

Selecting the perfect paint color for your space involves considering factors like natural light, room size, and desired ambiance. When painting a room, take into account the amount of natural light it receives throughout the day. Lighter colors can make a small room feel more spacious, while darker hues can create a cozy atmosphere.

Utilize color psychology to evoke specific emotions in different rooms; for instance, calming blues work well in bedrooms, while energizing yellows are great for kitchens. Test paint samples on the walls to see how they look in various lighting conditions before making your final decision.

Advertisement

Additionally, consider the existing furniture and decor in the room to guarantee a cohesive look. Consult color wheel principles to create harmonious color schemes, such as using complementary or analogous colors, for a visually pleasing result. By paying attention to these details, you can select the right paint color that enhances the overall feel of your space.

Preparing the Room for Painting

room ready for painting

To properly prepare the room for painting, begin by clearing all furniture and covering the floors with drop cloths to safeguard against any paint spills or splatters.

Here are some essential steps to make sure your room is ready for a successful painting project:

  • Lay down drop cloths to protect the floors from paint drips and splashes.
  • Use painter's tape to protect trim, edges, and fixtures from accidental paint marks.
  • Clean the walls to remove dirt, dust, and grease that can impact the paint's finish.

Proper Wall Preparation Techniques

prepping walls for painting

To properly prepare your walls for painting, start by thoroughly cleaning them to remove any dirt or grime.

Next, make sure to repair any damage by filling in holes or cracks with spackle for a smooth finish.

Remember to sand the walls to create an even surface that will help the paint adhere better.

Clean Walls Thoroughly

Prior to painting, guarantee a smooth and long-lasting finish by thoroughly cleaning your walls. To effectively prepare your walls for painting, follow these steps:

Advertisement
  • Wash the walls with a mild detergent solution to remove surface contaminants like dust and grease.
  • Rinse the walls well to make certain all the cleaning solution is removed.
  • For tougher stains or residues, consider using a TSP (trisodium phosphate) solution to clean the walls effectively.

Repair Any Damage

Repairing any damage on your walls before painting is important to achieve a smooth and professional finish. Prior to painting, it's vital to fill in any holes, cracks, or imperfections using spackle and a spackle knife. Smooth out rough spots with sandpaper and guarantee a clean surface with a tack cloth. If needed, spot prime the repaired areas for proper adhesion and paint coverage.

Best Painting Techniques for Interior Walls

optimal interior wall painting

For achieving a professional look on interior walls, using a 'W' or 'M' pattern while painting guarantees consistent coverage.

To guarantee a successful interior painting project, consider the following techniques:

  • Multiple Thin Coats: Apply multiple thin coats of paint rather than one thick coat for a smoother finish on interior walls.
  • Top to Bottom Painting: Start painting from the top of the wall and work your way down to catch drips and achieve a more even application.
  • Proper Drying Time: Allow each coat of paint to dry properly before applying the next layer to prevent smudges and ensure a durable finish.

Tips for Achieving Smooth Paint Application

achieving smooth paint application

To achieve a smooth paint application, start by thoroughly prepping the surface through cleaning, sanding, and fixing imperfections.

Make sure to select quality paint and tools specifically designed for interior painting to attain a professional-looking finish.

Remember to apply primer before painting and utilize techniques like cutting in and rolling in a 'W' or 'M' pattern for even coverage.

Proper Surface Preparation

Prepare your surfaces meticulously before painting to achieve a flawless and smooth finish. To guarantee successful surface preparation, consider these essential steps:

  • Start by scraping off any loose paint or debris.
  • Sand the surface to create a smooth and even base for the paint to adhere to.
  • Fill in any cracks or holes with spackling compound for a seamless finish.

Overlooking these steps can lead to visible imperfections like roller marks or paint not adhering properly. Additionally, determining how much paint you'll need beforehand can prevent interruptions during the painting process. Covering areas you don't intend to paint with plastic sheeting will safeguard them from accidental splatters.

Choosing the Right Tools

Before you begin painting, making sure you have the right tools is key to achieving a smooth and professional-looking finish on your interior walls. Invest in high-quality brushes and rollers for even paint application. Use a paint tray to access paint easily, guaranteeing a consistent finish. Consider a paint edger for clean lines at edges and corners, enhancing the room's appearance.

Advertisement

Apply multiple thin coats of paint rather than one thick coat to prevent drips and achieve a polished result. Follow the top-to-bottom painting technique to catch drips and ensure thorough coverage on interior surfaces. By using these tools and techniques, you can achieve a smooth paint application and elevate the overall look of your space.

Common Mistakes to Avoid While Painting

painting pitfalls to avoid

One essential step in achieving a successful paint job is ensuring you properly prepare the surfaces before starting. To help you avoid common mistakes while painting, consider the following tips:

  • Don't rush the process: Allow each coat to dry completely before applying the next one to prevent uneven coverage and potential damage to the paint.
  • Avoid overworking the paint: Applying too many coats or using excessive amounts of paint can result in drips, runs, and an uneven finish.
  • Use the right tools: Opt for high-quality brushes and rollers to avoid streaks, brush marks, and an overall unsatisfactory painting experience.

Final Touches and Clean-Up

final preparations and tidying

When finishing up your painting project, remember to carefully remove painter's tape to maintain clean lines and avoid peeling off fresh paint. Clean brushes and rollers immediately after use to prevent dried paint buildup and maintain their quality.

Dispose of drop cloths properly to avoid spreading paint residue and keep your work area clean. Reinstall furniture and decor in the room only after the paint has fully cured to prevent accidental damage.

Allow the paint to cure completely before exposing the walls and ceilings to heavy traffic to guarantee a durable finish. Remember to pay attention to details like painting the ceiling to achieve a cohesive look throughout the room.

Frequently Asked Questions

How Hard Is It to Paint Your Own House Interior?

Painting your house interior can seem challenging, but with the right tools and knowledge, it's manageable. Learning basic techniques and seeking advice can simplify the process.

Understanding paint selection and application methods is key. With practice, attention to detail, and patience, you can achieve a successful DIY project.

Advertisement

Prepare, plan, and take your time for a rewarding painting experience.

Is It Difficult to Paint Interior Walls?

Painting interior walls can be straightforward with the right approach. Proper preparation, tools, and techniques are key to making the process easier. By planning ahead, prepping the walls thoroughly, and selecting the appropriate paint, you can simplify the task.

With practice and patience, most homeowners find painting interior walls to be a manageable DIY project. So, roll up your sleeves and give it a try – you might just surprise yourself!

Should I Paint My Interior Myself?

You should definitely consider painting your interior yourself. It's a cost-effective way to personalize your space and gain valuable DIY skills. With the right tools and guidance, the project is manageable and rewarding.

Many homeowners successfully paint their interiors, and you can too. By learning basic painting techniques, you'll feel empowered to take on future home improvement projects with confidence.

Advertisement

Is It Cheaper to Paint Your Own House Interior?

Painting your own house interior is usually cheaper than hiring a professional. For a 10×12 room, DIY costs about $200 to $600, while a professional job can set you back $380 to $790.

By doing it yourself, you control the quality and choose the colors you want. Even though you'll need tools and materials upfront, like brushes and paint, the savings can be significant.

If you're willing to learn and put in the effort, DIY painting is a budget-friendly option.

Conclusion

To sum up, painting the interior of your home can be a straightforward task with the right tools and techniques.

By choosing the correct paint color, preparing the room properly, and using the best painting techniques, you can achieve a smooth and professional finish.

Advertisement

Remember to avoid common mistakes and take care of final touches for a polished look.

With a little patience and attention to detail, you can transform your space with a fresh coat of paint.

Continue Reading

Wall Art and Decor

Is Garage Paint Interior or Exterior

Intrigued about whether garage paint is interior or exterior? Uncover the best paint types, finishes, and colors for your garage transformation.

Published

on

By

garage paint type clarification

Garage paint is generally interior for walls and ceilings. It dries fast with less smell, fitting for enclosed spaces like garages. Opt for satin finish for easy cleaning and hiding flaws. Light shades such as white, gray, or neutrals can brighten up the area. Before painting, prep the surface thoroughly. For garage floors, epoxy coatings endure well with a shiny finish and resist chemicals. Concrete stains are long-lasting and decorative. Interior paint may not handle humidity as exterior paint. Longevity and quality improve when surfaces are spotless. Proper prep boosts durability and professionalism of the finish. Further details enhance your understanding.

Key Takeaways

  • Garage paint is typically interior due to quicker drying time and odor considerations.
  • Exterior paint is more suitable for humid environments in garages.
  • Interior latex paint is ideal for garage walls and ceilings.
  • Exterior paint is more durable and moisture-resistant.
  • Proper surface preparation is crucial for both interior and exterior garage paints.

Garage Paint for Walls and Ceiling

transforming garage with paint

When painting your garage walls and ceiling, opt for interior latex paint over exterior options for a faster drying time and minimal odor. Interior latex paint is the go-to choice for garage walls and ceilings due to its quick drying properties, low odor, and easy cleanup. Opt for a satin finish for these surfaces as it provides a cleanable surface and can hide imperfections well. Before you start painting, make sure to prepare the surfaces properly by cleaning them thoroughly and potentially applying a primer for a smooth and long-lasting finish.

Light colors like white, gray, beige, or neutral blues are popular options for garage walls and ceilings as they can make the space feel bright and spacious. These colors can also help in reflecting light and brightening up the garage. Remember, the key to a successful garage painting project lies in selecting the right interior latex paint, choosing the appropriate finish, and ensuring thorough surface preparation before diving into the painting process.

Paint Types for Garage Floors

garage floor paint options

For your garage floors, you have two main paint options to ponder: epoxy coatings and concrete stains.

Epoxy coatings are renowned for their durability and resistance to chemicals and heavy traffic.

On the other hand, concrete stains offer a different aesthetic appeal while still providing protection for your garage floor.

Epoxy Coatings

Consider using epoxy coatings for your garage floor if you're looking for a durable and visually appealing solution. Epoxy coatings are a popular choice due to their durability, high-gloss finish, and non-slip surface, making them ideal for garage floors.

Advertisement

These coatings resist chemicals, stains, and abrasions, providing a seamless and easy-to-clean surface. Customizable with various colors and patterns, epoxy coatings can enhance the aesthetic appeal of your garage floor.

Proper surface preparation is essential for the successful application of epoxy coatings, ensuring a long-lasting and professional finish. With their practicality and safety features, epoxy coatings offer a reliable solution for both protecting and beautifying your garage floor.

Concrete Stains

Opt for concrete stains as a durable and decorative paint choice for your garage floors. These stains penetrate the surface, creating a long-lasting and attractive finish that resists chipping and peeling.

With various colors and finishes available, you can customize your garage floor to match your style. Concrete stains are also chemical resistant, making them perfect for areas with high traffic, like your garage.

To guarantee a professional and resilient outcome, it's important to follow proper preparation techniques when applying these stains. By choosing concrete stains for your garage floors, you not only enhance the appearance of your space but also invest in a durable solution that will withstand the demands of daily use.

Advertisement

Choosing the Right Paint Sheen

selecting the perfect paint

When choosing the right paint sheen for your garage, consider the lighting conditions in the space. Different sheens, like semi-gloss or satin, can impact how light reflects off the walls.

This choice can influence the overall look and durability of your garage paint job.

Paint Sheen Options

Selecting the appropriate paint sheen for your garage walls is essential in ensuring both aesthetic appeal and long-lasting durability. For garage walls, semi-gloss or satin finishes are recommended due to their cleanable surface and ability to hide imperfections.

Primer may be necessary, especially when painting over unfinished drywall, to guarantee proper adhesion of the paint. Semi-gloss or satin finishes offer easy maintenance and wipeability, making them ideal for garage walls that may face wear and tear.

The sheen choice, such as satin or semi-gloss, can greatly impact the final look and durability of the paint job in your garage, so choosing the right one is vital for a successful and long-lasting finish.

Consider Lighting Conditions

Enhancing the visibility and light reflection in your garage can be achieved by choosing a semi-gloss or satin finish for the walls. These finishes are ideal for garage walls with varying lighting conditions. They strike a balance between hiding imperfections and reflecting light, creating a bright space.

Advertisement

Opting for a semi-gloss sheen can make the garage feel more spacious and well-lit. Consider how different sheens interact with lighting to create the desired ambiance in the garage.

Considerations for Humidity Resistance

protecting against moisture damage

For better durability in humid conditions, opt for exterior paint on your garage walls. Exterior paint is a durable option that resists humidity better than interior paint. Garage walls exposed to moisture require a paint that can withstand these conditions.

The higher resin content in exterior paint makes it more suitable for humid environments compared to interior paint. Interior paint may peel or bubble in high humidity, which can be problematic for garage walls.

Choosing exterior paint for your garage can guarantee better longevity and performance, especially in areas with high moisture levels. The formulation of exterior paint is specifically designed to handle moisture, making it a more reliable choice for humid garage settings.

Prepping Garage Surfaces for Painting

preparing garage floor surface

Before painting your garage surfaces, make sure they are thoroughly cleaned to remove dust and dirt for best paint adhesion and a professional finish. A clean surface is crucial for the paint to adhere properly and for the final result to look polished. Use a shop vac, damp sponge, or broom to eliminate any debris. Once cleaned, ensure the walls are completely dry before applying any paint to promote better adhesion and a smoother appearance. Remember, the cleanliness of the surface directly impacts the quality and longevity of the paint on your garage walls. Following these prepping steps diligently will not only enhance the durability of the paint job but also contribute to a more professional finish.

Prepping Garage Surfaces
Thoroughly Clean Surfaces Remove Dust and Dirt Ensure Dryness Before Painting
Promote Paint Adhesion Professional Finish Longer-lasting Paint Job

Factors for Long-Lasting Garage Paint

garage paint durability factors

To guarantee long-lasting garage paint, prioritize selecting exterior paint for its superior durability against moisture and harsh conditions.

Exterior paint is designed to withstand the wear and tear that garage walls are exposed to, including moisture and dirt. Its resilience against temperature changes and environmental elements makes it a practical choice for long-term protection.

The high resin content in exterior paint enhances its resistance to wear, ensuring that your garage walls maintain their fresh appearance for years. By choosing exterior paint specifically formulated for exterior surfaces, you can achieve a durable finish that requires minimal maintenance.

Advertisement

Investing in quality exterior paint for your garage walls not only enhances their aesthetic appeal but also provides a protective barrier that prolongs the lifespan of your paint job. Prioritizing durability and resistance to moisture are key factors in ensuring that your garage paint remains in top condition for an extended period.

Frequently Asked Questions

Should Garage Paint Be Interior or Exterior?

You can use interior paint for your garage if it won't face extreme conditions like direct sunlight or heavy moisture. However, exterior paint is more robust against temperature fluctuations and water, making it ideal for unheated garage walls.

Exterior paint has more resin for better stain resistance and durability. Interior paint might lack mildewcide, so choose based on your garage's specific needs for long-lasting performance.

How Do I Know if My Paint Is Interior or Exterior?

Wondering if your paint is interior or exterior? Look for labels on the can or check for weather-resistant additives in exterior paint. Higher VOC levels in exterior paint are also indicators.

Interior paint is for indoor use and may not hold up outdoors. Exterior paint is designed to handle UV rays, moisture, and temperature changes. Make sure to pick the right type to suit your needs and environment.

Advertisement

Can You Paint a Garage Interior?

Yes, painting your garage interior is a great way to freshen up the space. It can make the area look cleaner and more inviting. Plus, it's an opportunity to personalize and protect the walls.

Choosing the right type of paint is important for durability and ease of maintenance. Remember to properly ventilate the area while painting to guarantee safety. Consider using interior paint for its quick drying time and low odor.

Can You Paint Garage Exterior?

When painting a garage exterior, it's crucial to use exterior paint designed to withstand outdoor elements like rain and UV exposure.

Exterior paint provides a durable finish that can endure tough conditions, ensuring longevity and protection for your garage's exterior surfaces.

Conclusion

To sum up, when it comes to painting your garage, it's important to use the right type of paint for each surface. Remember, garage paint can be used for both interior and exterior applications.

Advertisement

So, whether you're tackling the walls, ceiling, or floors, make sure to choose a paint that's durable, moisture-resistant, and long-lasting.

Don't let your garage be just another dull space – transform it into a vibrant and functional area with the right paint choice.

Continue Reading

Wall Art and Decor

How Paint Interior Walls

Not sure how to paint interior walls? Learn the essential steps for a flawless finish that will transform your space.

Published

on

By

tips for painting walls

To paint interior walls, start by cleaning them well. Patch up any cracks and holes, then apply primer. Sand rough spots for a thorough finish. Wait until the walls are completely dry before painting. Pick high-quality, durable paint that suits the room's lighting and size. Get the right tools like rollers, brushes, and tape. Use blue painter's tape correctly for clean lines. Apply paint with care using proper techniques like a W-shaped motion. Let each coat dry before adding more. For more detailed steps and tips, follow the thorough guide provided.

Key Takeaways

  • Clean walls thoroughly and repair imperfections before painting.
  • Choose high-quality, low-VOC paint that complements the room.
  • Gather necessary tools like rollers, brushes, and painter's tape.
  • Apply painter's tape correctly along trim for clean lines.
  • Use proper techniques like even coats and allowing adequate drying time.

Wall Preparation for Painting

preparing walls for painting

Before painting your interior walls, make sure to thoroughly clean, repair, and prime the surfaces for best results. Cleaning the walls is vital to remove dust, dirt, and grease, ensuring proper paint adhesion.

Repair any imperfections like cracks, holes, or peeling paint to create a smooth base for the new paint. Using a primer is essential as it seals the surface and helps the paint adhere uniformly.

After patching, sand rough areas to guarantee a smooth finish and ideal paint application. It's important to wait for the walls to dry completely before painting to prevent issues such as blistering or poor adhesion.

Choosing the Right Paint

selecting the perfect paint

When selecting the right paint for your interior walls, prioritize taking into account factors such as the room's lighting, size, and desired ambiance to achieve the perfect look. Opt for high-quality paint that offers durability and aesthetic appeal. Look for low-VOC or VOC-free paints to create a healthier indoor environment. Take into consideration the existing decor and furnishings to make sure the paint color complements the overall room design. Seek advice from paint professionals or use online tools to test paint samples and visualize how different colors will look on the walls.

Factors to Take into Account Options Available Benefits
Room Lighting Natural vs. Artificial Enhances Color Perception
Paint Color Selection Various Shades and Tints Sets the Mood
Paint Finish (e.g., Matte) Matte, Satin, Semi-Gloss Aesthetic Appeal
Low-VOC Paint Environmentally Friendly Healthier Indoor Air
Paint Samples Test Colors Before Buying Avoid Costly Mistakes

Tools and Materials Needed

tools and materials list

You'll need paint rollers, brushes, drop cloths, painters tape, sandpaper, and a paint tray to get started on painting your interior walls. These tools are essential for a successful painting project.

Make sure you have all the necessary materials before you begin to guarantee a smooth process.

Essential Tools for Painting

To paint interior walls effectively, gather essential tools such as paint rollers, brushes, drop cloths, painter's tape, and a paint tray. Quality tools like high-density foam rollers and angled brushes guarantee a smooth paint application. A sturdy ladder or step stool is vital for reaching high areas, while extension poles help with ceilings and tall walls.

Advertisement

Having a 5-in-1 tool can be useful for tasks like scraping and opening paint cans. These tools will assist you in achieving a professional finish on your interior walls. Make sure to have all these essential tools on hand before starting your painting project for a successful outcome.

Required Painting Materials

Gather the essential painting materials needed for your interior wall project to guarantee a smooth and professional finish. You'll require paint rollers, brushes, drop cloths, painter's tape, and a paint tray for easy application.

Sandpaper smooths surfaces, spackle fills holes, and tack cloth cleans before painting. Use a spackle knife for applying spackle and spot prime repaired areas to make certain even paint coverage. Proper preparation with these tools is vital for achieving a polished outcome.

Applying Painter's Tape Correctly

tape for painting precision

For achieving clean paint lines along edges, opt for blue painter's tape with medium adhesion.

When applying the painter's tape, make sure to run it in straight lines along the trim, pressing it down firmly to create a good seal.

To prevent peeling, remove the tape at a 45-degree angle before the paint fully dries.

Advertisement

It's important not to leave the tape on for too long to avoid it bonding with the paint, which could cause damage when removed.

Before taping off a large area, test a small section first to make sure it doesn't harm the existing paint or surface.

By following these steps, you can achieve sharp, professional-looking edges in your painting projects.

Painting Techniques and Tips

artistic advice and methods

To achieve a polished look when painting interior walls, make sure you prep the walls properly, use high-quality paint, and apply coats evenly.

These steps will help you achieve a professional finish and enhance the durability of your paint job.

Remember to invest in the right tools and techniques for a successful painting project.

Advertisement

Prep Walls Properly

Thoroughly cleaning your walls before painting is essential to guarantee a smooth and professional finish. Start by using painter's tape to protect trim and ensure clean lines. Next, apply primer to the walls for better paint adhesion and a polished look. When painting, utilize the W-shaped painting technique for even coverage on your interior walls. Remember to allow each coat of paint to dry completely before applying the next coat. Following these steps will help you achieve a professional finish and ensure the paint adheres well to the walls. Below is a table summarizing the key points for prepping your walls properly:

Prepping Walls Properly
Painter's Tape Apply Primer W-shaped Technique
Interior Walls Coats of Paint Professional Finish
Trim Even Coverage

Use Quality Paint

Consider selecting a high-quality paint containing elevated levels of acrylic and pigments for superior coverage and durability on your interior walls. When choosing paint, opt for low VOC levels to enhance indoor air quality.

Look for a satin or eggshell finish for a smooth, washable surface. Make sure the paint is specifically formulated for interior use to guarantee proper adhesion and long-lasting color retention.

Remember to use quality paint supplies such as painters tape and a suitable roller for the wall texture to achieve a professional paint job. Investing in good paint can make a significant difference in the overall look and longevity of your room's walls and ceiling.

Apply Coats Evenly

For a flawless finish on your interior walls, make sure you apply each coat evenly using a high-quality paint roller and a crisscross pattern technique. To guarantee a wet edge and blend sections seamlessly, work in small areas at a time. Allow the paint to dry completely between coats to avoid smudges. Inspect the painted walls under natural or artificial light for imperfections that may require touch-ups. Utilize a high-quality paint roller to achieve a smooth and even application. Remember to use painters tape to protect areas you don't want to paint. Following these steps will secure a professional-looking paint job on your interior walls.

Advertisement
Steps for Applying Coats Evenly
Use a high-quality paint roller
Apply paint in a crisscross pattern
Maintain a wet edge
Allow paint to dry between coats

Proper Cleanup and Storage

securely store and clean

To preserve the quality of your paint tools and leftover paint, make sure you clean them promptly and store them properly. Here are some essential steps to follow for proper cleanup and storage:

  • Clean paint brushes and rollers: Use warm, soapy water immediately after use to prevent paint from drying and clogging the bristles.
  • Dispose of leftover paint: Seal the can tightly and store it in a cool, dry place away from extreme temperatures.
  • Store paint cans upside down: This creates a better seal, preventing air from entering and prolonging the paint's shelf life.
  • Label each paint can: Include the color, room, and date of purchase for easy identification during touch-ups or future projects.

Understanding Drying Times

monitoring paint drying process

When it comes to painting interior walls, understanding drying times is crucial for achieving a professional finish. Most paints dry to the touch in 1-2 hours, but it's best to wait 4 hours before applying a second coat. Latex paint dries faster, around 4 hours, compared to oil-based paint, which can take 6-8 hours.

Factors like temperature, humidity, and ventilation play a role in drying times; higher temperatures and lower humidity speed up the process. To guarantee a proper finish, allow the paint to cure for up to 30 days before cleaning or scrubbing the walls.

If you want to speed up drying, use fans or open windows to improve air circulation and reduce moisture in the room. By paying attention to these details, you can ensure your painted walls look professional and last longer.

Troubleshooting Common Painting Issues

solve painting problems effectively

Experiencing issues like blistering, cracking, or uneven sheen while painting interior walls can be frustrating, but understanding common problems and their solutions can help you achieve a professional finish.

Here are some common painting problems and how to troubleshoot them:

  • Blistering or bubbling paint: Avoid painting in direct sunlight or high humidity levels.
  • Cracking or flaking paint: Make sure you're not applying too thick of a coat and avoid painting over a dirty surface.
  • Peeling paint: Check for moisture issues, improper surface preparation, or the use of low-quality paint.
  • Uneven paint sheen: Be sure to mix the paint properly, use consistent application techniques, and avoid using different paint finishes on the same wall.

Frequently Asked Questions

What Is the Best Way to Paint Interior Walls?

To paint interior walls effectively, start with preparing surfaces by cleaning, fixing flaws, and priming for better paint adhesion.

Use quality paint and tools like brushes, rollers, or sprayers for a pro finish.

Employ proper techniques such as cutting in edges, rolling in a W shape, and applying multiple coats.

Advertisement

Allow drying time between coats for durability.

Finish by removing tape carefully, cleaning up, and admiring your transformed space.

What Is the Correct Order to Paint a Room?

To paint a room correctly, start with the ceiling, move to the walls, and finish with the baseboards, windows, and door trim. This sequence prevents drips on fresh paint and guarantees a polished look.

Working from top to bottom helps you avoid redoing sections due to paint overlap. It makes touch-ups easier and creates a smooth shift between surfaces.

Allow each coat to dry thoroughly for the best results.

Advertisement

How Do You Prepare an Inside Wall for Painting?

To prepare an inside wall for painting, start by cleaning it thoroughly to remove dust and dirt.

Repair any imperfections like cracks and holes using spackle and sanding.

Protect surrounding areas with drop cloths and painter's tape to avoid splatters.

Apply a primer to seal the wall for better paint adhesion.

Consider the room's lighting when choosing a paint color to create the desired atmosphere.

Advertisement

All these steps will guarantee a smooth and professional finish.

Can I Paint Interior Walls Myself?

You can definitely paint interior walls yourself. It's a money-saving DIY project that lets you personalize your space. With the right tools, preparation, and techniques, achieving professional-looking results is within reach.

Many resources, tutorials, and guides are available to help you through the process. Take your time, follow the steps, and enjoy the satisfaction of transforming your living space with a fresh coat of paint.

Conclusion

Now that you know the basics of how to paint interior walls, grab your paintbrush and get ready to transform your space!

Remember, preparation is key, so take your time to choose the right paint and tools.

Advertisement

Don't worry if you encounter a few bumps along the way – practice makes perfect.

So, go ahead and reveal your inner Picasso with a splash of color on your walls!

Happy painting!

Continue Reading

Trending