Connect with us

Home Decor

What Is Oriental Home Decor

Kickstart your home transformation with a touch of elegance and tradition through Oriental home decor – a world of cultural richness awaits!

Published

on

exploring oriental home decor

Step into the world of Oriental home decor, drawing inspiration from East Asian cultures like China and Japan. Immerse yourself in intricate patterns, delicate craftsmanship, and symbolic motifs that define this style. Think pastel colors, floral designs, silk fabrics, and hand-embroidered textiles for a touch of tradition. Embrace elements like silk, calligraphy, flowers, and animals to infuse elegance and meaning into your space. From bamboo symbolizing resilience to dragons representing power, each piece tells a story. Consider incorporating wall fans, bonsai trees, and bamboo rugs to create harmony. Combine tradition with modernity for a truly serene atmosphere filled with cultural richness.

Key Takeaways

  • Oriental decor originates from East Asian nations like China and Japan.
  • It embodies intricate patterns, delicate craftsmanship, and symbolic motifs.
  • Key elements include silk, calligraphy, flowers, animals, and bonsai trees.
  • Symbolism in decor includes bamboo, lotus flowers, cranes, dragons, and peony flowers.
  • Modern trends feature minimalist furniture, natural materials, calming color palettes, and a blend of traditional and contemporary aesthetics.

Origins of Oriental Decor

oriental decor history explained

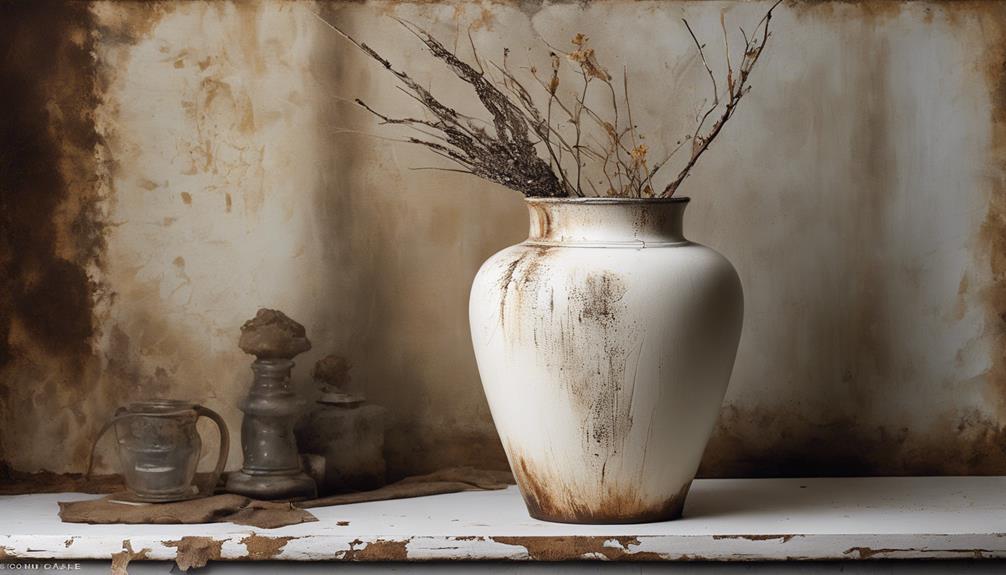
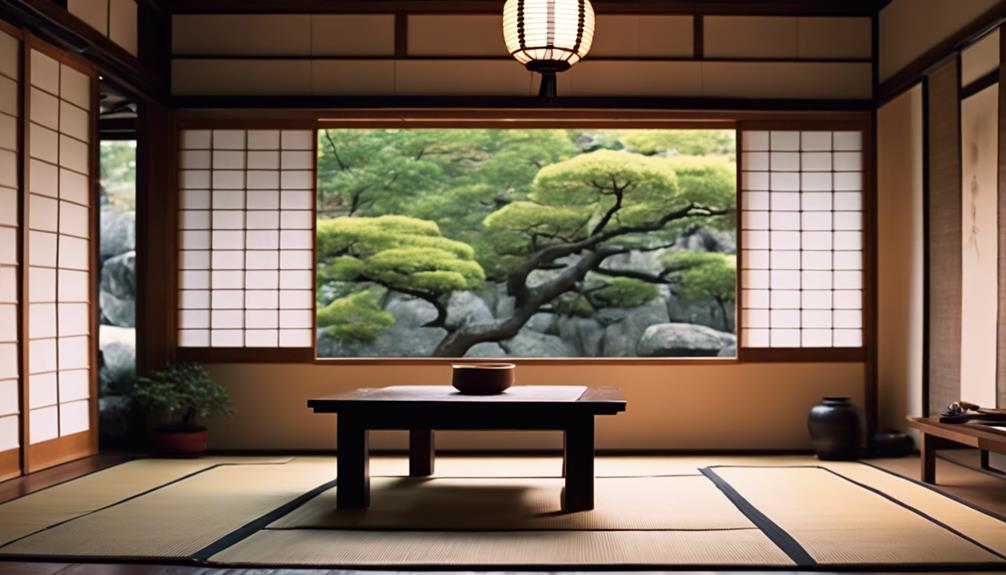
Originating from East Asian nations like China, Japan, Vietnam, and Thailand, Oriental home decor embodies a fusion of design trends deeply rooted in Asian cultures. The influence of East Asia is evident in the intricate patterns, delicate craftsmanship, and symbolic motifs that characterize this style. Traditional Oriental decor historically featured pastel colors, floral designs, organic patterns, silk materials, and hand-embroidered fabrics, reflecting the artistic traditions of the region.

Over the years, Oriental home decor has evolved to incorporate a blend of tradition and modernity, adapting to contemporary design trends while maintaining its cultural essence. The rich heritage of Asian cultures is evident in the use of materials such as wood, porcelain, silk, and the incorporation of calligraphy and animal motifs in home decor. The intricate details and symbolism found in Oriental design elements continue to captivate and inspire, expanding the definition of oriental home decor beyond its East Asian origins.

Key Elements in Oriental Decor

oriental decor essentials highlighted

When incorporating Oriental decor into your home, focus on key elements like silk, calligraphy, flowers, and animals to capture the essence of traditional Asian aesthetics. Asian home decor often features hand-painted silk fabrics, adding a touch of elegance and luxury to your living space.

Calligraphy, with its artistic strokes and intricate characters, can be incorporated into wall art or decorative pieces to bring a sense of cultural authenticity. Flowers, such as cherry blossoms or lotus flowers, symbolize beauty and purity in Asian design, making them popular choices for decor accents.

Animals like dragons or koi fish are also common motifs, representing strength, good fortune, and prosperity in oriental tradition. Additionally, bonsai trees, meticulously trained and pruned to embody harmony and balance, are a staple in Oriental decor, bringing a sense of nature and tranquility into your home.

Embrace these key elements to infuse your space with the timeless charm of Asian design.

Advertisement

Symbolism in Oriental Decor

symbolism in asian design

Incorporate symbolism in Oriental decor to infuse your space with rich cultural meanings and aesthetic depth. In Asian decor, various symbols hold significant meanings that can add layers of symbolism to your home. For instance, bamboo in Oriental design represents resilience, flexibility, and longevity, making it a popular choice for decor elements. The lotus flower is another common symbol, symbolizing purity, enlightenment, and rebirth. Cranes, often featured in Asian decor, symbolize longevity, good fortune, and happiness, while dragons represent power, strength, and good luck. The peony flower is also a prevalent motif in Oriental decor, symbolizing prosperity, honor, and feminine beauty. By incorporating these symbols into your home decor, you not only add visual interest but also imbue your space with the rich cultural heritage and meanings associated with Oriental design.

Symbol Meaning
Bamboo Resilience, flexibility, longevity
Lotus Flower Purity, enlightenment, rebirth
Cranes Longevity, good fortune, happiness
Dragons Power, strength, good luck

Incorporating Oriental Decor in Homes

incorporating asian inspired decor elements

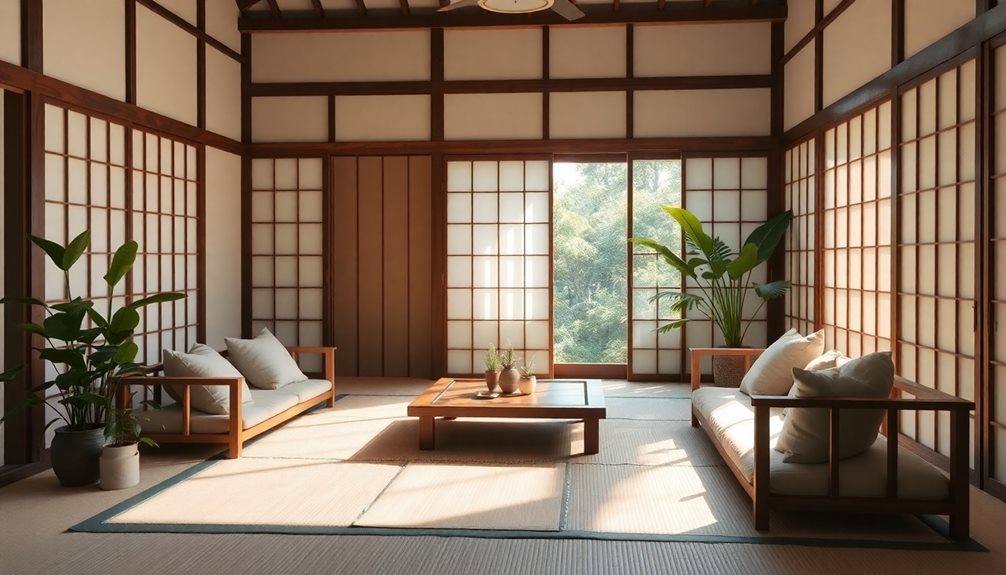
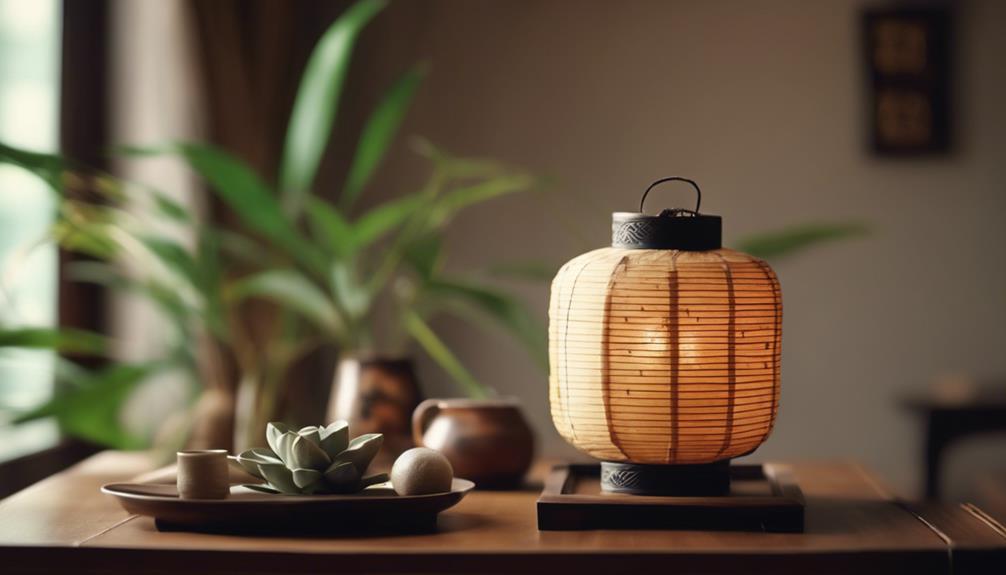
Enhance your living space with the serene elegance of Oriental decor through the thoughtful integration of traditional elements like silk, calligraphy, and floral motifs. When incorporating Asian decor into your interior design, consider adding items such as wall fans, bonsai trees, and bamboo rugs to symbolize harmony and balance in your living room. Opt for pastel colors, organic patterns, and hand-embroidered fabrics to bring a traditional touch to your space. These elements will evoke a sense of tranquility inspired by geishas, zen gardens, and mist-wreathed forests.

To create a peaceful ambiance in your living room, focus on simplicity and elegance by incorporating Asian elements. Embrace the growing trend of integrating Oriental motifs into your home decor, aiming to establish a harmonious atmosphere that promotes relaxation and well-being. By carefully selecting and arranging these decor pieces, you can transform your living space into a serene sanctuary that reflects the timeless beauty of Oriental design.

Modern Trends in Oriental Decor

contemporary oriental design trends

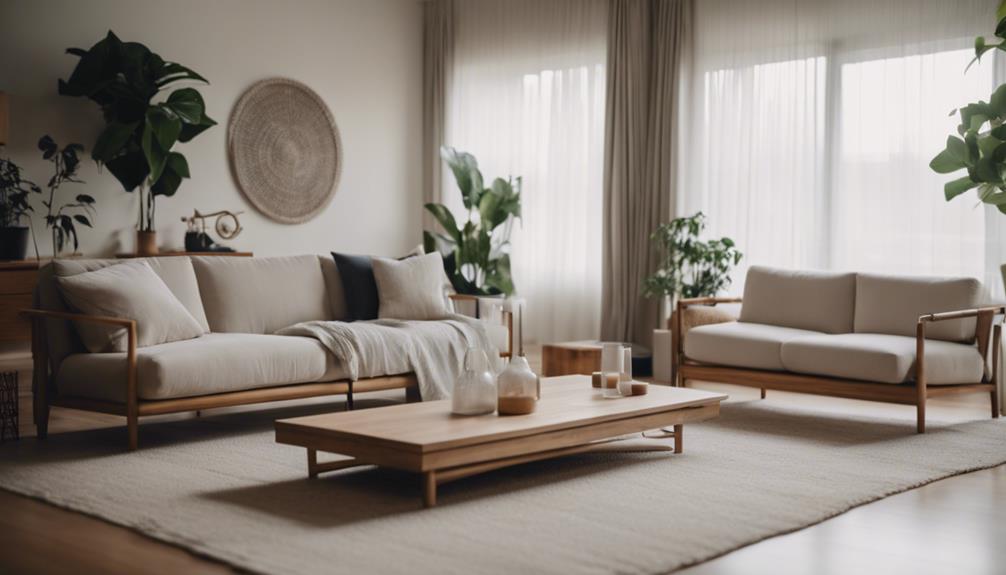
With a blend of traditional Asian elements and contemporary design trends, modern Oriental home decor exudes simplicity, elegance, and functionality. When it comes to modern trends in Asian-inspired design, there are several key elements worth exploring:

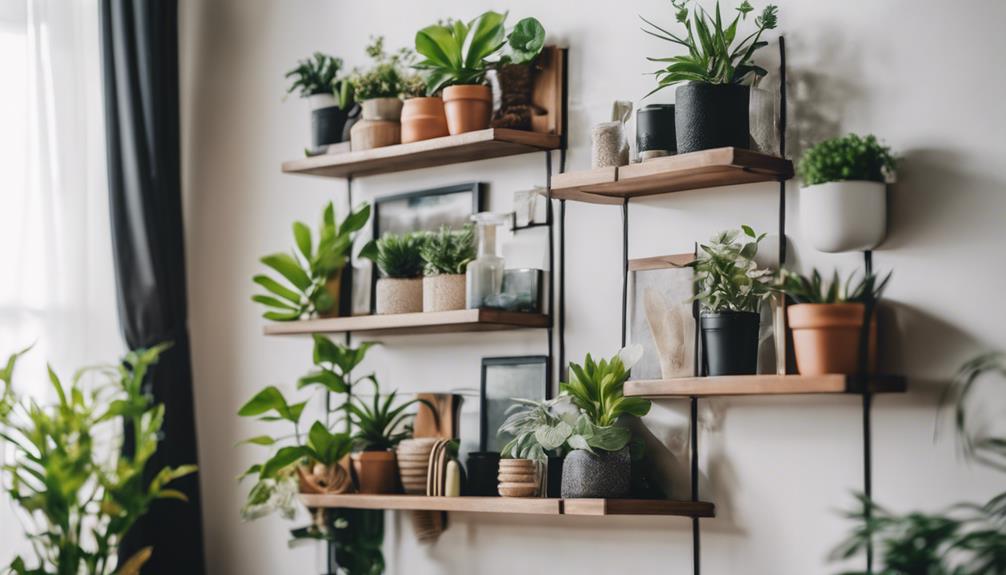
  • Minimalist Furniture: Clean lines and simple forms characterize modern Oriental decor, creating a sense of spaciousness and tranquility.
  • Natural Materials: From bamboo flooring to wooden accents, incorporating natural elements brings a sense of warmth and earthiness to the space.
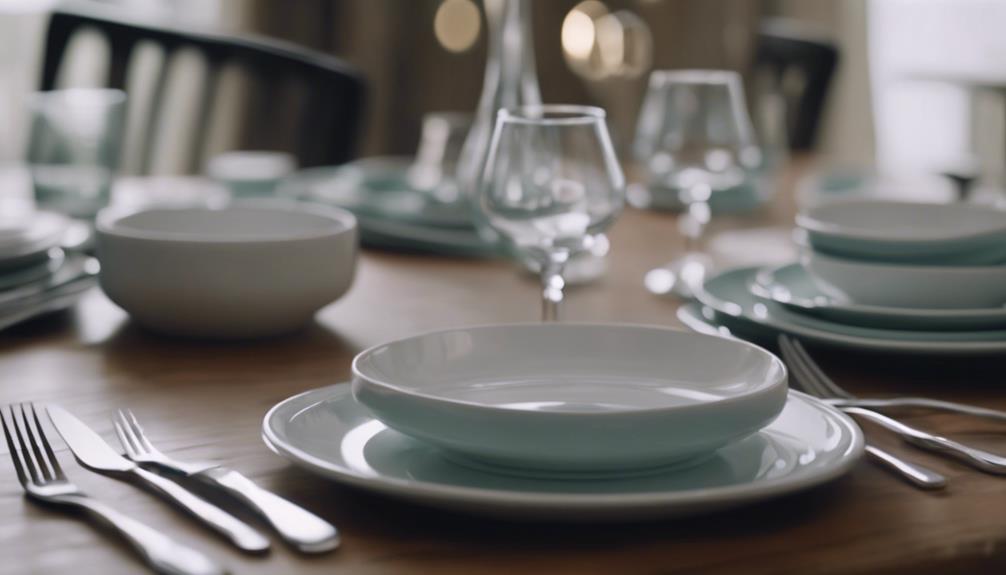
  • Calming Color Palettes: Soft neutrals, muted tones, and soothing hues like pale blues and greens are commonly used in modern Oriental decor to promote relaxation.
  • Asian Motifs: Cherry blossoms, bamboo patterns, and other traditional Asian motifs add an authentic touch to modern Oriental design, infusing spaces with cultural richness.
  • Harmonious Blend: By seamlessly integrating traditional Asian aesthetics with contemporary design principles, modern Oriental decor achieves a harmonious balance that fosters a serene living environment.

Frequently Asked Questions

What Is the Meaning of Oriental Decoration?

Oriental decoration draws inspiration from East Asian cultures, incorporating motifs, materials, and styles from countries like China, Japan, Vietnam, and Thailand.

It features intricate patterns, silk fabrics, calligraphy, and symbolic representations such as flowers and animals.

By blending traditional Asian elements with modern design trends, Oriental home decor creates a serene, elegant, and culturally rich atmosphere in living spaces.

Embrace this style to infuse your home with a touch of the East.

What Is Oriental Style Interior Design?

Oriental style interior design draws inspiration from various Asian cultures like China, Japan, India, and Vietnam. It features intricate patterns, silk fabrics, floral motifs, and handcrafted details. By embracing natural elements, minimalist aesthetics, and a focus on simplicity and elegance, Oriental decor creates a tranquil atmosphere.

Advertisement

Combining calming colors, organic shapes, and traditional symbols, this style offers a sophisticated look that blends tradition with modernity for a relaxing and culturally rich ambiance.

What Is the Meaning of Oriental Style?

The meaning of Oriental style in home decor refers to designs inspired by Asian cultures, blending tradition with modern elements. It encompasses characteristics from countries like China, Japan, India, Vietnam, and Thailand.

Key elements include wood, porcelain, silk, calligraphy, and animal motifs. This style has had a lasting impact on global design trends, with materials like wood, lacquer, and porcelain being commonly used.

Silk, originating in China, has added elegance to many Oriental design pieces.

What Is an Oriental Look?

An oriental look draws inspiration from East Asian cultures like China, Japan, Vietnam, and Thailand. It typically includes pastel colors, floral designs, silk materials, and hand-embroidered fabrics. The style historically uses wood, porcelain, and silk to create intricate pieces.

Advertisement

This aesthetic evokes tranquility and a connection to nature through calming colors and natural motifs. Incorporating oriental decor into your home can blend tradition with modernity, creating a unique and serene living space.

Conclusion

To sum up, Oriental home decor is a beautiful and timeless style that incorporates elements such as bamboo, cherry blossoms, and intricate patterns to create a serene and harmonious atmosphere.

By understanding the origins, key elements, symbolism, and modern trends of Oriental decor, you can easily incorporate this style into your own home.

So why not add a touch of tranquility and elegance to your living space with Oriental decor today?

Advertisement

Continue Reading
Advertisement

Home Decor

Turn Dresser Into Bookshelf: 3 Simple Steps

Illuminating your creativity, breathe new life into an old dresser by transforming it into a functional bookshelf in just three simple steps.

Published

on

repurposing a dresser creatively

You can upcycle an old dresser into a functional bookshelf in three simple steps. First, prepare the dresser frame by removing the top drawer supports, detaching the front, and evaluating its foundation for adjustments. Next, add shelves and supports by measuring and marking shelf locations, cutting shelves to fit, and securing them in place. Finally, refinish and decorate the bookshelf by sanding, refinishing, and adding decorative elements like paint, trim, or hardware. By following these steps, you'll transform an old dresser into a one-of-a-kind bookshelf that not only reduces waste but also showcases your creativity – and there's more to explore in this process.

Key Takeaways

• Remove the top drawer supports and detach the front of the dresser to assess its foundation and prepare for transformation.

• Measure and mark shelf locations inside the dresser, then cut shelves to fit and install shelf supports or cleats along the sides.

• Secure shelves in place with screws or brackets, ensuring they are level and properly spaced for optimal book storage and display.

• Refinish the dresser to eliminate imperfections, and add decorative hardware or knobs to enhance its aesthetic appeal.

Advertisement

• Add decorative elements, such as baskets or bins, to personalize the shelves and create a unique bookshelf that showcases your creativity.

Prepare the Dresser Frame

Remove the top drawer supports and detach the front of the dresser to expose the frame, giving you a clean slate to work with. This initial step is important in preparing the dresser for its transformation into a bookshelf. You'll be working with a blank canvas, so to speak, allowing you to visualize and bring your design to life.

As you detach the drawers, take note of the frame's structure and any areas that may need attention. This is your opportunity to assess the dresser's foundation and make any necessary adjustments before moving forward. Remember to set aside the removed parts, as you may need them later in the transformation process.

With the frame exposed, you can now begin shaping and cutting new pieces to fit your design. This is where your creativity can shine, so don't be afraid to get creative and think outside the box – or in this case, the dresser.

Add Shelves and Supports

organize with new furniture

With your dresser frame exposed, you're ready to add the shelves and supports that will bring your bookshelf vision to life. Measure and mark where you want to add shelves inside the dresser, taking into account the space you need for your books or storage items. Next, use a saw to cut shelves to fit the dimensions of the dresser. Don't forget to install shelf supports or cleats along the sides of the dresser for the shelves to rest on.

Here's a breakdown of the shelf installation process:

Advertisement
Step Task Tools Needed
1 Measure and mark shelf locations Measuring tape, pencil
2 Cut shelves to fit dresser dimensions Saw
3 Install shelf supports Drill, screws
4 Secure shelves in place Drill, screws, brackets

Once you've installed the shelves, make sure they're level and properly spaced for your books or storage items. Anchor the shelves in place with screws or brackets for stability. With your shelves and supports in place, you're one step closer to transforming your dresser into a functional bookshelf.

Refinish and Decorate

update home with style

Now that your shelves are in place, you're ready to give your bookshelf a fresh new look by sanding and refinishing the dresser to eliminate any imperfections. This is where the magic happens, and your dresser turned bookshelf starts to take shape.

Refinish and decorate your repurposed dresser to match your desired aesthetic. You can use paint, trim, or other embellishments to give it a unique touch. Consider adding decorative hardware or knobs to enhance the overall look of the bookshelf. Don't be afraid to experiment with different color schemes, finishes, and styles to create a one-of-a-kind piece.

To add a personal touch, use accessories like baskets, bins, or decorative items to organize and personalize the shelves. With a little creativity, your dresser turned bookshelf will be a stunning addition to any room.

Frequently Asked Questions

Can You Turn a Dresser Into a Bookshelf?

You're wondering if it's possible to turn a dresser into a bookshelf. The answer is yes, you can! By repurposing the drawers into shelves, you can create a functional and stylish bookshelf.

This DIY project is a great way to upcycle old furniture, maximize storage space, and reduce waste. With some creativity and elbow grease, you can transform an old dresser into a unique and functional bookshelf that suits your needs.

Advertisement

How to Make Shelves Out of Dresser Drawers?

As you start on this DIY journey, picture transforming a worn-out dresser into a vibrant bookshelf, breathing new life into a forgotten piece of furniture.

To make shelves out of dresser drawers, begin by removing all hardware and filling any holes with wood putty. Then, thoroughly sand the drawer and measure the insides to determine the shelf width.

This important step guarantees a seamless fit for your new shelves.

How Do You Convert a Plain Dresser?

When you want to convert a plain dresser, you're likely looking to breathe new life into a piece of furniture that's no longer serving its original purpose.

To get started, remove the hardware and drawers to create a blank canvas. From there, you can repurpose the dresser frame by adding new shelves, painting or refinishing the surface, and incorporating decorative elements to match your desired aesthetic.

Advertisement

How to Turn a Dresser Into a Toy Box?

You're looking to turn a dresser into a toy box, a fantastic way to repurpose old furniture and create a functional storage solution for kids' toys.

Start by removing the drawers and hardware to create a spacious interior for toy storage.

Consider adding shelves or dividers to organize different types of toys, and repaint or refinish the dresser to match the room's decor.

Conclusion

Now, your once-cluttered dresser has transformed into a bookshelf that's the epitome of organizational elegance, a true phoenix from the ashes.

You've given new life to an old piece, and the result is a functional work of art that's as unique as it's useful.

Advertisement

As you step back to admire your handiwork, remember that upcycling isn't just about reducing waste, but about tapping into your creativity and turning trash into treasure.

Continue Reading

Home Decor

What Are the Different Interior Decorating Styles

Curious about interior decorating styles? Explore Contemporary design and discover a blend of modern and traditional elements that offer adaptability and sophistication.

Published

on

By

exploring interior decorating styles

Interior decorating styles vary widely, including Traditional with rich colors and ornate details, Modern emphasizing clean lines, Eclectic mixing different eras and styles, Contemporary blending modern and traditional elements, and Minimalist prioritizing simplicity and decluttered spaces. Traditional design exudes Old World charm, while Modern opts for sleek aesthetics. Eclectic showcases vibrant, personalized aesthetics, and Contemporary offers adaptability. Minimalist, born in Australia, focuses on functionality and calmness. Each style brings unique characteristics to spaces, catering to diverse tastes and preferences, providing individuals with a broad spectrum of choices to create atmospheres that resonate with them.

Key Takeaways

  • Traditional style: Rich colors, ornate details, formal furniture arrangements.
  • Modern style: Clean lines, minimalist design, steel and glass materials.
  • Eclectic style: Curated mix of different styles, bold colors, unique decor pieces.
  • Contemporary style: Blends modern and traditional elements, open floor plans.
  • Minimalist style: Neutral palette, decluttered spaces, serene and uncluttered living areas.

Traditional Interior Design Style

capturing classic design elements

Emphasizing rich colors and ornate details, traditional interior design style exudes a sense of elegance and comfort. In traditional interiors, you'll often find formal furniture arrangements that prioritize symmetry and balance, creating a harmonious look. These design choices are influenced by European styles, adding a touch of Old World charm to the space. The use of a neutral color palette with occasional pops of vibrant hues is a hallmark of traditional homes, creating a warm and inviting atmosphere.

Traditional interior design style pays homage to classic elements that have stood the test of time. By incorporating intricate patterns, luxurious fabrics, and timeless pieces of furniture, this style captures a sense of grandeur while maintaining a cozy feel. Whether it's a vintage chandelier hanging from the ceiling or a beautifully crafted wooden cabinet, traditional interiors aim to create a space that feels both sophisticated and welcoming. So, if you're looking to infuse your home with a sense of timeless elegance, traditional design might be the perfect choice for you.

Modern Interior Design Style

capturing modern design aesthetics

In traditional interior design styles with their focus on elegance and comfort, a sharp contrast emerges when considering the clean color schemes and minimalist approach characteristic of modern interior design style. Modern interior design emphasizes clean lines and a minimalist design aesthetic, drawing inspiration from Scandinavian style and German design principles that prioritize functionality. Materials like steel and glass are often featured prominently in modern interiors, contributing to the sleek and contemporary aesthetic that is popular in many homes and commercial spaces. Open floor plans are a common feature in modern interior design, promoting a sense of spaciousness and flow throughout the space. By focusing on simplicity and minimalism, modern interior design creates a sophisticated and uncluttered environment that appeals to those who appreciate a clean, organized living space.

Keyword Description
Clean Lines Emphasizes straight, uncluttered lines for a sleek and modern look
Minimalist Design Focuses on simplicity and minimalism, stripping down to the essentials
Functionality Prioritizes practicality and usability in design choices
Steel Common material used in modern interior design for its sleek and durable properties
Glass Adds transparency and light to spaces, creating a modern and airy feel

Eclectic Interior Design Style

eclectic decor and design

With its curated mix of different design styles and eras, eclectic interior design style stands out for its vibrant and personalized aesthetic. Bold colors and patterns are key elements that infuse energy and personality into eclectic spaces.

Unique and quirky decor pieces are often incorporated to add an unconventional and eclectic touch. In eclectic interiors, a strong emphasis is placed on personalized and expressive design choices, allowing individuals to showcase their creativity and uniqueness. This style celebrates individuality, encouraging a diverse aesthetic that combines various elements harmoniously.

By blending different styles, colors, and textures, eclectic interior design creates a dynamic and visually stimulating environment. Whether it's mixing vintage with contemporary pieces or layering patterns and textures, eclectic design offers a creative and expressive way to personalize your space.

Embrace the diverse and eclectic nature of this style to craft a truly unique and personalized interior that reflects your individuality.

Advertisement

Contemporary Interior Design Style

contemporary design aesthetics showcased

Contemporary interior design style seamlessly blends modern and traditional elements to create a fresh and sophisticated aesthetic. This style is known for its adaptability, making it suitable for every room in the house.

Open floor plans are a common feature in contemporary design, allowing for a seamless flow between spaces and maximizing natural light. Eco-friendly materials, such as recycled options, play a significant role in contemporary interiors, emphasizing sustainability.

Neutral colors like whites, grays, and beiges are often used as a base in contemporary design, while vibrant accents in hues like teal, mustard, or coral add a touch of personality and energy to the space. The key to achieving a contemporary look is the harmonious blend of new and old elements, resulting in a modern yet timeless ambiance.

Minimalist Interior Design Style

minimalist aesthetic in homes

Blending simplicity and functionality, minimalist interior design style originated in Australia and prioritizes clean lines, simple forms, and a neutral color palette. This design philosophy revolves around the idea that 'less is more,' aiming to create serene and uncluttered living spaces. Functionality and decluttering are essential elements in minimalist interior design, with a focus on open floor plans and the use of empty space to enhance the overall ambiance. The minimalist approach seeks to eliminate excess and create a sense of calm through carefully curated design choices.

Key Principles Description Examples
Clean Lines Emphasizes straight, crisp lines that contribute to a sense of order and simplicity Straight-edged furniture, linear lighting fixtures
Simple Forms Focuses on uncomplicated shapes and structures to maintain a minimalist aesthetic Geometric furniture, basic shapes in decor
Neutral Color Palette Utilizes muted tones like whites, grays, and earthy hues to create a harmonious space White walls, beige furniture, gray accents

Frequently Asked Questions

What Are the 7 Concepts of Interior Design?

The 7 concepts of interior design are space, line, form, light, color, texture, and pattern.

These elements are essential in creating visually appealing and cohesive spaces.

Space sets the boundaries of a room, while line directs the eye and adds movement.

Advertisement

Form deals with object shapes, light influences the ambiance, and color, texture, and pattern inject personality and interest.

Understanding and applying these concepts help designers craft harmonious interiors that reflect style and functionality.

What Is the Most Popular Style of Decorating?

We perceive contemporary and modern styles as the most popular in decorating due to their sleek lines and minimalist aesthetic, resonating with many individuals.

Traditional design, with its classic elegance, also maintains a timeless allure.

The rise of eclectic style, blending diverse design elements for personal expression, is remarkable.

Advertisement

Transitional design, harmonizing modern and traditional features, offers a balanced and versatile approach.

These styles cater to a wide range of tastes and preferences.

How Do I Choose a Decorating Style?

When choosing a decorating style, consider personal preferences, space architecture, and inspiration sources.

Evaluate color palettes, furniture styles, and ambiance that resonate with you.

Analyze architectural features like natural light and room layout to find a complementary style.

Advertisement

Research popular styles such as modern, traditional, boho, and minimalist.

Seek inspiration from design magazines, online platforms, and social media.

Consult with professionals for guidance aligning with your lifestyle, preferences, and budget.

What Style of Interior Design Is in Right Now?

We see the modern farmhouse style as a top choice currently, marrying rustic and refined elements for a cozy yet sophisticated vibe.

Blending design is another popular option, blending traditional and contemporary features for a harmonious look.

Advertisement

Coastal design, inspired by beach living, offers a relaxed and airy feel that many are loving.

Bohemian style, with its eclectic and vibrant aesthetic, is on the rise.

Art Deco's luxurious and geometric design is also making a stylish comeback.

Conclusion

To sum up, it's worth noting that there are various interior decorating styles to choose from, each offering unique characteristics and aesthetics. An interesting statistic to bear in mind is that over 60% of homeowners prefer a modern interior design style, featuring clean lines and minimalistic elements.

Whether you lean towards traditional, eclectic, contemporary, or minimalist design, it's crucial to select a style that reflects your personal taste and creates a comfortable living space. Ultimately, the key is to find a style that resonates with you and makes your house feel like home.

Advertisement

Continue Reading

Wall Art and Decor

How Paint Interior Walls

Not sure how to paint interior walls? Learn the essential steps for a flawless finish that will transform your space.

Published

on

By

tips for painting walls

To paint interior walls, start by cleaning them well. Patch up any cracks and holes, then apply primer. Sand rough spots for a thorough finish. Wait until the walls are completely dry before painting. Pick high-quality, durable paint that suits the room's lighting and size. Get the right tools like rollers, brushes, and tape. Use blue painter's tape correctly for clean lines. Apply paint with care using proper techniques like a W-shaped motion. Let each coat dry before adding more. For more detailed steps and tips, follow the thorough guide provided.

Key Takeaways

  • Clean walls thoroughly and repair imperfections before painting.
  • Choose high-quality, low-VOC paint that complements the room.
  • Gather necessary tools like rollers, brushes, and painter's tape.
  • Apply painter's tape correctly along trim for clean lines.
  • Use proper techniques like even coats and allowing adequate drying time.

Wall Preparation for Painting

preparing walls for painting

Before painting your interior walls, make sure to thoroughly clean, repair, and prime the surfaces for best results. Cleaning the walls is vital to remove dust, dirt, and grease, ensuring proper paint adhesion.

Repair any imperfections like cracks, holes, or peeling paint to create a smooth base for the new paint. Using a primer is essential as it seals the surface and helps the paint adhere uniformly.

After patching, sand rough areas to guarantee a smooth finish and ideal paint application. It's important to wait for the walls to dry completely before painting to prevent issues such as blistering or poor adhesion.

Choosing the Right Paint

selecting the perfect paint

When selecting the right paint for your interior walls, prioritize taking into account factors such as the room's lighting, size, and desired ambiance to achieve the perfect look. Opt for high-quality paint that offers durability and aesthetic appeal. Look for low-VOC or VOC-free paints to create a healthier indoor environment. Take into consideration the existing decor and furnishings to make sure the paint color complements the overall room design. Seek advice from paint professionals or use online tools to test paint samples and visualize how different colors will look on the walls.

Factors to Take into Account Options Available Benefits
Room Lighting Natural vs. Artificial Enhances Color Perception
Paint Color Selection Various Shades and Tints Sets the Mood
Paint Finish (e.g., Matte) Matte, Satin, Semi-Gloss Aesthetic Appeal
Low-VOC Paint Environmentally Friendly Healthier Indoor Air
Paint Samples Test Colors Before Buying Avoid Costly Mistakes

Tools and Materials Needed

tools and materials list

You'll need paint rollers, brushes, drop cloths, painters tape, sandpaper, and a paint tray to get started on painting your interior walls. These tools are essential for a successful painting project.

Make sure you have all the necessary materials before you begin to guarantee a smooth process.

Essential Tools for Painting

To paint interior walls effectively, gather essential tools such as paint rollers, brushes, drop cloths, painter's tape, and a paint tray. Quality tools like high-density foam rollers and angled brushes guarantee a smooth paint application. A sturdy ladder or step stool is vital for reaching high areas, while extension poles help with ceilings and tall walls.

Advertisement

Having a 5-in-1 tool can be useful for tasks like scraping and opening paint cans. These tools will assist you in achieving a professional finish on your interior walls. Make sure to have all these essential tools on hand before starting your painting project for a successful outcome.

Required Painting Materials

Gather the essential painting materials needed for your interior wall project to guarantee a smooth and professional finish. You'll require paint rollers, brushes, drop cloths, painter's tape, and a paint tray for easy application.

Sandpaper smooths surfaces, spackle fills holes, and tack cloth cleans before painting. Use a spackle knife for applying spackle and spot prime repaired areas to make certain even paint coverage. Proper preparation with these tools is vital for achieving a polished outcome.

Applying Painter's Tape Correctly

tape for painting precision

For achieving clean paint lines along edges, opt for blue painter's tape with medium adhesion.

When applying the painter's tape, make sure to run it in straight lines along the trim, pressing it down firmly to create a good seal.

To prevent peeling, remove the tape at a 45-degree angle before the paint fully dries.

Advertisement

It's important not to leave the tape on for too long to avoid it bonding with the paint, which could cause damage when removed.

Before taping off a large area, test a small section first to make sure it doesn't harm the existing paint or surface.

By following these steps, you can achieve sharp, professional-looking edges in your painting projects.

Painting Techniques and Tips

artistic advice and methods

To achieve a polished look when painting interior walls, make sure you prep the walls properly, use high-quality paint, and apply coats evenly.

These steps will help you achieve a professional finish and enhance the durability of your paint job.

Remember to invest in the right tools and techniques for a successful painting project.

Advertisement

Prep Walls Properly

Thoroughly cleaning your walls before painting is essential to guarantee a smooth and professional finish. Start by using painter's tape to protect trim and ensure clean lines. Next, apply primer to the walls for better paint adhesion and a polished look. When painting, utilize the W-shaped painting technique for even coverage on your interior walls. Remember to allow each coat of paint to dry completely before applying the next coat. Following these steps will help you achieve a professional finish and ensure the paint adheres well to the walls. Below is a table summarizing the key points for prepping your walls properly:

Prepping Walls Properly
Painter's Tape Apply Primer W-shaped Technique
Interior Walls Coats of Paint Professional Finish
Trim Even Coverage

Use Quality Paint

Consider selecting a high-quality paint containing elevated levels of acrylic and pigments for superior coverage and durability on your interior walls. When choosing paint, opt for low VOC levels to enhance indoor air quality.

Look for a satin or eggshell finish for a smooth, washable surface. Make sure the paint is specifically formulated for interior use to guarantee proper adhesion and long-lasting color retention.

Remember to use quality paint supplies such as painters tape and a suitable roller for the wall texture to achieve a professional paint job. Investing in good paint can make a significant difference in the overall look and longevity of your room's walls and ceiling.

Apply Coats Evenly

For a flawless finish on your interior walls, make sure you apply each coat evenly using a high-quality paint roller and a crisscross pattern technique. To guarantee a wet edge and blend sections seamlessly, work in small areas at a time. Allow the paint to dry completely between coats to avoid smudges. Inspect the painted walls under natural or artificial light for imperfections that may require touch-ups. Utilize a high-quality paint roller to achieve a smooth and even application. Remember to use painters tape to protect areas you don't want to paint. Following these steps will secure a professional-looking paint job on your interior walls.

Advertisement
Steps for Applying Coats Evenly
Use a high-quality paint roller
Apply paint in a crisscross pattern
Maintain a wet edge
Allow paint to dry between coats

Proper Cleanup and Storage

securely store and clean

To preserve the quality of your paint tools and leftover paint, make sure you clean them promptly and store them properly. Here are some essential steps to follow for proper cleanup and storage:

  • Clean paint brushes and rollers: Use warm, soapy water immediately after use to prevent paint from drying and clogging the bristles.
  • Dispose of leftover paint: Seal the can tightly and store it in a cool, dry place away from extreme temperatures.
  • Store paint cans upside down: This creates a better seal, preventing air from entering and prolonging the paint's shelf life.
  • Label each paint can: Include the color, room, and date of purchase for easy identification during touch-ups or future projects.

Understanding Drying Times

monitoring paint drying process

When it comes to painting interior walls, understanding drying times is crucial for achieving a professional finish. Most paints dry to the touch in 1-2 hours, but it's best to wait 4 hours before applying a second coat. Latex paint dries faster, around 4 hours, compared to oil-based paint, which can take 6-8 hours.

Factors like temperature, humidity, and ventilation play a role in drying times; higher temperatures and lower humidity speed up the process. To guarantee a proper finish, allow the paint to cure for up to 30 days before cleaning or scrubbing the walls.

If you want to speed up drying, use fans or open windows to improve air circulation and reduce moisture in the room. By paying attention to these details, you can ensure your painted walls look professional and last longer.

Troubleshooting Common Painting Issues

solve painting problems effectively

Experiencing issues like blistering, cracking, or uneven sheen while painting interior walls can be frustrating, but understanding common problems and their solutions can help you achieve a professional finish.

Here are some common painting problems and how to troubleshoot them:

  • Blistering or bubbling paint: Avoid painting in direct sunlight or high humidity levels.
  • Cracking or flaking paint: Make sure you're not applying too thick of a coat and avoid painting over a dirty surface.
  • Peeling paint: Check for moisture issues, improper surface preparation, or the use of low-quality paint.
  • Uneven paint sheen: Be sure to mix the paint properly, use consistent application techniques, and avoid using different paint finishes on the same wall.

Frequently Asked Questions

What Is the Best Way to Paint Interior Walls?

To paint interior walls effectively, start with preparing surfaces by cleaning, fixing flaws, and priming for better paint adhesion.

Use quality paint and tools like brushes, rollers, or sprayers for a pro finish.

Employ proper techniques such as cutting in edges, rolling in a W shape, and applying multiple coats.

Advertisement

Allow drying time between coats for durability.

Finish by removing tape carefully, cleaning up, and admiring your transformed space.

What Is the Correct Order to Paint a Room?

To paint a room correctly, start with the ceiling, move to the walls, and finish with the baseboards, windows, and door trim. This sequence prevents drips on fresh paint and guarantees a polished look.

Working from top to bottom helps you avoid redoing sections due to paint overlap. It makes touch-ups easier and creates a smooth shift between surfaces.

Allow each coat to dry thoroughly for the best results.

Advertisement

How Do You Prepare an Inside Wall for Painting?

To prepare an inside wall for painting, start by cleaning it thoroughly to remove dust and dirt.

Repair any imperfections like cracks and holes using spackle and sanding.

Protect surrounding areas with drop cloths and painter's tape to avoid splatters.

Apply a primer to seal the wall for better paint adhesion.

Consider the room's lighting when choosing a paint color to create the desired atmosphere.

Advertisement

All these steps will guarantee a smooth and professional finish.

Can I Paint Interior Walls Myself?

You can definitely paint interior walls yourself. It's a money-saving DIY project that lets you personalize your space. With the right tools, preparation, and techniques, achieving professional-looking results is within reach.

Many resources, tutorials, and guides are available to help you through the process. Take your time, follow the steps, and enjoy the satisfaction of transforming your living space with a fresh coat of paint.

Conclusion

Now that you know the basics of how to paint interior walls, grab your paintbrush and get ready to transform your space!

Remember, preparation is key, so take your time to choose the right paint and tools.

Advertisement

Don't worry if you encounter a few bumps along the way – practice makes perfect.

So, go ahead and reveal your inner Picasso with a splash of color on your walls!

Happy painting!

Continue Reading

Trending