Connect with us

Home Decor

Where Is the Best Place to Sell Home Decor

Kickstart your home decor sales journey with top platforms like Etsy, Craigslist, and more – find out where to maximize exposure and profits!

Published

on

selling home decor online

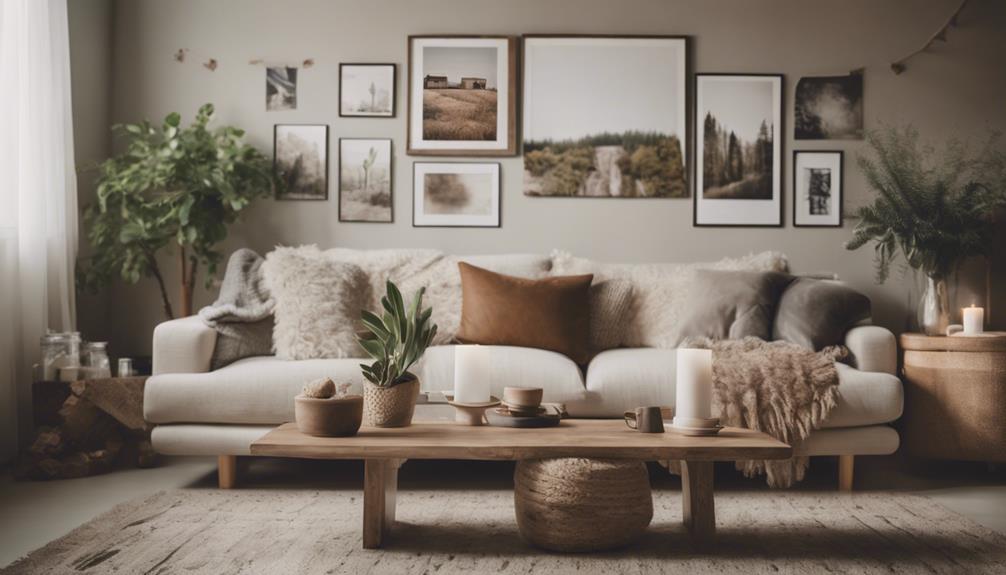
When it comes to selling home decor, consider popular platforms like Etsy, Craigslist, OfferUp, and specialized sites like Chairish and 1stdibs to maximize exposure and profits efficiently. These platforms cater to various needs, from handmade items to vintage treasures, and even artisanal pieces. Exploring these options will help you reach a broader audience and potentially enhance your sales experience. If you're interested in delving deeper into the world of online home decor sales, these platforms offer diverse opportunities worth exploring.

Key Takeaways

  • Etsy is ideal for artisans with low fees.
  • Craigslist and Facebook Marketplace offer local sales.
  • Chairish and 1stdibs specialize in luxury decor.
  • Niche platforms like Etsy cater to artisans.
  • Consider eco-friendly options on dedicated platforms.

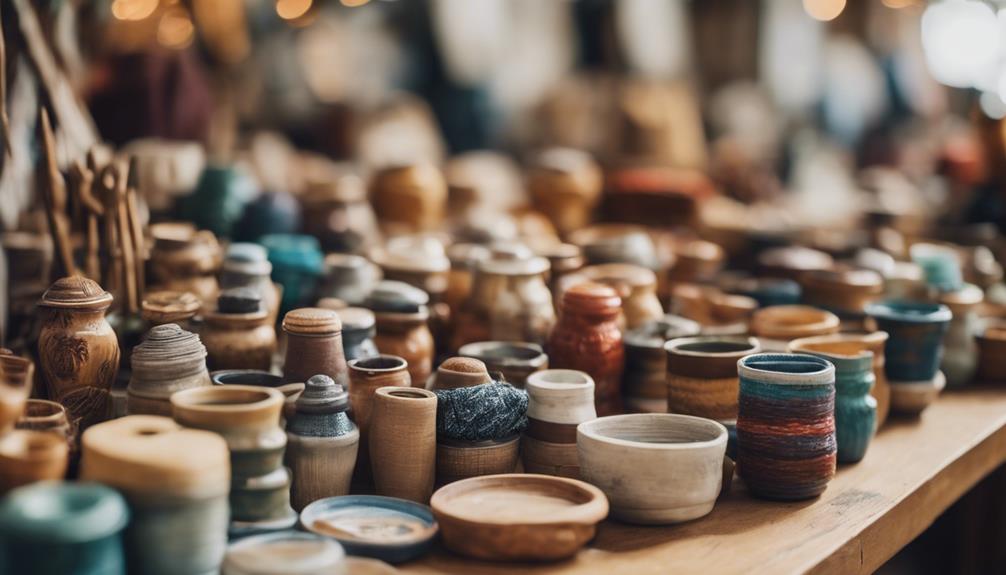
Top Platforms for Handmade Home Decor

When we investigated top platforms for handmade home decor, Etsy emerged as a standout choice for artisans looking to showcase and sell their unique creations. With a listing fee of $0.20 per item and a transaction fee of 6.5%, Etsy provides a cost-effective way for sellers to reach a niche audience interested in crafts, jewelry, and art-related products. The user-friendly interface offered by Etsy makes it easy for artisans to set up their online shops and start selling their handmade home decor items. Additionally, Etsy's global audience allows creative individuals to expand their market reach beyond local borders.

Sellers on Etsy can benefit from seamless transactions with payment processing fees of 3% plus $0.25. This feature enhances the overall selling experience for artisans, making it convenient to manage their businesses on the platform. For those looking to tap into a community of like-minded individuals and showcase their creativity to a broader audience, Etsy proves to be an excellent choice among various platforms available for selling handmade home decor.

Local Sales Options for Home Decor

local home decor sales

Local platforms like Craigslist, OfferUp, and Facebook Marketplace offer convenient options for selling home decor items to buyers in your area. These local platforms provide direct communication between sellers and buyers, eliminating intermediary fees and making transactions smoother.

Craigslist, known for its wide reach and absence of listing fees, is a popular choice. OfferUp and Facebook Marketplace, with their user-friendly interfaces, make it easy to post and browse home decor listings. Selling through these platforms not only guarantees convenience but also allows for simple pickup or delivery arrangements.

Specialty Websites for Home Decor

home decor online resources

Specialty websites for home decor, like Chairish and 1stdibs, offer unique decor finds that cater to niche design preferences. These platforms specialize in luxury antique pieces, artisanal home goods, and high-end furnishings, providing a curated selling experience for sellers looking to reach a discerning audience.

Unique Decor Finds

Searching for unique decor finds? Explore specialty websites dedicated to home decor like 1stdibs, AptDeco, Chairish, EBTH, and Sothebys Home for a curated selection of exquisite pieces.

These platforms offer a platform for selling vintage and luxury antique items, catering to both buyers and sellers looking for high-quality photos and unique home decor finds.

Advertisement

AptDeco stands out for selling preloved furniture with convenient pickup and delivery services. Chairish streamlines the process by approving listings, managing shipping, and ensuring sellers get paid promptly.

EBTH provides an end-to-end consignment service, making it easy to discover one-of-a-kind home decor items. Sothebys Home specializes in high-end furnishings and offers favorable terms for private sellers.

Niche Design Platforms

Exploring niche design platforms dedicated to home decor reveals a world of luxury antique and vintage finds that cater to discerning buyers and sellers alike. These platforms, such as 1stdibs and Chairish, offer a curated selection of high-end furnishings, including antique and vintage pieces. AptDeco provides a convenient listing service for preloved furniture, while Sothebys Home focuses on premium home decor items with favorable terms for sellers. Additionally, EBTH offers a thorough consignment service for unique home decor items, ensuring a seamless selling experience. These platforms cater to individuals seeking specialized marketplaces for their furniture and decor needs, providing a range of options for both buyers and sellers in the home decor niche.

Platform Services Offered
1stdibs Luxury antique and vintage home decor finds
AptDeco Listing service for preloved furniture
Chairish Approval for listings, shipping logistics, seller payments
Sothebys Home Focus on high-end furnishings, friendly terms for sellers
EBTH End-to-end consignment service for unique home decor items

Artisanal Home Goods

When looking to discover unique artisanal home goods for your decor needs, one can explore specialized websites like 1stdibs or Chairish. These platforms offer a wide range of options for design enthusiasts seeking luxury antique and vintage home decor pieces.

Additionally, sites like AptDeco and Chairish provide curated home goods listings with added services such as logistics management and shipping, making the buying process more convenient.

Advertisement

Furthermore, EBTH stands out by offering an end-to-end consignment service for those looking to sell unique and high-end home decor items. Whether you're in search of high-end home furnishings or simply want to explore a collection of unique home decor pieces, these platforms cater to a variety of tastes and preferences.

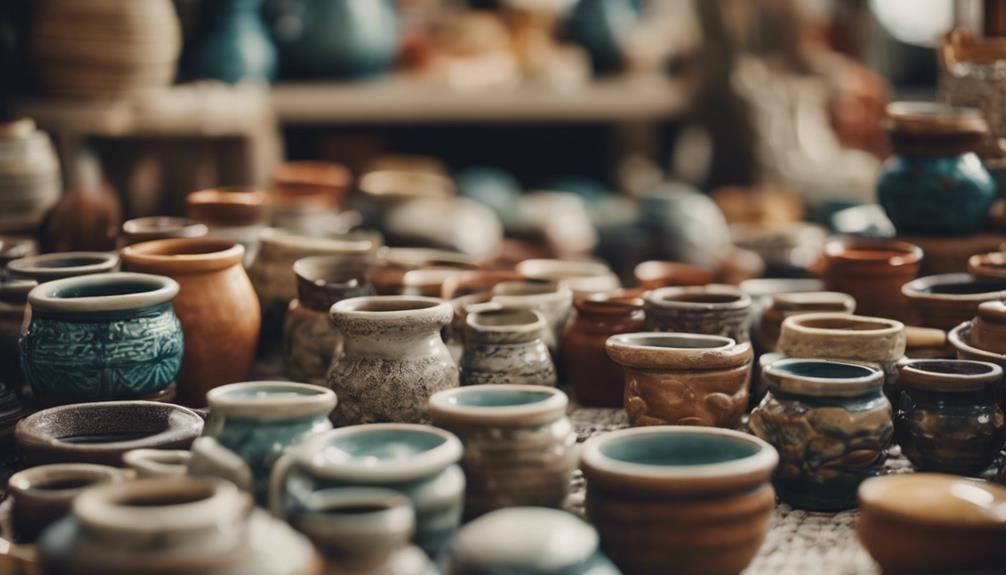
Best Online Marketplaces for Vintage Decor

vintage decor online shopping

When it comes to selling vintage decor online, it's essential to explore the top platforms dedicated to these unique finds.

These platforms offer a variety of services to assist sellers in navigating the process successfully. From curated selections to end-to-end consignment services, these marketplaces cater to those looking to sell vintage items effectively.

Top Vintage Platforms

Among the top online marketplaces for vintage decor, 1stdibs stands out for its specialization in luxury antique and vintage finds for home decor. When looking to sell home decor items or find unique vintage decor pieces, consider these platforms:

  1. Chairish offers curated listings for furniture and decor, taking care of logistics to simplify the selling process.
  2. Sothebys Home focuses on high-end furnishings, providing favorable terms for private sellers looking to sell antique items.
  3. AptDeco enhances the selling experience by offering pickup and delivery services for preloved furniture, making it convenient for sellers to list their home goods.

Selling Vintage Successfully

Exploring the top online marketplaces for vintage decor reveals a diverse range of platforms catering to sellers seeking to successfully sell their unique items.

1stdibs is renowned for luxury antique and vintage home decor finds, while Chairish offers a curated platform for selling vintage decor with optimized listings.

Sothebys Home focuses on high-end vintage furnishings and provides friendlier terms for private sellers.

Advertisement

EBTH stands out with its end-to-end consignment service for unique vintage items, ensuring a hassle-free selling process.

AptDeco specializes in listing preloved vintage furniture and offers convenient pickup and delivery services to both sellers and buyers.

These platforms provide excellent opportunities for selling vintage decor, catering to different needs and preferences of sellers in the market.

Niche Platforms for Artisan Home Decor

artisan home decor platforms

While exploring platforms for selling artisan home decor, one can find niche websites like Etsy and Chairish that cater specifically to this market. These platforms focus on connecting sellers of unique items with a targeted audience interested in artisanal and curated home decor pieces.

When considering these niche platforms, sellers should be aware of the fee structures in place. For example, Etsy charges a listing fee of $0.20 per item along with a transaction fee of 6.5%. On the other hand, Chairish offers services to optimize listings and manage logistics for a commission.

Emerging Trends in Home Decor Sales

home decor sales increase

In the world of home decor sales, a notable shift is underway towards personalized and sustainable choices. Buyers are increasingly interested in eco-friendly and ethically sourced options when it comes to furnishing their homes. Platforms like Chairish and 1stdibs cater to this trend by offering unique vintage and luxury items. Additionally, services such as Sothebys Home provide favorable terms for private sellers looking to offer high-end furnishings. This shift reflects a growing awareness of the environmental impact of home decor choices.

When it comes to buying and selling furniture and home decor, online platforms have become a good place to sell old items and make extra cash. Sellers can list their products and buyers can make offers, creating a convenient way to sell your stuff online. Ensuring that items are priced competitively and taking into account the selling price trends can help attract potential buyers. Embracing these emerging trends not only benefits sellers but also contributes to a more sustainable and environmentally conscious approach to home decor.

Advertisement

Frequently Asked Questions

How to Make Money Selling Home Decor?

When it comes to making money selling home decor, there are various platforms to explore. Consider sites like Chairish, ThredUp, and Poshmark for different selling experiences. Platforms like Chairish offer full-service options, while Poshmark allows for self-service selling.

Make sure to prep your items well by cleaning, repairing, and photographing them attractively to boost sales. Taking these steps can help you attract buyers and increase your profits effectively.

What Is the Most Sold Home Decor?

When it comes to home decor, the most popular items that fly off the shelves are:

  • Wall art
  • Decorative throw pillows
  • Stylish rugs
  • Unique lighting fixtures
  • Trendy vases

People gravitate towards various styles like bohemian, farmhouse, modern, and Scandinavian, all influencing what gets snatched up.

Keeping up with seasonal trends is key, as holiday-themed items, seasonal colors, and cozy accents are always in demand.

Buyers also love functional pieces like:

Advertisement
  • Storage baskets
  • Accent mirrors
  • Decorative trays
  • Botanical prints

Sustainable options like bamboo furniture, recycled glass accents, organic textiles, and natural fiber rugs are gaining traction too.

Who Spends the Most on Home Decor?

We've found that millennials spend an average of $1,500 annually on home furnishings and decor, topping the spending charts.

Baby boomers follow closely behind, allocating around $1,200 each year for home decor items.

Gen Xers fall slightly behind, spending approximately $1,000 annually on decorations and furnishings.

The luxury home decor market is thriving, with high-income households investing substantially in upscale designer products, indicating a diverse and robust consumer base.

Is Selling Home Decor Online Profitable?

Selling home decor online can be profitable. Utilizing platforms like Etsy, eBay, and Chairish can attract a wide audience. Unique and vintage pieces often fetch higher prices, appealing to niche buyers. Properly marketing items with clear descriptions and quality photos drives sales.

Advertisement

Social media and targeted ads help reach potential buyers. With the global market expected to reach $838 billion by 2027, online sales present significant profit potential for home decor sellers.

Conclusion

To sum up, when it comes to selling home decor, there are a variety of platforms to explore. From handmade items to vintage pieces, there are options for every style and budget.

By investigating different avenues such as online marketplaces, local sales options, and specialty websites, sellers can reach a wide audience and maximize their sales potential.

As the saying goes, 'One man's trash is another man's treasure' – so don't overlook any opportunity to showcase your unique decor pieces.

Advertisement

Continue Reading
Advertisement

Home Decor

How to Paint Over Mirrors: A Step-By-Step Guide for You

Spruce up your space with a stunning makeover, but first, uncover the surprising techniques to paint over mirrors like a pro.

Published

on

painting mirrors step by step guide

To breathe new life into an old mirror, start by cleaning the surface with glass cleaner, followed by priming with spray primer for a strong bond. Use chalk paint specifically designed for mirrors, applying it in light, even coats. Mask off areas with painter's tape to create crisp lines, and touch up edges with acrylic paint and a fine brush. Seal your masterpiece with a clear acrylic sealer for added protection. Finally, apply a topcoat designed for glass surfaces to guarantee durability. Now that you've got the basics down, you're ready to discover the secrets to a truly transformed mirror – and it all starts with the next step.

Key Takeaways

• Clean the mirror surface with glass cleaner to ensure proper adhesion of the paint.

• Use chalk paint for its adhesion properties to prevent peeling or chipping.

• Prime the mirror's surface with spray primer for a strong bond and durability.

• Apply high-quality spray paint designed for mirrors in light, even coats for even coverage.

Advertisement

• Seal the painted mirror with a clear acrylic sealer for added protection.

Prepare the Mirror Surface

Before you can start painting, you'll need to thoroughly clean the mirror surface with a glass cleaner to remove any dirt, dust, or residue that may interfere with paint adhesion. This vital step guarantees a strong bond between the mirror and the paint, preventing peeling or chipping over time.

Once the mirror surface is clean, you're ready to move on to the next step. Since you'll be using chalk paint, which is known for its excellent adhesion properties, you can feel confident that your paint job will last. However, it's still essential to take the time to properly prepare the surface to achieve the best results.

Clean the Mirror Frame

reflecting on a cleanse

With your mirror surface sparkling clean, turn your attention to the frame, where a mixture of water and mild detergent awaits to help you scrub away dust, dirt, and grime. This important step guarantees a clean mirror frame, essential for proper paint adhesion and a professional-looking finish.

Using a microfiber cloth or sponge, gently scrub the frame, paying special attention to corners and intricate details. Remove any residue, making sure all surfaces are clean and dry. Allow the frame to dry completely after cleaning to prevent any moisture from affecting the adhesion of the paint.

A clean mirror frame is crucial, as it provides a smooth surface for painting. Take your time to thoroughly clean the frame, and you'll be rewarded with a beautifully painted mirror that looks like new. By cleaning the mirror frame, you're setting yourself up for success and ensuring a stunning final result.

Advertisement

Prime the Mirror

reflecting on inner self

As you move on to the next step, it's crucial to focus on preparing the mirror's surface for painting.

Now that you've cleaned the mirror frame, you'll need to prime the mirror itself, which involves cleaning the surface and applying a primer coat to establish a strong bond between the paint and the mirror.

Cleaning the Surface

You'll need to give your mirror a thorough cleaning to guarantee a strong bond between the mirror and the paint. This step is crucial, as any dirt, grime, or residue can affect the paint's adhesion. Reach for a trusted glass cleaner and spray it onto the mirror's surface. Wipe it down with a lint-free cloth or paper towel, making sure to remove any streaks or residue. If you want to add an extra layer of cleanliness, mix a mild detergent with water or use a vinegar solution to remove any oils or fingerprints.

Cleaning Supplies Purpose Tips
Glass Cleaner Removes dirt and grime Use a lint-free cloth or paper towel
Mild Detergent Removes oils and fingerprints Mix with water for a gentle solution
Vinegar Solution Removes oils and fingerprints Dilute with water for a gentle solution

Applying Primer Coat

Now that your mirror is sparkling clean, it's time to prime the surface to guarantee a strong bond between the mirror and paint. Applying a primer coat is an important step in ensuring a professional-looking finish and a long-lasting paint job. When you prime the mirror frame, you're promoting adhesion and durability, which prevents chipping or peeling of the paint.

To do this, use a spray primer for easy application and even coverage on the mirror frame. Hold the can 8-10 inches away from the surface and move it back and forth, applying a light coat evenly. Make sure to follow the manufacturer's instructions for drying time before moving on to the next step.

Paint the Mirror Design

reflective painting process described

With your mirror detached or masked, start by applying a light coat of primer to the frame, making sure to cover all angles for an even finish. As an Amazon Associate, I recommend using a high-quality spray paint specifically designed for mirrors to achieve a stroke-free finish. Hold the can 8-10 inches away from the frame and spray in a steady, back-and-forth motion, covering the entire surface.

Make sure to apply light coats, guaranteeing each coat to dry before applying the next. This will prevent drips and secure a smooth finish. You can use a small brush to touch up any areas the spray paint may have missed. Remember to spray from all angles to achieve even coverage on the mirror frame.

Advertisement

Once you've achieved the desired color, let the final coat dry completely before moving on to the next step.

Remove Masking and Tape

unmask and reveal truth

After applying the final coat of paint, it's time to remove the masking and tape from the mirror frame to reveal the beautifully painted design. This is an exciting step, as you get to see your hard work come together.

Step Action Tips
1 Peel off masking tape and painter's tape Use a gentle touch to avoid scratching the mirror
2 Remove excess paint Use a razor blade or craft knife to lift paint off the mirror surface
3 Clean the mirror Use glass cleaner to remove residue left behind by the tape
4 Inspect the mirror Check for any remaining paint marks or smudges that need attention

As you remove the tape, use a gentle touch to avoid scratching the mirror. You may need to use a razor blade or craft knife to gently lift any paint that may have seeped onto the mirror surface. After cleaning the mirror with glass cleaner, inspect it closely for any remaining paint marks or smudges that need to be addressed. Once you've completed these steps, you can enjoy your newly painted mirror without any masking or tape remnants detracting from its beauty.

Touch Up Mirror Edges

refine mirror frame design

Guarantee the mirror edges are carefully painted, using a small, fine paintbrush to achieve a professional finish.

You want to make sure that the paint only reaches the edges, so apply a thin layer of painter's tape along the edges of the mirror to create a clean line. This will prevent any paint from seeping onto the mirror's surface.

Next, use a high-quality acrylic paint specifically designed for glass surfaces to carefully touch up the mirror edges. Work methodically, using smooth, even strokes to cover the entire edge. Remember to maintain a steady hand and take your time – it's better to apply multiple thin coats than to risk applying too much paint at once.

Once you've completed the edges, allow the paint to dry completely before removing the painter's tape to reveal crisp, freshly painted mirror edges.

Advertisement

With patience and attention to detail, you'll achieve a flawless, professional-looking finish.

Seal the Painted Mirror

mirror painting sealed securely

As you move forward with sealing your painted mirror, you'll want to focus on two key points: protecting the paint job and adding a topcoat.

By doing so, you'll guarantee your DIY project remains vibrant and durable for years to come.

Protecting the Paint Job

Completing your painted mirror with a clear acrylic sealer is important to safeguarding your artwork from scratches and damage. This step is vital in guaranteeing your hard work lasts for years to come.

By applying a clear acrylic sealer, you're adding an extra layer of protection against the elements and daily wear and tear.

Here are some key takeaways to keep in mind when sealing your painted mirror:

Advertisement
  • Choose a high-quality sealer suitable for glass surfaces to ensure long-lasting durability.
  • Apply the sealer in thin, even coats to prevent drips or streaks on the painted mirror.
  • Allow each layer of sealer to dry completely before applying additional coats for best protection.
  • Regularly clean and maintain the sealed painted mirror to preserve its appearance and longevity.
  • Be patient and take your time when applying the sealer, as this will ensure a professional-looking finish.

Adding a Topcoat

With your painted mirror fully dry, you're ready to seal in your artwork with a clear topcoat, the final protective layer that will shield your masterpiece from scratches and wear. This step is vital to guarantee your design lasts for a long time.

When choosing a topcoat, select one specifically designed for use on glass surfaces, as it will provide better adhesion and durability. Before applying the topcoat, make sure the painted mirror is completely dry to prevent smudging or an uneven finish.

Follow the manufacturer's instructions for the topcoat application process to ensure a smooth and long-lasting result. A clear topcoat with a gloss or satin finish can enhance the painted mirror's appearance, giving it a professional look.

Hang Your New Masterpiece

create with pride always

You're ready to hang your newly painted mirror, and a few final checks will guarantee it's securely in place. After investing so much time and effort into transforming your mirror, you want to make sure it's properly secured to the wall.

Here are the final steps to complete the process:

  • Clean the frame one final time to remove any lingering dust or residue before hanging your newly painted mirror.
  • Check the hanging hardware on the back of the mirror to make sure it's secure and can support the weight of the mirror.
  • Use appropriate wall anchors or screws to hang the mirror securely, considering the weight and size of the mirror.
  • Measure and mark the desired placement of the mirror on the wall before hanging to ensure proper alignment.
  • Step back and admire your transformed mirror, appreciating the new look it brings to the space.

Frequently Asked Questions

How to Paint Over a Mirror?

When you're wondering how to paint over a mirror, remember to cover the mirror's surface with masking tape or detach it from the frame to prevent paint from seeping underneath.

Then, prime the frame with spray primer for better paint adhesion.

Apply light, even coats of spray paint from different angles, ensuring complete coverage.

Advertisement

Can I Use Acrylic Paint on a Mirror?

You're probably wondering if you can use acrylic paint on a mirror – and the answer is a resounding yes!

In fact, acrylic paint adheres amazingly well to glass surfaces, making it a fantastic choice for decorative projects or unique art pieces.

With its quick-drying properties, you'll be amazed at how swiftly you can transform your mirror into a stunning work of art.

What Do You Cover a Mirror With When Painting?

When painting around a mirror, you'll want to cover it to prevent paint from getting on the reflective surface. You can use painter's tape or masking tape to cover the mirror, and for added protection, layer newspaper or brown kraft paper on top, securing it with tape.

Alternatively, you can use plastic drop cloths or garbage bags to cover the mirror. Just make sure the covering is tightly secured to prevent any paint seepage.

Advertisement

Does Spray Paint Work on Mirrors?

You're likely wondering: does spray paint work on mirrors?

The answer is yes, it does! In fact, spray paint is a great option for painting mirrors, offering a stroke-free finish and easy application.

It's perfect for accessing tight angles and corners on the mirror frame, ensuring even coverage. Plus, it's a quick and cost-effective way to refresh your mirror's look.

Conclusion

As you step back to admire your handiwork, the transformed mirror reflects not only your new design, but also your resourcefulness and creativity.

Like a phoenix rising from the ashes, your once-bare mirror now boasts a fresh, vibrant personality, ready to elevate any room.

Advertisement

With each brushstroke, you've not only painted over the mirror but also infused it with a piece of yourself – a symbol of the power of transformation and self-expression.

Continue Reading

Alfresco

Is an Alfresco a Habitable Room? Understanding the Terms!

Find out if your alfresco can be considered a habitable room by understanding the essential terms and requirements for compliance with regulations.

Published

on

By

defining alfresco and habitable

When considering if an alfresco qualifies as a habitable room, it must adhere to specific requirements. These include suitable space for living, proper ventilation, lighting, and compliance with the Building Code of Australia (BCA). Meeting these standards guarantees safe and comfortable living spaces within a building. Importantly, alfrescos may lack adequate heating and room size, hindering them from being habitable rooms. If you seek to convert an alfresco, consulting with local authorities and following BCA guidelines for essential permits is essential. Understanding these terms is important to guarantee compliance with regulations for a habitable living space.

Key Takeaways

  • Alfrescos are not habitable rooms due to lack of heating and compliance with room size standards.
  • Permanent heating installation is essential to meet habitable room criteria.
  • Consultation with authorities is vital to determine if an alfresco can be converted into a habitable room.
  • Compliance with BCA regulations and minimum ceiling height standards is necessary for alfresco conversions.
  • Building permits are required for converting alfrescos into habitable rooms, ensuring safety and comfort.

Definition of Habitable Room

In building codes, a habitable room is defined as a space suitable for living, sleeping, eating, or cooking. To meet the standards of a habitable room, there are specific requirements such as minimum room size, proper ventilation, adequate lighting, and temperature control. These regulations guarantee that occupants have comfortable and safe living spaces within a building.

Examples of habitable rooms commonly found in a dwelling unit include bedrooms, living rooms, and kitchens. The designation of a room as habitable is essential for fulfilling the basic needs of individuals residing in a structure.

Compliance with the criteria set for habitable rooms plays a significant role in ensuring that the living environment is suitable for human occupancy. By adhering to these standards, building owners and occupants can be confident in the habitability and functionality of the living spaces provided within a property.

Building Permit Requirements

building permit application process

To convert an alfresco into a habitable room, you must adhere to strict building permit regulations. Essential compliance with the Building Code of Australia (BCA) is required when seeking a permit for this conversion.

Consider crucial aspects such as proximity to effluent systems and the necessity of a damp proofing membrane during the conversion process.

Permit Regulations Overview

For converting an alfresco into a habitable space, obtaining a building permit is an essential step that requires compliance with the Building Code of Australia (BCA).

Advertisement

When applying for a permit, it's vital to meet the minimum floor to ceiling height of 2.4m for habitable room conversions.

As part of the permit regulations overview, considerations such as proximity to effluent systems and damp proofing requirements must be addressed to guarantee the safety and livability of the space.

Required documents for a building application include a completed form, fees, design compliance certificate, site plan, and floor plan with elevations.

These documents are crucial for the permit process and demonstrate adherence to the necessary standards set by the BCA.

Compliance Checklist Essentials

How can you guarantee compliance with building permit requirements when converting your alfresco into a habitable room?

Advertisement

When converting your alfresco into a habitable room, it's important to ensure adherence to building permit requirements. This involves following the Building Code of Australia (BCA) and meeting specific criteria for habitable rooms.

Key considerations include the location of the alfresco in relation to effluent systems and the installation of damp-proofing membranes to prevent moisture issues. Additionally, habitable rooms must meet minimum floor to ceiling height requirements of 2.4 meters to ensure adequate livable space.

To ensure compliance, it's essential to submit the necessary documents as part of your building application. These documents may include design certificates, site plans, and floor plans detailing the proposed conversion of the alfresco into a habitable room.

Compliance With Building Code of Australia

meeting australian building standards

Ensuring compliance with the Building Code of Australia is vital in determining the habitability of an alfresco area. To be classified as a habitable space, alfresco areas must meet the specific BCA regulations set forth for such areas.

These regulations outline the requirements that alfresco areas need to fulfill in order to be considered habitable rooms. By adhering to the BCA guidelines, property owners can guarantee that their alfresco spaces meet the necessary standards for habitability.

Understanding and following BCA standards is essential as they dictate the specifications that alfresco areas must comply with to achieve the classification of habitable rooms. Therefore, when evaluating whether an alfresco area can be deemed habitable, it's imperative to assess its compliance with the Building Code of Australia to ensure that the space meets the required criteria for habitability.

Advertisement

Factors to Address for Conversion

factors for successful conversions

Consider key factors when aiming to convert an alfresco area into a habitable room. Alfrescos, typically outdoor recreational spaces lacking heating facilities, don't meet the requirements for habitable spaces as per building codes.

These areas aren't marketed as habitable by real estate agents. Merely adding portable heat sources doesn't transform alfrescos into habitable rooms, and even connection to the house's central heating system may not guarantee compliance with habitable space standards.

To convert an alfresco into a habitable room, addressing the heating deficiency is important. Installing a permanent heating system that adequately warms the space is essential to meet habitable room criteria.

It's important to note that the absence of proper heating remains a significant obstacle in reclassifying alfrescos as habitable areas. Therefore, ensuring a reliable heating solution is in place is a fundamental consideration when seeking to convert alfrescos into habitable rooms.

Minimum Ceiling Height Requirement

minimum height for ceilings

The minimum ceiling height requirement, typically set at 2.4 meters, plays a critical role in determining habitability. This standard guarantees that spaces are comfortable and functional for occupants while also complying with legal regulations.

Failing to meet these ceiling height standards can impact the usability and legality of a room or space.

Ceiling Height Standards

A habitable room must meet the minimum ceiling height requirement of typically 2.4 meters (7.87 feet) as mandated by building codes. The ceiling height standards are in place to guarantee that there's adequate headroom for comfortable use of habitable spaces.

Advertisement

It's important to comply with these minimum ceiling height standards as they play a significant role in designating a room as habitable. Proper ceiling height not only contributes to the overall habitability of a room but also affects its functionality.

Failure to meet these minimum requirements may have implications on the habitable status of a room. Hence, when designing or renovating a space, it's crucial to adhere to the established ceiling height standards to ensure that the room is both comfortable and functional for its intended use.

Comfort and Functionality

Meeting the minimum ceiling height requirement is essential for guaranteeing the comfort and functionality of habitable rooms. The standard height of 2.4 meters (7.87 feet) is established to provide adequate headroom and a sense of spaciousness within living areas. These dimensions contribute to a room's usability, allowing for the installation of lighting fixtures, ceiling fans, and other essential amenities without compromising comfort.

Natural light plays a key role in creating a welcoming atmosphere and can be maximized with proper ceiling height, enhancing the overall ambiance of the space. Additionally, adequate room sizes, combined with ideal ceiling height, ensure that furniture can be arranged effectively, promoting ease of movement and functionality.

While alfresco areas offer a unique outdoor experience for dining and entertainment, they don't adhere to habitable room standards due to their open nature and lack of enclosure. Therefore, compliance with minimum ceiling height requirements isn't expected for these outdoor spaces, as they serve a different purpose than traditional habitable rooms.

Advertisement

Legal Compliance Considerations

When considering legal compliance, ensuring that habitable rooms meet the minimum ceiling height requirement is vital for adherence to building regulations. The minimum ceiling height for habitable rooms, set at 2.4 meters (7.87 feet) by building codes, is essential to guarantee that the space is adequate for human occupancy.

This requirement applies to Alfresco areas as well; to be classified as habitable rooms, Alfresco spaces must also meet the 2.4-meter ceiling height standard. When submitting building applications for converting Alfresco areas, it's imperative to include detailed plans demonstrating compliance with the ceiling height requirement.

Failure to meet the minimum ceiling height could lead to non-compliance with building regulations concerning habitable spaces. Therefore, it's crucial to meticulously follow the stipulated ceiling height guidelines to ensure legal conformity and the safety and suitability of the living environment.

Consultation With Local Authorities

collaboration with community leaders

Engage local authorities early in the process to determine whether your alfresco area can be classified as a habitable room. By consulting with local authorities, you can guarantee compliance with regulations governing the habitability of alfresco spaces.

Here are three key reasons why involving local authorities is vital:

  1. Guidance on Regulations: Local authorities can provide clarity on whether your alfresco area meets the criteria set for habitable rooms in building codes, helping you understand the specific requirements that need to be met.
  2. Modification Advice: Authorities can advise on any necessary modifications or additions needed to classify your alfresco area as habitable, ensuring that it meets the standards set by the regulations.
  3. Compliance Assurance: Obtaining input from local authorities will help you navigate the complex regulations governing alfresco spaces, giving you confidence that your area complies with the necessary standards for habitable rooms.

Understanding Regulations and Approvals

navigating legal requirements efficiently

To guarantee adherence and successful conversion of your alfresco into a habitable room, understanding relevant regulations and obtaining necessary approvals is essential.

Building permits are a prerequisite for converting alfrescos into habitable rooms. Compliance with the Building Code of Australia (BCA) regulations is pivotal for ensuring a safe and habitable living space. Factors such as proximity to effluent systems and the installation of a damp proofing membrane are crucial considerations before initiating the conversion process.

Advertisement

A minimum floor to ceiling height of 2.4m must be met to classify alfrescos as habitable rooms. When applying for a building permit, make sure you have the required documents, including a completed form, design compliance certificate, site plan, and floor plan.

Remember that meeting these regulations and obtaining approvals are necessary steps in transforming your alfresco into a comfortable and legally compliant dwelling unit.

Frequently Asked Questions

What Is Considered a Habitable Room?

To be classified as habitable, a room must meet specific criteria like heating, lighting, ventilation, and insulation. Bedrooms, living rooms, studies, and recreation rooms are typical examples. Kitchens, bathrooms, and laundry rooms have their own requirements.

What Does Alfresco Mean in Housing?

Step into your outdoor oasis with an alfresco, a charming extension of your home. Alfrescos, though cozy, lack the essentials to be deemed habitable. Enjoy the fresh air and sun in this unique space!

What Is an Alfresco Room?

An alfresco room is an outdoor living space attached to a house, featuring outdoor furniture, cooking facilities, and entertainment areas. It provides a comfortable outdoor environment for dining and relaxation, popular for entertaining guests and enjoying the outdoors.

Advertisement

What Are Examples of Habitable Room?

Imagine cozy bedrooms, lively living rooms, productive studies, and fun recreation rooms. These are examples of habitable rooms where you relax, work, and play. They are designed for your comfort and daily activities.

Conclusion

To wrap up, while an alfresco area may provide a pleasant outdoor space, it doesn't meet the requirements to be classified as a habitable room. As the saying goes, 'a room is like a shell, it must offer shelter and comfort.'

It's important to understand the regulations and approvals needed before converting an alfresco into a habitable room to guarantee compliance with building codes and safety standards.

Always consult with local authorities for guidance on these matters.

Advertisement

Continue Reading

Home Decor

Step-by-Step DIY Nest Building

Crafting a whimsical bird's nest from natural materials, discover the secrets to weaving a sturdy and visually stunning abode that sparks imagination.

Published

on

diy bird nest tutorial

To create your own DIY nest, start by gathering natural materials like twigs, grass, and moss, while drawing inspiration from different bird nests. Choose a location that mimics a bird's natural habitat, providing shelter and access to food and water. Weave the nest together using long, flexible stems, securing the foundation with natural materials. Test the nest's sturdiness by gently pressing and evaluating its weight capacity. Add decorative touches like colorful leaves or feathers to create a cozy environment. Finally, display your unique nest in a decorative tray or cloche, experimenting with heights and angles for visual interest – and that's just the beginning of your creative journey.

Key Takeaways

• Gather natural materials like twigs, grass, and moss, and observe bird nests for inspiration before collecting materials.

• Choose a location that mimics a bird's natural habitat, with shelter from harsh weather and access to food and water.

• Construct the nest by securely binding twigs, using long stems for the frame, and weaving materials tightly for insulation and protection.

• Test the nest's structural integrity, weight capacity, and resistance to environmental factors, and reinforce weak spots as needed.

Advertisement

• Add decorative elements like colorful leaves, flowers, or feathers to personalize the nest and create a cozy environment.

Gathering Materials and Inspiration

Gather natural materials like twigs, grass, leaves, and moss to get started on your DIY nest building project. You'll be amazed at how these simple elements can come together to create a beautiful and intricate nest.

As you collect your materials, take inspiration from the bird nests you observe in nature or online pictures. Notice the varying shapes and sizes, and think about the type of nest you want to build. Consider the size and shape of the nest you want to create before gathering materials, as this will help you determine the quantity of materials you'll need.

Take a cue from the birds in your area, and explore different types of nests they build. From intricately woven twig structures to cozy moss-lined cups, each nest is a reflection of the birds' remarkable engineering skills.

Choosing the Perfect Location

selecting the ideal wedding spot

Now that you've gathered your materials and have a sense of the type of nest you want to build, it's time to think about where to place it. Choosing the perfect location is vital for attracting the right birds and ensuring they build a nest successfully.

To increase your chances of attracting birds, select a location that mimics the natural habitat of the species you want to attract. Make sure the nesting area is sheltered from harsh weather conditions like wind and rain. It's also essential to position the nest in a spot with easy access to food sources and water for the birds.

Advertisement

Avoid high-traffic areas where human or animal disturbances could disrupt the nesting process. Consider installing the nest at a height suitable for the bird species, ensuring safety from predators.

Weaving the Nest Together

creating a cozy home

As you begin weaving your nest together, you'll need to focus on:

  • Binding twigs together securely
  • Assembling the frame of your nest
  • Establishing a sturdy foundation

These essential steps will provide the structure for your DIY decorative nest, ensuring it's both visually appealing and durable.

Binding Twigs Together

You'll start weaving twigs together by selecting sturdy, flexible branches that will form the foundation of your nest.

As you begin binding twigs, remember that birds use this technique to create a vital foundation for their nests. By intricately weaving twigs, you'll form a secure structure that can withstand the weight of eggs and chicks. This essential step provides stability and durability to the nest, ensuring the safety of the eggs and hatchlings.

As you weave, keep in mind that twigs are an essential component in building a bird's nest. By properly binding twigs, you'll create a safe and comfortable space for bird nesting.

This intricate process requires patience and attention to detail, but the end result is well worth the effort. By following these steps, you'll be well on your way to creating a cozy and secure nest, just like birds do in the wild.

Advertisement

Nest Frame Assembly

With your sturdy twig foundation in place, gather long, flexible plant stems to shape the main frame of your nest. These stems will form the primary structure of your nest, so choose ones that are sturdy yet pliable.

To weave the nest frame together, bend the plant stems into a loop and secure them in place with twine or string. This will create the basic shape of your nest.

Next, add smaller loops and shapes to the nest frame by weaving in additional plant stems or branches. As you build, make sure to maintain a sturdy and well-shaped structure, as this will be the foundation of your nest.

Sturdy Nest Foundation

How do you plan to weave your nest together to create a sturdy foundation that will protect your eggs or young birds from the elements and predators? This vital step in DIY nest building requires careful consideration of the materials and techniques used.

By incorporating a variety of natural materials like twigs, grass, and leaves, you can create a strong and durable structure for your bird nest.

Advertisement

Here are some essential tips to keep in mind:

  • Use a combination of flexible and sturdy materials to achieve the right balance of strength and flexibility.
  • Weave the materials together tightly to prevent gaps and holes.
  • Pay attention to the nest shape, ensuring it's deep enough to protect your eggs or young birds.
  • Use weaving techniques that allow for good insulation and protection from the elements.
  • Make sure the nest is well-anchored to prevent it from toppling over or being dislodged.

Testing the Nest's Sturdiness

stress testing the nest

As you test the nest's sturdiness, you're evaluating its structural integrity, weight capacity, and ability to resist environmental factors.

By gently pressing down on the nest, you'll determine if it can hold the weight of an egg without collapsing, a vital aspect of nest building.

A sturdy nest is one that can withstand wind, rain, and other harsh conditions, so it's imperative to get it right.

Nest Structural Integrity

You'll want to put your nest to the test by gently pressing down on it to check its sturdiness. This important step guarantees that your bird nest can withstand the elements and provide a safe haven for its future inhabitants. When testing the nest's sturdiness, you're verifying if it maintains its shape and structure when pressure is applied.

Here are some key takeaways to keep in mind:

Advertisement
  • A sturdy nest will retain its shape when pressed upon, indicating proper weaving and material placement.
  • The nest should securely hold its shape without collapsing or losing its form.
  • If the nest collapses or loses its shape easily, it may need additional weaving or reinforcement.
  • Ensuring the nest's sturdiness is essential for protecting eggs and providing a stable foundation for bird nesting.
  • Building nests that can withstand the elements requires careful attention to detail and a focus on structural integrity.

Nest Weight Capacity

To determine your nest's weight capacity, place weighted objects like eggs or small rocks inside the nest, gradually increasing the weight to test its importance. This critical step guarantees that your nest can support the weight of birds and their offspring without collapsing or losing its shape.

As you're building your nest, keep in mind that birds can build their nests to last, and yours should be no exception. When you make a bird nest, it's crucial to take into account the weight capacity to attract birds and make sure the nest's functionality.

Observe how the nest reacts to different weights to gauge its durability. You can use a bucket or container to hold the weighted objects during testing. As you add more weight, pay attention to any signs of strain or weakness in the nest's structure. A sturdy nest that can hold objects without breaking is crucial for its success.

Resisting Environmental Factors

Now that you've confirmed your nest can support the weight of its inhabitants, it's time to test its sturdiness against environmental factors that could threaten its structure. As a DIY nest builder, resisting environmental factors is vital to make sure your birds nest remains safe and cozy.

To evaluate your nest's sturdiness, follow these essential steps:

  • Gently press on the nest to see if it holds its shape.
  • Check for loose or weak spots that may need reinforcement.
  • Make sure the nest can withstand mild environmental factors like wind or light pressure.
  • Evaluate the nest's resilience by lightly shaking it to see if the structure remains intact.
  • Consider using additional materials or techniques to enhance the nest's durability against environmental factors.

Adding Decorative Touches

enhancing with decorative elements

With a solid foundation in place, it's time to elevate your nest's aesthetic appeal by incorporating decorative touches that reflect your personal style.

You can make your nest truly unique by experimenting with various textures and colors. For instance, you can add some green moss to give it a natural, earthy feel, similar to what some bird species use to make nests.

Advertisement

To add an extra layer of realism, you can place eggs inside the nest, which will give it a cozy, inhabited look. Decorative touches like feathers, bark, and other natural materials can enhance the visual appeal of your nest, making it a beautiful piece of art.

By incorporating these elements, you can create a visually appealing decorative nest that showcases your creativity and attention to detail.

Completing and Displaying the Nest

building a bird s nest

You've invested time and creativity into building a unique nest, and now it's time to showcase your masterpiece by displaying it in a way that highlights its beauty and charm. A well-designed display can elevate your nest from a simple craft project to a stunning work of art.

Here are some ideas to get you started:

  • Consider placing your nest on a decorative tray or in a cloche to add an extra layer of elegance.
  • Experiment with different heights and angles to create visual interest.
  • Add some natural elements, like pinecones or twigs, to bring the outdoors in.
  • Create a themed display by incorporating seasonal decorations, like holly or ornaments, around your nest.
  • Don't be afraid to think outside the box (or nest!) and try displaying your nest in a unique way, like on a handmade cake stand or with farmhouse elements for a rustic look.

Frequently Asked Questions

How Do You Make Your Own Nest?

You're wondering how to make your own nest?

Start by gathering long, flexible plant stems to form the main shape. Bend and tie them into a loop, then add smaller loops to shape the rest of the nest.

You can decorate it with feathers, bark, moss, and other scavenged materials to give it a cozy touch.

Advertisement

How Do You Make a Nest for Yourself?

Are you thinking, 'What's the point of making a nest for myself?'

Well, creating a cozy nook can be a therapeutic escape from the world.

To make a nest for yourself, start by identifying a quiet, comfortable spot, like a corner of your bedroom or a secluded outdoor area.

Then, gather materials like blankets, pillows, and soft fabrics to create a snug, inviting space that's all yours.

How Do You Make a Simple Nest for Kids?

When creating a simple nest for kids, you'll want to gather natural materials like twigs, grass, and leaves. Collect these materials in a bucket or container, and encourage kids to observe nearby bird nests for inspiration.

Advertisement

Building the nest on a tray makes it easy to work indoors, or you can take the activity outside. Once built, test the nest's sturdiness by placing small rocks or eggs inside.

How to Build a Bird Box Step by Step?

As you start building a bird box, remember that it's not just about providing a cozy home for your feathered friends, but also about creating a safe haven that mimics their natural habitat.

To get started, choose the right materials, such as wood, screws, and waterproof paint, and measure the wood pieces according to the species you want to attract.

Conclusion

As you step back to admire your handiwork, the nest's natural nuances nestled among the branches, you'll notice the intricate interplay of twigs, leaves, and feathers.

Softly swaying in the breeze, the nest's sturdy structure shines, a confirmation of your patient persistence.

Advertisement

With each delicate detail deliberately designed, your DIY masterpiece is now a cozy, calming sanctuary, waiting to cradle its new inhabitants.

Continue Reading

Trending