Connect with us

Home Decor

How to Make Adorable White Moss Dollar Store Pumpkins

Freshen up your fall decor with a unique twist on traditional pumpkins, transforming dollar store finds into charming white moss masterpieces.

Published

on

diy dollar store pumpkins

We'll start by gathering our materials, including foam pumpkins, chalk paint, Mod Podge, and white Spanish moss. Next, we'll prepare our pumpkins by applying a smooth layer of white chalk paint, ensuring uniform coverage for best moss adherence. After painting, we'll apply a thin layer of Mod Podge and add the moss from top to bottom, pressing firmly and trimming excess for a polished finish. Finally, we'll seal our pumpkins with clear spray paint for a durable, long-lasting finish. Now that we've got the basics covered, it's time to add our personal touch and learn how to elevate our pumpkins to the next level.

Key Takeaways

• Apply white chalk paint to the foam pumpkins, allowing each layer to dry, to create a smooth and even base for the moss.

• Use Mod Podge as an adhesive to attach white Spanish moss to the pumpkin, starting from the top and working down, for a polished finish.

• Seal the moss with clear high-gloss spray paint to preserve and protect it, and to add durability.

• Add optional embellishments like gold or silver paint, glitter, or gemstones to elevate the pumpkins and add personal style.

Advertisement

• Display the pumpkins in a decorative arrangement, incorporating fall decor elements like candles or pine cones, to create a cohesive and stylish look.

Gather Your Materials

We'll start by collecting the necessary materials to bring our adorable white moss pumpkins to life. To make sure we've everything we need, make sure to grab a few essential items.

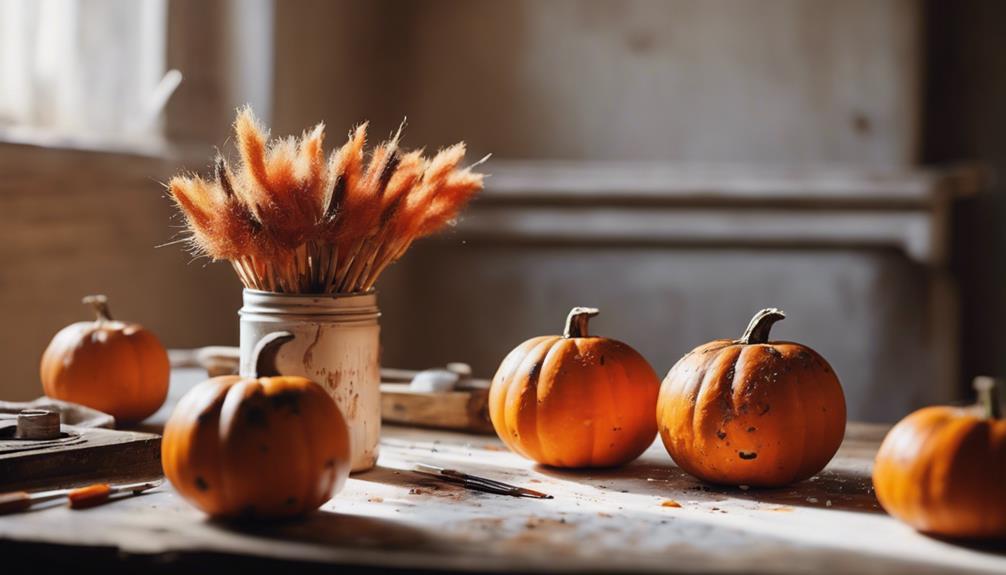
First, we'll need some foam pumpkins, which we can easily find at Dollar Tree.

Next, we'll require some paint to give our pumpkins a unique look. We'll opt for Spanish moss chalk paint to achieve a sagey green color, and white chalk paint to create a beautiful base for the moss. Additionally, we'll need high gloss spray paint to seal and protect our painted pumpkins.
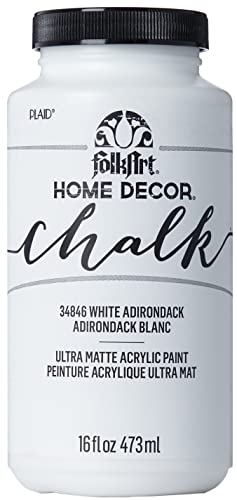
Prepare the Pumpkins

harvesting pumpkins for halloween

Let's get started by giving our foam pumpkins a fresh coat of white chalk paint. Apply it smoothly with a foam brush to create a clean base for our mossy design. We're using white chalk paint for a clean and neutral background that will allow our moss to take center stage.

With a foam brush, we can achieve smooth, even coverage that will help our moss adhere better. Remember to apply the paint in thin coats, allowing each layer to dry completely before adding more. This will prevent any drips or unevenness that might affect our final result.

Advertisement

Once the paint is dry, we'll have a beautiful, matte white surface ready for our mossy makeover. If you want to add a unique twist, consider using Spanish moss chalk paint for a soft, sagey green hue that will complement our moss perfectly.

Now that our pumpkins are prepped, we're ready to move on to the next step in creating our adorable white moss pumpkins.

Paint the Pumpkins White

spooky halloween decoration idea

How do we achieve a clean and bright look for our pumpkins?

We start by giving them a fresh coat of white chalk paint! This will provide a pristine canvas for our moss to shine on.

Using white chalk paint specifically because it's a great choice for covering the entire surface of the pumpkins, ensuring a smooth and even finish.

Now, you might be thinking – won't one coat be enough? Not quite! It's recommended applying multiple coats if needed, allowing each layer to dry completely to avoid any smudging or uneven application.

Advertisement

This might take some patience, but trust the process, it's worth it. By taking the time to do it right, we'll be left with beautiful, snow-white pumpkins that are the perfect base for our mossy masterpiece.

And that's it! Once our pumpkins are fully painted, we're ready to move on to the next step – adding that lush, green moss for a charming and rustic touch.

Apply Mod Podge Layer

add mod podge protection

Now that our pumpkins are nicely painted white, we're ready to apply a layer of Mod Podge, which will act as an adhesive for the moss.

We'll use a foam brush to spread a thin, even layer of Mod Podge over the entire surface of the pumpkin, making sure to cover every nook and cranny.

After applying the Mod Podge, we'll let it dry slightly before moving on to the next step, carefully checking our work to guarantee a smooth, even surface for our moss to adhere to.

Mod Podge Application

We apply a thin, even layer of Mod Podge over the surface of the pumpkin using a foam brush, working in small sections to prevent it from drying out before we're ready to add the moss. This guarantees that the Mod Podge doesn't dry before we've had a chance to add the moss, which is essential for a successful application.

Advertisement

As we work, we make sure to cover the entire pumpkin with Mod Podge, paying close attention to any areas where we want the moss to adhere. Don't worry if the Mod Podge appears streaky or uneven at this stage – it will dry clear, leaving no visible marks.

We continue to apply the Mod Podge, section by section, until the entire pumpkin is coated. Once we've completed the application, we let the Mod Podge dry completely before moving on to the next step in creating our adorable white moss dollar store pumpkin.

Drying and Inspection

We've coated our pumpkin with Mod Podge, and now it's time to let it dry completely, inspecting the surface for any areas that might need a touch-up or additional moss coverage.

As we wait for the Mod Podge to dry, we'll take this opportunity to carefully examine the pumpkin's surface, searching for any missed spots or areas that require more coverage. If we notice any unevenness in the Spanish moss color, we might need to apply a second coat of paint, allowing each layer to dry thoroughly before proceeding.

Once the paint is dry, we'll apply a significant and even layer of Mod Podge using a foam brush, making sure the entire surface is covered to create a protective barrier. It's important to allow the Mod Podge layer to dry completely before adding any embellishments or decorations to guarantee a smooth and durable finish on our white moss dollar store pumpkin.

Advertisement

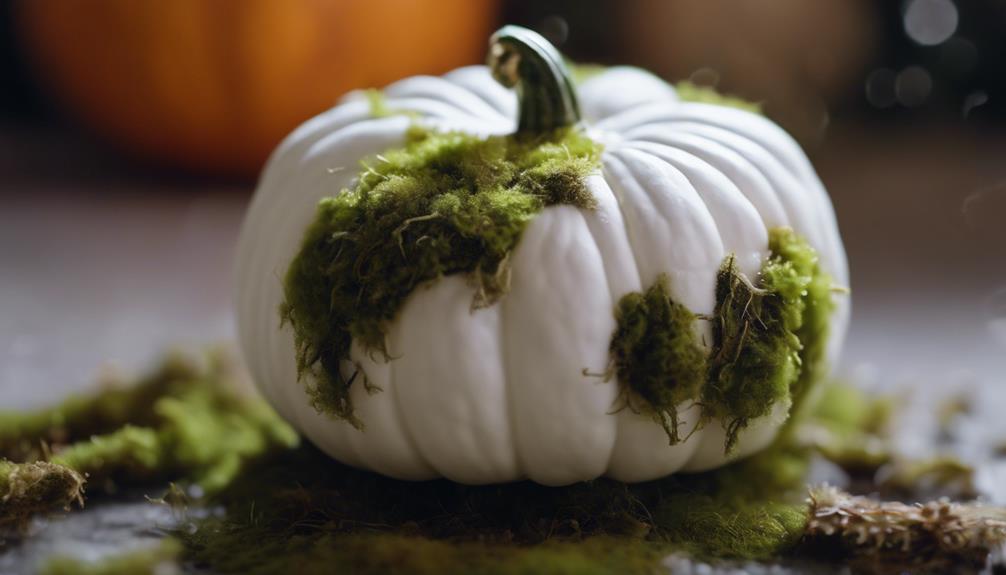
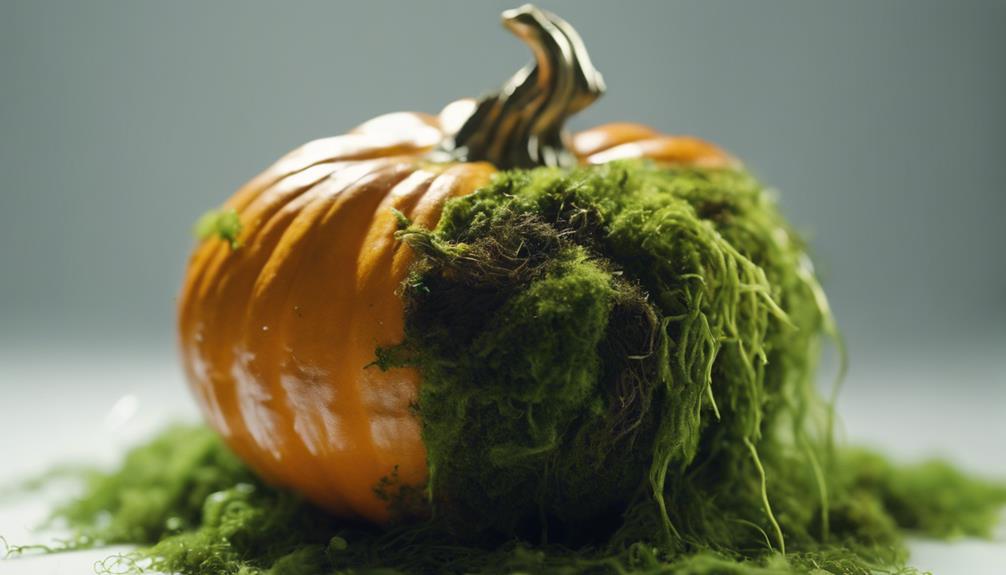
Add White Spanish Moss

sprinkle spanish moss generously

Now that we've applied our Mod Podge layer, it's time to add the star of the show: the white Spanish moss.

As we begin adding the moss to our pumpkin, we'll want to keep a few key tips in mind to guarantee a lush, textured look.

This includes how to achieve the right level of coverage and some expert tricks for application.

Moss Application Tips

To achieve a beautifully moss-covered pumpkin, start by applying a thin layer of Mod Podge or craft glue to the pumpkin surface. This adhesive will help the white Spanish moss stick to the pumpkin, creating a lush, textured look.

Next, we'll start applying the moss, working from the top of the pumpkin down. This guarantees any stray strands of moss will fall downwards, rather than upwards, creating a neater finish. As we apply the moss, we'll press it firmly onto the glue, making sure to overlap layers to achieve full coverage.

Any gaps or bare spots can be filled in with additional moss, and we'll trim any excess moss for a clean, polished finish. By following these steps, we'll end up with a stunning, fluffy pumpkin that's perfect for autumn decor.

Advertisement

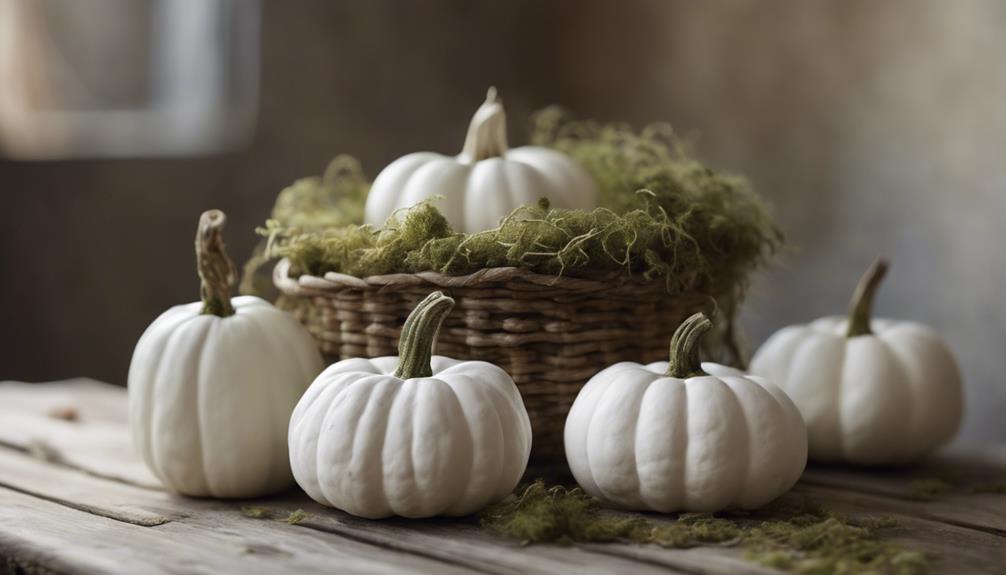
Moss Coverage Options

We can choose to cover our pumpkins entirely with white Spanish moss for a decadently fluffy look or opt for a more subtle, partial coverage to add some rustic charm.

By incorporating white Spanish moss, we can create a unique and adorable decoration that exudes a cozy and inviting atmosphere. This option allows us to transform ordinary dollar store pumpkins into something truly special.

We can experiment with different coverage styles and amounts of white moss to achieve the desired aesthetic for our pumpkins. Whether we choose to fully cover or partially adorn our pumpkins, the result will be a soft, elegant, and textured look that adds depth and visual interest.

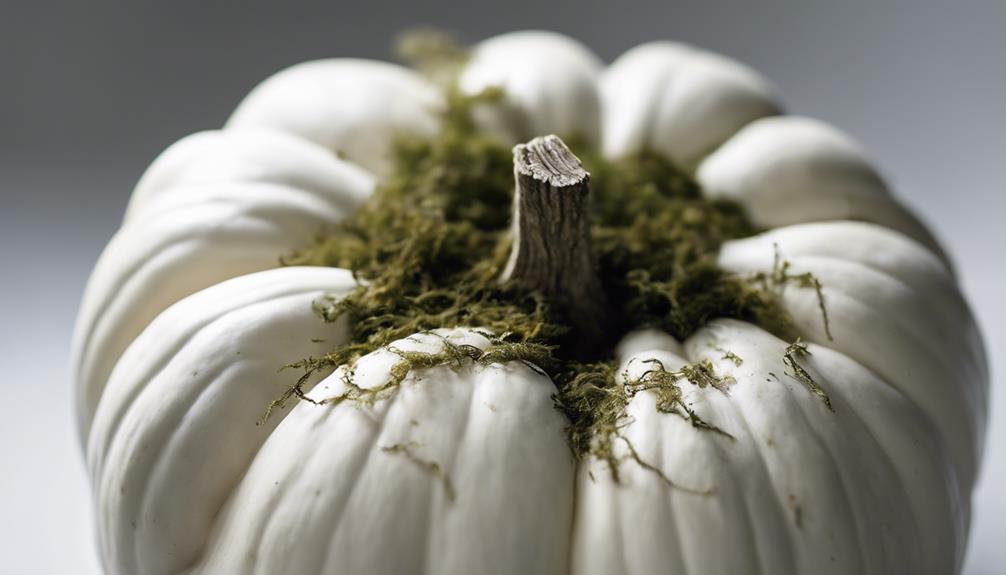
Shape and Secure Moss

mold greenery into place

We shape the Spanish moss into small, manageable pieces, making it easy to cover the entire surface of our Dollar Store pumpkin. This step is important in achieving a uniform and visually appealing finish.

To secure the moss, we use hot glue or craft adhesive to make sure it stays in place.

Here are the key steps to follow:

Advertisement
  • Press the moss firmly against the pumpkin to create a cohesive and full coverage look.
  • Make sure the moss covers the entire surface of the pumpkin for a uniform finish.
  • Use a generous amount of glue or adhesive to prevent the moss from coming loose.
  • Add additional embellishments like ribbon, twine, or small decorative items to add extra charm to the white moss pumpkin.

Allow to Dry Completely

dry the surface thoroughly

With our moss-covered pumpkins securely in place, we let them sit undisturbed in a well-ventilated area to allow the moss to dry completely. Depending on the type of moss used, drying times may vary, but typically it takes about 24-48 hours for the moss to dry thoroughly.

We make sure to avoid touching or moving them while they're drying, as this can prevent any moisture from seeping into the pumpkins. As we wait, we keep an eye out for any damp spots or areas that may need additional drying time before proceeding with the next steps of the project. We're patient, knowing that allowing the moss to dry completely is essential for the longevity of our adorable white moss dollar store pumpkins.

Once the moss is completely dry, we'll be ready to move on to the next steps of our project, adding further decoration and embellishment to our pumpkins. With the drying process underway, we can confidently await the transformation of our plain dollar store pumpkins into stunning works of art.

Seal With Clear Spray Paint

protect artwork from damage

Now that our adorable white moss pumpkins are complete, we need to seal them with clear spray paint to protect our hard work and make them last longer.

By doing so, we'll not only preserve the moss but also give our pumpkins a glossy finish that will enhance their overall appearance.

As we explore the benefits of using clear spray paint and the best ways to apply it, we'll guarantee our creations remain beautiful and intact for seasons to come.

Spray Paint Benefits

By applying a coat of white spray paint to our dollar store pumpkins, we can create a clean and uniform base that's perfect for adding moss and other decorative elements. This simple step can transform our inexpensive pumpkins into stylish decor pieces.

Advertisement

The benefits of using spray paint are numerous:

  • Provides a neutral background for adding moss and other decorative elements
  • Creates a clean and uniform base for further embellishments
  • Allows us to easily add textures and colors to our pumpkins
  • Enables us to transform inexpensive dollar store pumpkins into adorable decor pieces for our homes

Sealant Application Tips

Applying a crucial sealant is a necessary step in preserving our moss-covered pumpkins, and we're using clear spray paint to get the job done. This sealant not only safeguards the moss from damage but also adds a glossy finish to our adorable pumpkins.

When selecting a clear spray paint, we choose one suitable for both indoor and outdoor use to guarantee the moss remains intact and durable. To achieve an even, smooth finish, we hold the spray paint can approximately 8-12 inches away from the pumpkins, preventing drips or pooling of the sealant.

We apply multiple thin coats, allowing each coat to dry completely before applying the next one. This method ensures a professional finish and prevents the moss from becoming soggy or discolored. Remember to work in a well-ventilated area to avoid inhaling fumes, and let the pumpkins dry thoroughly before displaying them.

Add Embellishments Optional

embellish your writing freely

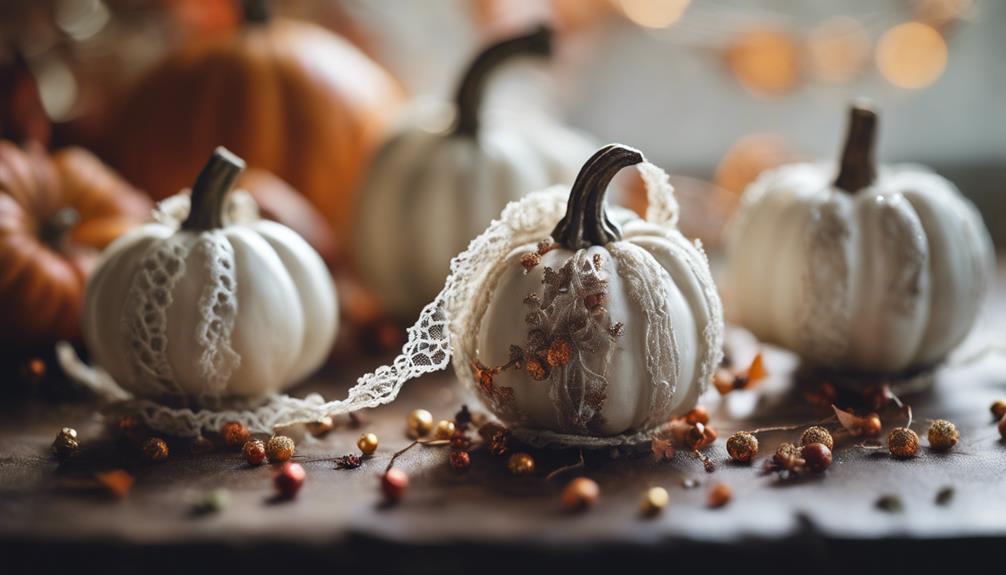
We can elevate our white moss pumpkins to a whole new level by adding embellishments that reflect our personal style. This is where we can really get creative and make our pumpkins stand out. We can add a touch of elegance with gold or silver paint, or experiment with different textures and materials like glitter or gemstones.

Here are some ideas to get us started:

  • Ribbon or bows to add a pop of color and whimsy
  • Artificial flowers for a more rustic or vintage look
  • Glitter or gemstones to add some sparkle and shine
  • Painted designs or patterns to match our home decor or personal style

When attaching embellishments, we'll want to use hot glue to securely attach them to the pumpkins without damaging the moss or the pumpkin itself.

With a little creativity and experimentation, we can create one-of-a-kind pumpkins that reflect our unique style and add a personal touch to our decor.

Advertisement

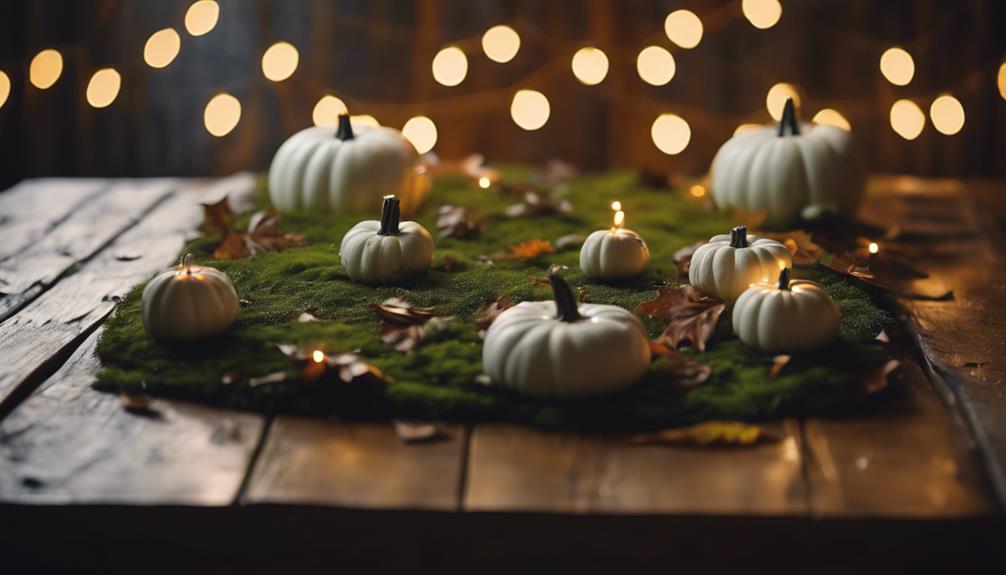
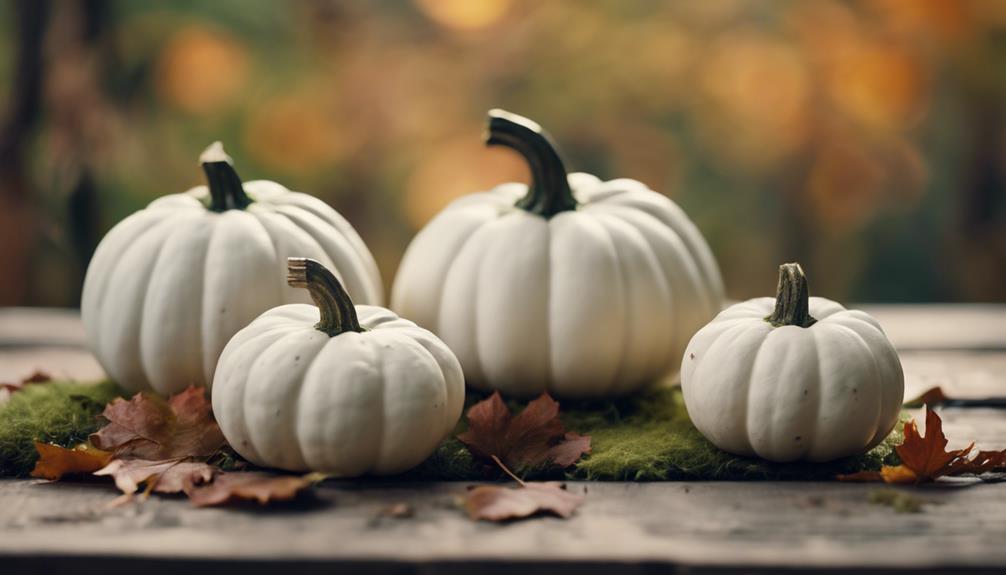
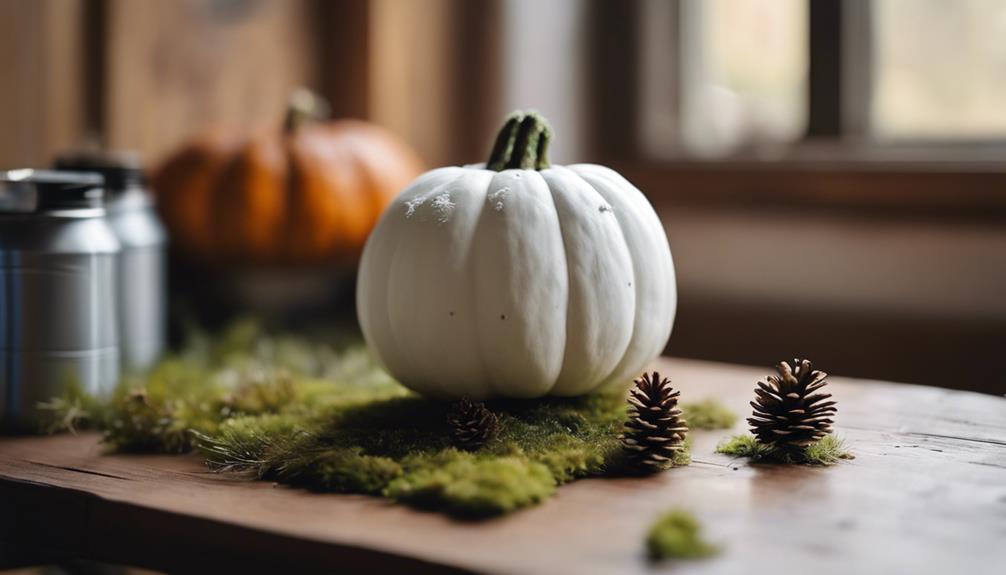
Display Your Masterpiece

create with precision and pride

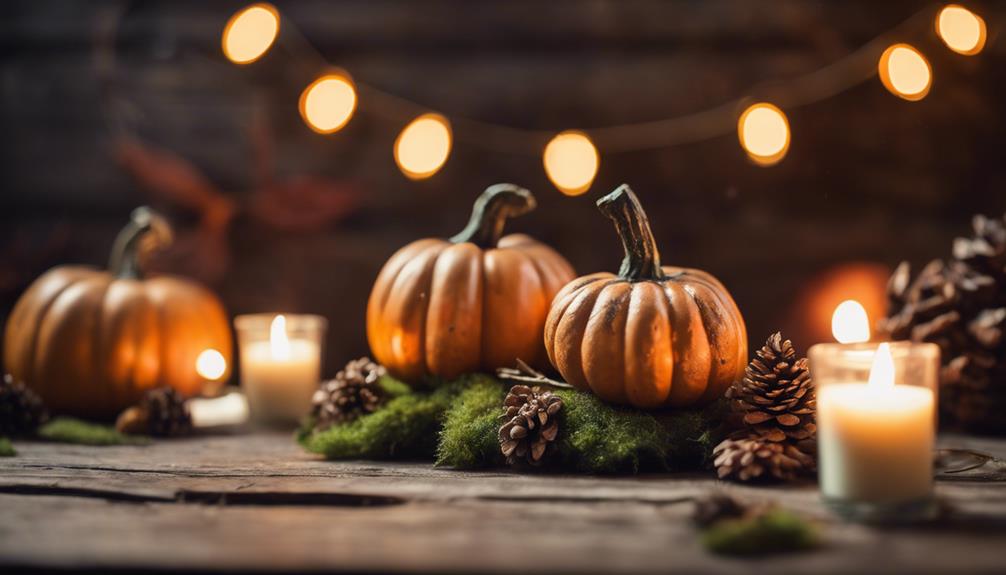
Now that we've added our personal touch to our white moss pumpkins, it's time to showcase them in a beautiful display that adds warmth and coziness to our fall decor.

To create a stunning display, we can arrange our pumpkins in a group on a mantel or tabletop for a cohesive look. We can also incorporate other fall decor elements like candles, pine cones, or small gourds to enhance the seasonal feel.

For a stylish centerpiece, we can place the white moss pumpkins on a decorative tray or platter on our dining table or coffee table. Adding some greenery or faux leaves around the pumpkins will add a touch of natural charm to our display.

To create visual interest and depth, we can experiment with different heights and sizes of pumpkins in our arrangement. By mixing and matching these elements, we can create a beautiful and inviting display that showcases our adorable white moss pumpkins.

Frequently Asked Questions

How to Make a Pumpkin White?

"We make a pumpkin white by using white chalk paint or spray paint, applying multiple coats for even coverage, and letting each coat dry before adding the next for a flawless finish."

How to Stack Craft Pumpkins?

We're excited to create a visually appealing display by stacking our craft pumpkins, choosing different sizes, and securing them with hot glue, adding decorative elements like ribbon or faux leaves for a beautiful arrangement.

Advertisement

What to Use to Decorate a Pumpkin?

"We're literally drowning in decoration options! For a show-stopping pumpkin, we swear by chalk paint, glitter floor stickers, decoupage, and embellishments like clay stems and Raffia bows – the possibilities are endless, and we can't get enough!"

How to Make Pumpkin With Paper?

We're excited to create a unique pumpkin with paper! To make it, we'll decoupage napkin cutouts onto the pumpkin using Mod Podge, adding delicate patterns and securing them with additional coats for a beautiful finish.

Conclusion

With our white moss pumpkins now complete, we've successfully transformed humble dollar store finds into autumnal masterpieces that exude rustic charm.

By marrying the simplicity of white paint with the organic texture of Spanish moss, we've created a seasonal decor staple that's both understated and elegant.

As we display our creations, we're reminded that sometimes, it's the subtle, nuanced touches that bring the most joy – and that with a little creativity, even the most mundane objects can be transformed into something truly special.

Advertisement

Continue Reading
Advertisement

Home Decor

Transform Your Bedroom for Late Summer With These Simple Hacks – the Difference Is Stunning!

Optimize your late summer bedroom with stunning hacks that will transform your space—discover the secrets to a refreshing and vibrant atmosphere!

Published

on

By

stunning late summer bedroom transformation

You can easily transform your bedroom for late summer with a few simple hacks. Start by rejuvenating your bedding with lighter materials like cotton or linen and swap out heavy comforters for lightweight quilts. Declutter your space by removing unnecessary items and implementing stylish storage solutions. Incorporate seasonal decor with fresh flowers and brighter pillows to enhance the vibe. Layer your lighting for a cozy ambiance and set up a reading nook for relaxation. Finally, utilize fashion items as unique decor pieces. Stick around to discover even more ways to elevate your summer bedroom style!

Key Takeaways

  • Refresh your bedding with lightweight fabrics like cotton or linen to enhance comfort and breathability for the late summer season.
  • Declutter nightstands and drawers to create a serene and organized space, using decorative boxes for extra storage solutions.
  • Incorporate fresh floral arrangements and lighter decorative pillows to brighten up the room and reflect a relaxed summer vibe.
  • Enhance lighting with layered sources, such as stylish table lamps and soft bulbs, to create a calming and inviting ambiance.

Refresh Your Bedding

To create a comfortable oasis during late summer, refresh your bedding with lighter materials like cotton or linen for enhanced breathability. These fabrics allow air to circulate, keeping you cool while you sleep.

Replace heavy comforters with lightweight quilts that offer just the right amount of warmth without overheating. This makes them perfect for those warm, fluctuating summer nights when temperatures can dip unexpectedly.

Consider swapping traditional top sheets for fitted sheets. They simplify your bedding setup, making it easier to manage while providing a sleek and tidy look.

To elevate the visual appeal of your bedding, choose coordinating bedding colors and patterns that complement your room's decor. This not only enhances the aesthetic but also reflects the relaxed vibe of summer.

Declutter for Clarity

organize for mental clarity

A fresh bedding setup sets the stage for a serene environment, making it the perfect time to declutter your bedroom for added clarity and peace of mind. Start by evaluating your nightstands and drawers—removing unnecessary items can transform your space and create a calming atmosphere. Regular decluttering enhances your focus, helping you rejuvenate more effectively in your personal retreat.

To maximize your organization, consider implementing extra storage solutions. Decorative boxes or baskets can neatly house items that tend to clutter your space, making everything easily accessible while maintaining a clean aesthetic. Here's a quick guide to help you declutter effectively:

Advertisement
Area to Declutter Action Item Storage Solution
Nightstand Remove old magazines Use a decorative basket
Closet Donate unworn clothes Use clear bins
Drawer Organize with dividers Use small boxes
Under the bed Store seasonal items Use under-bed storage
Surface areas Clear all unnecessary items Use a tray for essentials

Incorporate Seasonal Decor

embrace seasonal home accents

Incorporating vibrant seasonal decor can instantly refresh your bedroom, infusing it with the lively energy of late summer. A great decorating tip is to introduce fresh floral arrangements that not only brighten the space but also create a cheerful atmosphere. You can keep them looking fresh by maintaining water levels.

Don't forget to use summer fashion items like hats, scarves, and bags as unique decor pieces. They showcase your personal style while keeping your space organized. Swap out your decorative pillows and throws for lighter, brighter colors that reflect the season's warmth.

To cozy up your space, consider creating a reading nook with a curated selection of books. This not only adds character but also serves a functional purpose. Additionally, incorporate light, airy textiles such as linen or cotton in your bedding and curtains. These materials enhance the seasonal feel, promoting comfort during warmer months.

Enhance Lighting Ambiance

elevate atmosphere with illumination

To enhance the lighting ambiance in your bedroom, focus on layered lighting techniques that combine ambient, task, and accent sources.

Consider adding statement lighting fixtures like stylish table lamps or wall sconces for both functionality and flair.

This thoughtful approach not only brightens your space but also creates a warm, inviting atmosphere.

Layered Lighting Techniques

Layered lighting transforms your bedroom into a cozy retreat by combining various light sources at different heights for a warm and inviting atmosphere.

Advertisement

Start with ambient lighting, using soft, warm-toned bulbs in ceiling fixtures or wall sconces that provide overall illumination. This creates a calming environment perfect for relaxation.

Next, consider incorporating table lamps or floor lamps to add depth. These sources can serve dual purposes: enhancing functionality for reading or working while contributing to the layered lighting effect. Opt for dimmable options so you can adjust the brightness according to your mood or time of day.

For a touch of flair, integrate statement lighting that showcases your personal style. Unique lamps or decorative sconces not only illuminate but also serve as eye-catching focal points in the room.

Lastly, experiment with high-contrast lighting by mixing different styles and finishes. This adds visual interest and depth, making your bedroom feel more dynamic. By thoughtfully layering your lighting, you can create a versatile and inviting space that adapts to your needs, enhancing the overall ambiance of your late summer retreat.

Statement Lighting Fixtures

Statement lighting fixtures instantly elevate your bedroom's ambiance, transforming it into a stylish and inviting space that reflects your personal taste.

Advertisement

Consider adding bold table lamps or unique wall sconces, which not only provide essential ambient lighting but also serve as decorative focal points. These high-contrast fixtures draw the eye, enhancing the overall design of your room.

By layering your lighting with these statement pieces, you create a warm, cozy atmosphere that invites relaxation. Soft lighting from these fixtures helps set a serene mood, perfect for unwinding after a long day.

Varying the heights and styles of your lighting choices adds depth and visual interest, ensuring your space feels dynamic and well-curated.

Don't forget to mix ambient, task, and accent lighting for a balanced approach. This layered strategy makes your bedroom feel luxurious and comfortable, allowing you to enjoy both functionality and aesthetics.

With the right statement lighting fixtures, your bedroom can transform into a haven that showcases your unique style while providing a cozy retreat for late summer nights.

Advertisement

Create a Cozy Reading Nook

comfortable nook for reading

Creating a cozy reading nook starts with finding a quiet corner in your bedroom that gets plenty of natural light. This bright spot will enhance the inviting atmosphere, making it an ideal space for your reading adventures.

Next, incorporate a comfortable chair or a small loveseat where you can settle into with soft throw pillows and blankets, encouraging relaxation during those long reading sessions.

To keep your favorite books and a warm cup of tea or coffee within reach, add a small side table or a stylish bookshelf. This setup makes it convenient to plunge into your current reads without interruptions.

Layered lighting is essential for setting the perfect mood in your reading nook. Opt for a statement floor lamp or wall sconces that provide adequate illumination without straining your eyes.

Utilize Fashion as Decor

fashion inspired interior design

Incorporating summer fashion items like hats and scarves into your bedroom decor instantly adds a vibrant and personal touch. You can use these fashion items as unique accessories that reflect your style while enhancing the overall aesthetic of your space. Think about displaying a stylish hat on a wall hook or draping a colorful scarf over a chair.

This approach not only brightens your room but also serves as a cost-effective way to refresh your decor without extensive renovations. Regularly updating these fashion items with current trends keeps your space feeling fresh and aligned with the changing seasons.

To elevate your decor even further, consider pairing your fashion accessories with fresh floral arrangements. The combination of colorful blooms and stylish items creates a lively atmosphere that invites warmth and joy into your bedroom.

Advertisement

Frequently Asked Questions

How to Make Your Bedroom Look Luxurious?

To make your bedroom look luxurious, invest in high-quality bedding, layer rugs for texture, mix unique furniture pieces, and use decorative window treatments. Don't forget to add layered lighting for a warm, inviting atmosphere.

How Can I Make My Bedroom Look Nice Without Money?

Isn't it amazing how a little creativity can transform your space? Rearrange furniture, declutter surfaces, and use personal items as decor. Layer your bedding and bring in natural elements for a revitalizing, stylish bedroom—all for free!

How Can I Make My Bedroom Cozy and Beautiful?

To make your bedroom cozy and beautiful, switch to lighter bedding, layer your lighting, declutter your space, add seasonal decor, and focus on symmetry. These simple changes create a warm, inviting atmosphere you'll love.

How Do I Make My Bedroom Beautiful?

Oh sure, just sprinkle some glitter and call it a day! Seriously though, invest in quality bedding, mix furniture styles, and layer your lighting to create a beautiful, cozy sanctuary that's uniquely yours.

Conclusion

By making these simple changes, your bedroom can feel as vibrant as a summer sunset.

Advertisement

Embrace fresh bedding, tidy up clutter, and add seasonal decor to create a serene oasis.

Don't forget to enhance the lighting for that perfect ambiance and carve out a cozy nook for reading.

Finally, let your favorite fashion pieces double as decor.

Immerse yourself in these hacks, and watch your space transform into a stunning summer retreat you'll love spending time in!

Advertisement

Continue Reading

Home Decor

Proven Steps to Create a Cozy Scandinavian Reading Nook

Learn how to transform your space into a cozy Scandinavian reading nook that invites relaxation and warmth—discover the essential steps inside!

Published

on

By

cozy scandinavian reading nook

To create a cozy Scandinavian reading nook, start with a soothing color palette of soft neutrals and earthy tones. Use natural materials like wood and stone for warmth, and layer in various textures with plush seating, chunky knits, and soft linens. Choose essential fixtures like a minimalist armchair and a warm throw blanket. Don't forget lighting; soft LED lights or candles create a welcoming ambiance. Finally, incorporate decorative elements like botanical art and natural accents to enhance the space's charm. Stick around to explore more tips that can elevate your cozy retreat even further.

Key Elements

essential components summary

When creating your cozy Scandinavian reading nook, focus on a soothing color scheme that features neutral tones.

Choose natural materials and incorporate a variety of textures to add depth and warmth to the space.

These key elements will help you establish a serene atmosphere perfect for immersing yourself in a good book.

Color Scheme

A cozy Scandinavian reading nook thrives on a color scheme of soft neutrals, earthy accents, and light wood finishes that foster a serene and inviting atmosphere.

Start with a base of soft neutrals like whites, grays, and muted pastels to create a calming environment. These colors not only enhance the brightness of the space but also reflect natural light beautifully, making your nook feel airy and open.

Advertisement

Next, introduce earthy tones such as deep greens or warm browns to add warmth and a touch of nature. These accents can be incorporated through cushions, throws, or even artwork, providing a grounding element to your design.

Don't forget about cozy textures! Incorporate textiles like chunky knits or soft linens in pale colors to add depth without overwhelming the minimalist aesthetic typical of Scandinavian design.

The combination of these cozy textures and the carefully chosen color scheme will create a harmonious space, perfect for curling up with your favorite book. With the right balance, your reading nook will become a tranquil retreat that invites relaxation and enjoyment.

Materials

Natural materials like wood, stone, and soft textiles are essential for creating the warm and inviting atmosphere found in a cozy Scandinavian reading nook. Start by selecting quality natural materials that reflect the beauty of nature, such as a wooden bookshelf or a stone accent wall. These elements ground the space and enhance its organic feel.

Next, incorporate soft textiles like wool throws, linen cushions, and chunky knits to provide comfort and warmth. These cozy touches invite you to settle in with a good book. Stick to a neutral color palette featuring whites, grays, and soft pastels, as this promotes tranquility and brightness, making the nook feel open and airy.

Advertisement

When it comes to furniture, opt for functional pieces that align with the Scandinavian design ethos. A well-crafted armchair and a minimalist side table not only serve practical purposes but also maintain the clean lines characteristic of this style.

Textures

To create a warm and inviting atmosphere in your Scandinavian reading nook, incorporate a variety of textures, such as soft fabrics like tumbled linen and chunky knits.

Start with comfortable seating, perhaps a plush armchair or a cozy loveseat, to anchor your space. Layer in soft blankets and chunky knit throws to invite relaxation and warmth.

Don't forget to add a plush rug underneath, which can enhance the coziness while also providing a tactile contrast against natural materials like wood or wicker. These elements not only add warmth but also connect your nook to nature, a key aspect of Scandinavian design.

Consider incorporating patterned textiles, like geometric designs or subtle florals, which can add visual interest without overwhelming the minimalist aesthetic.

Advertisement

Stick to pastel shades or earth tones to maintain a tranquil ambiance that encourages reading and reflection.

Essential Fixtures and Furniture

key items for interiors

To create your cozy Scandinavian reading nook, focus on essential fixtures and furniture that enhance comfort and style.

A soft armchair paired with a warm, knitted throw blanket invites you to relax, while a wooden bookshelf with a minimalist design keeps your favorite reads close at hand.

Together, these elements establish a serene and inviting atmosphere perfect for enjoying your books.

Scandinavian-Style Armchair

A Scandinavian-style armchair embodies simplicity and comfort, making it an indispensable fixture for any cozy reading nook. With clean lines and a minimalist design, these armchairs often feature natural materials like birch or ash, perfectly complementing the inviting atmosphere you want to create. Upholstered in neutral tones such as whites, grays, or soft pastels, this armchair enhances the airy feel of your cozy reading nook, providing a soothing backdrop for comfortable reading.

Ergonomics play a crucial role in the design of many Scandinavian armchairs. They're crafted for extended sitting periods, often equipped with plush cushions that offer essential support. The use of textiles like wool or linen adds warmth, ensuring your reading nook remains inviting and cozy.

Advertisement

Additionally, a Scandinavian-style armchair's minimalist silhouette allows for flexibility in decor. It seamlessly blends with other elements, such as soft rugs and layered lighting, helping you achieve a cohesive reading space. By choosing the right armchair, you can transform your reading nook into a haven where you can lose yourself in a good book while feeling completely at ease.

Warm, Knitted Throw Blanket

Nothing enhances the cozy charm of a Scandinavian reading nook quite like a warm, knitted throw blanket, inviting you to snuggle up with your favorite book. This essential fixture adds texture and comfort, creating the cozy atmosphere that defines this design style.

When choosing your throw, opt for natural fibers like wool or cotton; they provide warmth and breathability, which is key to achieving that Scandinavian emphasis on functionality and quality materials.

To maintain the serene palette typical of Scandinavian decor, select a throw in neutral colors or soft pastels. This choice promotes a calming environment perfect for reading. Layering your knitted throw over a plush chair or chaise lounge not only encourages relaxation but also complements the minimalist aesthetic of your nook.

Don't forget to refresh your space regularly by rotating throws. This simple act can adapt your reading nook to seasonal changes and keep it inviting year-round.

Advertisement

A warm, knitted throw blanket is more than just a decorative touch; it's a crucial component that transforms your nook into a cozy retreat, perfect for unwinding with a good book.

Wooden Bookshelf With Minimalist Design

Incorporating a wooden bookshelf with a minimalist design instantly elevates your Scandinavian reading nook, showcasing both your favorite books and decorative accents in a clean, inviting manner.

Opt for light-colored woods like pine or birch to enhance the airy feel that defines Scandinavian aesthetics while creating a warm atmosphere. Your bookshelf should emphasize clean lines and natural materials, promoting that essential clutter-free environment that's key to minimalism.

Arrange your shelves with ample spacing, allowing for both books and decorative items to breathe and be appreciated. Consider modular or floating bookshelf designs to maximize your floor space, enabling versatile arrangements that adapt to your needs.

This flexibility not only boosts usability but also maintains the simplicity inherent in Scandinavian design. Lastly, choose sleek, simple hardware and finishes that align with the minimalist ethos.

Advertisement

This guarantees your wooden bookshelf complements rather than overwhelms the overall design of your reading nook, allowing you to create a space that's both functional and aesthetically pleasing. With these elements, your Scandinavian reading nook will become a haven for relaxation and inspiration.

Lighting Ideas

creative illumination solutions

To create the perfect ambiance in your Scandinavian reading nook, you'll want to focus on lighting that enhances comfort and warmth.

Consider a warm pendant light fixture as a centerpiece, complemented by soft LED strip lighting for subtle accents.

Don't forget an adjustable floor lamp and the cozy glow of candlelight to truly set the mood for your reading sessions.

Warm Pendant Light Fixture

Warm pendant light fixtures can transform your reading nook into a cozy retreat, combining stylish design with the perfect ambiance for enjoying your favorite books.

To enhance your cozy reading nook, choose fixtures that feature natural materials like wood or woven fibers, which embody the essence of Scandinavian design. These materials not only look beautiful but also contribute to a warm, inviting atmosphere.

Advertisement

When selecting your warm pendant light fixture, consider options with adjustable brightness settings. This allows you to customize the lighting for reading based on the time of day or your mood. Opt for LED bulbs in warm white (2700K-3000K) to achieve a soft glow that reduces eye strain and promotes relaxation during nighttime reading.

Hanging your pendant light at varying heights can add visual interest and help define your nook, drawing attention to bookshelves or artwork nearby. Embracing a minimalist design for your fixture aligns perfectly with the Scandinavian principle of simplicity, ensuring it blends seamlessly into your cozy environment without overwhelming the space.

With the right pendant light, you'll create a cozy atmosphere that's perfect for curling up with a good book.

Soft LED Strip Lighting

Soft LED strip lighting instantly enhances your Scandinavian reading nook by providing adjustable brightness and a welcoming glow. You can easily install these lights under shelves, along walls, or around furniture to create a cozy reading nook that invites relaxation. Opt for soft white (2700K-3000K) LED strips to mimic natural light, promoting the perfect ambiance for curling up with a good book.

One of the main advantages of soft LED strip lighting is its energy-efficient nature; these lights use up to 75% less energy than traditional incandescent bulbs. This not only saves you money but also aligns with a sustainable lifestyle. Many LED strips come equipped with dimmable features or remote controls, allowing you to customize the lighting levels to suit different times of day or reading conditions.

Advertisement

Incorporating these strip lights into your reading room complements the Scandinavian design's focus on simplicity and functionality. By enhancing the cozy and minimalist vibe of your nook, soft LED strip lighting transforms it into your go-to space for unwinding and immersing yourself in literature.

Adjustable Floor Lamp Option

An adjustable floor lamp offers the ideal solution for customizing your reading nook's lighting to suit your needs and preferences. With the ability to change the height and angle, you can guarantee maximum brightness for reading without straining your eyes. This flexibility is essential for creating effective task lighting, especially when you're diving into a good book.

When choosing an adjustable floor lamp, look for models with dimmable features. This allows you to adjust the light intensity based on the time of day and your mood, enhancing the cozy atmosphere of your reading nook. Opting for lamps that embody Scandinavian design principles, with their clean lines and neutral colors, will assure your lamp seamlessly integrates into your decor.

Additionally, consider using energy-efficient LED bulbs in your adjustable floor lamp. These bulbs provide ample light while reducing electricity consumption, and they last considerably longer than traditional options. Many models even come with built-in USB ports, letting you charge your devices conveniently as you enjoy your reading time.

This combination of style, functionality, and efficiency makes an adjustable floor lamp an essential addition to your Scandinavian-inspired reading nook.

Advertisement

Candlelight for Warm Ambiance

Adjustable floor lamps provide great task lighting, but adding candlelight brings a unique warmth and charm to your Scandinavian reading nook. To create that cozy atmosphere, opt for warm-colored candles with a color temperature between 2700-3000K. This range complements the minimalist design typical of Scandinavian decor, enhancing the overall warm ambiance.

Choose natural wax candles, like beeswax or soy, as they burn cleaner and produce less soot compared to traditional paraffin options. You can elevate the aesthetic by using varied heights and sizes of candle holders; this adds visual interest while showcasing the soft glow of the candlelight.

Consider clustering your candles on side tables or shelves to provide layered lighting that draws you into your reading nook. This arrangement not only highlights the beauty of the candles but also creates an inviting space for relaxation.

For an extra touch, try scented candles with subtle fragrances such as vanilla or sandalwood. These scents promote relaxation without overwhelming your senses, allowing you to fully immerse yourself in your reading experience while surrounded by the cozy embrace of candlelight.

Decorative Elements

artistic design features

To truly capture the essence of a cozy Scandinavian reading nook, you'll want to focus on adding decorative elements that reflect nature and simplicity.

Consider incorporating framed botanical wall art, a handwoven macrame wall hanging, or a ceramic vase filled with dried flowers.

Advertisement

These touches not only enhance the aesthetic but also create a warm and inviting atmosphere for your space.

Framed Botanical Wall Art

Framed botanical wall art brings a touch of nature into your Scandinavian reading nook, enhancing tranquility and connection to the outdoors. To create an inviting atmosphere, choose prints that feature local flora or minimalist plant designs in neutral tones. This selection aligns perfectly with the clean aesthetic that defines Scandinavian decor.

Opt for frames made from natural materials like wood or bamboo to enhance the organic feel of your space. These elements not only contribute to the decor's sustainability but also reflect the Scandinavian ethos of natural simplicity. When you hang your botanical prints at eye level, you create a focal point that draws the eye without overwhelming the area.

For added dynamism, consider regularly rotating the botanical art. This practice refreshes the atmosphere of your reading nook, keeping it engaging and visually interesting.

Whether you're diving into a good book or simply enjoying a moment of peace, framed botanical wall art will help you bring nature indoors, making your Scandinavian reading nook a cozy retreat. Embrace these elements, and you'll create a harmonious space that feels both serene and inspiring.

Advertisement

Handwoven Macrame Wall Hanging

Handwoven macrame wall hangings infuse your Scandinavian reading nook with texture and warmth, making the space feel both inviting and cozy. These decorative elements, crafted from natural fibers like cotton or jute, perfectly embody the Scandinavian design ethos of simplicity and connection to nature.

The intricate patterns of macrame not only serve as a stunning focal point but also draw the eye, creating a sense of warmth and comfort that enhances your reading experience.

Incorporating a macrame wall hanging can help soften the hard lines of your furniture and architecture, contributing to a more relaxed atmosphere. This touch of craftsmanship adds depth to your nook, making it a delightful spot to unwind with your favorite book.

Plus, by choosing handmade macrame pieces, you're supporting local artisans and sustainable practices, which makes your decor choice even more meaningful.

Ceramic Vase With Dried Flowers

A ceramic vase filled with dried flowers brings a touch of natural beauty and serenity to your Scandinavian reading nook. This decorative element enhances the cozy atmosphere you're aiming for, perfectly aligning with the minimalist principles of Scandinavian design. Opt for a ceramic vase in neutral or soft colors like whites, greys, or muted pastels to complement your space's calmness.

Advertisement

Dried flowers are a practical choice for busy readers, requiring minimal maintenance compared to fresh blooms. You can enjoy their beauty without the worry of wilting or constant care. Additionally, incorporating dried flowers allows you to switch up your decor seasonally, rejuvenating your nook effortlessly.

Using organic materials like ceramics and dried botanicals helps create a connection with nature, which is central to the Scandinavian aesthetic. Choose flowers that resonate with you, whether it's soft lavender, delicate eucalyptus, or rustic wheat, to reflect your style.

Flooring

flooring installation and maintenance

When choosing flooring for your Scandinavian reading nook, natural materials like wood or laminate work best to reflect the design's simplicity.

Light-colored options, such as pale oak, create an airy feel, while a soft, plush area rug can add warmth and comfort underfoot.

Don't forget to take into account durability and ease of cleaning to maintain both style and practicality.

Soft, Plush Area Rug

Choosing a soft, plush area rug instantly transforms your reading nook into a warm, inviting retreat. This essential element not only adds comfort underfoot but also helps define your space, creating a cozy atmosphere that invites relaxation.

Advertisement

When selecting your rug, consider options made from natural materials like wool or cotton. These materials enhance warmth and durability while aligning with the Scandinavian aesthetic of simplicity and functionality.

Opting for light neutral colors or soft pastels can brighten your nook, complementing the airy, minimalist style typical of Scandinavian design. Additionally, a plush area rug provides sound absorption, reducing echo and creating a quieter environment ideal for focused reading.

Make sure to choose a rug size that adequately covers the seating area, allowing all your furniture to sit partially on it. This arrangement fosters a cohesive look and enhances the overall comfort of your nook.

Natural Wood Floorboards

Natural wood floorboards bring an inviting warmth and a touch of nature to your reading nook, perfectly complementing the softness of your plush area rug. In Scandinavian design, these floorboards are a hallmark feature that enhances the cozy atmosphere essential for any comfortable space. Common woods like birch, pine, and oak not only offer durability but also light colors that help brighten your nook, making it feel more open and inviting.

The natural grain patterns of wood floorboards add visual interest and texture, aligning beautifully with the minimalist aesthetic typical of Scandinavian decor. Plus, maintaining and cleaning wood flooring is a breeze, which is ideal for a space dedicated to relaxation and leisure, like your reading nook.

Advertisement

When you layer area rugs over these natural wood floorboards, you introduce an additional layer of comfort and warmth that further enriches the cozy feel of your corner. This combination not only enhances the aesthetic appeal but also invites you to sink into your favorite chair with a good book.

Embrace the beauty and practicality of natural wood floorboards to create a reading nook that feels like a serene retreat.

Textured Jute Area Rug

A textured jute area rug effortlessly adds warmth and a touch of natural elegance to your Scandinavian reading nook. Made from natural fibers, this eco-friendly choice not only enhances the cozy reading nook's appeal but also aligns perfectly with sustainable living principles.

The neutral color palette of jute rugs complements the light and airy aesthetics typical of Scandinavian design, creating a harmonious visual flow in your space.

Jute's durable nature means it can withstand high foot traffic, making it a practical addition to your reading nook. You won't have to worry about wear and tear; it'll maintain its beauty over time.

Advertisement

Furthermore, the natural fibers are excellent at absorbing moisture and sound, contributing to a quieter and more serene reading environment. This means you can plunge into your favorite books without distractions.

Conclusion

Now that you know the proven steps to create your cozy Scandinavian reading nook, it's time to put your ideas into action.

Focus on incorporating key elements like comfortable furniture and warm lighting to set the mood.

Don't forget to add personal touches with decorative elements that reflect your style.

With the right flooring and fixtures, you'll transform any corner into a relaxing retreat.

Advertisement

Grab your favorite book and enjoy your new reading sanctuary!

Continue Reading

Home Decor

Add Instant Depth to Any Room With These Easy Texture Tips!

Spruce up your space effortlessly with these texture tips that promise to transform any room into a captivating sanctuary—discover how inside!

Published

on

By

instant depth through texture

Adding texture is a simple way to give your room instant depth. Start by mixing materials, like draping velvet and linen cushions on your sofa. Layer bedding with cotton and wool for a cozy feel. Use area rugs to enhance hard surfaces and consider textured wallpaper for visual interest. Don't forget to blend vintage and modern elements for character. Incorporate a neutral palette with varying shades and metallic accents to elevate the look. These ideas create an inviting atmosphere that feels dynamic and rich. Keep going, and you'll discover even more creative ways to enhance your space.

Key Takeaways

  • Layer different fabrics, such as velvet and linen, in cushions and throws to create visual interest and comfort.
  • Incorporate textured finishes like plaster or embossed wallpaper to add dimension to walls and break monotony.
  • Use area rugs over hard surfaces to soften spaces and introduce warmth beneath your feet.
  • Combine vintage and modern elements, such as antique furniture with sleek decor, to enrich the room's texture and character.

Understanding the Importance of Texture

Texture isn't just an afterthought; it's vital for creating a visually engaging and inviting space. You can transform your home decor by incorporating various textural elements that add depth and dimension. By layering different materials—like fabrics, wood, and metal—you'll evoke warmth and comfort, making your rooms more inviting.

Engaging textures work to break up the monotony of flat surfaces, preventing a dull appearance. When you thoughtfully mix these textures, you're not only enhancing aesthetic appeal but also creating a balanced atmosphere that draws people in. For instance, combining a soft wool throw with a sleek leather sofa can create a stunning visual contrast that captures attention.

Don't underestimate the power of texture; it plays a significant role in how a space feels and looks. Without it, your rooms might come off as uninviting. So, as you begin your design journey, remember to incorporate a variety of textures to create a dynamic and inviting space that truly reflects your style.

Creative Ways to Mix Textiles

innovative textile mixing techniques

You can elevate your space by creatively mixing textiles to bring warmth and visual interest into each room. By layering different materials, you create depth and a cozy atmosphere that invites relaxation.

Here are three effective ways to mix textiles in your home:

  1. Decorative Cushions: Combine various fabrics like velvet, linen, and cotton in your cushions. This mix of textures and mixed patterns will add personality and engage the senses, making your space more dynamic.
  2. Layered Bedding: Use a lightweight cotton duvet paired with a plush wool blanket and a textured throw. This layering not only enhances comfort but also introduces layered softness that invites you to snuggle in.
  3. Window Treatments: Pair sheer curtains with heavier drapes to create depth. This combination serves both function and aesthetic, allowing natural light to filter through while adding visual interest to your windows.

Incorporating a plush area rug over hardwood or tile floors can also enhance the overall texture of your room, tying together your design choices.

With these tips, you'll easily create a space that feels inviting and stylish.

Advertisement

Exploring Finishes and Materials

finishes and materials exploration

Exploring various finishes and materials can transform your space, adding depth and character that plain surfaces simply can't achieve. Shifting from flat white walls to textured finishes, like plaster or embossed wallpaper, introduces visual interest that draws the eye. You might consider incorporating textured tiles in your kitchen or bathroom, creating unique focal points that are both functional and stylish.

To achieve a layered design, blend original features of your home, such as crown molding or woodwork, with modern pieces. This balance cultivates a harmonious dialogue between traditional and contemporary styles. For instance, pairing natural stone countertops with sleek metal fixtures not only enhances the overall aesthetic but also elevates the sophistication of your space.

Don't forget about accent walls; applying textured finishes here can add dimension and make your rooms feel more intimate. Whether you choose to experiment with different materials or just focus on a few key textures, the result will be a rich, inviting atmosphere that reflects your personal style.

Embrace the possibilities of finishes and materials to create a space that's truly yours.

Achieving a Cohesive Tonal Look

cohesive tonal aesthetic achievement

A cohesive tonal look relies on a neutral palette with varying shades to create depth and prevent a flat appearance in your space. To achieve this, consider these three elements:

  1. Materials: Mix textures like linen, silk, and wool in similar hues to enhance depth and richness within your monochromatic scheme.
  2. Finishes: Incorporate metallic accents alongside natural materials. These finishes not only add sophistication but also contribute to the overall tonal harmony.
  3. Accessories: Use textured accessories such as throws and pillows in various fabrics. These items can break the monotony of a tonal palette while maintaining a unified aesthetic.

Layering different tones within the same color family fosters a sense of harmony and visual intrigue throughout the room.

By thoughtfully selecting your materials and finishes, you'll create an inviting atmosphere that feels both cohesive and stylish.

Mixing Vintage and Modern Elements

eclectic fusion of styles

Mixing vintage and modern elements not only enriches a room's texture but also showcases a unique personality that reflects your individual style. By blending different eras, you create visual interest that draws the eye. For instance, layering an antique wooden coffee table with sleek modern decor invites conversation and enhances depth in your home.

Vintage Elements Modern Elements Effect
Rustic wooden coffee table Sleek metal accents Dynamic contrast
Patterned throw or antique rug Minimalist furniture pieces Warmth and balance
Vintage dining table Contemporary chandelier Focal point creation

Incorporating vintage textiles alongside modern furnishings creates a beautiful tension between the old and new. Updated lighting fixtures over antique furniture highlight unique textures, enriching the overall atmosphere. This approach not only personalizes your space but also reflects your experiences and taste, making your home feel curated and lived-in. Embrace the magic of mixing vintage and modern to achieve a stunning, layered look that truly represents you.

Advertisement

Frequently Asked Questions

How Do You Add Depth to a Room?

To add depth to a room, layer textures by combining various materials like wood, metal, and textiles. Use area rugs, mix vintage and contemporary pieces, and incorporate textured wall finishes to create visual interest and warmth.

What Does Texture Visually Add to a Room?

Think of texture as the seasoning in your favorite dish; it adds richness and complexity. Texture visually enriches your room, breaking monotony, creating depth, and inviting comfort, ultimately transforming your space into a dynamic and engaging environment.

How Do You Layer Textures in a Room?

To layer textures in a room, start with a neutral base, then mix materials like velvet and leather. Incorporate varied textile weights and balance hard and soft elements for a rich, inviting atmosphere.

What Does Rough Texture Do to a Room?

Ever wondered what rough textures can do for your space? They invite warmth and charm, create striking contrasts with smooth surfaces, and draw the eye, making your room feel inviting, grounded, and full of character.

Conclusion

So, go ahead, toss a few pillows on that sad sofa and call it a day!

Advertisement

Who needs a designer when you've got the power of texture at your fingertips?

Just remember, layering fabrics is like wearing all your clothes at once—sure, it sounds ridiculous, but you might just start a trend!

Embrace the chaos, mix those patterns, and watch as your bland room transforms into an Instagram-worthy spectacle.

After all, who doesn't love a little controlled mess?

Advertisement

Continue Reading

Trending