
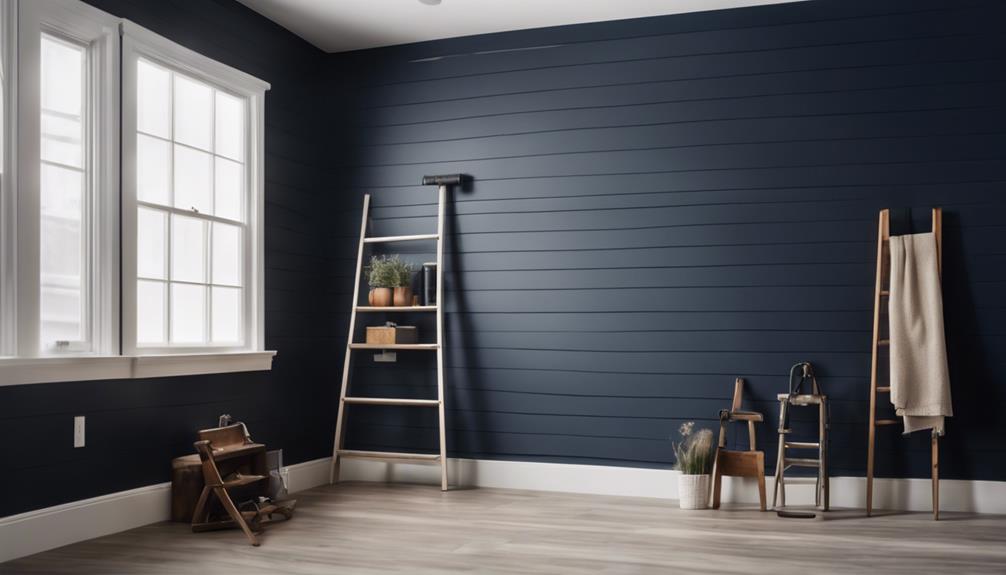
You're about to start on a stylish journey, creating a stunning navy shiplap accent wall that elevates your space's visual appeal. To guarantee a flawless installation, begin by measuring and marking your wall, taking precise measurements to avoid miscalculations. Next, prepare your navy shiplap boards by sanding, priming, and painting them for a rich, vibrant color. When installing the boards, start at eye level, making sure a straight and securely attached first board. From there, add remaining boards in a staggered pattern, using construction adhesive and carefully cutting around obstacles. Now, you're set to transform your space with a breathtaking navy shiplap accent wall – and there's more to come.
Key Takeaways
• Measure the wall's height and width accurately to ensure proper shiplap coverage and avoid miscalculations.
• Prepare navy shiplap boards by sanding edges, priming, and painting with a navy blue color, and consider sealing with a clear coat.
• Install boards by finding wall studs, marking locations, and hanging the first board at eye level, ensuring each board is level and securely attached.
• Cut corner boards at a 45-degree angle, sand edges, and test fit before nailing to ensure a seamless joint.
• Inspect the accent wall for gaps, uneven boards, or nail holes, and touch up paint or stain for a consistent color tone.
navy shiplap wall panels
As an affiliate, we earn on qualifying purchases.
As an affiliate, we earn on qualifying purchases.
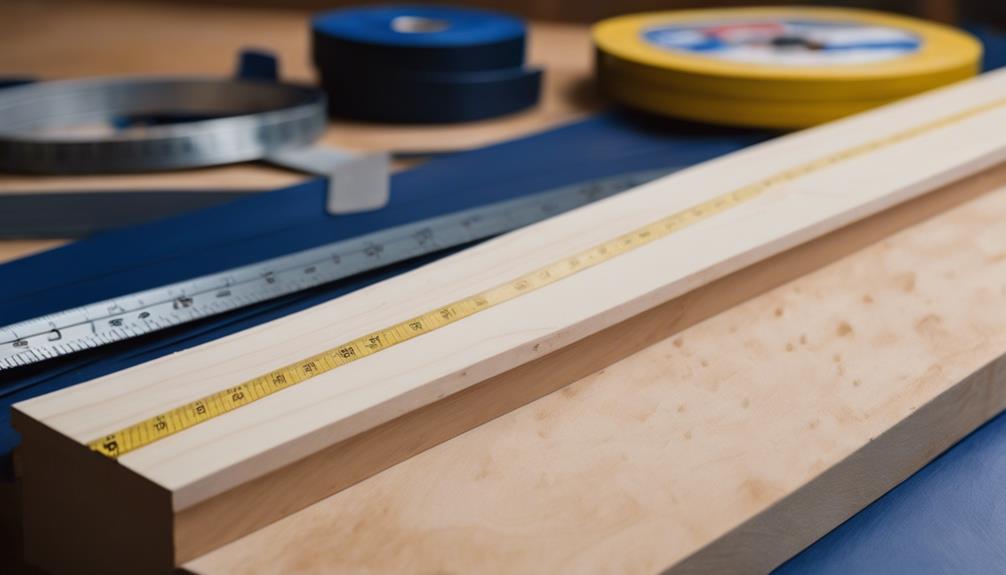
Measuring and Marking the Wall
Measure the wall's height and width to determine how much shiplap you'll need to cover the entire accent wall area. This important step guarantees you have enough material to complete your Navy Shiplap Accent Wall project. Take precise measurements to avoid miscalculations, which can lead to unnecessary delays or additional costs.
Next, mark the top and bottom boundaries of the accent wall using a pencil and level. This helps you visualize the layout and maintain a straight line. Divide the wall into equal sections to plan the placement of the shiplap boards. This division will help you space the boards evenly, creating a balanced look.
Use painter's tape to visualize the shiplap layout before installation, making adjustments as needed. Finally, mark stud locations on the wall to ensure secure attachment of the shiplap boards. By following these steps, you'll be well-prepared to start installing your Navy Shiplap Accent Wall.
shiplap board sanding and priming kit
As an affiliate, we earn on qualifying purchases.
As an affiliate, we earn on qualifying purchases.
Preparing Navy Shiplap Boards
With your wall measurements in hand, it's time to transform your navy shiplap boards into stunning accent wall material. Start by confirming that the boards are properly measured and cut to fit the wall dimensions.
Sand the edges of the boards to create a smooth finish and prevent splinters. Next, prime the boards with a high-quality primer to guarantee even coverage and a vibrant navy color. Apply the primer according to the manufacturer's instructions, making sure to cover the entire surface.
Once the primer is dry, paint the boards with a rich, navy blue color, allowing each coat to dry before applying the next. After the final coat, let the boards dry completely to achieve a professional finish. Consider sealing the painted boards with a clear coat for added protection and durability.
With your navy shiplap boards prepared, you're one step closer to creating a stunning accent wall that will elevate your space.
shiplap installation tools kit
As an affiliate, we earn on qualifying purchases.
As an affiliate, we earn on qualifying purchases.
Installing the First Board

As you begin installing the first board, keep in mind that accurate measurements are essential to a successful shiplap accent wall.
You'll need to measure the wall to determine the best placement for your first board, and then use a stud finder to locate the wall studs that will provide a secure anchor for your board.
Measuring the Wall
You'll need to take precise measurements of the wall's height and width to determine the number and size of shiplap boards required for the project. Measuring the wall accurately is vital to guarantee a seamless installation. Take out your tape measure and record the dimensions of the wall, including any obstacles like outlets or windows. This will help you calculate the number of shiplap boards you'll need to buy and how to cut them to fit around any obstructions.
When measuring the wall, pay attention to its alignment. Ensure the wall is straight and level, as this will impact the overall appearance of your shiplap accent wall. If the wall is slightly crooked, you may need to adjust your installation accordingly.
Finding the Studs
Locate the wall studs using a stud finder to guarantee secure installation of your shiplap boards. This vital step ensures that your boards are securely attached to the wall, preventing sagging over time.
Typically, wall studs are spaced 16 inches apart, but this may vary in older homes. To mark the stud locations, use a pencil to make a small mark on the wall. This will guide your board placement and guarantee a secure installation.
Remember, securing your boards to studs provides the stability you need for a professional-looking finish. Start by finding the top stud, as this will be the anchor point for your first board. Take your time, and make sure to mark each stud location accurately. This might seem like a tedious task, but trust us, it's worth the extra effort.
With your stud locations marked, you're ready to move on to the next step: hanging your first board.
Hanging the Board
Measure and mark the starting point on the wall, ensuring it's level and aligned with the room's layout, before you begin hanging the first board. This essential step sets the tone for the entire shiplap accent wall installation.
Next, use a stud finder to locate and mark the wall studs for secure attachment of the first board. Apply construction adhesive to the back of the board, providing added stability and a professional finish.
Hold the board in place, ensuring it's level, and use a nail gun to secure it to the marked studs. Begin with a full-length board at eye level or slightly higher to establish the starting point for the shiplap accent wall.
As you hang the first board, double-check that it's straight and properly aligned using a level. This attention to detail will pay off in the end, resulting in a beautifully installed navy shiplap accent wall that adds a touch of elegance to any room.
wall stud finder for shiplap
As an affiliate, we earn on qualifying purchases.
As an affiliate, we earn on qualifying purchases.
Adding Remaining Shiplap Boards

With the first row of shiplap boards in place, start adding the remaining boards. Make certain each one is level and securely nailed into the wall studs.
As you work your way up the planked wall, use a miter saw to cut boards to fit around obstacles like outlets and light fixtures. To create a visually appealing staggered pattern, alternate the length of each board, ensuring to maintain a consistent gap between them.
Before nailing each board into place, apply construction adhesive on the back for added durability. Double-check the alignment and spacing between boards to guarantee a professional-looking finish.
As you add each new board, ensure it's level and securely fastened to the wall studs.
Cutting and Fitting Corner Boards

Now that you've successfully added the remaining shiplap boards, turn your attention to the corners, where precision cutting and fitting are key to a seamless look. To guarantee a professional finish, accurate cutting of the corner boards and snug fitting into place are crucial.
Here's a summary of the key steps to follow:
| Step | Action | Tool |
|---|---|---|
| 1 | Measure corner boards precisely | Tape measure |
| 2 | Cut corner boards at 45-degree angle | Miter saw |
| 3 | Sand down edges to remove roughness | Sandpaper |
| 4 | Test fit corner boards before nailing | Hands |
| 5 | Apply construction adhesive for secure fit | Adhesive |
When cutting the corner boards, use a miter saw to make precise 45-degree angle cuts. Sand down the edges to remove any roughness before installing them. Test fit the corner boards to ensure a snug fit, and apply a small amount of construction adhesive to secure them firmly to the wall. By following these steps, you'll achieve a seamless joint that complements your navy shiplap accent wall.
Finishing Touches and Painting

Now that your shiplap accent wall is installed, it's time to focus on the finishing touches and painting.
You'll want to apply final coats of paint, ensuring the desired color saturation, and attend to any remaining details, such as caulking gaps between boards.
With a thorough wall preparation checklist in hand, you'll be well on your way to achieving a stunning, professional-looking navy shiplap accent wall.
Final Coats Applied
After preparing your shiplap wall for painting, you're ready to apply the final coats of navy paint to achieve a rich, professional-looking finish. As a DIY enthusiast, you're one step closer to completing your plank walls project.
To guarantee a flawless finish, follow these essential steps:
- Apply multiple coats of paint in your chosen navy color to guarantee full coverage and a rich finish.
- Allow each coat of paint to dry completely before applying the next to avoid streaks or uneven color.
- Consider using a high-quality paint roller or brush to achieve a smooth and professional-looking finish on the shiplap wall.
- Use painter's tape to protect adjacent surfaces and ensure clean, crisp edges when painting the navy shiplap wall.
- Inspect the wall after painting to touch up any missed spots or imperfections for a flawless final result.
Wall Preparation Checklist
You've applied the final coats of navy paint to your shiplap wall, but before you can fully enjoy the fruits of your labor, it's time to tackle the finishing touches and painting preparation to guarantee a flawless accent wall.
To achieve a seamless shiplap look, it's crucial to create a smooth base for installation. Start by sanding down the wall surface to remove any imperfections.
Next, fill any holes or gaps with spackling compound and sand it down for a smooth finish. Protect your trim and edges with painter's tape to prevent paint from bleeding onto them.
Apply a primer to ensure better adhesion and coverage of the navy paint color you've chosen. This wall preparation checklist will ensure a cohesive and stylish look that complements your shiplap boards.
Final Inspection and Completion
With your navy shiplap accent wall installation nearly complete, take a step back to inspect the entire wall for any imperfections. This final inspection is important to guarantee a polished finish and a cohesive look across the entire wall.
To secure a completed appearance, don't forget to:
- Inspect the accent wall for any gaps, uneven boards, or visible nail holes to make sure a polished finish.
- Check the alignment and straightness of the shiplap boards for a cohesive look across the entire wall.
- Touch up any paint or stain as needed to maintain a consistent color tone throughout the accent wall.
- Ensure all trim pieces are securely attached and seamlessly integrated with the shiplap for a completed appearance.
- Step back and admire your finished navy shiplap accent wall to appreciate the transformation it brings to the room.
Frequently Asked Questions
How to Install a Shiplap Accent Wall?
When you're ready to install a shiplap accent wall, start by measuring the wall area to determine how much shiplap you'll need.
Begin at the top of the wall for a seamless finish and work your way down, using a nail gun to attach the shiplap to the wall, making sure to hit the studs for stability.
Do You Start at the Top or Bottom When Installing Shiplap?
As you begin your shiplap installation journey, you're probably wondering where to start. Do you start at the top or bottom of the wall?
Imagine a perfectly aligned puzzle, with each piece fitting seamlessly together. To achieve this, start at the top of the wall, where you can hide shorter pieces behind baseboards and guarantee a level, even installation.
Do You Remove Baseboards When Installing Shiplap?
When installing shiplap, you're faced with the decision of whether to remove baseboards or not. Removing them allows for a cleaner, more professional finish, ensuring a seamless shift between the shiplap and the wall.
However, it's not always necessary, and some installation methods can work around them. You'll need to contemplate the overall look and ease of installation to decide what's best for your project.
How Do You Join the Ends of Shiplap?
When joining the ends of shiplap, you'll want to guarantee a seamless connection. To do this, cut the last piece to fit snugly against the corner or edge, using a saw to create a precise cut that aligns with the existing boards.
Securely attach the end piece to the wall, making sure it's level with the rest of the shiplap. Depending on your design, you might need to miter the ends for a flawless finish.
Conclusion
You've successfully installed your navy shiplap accent wall, adding a touch of sophistication to your space.
Did you know that, according to the National Association of Home Builders, 71% of homeowners consider a decorative wall treatment, like shiplap, a 'must-have' feature in new homes?
With your new accent wall, you're part of a growing trend. Take a step back, admire your handiwork, and enjoy the fruits of your labor – you've earned it!