Connect with us

Home Decor

What Can You Do With an Old Metal Gazebo Frame?

Create a unique outdoor space by repurposing an old metal gazebo frame into a functional or decorative element that elevates your backyard experience.

Published

on

repurpose old metal gazebo

You can breathe new life into an old metal gazebo frame by repurposing it into a cozy outdoor room, lush vertical garden, or bird-friendly habitat. Convert it into a functional space like a rustic outdoor kitchen, whimsical playhouse, or greenhouse oasis. Alternatively, upcycle it into a decorative element like a garden arbor or chic outdoor bar. With a little creativity, you can transform an old metal gazebo frame into a unique and functional space that enhances your outdoor living experience. Explore the possibilities, and you might just discover a hidden gem waiting to be uncovered in your own backyard.

Key Takeaways

• Repurpose the metal gazebo frame into a cozy outdoor room with comfortable seating, curtains, and outdoor lighting for relaxation.

• Transform the frame into a lush vertical garden by attaching planters, selecting cascading plants, and ensuring proper sunlight and watering.

• Convert the frame into a bird-friendly habitat by adding bird feeders, nesting boxes, and plants that attract birds, and painting it with non-toxic paint.

• Use the frame to create a seasonal plant display by arranging potted plants, hanging baskets, and climbing vines thoughtfully, considering mature size and growing conditions.

Advertisement

• Repurpose the frame into a functional outdoor space, such as a rustic outdoor kitchen, whimsical playhouse, or greenhouse oasis, by incorporating functional elements and decorative touches.

Transform Into a Cozy Outdoor Room

With a little creativity, you can convert your old metal gazebo frame into a cozy outdoor room that's perfect for relaxation and entertainment. By adding weather-resistant curtains and comfortable seating, you can transform the metal structure into a functional outdoor space that serves as an extension of your home.

To enhance the ambiance and comfort of this new outdoor room, consider installing outdoor lighting, rugs, and throw pillows that complement the existing décor. A small table or fire pit can also be added to make the area perfect for relaxing or entertaining guests.

As you design this cozy retreat, think about the function you want it to serve: will it be a private reading nook, a spot for meditation, or a place to enjoy the surrounding scenery? Whatever your vision, with a little creativity, your old metal gazebo frame can become a warm and inviting outdoor space that you'll love spending time in.

Create a Lush Vertical Garden
vertical garden with lush plants

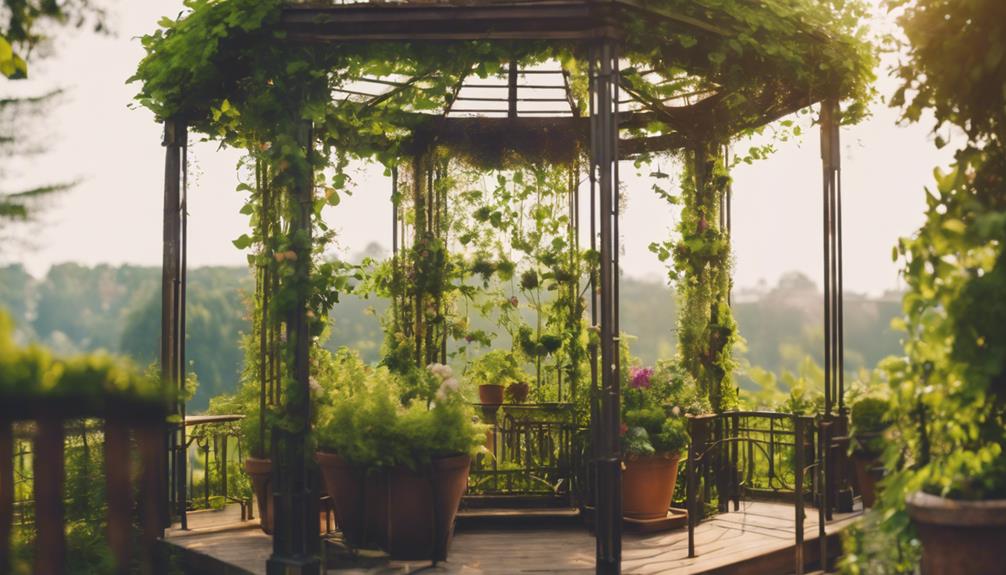
As you embark on creating a lush vertical garden using your old metal gazebo frame, you'll need to contemplate the types of plants that will thrive in this unique environment.

You'll want to select a mix of cascading plants, flowers, and herbs that will add color and texture to your garden, and then decide on a layout that showcases these plants to their fullest potential.

Advertisement

Plant Selection Guide

When creating a lush vertical garden, you'll want to curate a diverse selection of plants that thrive in vertically-stacked environments, such as succulents, ferns, herbs, and trailing vines. These plants are perfect for transforming your old metal gazebo frame into a stunning vertical garden.

Plant Type Benefits
Succulents Low maintenance, drought-tolerant, and add visual interest
Ferns Add a touch of greenery, thrive in shaded areas, and purify the air
Herbs Fragrant, edible, and can be used in cooking and herbal remedies
Trailing Vines Spill over the edges, add movement, and create a whimsical feel

As you select your plants, consider the amount of sunlight your vertical garden will receive. Make sure you have a proper watering and drainage system in place to keep your plants healthy. Research the specific care requirements for each plant to maintain a thriving vertical garden. By choosing the right plants and providing the necessary care, you'll be on your way to creating a lush and stunning vertical garden around your old metal gazebo frame.

Garden Layout Options

Transform your old metal gazebo frame into a stunning vertical garden by arranging plants in a way that maximizes visual appeal and functionality. You can attach planters or pots to the frame, incorporating a variety of plants such as herbs, flowers, and succulents to add color and texture to the vertical garden. To guarantee proper hydration, consider using a drip irrigation system or self-watering planters.

By utilizing the vertical space, you can grow a multitude of plants in a small area, making it ideal for urban or limited space gardens. Create a stunning visual display by arranging plants of different sizes and colors to create a vibrant and dynamic vertical garden. Take advantage of the gazebo's structure to create a unique and eye-catching display.

As you design your vertical garden, think about the overall aesthetic you want to achieve and choose plants that will thrive in the conditions provided by the gazebo. With a little creativity, your old gazebo frame can become a lush oasis that adds beauty and functionality to your outdoor space.

Advertisement

Build a Bird-Friendly Habitat

create a bird sanctuary

You can repurpose the old metal gazebo frame into a thriving habitat for birds by strategically hanging bird feeders and nesting boxes from its sturdy structure. This is a good idea, as it allows you to breathe new life into an old gazebo while creating a function that benefits local wildlife.

By utilizing the gazebo's structure, you can create a safe and welcoming environment for various bird species in your backyard. Consider enhancing the experience by adding bird baths, perches, and plants that attract birds to the repurposed gazebo frame.

You can even paint the frame with non-toxic paint to blend with the natural surroundings and attract more birds. By doing so, you'll create a peaceful and serene space for bird enthusiasts to enjoy observing and interacting with local avian wildlife.

With a little creativity, your old gazebo can become a haven for birds, providing a unique opportunity to connect with nature right in your own backyard.

Make a Seasonal Plant Display
create a festive plant

As you transform your old metal gazebo frame into a seasonal plant display, remember that the key to creating a stunning visual impact lies in the details.

You'll want to carefully consider the types of plants you choose, arrange them thoughtfully, and add decorative elements to enhance the overall aesthetic.

Plant Selection Matters

With a little creativity, your old metal gazebo frame can become a stunning seasonal plant display, teeming with life and color. When selecting plants, consider the function you want your display to serve. Are you looking for a vibrant and colorful display? Choose seasonal plants like petunias, marigolds, and impatiens.

Advertisement

Want to add some texture and visual interest? Opt for trailing plants like sweet potato vines or ivy. If you're looking for a fragrant and functional addition, consider planting herbs like basil, mint, and rosemary.

Mixing and matching annuals and perennials will guarantee a long-lasting and ever-changing display. Don't forget to incorporate different textures and heights with plants like ornamental grasses, ferns, and coleus to create a dynamic arrangement.

Arrange With Care

By strategically positioning potted plants, hanging baskets, and climbing vines on the metal gazebo frame, you can create a stunning seasonal display that showcases your favorite flowers, foliage, and greenery. This arrangement will not only add a touch of elegance to your outdoor space but also highlight the beauty of your plants.

Here's a suggested arrangement plan to get you started:

Level Plant Type Example Plants
Top Hanging Baskets Ferns, Petunias, Fuchsias
Middle Potted Plants Hydrangeas, Succulents, Herbs
Bottom Climbing Vines Clematis, Wisteria, Honeysuckle

Consider the mature size of your plants, their growing conditions, and the amount of sunlight they require when selecting and arranging your plants. With careful planning, you can create a visually appealing display that changes with the seasons, adding beauty and interest to your outdoor area.

Advertisement

Add Decorative Touches

Transform your metal gazebo frame into a stunning seasonal display by adding decorative touches that reflect the current time of year.

You can repurpose the frame as a base for creating a vibrant plant display in your garden or outdoor space. Start by incorporating hanging baskets or pots filled with colorful flowers and lush greenery to add a decorative touch to the frame.

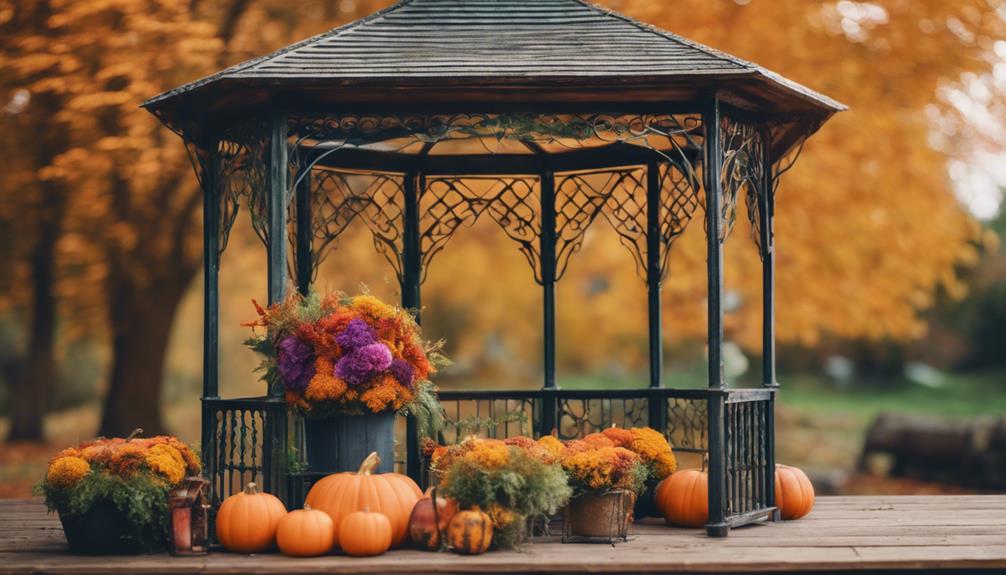
Consider showcasing seasonal plants like pumpkins, gourds, or festive decorations during holidays to keep your display fresh and engaging. Utilize the height and structure of the gazebo frame to create a visually appealing plant arrangement that changes with the seasons.

You can enhance the beauty of your outdoor area by repurposing the metal gazebo frame as a focal point for showcasing your favorite plants and seasonal decor. By doing so, you'll create a stunning display that will impress your friends and family, and add a personal touch to your outdoor space.

Design a Rustic Outdoor Kitchen
rustic outdoor kitchen design

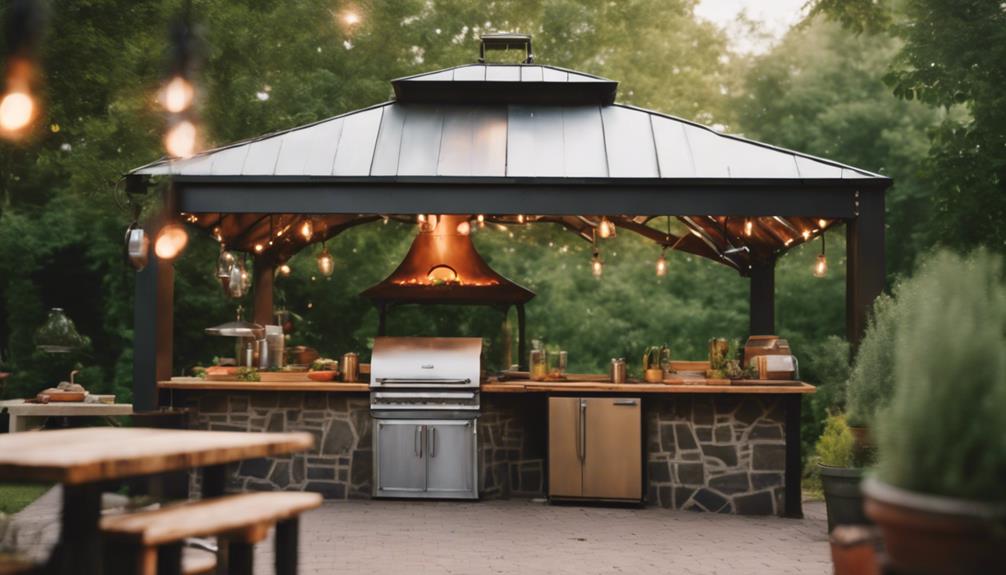
You can repurpose the old metal gazebo frame into a rustic outdoor kitchen by incorporating functional elements that blend seamlessly with the natural surroundings. To create a functional cooking space, add countertops, shelves, and a grill for cooking and entertaining.

Utilize the frame's sturdy structure to hang pots and pans, utensils, and lighting fixtures, maximizing storage and convenience. Consider incorporating a sink or water source for added practicality.

Advertisement

Seating areas for dining and socializing can also be integrated into the design. Customize the space with reclaimed wood, metal accents, and decorative elements to enhance the rustic charm.

Construct a Whimsical Playhouse

creative playhouse design project

Repurpose the old metal gazebo frame as a whimsical playhouse where kids can let their imagination run wild. You can transform the frame into a magical space that sparks creativity and adventure in children. Start by adding walls, a roof, and fun elements that will make the playhouse a cozy and inviting spot.

Don't forget to enhance the playhouse with colorful paint, playful decorations, and interactive features that will capture kids' attention.

As you build the playhouse, prioritize safety and imagination. Create a space that encourages kids to explore, dream, and have fun. You can add features like windows, a door, and even a tiny mailbox to make the playhouse feel like a miniature home.

With a little creativity, you can turn the old gazebo frame into a charming and imaginative play area that kids will adore. By repurposing the frame, you'll not only give new life to an old structure but also create a unique and exciting space for kids to play and grow.

Turn Into a Greenhouse Oasis

transform space into paradise

By cleverly utilizing the old metal gazebo frame, you can create a lush greenhouse oasis that brings a touch of serenity to your backyard.

To achieve this, you'll need to transform the frame using greenhouse plastic, shower curtain liners, and landscape fabric. Don't forget to take into account insulation needs, water drainage, and air tightness to make sure your greenhouse oasis remains cozy and functional.

Advertisement

Get creative and think outside the box – or in this case, the gazebo frame! Utilize recycled materials and innovative ideas, such as creating shade for temperature control, to make your greenhouse truly unique.

However, be prepared to overcome challenges like maintaining warmth, water resistance, and fungal issues during the conversion process. With some TLC and clever thinking, you'll be enjoying your tranquil greenhouse oasis in no time.

Just remember to stay focused on the task at hand, and don't be afraid to get your hands dirty!

Upcycle Into a Garden Arbor
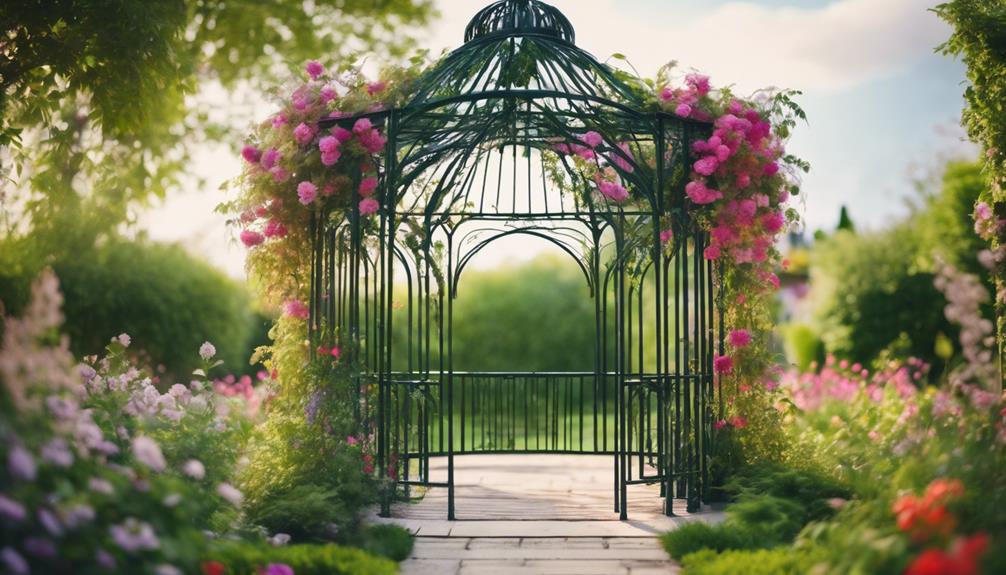
reusing materials for gardening

Transforming an old metal gazebo frame into a charming garden arbor can be a brilliant way to breathe new life into your outdoor space. By repainting it in a fresh color, you can give your garden a fresh new look.

You can use the arbor as a focal point in your garden to support climbing plants like roses, vines, or jasmine. This won't only add beauty to your garden but also create a sense of tranquility.

Here are a few ways you can make the most of your garden arbor:

Advertisement
  1. Create an entrance: Repurpose the frame to create a lovely entrance to your garden or a pathway through your yard.
  2. Add decorative elements: Consider adding hanging baskets, solar lights, or wind chimes to enhance the arbor's appeal.
  3. Use as a backdrop: Utilize the garden arbor as a picturesque backdrop for outdoor events, photo shoots, or intimate gatherings.

Craft a Chic Outdoor Bar

create a stylish outdoor bar

With a little creativity, you can convert your old metal gazebo frame into a chic outdoor bar that's perfect for hosting friends and family. By adding a counter, shelves, and storage for drinks and glassware, you can transform the frame into a functional and stylish bar.

Utilize the sturdy frame as a base for a bar top made from reclaimed wood, granite, or concrete for a rustic or modern look. To enhance functionality, incorporate features like a built-in cooler, wine rack, or hanging space for bar tools.

Don't forget to add some ambiance with string lights, outdoor bar stools, and outdoor decor to create a welcoming space. By repurposing the gazebo frame, you'll create a focal point for your outdoor entertainment area, perfect for gatherings and enjoying drinks with friends and family.

With a little creativity and some elbow grease, you can turn your old gazebo frame into a chic outdoor bar that's sure to impress.

Frequently Asked Questions

How to Upcycle a Gazebo?

When you're wondering how to upcycle a gazebo, you're probably thinking of creative ways to breathe new life into that old metal frame. You're not alone! Many people have successfully transformed their gazebos into unique outdoor features.

You can repurpose it as a plant trellis, outdoor seating area, or even a mini greenhouse. The possibilities are endless, and with a little creativity, you can turn that old gazebo into a stunning outdoor focal point.

Advertisement

How Long Will a Galvanized Steel Gazebo Last?

You're probably wondering, how long will a galvanized steel gazebo last? With proper maintenance and care, it can last up to 50 years.

The galvanized steel is resistant to rust and corrosion, which greatly extends its lifespan. Regular cleaning and protective coatings also play an important role in prolonging its durability.

However, harsh weather conditions can impact its longevity. Inspecting for signs of wear and addressing issues promptly can help maximize its lifespan.

Are Metal Gazebos Worth It?

You're wondering if metal gazebos are worth the investment, and the answer is yes! They offer durability and resistance to harsh weather conditions, requiring minimal maintenance compared to their wooden counterparts.

Their sturdy construction makes them a long-term investment, providing a modern and sleek aesthetic to your outdoor space. With proper care, they can last for many years, making them a valuable addition to your backyard.

Advertisement

Can I Paint a Metal Gazebo?

You're wondering if you can paint a metal gazebo, and the answer is yes, you can!

Before you start, make sure to prime the metal surface with a high-quality primer to guarantee better adhesion and durability.

Choose an outdoor metal paint that's designed to withstand the elements, and consider lightly sanding the surface for a smooth finish.

Conclusion

As you explore the possibilities of repurposing an old metal gazebo frame, remember that upcycling isn't only eco-friendly but also creatively fulfilling.

Did you know that, according to the Environmental Protection Agency, upcycling helps reduce the 12 million tons of metal waste generated in the US each year?

Advertisement

By transforming your old gazebo frame, you're not only giving new life to an old structure but also contributing to a more sustainable future.


Continue Reading
Advertisement

Home Decor

Master the Art of Antiquing With Chalk Paint in 10 Steps

Achieve a timeless, vintage aesthetic by following these expert tips to transform ordinary furniture into stunning, one-of-a-kind masterpieces.

Published

on

antiquing with chalk paint

To master the art of antiquing with chalk paint, start by thoroughly cleaning and preparing your furniture piece, ensuring a strong bond between the paint and surface. Next, apply a high-quality primer and base coat, followed by distressing edges and details to achieve a vintage look. Use dark wax strategically to enhance the distressed appearance, and buff the piece for a smooth finish. Enhance with additional coats and decorative elements, and seal your masterpiece with a clear wax or polyurethane. As you work through these steps, you'll uncover the secrets to transforming ordinary furniture into stunning, one-of-a-kind pieces that exude character and charm.

Key Takeaways

• Thoroughly clean and prepare the surface for painting by repairing, sanding, and priming to ensure a strong bond between paint and surface.

• Apply high-quality chalk paint in thin coats, allowing each coat to dry completely, to achieve a smooth and even base coat.

• Distress edges and details using fine-grit sandpaper to create a visually appealing antique finish and add depth to the painted furniture.

• Use dark wax strategically to enhance the distressed appearance, building up layers for a deeper, richer look and adding texture for visual interest.

Advertisement

• Seal the finished piece with clear wax or polyurethane, applying thin coats and choosing a high-quality sealant to protect and showcase the artwork.

Prepare Your Furniture Piece

Before you can achieve a beautifully antiqued finish with chalk paint, thoroughly clean your furniture piece to remove dirt, grime, and any previous finishes that may interfere with the painting process. This essential step guarantees a strong bond between the paint and the surface, resulting in a durable and long-lasting finish.

Take the time to inspect your furniture piece carefully, making any necessary repairs to loose joints or cracks and dents. Once you've cleaned the surface, lightly sand it to create a smooth and even base for the chalk paint to adhere to. This gentle sanding will help the paint penetrate the surface more evenly, reducing the risk of unevenness or peeling.

Clean and Prime the Surface

prepare the surface before painting

Clean the furniture surface thoroughly with soapy water to remove dirt and grime, ensuring a strong bond between the chalk paint and the surface. This step is vital, as any dirt or grime left behind can compromise the adhesion of the paint. Use a soft-bristled brush to gently scrub away any stubborn dirt or stains.

Once the surface is clean, inspect it for any areas that may need priming. If your furniture piece has been previously painted or stained, it's a good idea to prime the surface to guarantee excellent adhesion. Use a high-quality primer specifically designed for chalk paint to promote durability and prevent bleed-through. Apply the primer according to the manufacturer's instructions, making sure the surface is completely dry before moving on to the next step.

Apply Base Coat of Chalk Paint

chalk paint base coat

With your surface clean and primed, you're ready to apply a base coat of chalk paint to your furniture, setting the stage for a beautifully distressed finish. This important step lays the groundwork for a stunning, vintage-inspired look.

When applying the base coat, remember to:

Advertisement
  1. Choose the right paint: Select a high-quality chalk paint in your desired color for a smooth, even finish.
  2. Apply thin coats: Guarantee even coverage by using thin coats of chalk paint, allowing each coat to dry completely before applying additional coats.
  3. Use the right tools: Opt for chalk paint brushes, designed specifically for easy and efficient application of the base coat.
  4. Be patient: Allow each coat to dry completely before moving on to the next step, ensuring a flawless finish.

Distress the Edges and Details

distress for added character

Using fine-grit sandpaper, you'll carefully distress the edges and details of your furniture piece, focusing on areas that would naturally wear over time to achieve a realistic antique look. As you work, remember to highlight intricate carvings, corners, and edges for a more authentic distressed effect. This step is vital in adding depth and character to your painted furniture, giving it a rich, storied past.

Take your time distressing, as it's all about balance and restraint. You want to achieve a visually appealing antique finish, not a piece that looks like it's been ravaged by time. With Chalk Paint, you've got a solid foundation to work from, and now it's time to add the finishing touches.

Add Dark Wax for Antique Effect

antique look with wax

As you move on to the next step in mastering antiquing with chalk paint, you'll learn how to effectively use dark wax to create a truly vintage look.

To achieve this, you'll need to master various dark wax techniques, such as strategically applying it to highlight specific details and contours, and waxing for distressing to accentuate the aged appearance.

Dark Wax Techniques

You can achieve a rich, antique look on your chalk-painted furniture by applying dark wax, which adds depth and age to the piece. This technique is a game-changer for creating a truly unique, one-of-a-kind piece.

To get started, apply dark wax after the paint has dried and sealed with clear wax. You can use it sparingly for a subtle effect or build it up in layers for a more dramatic antique look.

Here are some key tips to keep in mind when working with dark wax:

Advertisement
  1. Apply it strategically: Focus on crevices, corners, and edges to enhance the distressed appearance.
  2. Control the intensity: Buff the dark wax to tone down the antique effect if needed.
  3. Build it up: Apply multiple layers of dark wax for a deeper, richer look.
  4. Experiment with texture: Use dark wax to add texture and visual interest to your piece.

Waxing for Distressing

To achieve a truly aged appearance, apply dark wax strategically to the chalk-painted surface, focusing on areas that would naturally show wear and tear over time. As you wax for distressing, remember that dark wax is key to creating an antique effect.

By applying it over chalk paint, you'll enhance details, crevices, and texture, adding depth and dimension to the piece. To control the intensity of the antiquing effect, apply dark wax after clear wax.

Use a wax brush or lint-free cloth to apply the dark wax in a controlled manner, focusing on edges, corners, and areas where natural wear would occur. As you work, keep in mind that dark wax can be buffed or wiped off to achieve the desired level of antiquing, giving your furniture a rich, timeworn look.

Apply Clear Wax for Protection

protect furniture with clear wax

Now that you've achieved the perfect distressed look with dark wax, it's time to protect your masterpiece with a clear wax topcoat.

As you apply this important layer, you'll want to keep in mind some essential tips, including how to apply the wax for best coverage, how long it takes to dry, and what to do if you need to remove excess wax.

Wax Application Tips

After completing your chalk paint project, applying a clear wax coating is the next essential step towards safeguarding your beautifully crafted piece from damage and wear. This protective layer guarantees that your chalk paint finish remains vibrant and intact for years to come.

When applying clear wax, remember these essential tips:

Advertisement
  1. Use a wax brush: A wax brush is specifically designed for applying wax, allowing for smooth, even coats.
  2. Apply thin coats: Thin coats prevent pooling and ensure a smooth finish.
  3. Work in small sections: Divide your project into smaller areas to maintain even coverage and prevent wax buildup.
  4. Don't overdo it: Too much wax can lead to a sticky, uneven finish.

Wax Drying Time

You'll need to allow the clear wax to dry for at least 24 hours before using your beautifully transformed furniture. This drying time is important, as it allows the wax to fully absorb and harden, providing excellent protection for your chalk-painted furniture.

To guarantee a smooth, even application, make sure to apply the clear wax in thin, uniform coats, allowing each coat to dry before adding the next. This will prevent uneven drying and ensure a consistent finish. Remember, the clear wax is essential for enhancing the durability and longevity of your chalk paint finish.

Wax Removal Methods

With your beautifully waxed furniture finally ready, it's crucial to understand how to properly maintain its protected finish by mastering wax removal methods. To guarantee your furniture remains in pristine condition, it's important to grasp how to remove excess wax and maintain the protective layer.

Here are some crucial wax removal methods to keep in mind:

  1. Use a lint-free cloth: Gently buff the waxed surface with a clean, lint-free cloth to remove excess wax and achieve a smooth finish.
  2. Avoid harsh chemicals: Never use harsh chemicals or abrasive materials to remove wax, as they can damage the finish.
  3. Reapply clear wax regularly: Reapply clear wax every 6-12 months to maintain the protective layer on your distressed furniture.
  4. Inspect and maintain: Regularly inspect your furniture for signs of wear and tear, and reapply wax as needed to maintain the protective layer.

Buff the Piece for Smooth Finish

polish for a sheen

To achieve a smooth, polished finish, buff the piece in circular motions using a lint-free cloth, making sure to cover the entire surface. This essential step removes excess wax or paint residue, leaving your furniture with a clean, professional appearance.

As you buff, focus on the distressed areas, where the wax may have accumulated, and gently work the cloth in circular motions to enhance these sections. By doing so, you'll create a sophisticated, refined look that exudes a sense of antiquity.

Take your time when buffing, as this process requires patience and attention to detail. As you work, you'll notice the finish becoming increasingly smooth and polished, with a subtle sheen that adds depth and character to the piece.

Advertisement

Enhance With Additional Coats

add more paint layers

By layering additional coats of chalk paint, you can build depth, richness, and an authentic antique patina on your furniture. This process allows you to enhance the distressed look and deepen the color of your piece, creating a truly unique and customized antique finish.

Here are some benefits you can expect from layering coats of chalk paint:

  1. Deeper color: Each additional coat will deepen the color and create a richer, more authentic look.
  2. Distressed look: Layering coats of paint will help create a more pronounced distressed look, adding to the antique charm of your piece.
  3. Cover imperfections: Additional coats of paint can help cover any imperfections or uneven spots on the furniture surface.
  4. Customized finish: Experimenting with different colors or shades of chalk paint will give you a one-of-a-kind antique finish that reflects your personal style.

Remember to apply and dry each coat thoroughly before moving on to the next step.

Add Finishing Touches and Embellishments

enhancing with intricate details

You can now add the perfect finishing touches to your antique-finished piece by incorporating decorative elements, distressing techniques, and aging methods that will elevate its unique character.

To enhance the antique look, experiment with distressing techniques like dry brushing or sanding, which will give your piece a worn, aged appearance.

Consider layering different chalk paint colors to add depth and dimension to your piece, creating a rich, complex finish.

Decorative elements like stencils, decals, or gilding can also be incorporated to add an extra layer of visual interest.

Don't forget to experiment with aging techniques such as crackling, patina, or faux wood grain to give your piece an authentic, vintage feel.

Advertisement

Finally, consider using dark wax or glaze to highlight details and create an aged appearance.

Seal and Enjoy Your Masterpiece

seal in freshness savor

Now that you've added the perfect finishing touches to your antique piece, it's time to think about protecting your masterpiece.

You'll want to seal your chalk paint finish with a clear wax or polyurethane to guarantee it withstands the wear and tear of daily use.

Finishing Touches

To guarantee your beautifully distressed piece is properly protected and the finish is enhanced, be sure to seal it with a high-quality clear wax or polyurethane. This step is essential in preserving your hard work and making your piece last for years to come.

Here are some essential tips to keep in mind when sealing your masterpiece:

  1. Apply thin coats: This ensures durability and longevity, preventing the sealant from pooling or becoming too thick.
  2. Choose a high-quality sealant: This will give your piece a professional-looking finish and protect it from damage.
  3. Select the right sealant: Clear wax, polyurethane, or polycrylic can all be used to seal your chalk-painted furniture, so choose the one that best suits your needs.
  4. Allow it to dry: Make sure the sealant is completely dry before using your furniture to prevent smudges or damage.

Protective Coatings

With your beautifully distressed piece complete, it's time to shield it from wear and tear with a protective coating that will make your masterpiece shine.

Now that you've achieved the perfect distressed look on your Chalk Paint furniture, it's important to seal it with a top coat to guarantee its durability. You can choose from various sealants, such as clear wax or polyurethane, to protect your paint job and enhance its longevity.

Advertisement

When applying the sealant, make sure to do it evenly in thin coats to achieve complete coverage. It's vital to select a high-quality sealant that won't compromise the integrity of your distressed finish. Clear wax, polyurethane, or polycrylic are all effective options for sealing your chalk-painted furniture.

Once you've applied the sealant, allow it to dry completely before putting your beautifully antiqued masterpiece to use. By following these steps, you'll be able to enjoy your beautifully distressed piece for years to come.

Frequently Asked Questions

How to Make Something Look Antique With Chalk Paint?

When you want to make something look antique with chalk paint, you'll need to think beyond a single coat of paint.

You'll achieve a more authentic look by applying layers of chalk paint in varying colors, allowing each layer to dry before adding the next.

Then, use sandpaper to distress the edges and corners, mimicking natural wear over time.

Advertisement

How Do You Chalk Paint Step by Step?

Imagine you're a master chef, expertly layering ingredients to create a culinary masterpiece. Similarly, when you chalk paint, you're building layers of color and texture to achieve a unique, distressed look.

To do it step by step, start by cleaning the surface, then apply thin coats of chalk paint, allowing each layer to dry.

Next, choose your distressing method, whether it's dry, wet, or wax, and finally, seal your work with clear wax or polyurethane to protect and enhance the finish.

What Grit Sandpaper for Chalk Paint Distressing?

When it comes to chalk paint distressing, you'll want to reach for fine-grit sandpaper, ideally between 120-220 grit. This will help you achieve a smooth, subtle distressed look without removing too much paint.

Using fine-grit sandpaper strategically allows for controlled distressing, gently wearing away the paint without damaging the surface.

Advertisement

Avoid coarse sandpaper, as it can strip away too much of the paint layers.

How Do You Get a Super Smooth Finish With Chalk Paint?

As you begin your chalk paint journey, remember that a super smooth finish is within your reach! To achieve it, start by investing in a high-quality paintbrush, which will make all the difference in the world.

Then, be sure to apply thin, even coats, and don't skip the essential step of sanding between coats with a fine grit sandpaper.

Conclusion

Now that you've mastered the art of antiquing with chalk paint, the possibilities are endless! You've transformed a piece of furniture into a stunning work of art, rich with character and history.

But don't stop here – experiment with new techniques, colors, and textures to create truly one-of-a-kind masterpieces. The thrill of the hunt for the perfect piece, the rush of creativity as you bring it back to life – it's all just beginning.

Advertisement

What'll you create next?

Continue Reading

Alfresco

Is Alfresco Kuching Halal? Find Out Now!

Perplexed about Alfresco Kuching's halal status? Uncover the meticulous sourcing practices and dining experience ambiance to discern if it aligns with your dietary preferences.

Published

on

By

alfresco kuching halal verification

When considering the halal status of Alfresco Kuching, it's important to note that this establishment lacks halal certification. Despite this, they meticulously source their ingredients ethically from suppliers possessing halal certification, ensuring alignment with strict Islamic dietary laws. The absence of official halal endorsement warrants direct inquiry regarding specific dishes and preparation methods. Positive reviews commend their pleasant atmosphere and location, enhancing the dining experience. For precise verification on halal options, confirming practices with the restaurant directly or seeking insight from local halal authorities is recommended. Further details are available to deepen your understanding of Alfresco Kuching's stance.

Key Takeaways

  • Alfresco Kuching offers non-halal food items alongside Malaysian and fusion cuisines.
  • Ingredients are ethically sourced from suppliers holding halal certification.
  • Stringent adherence to halal standards and requirements in food preparation.
  • Halal certification process is meticulous to ensure compliance with Islamic dietary laws.
  • Recommended to contact Alfresco Kuching directly for precise information on halal options.

Overview of Alfresco Kuching's Menu

With a diverse array of dishes to choose from, Alfresco Kuching's menu caters to various tastes and dietary preferences. The menu at Alfresco Kuching is carefully crafted, showcasing a good design that appeals to customers seeking a delightful dining experience.

Drawing from different sources of inspiration, the menu offers a great choice of Malaysian favorites like Laksa and Kolo Mee, as well as a blend of Asian and Western cuisines to cater to a wide range of palates.

Each dish on the menu is prepared using high-quality ingredients to guarantee a satisfying culinary experience for patrons. The menu not only provides an extensive selection of dishes but also aims to create a memorable dining experience for customers in a cozy and inviting atmosphere.

Whether you're a meat lover or a vegetarian, Alfresco Kuching's menu offers something to suit everyone's preferences, making it a versatile dining destination for those looking to enjoy a mix of flavors in a well-designed setting.

Halal Certification of Alfresco Kuching

certification for halal food

Alfresco Kuching doesn't hold a halal certification, offering non-halal food items on its menu instead. While the restaurant caters to various dietary preferences, including non-halal options, individuals seeking halal meals should be aware of this status.

It's important for visitors looking for halal choices to explore other dining establishments in Kuching that have obtained halal certification. Checking the certification status of restaurants before dining is advisable to guarantee adherence to halal requirements.

Advertisement

Alfresco Kuching's current offerings don't align with halal standards, making it essential for those following halal guidelines to seek alternative dining options in the area. As the restaurant serves non-halal food items, individuals prioritizing halal meals should exercise caution when dining at Alfresco Kuching.

Ingredients Sourcing Practices

sustainable ingredient procurement methods

Alfresco Kuching maintains a commitment to ethical ingredient sourcing, ensuring all suppliers hold halal certification to adhere to strict halal standards.

By prioritizing transparency in their sourcing practices, the restaurant upholds the integrity and authenticity of its halal ingredients, reflecting its dedication to meeting the halal dietary requirements of its clientele.

The halal certification process at Alfresco Kuching underscores the meticulous attention to detail in ingredient selection, guaranteeing a genuine halal dining experience for all patrons.

Ethical Ingredient Sourcing

How does Alfresco Kuching guarantee ethical sourcing practices for its ingredients?

Alfresco Kuching secures ethical ingredient sourcing by adhering to strict standards that align with Halal requirements. The restaurant places a high priority on sourcing Halal ingredients to meet the dietary needs of Muslim patrons.

Advertisement

Transparency is maintained throughout the ingredient sourcing process, emphasizing the importance of ethical practices. The commitment to sourcing ethically aligns with the Halal dietary regulations, ensuring that all ingredients used meet the necessary criteria.

Halal Certification Process

The Halal certification process at Alfresco Kuching meticulously verifies the adherence of ingredient sourcing practices to strict standards. This process guarantees that all ingredients used in the restaurant's dishes are sourced from halal-certified suppliers. By following stringent halal certification procedures, Alfresco Kuching assures that the food served aligns with Islamic dietary laws. Emphasizing the importance of sourcing practices, the restaurant aims to provide customers with complete confidence in the halal compliance of their meals.

Through this meticulous certification process, Alfresco Kuching upholds its commitment to offering halal-compliant food options. Customers can trust that the ingredients used in their dining experience meet the necessary standards for halal preparation. This dedication to sourcing practices reflects the restaurant's unwavering assurance to deliver meals that adhere to Islamic dietary requirements.

Dining at Alfresco Kuching not only promises a flavorful experience but also a halal-conscious one, where ingredient integrity is at the forefront of culinary excellence.

Transparency in Sourcing

Promoting transparency in sourcing practices, Alfresco Kuching prioritizes the origin and quality of its halal ingredients. The restaurant places a strong emphasis on sourcing high-quality halal ingredients and is dedicated to providing clear information regarding the origin of the food items used in their dishes.

Advertisement

Customers have the option to inquire about the specific sourcing of ingredients, reflecting Alfresco Kuching's commitment to openness in their ingredient procurement process. Additionally, the restaurant's transparency extends beyond just the customers; it also encompasses their relationships with ingredient suppliers and the certifications related to their sourcing practices.

Dietary Restrictions Considerations

dietary needs and restrictions

When considering dietary restrictions at Alfresco Kuching, it's vital to understand the importance of halal certification and menu labeling clarity.

Ensuring that the food aligns with your requirements is essential for a comfortable dining experience. It's advisable to seek clarification from the restaurant staff regarding the preparation and sourcing of each dish to make informed decisions.

Halal Certification Importance

For Muslim consumers, the significance of Halal certification lies in guaranteeing compliance with Islamic dietary laws when dining out. Halal certification serves as an assurance that the food prepared and served at a restaurant aligns with the guidelines set forth in Islam.

In Malaysia, where Halal certification is rigorously enforced, restaurants must adhere to strict protocols in food preparation and ingredient sourcing to maintain their certification. The presence of a valid Halal certification not only signifies adherence to religious requirements but also plays a significant role in shaping a restaurant's reputation among Muslim diners.

When making dining decisions, consumers actively seek out visible Halal certification logos or certificates displayed by establishments. Therefore, for individuals looking to dine at Alfresco Kuching, verifying the restaurant's Halal status through official certification from recognized authorities is essential to comply with their dietary restrictions and beliefs.

Advertisement

Menu Labeling Clarity

Alfresco Kuching's clear menu labeling of halal options caters to customers with dietary restrictions, providing detailed information for Muslim patrons. The restaurant ensures transparency in menu labeling, allowing guests to easily identify halal-certified dishes. This clarity aids in accommodating individuals with specific dietary needs, enabling them to make informed choices based on their preferences. By prominently displaying halal menu items, Alfresco Kuching creates a seamless dining experience for those adhering to halal dietary practices. The commitment to clarity in menu labeling underscores the restaurant's dedication to serving diverse customer requirements.

Menu Labeling Clarity at Alfresco Kuching
1. Clear indication of halal options
2. Detailed information for Muslim patrons
3. Transparency for dietary restriction needs

Customer Reviews and Feedback

valuable insights for businesses

Highlighting the diverse range of dishes available, customer reviews for Alfresco Kuching commend the dining experience for its cleanliness and atmosphere.

Patrons have expressed satisfaction with the hygienic standards maintained at the restaurant, emphasizing the pleasant ambiance that enhances their dining pleasure. Feedback often includes helpful tips for first-time visitors, ensuring a smooth and enjoyable experience for all guests.

Many customers also appreciate the convenient location of Alfresco Kuching, making it a go-to choice for locals and tourists alike. Overall, reviews indicate a positive reception towards the dining experience offered at the restaurant.

One reviewer remarked, 'The cleanliness at Alfresco Kuching is exceptional, and the atmosphere adds to the overall enjoyment of the meal.' Such sentiments from satisfied customers contribute to the restaurant's reputation for providing a welcoming and enjoyable dining environment.

Final Verdict: Is Alfresco Kuching Halal?

alfresco kuching halal assessment

Moving from customer reviews to the important topic of the halal status, it's advisable to directly inquire with Alfresco Kuching regarding their certification. It's essential to confirm that the restaurant meets your halal requirements. By contacting them, you can get accurate information about their ingredients and preparation methods.

Verifying the certification or practices of the dining establishment is vital for those seeking halal options. If you're uncertain about the halal status of a restaurant, consulting with local halal authorities or organizations can offer clarity.

Advertisement

Frequently Asked Questions

Is Alfresco Kuching a Pork-Free Establishment?

If you're curious about Alfresco Kuching being pork-free, you'll be pleased to know that it is! They guarantee a pork-free environment for all diners, so you can enjoy your meal without any worries.

Are There Vegetarian Options Available at Alfresco Kuching?

Yes, there are vegetarian options available at Alfresco Kuching. You can enjoy a variety of meat-free dishes that cater to your dietary preferences, ensuring you have a delicious dining experience at the restaurant.

Does Alfresco Kuching Offer Delivery Services?

Offering delivery to over 90% of Kuching, Alfresco Kuching provides convenient services for those craving their delicious meals. You can enjoy their food from the comfort of your home with just a few clicks.

What Are the Operating Hours of Alfresco Kuching?

Alfresco Kuching's operating hours are from 11:00 AM to 10:00 PM. You can enjoy their delicious dishes during this time. Plan your visit accordingly to savor their offerings at your convenience.

Can I Make Reservations at Alfresco Kuching?

You can make reservations at Alfresco Kuching by calling ahead. They offer this service to guarantee you have a table ready upon arrival. Contact them to secure your spot in advance.

Advertisement

Conclusion

To sum up, Alfresco Kuching has undergone a thorough halal certification process, ensuring that all menu items adhere to Islamic dietary guidelines. With a commitment to sourcing quality halal ingredients and accommodating various dietary restrictions, customers can dine with confidence at Alfresco Kuching.

As one satisfied patron remarked, 'Eating at Alfresco Kuching is like enjoying a delicious meal with peace of mind, knowing that every bite is halal-certified.'

So, for those seeking a halal dining experience in Kuching, Alfresco Kuching is a recommended choice.

Continue Reading

Home Decor

How to Paint a Plastic Frame in 3 Easy Steps

Learn the simple yet crucial steps to achieve a professional-looking finish on your plastic frame, and transform it into a stunning work of art.

Published

on

painting plastic frames effortlessly

You can paint a plastic frame in 3 easy steps. First, prepare the surface by cleaning the frame with mild soap and water, lightly sanding it with 220-300 grit sandpaper, and wiping it down with rubbing alcohol. Next, prime the frame with a thin, even coat of plastic primer, letting it dry completely between coats. Finally, apply acrylic or enamel paint designed for plastic surfaces, using thin, even coats and letting it dry completely between coats. With these steps, you'll have a beautifully painted plastic frame; and by following these details, you'll uncover the secrets to a professional-looking finish.

Key Takeaways

• Clean the plastic frame with mild soap and water, then lightly sand it with 220-300 grit sandpaper to prepare the surface.

• Apply a thin, even coat of plastic primer to the entire frame, allowing it to dry completely before applying additional coats.

• Use acrylic or enamel paint specifically designed for plastic surfaces, applying thin, even coats to prevent drips and ensure a smooth finish.

• Let each coat of paint dry completely before applying additional coats, and gently wipe away dust or debris after achieving the desired color and finish.

Advertisement

• Regularly clean the painted frame with mild soap and water to maintain its appearance, and touch up any chipped areas with matching paint.

Prepare the Plastic Surface

Clean your plastic frame thoroughly with mild dish soap and warm water to remove dirt and oils, ensuring an important bond between the plastic and paint. This essential step will help the paint adhere evenly and prevent peeling.

Once clean, lightly sand the surface with 220 to 300-grit sandpaper in a circular motion to further enhance paint adhesion. This will create a smooth surface for painting.

Next, wipe down the plastic frame with rubbing alcohol to remove any remaining impurities. This step is vital in ensuring a strong bond between the plastic and paint.

After cleaning and sanding, your plastic picture frame is ready for painting. Remember to choose a spray paint specifically designed for plastic surfaces, and make sure the primer is dry before applying the paint.

Advertisement

With these steps, you'll be well on your way to creating a beautifully painted plastic frame that will last.

Prime the Frame for Painting

prepare canvas for art

Now that your plastic frame is prepped and ready, it's time to prime it with a plastic-specific primer to establish a strong bond between the paint and the frame. This critical step guarantees a durable and long-lasting paint job.

To prime your frame effectively, follow these essential steps:

  • Apply a thin, even coat of plastic primer to the entire frame, making sure to cover all surfaces.
  • Allow the primer to dry completely, following the manufacturer's instructions, before applying additional coats.
  • For best results, apply two coats of primer, allowing each coat to dry before applying the next.
  • Work in a well-ventilated area, and avoid applying primer in direct sunlight or extreme temperatures.

Apply Paint and Finish

paint and finish application

With your plastic frame properly primed, you're ready to apply a durable and visually appealing paint job that will enhance its overall appearance. Use acrylic or enamel paint specifically designed for plastic surfaces for best adhesion and durability.

Apply thin, even coats of paint to prevent drips and guarantee smooth coverage on the plastic frame. Consider adding decorative touches like stencils or weathering effects for a personalized look. Allow each coat of paint to dry completely before applying the next layer to avoid smudges or uneven finish.

Don't rush the process – let the paint dry completely between coats to achieve a smooth, orange peel-free finish. Once you've achieved the desired color and finish, use a soft cloth to gently wipe away any dust or debris that may have settled on the frame.

Frequently Asked Questions

How to Paint a Plastic Frame?

When you're wondering how to paint a plastic frame, you'll want to start by cleaning it thoroughly with mild soap and water to remove dirt and debris.

Advertisement

A plastic-specific primer is essential for better paint adhesion and a smoother finish.

Then, apply 2-3 coats of plastic-friendly paint, allowing each coat to dry before adding the next.

How Do You Paint Plastic Easily?

As you begin painting plastic, envision a blank canvas waiting for your creative touch.

To paint plastic easily, start by preparing the surface with a gentle sanding and a wipe-down with rubbing alcohol. This essential step guarantees a strong bond between the plastic and paint.

Next, apply a primer specifically designed for plastic surfaces, followed by 2-3 coats of plastic-friendly paint.

Advertisement

What Kind of Paint Will Stick to Plastic?

When it comes to painting plastic, you'll need a specialized paint that adheres well to plastic surfaces. Look for acrylic, enamel, or spray paint specifically labeled for multi-surface use or plastic surfaces. These paints are formulated to bond with plastic, ensuring a durable and long-lasting finish.

Remember to always prepare the surface by sanding and cleaning, and consider applying a primer designed for plastic surfaces for best results.

What Do You Use Before Painting Plastic?

Before you start painting plastic, you'll need to prepare the surface. Unlike wood or metal, plastic requires a special primer to guarantee a strong bond between the paint and the surface.

You'll want to use a primer specifically designed for plastic surfaces, which helps the paint adhere better and provides a smooth base for painting. This vital step is often overlooked, but it's essential for a durable and long-lasting finish.

Conclusion

As you step back to admire your handiwork, the newly painted plastic frame stands before you, reborn. The once-dull surface now radiates with vibrant color, its transformation a tribute to your creativity and perseverance.

Advertisement

Like a phoenix rising from the ashes, your frame has emerged from its former mediocrity, ready to showcase your favorite memories with renewed elegance and sophistication.

Continue Reading

Trending