
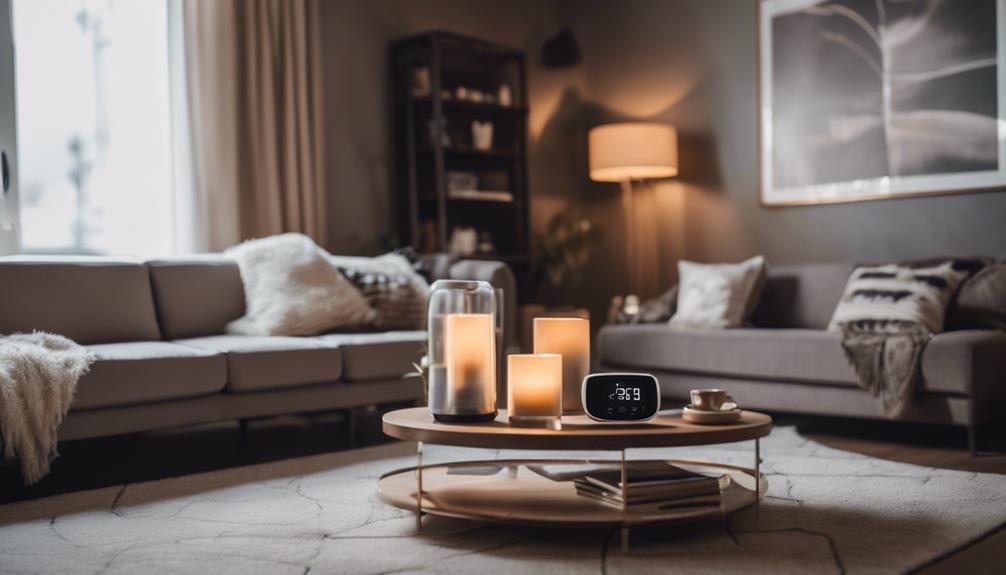
Home Decor
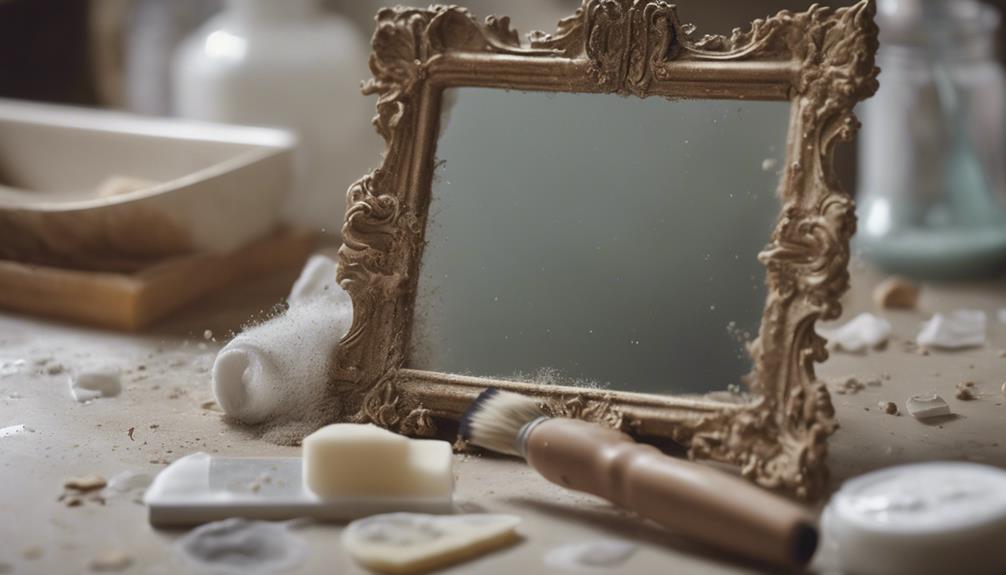
Painting the Mirror Frame: 10 Steps
Necessitating a fresh new look, discover the 10 essential steps to transform your mirror's frame with a stunning, professionally-painted finish.

You're about to transform your mirror's frame with a fresh coat of paint, and these 10 steps will guide you through the process. Start by preparing the frame, cleaning it thoroughly, and sanding off any old paint or debris. Safeguard your mirror with painter's tape or remove it to prevent damage. Next, apply primer to guarantee a smooth, durable finish. Paint the frame evenly, using high-quality brushes or rollers, and remove excess paint carefully. Follow up with techniques for distressing and aging, then apply a second coat and seal the finished frame with wax or poly topcoat. As you continue, you'll uncover the secrets to achieving a beautifully transformed look that reflects your personal style.
Key Takeaways
• Clean and sand the mirror frame to ensure a smooth surface for painting and remove old paint or debris.
• Apply primer to the frame for improved adhesion and durability, choosing the right primer for the frame material.
• Paint the frame evenly with smooth, consistent strokes using a high-quality paintbrush or roller for even coverage.
• Distress the frame using techniques like edge wear, frame edge distressing, and roughening the edges for a vintage look.

• Seal the finished frame with wax or poly topcoat for protection and reattach hardware securely for hanging the mirror.
Prepare the Mirror Frame
Before you begin painting, how clean is your mirror frame, and is it free of any debris that might affect the painting process? It's important to prepare the mirror frame before applying paint, guaranteeing a smooth and successful painting experience.
Clean the mirror frame thoroughly to remove any dust or debris that may impact the painting process. This step is vital, as any remaining dirt or dust can cause the paint to adhere unevenly or even flake off prematurely. If the old paint is chipping, consider sanding the frame to create a smooth surface for the new paint to adhere to.
Additionally, remove the mirror from the frame if possible, or use painters tape and paper to protect it from accidental paint spills or splatters. By taking the time to properly prepare the mirror frame, you'll ensure a professional-looking finish that complements your newly painted frame.
Clean the Frame Thoroughly
Clean the mirror frame thoroughly with a general cleaner to remove any dust and dirt buildup that may impact paint adhesion. This vital step guarantees a strong bond between the frame and the paint, resulting in a durable and long-lasting finish.
| Cleaning Steps | Importance |
|---|---|
| Use a general cleaner | Removes dust and dirt buildup |
| Confirm the frame is dry | Prevents paint adhesion issues |
| Avoid using painter's tape on the mirror | Prevents damage or residue |
| Use a tack cloth before painting | Removes sanding dust for a smooth finish |
| Scuff sand the frame (next step) | Creates a rough surface for paint adhesion |
Scuff Sand the Frame

With your frame sparkling clean, it's time to roughen up the surface with some scuff sanding to make sure the paint really grabs on. Scuff sanding is an essential step in preparing your mirror frame for painting, as it helps the paint adhere better to the surface. To do this, you'll need to use 220-grit sandpaper to gently roughen up the surface of the frame.
Here are some key benefits of scuff sanding:
- Improved paint adhesion: Scuff sanding creates a surface for the paint to bond to, ensuring a strong and durable finish.
- Removes imperfections: Scuff sanding helps to remove any existing finish or imperfections on the frame, leaving a smooth surface for painting.
- Professional finish: Proper scuff sanding is essential for a professional and long-lasting paint finish on your mirror frame.
- Ensures a smooth paint job: By cleaning the frame before sanding, you'll get a smooth and even surface for painting.
Apply Primer to the Frame
As you get ready to apply primer to the frame, you'll need to make sure you have the right essentials, including a high-quality primer and a suitable brush. Before you start, it's important to check the frame's surface readiness, ensuring it's smooth and even.
Primer Preparation Essentials
You'll need to prime the entire mirror frame to guarantee a smooth, even surface for painting. This essential step ensures a durable and long-lasting finish. Applying primer helps to prevent the original color of the frame from bleeding through the new paint, and it also promotes better adhesion and longer-lasting results.
Here are the key primer preparation essentials to keep in mind:
- Choose the right primer: Select a quality primer suitable for the type of material your mirror frame is made of, such as wood or metal.
- Ensure a smooth surface: Primer helps create a smooth surface for painting, which is important for a professional-looking finish.
- Promote adhesion: Primer ensures better adhesion of the paint to the frame, resulting in a more durable finish.
- Allow it to dry: Let the primer dry completely before applying the paint to achieve the best results.
Frame Surface Readiness Check
What's the current state of your mirror frame – are there any imperfections or damage that need attention before you apply primer? Take a closer look and inspect the frame surface carefully, as any flaws can affect the adhesion of the primer and, ultimately, the painting process.
If you notice any rough spots or damage, lightly sand the frame to create a smooth surface for the primer to adhere to. This step is vital in ensuring a strong bond between the primer and the frame, which is essential for a durable and long-lasting finish.
Remember, a well-prepared frame surface is key to achieving a professional-looking result when painting a mirror frame. By taking the time to inspect and prepare the frame, you'll be rewarded with a beautifully finished mirror that will be the focal point of any room.
Now that your frame is ready, it's time to apply the primer, a critical step in the process that will guarantee a flawless finish.
Primer Application Techniques
With your frame surface now ready, pick up a high-quality primer and a paintbrush, and start applying the primer to the frame, working in sections to maintain even coverage. When applying primer, it's crucial to follow the direction of the wood grain to guarantee a smooth finish. This is particularly important when painting a light color over a dark or stained frame.
Here are some key benefits to keep in mind when applying primer:
- Improved adhesion: Primer helps the paint adhere better to the frame, providing a more durable finish.
- Smooth surface: Primer creates a smooth surface for painting, reducing the risk of unevenness and rough patches.
- Enhanced color: Primer ensures that the paint color appears vibrant and true, without being affected by the underlying frame color.
- Durability: Primer adds an extra layer of protection to the frame, making it more resistant to wear and tear.
Remember to allow the primer to dry completely before applying the first coat of paint. By following these primer application techniques, you'll be well on your way to a beautifully painted mirror frame.
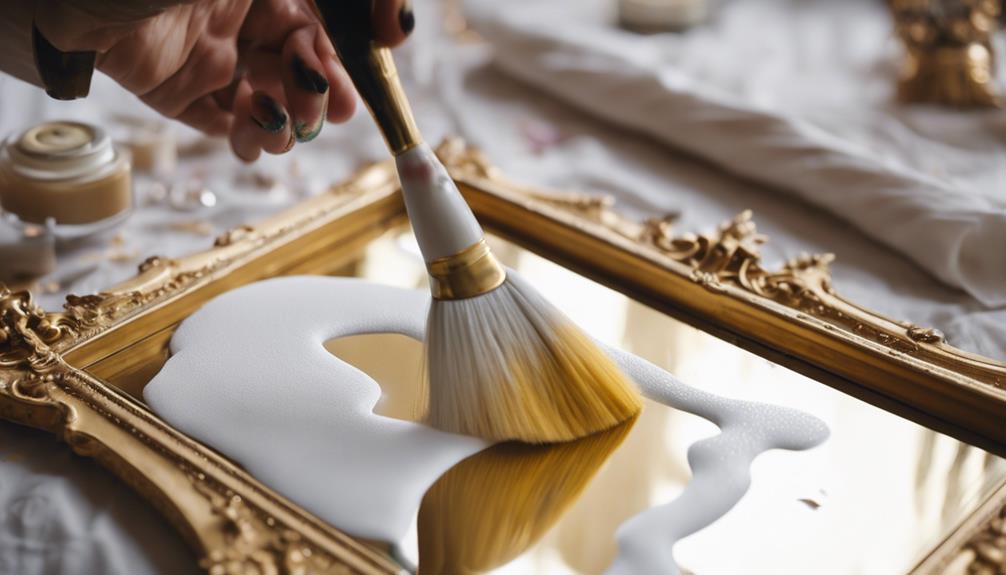
Paint the Frame Evenly

Now that your frame is prepared, apply a coat of paint in smooth, consistent strokes to guarantee uniform coverage. As you paint a mirror frame, remember to maintain even coverage by using a high-quality paintbrush or roller. This will secure a professional finish and avoid any uneven areas on the frame surface.
Take your time, and work in sections to prevent drips or pooling of paint. Hold the brush or roller at a consistent angle, and apply gentle to moderate pressure, depending on the type of paint you're using. Check the frame from different angles to secure even coverage and a uniform finish.
If you notice any missed spots, don't hesitate to touch them up. Remember, the goal is to achieve a smooth, even coat that showcases your frame's beauty. By following these steps, you'll be well on your way to a beautifully painted mirror frame that adds a touch of elegance to any room.
Remove Excess Paint

After applying a smooth, even coat of paint to your mirror frame, focus on removing any excess paint that may have gotten onto the mirror itself. This step is important to make sure your mirror frame looks professional and polished.
To remove excess paint, follow these steps:
- Scrape carefully: Use a razor blade to scrape off excess paint from the mirror, taking care not to scratch the surface.
- Wipe clean: Use a clean cloth to wipe away any remaining paint residue from the mirror.
- Glass cleaner: Consider using a glass cleaner to make sure the mirror is completely free of paint.
- Take your time: Remove paint slowly and deliberately to avoid damaging the mirror.
Remember to take your time and be gentle when removing excess paint to avoid scratching the mirror. By following these steps, you'll be able to remove excess paint and achieve a beautiful, professional-looking mirror frame.
Distress the Frame Edges

When distressing the frame edges, you'll want to explore the various techniques for achieving the perfect level of wear. You'll experiment with different edge wear techniques, such as roughening the edges or using sandpaper to gently rub away the surface, to create a unique, distressed look.
Edge Wear Techniques
Sand lightly into the edges of your mirror frame with sandpaper to create a beautifully distressed look that's reminiscent of years of gentle wear. This technique, known as edge wear, adds character to your frame and gives it an old, vintage feel. To achieve this look, focus on the corners, edges, and areas that would naturally wear over time, such as the points where the frame's molding meets.
Here are some tips to keep in mind when distressing your frame's edges:
- Use a gentle hand when distressing to control the amount of wear and maintain the frame's integrity.
- Experiment with different sandpaper grits to achieve varying levels of distressing for a customized finish.
- Focus on areas that would naturally wear over time for a realistic effect.
- Wipe away excess dust from distressing before sealing the frame to preserve the aged appearance.
Frame Edge Distressing
To create a truly unique, distressed look, you'll want to focus on distressing the edges of your mirror frame. Use sandpaper or a sanding block to wear down the wood in areas that would naturally show signs of aging. This technique adds a vintage or rustic touch to your mirror frame, giving it a one-of-a-kind appearance.
When distressing the frame edges, use gentle strokes to wear down the wood, focusing on areas that would naturally experience wear and tear over time. By doing so, you'll create a shabby chic or weathered appearance that adds character to your mirror frame. Experiment with different levels of distressing to achieve the desired aesthetic.
Roughening the Edges
By focusing on the frame's edges, you can strategically roughen them to create a naturally weathered appearance that adds character to your mirror frame. This process, known as distressing, involves lightly sanding or scraping the edges to create a worn and aged look. To achieve this, you can use sandpaper with a higher grit, such as 220-grit, to effectively distress the edges.
Here are some key considerations to keep in mind when roughening the edges:
- Strategic distressing: Focus on corners and raised areas to create a natural weathered appearance.
- Even distressing: Take care to distress the edges evenly to avoid an uneven look.
- Vintage charm: Distressing can add a vintage or rustic charm to your mirror frame.
- Harmonizing with the style: Make sure that the distressing complements the overall style of the mirror frame.
Apply a Second Coat

You'll likely need to apply a second coat of paint to guarantee a flawless, professional-looking finish on your mirror frame. This additional layer ensures a uniform finish, filling in any areas that might've been missed during the first coat.
As you prepare to apply the second coat, make sure the first coat is completely dry to prevent smudging or uneven application. This patience will pay off, as the second coat provides a more vital and long-lasting finish on your mirror frame.
Take your time, and allow sufficient drying time between coats – it's crucial to achieve a professional-looking result. By doing so, you'll be rewarded with a beautifully painted mirror frame that's sure to impress.
Seal the Finished Frame

With your beautifully painted mirror frame now complete, it's time to add a protective seal to guarantee its beauty lasts for years to come. This essential step safeguards your hard work doesn't go to waste, and your frame remains vibrant and stunning.
To seal the finished frame, you'll need to choose between a wax or poly topcoat. Here are some key benefits to ponder:
- Protection: Sealing your frame shields the paint from wear and tear, ensuring it remains vibrant and stunning.
- Finish options: Wax provides a matte finish, enhancing the vintage look of your frame, while poly topcoat offers a more durable and glossy finish.
- Easy application: Apply your chosen sealant evenly over the painted frame for a professional and long-lasting result.
- Long-term benefits: Sealing your frame guarantees its beauty will last for years to come, making it a worthwhile investment of your time and effort.
Reattach Hardware

Now that your beautifully painted frame is sealed, it's time to reattach the original hooks and hardware to hang your mirror securely.
To do this, gather the original hooks and hardware that you removed from the mirror frame before painting. Using appropriate tools, such as a screwdriver, reattach the hardware securely, ensuring that the hooks are aligned properly for hanging the mirror.
Double-check the stability of the hardware to support the weight of the mirror. You don't want your hard work to go to waste if the hardware fails.
Confirm that all hardware is firmly attached before hanging the mirror back on the wall. Make sure everything is tightened properly to avoid any accidents. By reattaching the hardware correctly, you'll be able to hang your mirror with confidence, admiring your beautifully painted frame.
With the hardware securely in place, you can now hang your mirror, stepping back to appreciate the final result of your hard work.
Frequently Asked Questions
How to Paint the Frame of a Mirror?
When you decide to paint the frame of a mirror, start by cleaning it thoroughly to remove dust and debris.
Next, use painters tape to protect the mirror's surface from paint splatter.
Then, apply a primer coat to guarantee better paint adhesion and coverage.
With a quality paint brush, apply even coats of paint, allowing each coat to dry properly.
You can also add decorative elements or distressing techniques for a unique finish.
How to Upcycle a Mirror Frame?
Like a blank canvas, your old mirror frame awaits transformation.
To upcycle it, start by cleaning and prepping the surface, removing any dirt or grime.
Next, choose a paint that fits your desired look – chalk paint for vintage, spray paint for modern.
Apply multiple coats for full coverage, protecting the mirror with petroleum jelly or tape.
How to Chalk Paint a Metal Mirror Frame?
When you decide to chalk paint a metal mirror frame, remember to clean and dry the surface first for better paint adhesion.
Next, grab a round brush and apply the chalk paint evenly, taking advantage of its quick-drying properties.
If you're going for a shabby chic look, lightly sand the frame after painting to distress it.
With these simple steps, you'll achieve a beautifully updated mirror frame with a unique, vintage finish.
How to Decorate a Mirror Frame?
You're probably aware that 75% of homeowners consider decorative mirrors an essential element in interior design.
When it comes to decorating a mirror frame, you're spoiled for choice. Consider adding a vintage touch with chalk paint or experimenting with bold colors to match your room's aesthetic.
You can take it up a notch by applying decorative transfers or embellishments to add texture and visual interest.
Conclusion
With your newly painted mirror frame, you've transformed a dull, lackluster piece into a stunning work of art that's ready to hang proudly in your home.
Like a phoenix rising from the ashes, your once-bland frame now radiates a fresh, vibrant energy, waiting to be admired.
By following these 10 steps, you've successfully given your mirror frame a brilliant makeover, and it's now ready to shine in all its glory.

Vivienne – Your Content Companion Vivienne is your content companion, curating valuable tips, advice, and inspiration to guide you on your home decor journey. From insightful blog posts to informative product descriptions, she’s here to empower you with the knowledge you need to create your dream space.

Home Decor
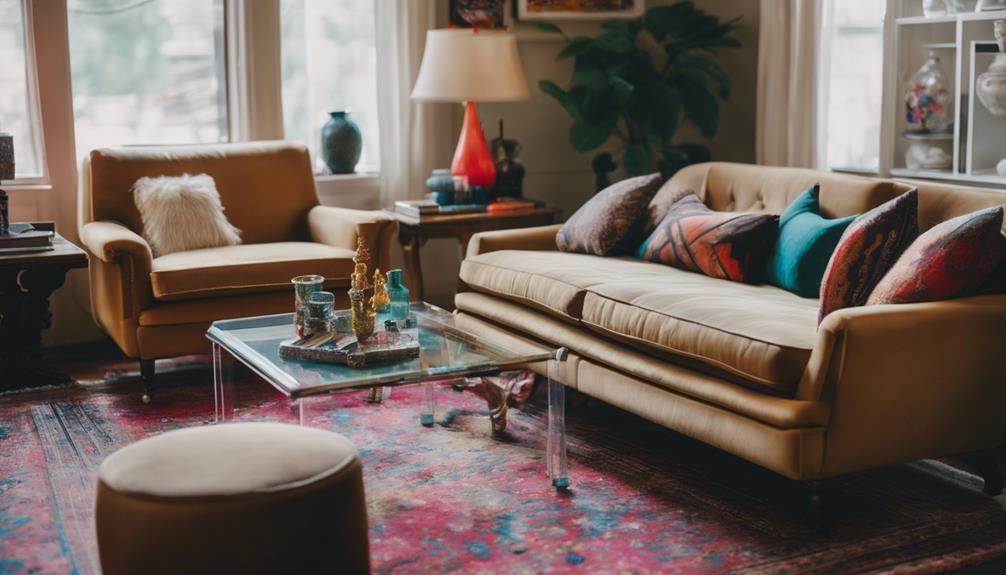
The Secret to Blending Modern and Traditional Decor Perfectly – Discover How!
Harness the art of blending modern and traditional decor seamlessly—uncover the secrets to achieving a harmonious and inviting space that captivates!

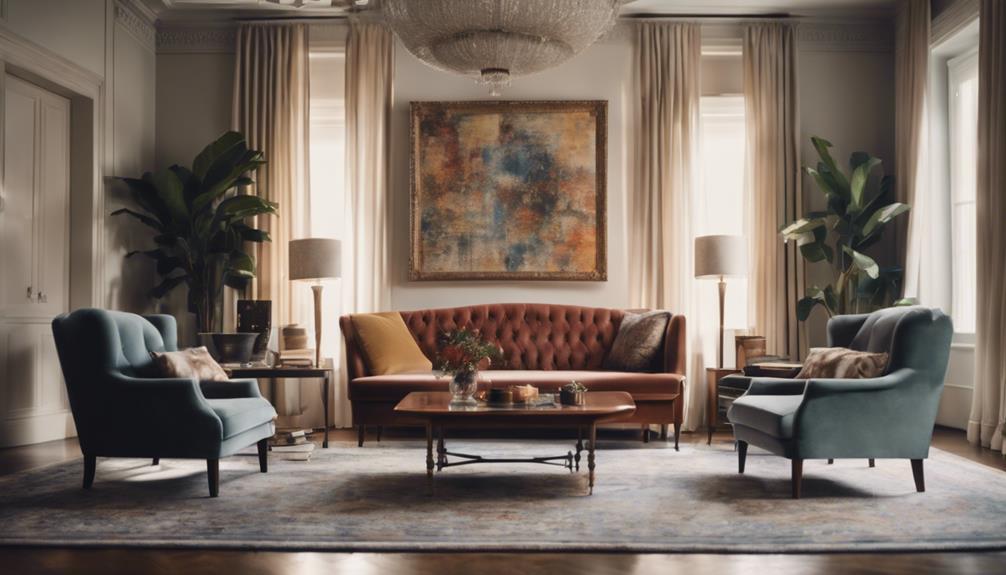
The secret to blending modern and traditional decor lies in understanding their distinct styles and finding harmony between them. Begin by integrating complementary pieces; think modern coffee tables with traditional sofas. Aim for an 80/20 balance, allowing one style to dominate while adding touches of the other. Next, establish a cohesive color palette to unite differing elements and mix textures to enhance visual interest. Statement pieces can act as focal points, creating depth in your space. With these strategies, you can craft an inviting atmosphere that showcases both styles beautifully, and the journey doesn't end here.
Key Takeaways
- Aim for an 80% dominant style and 20% elements from the other to achieve a balanced and harmonious decor.
- Create a cohesive color palette that resonates with both modern and traditional styles to enhance visual appeal.
- Mix textures, such as pairing sleek metals with rustic woods, to add depth and character to your space.
- Incorporate statement pieces, like oversized art or bold sculptures, to serve as focal points and unify diverse styles.
Understanding Furniture Styles
To create a harmonious space, you need to grasp the differences between modern, contemporary, and traditional furniture styles.
Modern furniture, originating from the mid-20th century, emphasizes clean lines and functional design. It often features materials like metal and glass, showcasing simplicity and minimalism.
In contrast, traditional furniture encompasses historical styles such as Chippendale and Victorian, characterized by ornate details and craftsmanship. These pieces bring a sense of warmth and elegance, often with rich woods and intricate carvings.
Now, let's clarify adaptive furniture. While many mistakenly see it as a distinct style, it actually blends modern and traditional elements. This style offers a balanced aesthetic, allowing you to incorporate both sleek designs and classic touches in your decor.
Recognizing these distinctions is vital for your design journey.
Techniques for Successful Mixing
To blend modern and traditional decor effectively, focus on selecting complementary pieces that enhance each style.
Aim for aesthetic balance by ensuring 80% of your space reflects your dominant style, while the remaining 20% introduces elements from the other.
This thoughtful approach creates a cohesive and visually appealing environment.
Complementary Piece Selection
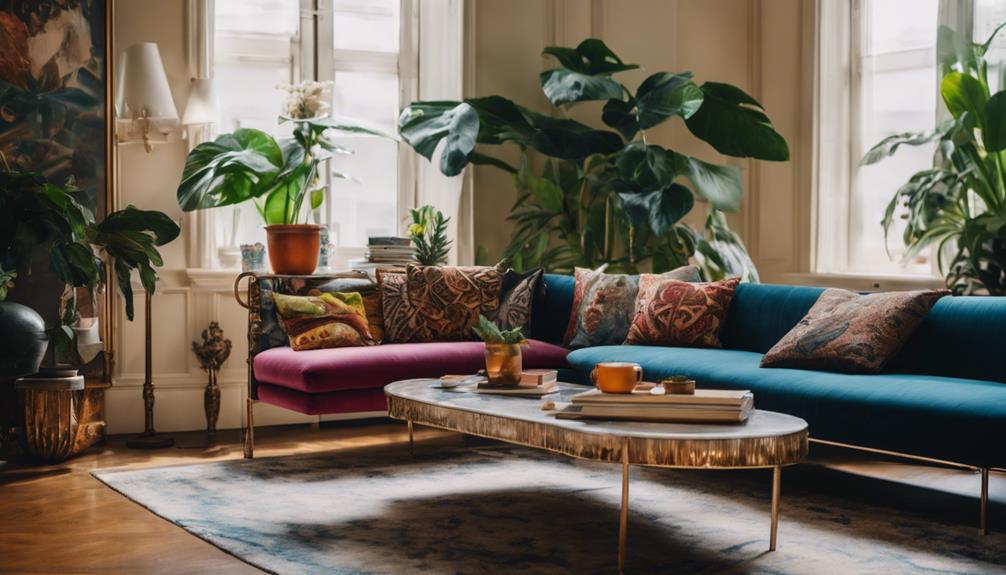
Selecting complementary pieces can transform your space by effortlessly blending modern and traditional decor elements. Start with a modern coffee table that enhances your traditional sofas; it creates a stylish focal point without clashing.
Incorporating contemporary accent chairs alongside traditional wooden furniture adds a modern flair while keeping visual interest high. These combinations seamlessly integrate different styles, making your space feel cohesive.
Consider adding a modern side table to serve as a practical and stylish addition to your traditional living room. This piece acts as a bridge between the two design approaches, enhancing the overall aesthetic.
Additionally, a patterned rug can act as a unifying element, tying together both modern and traditional elements for a cohesive backdrop.
When selecting these complementary pieces, focus on a color palette that resonates with both modern and traditional shades. This approach guarantees the pieces you choose harmonize well, creating a balanced and inviting atmosphere.
Achieving Aesthetic Balance
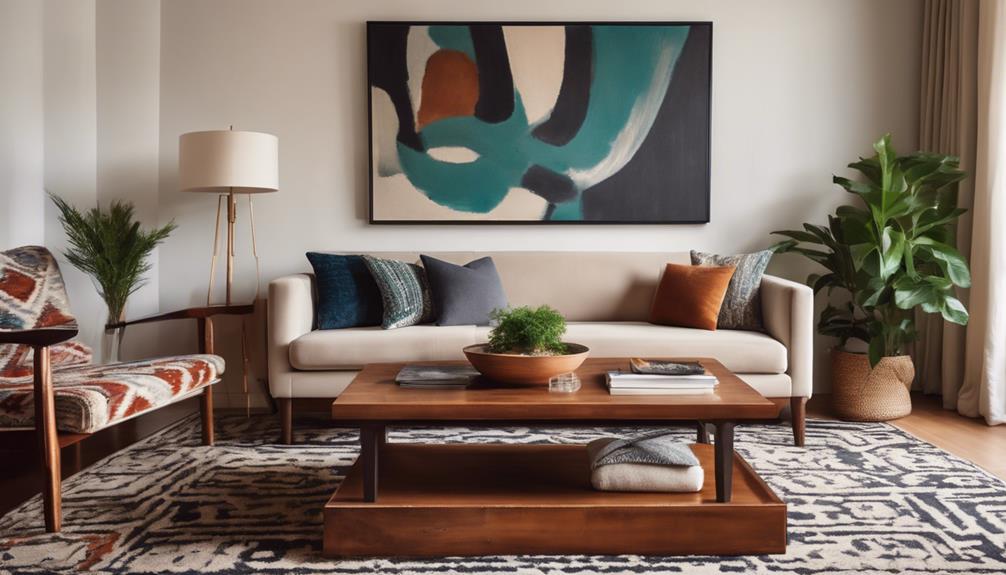
Balancing modern and traditional decor styles involves strategic choices that enhance visual harmony throughout your space. To achieve aesthetic balance, consider pairing a modern coffee table with traditional pieces like a classic sofa. This combination creates a focal point that draws the eye while maintaining a cohesive look.
Utilizing a unified color palette is vital as it ties together diverse furniture styles, preventing excessive matchiness. Choose colors that complement both modern and traditional elements, creating a seamless flow.
Mixing textures is another effective technique; for instance, combine sleek metal accents with distressed wood to enrich visual interest and bridge the gap between styles.
Distributing modern items evenly within your traditional setting is key. By placing a few contemporary decor pieces throughout the room, you can guarantee no single style dominates the space.
Finally, incorporate statement pieces, such as oversized art or bold decorative items, to elevate your design. These focal points can harmonize the various styles, resulting in a beautifully balanced environment.
Embrace these techniques, and you'll create a space that celebrates both modern and traditional aesthetics effortlessly.
Essential Elements for Blending
To successfully blend modern and traditional decor, focus on creating a harmonious color palette that ties everything together.
You can enhance the design by mixing textures, like pairing sleek metal with rustic wood, which adds depth and interest.
Color Palette Harmony
A cohesive color palette is essential for merging modern and traditional decor, guaranteeing your space feels harmonious and inviting.
Start with a neutral base, which can serve as a versatile backdrop for both styles. This way, you allow bolder accent colors to pop, adding personality without overwhelming your traditional home's charm.
Incorporate a mix of warm and cool tones to enhance the eclectic feel. This balance guarantees that modern elements don't clash with traditional pieces, but instead, complement each other beautifully.
Consider using color blocking techniques, as these can create defined spaces and add visual interest, highlighting the contrast between the two styles.
Consistency in your color choices across furniture, decor, and accessories reinforces a cohesive look.
When you select a unified color palette, the unique characteristics of both modern and traditional elements can shine through, making your space feel thoughtfully curated.
Textural Contrast Techniques
Incorporating diverse textures, like sleek metal against distressed wood, instantly elevates your decor by creating visual interest and enhancing the overall aesthetic.
Mixing textures is essential when blending traditional and modern styles, as it adds depth and character to your space. Consider pairing a plush velvet throw with a contemporary leather sofa; this textural contrast creates a striking focal point that draws the eye and invites comfort.
To further enrich your design, distribute vintage items made from natural materials throughout the room. These pieces provide tactile contrast, balancing the sleekness of modern elements with the warmth of traditional ones.
Don't overlook the importance of soft fabrics alongside hard surfaces—this combination fosters an inviting atmosphere that feels both cozy and sophisticated.
Shopping for Unique Pieces
Finding unique pieces for your decor can transform your space into a personal sanctuary that beautifully blends modern and traditional styles.
When shopping for unique pieces, consider exploring Facebook Marketplace and local online groups. You'll often discover vintage and contemporary items from local sellers at affordable prices. Flea markets are another treasure trove, offering curated selections of older pieces that can add character and history to your design.
Don't overlook junk shops and charity shops; they can yield unexpected finds that fit perfectly into your eclectic mix. Regular visits may lead to those one-of-a-kind items you didn't know you needed. Platforms like Freegle can also help you find free items nearby, allowing you to incorporate unique pieces into your home without breaking the bank.
Lastly, keep an eye out for street finds. Discarded furniture or decor can offer unique opportunities for creative repurposing.
Creating Impactful Statement Items
Oversized statement pieces like large abstract paintings or bold sculptures instantly draw the eye, transforming your space into a mesmerizing focal point. When you choose impactful items, consider how they can blend different styles. For instance, a vibrant area rug can add a splash of color, creating a striking contrast against more subdued decor.
Incorporating unique pieces, such as a vintage armoire or a sleek coffee table, elevates your room's aesthetic while harmonizing traditional and contemporary elements. You can pair an antique dresser with a minimalist mirror to introduce elegance and a dynamic interplay between old and new.
Ensure that your statement items complement the overall design by sticking to a consistent color palette or shared materials. This cohesion helps maintain a harmonious look, allowing each piece to shine without clashing.
Practical Tips for Integration
To successfully integrate modern and traditional decor, start by establishing a balanced foundation that aligns with your dominant style, using an 80/20 ratio to guide your choices. This approach helps you create a cohesive interior design in your room.
Here are three practical tips for integration:
- Mix Textures: Incorporate materials like metal and distressed wood. This combination adds depth and visual interest to your space, bridging the gap between modern and traditional elements.
- Choose a Unifying Color Palette: Select colors that harmonize with both styles. A well-thought-out palette guarantees that even contrasting pieces feel cohesive, enhancing the overall aesthetic of the room.
- Distribute Vintage Items Evenly: Spread your vintage decor throughout the space to maintain balance. This prevents one area from feeling overwhelmed by a single style.
Frequently Asked Questions
How to Blend Traditional and Modern Decor?
To blend traditional and modern decor, start with a dominant style, mix textures, and maintain a consistent color palette. Incorporate essential pieces first, then finish with art and plants for warmth and personality.
How Do You Transition From Traditional to Modern Decor?
To shift from traditional to modern decor, start with a strong traditional base. Gradually add modern accents, use complementary pieces, and establish a unifying color palette for a seamless, balanced aesthetic that feels intentional.
How to Mix Traditional and Modern Art?
To mix traditional and modern art, incorporate a cohesive color palette, choose oversized modern pieces as focal points, and display traditional works in sleek frames or unconventional arrangements to create a balanced, visually appealing space.
How to Mix Old and New Interior Design?
Think of your space as a symphony; let modern and traditional elements dance together. Embrace an 80/20 balance, weave cohesive colors, and sprinkle in statement pieces to create harmony that sings with character and depth.
Conclusion
You might worry that blending modern and traditional decor will look chaotic or forced, but it doesn't have to!
By carefully selecting pieces that complement each other and following the techniques we've discussed, you can create a harmonious space that reflects your unique style.
Embrace the beauty of contrasts and let your personality shine through.
Remember, your home should tell your story—mixing styles is just another way to showcase who you are and what you love!

Sawyer – Your Storyteller Sawyer is your storyteller, sharing engaging narratives and insights to connect you with our brand and inspire your home projects. With his understanding of trends and passion for sharing stories, he keeps you informed and inspired every step of the way.
Home Decor
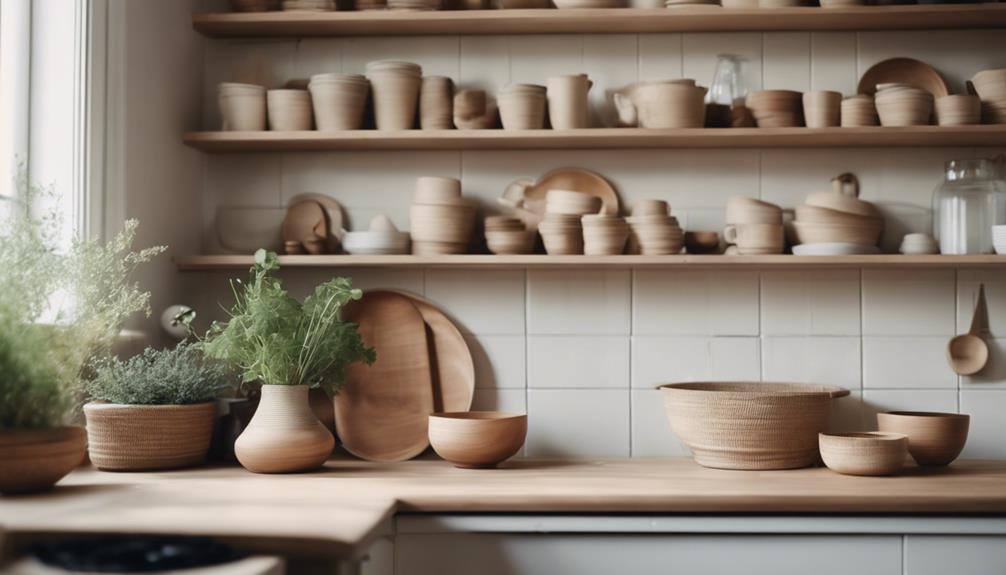
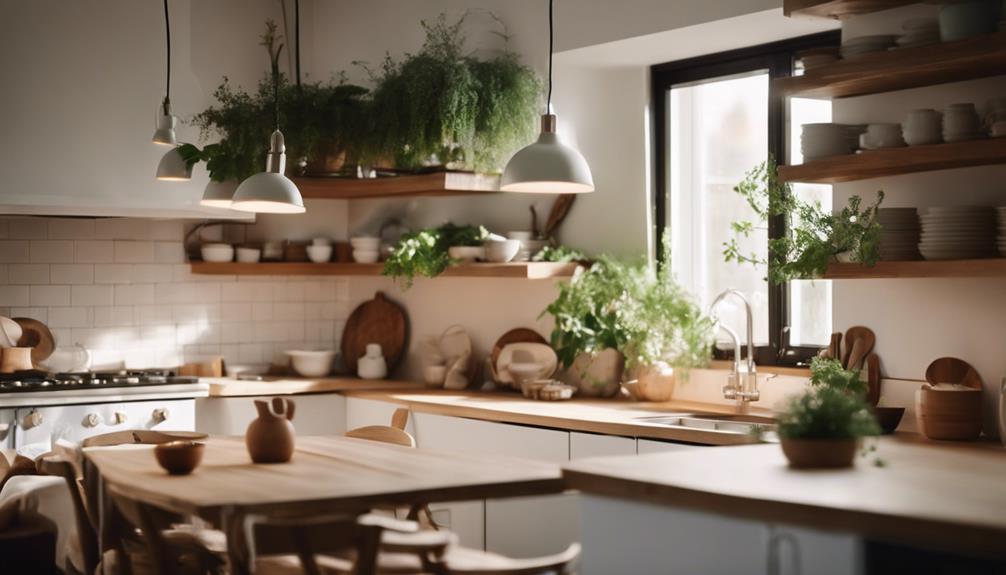
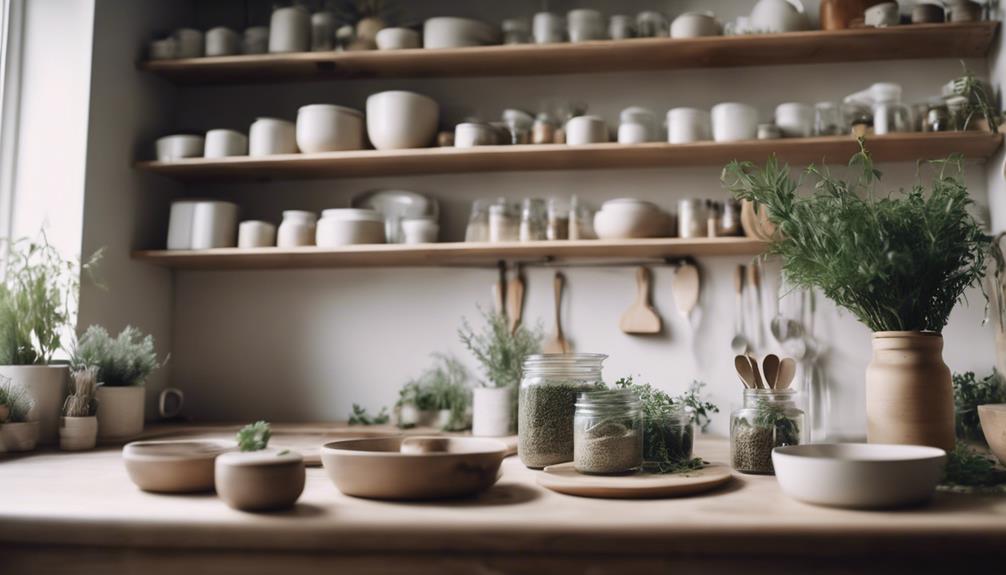
How to Style Open Shelving the Scandinavian Way Without Clutter
Wondering how to achieve a serene and stylish open shelving look? Discover essential tips to elevate your space without the clutter!
To style your open shelving the Scandinavian way without clutter, start by choosing a neutral color palette with soft tones and natural materials. Use light woods for shelves and organize items with decorative boxes or woven baskets to maintain a clean look. Incorporate textures like matte ceramics and soft textiles, and don't forget a few potted plants for a fresh touch. Employ warm, dimmable lighting for ambiance while spotlighting key decor pieces. Finally, layer items in varying heights for visual interest, making your open shelves both functional and inviting. There's more to explore to perfect your style!
Key Elements
When styling open shelving, your color scheme plays an essential role in setting the tone.
You'll want to choose materials and textures that complement your chosen palette, enhancing the overall aesthetic.
Color Scheme
A well-curated color scheme is essential for achieving the serene and airy atmosphere characteristic of Scandinavian open shelving. Start by choosing a color palette that emphasizes soft, neutral tones like whites, grays, and light woods. These hues create a calming environment that enhances your design. To maintain a cohesive look, limit yourself to no more than three primary colors. This approach keeps your shelves from feeling chaotic and cluttered.
Incorporate textures to add depth without straying from minimalism. Mixing materials such as matte ceramics, natural woods, and soft textiles can enrich your display while keeping the overall aesthetic understated.
When you want to introduce color, opt for muted shades like pastel blues or greens. These subtle pops should complement your neutral foundation without overwhelming your carefully curated space.
Materials
Choosing the right materials is essential for achieving the timeless elegance and functionality of Scandinavian open shelving.
In Scandinavian design, light woods like birch and ash are favored for their simplicity and warmth. These natural materials not only enhance visual appeal but also create an inviting atmosphere in your kitchen. If you want to introduce depth, consider integrating darker woods like walnut or teak. They provide a striking contrast to lighter tones, aligning beautifully with the minimalist aesthetic.
Additionally, incorporating metal or glass accents into your open shelving can enhance durability while offering a contemporary touch. These materials can complement the natural woods, creating a cohesive look that's both stylish and practical.
High-quality materials are vital for ensuring longevity, allowing your shelving to maintain its charm over time.
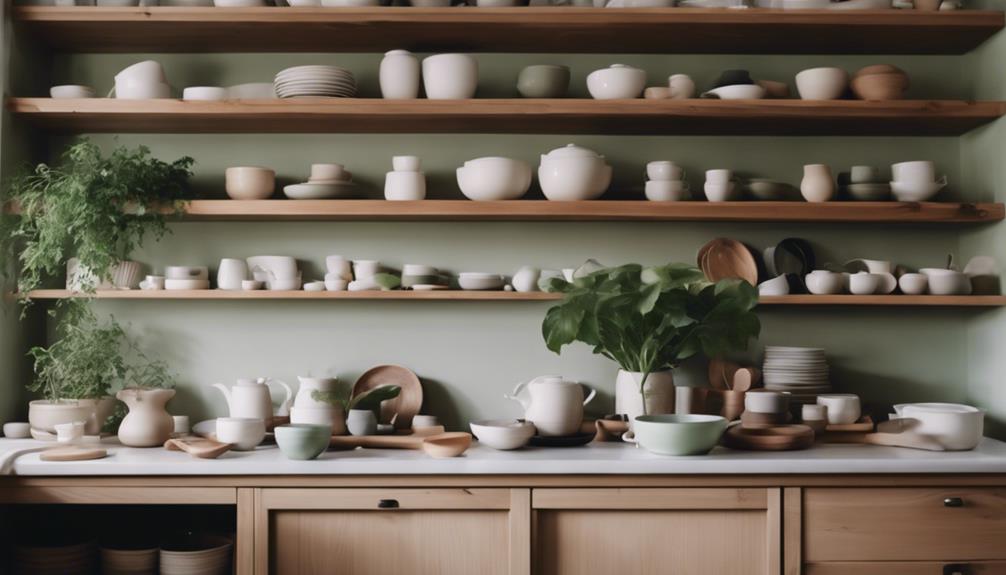
Textures
How can you enhance the visual appeal of open shelving through the careful selection of textures?
Start by incorporating natural elements like light woods such as birch or ash. These materials not only embody the Scandinavian aesthetic but also add warmth and simplicity to your space.
Next, consider using soft textiles like woven baskets or linen cloths. These not only provide depth but also help you organize items while keeping the overall look uncluttered. They can serve as a perfect contrast to the sturdiness of your shelves.
Integrate ceramic and stoneware items with matte finishes for a tactile contrast that maintains a minimalist vibe. These pieces can be both functional and decorative, enhancing the overall aesthetic.
Don't forget to layer in greenery. Potted plants or succulents add organic texture and life to your shelves without overwhelming the space.
When choosing decor items, focus on those with clean lines and subtle patterns, ensuring they complement the textures of your functional kitchenware. This approach will create a cohesive and serene atmosphere, making your open shelving a true reflection of Scandinavian design.
Essential Fixtures and Furniture
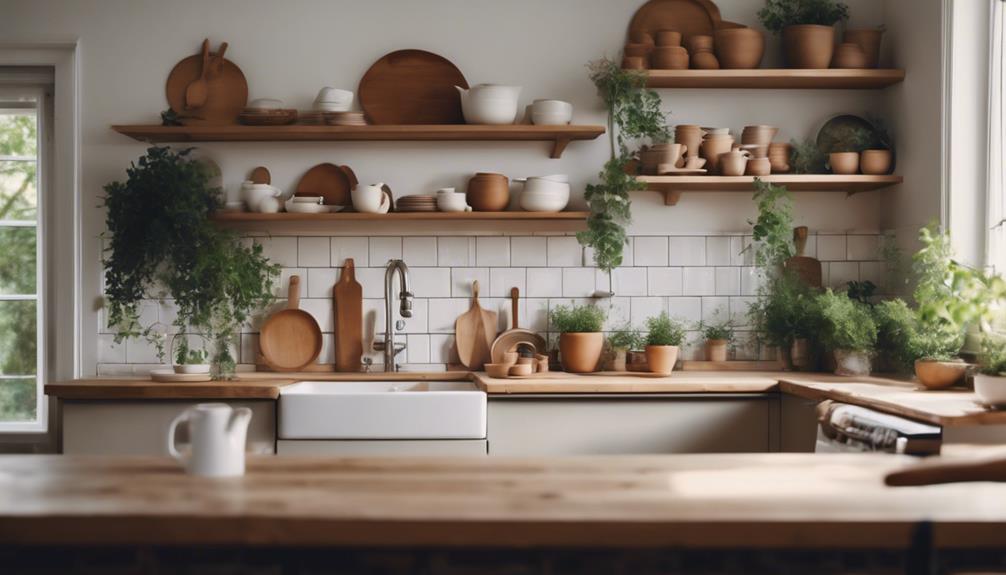
When styling your open shelving, consider incorporating natural wood shelves to add warmth and character to your space.
Floating metal brackets not only provide support but also create a sleek, modern look.
A vintage ceramic dish rack can serve as a charming accent, showcasing your favorite dishes while maintaining functionality.
Natural Wood Open Shelf
Embracing natural wood in open shelving instantly adds warmth and texture while enhancing the minimalist charm typical of Scandinavian design. Using light woods like birch or ash not only complements your decor but also creates a serene atmosphere that embodies the minimalist aesthetic.
To maintain a clean and uncluttered look, it's crucial to use a limited color palette and choose wood finishes that harmonize with your overall decor. This approach prevents overwhelming the space while allowing the beauty of natural wood to shine.
Pairing your open shelving with functional items, such as decorative boxes or woven baskets, helps you organize smaller items effectively, ensuring visual appeal without sacrificing practicality.
Regularly evaluating and rejuvenating the displayed wooden pieces keeps your shelves looking curated and stylish. Consider rotating items seasonally or swapping out pieces that no longer resonate with your design vision.
In doing so, you'll reinforce the functional aspects of your open shelving while elevating its aesthetic charm. By following these simple guidelines, you can create an inviting and organized display that perfectly captures the essence of Scandinavian design.
Floating Metal Brackets
Floating metal brackets offer a sleek and modern support system for your open shelving, emphasizing the clean lines that define Scandinavian design. These brackets, typically made from durable materials like steel or aluminum, provide stability while maintaining an unobtrusive look in your kitchen. By choosing brackets in a matte or brushed finish, you enhance the contemporary aesthetic, allowing your floating shelves to blend seamlessly with light-toned wood or white finishes.
Adopting a minimalist approach, these floating metal brackets not only support your shelves but also help create visual balance in your space. Their streamlined design keeps your kitchen feeling organized and airy, essential for practical storage. Installation is straightforward, making them a favorite among DIY enthusiasts who want to achieve a modern look without clutter.
Additionally, consider adjustable brackets for added flexibility in shelf height. This adaptability accommodates various kitchenware sizes, enhancing both functionality and style. With floating metal brackets, you can effortlessly elevate your open shelving while staying true to the principles of Scandinavian design. You'll find that these fixtures are key to achieving a stylish, clutter-free environment.
Vintage Ceramic Dish Rack
A vintage ceramic dish rack not only adds character to your open shelving but also offers organized storage for your plates and bowls, enhancing the overall aesthetic of your kitchen. This fixture embodies the Scandinavian aesthetic, emphasizing simplicity and functionality.
With its minimalist design, a vintage dish rack allows for easy access to your dishware while creating a visually appealing display that avoids clutter.
When you incorporate a vintage ceramic dish rack into your open shelving, you'll appreciate how it showcases natural materials and craftsmanship. Most racks come in neutral or muted color palettes, making them versatile pieces that seamlessly blend with your existing decor.
You can strategically group your dishware to maintain an organized look, reflecting the Scandinavian ethos of decluttering and tranquility.
Lighting Ideas
When it comes to lighting your open shelves, think about how different styles can enhance your space.
Warm pendant lights and adjustable LED strip lighting can create a cozy atmosphere, while recessed options keep things sleek.
Track lighting is another great choice, allowing you to spotlight your favorite decor and keep everything well-lit.
Warm Pendant Lights Above Shelves
Warm pendant lights positioned above open shelving not only illuminate your carefully curated displays but also enhance the cozy ambiance typical of Scandinavian design. By choosing warm pendant lights crafted from natural materials like wood or woven rattan, you can create an inviting atmosphere while maintaining a clutter-free look. These lights serve as a focal point, drawing the eye upward and adding visual height to your space.
To achieve the best effect, opt for dimmable warm-toned bulbs (2700K to 3000K) that complement the minimalist aesthetic of Scandinavian interiors. This allows you to adjust the brightness based on your mood and the time of day. Additionally, selecting pendant lights with adjustable heights guarantees that your shelving contents are properly illuminated without overwhelming the area.
Scandinavian-style pendant lights often feature clean lines and simple shapes, aligning with the principles of functionality and beauty. By incorporating these lighting elements above your open shelving, you not only enhance the overall design but also create an inviting space that feels both stylish and accessible.
Adjustable LED Strip Lighting
Installing adjustable LED strip lighting beneath your shelves creates a soft, ambient glow that enhances the minimalist aesthetic of Scandinavian design.
These energy-efficient lights can be customized in brightness and color temperature, allowing you to set a warm or cool light depending on your mood. The flexibility of LED strips makes them perfect for various shelf sizes and shapes, ensuring they blend seamlessly into your open shelving.
The installation process is straightforward, as many LED strips come with adhesive backing. This means you won't need complex tools or professional help to achieve that desired look.
Once installed, the adjustable LED strip lighting not only brightens up your space but also highlights your decorative items, drawing attention to your carefully curated displays.
Recessed Shelf Lighting Options
Recessed shelf lighting offers a sleek way to showcase your favorite items while enhancing the overall aesthetic of your space. This lighting option is perfect for achieving the clean aesthetic typical of Scandinavian design. By integrating recessed shelf lighting, you not only improve visibility but also elevate the style of your decorative pieces.
LED strip lights are an excellent choice for this purpose. They provide energy-efficient illumination and can be easily installed along the edges of your shelves. Opt for warm white light (around 2700K) to create a cozy ambiance that complements the natural materials often found in Scandinavian interiors.
Dimmable recessed lights let you adjust the brightness, allowing you to highlight specific items without overwhelming the room. This versatility is perfect for showcasing those cherished decorative pieces you want to stand out.
Additionally, incorporating motion sensors into your recessed shelf lighting can enhance functionality. These sensors automatically turn on the lights when you access your shelves, promoting energy savings and convenience. With these options, you can effortlessly blend style and functionality in your open shelving.
Track Lighting for Open Shelves
Enhancing your open shelves with track lighting not only improves visibility but also adds a stylish touch to your decor. Track lighting is perfect for illuminating open shelving, as it allows you to adjust the light placement for even coverage. This guarantees that your decorative items are highlighted beautifully without creating harsh shadows.
Incorporating LED track lights can also boost energy efficiency, making it a sustainable choice. These fixtures align perfectly with the minimalist aesthetic of Scandinavian design, blending seamlessly into the clean lines of open shelving. When positioned above your shelves, track lights don't just enhance visibility; they create a warm and inviting ambiance that showcases your curated decor and kitchenware.
Moreover, consider installing dimmable track lighting for versatility. This feature allows you to adjust brightness levels based on the occasion—whether you need bright task lighting while cooking or a soft, ambient glow for a relaxed evening.
With track lighting, you can elevate both the functionality and aesthetic of your open shelving, making it a true focal point in your home.
Decorative Elements
To bring personality to your open shelving, consider incorporating a handcrafted ceramic vase that adds a unique touch.
A woven textile wall hanging can introduce texture and warmth, while framed botanical art prints offer a pop of color and interest.
These decorative elements not only enhance the visual appeal but also reflect your personal style.
Handcrafted Ceramic Vase
Handcrafted ceramic vases bring a unique touch to open shelving, infusing your space with texture and an artisanal charm that perfectly complements Scandinavian design. These vases, often available in muted, earthy tones, help maintain a cohesive and calming aesthetic, aligning with the minimalist approach that defines Scandinavian decor.
When styling your shelves, consider incorporating varying heights and shapes of handcrafted ceramic vases. This not only adds texture but also creates visual interest and depth, ensuring your display feels intentional rather than cluttered. Opt for vases with simple, organic forms to evoke a sense of natural beauty and tranquility, which is essential to creating harmonious spaces.
You can also utilize these vases as functional pieces, showcasing seasonal flowers or greenery. This further enhances your connection to nature, a key element in Scandinavian design.
Woven Textile Wall Hanging
Woven textile wall hangings introduce warmth and texture to your open shelving, perfectly embodying the Scandinavian focus on simplicity and natural materials. By incorporating these pieces, you create a serene backdrop that enhances the overall aesthetic of your space. Neutral colors and organic shapes in your woven textiles promote a harmonious atmosphere, aligning seamlessly with the principles of Scandinavian design.
These wall hangings can elevate your curated items, adding visual interest without overwhelming the area. Position your woven textile wall hangings strategically behind your decorative pieces to create a layered look that draws the eye. Opting for handmade or artisanal designs not only supports sustainable practices but also reflects the Scandinavian value of craftsmanship and quality.
To add depth and dimension, consider layering multiple woven wall hangings at different heights. This approach contributes to a well-styled, clutter-free appearance on your open shelving.
Framed Botanical Art Print
Incorporating framed botanical art prints into your open shelving not only adds a touch of nature but also enhances the overall Scandinavian aesthetic of simplicity and connection to the outdoors. To achieve this, choose prints with a muted color palette, focusing on soft, earthy tones that reflect the principles of Scandinavian design while maintaining a harmonious, uncluttered look.
Arrange your framed botanical art in groups of varying heights and sizes to create visual interest without overwhelming the shelf. This approach reflects the Scandinavian principle of balance and guarantees your space feels inviting yet minimal. Opt for frames made from natural materials like wood or metal, which complement the organic elements of the prints and align with the overall minimalist theme.
Position your botanical art prints at eye level, allowing them to serve as focal points within your display. This not only draws attention to the artwork but also promotes a sense of openness and accessibility on your shelves.
Flooring
When it comes to flooring, your choice considerably impacts the overall look and feel of your space.
Light oak hardwood, textured gray vinyl plank, and dark stained bamboo each offer unique aesthetics that can enhance your open shelving.
Light Oak Hardwood Flooring
Light oak hardwood flooring instantly brightens your space, creating a warm and inviting atmosphere that perfectly complements Scandinavian design. Its light hue reflects natural light, enhancing the airy feel of your interiors and aligning with the minimalist approach typical of this style.
When you choose light oak flooring, you're not just opting for aesthetic appeal; you're also selecting a durable option that withstands the wear of daily life, making it ideal for high-traffic areas. This flooring type adds visual interest without overwhelming your decor, allowing the simplicity of Scandinavian design to shine through.
Pair it with open shelving to create a cohesive look that emphasizes functionality. The natural grain of light oak enhances your storage solution, showcasing your curated items while maintaining an organized appearance.
With its versatility, light oak flooring complements various color palettes, ensuring your space feels serene and well-coordinated. Whether you're displaying books, plants, or decorative pieces on your open shelves, the flooring will provide a beautiful backdrop, making your home feel both inviting and stylish.
Embrace light oak hardwood flooring to elevate your Scandinavian-inspired interiors!
Textured Gray Vinyl Plank Flooring
Textured gray vinyl plank flooring brings a modern edge to your space, perfectly aligning with Scandinavian design's focus on simplicity and functionality.
This flooring option not only offers a sleek and contemporary look but also enhances the visual appeal of your home. With its textured finish, it mimics natural wood while providing durability and ease of maintenance, making it ideal for high-traffic areas.
When you incorporate this flooring with open shelving, you create a cohesive aesthetic that emphasizes minimalism. The various shades of gray available allow you to play with color and texture, ensuring your space remains stylish and inviting.
The textured surface also enhances grip and comfort, contributing to the cozy atmosphere that Scandinavian interior design is known for.
Dark Stained Bamboo Flooring
Dark stained bamboo flooring not only enhances your home's warmth and sophistication but also aligns perfectly with the sustainable principles of Scandinavian design. This eco-friendly option features a rich color that harmonizes beautifully with the minimalist aesthetics often seen in Scandinavian interiors. When you choose dark stained bamboo, you're not just investing in flooring; you're adding a layer of character to your space.
The durability of bamboo flooring makes it ideal for high-traffic areas, ensuring it maintains its elegant appearance even in bustling households. Its ability to hide dirt and stains helps reduce the appearance of clutter, which is essential for achieving the clean lines that open shelving demands.
Moreover, the unique visual texture created by the natural variations in bamboo grain adds depth and intrigue to your space, enhancing its overall appeal. Dark stained bamboo flooring serves as a perfect backdrop for your curated open shelving, allowing your decorative pieces to shine while maintaining a serene atmosphere.
Embrace the blend of style and sustainability that dark stained bamboo brings to your home, and watch how it elevates your design effortlessly.
Conclusion
By embracing the key elements of Scandinavian design, you can create a beautifully styled open shelving display that avoids clutter.
Focus on essential fixtures and furniture that enhance functionality and aesthetics.
Incorporate thoughtful lighting to highlight your curated pieces and choose decorative elements that reflect your personal style.
Finally, don't forget about your flooring; it sets the stage for your entire space.
With these tips, you'll achieve a cohesive, serene look that embodies the essence of Scandinavian design.

Aurora – Your Creative Guide Aurora serves as your creative guide, igniting inspiration and offering innovative design solutions for your home. With her keen eye for aesthetics and passion for creating beautiful spaces, she’s here to help you turn your vision into reality.
Home Decor
August Home Accessories You Can’t Live Without – Upgrade Your Space!
Navigate your home upgrade journey with essential August accessories that promise convenience and security—discover what you can't afford to miss!

If you're looking to upgrade your space, August home accessories are a must-have. Start with the August Smart Lock for keyless entry and remote access. Pair it with the Connect Wi-Fi Bridge to manage guest access effortlessly. The Auto-Lock feature brings peace of mind by securing your home automatically. For added convenience, integrate it with voice assistants like Alexa and Google Assistant. You'll enjoy seamless control and real-time notifications about your door's status. These upgrades not only enhance security but also transform your daily routine. Keep exploring to discover more accessories that can elevate your home experience even further!
Key Takeaways
- Connect Wi-Fi Bridge: Essential for remote locking and guest management, allowing control from anywhere for just $79.99.
- Yale Keypad: Offers keyless entry with customizable codes, enhancing convenience and security from $69.99.
- August View Swappable Battery: A rechargeable battery option for $29.99, ensuring long-lasting power for your smart lock.
- Auto-Lock Feature: Automatically secures your door after closing, customizable timings enhance family safety and peace of mind.
Essential Smart Lock Features
When it comes to securing your home, the August Smart Lock offers essential features that make access and control easier than ever.
With the August app, you can remotely lock and open your door from anywhere, giving you complete control over your home security. Imagine the convenience of being able to open your door for a friend or family member without needing to be there—thanks to the guest access feature, you can send secure virtual keys instantly.
The Auto-Open feature takes ease of access a step further by automatically opening your door as you approach it, so you don't have to fumble with keys when your hands are full.
You can also enjoy peace of mind knowing that the August Smart Lock uses DoorSense technology to provide real-time notifications about your door's status, letting you know if it's securely locked or ajar.
Plus, it integrates seamlessly with voice assistants like Alexa and Google Assistant, making hands-free operation a breeze.
With these features, the August Smart Lock guarantees that your home remains secure while providing the utmost convenience.
Top August Home Accessories
August offers a range of smart home accessories that enhance your security and convenience beyond just the smart lock itself. The August Smart Lock is central to this ecosystem, enabling keyless entry with customizable codes.
To further enhance your experience, consider adding the Connect Wi-Fi Bridge. Priced at $79.99, it allows you to lock or open your August Smart Lock from anywhere, plus manage guest access remotely.
If you prefer physical access, the Yale Keypad is a fantastic addition. Starting at $69.99, it provides another layer of keyless entry, letting you enter codes without needing a traditional key.
For those who want continuous functionality, the August View Swappable Battery is a great investment at $29.99. It's rechargeable and offers an impressive three-month average battery life, ensuring that your smart lock stays operational without hassle.
Lastly, don't forget the Open Device, which pairs seamlessly with any August Smart Lock. It's powered by two AAA batteries (included) and provides keyless access anytime.
These accessories not only upgrade your space but also streamline how you secure your home.
Enhancing Home Security
When it comes to enhancing your home security, the right accessories can make all the difference.
With features like Auto-Lock, remote access control, and activity tracking, you can stay connected and in control of your home at all times.
Let's explore how these tools can give you peace of mind and protect what matters most.
Auto-Lock Feature Benefits
The Auto-Lock feature automatically secures your door after closing, giving you instant peace of mind without any extra effort. This innovative technology enhances your home's security, allowing you to focus on what really matters.
With the added benefit of DoorSense technology, you can trust that the Auto-Lock engages only when the door is fully closed, eliminating the risk of false locking.
Here are three key benefits of the Auto-Lock feature:
- Flexible Timing: You can customize the Auto-Lock timing, locking between 30 seconds and 30 minutes after closing, fitting seamlessly into your routine.
- Enhanced Safety for Families: This feature considerably reduces the chances of leaving your doors unsecured, providing an extra layer of safety for your loved ones.
- Convenient Monitoring: With remote access through the August app, you can manage and check the Auto-Lock status from anywhere, ensuring security even when you're away.
Embracing the Auto-Lock feature not only enhances your home security but also offers you the peace of mind you deserve. You won't have to worry about whether you locked the door again!
Remote Access Control
Remote access control takes home security to the next level, allowing you to lock and open your door from anywhere with just your smartphone.
With the August Smart Lock, you can easily manage your home's security without needing to be physically present. By adding a Wi-Fi Bridge to your existing lock, you gain the ability to remotely lock or release your door, making it incredibly convenient for granting access to trusted guests.
The August app enhances your experience by letting you provide keyless entry to visitors and family members. You can control who enters your home and when, all while maintaining peace of mind.
The Smart Lock features Auto-Lock and Auto-Release, ensuring that your door secures itself when closed and recognizes your arrival for seamless access.
What's more, the system uses bank-level encryption to safeguard your data, ensuring that your remote access is secure. This means you can rest easy knowing that your home is protected against unauthorized entry.
Embracing remote access control not only simplifies your life but also fortifies your home security in today's fast-paced world.
Activity Tracking and Alerts
Enhancing your home security becomes effortless with the August Smart Lock's robust activity tracking and alert system, which keeps you informed about who enters and exits your home. This feature not only enhances your security awareness but also provides peace of mind, knowing you're always in the loop.
Here are three key benefits of the August Smart Lock's activity tracking and alerts:
- Real-Time Notifications: With Smart Alerts, you'll receive instant notifications via the August app whenever your door's status changes—whether it's locked, opened, or ajar.
- Detailed Activity Feed: You can access an extensive log of entry and exit times, helping you track who accessed your home and when, ensuring you always know who's coming and going.
- Control Over Access: If you share virtual keys, the activity tracking functionality allows you to revoke access easily, so you can maintain control over who enters your home at all times.
With data encryption and two-factor authentication, your information remains secure, giving you confidence that only authorized users can access your lock data.
Seamless Smart Home Integration

Seamlessly integrating with popular voice assistants like Siri, Alexa, and Google Assistant, the August Smart Lock gives you hands-free control over your door locks. You can manage your smart locks effortlessly, whether you're at home or away. With the August app, you can lock or open your door remotely, making guest access a breeze.
If you have an existing smart home setup, the August Smart Lock enhances your automation experience by connecting with other devices, like Samsung SmartThings. You'll love the convenience of the Auto-Lock and Auto-Open features, which use geo-fencing technology to secure your home automatically as you leave or approach. This means you don't have to fumble for keys when your hands are full.
The Activity Feed in the August app keeps you informed about who's coming and going, tracking entry and exit times in real-time. This provides peace of mind, knowing you can monitor your home's security with ease.
The combination of these features makes the August Smart Lock an essential addition to your smart home, ensuring both convenience and safety at your fingertips.
Unique Entry Options
When it comes to unique entry options, keyless access can truly transform your daily routine.
You'll appreciate how secure guest management works seamlessly with the August Smart Lock, allowing you to grant temporary access without the hassle of physical keys.
Plus, enhanced home security features mean you can feel at ease knowing your home's safety is a top priority.
Keyless Access Convenience
Keyless access convenience redefines how you manage entry to your home, offering unique options that simplify your life and enhance security. With the August Smart Lock, you can effortlessly control access without the hassle of physical keys.
Here are three standout features that elevate your home security:
- Unique Entry Codes: Create custom codes for keyless access, allowing you to manage who can open your door. You can easily change codes for added security whenever needed.
- Instant Virtual Keys: Using the August app, you can send secure virtual keys to trusted individuals in seconds, ensuring convenience for guests or service personnel while you retain control of access.
- Auto-Open Feature: The Smart Lock detects your arrival and automatically opens, so you never have to fumble for keys when your hands are full.
The Smart Lock seamlessly integrates with your existing deadbolt, so you maintain the functionality of traditional keys while enjoying modern convenience.
Embrace keyless access and transform how you enter your home!
Secure Guest Management
Managing guest access has never been easier with unique entry options from the August Smart Lock, allowing you to give trusted visitors secure entry without the hassle of physical keys. You can send secure keys to friends and family through the August app, ensuring they've the right access when they need it. With unique entry codes, you can provide temporary access for guests or service providers, enhancing both convenience and security.
The Auto-Release feature automatically detects when a registered guest approaches, seamlessly opening the door. This means no more fumbling for keys, making visits as smooth as possible. Plus, you can manage guest access remotely, giving you full control over who enters your home.
The Activity Feed keeps you informed by tracking entry and exit times for each guest, so you always know who's coming and going. This feature is especially useful for vacation rental hosts looking to maintain oversight while providing a welcoming experience for their guests.
With August Smart Lock, you've got secure guest management covered, making your life easier while ensuring your home stays safe.
Enhanced Home Security
August Smart Lock's unique entry options empower you to enhance your home security effortlessly, providing trusted individuals with secure access without the need for physical keys. With keyless access, you can easily manage who enters your home while maintaining complete control over your security.
Here are three features that elevate your home security:
- Auto-Lock Feature: This feature automatically secures your door after it closes, ensuring your home remains protected without you having to lift a finger.
- DoorSense Technology: This innovative technology lets you know if your door is securely closed or ajar, giving you peace of mind about your home's security status in real-time.
- Activity Feed: The August app's activity feed tracks entry and exit times, providing you with a detailed overview of who accesses your home and when. This transparency enhances your security and helps you stay informed.
Together, these features make the August Smart Lock an essential tool for anyone looking to bolster their home's security. Enjoy enhanced security and convenience, knowing you have the latest technology at your fingertips.
User Experience Insights
Users enjoy the effortless installation of the Smart Lock, often completing it in under 30 minutes without the need for drilling. This makes it a fantastic choice for both homeowners and renters looking to enhance their security quickly and easily.
The Smart Lock with Keypad integrates seamlessly with your existing keys, allowing you to maintain traditional access methods while enjoying modern tech features.
The August app offers a user-friendly interface, making it simple to lock, open, and track your door's activity from anywhere. You'll appreciate the convenience of the Auto-Open feature that detects your arrival and opens the door automatically—no more fumbling for keys when your hands are full.
While some users have reported occasional connectivity issues with the WiFi bridge, the Bluetooth range generally provides reliable operation. This guarantees you have consistent access to your Smart Lock, whether you're at home or on the go.
Installation and Compatibility
Installing the Smart Lock is a breeze, typically taking less than 10 minutes to secure over your existing single-cylinder deadbolt without any drilling or modifications. This easy-to-install feature makes it perfect for anyone looking to upgrade their home security quickly and efficiently.
Here are three key benefits of the August Smart Lock regarding installation and compatibility:
- Renter-Friendly: The installation process is designed to guarantee that tenants can easily maintain the original exterior appearance of their locks while enjoying the benefits of a smart lock.
- Broad Compatibility: August Smart Locks are compatible with most standard single-cylinder deadbolt types, allowing you to enhance your security without the hassle of replacing your entire door hardware.
- Key Functionality: You'll retain the functionality of your existing traditional keys, providing a seamless shift to keyless entry while keeping backup options available.
With these features, you can confidently upgrade your home's security without the stress of complex installation processes. Embrace the convenience and functionality of the August Smart Lock today!
Customer Feedback Overview
With a solid customer rating of 4.4 out of 5 stars from nearly 2,800 ratings, the feedback on the Smart Lock reveals a largely positive reception among homeowners.
Many users rave about the ease of use and the smart lock's design, highlighting how the remote access feature allows for convenient management of entry for families and guests alike.
However, some customer feedback indicates connectivity challenges, particularly with the WiFi bridge. Maintaining a reliable connection within its 10-foot range can sometimes be an issue, which may affect your experience.
Additionally, several customers emphasize the importance of installation accuracy, noting that proper alignment is vital for the lock's best performance.
Frequently Asked Questions
Are Yale and August the Same Company?
No, Yale and August aren't the same company, but they're both under the Assa Abloy Group. Yale focuses on traditional locks, while August specializes in smart lock technology, making them distinct yet compatible brands.
What Is an August Smart Lock?
Imagine a keyless world where convenience reigns supreme. An August Smart Lock transforms your door into a guardian, letting you access it with your phone, while creating unique entry codes for enhanced security and peace of mind.
How Many August Locks to One Bridge?
You can connect multiple August Smart Locks to a single August Connect Wi-Fi Bridge, allowing you to manage all your locks from one app. Just remember, each lock connects to only one bridge at a time.
What Is the Best Automatic Door Lock in 2024?
When considering the best automatic door lock in 2024, you can't go wrong with the August Wi-Fi Smart Lock. Its remote access, Auto-Lock features, and compatibility with voice assistants make it incredibly convenient and secure for your home.
Conclusion
Incorporating August home accessories isn't just about style; it's about transforming your living space into a smart haven.
You might think you can live without these upgrades, but once you experience the convenience of seamless integration and enhanced security, you'll wonder how you ever managed before.
So, why not explore the future of home living? Embrace these essentials, and you'll access a lifestyle that's not only modern but also incredibly secure and user-friendly.
Sawyer – Your Storyteller Sawyer is your storyteller, sharing engaging narratives and insights to connect you with our brand and inspire your home projects. With his understanding of trends and passion for sharing stories, he keeps you informed and inspired every step of the way.


The Secret to Blending Modern and Traditional Decor Perfectly – Discover How!

How to Style Open Shelving the Scandinavian Way Without Clutter

August Home Accessories You Can’t Live Without – Upgrade Your Space!

Diy Burlap Lamp Shade

Incredible Ways to Use Natural Elements in Your Home – The Transformation Will Amaze You!

Trendy Room Decor: Stay Ahead With the Latest Aesthetic Trends!

What Is Dining Alfresco Mean? Outdoor Dining Explained!

15 Best Fake Fireplace Options to Create Cozy Ambiance in Your Home

How to Paint Over Mirrors: A Step-By-Step Guide for You

Welcome to Decorative Inspirations

Stylish Boho Finds for Every Home

Tis the Season to Make a Nostalgic Hot Cocoa Bar

Discover the Charm of Farmhouse Wall Decor

Discover Rustic Charm in Farmhouse Furniture Galore

French Decor Elegance Unveiled

-
 Vetted2 months ago
14 Best Personalized Father's Day Gifts for Your Husband – Show Him You Care
-

 Alfresco1 month ago
Alfresco Stacker Doors: Seamless Indoor-Outdoor Living!
-

 Craft and Textiles3 months ago
15 Best Places to Buy Appliances for Your Home – Top Retailers Reviewed
-

 Decorative Throws3 months ago
Is It Better to Dry Clean Blankets?
-

 Tableware and Dining Accessories3 months ago
What Is the Meaning of the Word Tableware
-

 Tableware and Dining Accessories3 months ago
What Is the Hindi Meaning of Tableware
-

 Craft and Textiles3 months ago
15 Best Cordless Mowers for Effortless Lawn Care – Top Picks of 2024
-

 Yarn3 months ago
Is Yarn Natural or Manmade? Unravel the Truth