Connect with us

Home Decor

Bookcase on Top of Dresser: How to Stack a Bookcase on a Dresser

Finding the perfect storage solution, learn how to securely stack a bookcase on top of a dresser to maximize space and style.

Published

on

stacking bookcase on dresser

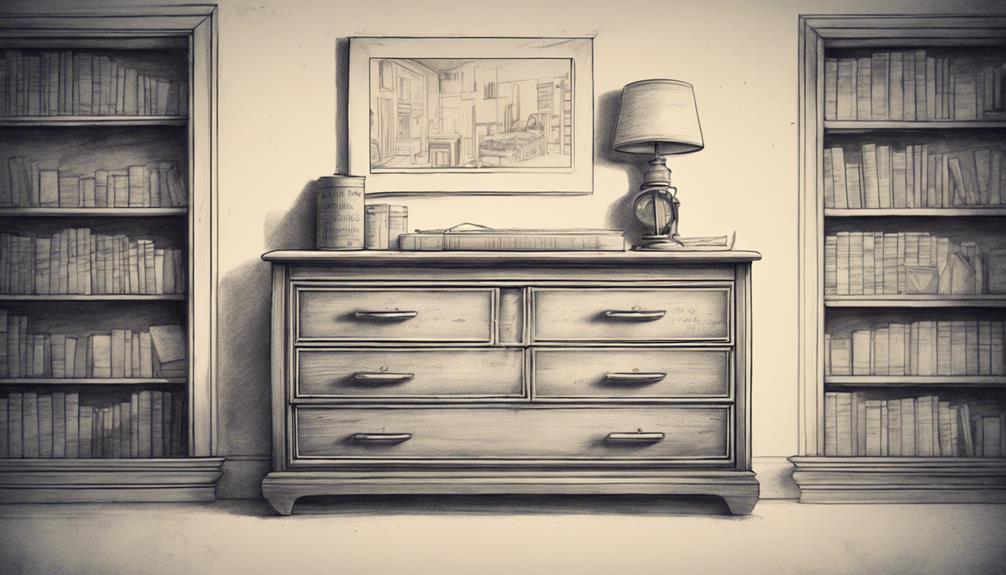
You're about to transform your dresser into a functional and stylish storage space by stacking a bookcase on top of it. To get started, make sure your dresser is sturdy and stable, and clear the top surface of any clutter. Choose a bookcase that matches your dresser's style and consider one with adjustable shelves. Measure the dresser top and bookcase carefully to guarantee a secure fit. By following these steps and taking necessary safety precautions, you'll be able to create a stable and visually appealing stacked bookcase and dresser. Now, discover the detailed steps to achieve a successful and secure assembly.

Key Takeaways

• Ensure the dresser is sturdy and stable to support the weight of the bookcase before stacking.

• Measure the dresser top dimensions and bookcase weight capacity to ensure a secure fit.

• Mark the dresser top for bookcase placement and double-check measurements to prevent errors.

• Securely attach the bookcase to the dresser using L-brackets and anti-tip straps for added stability.

Advertisement

• Distribute weight evenly on the dresser and bookcase to maintain balance and prevent tipping or leaning.

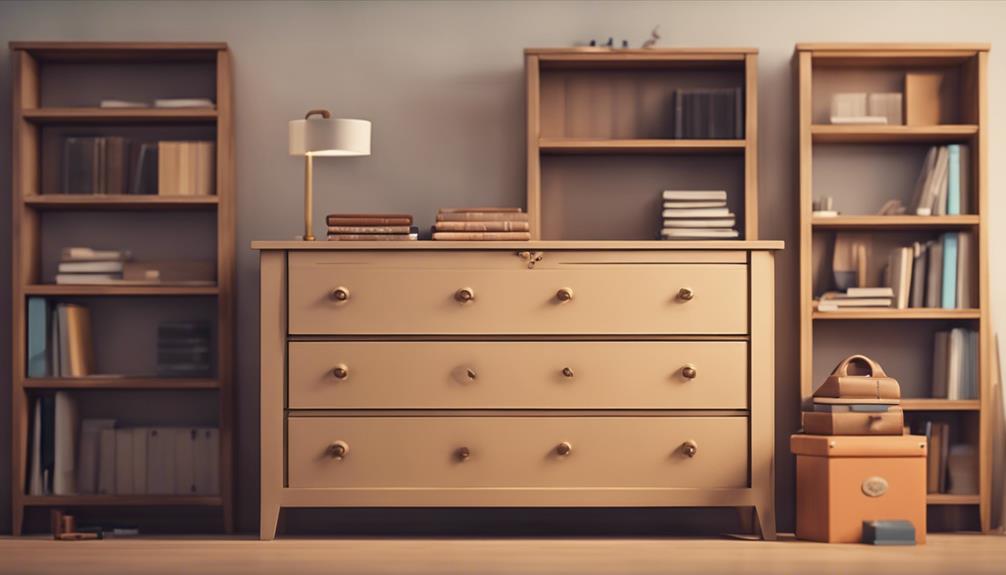
Preparing the Dresser for Stacking

Before you start stacking, make sure your dresser is sturdy and stable enough to support the weight of a bookcase on top. You don't want your entire storage unit to come crashing down due to a flimsy dresser. Take a closer look at your dresser's construction and verify it can handle the added weight. If you're unsure, try painting the dresser a new color to give it a fresh look and distract from any structural weaknesses.

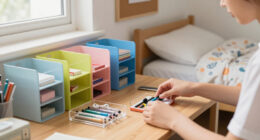
Next, clear the top surface of the dresser to provide a flat and level base for the bookcase. Remove any clutter or items that might be obstructing the surface. You want a smooth, even surface for the bookcase to sit on. This will help keep things stable and secure.

Choosing the Right Bookcase

selecting the perfect bookshelf

When choosing the right bookcase to stack on your dresser, you'll want to take into account a few key factors to guarantee a stable and stylish combination.

You'll need to think about the bookcase's size, bearing in mind the dresser's dimensions, as well as its style, which should complement or match the dresser's design.

Bookcase Size Matters

You'll want to measure the dimensions of the dresser top to make sure the bookcase fits securely, as a bookcase that's too large can be unstable and even topple over. A bookcase that's too small, on the other hand, mightn't provide enough storage space. To find the perfect fit, consider the following:

Advertisement
  • Measure carefully: Take precise measurements of the dresser top to make certain the bookcase fits snugly.
  • Check the weight capacity: Make sure the dresser can support the weight of the bookcase and its contents.
  • Think about style: Choose a bookcase that complements the dresser in terms of style, color, and design.
  • Adjustability is key: Opt for a bookcase with adjustable shelves to accommodate books and items of varying heights.

Bookcase Style Fits

Now that you've found a bookcase that fits the dresser's dimensions, it's time to think about the style of the bookcase that will work best for your needs. You want a bookcase that not only looks great but also complements the dresser and meets your storage requirements.

When choosing a bookcase style, consider the following factors:

Feature Description
Adjustable Shelves Provides flexibility in organizing items on top of the dresser
Stable Base Guarantees stability when stacked on the dresser
Secure Attachment Prevents the bookcase from toppling over
Complementary Design Matches the dresser's style for a cohesive look
Weight Capacity Can hold the weight of your items without overloading

Measuring and Marking the Space

precise spatial measurements taken

Measure the width and depth of the top of the dresser carefully to guarantee a secure fit for the bookcase. You want to make sure the bookcase sits snugly on top of the dresser, without any wobbling or instability. Take out your tape measure and record the dimensions of the dresser top. Don't forget to take into account the weight of the bookcase and its contents when measuring and marking the space.

Here are some key things to keep in mind:

  • Use a tape measure to determine the height clearance above the dresser for the bookcase.
  • Mark the areas on the dresser where the bookcase will sit to guide the placement.
  • Double-check the measurements and markings before placing the bookcase on top of the dresser to prevent any misalignment.
  • Take into consideration the overall weight of the bookcase and its contents when measuring and marking the space.

Assembling the Bookcase Top

building furniture with precision

Place the bookcase top onto the uprights, making sure it fits snugly and evenly, with the pre-drilled holes aligning perfectly for a secure attachment.

Once you've verified the top is properly aligned, you can start attaching it to the uprights using the provided screws or bolts. Be sure to tighten them firmly, but avoid overtightening, which can damage the material.

As you assemble the bookcase top, double-check that it's level and stable, as any imbalance can affect the overall structure's stability.

Additionally, make sure the top is securely attached to the uprights to prevent it from shifting or collapsing under the weight of the books or decorations you plan to place on it.

Advertisement

Remember to consult the manufacturer's instructions if you're unsure about any part of the assembly process.

Securing the Bookcase to Dresser

anchoring furniture for safety

You'll need to take extra precautions to make sure the bookcase remains stable and secure when positioned on top of the dresser. After all, you've invested time and effort into assembling the bookcase, and you want to guarantee it stays upright and functional.

To achieve this, follow these essential steps:

  • Use L-brackets to secure the bookcase to the dresser for added stability.
  • Ensure the dresser is sturdy enough to support the weight of the bookcase.
  • Anchor the bookcase to the wall for further security, especially if it's tall.
  • Position the bookcase evenly on top of the dresser to distribute weight evenly.

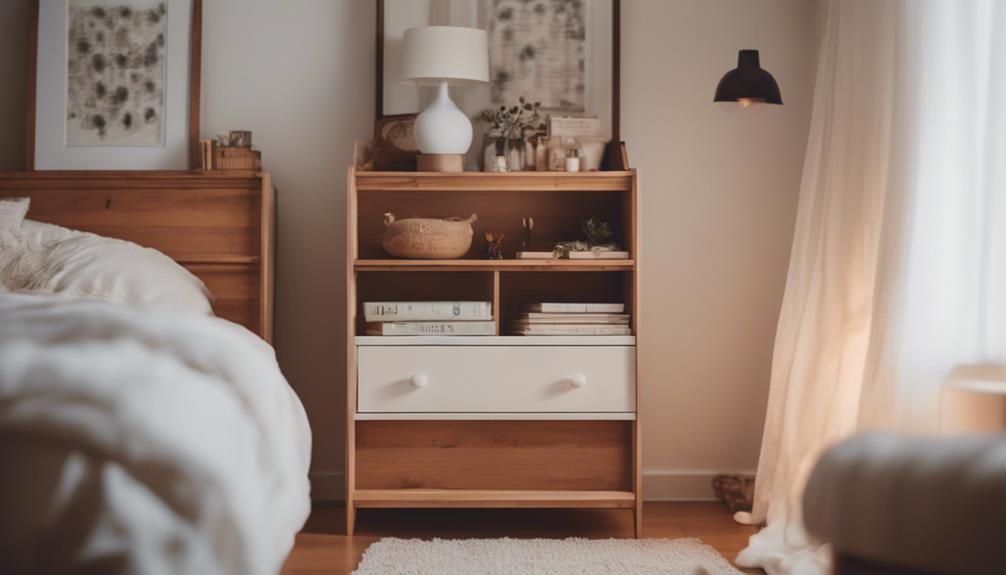
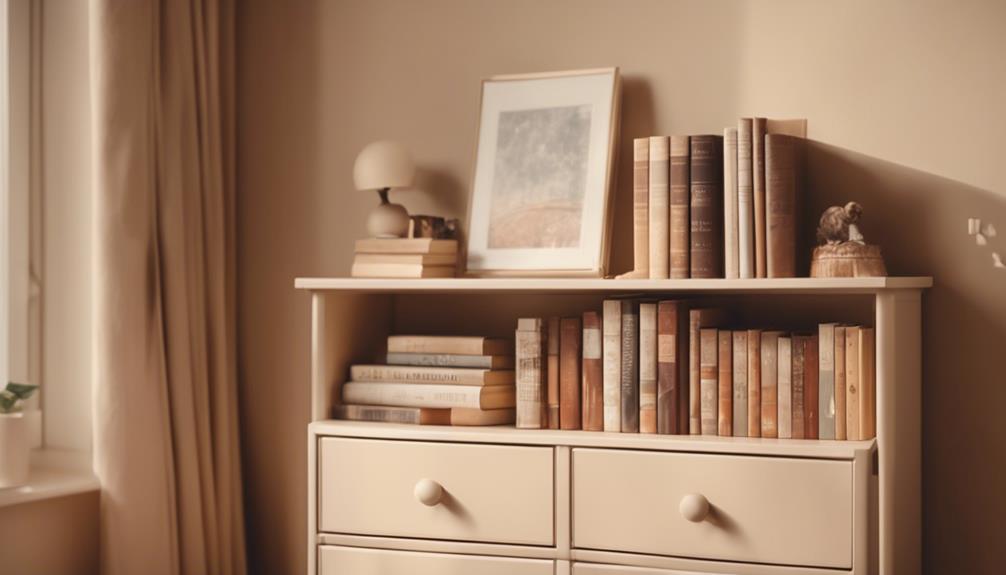
Adding Decorative Touches

enhancing with decorative elements

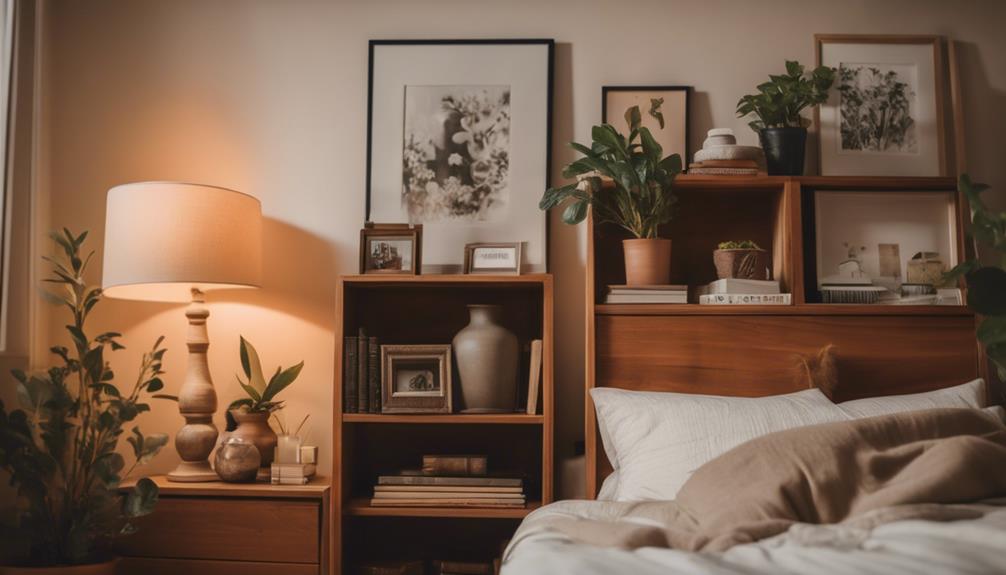
Now that your bookcase is securely positioned on the dresser, it's time to get creative and add some decorative flair to make this combo piece truly stand out.

You can start by considering adding decorative molding or trim to the top of the bookcase to create a smooth shift between the dresser and shelving units.

Another idea is to use adhesive wallpaper or contact paper to add a pop of color or pattern to the back of the bookcase for a stylish touch.

If you want to add some modern functionality, incorporate LED strip lights underneath the bookcase for a sleek and functional lighting solution.

Advertisement

To enhance the overall look of the dresser-shelving combo, display decorative items like plants, figurines, or framed photos on top of the bookcase.

Finally, experiment with different styling options, such as arranging books in a mix of vertical and horizontal stacks or organizing items by color for a visually appealing display.

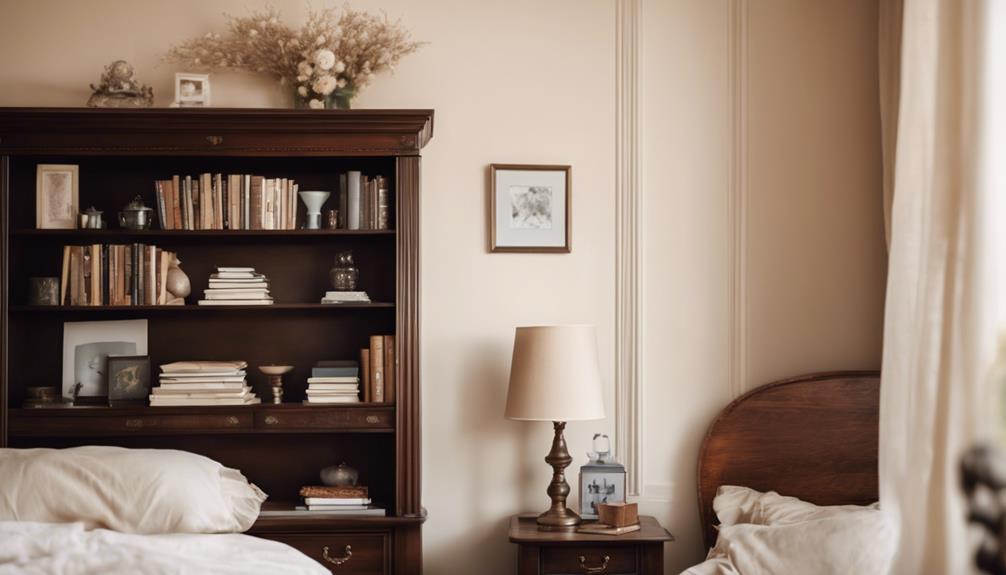
Final Assembly and Placement

final assembly and arrangement

Now that you've added those final decorative touches, it's time to focus on securing your bookcase on top of the dresser.

In this final assembly and placement stage, you'll need to:

  • Secure the bookcase top
  • Position the bookcase unit
  • Finalize the assembly to guarantee a sturdy and visually appealing combination.

Secure the Bookcase Top

With the bookcase positioned securely on top of the dresser, make certain its top is evenly aligned and firmly attached to prevent any shifting or tilting. You want to guarantee that the bookcase is stable and won't topple over, causing damage or injury.

To achieve this, follow these essential steps:

  • Use anti-tip straps or brackets to secure the bookcase to the wall for added support.
  • Make sure the dresser is level and sturdy to support the weight of the bookcase.
  • Test the stability of the bookcase on the dresser by gently pushing and pulling on it.
  • Leave some space between the bookcase and the wall for ventilation and easy access to the dresser drawers.

Position the Bookcase Unit

Place the bookcase unit on the dresser, making sure it's centered and aligned for maximum stability.

Double-check that the weight distribution is even on the dresser to support the bookcase's weight. You don't want the dresser to tip or the bookcase to slide off.

Advertisement

To prevent this, place non-slip pads or rubber feet under the bookcase to keep it firmly in place. Additionally, consider using anti-tip hardware to secure the bookcase to the wall, eliminating any risk of tipping hazards.

Before you start loading the bookcase with books or items, test its stability to confirm everything is secure. Give the bookcase a gentle push or pull to check that it doesn't wobble or shift.

If you're satisfied with the setup, you're ready to start loading your bookcase with your favorite books or decorative items. Remember to maintain a balanced weight distribution to keep your stacked bookcase and dresser combination stable and safe.

Finalize the Assembly

You've confirmed the stability of your stacked bookcase and dresser, so it's time to finalize the assembly by securely attaching the bookcase to the dresser and making any necessary adjustments for a balanced and visually appealing arrangement.

This is the final step in creating a sturdy and attractive storage solution.

Advertisement

To guarantee a safe and secure setup, remember to:

  • Attach the bookcase to the dresser using appropriate connectors for stability
  • Ensure even weight distribution to prevent tipping or leaning
  • Double-check all connections and fastenings to assure a safe and secure setup
  • Test the stability by gently nudging the bookcase to confirm the dresser can support the weight

Safety Precautions and Tips

safety first always prepared

Prior to stacking a bookcase on a dresser, verify that the dresser is sturdy and stable enough to support the weight of the bookcase to avoid any potential hazards. You don't want the entire structure to come crashing down, causing damage or even injury.

To guarantee your safety, take some essential precautions. First, use anti-tip straps to secure the bookcase to the wall, preventing it from tipping over. Next, distribute the weight evenly on the dresser and bookcase to maintain balance. Avoid overloading the shelves with heavy items, as this can put undue strain on the dresser. Finally, regularly check and tighten the connections between the dresser and bookcase for added safety.

Frequently Asked Questions

Can I Put a Bookshelf on Top of a Dresser?

You're wondering if you can put a bookshelf on top of a dresser. The short answer is yes, but with caution. Make sure your dresser is sturdy enough to support the weight of the bookshelf, and consider the overall height and aesthetics.

You'll also want to secure the bookshelf to the dresser to prevent sliding or tipping. With careful planning, you can create a functional and stylish storage solution.

How Do You Stack a Bookcase?

As you contemplate the challenging task of stacking a bookcase, imagine a Jenga tower teetering on the brink of collapse – a delicate balancing act that demands precision and patience.

Advertisement

To stack a bookcase, you'll need to guarantee stability and levelness, aligning the edges of the dresser and bookcase, and securing it with brackets or wall anchors.

Don't forget to check the weight capacity of both pieces to avoid a catastrophic collapse.

How to Attach Two Bookcases Together?

To attach two bookcases together, you'll need to secure them at the top and bottom using L-brackets or corner braces. Confirm they're level and aligned before attaching them.

Drill pilot holes for the screws to prevent splitting the wood, and choose the right screws or bolts for the material.

Can I Stack BILLY Bookcases?

You're wondering if you can stack BILLY bookcases? The answer is yes, you can! IKEA designed these bookcases to be stackable, and they even come with the necessary hardware to secure them together.

Advertisement

Just make sure you follow the assembly instructions and verify that the dresser can support the added weight and height.

Conclusion

By following these steps, you've successfully stacked your bookcase on top of your dresser, creating a unique and functional storage solution. This space-saving hack not only adds extra storage but also creates a visually appealing display for your favorite books and decorative items.

Remember to always prioritize safety and stability when stacking heavy furniture, and don't be afraid to get creative with your design choices.

Continue Reading
Advertisement

Home Decor

The Timelessness of Vintage Glass Globes

Holding a vintage glass globe, you're about to uncover the intricate craftsmanship, historical significance, and timeless charm that makes them treasured possessions.

Published

on

elegant vintage glass globes

As you hold a vintage glass globe, you're not just grasping a decorative ornament, but a tangible piece of history that distills the essence of a bygone era, its intricate craftsmanship, and cartographic precision evoking a deep sense of nostalgia and wonder. Vintage globes showcase meticulous craftsmanship, unique designs, and historical significance, making them timeless treasures. With their classic elegance, they blend seamlessly into modern spaces, illuminating the world's wonders and serving as educational tools. As you explore the world of vintage glass globes, you'll discover the artisanal craftsmanship, educational value, and nostalgic charm that make them truly timeless.

Key Takeaways

• Vintage glass globes evoke a sense of adventure and whimsy, transporting us to past eras with their timeless charm.

• Meticulous craftsmanship and unique designs make each vintage globe a one-of-a-kind masterpiece, exuding elegance and sophistication.

• As educational tools, vintage glass globes combine decorative and educational elements, illuminating geographical landscapes for students and scholars.

• Blending old and new, vintage glass globes add a touch of classic sophistication to modern spaces, creating a warm and inviting glow.

Advertisement

• As valuable resources, vintage glass globes confirm the art of antique cartography, holding a piece of history in your hands.

Capturing the Essence of the Past

As you gaze upon the intricate details of a vintage glass globe, you're instantly transported to an era that whispers tales of adventure, discovery, and exploration, capturing the essence of the past with remarkable precision.

The Replogle illuminated world globe, designed by Gustav Brueckmann in the late 1940s, is a prime example of this phenomenon. This 12-inch Library model, made in the USA, features identifying countries such as Germany, Korea, Israel, and French Indo China, showcasing a level of cartographical accuracy that was groundbreaking for its time.

The globe's glass shades, a hallmark of vintage lighting, add a touch of sophistication to any room. If you're looking for a similar piece, the Crams Imperial World Globe and the Replogle Stereo Relief Globe are also available, along with the Faries Bankers Lamp, which offers a unique blend of functionality and style.

Each of these vintage globe options offers a unique window into the past, allowing you to appreciate the artistry and craftsmanship of a bygone era.

Advertisement

Nostalgic Charm of Vintage Globes

vintage globes evoke nostalgia

As you explore the nostalgic charm of vintage globes, you'll discover a world of whimsy and adventure. From the beautifully illustrated maps of yesteryear to the forgotten era of exploration that inspired them, every aspect of these alluring orb-shaped treasures whispers stories of the past.

As you continue to uncover the allure of vintage glass globes, you'll find yourself enchanted by the intricate details and historical significance that make them truly special.

Whimsical Maps of Yesteryear

Stepping into a room adorned with a vintage glass globe is like taking a step back in time, as the whimsical maps of yesteryear transport you to an era of discovery and exploration. You can't help but marvel at the intricate details and historical cartography styles that showcase geographical representations from bygone eras.

These vintage globes evoke a sense of nostalgia, capturing the essence of exploration and discovery that defined the past. As you gaze upon the maps, you're reminded of the thrill of adventure and the uncharted territories that awaited brave explorers. The craftsmanship and unique features of these globes are a tribute to the skill of cartographers and artisans of the past.

Whether you're a collector, enthusiast, or simply someone who appreciates the beauty of history, vintage glass globes are a treasured find. They add a touch of character and history to any space, serving as a decorative piece that sparks conversation and inspires curiosity.

Forgotten Era of Exploration

You're instantly transported to a bygone era of exploration and discovery when surrounded by the nostalgic charm of vintage glass globes. These ornate decorations evoke a sense of adventure, taking you back to a time when cartographers meticulously mapped the world, and explorers bravely ventured into the unknown.

Advertisement

The intricate details and craftsmanship of these vintage globes reflect the artistry of cartographers from the past, showcasing historical cartography and design. As you gaze upon the aged patina and wear on these globes, you're reminded of their journey through time and history.

The nostalgic charm of vintage glass globes adds a touch of sophistication to any space, making them a prized collectible for enthusiasts. By displaying one of these treasures, you're not only showcasing a piece of history but also paying homage to the pioneers of exploration.

Whether you're a history buff, a collector, or simply someone who appreciates the beauty of the past, vintage glass globes are sure to captivate and inspire.

Captivating Orb-Shaped Treasures

With their enchanting orb-shaped design, vintage glass globes exude timeless charm, transporting you to an era of elegance and refinement. As you gaze at these captivating treasures, you can't help but feel a sense of nostalgia wash over you.

The intricate craftsmanship that went into creating these vintage glass globes is a tribute to the artisans of the past, who carefully blended artistry and functionality. Whether displayed in a home, office, or library, these globes add a touch of sophistication to any space.

Advertisement

The allure of vintage glass globes lies in their classic appeal and historical significance, making them a nostalgic treasure that transcends time. As you hold one of these vintage globes in your hands, you can almost imagine the explorers of yesteryear using similar instruments to navigate uncharted territories.

The timeless charm of vintage glass globes is undeniable, making them a treasured possession for anyone who appreciates the beauty of the past.

Artisanal Craftsmanship on Display

detailed and skilled craftsmanship

As you hold a vintage glass globe, you're struck by the precision and artistry that defines every delicate curve and intricate detail. It's a tribute to the skilled artisans who crafted these orbs, pouring their hearts and souls into every piece. Each globe is a unique work of art, a masterpiece that showcases the artisan's expertise.

Craftsmanship Materials Characteristics
Hand-blown glass High-quality glass Delicate curves, intricate details
Meticulous attention to detail Skilled artisans Timeless elegance, charm
Precision engineering Quality materials Stunning decorative pieces
Unique, one-of-a-kind designs Vintage charm Collector's items
Skilled craftsmanship Attention to detail Sophisticated, elegant decor

The level of craftsmanship within these globes is astounding, and it's no wonder they're highly sought after by collectors. When you purchase a vintage glass globe, you're not just buying a decorative piece – you're investing in a piece of history. And with a Money Back Guarantee, you can trust that you're getting a genuine, high-quality item that will open up a new world of wonder within your home.

Illuminating the World's Wonders

exploring global wonders brightly

Vintage glass globes like the Replogle Illuminated Glass Globe, designed and edited by Gustav Brueckmann, offer a fascinating glimpse into the world's wonders, bringing international landmarks and geographical features to life with their soft, warm glow.

As you gaze at this 12-inch Library model globe, you'll discover identifying countries like Germany, Korea, Israel, and French Indo China, taking you on a journey across the world.

This stunning item, estimated to be from 1948-49, stands 15 3/4 inches tall with a base diameter of 8 5/8 inches, making it a statement piece in any room. With its working light and 6 2 cord, you can enjoy the warm ambiance it provides.

Advertisement

Plus, with free domestic shipping to the 48 contiguous states, you can get this vintage beauty delivered right to your doorstep. And, with a Money Back Guarantee, you can shop with confidence.

If you're looking to finance your purchase, consider using your PayPal Credit account, which opens new window of payment options.

Vintage Glass in Modern Spaces

incorporating historical glass designs

As you bring vintage glass globes into your modern space, you're about to discover the magic of blending old and new, creating a look that's both nostalgic and contemporary.

By incorporating these timeless treasures, you'll revive classic elegance and add a touch of sophistication to your interior design.

With their versatility and enduring appeal, vintage glass globes become essential decor elements that elevate your space and transcend fleeting trends.

Mixing Old and New

By incorporating vintage glass globes into your modern space, you'll create a mesmerizing blend of past and present that adds depth and visual interest to your interior design. This eclectic touch brings a unique sophistication to contemporary design, making your space stand out from the crowd.

Advertisement

Here are three ways to successfully mix old and new styles with vintage glass globes:

  1. Play with contrast: Combine vintage glass globes with modern, sleek furniture to create a visually striking juxtaposition.
  2. Add a pop of color: Use vintage glass globes in bold, bright colors to add a fun and playful touch to your modern space.
  3. Create a focal point: Group vintage glass globes together to create a stunning centerpiece that draws the eye and sparks conversation.

Reviving Classic Elegance

You can bring a sense of refinement to your modern space by incorporating vintage glass globes, which infuse the room with a classic elegance that's hard to replicate with modern decor alone. These globes offer a timeless appeal that complements a variety of interior design styles, from modern minimalist to traditional and eclectic. By incorporating vintage glass globes into your decor, you can create a nostalgic atmosphere that transports you to a bygone era.

Benefits Description
Timeless Appeal Vintage glass globes add a touch of classic elegance to modern spaces
Versatility They complement a variety of interior design styles
Nostalgic Atmosphere They create a warm and inviting glow while showcasing intricate cartography
Historical Charm They elevate the aesthetic of a room with their historical charm

Timeless Decor Essentials

Your modern space can greatly benefit from the incorporation of vintage glass globes, which effortlessly merge nostalgic charm with sleek contemporary design. These decorative pieces add a touch of timeless elegance to any room, blending nostalgia with modernity.

Whether you're looking to create a cozy atmosphere in your living room or add a touch of sophistication to your home office, vintage glass globes are the perfect accent.

Here are just a few ways to incorporate vintage glass globes into your modern decor:

  1. Add a touch of whimsy: Hang a vintage glass globe from a pendant light or use it as a unique centerpiece for your dining table.
  2. Create a cozy reading nook: Place a vintage glass globe on a side table or bookshelf to add warmth and ambiance to your reading space.
  3. Elevate your home office: Use a vintage glass globe as a paperweight or desk decoration to add a touch of sophistication to your workspace.

When shopping for vintage glass globes, look for sellers that offer a Money Back Guarantee, such as eBay's Money Back Guarantee, to make a risk-free purchase. With their timeless charm and versatility, vintage glass globes are the perfect addition to any modern space.

Educational Tools of Yesteryear

obsolete teaching methods revisited

Discover the fascinating world of vintage glass globes, which played a significant role as educational tools of yesteryear, illuminating the geographical landscape for students and scholars alike.

As you explore the world of vintage globes, you'll realize that they were more than just decorative pieces – they were essential tools for learning.

Advertisement

Take, for instance, the Replogle 12 inch Library model, designed by Gustav Brueckmann in Chicago, Illinois. Made in the USA around 1948-49, this globe features a 6'2' cord and displays countries like Germany, Korea, Israel, and French Indo China. With its 15 3/4' height and 8 5/8' base diameter, this illuminated glass globe is both a decorative and educational masterpiece.

When purchasing vintage globes, you can rest assured with eBay's Money Back Guarantee, ensuring your purchase is protected. With free shipping within the 48 contiguous states, you can start exploring the world of vintage glass globes today!

The Allure of Antique Cartography

exploring vintage map treasures

As cartographers like Gustav Brueckmann poured over ancient maps and manuscripts, they crafted intricate, historically accurate representations of the world, which are now showcased in vintage glass globes. These globes are a confirmation to the art of antique cartography, where every detail, from country borders to geographic features, was meticulously researched and rendered. The allure of these vintage globes lies in their ability to transport you to a bygone era, where exploration and discovery were still unfolding.

Here are a few fascinating aspects of antique cartography in vintage glass globes:

  1. Historical accuracy: Cartographers like Brueckmann confirmed that their maps reflected the most up-to-date knowledge of the time, making these globes valuable resources for historians and researchers.
  2. Intricate details: From the subtle shading of mountains to the delicate rendering of coastlines, every aspect of these globes was carefully crafted to create an immersive experience.
  3. Timeless appeal: Despite being created decades ago, vintage glass globes like the Replogle Globes' 12-inch Library globe model continue to captivate audiences with their beauty and historical significance.

As you gaze upon these vintage globes, you're not just looking at a decorative piece – you're holding a piece of history in your hands.

Sophisticated Decor for Any Room

elegant and stylish furnishings

With their classic elegance and timeless appeal, vintage glass globes effortlessly elevate the ambiance of any room, adding a sophisticated touch to your interior design.

You can create a unique and elegant atmosphere in your space by incorporating these beautiful decorative pieces into your decor.

Whether you're looking to add a touch of nostalgia or a dash of sophistication, vintage glass globes are the perfect addition to any room.

Advertisement

They come in various sizes and styles, making it easy to find the perfect fit for your aesthetic preferences.

Use them as standalone decor pieces or as functional lighting fixtures – the possibilities are endless.

By incorporating vintage glass globes into your interior design, you'll be adding a timeless touch that exudes elegance and refinement.

They're a popular choice for those seeking a blend of nostalgia and style, and with their versatility and classic appeal, it's easy to see why.

Preserving History in Glass

capturing history in glass

You can own a piece of history with vintage glass globes like the Replogle Library Globe, which was meticulously designed by Gustav Brueckmann in the late 1940s. These unique pieces not only add a touch of sophistication to any room but also serve as a window to the past.

When preserving history in glass, it's crucial to take into account the following factors:

Advertisement
  1. Authenticity: Verify the globe is genuine and not a reproduction. Look for signs of aging, and confirm the manufacturer's marks.
  2. Condition: Inspect the globe's working condition, including any illumination features. A functioning globe can greatly enhance its value.
  3. Provenance: Investigate the globe's history, including its origins and previous owners. This can significantly impact its value and authenticity.

When purchasing a vintage glass globe, consider buying from reputable sellers who offer an eBay Money Back Guarantee. This ensures you're protected in case the globe doesn't match the description.

With the right precautions, you can own a stunning piece of history that will illuminate your space and spark conversations.

Frequently Asked Questions

Are Vintage Glass Globes More Valuable if Signed by the Artist?

When you're considering the value of vintage glass globes, one important factor is the signature of the artist. You'll often find that signed globes are more valuable due to their rarity and authenticity.

Typically, a signature from a renowned artist can increase the globe's worth by 20-50%. However, it's vital to verify the signature's authenticity through documentation or expert appraisal to make sure you're not buying a reproduction.

Can I Use Vintage Globes as Functional Decorations in My Office?

You're contemplating repurposing vintage globes as functional decorations in your office, but you might be wondering if they're more than just a quirky conversation starter.

Surprisingly, these ornate globes can add a touch of sophistication to your workspace. With a little creativity, you can transform them into unique pen holders, paperweights, or even mini planters.

Advertisement

Just make sure you clean and dust them regularly to maintain their elegance.

How Do I Properly Clean and Maintain My Vintage Glass Globe?

When it comes to cleaning and maintaining your vintage glass globe, you'll want to handle it with care. Gently dust the globe with a soft, dry cloth to remove any loose particles.

For more thorough cleaning, mix a solution of mild soap and distilled water, and gently wipe the globe with a soft-bristled brush or a lint-free cloth.

Avoid using harsh chemicals, abrasive materials, or excessive water, which can damage the globe's surface or cause it to deteriorate over time.

Can I Find Vintage Globes With Specific Geographical Features or Themes?

You're on the hunt for vintage globes with specific geographical features or themes – and you're not alone! Many collectors seek out globes showcasing particular regions, like antique maps of Europe or Asia, or globes highlighting historical events, such as the Age of Exploration.

Advertisement

You can find these unique globes at antique shops, estate sales, or online marketplaces like eBay or Etsy, where sellers often highlight the globe's distinct features in their descriptions.

Are Vintage Glass Globes Considered a Good Investment Opportunity?

As you consider investing in vintage glass globes, you're probably wondering if they're a good investment opportunity.

While some rare and limited-edition globes can appreciate in value over time, most vintage globes are more of a collectible hobby than a lucrative investment.

You'll need to research and find rare, high-demand globes in excellent condition to potentially see a return on your investment.

Conclusion

As you gaze upon the vintage glass globe, its intricate details and faded hues transport you to an era of discovery and exploration.

Advertisement

Like a time capsule, it holds secrets of the past, whispers of ancient cartographers, and the echoes of forgotten civilizations.

Will you be the keeper of its stories, the guardian of its timeless beauty?

Continue Reading

Home Decor

10 Stylish 34-Inch Tree Collars for Your Christmas Decor

Find the perfect finishing touch for your Christmas tree with these 10 stylish 34-inch tree collars that elevate your holiday decor.

Published

on

stylish 34 inch christmas tree

Elevate your Christmas decor with a stylish 34-inch tree collar that complements your unique holiday style. From modern sophistication to rustic charm, you'll find a collar to fit your theme. Choose from red velvet with sequins, burlap for a natural look, or a winter wonderland snowflake design. For a classic touch, opt for emerald green or galvanized steel for a farmhouse chic vibe. Alternatively, go for vintage glamour with gold sequins, Scandinavian minimalism in white, or a cozy country cottage look with a plaid pattern. Whichever style you choose, you'll add a touch of elegance to your holiday display, and there's more to discover.

Key Takeaways

• The Red Velvet Tree Collar offers modern sophistication with its double-layer velvet and sequins, fitting larger trees with its 34-inch diameter.

• The Scandinavian Minimalist Tree Collar provides a sleek, modern design in white, easily assembling and storing with its 34-inch size.

• The Rustic Charm Burlap Tree Collar brings natural texture and neutral color, fitting trees up to 11 feet tall for a cozy ambiance.

• The Winter Wonderland Snowflake Design Tree Collar features a white and silver color scheme, durable materials, and easy assembly for a festive display.

Advertisement

• Multiple stylish options, including galvanized steel and emerald green, cater to different decor styles, from rustic to elegant and sophisticated.

Modern Sophistication in Red Velvet

Adding a 34-inch red velvet tree collar to your Christmas decor instantly injects modern sophistication into your holiday display. This luxurious touch isn't just aesthetically pleasing, but also elevates your entire Christmas decor.

The double-layer velvet, sequins, and glitter used to craft this tree collar exude elegance and glamour, making it a stunning focal point for your holiday tree. Measuring 34 inches in diameter, this tree collar is perfect for larger trees, providing ample coverage for the base.

The rich red color and detailed design of the collar create a beautiful contrast against the green of your tree, drawing the eye upward. By incorporating this stylish tree collar into your decor, you'll seamlessly combine beauty and functionality, taking your Christmas display to the next level.

With its luxurious feel and modern design, this red velvet Christmas tree collar is the perfect addition to your holiday decor.

Advertisement

Rustic Charm With Burlap Accents

chic barn wedding d cor

You can bring rustic charm to your Christmas decor with a 34-inch burlap tree collar that wraps around your tree, introducing a natural, earthy tone to your holiday display. This type of Christmas tree collar is perfect for those who want to add a cozy and inviting vibe to their festive decorations. With its neutral color, burlap complements a wide range of tree styles and ornaments, making it a versatile choice for any home.

Feature Description Benefit
Natural Texture Burlap tree collars have a natural, earthy tone Adds rustic charm to your decor
Ample Coverage 34-inch tree collars fit trees up to 11 feet tall Ensures a cohesive look for larger trees
Neutral Color Burlap complements a wide range of tree styles and ornaments Versatile choice for any home

Winter Wonderland Snowflake Design

festive snowflake pattern creation

Thirty-four inches of Winter Wonderland Snowflake Design tree collar wraps around your tree, bringing an elegant touch to your holiday display with its intricate snowflake patterns. This stunning tree collar is perfect for larger Christmas trees, adding a touch of sophistication to your holiday decor.

The snowflake pattern is carefully crafted to create a beautiful, intricate design that catches the eye. Made from durable materials, this tree collar is built to last for multiple holiday seasons, ensuring it remains a staple in your festive decorations for years to come.

The white and silver color scheme of this collar complements a variety of Christmas tree themes and color schemes, making it easy to incorporate into your existing decor. Plus, its easy assembly and storage make it a practical choice for busy holiday enthusiasts.

Whether you're going for a winter wonderland theme or a more subtle holiday look, this snowflake design tree collar is a stylish and functional addition to your festive decorations. Its elegant design and durable construction make it a great choice for anyone looking to elevate their holiday decor.

Classic Elegance in Emerald Green

elegant emerald green style

Wrapping your tree with the Classic Elegance in Emerald Green tree collar brings a sophisticated touch to your holiday decor, evoking the luxurious feel of a winter forest. This stunning 34-inch tree collar is designed to add a touch of classic elegance to your Christmas decor. The rich emerald green color complements a variety of tree styles and decorations, making it a versatile option for any holiday setup. Crafted from durable materials, this tree collar provides a sturdy and stylish base for your tree, ensuring it remains secure and stable throughout the holiday season.

As a Christmas tree base collar, the Classic Elegance in Emerald Green is designed to conceal unsightly tree stands and create a polished, put-together look. The emerald green hue adds a pop of color to your holiday decor, creating a festive ambiance that's sure to impress.

Whether you're going for a traditional or modern look, this stylish tree collar is sure to enhance the festive feel of your home. So why settle for a plain tree stand when you can elevate your holiday decor with the Classic Elegance in Emerald Green tree collar?

Advertisement

Farmhouse Chic With Galvanized Steel

rustic farmhouse with metal

Add a rustic touch to your holiday decor with galvanized steel tree collars, which bring a modern farmhouse chic twist to your Christmas setup. These 34-inch tree collars provide ample coverage for trees up to 11 feet tall, guaranteeing your tree looks stunning from base to top.

The durable steel construction guarantees long-lasting use season after season, making it a worthwhile investment for your holiday decor. You'll love how easy it's to assemble these galvanized steel tree collars, which add a touch of industrial elegance to your holiday display.

By incorporating a galvanized steel tree collar into your decor, you'll enhance the overall aesthetic of your tree, creating a beautiful focal point in your home. The modern farmhouse chic look is perfect for those who want to add a rustic touch to their holiday decor without sacrificing style.

With its versatility and durability, a galvanized steel tree collar is an excellent choice for anyone looking to elevate their Christmas decor.

Whimsical Woodland Animal Print

playful forest creature design

For a more playful and whimsical take on your Christmas decor, you'll love the charming woodland animal print tree collar that brings a touch of the forest to your holiday setup. This 34-inch tree collar is perfect for larger Christmas trees and features a delightful design with various woodland animals like deer, foxes, and owls, adding a festive and playful touch to your holiday decor.

Here's a breakdown of this whimsical woodland animal print tree collar:

Feature Description Benefit
Material Durable and high-quality Functional and decorative
Design Woodland animal print Adds a unique and whimsical element
Size 34 inches in diameter Suitable for larger Christmas trees
Assembly Easy to assemble and store Stylish and practical solution

This tree collar is not only decorative but also functional, enhancing the overall look of your tree display. The woodland animal print adds a unique and whimsical element to your Christmas tree, perfect for nature-themed or rustic decor styles.

Advertisement

Coastal Vibes With Natural Jute

sustainable coastal decor elements

As you set out to create a coastal-themed Christmas display, consider incorporating the Coastal Vibes Natural Jute Tree Collar. This 34-inch diameter tree collar is crafted from natural jute material, offering a rustic charm that complements various tree styles and decorations. The neutral color of the jute collar guarantees it blends seamlessly with your existing decor, adding a touch of coastal vibes to your holiday display.

Here are three benefits of choosing the Coastal Vibes Natural Jute Tree Collar:

  1. Easy Assembly and Storage: This tree collar is easy to assemble and store, making it a convenient addition to your holiday decor.
  2. Rustic Charm: The natural jute material and neutral color of the collar add a touch of rustic charm to your tree display.
  3. Versatility: The Coastal Vibes Natural Jute Tree Collar complements a range of tree styles and decorations, making it a versatile addition to your holiday decor.

Vintage Glamour in Gold Sequins

sparkling gold sequin gown

You'll make a bold statement with the Vintage Glamour Gold Sequin Tree Collar, which wraps your tree in luxurious elegance and sophistication. This stunning tree collar features a dazzling gold sequin design that adds a touch of glamour to your Christmas decor.

Crafted to fit most tree bases up to 32 inches in diameter, this collar guarantees a seamless look that complements your tree's natural beauty. Easy to assemble and store, this tree collar is a convenient holiday decorating option that won't take up too much space.

With its elegant design and effortless installation, you'll elevate your holiday display and create a sophisticated ambiance that's perfect for the festive season. Whether you're hosting a holiday party or simply want to add a touch of luxury to your home, the Vintage Glamour Gold Sequin Tree Collar is the perfect accessory for your Christmas tree.

It's a stylish and eye-catching addition that's sure to impress your friends and family.

Scandinavian Minimalist in White

clean simple nordic style

If vintage glamour isn't your style, a Scandinavian Minimalist in White Tree Collar can bring a sleek, modern touch to your holiday decor. This stylish tree collar features a clean and minimalist design in white, perfect for complementing your Christmas decor. Made of durable materials, it's built to last and easy to assemble and store.

Here are three benefits of choosing a Scandinavian Minimalist in White Tree Collar:

Advertisement
  1. Modern elegance: The sleek design adds a touch of Scandinavian style to your holiday display.
  2. Easy to use: The tree collar is easy to assemble and store, making it a convenient addition to your Christmas decorations.
  3. Versatile: The 34-inch size is suitable for larger trees, and the white color complements a variety of decorating styles.

With its modern design and durable construction, this tree collar is an excellent choice for anyone looking to add a touch of Scandinavian chic to their holiday decor. Whether you're going for a minimalist look or want to add a pop of white to your Christmas tree, this tree collar is an excellent choice.

Country Cottage With Plaid Pattern

cozy plaid country retreat

This charming Country Cottage With Plaid Pattern tree collar brings a warm, rustic touch to your holiday decor, evoking feelings of coziness and traditional charm. As you adorn your tree with this stylish accessory, you'll create a warm and inviting atmosphere that's perfect for the holiday season.

The 34-inch tree collar features a charming country cottage design with a festive plaid pattern, adding a cozy and rustic touch to your Christmas decor. Made of durable materials, this tree collar guarantees longevity and enhances the overall appeal of your tree display. Plus, it's easy to assemble and fits most tree bases up to 32 inches in diameter for a seamless finish.

With its classic design, this tree collar is perfect for creating a warm and inviting holiday atmosphere in your home. You'll love how it brings a touch of rustic charm to your holiday decor, making it a great addition to your festive decorations.

Frequently Asked Questions

How Big Should a Christmas Tree Collar Be?

When choosing a Christmas tree collar, you're probably wondering how big it should be. The key is to take into account your tree's height, as the collar's size is based on that.

For trees between 7 and 11 feet tall, a 34-inch collar is a good fit. It can cover bases up to 32 inches in diameter, giving your tree a polished look.

Just make sure the collar fits snugly around the base to enhance the overall aesthetic.

Advertisement

Are Tree Collars Still Popular?

You might be wondering, are tree collars still the 'it' thing for Christmas decor? The answer is a resounding yes!

Despite the ever-changing trends, tree collars remain a popular choice for many. In fact, they've become a staple in modern holiday decorating, offering a sleek and polished look that's hard to resist.

How to Make an Inexpensive Tree Collar?

You're looking for an inexpensive tree collar solution. Repurpose a galvanized tub or bucket for a rustic look.

Alternatively, use a woven basket or large planter as a unique alternative.

If you're crafty, create a DIY collar using wood planks or lattice panels.

Advertisement

You can even wrap a decorative blanket or fabric around the base of the tree for a cozy look.

How Do I Make My Christmas Tree Collar Taller?

You're probably thinking, 'Why settle for a mediocre tree collar when you can have one that's towering above the rest?'

To make your Christmas tree collar taller, you're not limited to just one option. Consider using risers or platforms underneath the tree collar to add height, or opt for a taller design, like a 34-inch option, to increase the overall height.

Conclusion

As you step back to admire your Christmas tree, the 34-inch tree collar of your choice adds a finishing touch, like the perfect accessory to a stylish outfit.

Imagine the rustic charm of burlap accents or the vintage glamour of gold sequins complementing your festive decor.

Advertisement

Whatever your style, these tree collars bring a touch of sophistication, transforming your tree into a winter wonderland centerpiece that shines like a beacon of holiday joy.

Continue Reading

Home Decor

Make a Simple Buffalo Plaid Galvanized Pumpkin

Discover how to elevate a plain galvanized pumpkin into a unique buffalo plaid masterpiece with a few simple steps and creative embellishments.

Published

on

By

diy buffalo plaid pumpkin

We're excited to share our guide on transforming a plain galvanized pumpkin into a stunning buffalo plaid masterpiece. First, we prepare the pumpkin by cleaning it thoroughly and selecting the right adhesive fabric for the design. Next, we create a buffalo plaid pattern using painter's tape and black paint, applying horizontal and vertical stripes alternately. After adding a stem that complements the design, we apply fabric strips securely using hot glue. Finally, we add finishing touches like a buffalo plaid bow, faux greenery, and a wood stem for rustic charm. Now, let's get crafting and discover the creative possibilities!

Key Takeaways

• Clean and prepare a galvanized metal pumpkin to ensure a smooth surface for painting and decorating.

• Create a buffalo plaid pattern on the pumpkin using painter's tape and black paint, allowing each layer to dry completely.

• Add a realistic stem that complements the design and provides texture and realism to the seasonal decor piece.

• Apply buffalo plaid fabric strips securely to the pumpkin using hot glue, smoothing out wrinkles or air bubbles as needed.

Advertisement

• Embellish the pumpkin with a buffalo plaid bow, faux greenery, and berries to add a festive touch and rustic charm.

Prepare the Galvanized Pumpkin

We begin by selecting a galvanized metal pumpkin as the foundation of our project, making sure it's free of dirt, grime, and moisture. This base will provide a clean slate for our buffalo plaid design.

Before we start decorating, we need to make certain our pumpkin is spotless. A quick wipe with a damp cloth should do the trick. This step is essential, as any dirt or grime can impact the adhesion of our paint or fabric.

We're going for a classic look, so we'll focus on a black and white buffalo plaid pattern. While we could use acrylic paint to create the design, we might opt for adhesive buffalo plaid fabric instead. This will give our pumpkin a unique texture and visual interest.

Once we've applied our chosen design, we can further customize our pumpkin with ribbon or faux greenery. The possibilities are endless, and we can't wait to see our galvanized pumpkin transform into a stunning piece of seasonal decor.

Advertisement

Create Buffalo Plaid Pattern

buffalo plaid pattern design

With our galvanized pumpkin clean and ready, let's create the iconic buffalo plaid pattern that'll give our seasonal decor a rustic touch. To achieve this, we'll use black and white paint to create the buffalo plaid pattern. Here's a breakdown of the painting process:

Step Description
1 Apply painter's tape to create clean lines and crisp edges for the buffalo plaid pattern.
2 Paint horizontal stripes with black paint, allowing each layer to dry completely before adding the next.
3 Alternate painting horizontal and vertical stripes to achieve the buffalo plaid design.

Using a small paintbrush for precision, we'll paint the buffalo plaid pattern on the galvanized pumpkin. Remember to allow each layer of paint to dry completely before adding the next layer to prevent smudging or blending of colors. By following these steps, we'll achieve a beautiful buffalo plaid pattern that'll add a rustic touch to our seasonal decor.

Add Dimension With Stem

enhance with stem support

To take our buffalo plaid galvanized pumpkin to the next level, we're adding a stem that not only complements the plaid design but also brings a touch of realism to this seasonal decor piece. The addition of a dimensional stem elevates the visual appeal of our buffalo check pumpkin, making it stand out among other fall decorations.

When selecting a stem, consider the following factors:

  • Choose a stem that complements the buffalo plaid design, ensuring a cohesive look.
  • Opt for a realistic stem that mimics the texture and color of a real pumpkin stem.
  • Select a stem that adds a touch of realism and texture to the galvanized pumpkin.

Apply Fabric Strips Securely

fabric strips for wound

We'll start applying the buffalo plaid fabric strips to our galvanized pumpkin, making sure to secure them tightly to prevent any unraveling. To guarantee a polished look, we'll press down firmly on the fabric strips to make sure they adhere well to the galvanized surface. Any wrinkles or air bubbles must be smoothed out for a clean finish.

Step Action Tips
1 Apply hot glue to the pumpkin Use a low-temperature glue gun to prevent damage
2 Place fabric strip on pumpkin Align the buffalo plaid pattern carefully
3 Press down firmly on fabric Ensure the fabric adheres smoothly to the surface

As we apply the fabric strips, we can use a buffalo check ribbon to add a decorative touch. Securing the fabric strips with hot glue or a strong adhesive is crucial to prevent them from peeling off. By following these steps, we'll achieve a beautiful, evenly covered galvanized pumpkin with a unique buffalo plaid design.

Add Finishing Touches

polishing the final details

As we move on to the final stage of our project, we're excited to add those finishing touches that will elevate our simple buffalo plaid galvanized pumpkin from charming to stunning.

Now it's time to focus on the final flourish details, embellishing with ribbons, and adding twine accents that will give our pumpkin a rustic, homespun charm.

Final Flourish Details

Now that our galvanized pumpkin is transformed into a buffalo plaid beauty, let's incorporate some finishing touches to make it truly special. We're almost done, and these final flourishes will elevate our pumpkin from ordinary to extraordinary.

Advertisement

Here are a few ideas worth exploring:

  • Add a buffalo plaid bow for a festive touch, perfect for adorning your door or using as a centerpiece for your pumpkin wreath.
  • Ponder embellishing with faux greenery and berries to bring in a natural element, reminiscent of a fall morning.
  • Utilize a wood stem for a natural element that complements the galvanized pumpkin, adding a touch of rustic charm to your decor.

These small details will make our buffalo check pumpkin truly one-of-a-kind.

We can experiment with different bead colors or dye them to match our decor, adding a pop of color to our arrangement.

With these finishing touches, our simple buffalo plaid galvanized pumpkin is now a stunning piece of autumnal decor, ready to adorn our door, mantel, or coffee table.

Embellish With Ribbons

With our buffalo plaid pumpkin as the foundation, we're ready to tie everything together with a statement ribbon that adds a burst of color and texture to our autumnal decor.

We opt for a buffalo plaid ribbon, which complements our pumpkin's plaid design perfectly. To add some flexibility to our ribbon, we choose a wired ribbon, allowing us to easily shape it around the pumpkin. We experiment with different ribbon widths and patterns to create a unique look that's all our own.

Advertisement

To secure our ribbon in place, we use hot glue or double-sided tape, ensuring a lasting hold. For added visual interest, we consider layering multiple ribbons, creating a more intricate and textured design.

Add Twine Accent

What's the perfect way to add a rustic touch to our buffalo plaid pumpkin without overpowering its statement ribbon? We think a twine accent is the answer!

This simple yet effective detail can elevate the overall look of our galvanized pumpkin. To add a twine accent, we'll wrap twine around the stem of the pumpkin, securing it with hot glue to make sure it stays in place.

Here are a few tips to keep in mind:

  • Wrap multiple layers of twine for a thicker accent or keep it minimal for a subtle look
  • Experiment with different colors and textures of twine to match your decor style
  • Twine accents can easily be customized or removed for a new look

Display Your Masterpiece

create exhibit your art

Where will we showcase our beautifully crafted buffalo plaid galvanized pumpkin to maximize its visual impact?

We've put in the effort to create this stunning piece, and now it's time to display it proudly.

Advertisement

As we place our buffalo checked pumpkin on a mantel, shelf, or as a centerpiece, we're adding a rustic touch to our fall decor.

The combination of buffalo plaid and galvanized metal creates a stylish fall accent that's sure to impress.

By showcasing our masterpiece in a prominent spot, we're not only highlighting our crafting skills but also adding a trendy design element to our home.

As we step back to admire our handiwork, we can't help but feel a sense of pride in our creative endeavor.

According to DIY experts, 'displaying your crafts prominently can boost your confidence and inspire you to take on more projects.'

Advertisement

Frequently Asked Questions

How to Make Plaid Pumpkins?

"We're wondering how to make plaid pumpkins, and we're excited to learn! We'll start by choosing a pumpkin, then select a plaid pattern, and finally, add the design using paint, vinyl, or fabric for a unique fall decoration."

How to Make Fake Pumpkins Easy?

"Cut to the chase, we're all about simplicity! For fake pumpkins, we just grab foam or plastic ones from the craft store, and voilà! We're halfway to a stress-free, easy-peasy fall decoration that's a real showstopper."

Conclusion

As we step back to admire our handiwork, the galvanized pumpkin transformed into a symbol of cozy autumn nights, reminiscent of crackling fires and warm apple cider.

The buffalo plaid pattern wraps around the pumpkin like a warm blanket, evoking feelings of comfort and nostalgia.

Our DIY project has come to life, a demonstration of the power of creativity and resourcefulness.

Advertisement

Now, proudly display your masterpiece, a beacon of autumnal charm, and bask in the warmth of the season.

Continue Reading

Trending