Connect with us

Home Decor

Creative Ways to Repurpose Flower Pots

Pondering new purposes for old planters, discover surprising storage solutions and decorative accents waiting to be unearthed.

Published

on

upcycling flower pots creatively

By repurposing old flower pots, you can unleash new life into discarded items, reveal hidden storage potential, and add a touch of creativity to indoor and outdoor spaces. Transform small planters into organizers for personal belongings, or fill terracotta pots with pampas grass for a rustic or modern look. You can also repurpose old planters in the bathroom for storage and organization, or create a whimsical fairy garden in a whiskey barrel. With a little creativity, you can turn ordinary items into extraordinary decor pieces, and discover even more innovative ways to repurpose flower pots as you explore further.

Key Takeaways

• Repurpose old flower pots as functional storage solutions for indoor spaces, such as storing keys, wallets, and bathroom essentials.

• Transform flower pots into unique decorative accents, like centerpieces or organizers, to add a touch of whimsy to events or home decor.

• Use small planters to create a potted herb garden or add a touch of greenery to indoor decor, perfect for cooking and outdoor decor.

• Turn vintage items into charming plant containers for a rustic charm, or utilize unconventional planters like mugs or rain gutters for herb gardens.

Advertisement

• Get creative with outdoor spaces by repurposing old metal birdbaths, flower pots, or bricks to create enchanting oases or raised garden beds.

Transforming Indoor Spaces

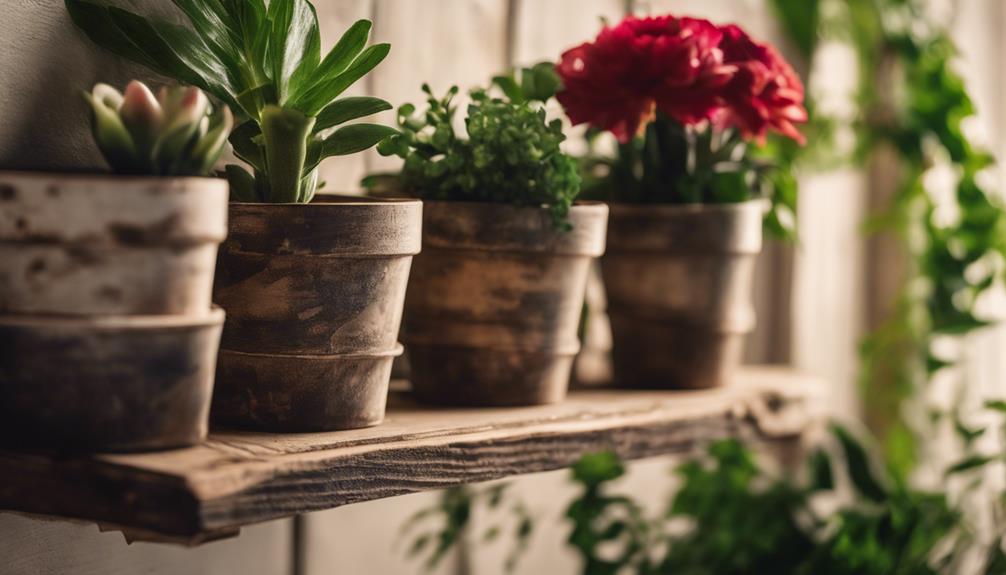
By repurposing old flower pots, you can transform your indoor spaces into functional and visually appealing areas. For instance, you can use small planters to organize your personal belongings, such as keys, wallets, or hair accessories. This not only keeps your space clutter-free but also adds a touch of greenery to your indoor decor.

If you have an old terracotta pot, consider filling it with pampas grass for a rustic or modern look that adds texture and visual interest to your room. You can also repurpose old planters in the bathroom to store cotton swabs, cotton balls, or even makeup brushes. This is a great way to keep your bathroom organized and within reach of the essentials you need.

With a little creativity, you can turn old flower pots into functional and stylish pieces that enhance your indoor spaces. By thinking outside the box, you can breathe new life into old planters and create a space that reflects your personal style.

Whimsical Outdoor Creations

playful garden sculptures artfully crafted

Step into the world of whimsical outdoor creations, where discarded items transform into vibrant planters, and ordinary spaces become enchanting oases.

As you explore the realm of repurposing, you'll discover the magic of transforming old, weathered items into unique planters. Take, for instance, an old metal birdbath or a large flower pot with drainage holes – these can be repurposed as durable planters for your outdoor plants.

Advertisement

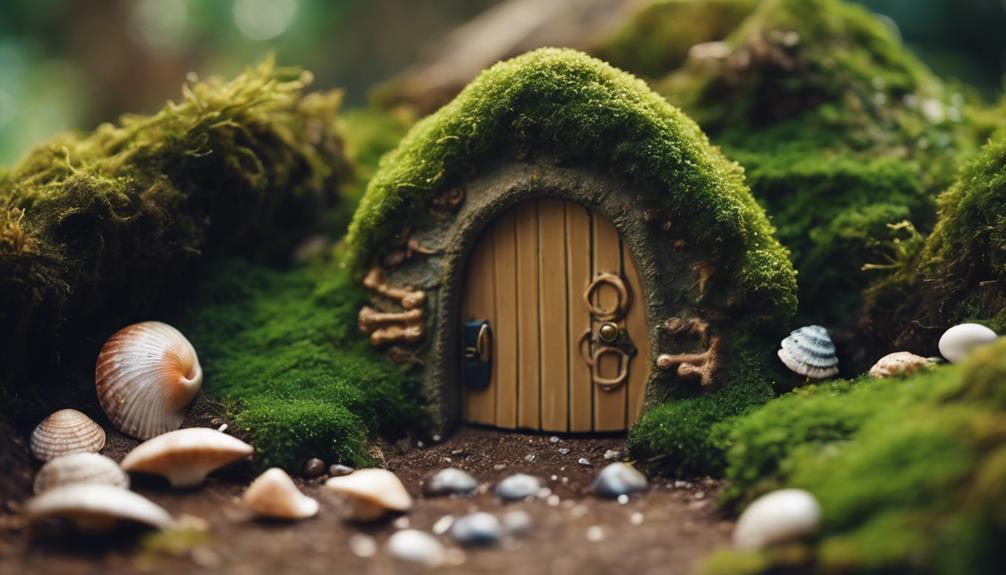
You can also create a whimsical fairy garden in a whiskey barrel, complete with small plants and fairy supplies, adding a touch of enchantment to your yard.

For a more rustic look, consider building a DIY raised garden bed using old bricks, which is both easy to assemble and durable in nature.

By adopting these creative and eco-friendly ideas, you'll not only reduce waste but also add a personal touch to your outdoor space.

With a little imagination, you can turn your yard into a vibrant oasis, perfect for relaxation and entertainment.

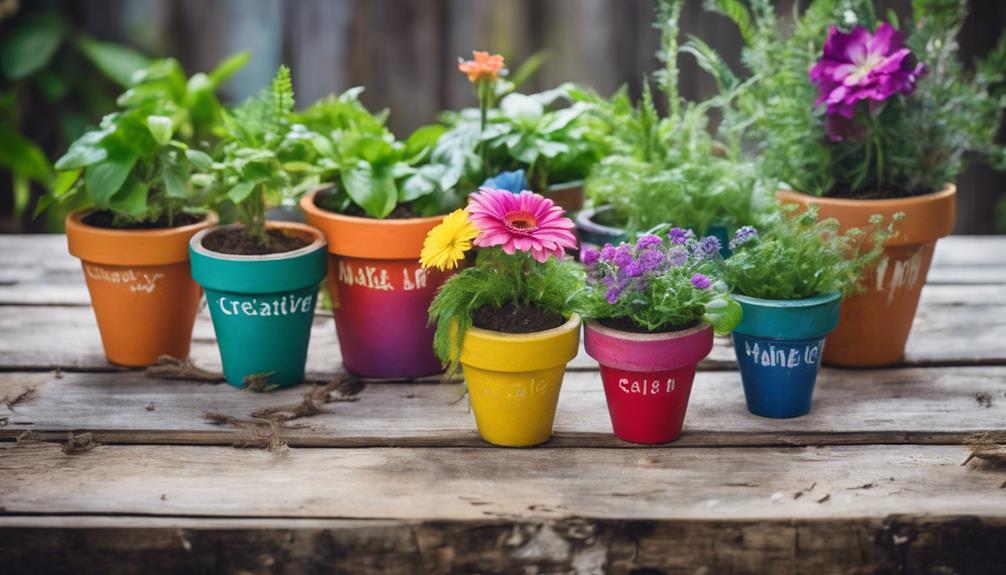
Unconventional Planter Ideas

creative and unique planters

As you explore unconventional planter ideas, you'll find that thinking outside the box (or pot) can lead to some truly innovative and functional designs.

For instance, you might create a potted herb garden that not only adds freshness to your cooking but also elevates your outdoor decor.

Advertisement

Potted Herb Garden

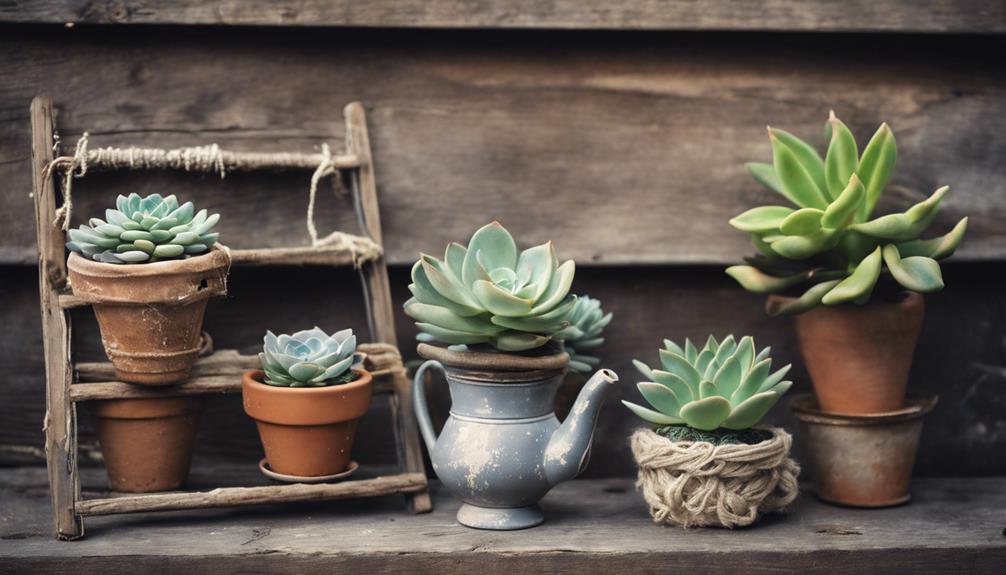
Transform your kitchen with a fresh and fragrant twist by repurposing old flower pots into a thriving potted herb garden, perfect for snipping a sprig of rosemary or thyme anytime. You can utilize unconventional planters like mugs, shoes caddies, or rain gutters for a unique herb garden display. By repurposing various containers into herb planters, you can save space and add a touch of greenery to any area.

Herb Container Size
Basil Small (6-8 inches)
Thyme Small (6-8 inches)
Rosemary Medium (10-12 inches)
Parsley Medium (10-12 inches)
Cilantro Large (14-16 inches)

Create a functional and decorative herb garden with repurposed items like cloth shoe caddies or coffee mugs. This will not only add a fresh and aromatic element to your living space but also provide you with a constant supply of fresh herbs for cooking. By exploring creative ways to repurpose flower pots as herb planters, you'll bring a touch of nature indoors and elevate your cooking game.

Unique Centerpiece Ideas

You can add a touch of personality to your event or home decor by repurposing flower pots as unique centerpieces that showcase your creativity and style. Think beyond traditional planters and use unconventional items like rain gutters, cardboard boxes, or cloth shoe caddies to add a creative twist.

If you're looking for a more rustic charm, transform vintage items like farmhouse sinks, wagons, or antique chamber pots into charming plant containers. You can also repurpose everyday items like coffee mugs, umbrellas, or old tires as distinctive planters.

For a more rustic or country-inspired look, consider using large, woven baskets, whiskey barrels, or even birdbaths as unique plant displays. Alternatively, use cinder blocks, old bricks, metal antiques, or wooden chairs to create a one-of-a-kind centerpiece.

Advertisement

Repurposed Decorative Accents

upcycled vintage home decor

With a dash of creativity, your old flower pots can be reborn as stylish decorative accents that add a touch of personality to your bathroom.

You can repurpose those flowerpots hanging around to store extra bathroom essentials, making your bathroom organization a breeze.

Here are some ideas to get you started:

  • Use small planters to store cotton balls, swabs, and rounds, keeping them within easy reach.
  • Turn old succulent planters into stylish organizers for your makeup and hair brushes.
  • Repurpose flower pots as decorative accents to store bath bombs, soaps, and washcloths.
  • Utilize planters to keep bathroom essentials organized and easily accessible, adding a decorative and practical touch to your bathroom.

Functional Storage Solutions

creative organization for homes

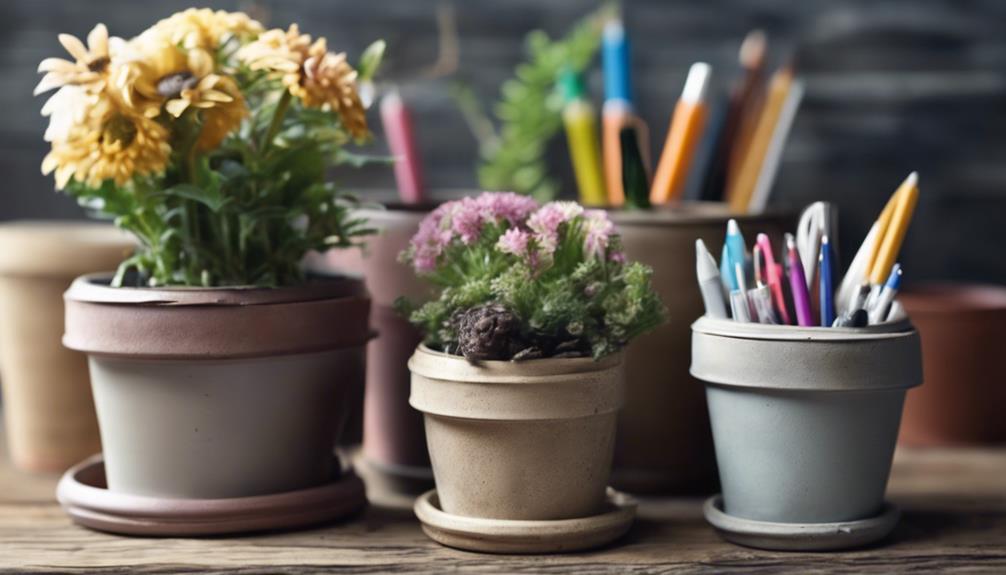
Beyond decorative accents, your old flower pots can also serve as functional storage solutions, providing a creative way to organize and declutter your living and working spaces. You can repurpose small flower pots for seed storage, keeping them organized and easily accessible. They can also make perfect nightstand organizers for storing small items like jewelry or eyeglasses. Additionally, you can turn small flower pots into vanity organizers for makeup brushes or hair accessories.

Functional Storage Solution Description
Seed Storage Keep seeds organized and easily accessible
Desk Organizer Hold utensils, pens, paper clips, or other office supplies
Toy Storage Create a neat and functional space in children's rooms

When repurposing flower pots for storage, ensure proper drainage to prevent water accumulation. You can also use small flower pots for Hose Storage, keeping your outdoor spaces organized. With a little creativity, your old flower pots can become functional storage solutions, making your life easier and more organized.

Artistic Expressions in Clay

creative pottery making process

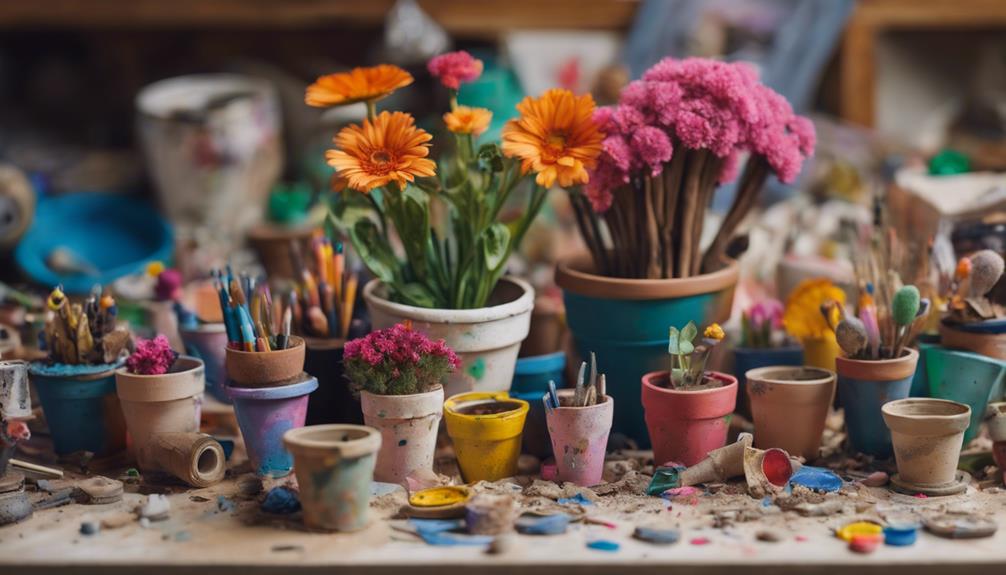
Clay flower pots offer a versatile canvas for artistic expressions, inviting you to express your creativity through painting, carving, or decoupage. With a little imagination, you can transform an old pot into a unique piece of art that adds a personal touch to your garden decor.

Take an old, worn-out pot and give it a fresh coat of paint to breathe new life into it. You can also upcycle a large planter into a stunning masterpiece that becomes the centerpiece of your outdoor space.

Here are some ways to make your clay pot a one-of-a-kind creation:

Advertisement
  • Carve intricate designs or patterns into the clay to create a textured and visually appealing surface.
  • Decoupage the pot with decorative paper or fabric to add a touch of elegance.
  • Add a protective sealant to your painted design to make sure it withstands the outdoor elements.
  • Experiment with different painting techniques, such as ombre or marbling, to create a truly unique piece of art.

Frequently Asked Questions

What Can I Do With Old Plant Pots?

You're wondering what to do with old plant pots? Well, you've got plenty of options!

You could repurpose them as organizers for keys, utensils, or small items around the house. Or, use them to store bathroom essentials like soaps and washcloths.

You could even turn them into a DIY bird bath or create a unique plant stand.

The possibilities are endless, and with a little creativity, you can give new life to those old pots.

What Can I Do With Leftover Pots?

You're wondering what to do with leftover pots, and you're not alone! You've probably accumulated a few from past plants or gardening projects.

Instead of letting them collect dust, think creatively. You can repurpose them as organizers for small items, seed storage, or even as a nightstand or desk organizer.

Advertisement

Get creative and turn them into something functional and useful, giving new life to what would otherwise be discarded.

How to Upcycle Plant Pots?

As you gaze at the stack of leftover pots, you wonder: how to upcycle plant pots? Instead of letting them collect dust, transform them into functional items that add charm to your space.

You can convert them into organizers, decorative elements, or even outdoor focal points. With a dash of creativity, you can breathe new life into these discarded pots, turning them into unique pieces that showcase your personal style.

How to Decorate a Planter Without Plants?

When you're looking to decorate a planter without plants, you have plenty of creative options. You can fill the planter with decorative rocks, sand, or glass beads for a visually appealing display.

Alternatively, you can add some magic with LED string lights or fairy lights for a whimsical ambiance.

Advertisement

If you want to create a soothing atmosphere, consider adding a small tabletop fountain or water feature.

Conclusion

As you repurpose those flower pots, you're not just giving old items new life – you're cultivating a mindset of resourcefulness and creativity.

Just as a garden blooms with care and attention, your imagination flourishes when nurtured with innovative thinking.

By transforming discarded pots into something new, you're tending to the seeds of ingenuity, allowing your unique perspective to take root and blossom into something truly remarkable.

Advertisement

Continue Reading
Advertisement

Home Decor

Make Quick and Simple Terra Cotta Pumpkins

Gain a head start on autumn decor with this easy guide to creating stunning, realistically textured terra cotta pumpkins in just a few simple steps.

Published

on

By

craft terra cotta pumpkins

We'll kick start our terra cotta pumpkin project by gathering ceramic pumpkins, craft paint, and natural stems for an authentic look. Next, we'll mix terracotta paint colors by blending orange, white, and brown hues, experimenting with ratios for unique shades. Adding flour to the paint will give our pumpkins a textured look, while precision painting and chip brush strokes will create a professional finish. After layering on flour for a realistic texture, we'll distress our pumpkins with sandpaper and add an aged look with powder. Finally, we'll seal our masterpiece with fixatif spray, and with these simple steps, we'll have created stunning terra cotta pumpkins that exude autumnal charm – and with more techniques to explore, our creativity will flourish.

Key Takeaways

• Blend orange, white, and brown craft paint to create unique terracotta shades for your pumpkin.

• Use a small paintbrush or chip brush to apply paint with precision for a professional finish.

• Add flour to paint for a chunky texture or sprinkle it on almost dry paint for a realistic look.

• Sand edges and corners to distress and age your pumpkin, focusing on areas prone to natural wear and tear.

Advertisement

• Seal your masterpiece with fixatif spray, applying multiple light coats for adequate coverage and protection.

Gather Your Supplies

We'll need a few essential items to get started on our terra cotta pumpkin project. To create these DIY terracotta pumpkins, we'll gather ceramic pumpkins in various sizes and shapes. These will serve as the base for our decorative pumpkins.

Next, we'll need a selection of craft paint in autumnal shades, such as Spiced Pumpkin, Burnt Sienna, Honey Brown, Oyster Beige, and Khaki Tan, to give our pumpkins a warm, seasonal look. A small paintbrush or chip brush will come in handy for applying the paint evenly.

To add an aged texture to our pumpkins, we can use white flour or baby powder. For an authentic touch, consider using natural pumpkin stems to complete the look.

With these basic supplies, we'll be well on our way to creating beautiful, rustic terra cotta pumpkins that will add a cozy ambiance to our homes.

Advertisement

Mix Terracotta Paint Colors

playful terracotta paint hues

Mixing the perfect terracotta color requires a blend of orange, white, and brown craft paint. This can be achieved by combining these hues in a bowl and adjusting the proportions to suit our desired shade.

We can experiment with different ratios of orange to white to brown to create a unique terracotta color that complements our pumpkins. For a more textured look, we can add a pinch of flour to the paint mixture. This will give our pumpkins a more rustic, earthy feel.

By adjusting the amount of flour, we can achieve varying levels of texture, from subtle to dramatic. Once we're happy with our terracotta color, we can use a brush to evenly paint our pumpkins, transforming them into beautiful, autumnal decorations.

With a little practice, we can achieve a range of different terracotta shades, each one unique and eye-catching. By mixing and matching our paints, we can create a collection of pumpkins that add a touch of warmth and coziness to any room.

Paint Your Foam Pumpkin

creative halloween craft idea

As we continue to transform our foam pumpkins into terra cotta masterpieces, we'll focus on the essential steps to achieve a realistic, earthy look.

Now that we've mixed our terracotta paint colors, it's time to explore the various paint color options that will give our pumpkins depth and character, as well as the brush stroke techniques that will add texture and visual interest.

Paint Color Options

We're spoiled for choice when it comes to craft paint colors that evoke the warm, earthy tones of terracotta, with options like Spiced Pumpkin, Burnt Sienna, Honey Brown, Oyster Beige, and Khaki Tan offering a great starting point. These colors provide a solid foundation for achieving a realistic terracotta finish on our DIY foam pumpkin.

Advertisement

Of course, we can always mix and match colors to create a unique shade that suits our taste. By experimenting with different color combinations, we can personalize our pumpkin and make it truly one-of-a-kind. Remember, the key to a convincing terracotta look lies in selecting the right paint colors.

With a small paintbrush or chip brush, we can apply the paint with precision, ensuring a professional-looking finish. Whether we're going for a vibrant, orange-hued pumpkin or a more muted, earthy tone, the right paint colors can make all the difference. By choosing the perfect shades, we can create a beautiful, terracotta-inspired pumpkin that's perfect for our fall decor.

Brush Stroke Techniques

With our chosen paint colors in hand, let's pick up a chip brush and start applying thick, textured strokes to our foam pumpkin. We love the look of a rustic, handmade terracotta pumpkin, and the right brush stroke techniques can make all the difference.

To achieve this, we'll use long vertical brush strokes with our chip brush, applying thickened paint to our foam pumpkin. As we brush up and down, we'll create a textured finish that adds depth and visual interest to our pumpkin. We'll let the paint dry naturally, maintaining those beautiful brush strokes for a realistic look.

Experimenting with different painting techniques is key to achieving the desired terracotta effect on our foam pumpkin. By mixing orange and yellow paint in a 1.5:1 ratio, we can create a custom terracotta color that's uniquely our own.

Advertisement

With practice and patience, we can master these brush stroke techniques and make a stunning, one-of-a-kind terra cotta pumpkin that we'll love displaying in our home.

Sealant Application Tips

Applying a sealant is essential to protecting our painted foam pumpkin from wear and tear, and choosing the right one is critical to preserving its texture and color. As we search for the perfect sealant, it's important to experiment with different options to find the one that works best for our project.

Here are some valuable tips to keep in mind for sealant application:

  • Use a fixatif spray as a gentle sealant for your painted foam pumpkin.
  • Apply multiple light coats of fixatif spray for heavier flour areas.
  • Avoid using clear matte acrylic sealer on your painted foam pumpkin.
  • Experiment with different sealant options like Mod Podge acrylic sealant for best results.
  • Allow the fixatif spray to dry completely before handling your painted foam pumpkin.

Add Texture With Flour

enhancing dishes with flour

As we explore the next step in creating realistic terra cotta pumpkins, we're going to discuss how adding flour can elevate our design.

We'll examine the benefits of using flour as a thickener, the advantages of incorporating flour texture, and some valuable tips for mixing flour into our paint.

Flour as Thickener

We add a pinch of creativity to our terra cotta pumpkins by incorporating flour as a thickener, which brings an intriguing texture to our decorative pieces. This DIY technique allows us to achieve a unique, realistic look that mimics the natural texture of terracotta.

Advertisement

To get started, we can add flour to our paint to create a thick, chunky texture. For a more subtle effect, we can sprinkle flour onto almost dry paint, which helps create a realistic terracotta look.

Here are some tips to keep in mind:

  • Distribute flour on different areas of the pumpkin for a varied texture.
  • Use a dry paint brush to help evenly spread the flour on the surface.
  • Experiment with the amount of flour used to achieve different textures and effects on your pumpkins.
  • Flour can be used to create a raised, bumpy texture or a smooth, even one, depending on how it's applied.
  • Don't be afraid to experiment and try out different flour-to-paint ratios to achieve the desired effect.

Flour Texture Benefits

By incorporating flour into our painting process, we can reveal a range of unique textures that add depth and visual interest to our terra cotta pumpkins.

The flour texture benefits are undeniable, as it allows us to achieve a textured finish that elevates our pumpkins from basic to exceptional. By sprinkling flour on almost dry paint, we can create an aged and realistic look that's perfect for autumnal decorations.

To achieve a natural texture, we can use a dry paint brush to distribute the flour evenly, ensuring a subtle yet striking effect. The best part? We can adjust the amount of flour to our liking, depending on how much texture we desire.

Experimenting with flour can lead to different levels of texture, resulting in unique pumpkin designs that showcase our creativity. With flour, we can transform our terra cotta pumpkins into stunning centerpieces that exude warmth and character.

Advertisement

Flour Mixing Tips

Mixing flour with paint is a simple process that reveals a world of textures, enabling us to create unique terra cotta pumpkins that stand out from the crowd.

When it comes to adding texture to our pumpkins, we've found that flour is an excellent addition to our paint. But how do we get the most out of this combination? Here are some flour mixing tips to help us achieve the perfect texture:

  • Sprinkle flour on the almost dry paint to create a textured look that's simply stunning
  • Distribute flour on different parts of the pumpkin for a realistic finish that mimics the natural texture of a real pumpkin
  • Use a dry paint brush to help spread the flour evenly and avoid clumps
  • Experiment with the amount of flour used to achieve your desired texture – more flour means a more textured look, while less flour results in a smoother finish
  • Mix flour with paint in small increments, as it's easier to add more flour than it's to remove excess

Distress the Terracotta Pot

distressed terracotta pot image

To achieve a weathered, vintage look, we're distressing the painted terracotta pot by gently sanding away the edges and corners, where natural wear and tear would occur over time. This process, referred to as light distressing, helps create a worn-out appearance that adds character to our pumpkin.

When using sandpaper, we're focusing on the areas that would naturally wear out first, such as the edges and corners. By gently rubbing the sandpaper in circular motions, we're able to create a subtle, aged look. Ensuring not to over-distress is crucial, as we aim to strike a balance between an aged and clean aesthetic.

Experimenting with different grits of sandpaper allows us to achieve the desired level of distressing. Remember, the goal is to create a subtle, weathered look, not to completely wear away the paint.

With a little patience and practice, we can achieve a beautifully distressed terracotta pot that adds a touch of rustic charm to our pumpkin decoration.

Advertisement

Add a Real Pumpkin Stem

incorporate real pumpkin stem

As we move forward with adding a real pumpkin stem to our terra cotta pumpkin, we'll need to focus on two important points: picking the perfect stem and attaching it securely.

We'll explore the significance of selecting a stem that fits our pumpkin's size and how to use hot glue or a strong adhesive to guarantee a strong bond.

Picking the Perfect Stem

We scour the local pumpkin patches and farmer's markets for the perfect stem, knowing that a sturdy, curved stem will add a touch of authenticity to our terra cotta pumpkins. To achieve a natural look, we're particular about the stems we choose. Here's what we look for:

  • Sturdy stems that can hold their own against the terra cotta pumpkin's weight
  • A curved shape that mimics the natural curve of a real pumpkin stem
  • Freshness – we avoid wilted or rotten stems that can compromise the overall appearance
  • A natural color that blends seamlessly with the terra cotta pumpkin
  • A stem that's free of debris or dirt, ensuring a clean attachment to our pumpkin

Attaching the Stem Securely

With our perfect stem in hand, we're ready to attach it securely to our terra cotta pumpkin. To guarantee a strong bond, we'll use hot glue or a strong adhesive, making sure the pumpkin stem is clean and dry before attaching it.

We'll apply the adhesive to the base of the stem and press it firmly onto the pumpkin, holding it in place for a few minutes to allow the adhesive to set and bond effectively.

As we attach the stem, we'll make sure it's centered and even, ensuring our terra cotta pumpkin looks natural and realistic. Once the stem is securely attached, we'll let it dry completely before handling or displaying our beautiful terra cotta pumpkin.

Age the Pumpkin With Powder

speed up pumpkin aging

We dust our terra cotta pumpkins with a light layer of powder to introduce an air of vintage charm. This simple technique adds a realistic, weathered look to our creations, giving them a unique and rustic appeal.

To achieve this aged texture, we sprinkle white flour or baby powder on the almost dry paint. Using a small paintbrush, we lightly distribute the powder, adjusting the amount based on the level of aging we desire.

Advertisement

Here are the benefits of aging our terracotta pumpkins with powder:

  • Enhances the overall appearance of the pumpkin, giving it a unique and rustic charm
  • Adds a realistic, weathered look to the terracotta surface
  • Creates a beautiful, vintage-inspired texture
  • Allows for customization of the aging level to suit individual tastes
  • Is a simple and easy technique to master, even for beginners

Seal Your Masterpiece (Optional)

create with optional flair

To guarantee our terracotta pumpkins remain vibrant and protected, consider applying a fixatif spray to seal in the paint and texture. This optional step will make sure our masterpieces stay fresh and intact. When choosing a sealant, avoid using clear matte acrylic sealer, as it may not provide the desired finish.

Sealant Options Characteristics
Fixatif Spray Protects paint and texture, multiple light coats recommended
Mod Podge Acrylic Sealant Alternative option for added protection
Clear Matte Acrylic Sealer Not recommended, may not provide desired finish
Multiple Coats Necessary for adequate coverage, especially on textured areas
Drying Time Allow fixatif spray to fully dry before handling or displaying

Display Your Terra Cotta Pumpkin

terra cotta pumpkin decoration

Now that our terra cotta pumpkins are complete, let's creatively arrange them to create a festive fall display that showcases our handiwork.

We've put in the effort to create these easy DIY terra cotta pumpkins, and now it's time to show them off!

Here are some ways to display our masterpieces:

  • Place your terra cotta pumpkins on a mantle or shelf for a charming display.
  • Group different sized pumpkins together for visual interest.
  • Mix in real or faux fall foliage for a festive touch.
  • Add twinkling string lights around your pumpkins for a cozy ambiance.
  • Incorporate other fall decor elements like acorns or pine cones to enhance the seasonal theme.

Tips for Styling Your Pumpkins

decorate pumpkins with flair

By creatively arranging our terra cotta pumpkins, we can craft a visually appealing display that showcases our handiwork. To add some depth and dimension to our DIY Halloween decorations, we can mix and match different sizes and shapes of pumpkins. By using different shades of terracotta paint, we can create a unique and eye-catching arrangement.

To give our pumpkins a more realistic look, we can add a touch of white paint or flour to achieve a weathered and aged appearance. Displaying our pumpkins in terracotta pots or rustic containers can further enhance the overall theme. For an extra touch of authenticity, we can experiment with incorporating real pumpkin stems into our design. This won't only add a natural element to our decoration but also create a unique conversation piece.

Frequently Asked Questions

How to Make Plastic Pumpkins Look Like Terracotta?

We're wondering how to make plastic pumpkins look like terracotta, and we're in luck! We can mix craft paint to achieve a terracotta color, add flour for texture, and sprinkle more flour on top for a realistic look.

Advertisement

How to Make Terracotta Jack O'lantern?

We're excited to create terracotta jack-o'-lanterns! We'll transform plastic pumpkins by mixing paint colors to achieve a terracotta shade, adding flour for texture, and sprinkling flour on almost dry paint for an aged look.

How to Paint a Pumpkin With Baking Soda?

"Painting a pumpkin with baking soda is like adding a secret ingredient to a recipe – it elevates the entire experience! We mix acrylic paint with baking soda to create a textured, realistic terracotta look that's uniquely ours."

How to Make Faux Pumpkins?

We're making faux pumpkins, and we're excited! We start with foam or ceramic bases, then add texture and color with craft paint and flour or baby powder to achieve a realistic, aged look.

Conclusion

As we step back to admire our handiwork, the warm, earthy tones of our terra cotta pumpkins seem to glow with a soft, autumnal light.

The textures, the colors, the subtle distressing – it all comes together to evoke the feeling of a rustic, vintage find.

Advertisement

And the best part? These little treasures are entirely our own creation, born from a few simple supplies and a dash of creativity.

Continue Reading

Alfresco

Is Frenchic Alfresco Waterproof? Learn More!

Harness the power of Frenchic Alfresco paint's waterproof properties for your outdoor projects – discover its durability and protection against the elements here!

Published

on

By

frenchic alfresco waterproof details

Frenchic Alfresco paint is highly water-resistant, offering excellent moisture protection for outdoor surfaces. With self-sealing and self-priming properties, it provides durability against varying weather conditions. This paint's weatherproof nature enhances its performance, safeguarding against elements like rain and sun exposure. Ideal for projects like garden furniture and front doors, it boasts UV resistance and a range of colors for a professional finish. Curing for at least 3 weeks in favorable climates guarantees longevity by creating a strong protective layer. Routine cleaning and inspection maintain its vibrant appearance. Discover more about Frenchic Alfresco's waterproof features for your outdoor endeavors.

Key Takeaways

  • Frenchic Alfresco paint is highly water-resistant with excellent moisture protection.
  • Offers weatherproof properties due to self-sealing and self-priming features.
  • Provides durable UV resistance for outdoor projects.
  • Full curing for at least 3 weeks enhances waterproofing.
  • Regular maintenance ensures long-lasting waterproofing qualities.

Properties of Frenchic Alfresco Paint

Frenchic Alfresco paint offers a range of durable and weatherproof properties suitable for various indoor and outdoor surfaces. Being water-based, it provides excellent resistance to UV rays, making it ideal for projects exposed to sunlight.

This self-priming and self-sealing paint not only simplifies application but also guarantees a smooth and professional finish. Additionally, its algae-resistant feature minimizes the risk of mold growth, particularly important for outdoor applications.

The wide color palette of 26 best-selling colors, including limited editions, allows you to choose the perfect shade for your project. Whether you're painting wood, laminate, UPVC, composites, metal, render, or brick, Frenchic Al Fresco paint caters to a diverse range of surfaces.

With its exceptional durability and weatherproof characteristics, this paint stands out as a versatile option for both interior and exterior use, promising long-lasting results that maintain their quality over time.

Water-Resistance Vs. Waterproofing

understanding water protection levels

What distinguishes water-resistance from waterproofing in paint products?

When considering the water-resistance of Frenchic Al Fresco paint for exterior projects, it's important to grasp the distinction between water-resistance and waterproofing.

Advertisement
  1. Water-resistance: Frenchic Al Fresco paint offers high water-resistance, being durable, weatherproof, and UV resistant. This means it can withstand exposure to elements like rain and sun without significant damage.
  2. Moisture Protection: While not completely waterproof, the paint provides excellent moisture protection, preventing issues like flaking and peeling due to water exposure.
  3. Surface Durability: Designed for exterior projects, Al Fresco paint ensures a long-lasting finish on surfaces exposed to varying weather conditions, enhancing overall surface durability.
  4. Weatherproof: The self-sealing and self-priming properties of the paint not only reduce maintenance needs but also contribute to its weatherproof characteristics, further improving water-resistance.

Suitable Applications for Alfresco Paint

alfresco paint for outdoors

Al Fresco paint is best suited for a variety of outdoor projects, ranging from garden furniture to front doors, due to its durable and weather-resistant properties. The Al Fresco Range offers a versatile solution for enhancing the appearance of your outdoor spaces.

Whether you're looking to revamp your garden furniture or add a fresh coat to your front door, this water-based paint is designed to withstand the elements while maintaining a vibrant finish. Its self-priming and self-sealing nature make it a convenient choice for UPVC doors and various surfaces such as wood, laminate, composites, and metal.

The weatherproof and durable characteristics of Al Fresco paint guarantee long-lasting results, providing a protective layer that can endure outdoor conditions. With its UV resistance and ability to create a low, flat finish, this paint is ideal for both indoor and outdoor applications, offering a professional look that lasts.

Curing Process for Longevity

preserving meat through curing

Ensuring proper curing of the paint is essential for maximizing its longevity and waterproofing capabilities. When dealing with Frenchic Al Fresco, the curing process plays an important role in creating a durable and weatherproof protective layer.

Here are some key points to keep in mind for the curing process:

  1. Allowing the paint to fully cure for at least 3 weeks is necessary for enhancing its durability and longevity.
  2. Best results are achieved when curing takes place in a warmer and drier climate.
  3. Proper curing helps the paint form a strong protective layer, making it more resistant to the elements.
  4. Following the instructions provided on the tin for the curing process is crucial to ensuring the paint's waterproofing properties are fully realized.

Maintenance Tips for Alfresco Paint

outdoor paint care guide

To maintain the durability and weatherproof qualities of Frenchic Alfresco paint, regular cleaning and inspection are crucial. Frenchic paints, especially those from the Al Fresco Inside/Outside Range, are designed to withstand outdoor conditions, but proper maintenance can prolong their lifespan.

For outdoor furniture coated with this water-based, weatherproof paint, wiping down surfaces with a mild detergent and water solution every few months can help remove dirt and debris that may accumulate. Additionally, inspecting the painted wood for any signs of wear or damage allows for timely touch-ups, preventing further deterioration.

UV resistance in Frenchic paints minimizes color fading, but it's still advisable to keep items protected from prolonged sun exposure. By following these maintenance tips, you can guarantee that your outdoor projects retain their vibrant appearance and protective qualities for years to come.

Advertisement

Conclusion: Is Frenchic Alfresco Waterproof?

frenchic alfresco waterproof testing

Frenchic Alfresco paint is indeed waterproof, providing long-lasting protection for your outdoor projects. This durable and weatherproof Al Fresco paint is specifically crafted for outdoor use, offering a reliable shield against the elements for your exterior surfaces.

Here are four key points reinforcing its waterproof qualities:

  1. UV Resistant: Frenchic Al Fresco paint is formulated to withstand the harmful effects of UV rays, preventing discoloration and fading over time.
  2. Self-Sealing and Self-Leveling: The paint's self-sealing properties help establish a protective barrier, while its self-leveling feature ensures a smooth and even finish that enhances its waterproof capabilities.
  3. Versatile Application: Suitable for various surfaces like wood, laminate, UPVC, composites, and metal, this paint adapts well to different materials, increasing its effectiveness in outdoor settings.
  4. Algae and Mould Resistance: Frenchic Al Fresco is designed to resist algae and mould growth, reducing the need for frequent maintenance and preserving the integrity of your exterior surfaces.

Frequently Asked Questions

Is Frenchic Alfresco Waterproof?

Yes, Frenchic Al Fresco paint is waterproof. It's designed for outdoor use, with excellent weather resistance, UV protection, and algae/mould inhibitors. It works on various surfaces, making it ideal for outdoor projects like furniture, fences, and sheds.

Can You Water Down Frenchic Alfresco Paint?

You can water down Frenchic Al Fresco paint if desired for a smoother application or a wash effect. However, diluting the paint may impact coverage and durability, so it's essential to adhere to recommended guidelines for best results.

Do You Need to Seal Frenchic Alfresco?

You don't need to seal Frenchic Al Fresco paint. It's self-sealing, water-based, and designed to be weatherproof and UV resistant. The paint is self-priming with a durable finish, eliminating the need for additional sealing products.

What Is so Special About Frenchic Paint?

Frenchic paint is renowned for its water-based, durable, and weatherproof properties, making it ideal for both indoor and outdoor projects. With self-levelling technology, easy application, and a range of vibrant colors, it stands out for its versatility and eco-friendly nature.

Conclusion

To sum up, Frenchic Alfresco paint offers excellent water resistance properties, making it suitable for outdoor applications. While it may not be completely waterproof, proper curing and maintenance can guarantee its longevity in various weather conditions.

Advertisement

By following the recommended guidelines for application and upkeep, you can enjoy the beauty and protection of Frenchic Alfresco paint for years to come. Remember, a little care goes a long way in preserving the quality and durability of your outdoor surfaces.

Continue Reading

Home Decor

Dollar Store Spring Cottage Birdhouses

Bring spring charm to your outdoor space with a whimsical birdhouse crafted from just a few simple dollar store supplies.

Published

on

By

affordable birdhouses for sale

We can create charming spring cottage birdhouses with just a few simple crafting supplies from the dollar store. First, gather essential supplies like birdhouse kits, chalk paint, Mod Podge, and decorative paper. Then, paint the birdhouse base with Waverly chalk paint in agave, adding a vintage look with wax. Add decorative paper details using scrapbook paper and cardstock, and incorporate floral accents for a whimsical touch. Finally, assemble the cottage birdhouse by following the kit's instructions and adding personal touches. As we continue to craft, we'll explore more creative ways to customize our birdhouse and bring spring charm to our outdoor spaces.

Key Takeaways

• Use Dollar Tree birdhouse kits as a base for your spring cottage birdhouse project to save time and money.

• Apply Waverly chalk paint in vibrant colors to create a unique and charming look for your birdhouse.

• Add decorative paper details, such as scrapbook paper and cardstock, to give your birdhouse a touch of personality.

• Embellish your birdhouse with small floral accents, like colorful flowers and greenery, for a whimsical touch.

Advertisement

• Consider adding personal touches, like painting or decorating, to make your birdhouse truly one-of-a-kind.

Gathering Essential Crafting Supplies

As we start on this creative journey, we'll need to gather a few essential crafting supplies to transform our Dollar Store finds into charming spring cottage birdhouses. The first step is to collect the necessary materials, including birdhouse kits, which will serve as the base for our project.

Next, we'll need chalk paint in various colors to give our birdhouses a unique and personalized look. Additionally, we'll require Mod Podge, decorative cardstock, and scrapbook paper to add texture and visual interest to our creations. These supplies will allow us to apply multiple coats of paint, with drying time in between, to achieve a rich and vibrant color.

We'll also need white paint on hand for touch-ups and to create a cohesive look. By gathering these essential crafting supplies, we'll be well on our way to creating beautiful and unique spring cottage birdhouses that showcase our creativity and attention to detail.

Painting the Birdhouse Base

detailing the birdhouse foundation

With our crafting supplies in hand, we're ready to bring our spring cottage birdhouses to life by painting the birdhouse base. This is where the magic happens, and our little birdhouses start to take shape.

To achieve a beautiful, solid base color, we'll apply two coats of Waverly chalk paint in agave, making sure that each coat dries completely before applying the next to prevent smudging or streaking.

Advertisement

Here are some essential tips to keep in mind:

  • Use a small brush to touch up any areas that may have been missed or need extra coverage with white paint.
  • Create a vintage look by applying wax over the dried paint, blending it in for a weathered effect.
  • Maintain a smooth and even finish by taking your time and applying the paint and wax carefully to the birdhouse base.

Adding Decorative Paper Details

creating art with paper

We're adding a personal touch to our spring cottage birdhouses by incorporating decorative paper details that infuse charm and character into these miniature homes. To guarantee this, we're using scrapbook paper and cardstock to create unique patterns and designs that reflect our personal style.

By mixing and matching different papers, we can create a cohesive and visually appealing final result. Next time, we might try adding rickrack trim or other embellishments to enhance the overall look of the birdhouse.

To make sure a secure hold, we'll attach the paper details using Mod Podge or glue. This technique is easy to master, and the results are well worth the effort.

With a little creativity, we can transform a plain birdhouse into a charming cottage that's full of personality. As we work on our birdhouses, we're reminded that it's the little details that make all the difference. By adding decorative paper details, we're creating a one-of-a-kind piece that's sure to delight.

Embellishing With Floral Accents

playing up floral details

Now that we've added personality to our birdhouses with decorative paper details, let's take them to the next level by introducing a touch of whimsy with small floral accents.

We wanted to make our birdhouses stand out, and what better way to do that than with a splash of colorful flowers and greenery? To enhance our spring cottage birdhouses, we can use a variety of small flowers and foliage to create a natural and eye-catching look.

Advertisement

Here are some tips to keep in mind when embellishing with floral accents:

  • Mix and match different flower shapes, sizes, and colors to create a visually appealing design.
  • Consider using artificial flowers for a long-lasting and low-maintenance decorative option.
  • Secure the floral accents with glue or adhesive to make certain they stay in place and withstand handling.

Assembling the Cottage Birdhouse

crafting a charming birdhouse

Let's get started on assembling our cottage birdhouse by following the instructions provided in the Dollar Tree birdhouse kit.

As we carefully read through the instructions, we'll make sure to pay attention to the finer details, such as aligning the roof and placing the windows correctly.

We'll use glue or nails to secure the pieces together, ensuring a sturdy construction that can withstand the elements.

As we assemble the birdhouse, we'll also think about adding our own personal touches, like painting or decorating, to make it truly unique.

If we're short on time, we can consider using a ready-made birdhouse from a craft store as an alternative.

Advertisement

Either way, we'll end up with a charming cottage birdhouse that's perfect for spring.

Frequently Asked Questions

Can I Use a Real Birdhouse Instead of a Wooden Birdhouse Shape?

We're wondering if we can ditch the wooden birdhouse shape and use a real birdhouse instead. Honestly, we think it's a great idea – it'll add a touch of authenticity to our DIY project!

Are There Any Alternatives to Decoupage Glue?

As we weave our creative tapestry, we ponder alternatives to decoupage glue, seeking a binding force that's strong yet gentle, like the threads of a spider's web. We find solace in mod podge, a trusty standby, or even white school glue, a humble hero.

How Do I Prevent the Paper Details From Peeling Off?

We prevent paper details from peeling off by applying a clear coat of varnish or Mod Podge after decoupage, ensuring a strong bond and protecting our artwork from wear and tear.

Can I Use Artificial Flowers Instead of Fresh Flowers?

We're wondering if artificial flowers are a viable substitute for fresh ones, and we think they're a great idea! They'll last longer and still add a pop of color, so go for it!

Advertisement

Is It Possible to Make This Project With Kids?

'As we dip our toes into the world of creativity, we ask: can little hands help craft this masterpiece? Absolutely! With patience and guidance, kids can contribute to this project, fostering a sense of pride and ownership.'

Conclusion

As we step back to admire our handiwork, our humble dollar store finds have been transformed into a charming spring cottage birdhouse, reminiscent of a 'hidden gem' tucked away in a lush garden.

The combination of soft hues and delicate details has yielded a whimsical retreat, beckoning birds to take up residence.

With a dash of creativity and some thriftiness, we've proven that beauty can indeed be found on a budget, as the saying goes, 'one person's trash is another person's treasure.'

Advertisement

Continue Reading

Trending