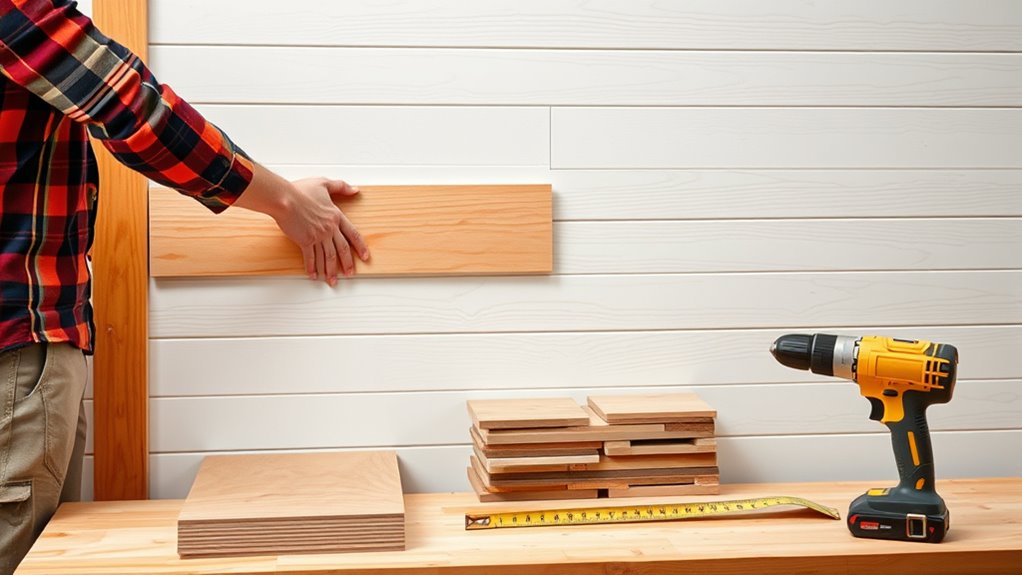
To install wall paneling, start by choosing the right material for your space and preparing the wall surface—clean, repair, and verify it’s dry. Measure carefully and plan your layout before gathering tools like a saw, level, and adhesive. Attach the panels straight and evenly, using a level to guide you. Finish with trim or paint for a polished look. Following these steps will help you achieve a professional finish, and more tips are just ahead.
Key Takeaways
- Carefully plan your layout, measure accurately, and select suitable paneling materials to ensure a cohesive and durable installation.
- Prepare the wall surface by cleaning, repairing damage, and addressing moisture issues for optimal panel adhesion.
- Gather all necessary tools, including saws, level, and fasteners, to facilitate precise cuts and secure mounting.
- Follow a systematic installation process, maintaining straight lines and even spacing using a level throughout.
- Finish with decorative accents, fill gaps, and perform regular maintenance to keep panels looking their best.

Art3d Smoothing Tool Kit for Applying Peel and Stick Wallpaper, Vinyl Backsplash Tile
【Set of basic tools】: Package includes craft art knife with 5 replaceable blades, red smoother, blue smoother with…
As an affiliate, we earn on qualifying purchases.
As an affiliate, we earn on qualifying purchases.
Selecting the Right Type of Wall Paneling
Choosing the right type of wall paneling is essential to achieving the look and function you want for your space. You have a variety of material options, including wood, MDF, PVC, and metal, each offering different durability and style. Your choice should align with your aesthetic considerations—whether you prefer a rustic, modern, or sleek appearance. For example, wood panels create warmth and texture, while PVC is great for moisture-prone areas. Consider how much maintenance each material requires and how it fits your overall design scheme. Think about the atmosphere you want to evoke and pick a material that complements your existing decor. Selecting the right paneling involves balancing these material options with your aesthetic goals, ensuring your space feels cohesive and personalized. Additionally, understanding the color accuracy of your materials can help you achieve a consistent and appealing visual style. Being aware of material durability can also influence your choice, especially in high-traffic or humid environments. Consulting with professionals about material performance can further ensure you select a suitable option for your specific needs. Moreover, considering the installation process can impact your project timeline and overall satisfaction with the finished space. Incorporating traditional design principles can also help in choosing paneling that respects your space’s cultural or historical context, especially if you’re aiming for a more authentic aesthetic.
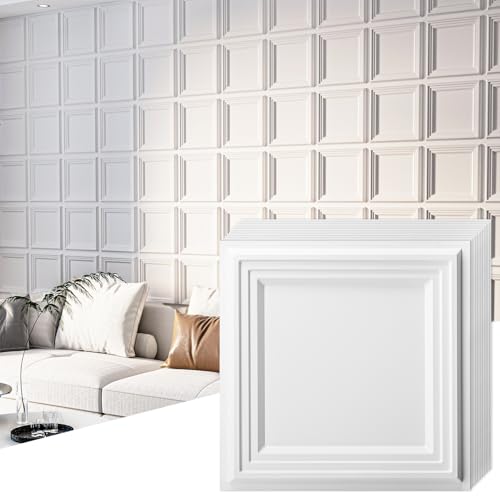
Art3d 33-Pack 3D Textured Accent Wall Panel for Interior Décor, Waterproof PVC Decorative Wall Paneling for Living Room Bedroom Gaming Room Office, 11.8"x11.8" Cover 32.Sq.Ft., White
【Wall Feeling Left Out?】Make it the star! Our 3D raised panels create a stunning accent wall with modern…
As an affiliate, we earn on qualifying purchases.
As an affiliate, we earn on qualifying purchases.
Preparing Your Wall Surface

Before installing your wall paneling, you need to prepare the surface properly. Start by cleaning the wall thoroughly to remove dust, grease, and debris. Then, check for any damage, such as cracks or holes, and repair them to make certain a smooth, even surface. Additionally, if you are working with an older wall, consider assessing its digital literacy to ensure it can support the paneling material effectively.
Surface Cleaning Techniques
To guarantee your wall surface is properly prepared for paneling, start by thoroughly cleaning it to remove dust, dirt, and grease. Use appropriate cleaning agents suited for your wall type to ensure effective surface prep. For glossy or greasy surfaces, a mixture of mild detergent and water works well. For stubborn stains, consider a specialized cleaner. Always rinse with clean water and let the wall dry completely before proceeding. Proper cleaning prevents future issues like adhesion failure or mold growth. Additionally, ensuring the surface is free of moisture is crucial for optimal adhesion and long-lasting results. Using suitable wall cleaning techniques can also help preserve the paint or wallpaper underneath, preventing damage during panel installation. Here’s a quick guide:
| Task | Recommended Method |
|---|---|
| Remove dust and dirt | Dry cloth or vacuum with brush attachment |
| Clean with cleaning agents | Mild detergent or surface-specific cleaner |
| Rinse thoroughly | Damp cloth with clean water |
| Allow to dry | Air dry completely |
Wall Damage Assessment
After cleaning your wall thoroughly, it’s important to inspect its surface for any damage that could affect paneling adhesion. Look for hidden damages like cracks, holes, or uneven spots that might weaken the wall. Pay close attention to moisture issues, such as stains, mold, or peeling paint, which indicate underlying problems. Moisture can cause the wall to warp or deteriorate, making it unsuitable for paneling. Check for signs of water damage, especially in areas near windows, pipes, or basements. Address any hidden damages or moisture issues before proceeding. Repair cracks or holes with spackle, and if you find moisture problems, resolve them first to ensure a solid, smooth surface. Proper damage assessment guarantees your paneling will stick securely and look professional. Additionally, understanding wall damage assessment is crucial for a successful installation. Recognizing moisture issues early can prevent future problems such as mold growth or panel warping. Being aware of home maintenance practices can also help you keep your walls in optimal condition over time. Regular inspections, including checking for structural integrity, and prompt repairs are essential components of effective wall care.

ROOMTEC 6-Packs Faux Stone Wall Covering Panels for Interior and Exterior Decor, PU Stone Veneer Exterior, Exterior Siding Panels for DIY Home Improvement Projects, 45.67" x 12.99"
【Real Texture】Our faux stone wall panel are made from high-quality polyurethane (PU) material that mimics the look and…
As an affiliate, we earn on qualifying purchases.
As an affiliate, we earn on qualifying purchases.
Measuring and Planning Your Layout

To start, gather your measuring tools like a tape measure, level, and pencil to guarantee accuracy. Then, plan your layout by considering design options such as centered panels or running boards. Proper measurement and thoughtful planning set the foundation for a smooth installation.
Measuring Tools Needed
Before you begin measuring and planning your wall paneling layout, acquiring the right tools is vital. You’ll need a measuring tape to get accurate dimensions and a laser level to guarantee your panels are straight and even. These tools help prevent mistakes and save time during installation. Additionally, understanding headphone compatibility can be useful if you plan to listen to music or instructions while working on your project. Ensuring you use proper measuring techniques will also contribute to precise panel placement. Using the correct tools is essential to achieve a professional-looking finish and avoid costly errors. Familiarity with measurement accuracy can further enhance your planning process, ensuring your panels fit perfectly. Being aware of installation guidelines can also help you follow best practices for a smooth and efficient setup.
Layout Design Strategies
Effective layout design starts with careful measurement and thoughtful planning. Begin by visualizing how decorative patterns will flow across your panels, ensuring alignment and symmetry. Use precise measurements to determine panel placement, considering wall height and width. To aid your planning, consider this layout options table:
| Pattern Type | Color Coordination Tips |
|---|---|
| Symmetrical Patterns | Match colors for a cohesive look |
| Asymmetrical Patterns | Use contrasting shades for interest |
Map out your design on paper first, playing with pattern placement and color schemes. This helps avoid surprises during installation. Remember, balancing decorative patterns with color coordination ensures a harmonious, polished appearance. Planning ahead minimizes errors and streamlines your project, resulting in a professional finish.

Art3d Premade Board and Batten Paintable Wainscoting Kit, MDF Accent Wall Panel for Kitchen Bedroom Living Room Home Decor Covers 189 x 54 in. Molding Trim Slat with Edge Strip
All-in-One Design – Package of 20 premade molding trim slat + 4 decorative edge strip create instant board…
As an affiliate, we earn on qualifying purchases.
As an affiliate, we earn on qualifying purchases.
Gathering Tools and Materials

Gathering the right tools and materials is the essential first step to guarantee a smooth wall paneling project. You’ll need a few key items to get started efficiently. First, gather power tools like a saw and drill for precise cuts and secure fastening. Don’t forget safety equipment, including goggles and gloves, to protect yourself during work. Ensure you have the right paneling materials, such as the panels themselves, adhesive, and nails or screws. Proper preparation includes understanding the material properties of your paneling to ensure compatibility and durability.
Gather essential tools and safety gear for a smooth, efficient wall paneling project.
- Use sharp tools to prevent accidents and ensure clean cuts
- Always wear safety equipment to protect your eyes and hands
- Double-check you have compatible fasteners for your paneling type
- Keep all tools within reach to streamline your work process
Installing Wall Paneling Step-by-Step

To begin installing your wall paneling, start by measuring and marking the wall to guarantee proper alignment. Choose your paneling style based on your desired look—be it beadboard, shiplap, or decorative panels. Carefully plan the layout, ensuring even spacing and straight lines. When installing, prioritize safety by wearing protective gear and using tools properly. Begin attaching the panels from a corner or a straight edge, securing each piece with appropriate fasteners. Use a level frequently to maintain alignment throughout. Take your time to avoid gaps or misaligned panels, which can compromise both appearance and safety. Regularly check your work, and make adjustments as needed. Remember that remote hackathons can be an excellent way to gather ideas or troubleshoot during complex projects. Following these steps will help you achieve a professional finish while maintaining safe installation practices.
Finishing Touches and Troubleshooting

Once you’ve installed your wall paneling, finishing touches guarantee a polished look and help address common issues. Adding decorative accents like trim, molding, or even artwork can enhance your design and hide minor imperfections. To guarantee a cohesive appearance, focus on color coordination—matching or complementing your wall panels with furniture or decor creates harmony. Troubleshooting common problems, such as gaps or uneven surfaces, may involve filling gaps with caulk or sanding rough spots. Keep these tips in mind:
- Use caulk for small gaps or cracks
- Sand rough edges for a smooth finish
- Incorporate decorative accents to add style
- Match paint or stain for consistent color coordination
- Consider the horsepower of electric dirt bikes when choosing your tools for installation, as powerful equipment can make the job easier and more efficient. Additionally, staying informed about sneaker trends in 2024 can inspire creative design choices and finishing touches that elevate your space. Being aware of local building codes and regulations can also ensure your project remains compliant. Understanding payment processing methods and security measures can help you manage the project’s budget and vendor payments efficiently. These steps help you achieve a professional finish and resolve issues quickly.
Maintaining and Caring for Your Wall Panels

Proper maintenance is essential to keep your wall panels looking their best over time. Regular cleaning helps preserve their appearance and prolongs their lifespan. For cleaning tips, start with a soft cloth or microfiber duster to remove dust and loose debris. For more thorough cleaning, use a mild soap solution or a gentle cleaner recommended for your panel type. Avoid harsh chemicals that can damage the surface. Product recommendations include a pH-neutral cleaner or a specialized wood or laminate cleaner, depending on your panels. Always test a small, hidden area first. Wipe with a damp cloth and dry immediately to prevent water damage. By following these simple steps, you’ll keep your wall panels looking fresh and vibrant for years to come.
Frequently Asked Questions
How Long Does Wall Paneling Installation Typically Take?
The installation timeline for wall paneling varies depending on the space size and complexity, but generally, it takes a few days. You should allocate time for preparation steps like measuring, cutting, and priming surfaces. During installation, expect to spend time aligning panels and securing them properly. If you’re experienced, it might go faster, but plan for at least a couple of days to make certain of a neat, professional finish.
Can Wall Paneling Be Installed Over Wallpaper?
You might think you can install wall paneling over wallpaper, but it’s not always ideal. To guarantee a smooth finish, you’ll need to remove the wallpaper first, as it can cause uneven surfaces. Proper wall preparation is key—clean, smooth, and dry walls help the paneling adhere better. Skipping wallpaper removal can lead to bubbling or peeling later, so taking the time for proper prep makes your project last longer and look better.
What Are the Best Adhesives for Different Panel Types?
When selecting adhesives for different panel types, you need to consider adhesive strength and application techniques. For wood panels, a high-strength construction adhesive works best, applied evenly with a caulking gun. PVC or plastic panels may require a solvent-based adhesive for better bonding, applied carefully to avoid mess. Always follow manufacturer instructions, guaranteeing proper surface prep and pressure for optimal adhesion. Proper adhesive choice ensures your panels stay securely in place.
Is Electrical Wiring Affected by Wall Paneling?
Imagine you’re installing wall paneling in a living room. Electrical wiring might be affected if you don’t consider electrical safety and wiring compatibility. For instance, covering existing wiring without proper access can lead to hazards or code violations. Always inspect and reroute wiring as needed before paneling, ensuring you maintain safety standards. This way, your wall paneling project stays safe, compliant, and functional without risking electrical issues.
How Do I Remove Wall Paneling Without Damaging the Wall?
To remove wall paneling without damage, start by gently prying it away with a putty knife or crowbar, following panel removal tips. Work slowly to prevent wall damage, and avoid pulling too hard. Use a utility knife to cut through any adhesive seams. Protect the wall surface with painter’s tape. With patience and care, you’ll preserve the wall’s integrity while removing the panels effectively.
Conclusion
Installing wall paneling can transform your space with a stylish, durable finish. Did you know that properly installed wall panels can increase your home’s value by up to 5%? By carefully selecting the right type, preparing your wall, and following step-by-step instructions, you’ll create a stunning feature wall that lasts. With patience and attention to detail, you’ll enjoy a beautiful, long-lasting upgrade that enhances your home’s appeal for years to come.