To block print on fabric at home, gather natural fabric, carving tools, fabric paints, and brushes. Start by designing and carving your pattern into a block or stamp, then set up a clean, organized workspace. Apply paint evenly onto the stamp and press firmly onto your fabric, repeating for patterns. Allow your designs to dry thoroughly and fix the colors with heat if needed. If you keep going, you’ll discover tips for perfecting your technique and creating stunning results.
Key Takeaways
- Gather natural fabric, carving tools, fabric paints, and a clean workspace before starting.
- Design and carve your pattern onto linoleum or foam blocks with sharp tools.
- Dip the carved block into fabric paint and press firmly onto the fabric following your layout.
- Allow the print to dry completely, then fix the design with gentle heat or steam if needed.
- Care for the finished fabric by washing gently in cold water and avoiding direct sunlight.
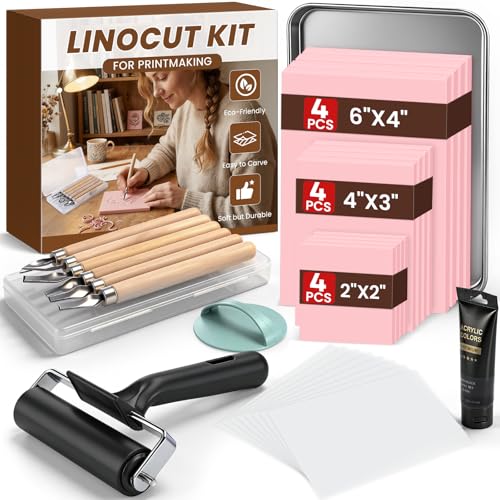
LINSIRON Linocut Kit for Printmaking, Linocut Tools Block Printing
- Complete Printmaking Starter Kit: Includes blocks, knives, roller, ink, and tools
- Durable Carving Knives: High-quality steel blades with wooden handles
- Portable Storage Box: Convenient for studio and travel use
As an affiliate, we earn on qualifying purchases.
As an affiliate, we earn on qualifying purchases.
Gathering Your Supplies and Tools
Before you begin block printing on fabric, it’s essential to gather all the necessary supplies and tools. You’ll need fabric suitable for dyeing, preferably natural fibers like cotton or linen, which absorb dye well. If you plan to incorporate fabric dyeing, choose dyes compatible with your fabric type. Additionally, gather your textile weaving tools to help prepare the fabric properly. You’ll also need carving tools or blocks for creating your pattern, fabric paints or dyes, brushes, and a clean workspace. Don’t forget to have protective gloves and aprons to keep your hands and clothes clean. Organizing your supplies beforehand guarantees a smooth process, whether you’re dyeing your fabric first or directly applying ink. Proper preparation is key to achieving vibrant, professional-looking results in your block printing project. Ensuring your workspace has adequate lighting can also help you work more precisely and avoid mistakes.
Choosing and Preparing Your Fabric

Choosing the right fabric is essential to achieving vibrant and crisp block print results. The fabric fiber impacts how well the dye adheres and the overall durability of your print, so opt for natural fibers like cotton, linen, or silk for best dye fastness. Before printing, prepare your fabric by washing to remove sizing or finishes that could hinder ink absorption. Iron it smooth to ensure an even surface, preventing blurred lines or uneven prints. Consider the fabric’s weight and texture, as thicker fabrics may require more pressure or a different ink consistency. Using high-quality, dye-fast fabrics ensures your designs stay bright and intact through washing, giving your project a professional finish. Proper preparation makes all the difference in achieving sharp, lasting prints.
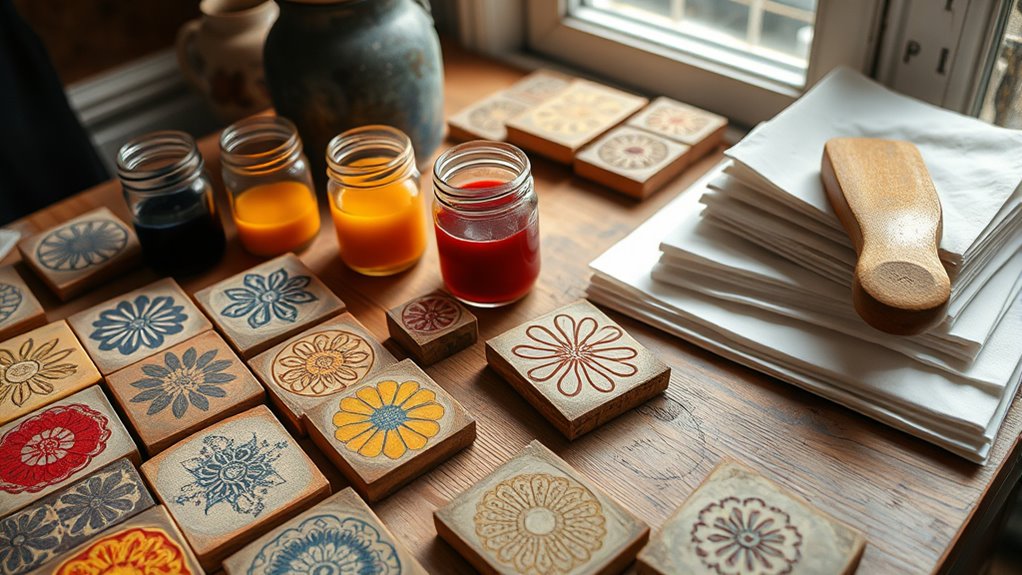
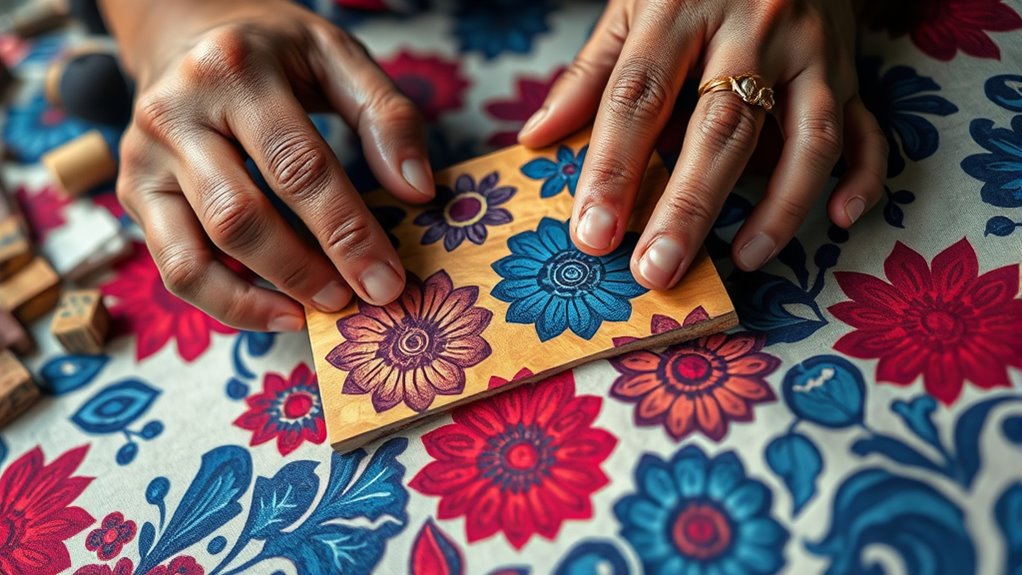
Designing Your Patterns and Carving Blocks

When designing your patterns, focus on choosing motifs that reflect your style and fit the fabric’s purpose. As you carve your blocks, use sharp tools and steady hands to create clean, precise cuts. Keep in mind helpful tips like testing your design on scrap material before printing your final fabric. Additionally, practicing shifting gears smoothly can help manage your workflow more efficiently during the carving process.
Choosing Your Motifs
Selecting your motifs is a essential step in creating unique fabric designs, as it sets the tone for your entire block print. Your choice reflects motif symbolism and cultural significance, giving your fabric depth and meaning. Think about patterns that resonate with you or tell a story. Visualize how your motifs will look on the fabric, considering size and repetition. For example:
- Intricate floral designs symbolizing growth and beauty
- Geometric patterns with cultural roots
- Animal motifs representing strength or prosperity
- Abstract shapes for a modern touch
- Understanding core personality traits can inspire more meaningful and personalized motif choices.
Carving Techniques and Tips
Once you’ve settled on your motifs, it’s time to bring them to life through carving. Use wood carving tools to carefully shape your design, applying relief techniques to create depth and texture. Start by outlining your pattern lightly, then remove the background material to make your motif stand out. Keep your tools sharp for clean cuts and control. Experiment with different relief techniques, like shallow or deep carving, to achieve varied effects. Practice on scrap wood before working on your final block. Remember, patience is key—rushing can ruin your design. Below is a helpful guide:
| Technique | Tip |
|---|---|
| Relief carving | Remove background around your design for depth |
| Shallow carving | Use light pressure for subtle details |
| Deep carving | Apply more pressure for bold outlines |
| Fine detailing | Use small tools for intricate work |
| Finishing touches | Smooth edges for a professional finish |
Setting Up a Workspace for Printing
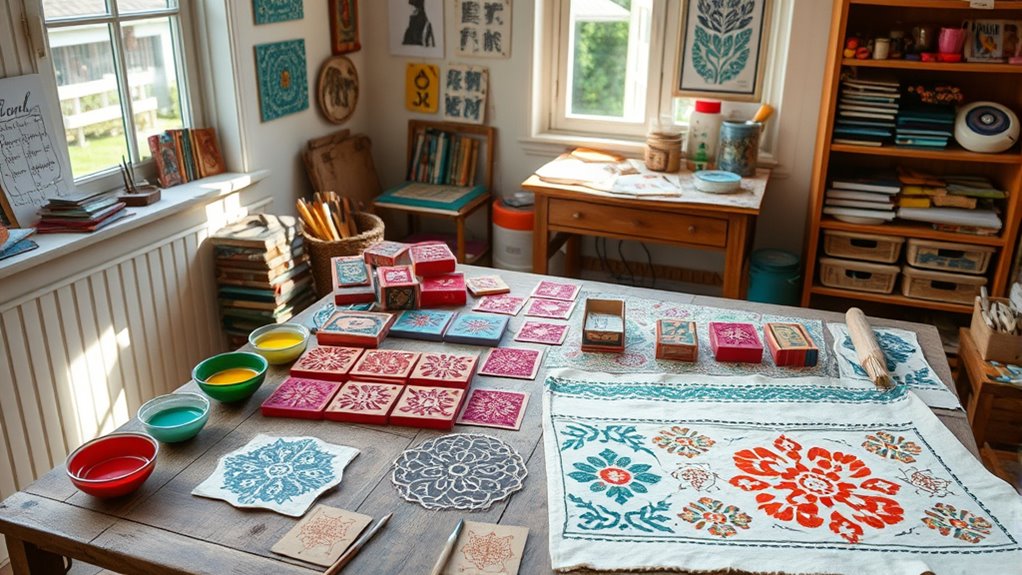
Start by designating a dedicated printing area to keep your workspace organized and mess-free. Arrange your tools and supplies nearby so you can access everything easily during the process. Keeping your space tidy helps you focus and makes printing more enjoyable. Incorporating storage solutions can further enhance your organization and efficiency.
Designate a Printing Area
Creating a dedicated printing area is essential for achieving clean, consistent block prints. Choose a space with good workspace lighting to see details clearly and prevent mistakes. Keep your fabric storage nearby so you can easily access different textiles without clutter. Clear a flat surface large enough for your printing projects and supplies. Consider setting up a protective mat or paper to catch excess ink and prevent messes. Having a designated spot helps you stay organized and focused, making the process more enjoyable. Plus, it keeps your workspace tidy and ready for multiple sessions. By establishing this area, you create an efficient environment that encourages creativity while maintaining neatness and precision throughout your block printing. Being aware of store hours can help you plan your shopping for supplies more effectively.
Organize Tools and Supplies
To set up a functional printing workspace, you need to organize your tools and supplies so everything is easily accessible. Use storage solutions like labeled bins, shelves, or drawer organizers to keep paints, brushes, carving tools, and stamps neatly arranged. Prioritize ergonomic organization by positioning frequently used items within arm’s reach and keeping your workspace clutter-free, which reduces strain and improves efficiency. Consider using a dedicated table or work surface that’s at a comfortable height, and keep cleaning supplies nearby for quick cleanup. Clear organization not only saves time but also helps you focus on your craft. Regularly tidy your supplies to prevent clutter buildup, making your printing process smoother and more enjoyable. Additionally, understanding the importance of proper organization in craft projects can significantly enhance your workflow and creative output.
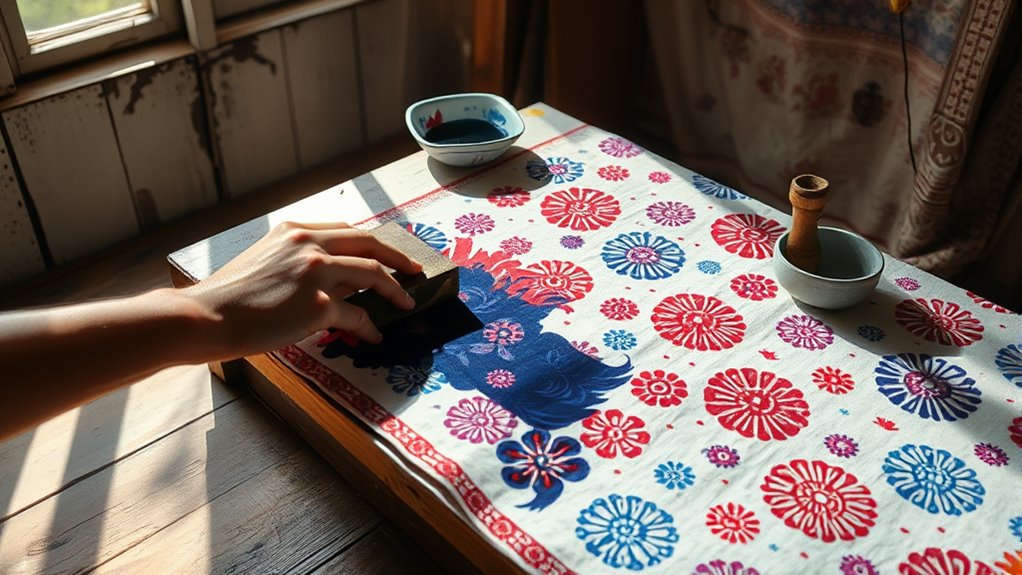
Applying Fabric Paint or Ink
Once you’ve prepared your block print and fabric, the next step is to apply the paint or ink carefully. Use a sponge, brush, or roller to load your chosen fabric dyeing medium evenly onto the block. Focus on ensuring the ink covers all the intricate details of your design for crisp lines. As you press the block onto the fabric, maintain steady pressure to transfer the pattern smoothly. Keep in mind that different fabric paints may require specific drying times to set properly. This step is vital in textile design, as it determines the clarity and vibrancy of your pattern. Visualize your fabric transforming with bold patterns and rich colors, bringing your creative vision to life. Your technique here impacts the final look markedly. Additionally, understanding colorfastness of your fabric paint can help ensure your design remains vibrant after washing.
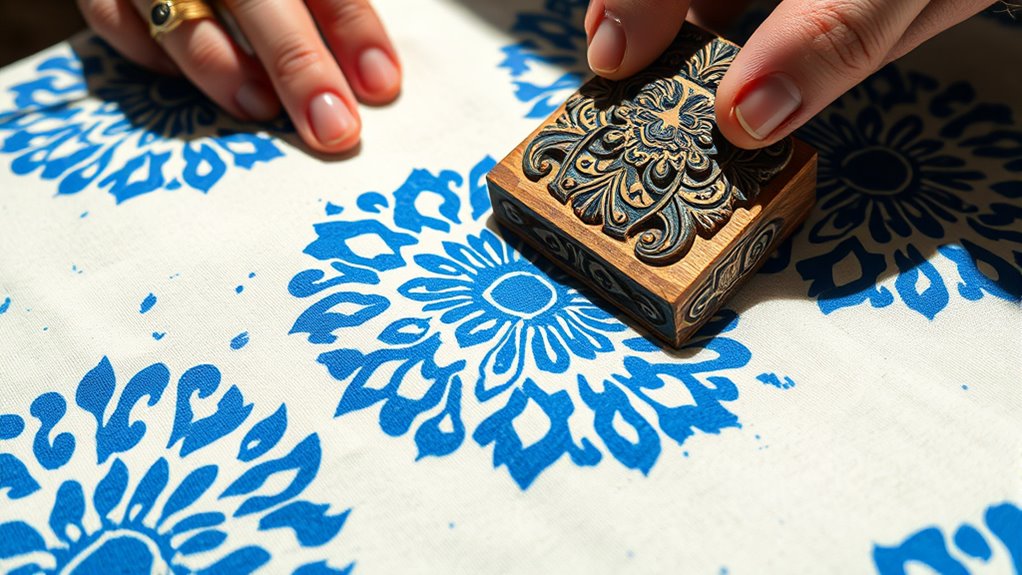
Techniques for Stamping and Creating Patterns
Mastering stamping techniques allows you to craft diverse patterns and textures on your fabric. To start, choose a sturdy stamp or carve your own using materials like linoleum or foam. Dip the stamp into fabric paint or ink, ensuring even coverage without excess. When creating patterns, plan your layout beforehand, spacing stamps evenly for symmetrical designs or experimenting with random placements for a more organic look. Press firmly to transfer the design, then lift straight up to avoid smudging. Repeat the process to fill larger areas or create complex motifs. Varying the pressure, angle, or color can add depth and interest. Practice different stamping techniques to develop your unique style and achieve consistent pattern creation on your fabric. Additionally, using appropriate tools and materials can enhance your results and make the process more enjoyable.
Drying and Fixing Your Designs
After you’ve finished stamping your fabric, it’s important to allow the design to dry completely before handling it further. Proper drying guarantees your fabric dyeing process sets well and prevents smudging. Once dry, you can proceed with fixing the color for enhanced colorfastness testing. Creating organized spaces can make the process of drying and fixing your fabric more efficient by reducing clutter and ensuring a clean environment. – Hang the fabric in a well-ventilated area away from direct sunlight to prevent fading. – Avoid touching or folding the fabric during drying to preserve crisp lines. – Use an iron on low heat if the dye requires heat setting, but check dye instructions first. – Consider steaming the fabric to lock in the colors and improve durability. These steps help secure your design, making your fabric more resistant to washing out, and ensure your block printing results last longer.
Tips for Creating Multiple Prints and Repeating Patterns

Creating multiple prints and repeating patterns can seem challenging at first, but with the right techniques, you can achieve seamless and consistent designs. Start by establishing a clear registration system, such as using a grid or guide marks, to align each print accurately. For monochrome patterns, keep your block steady and use even pressure to ensure uniform ink application. To create cohesive repeating designs, practice color blending techniques on your palette before printing—this helps maintain harmony across the pattern. You can also experiment with variations in tone or shade within the same color range to add depth. Consistent re-inking and careful placement are key to producing professional-looking, repeating patterns that look intentional and polished. Paying attention to the surface preparation ensures your prints will adhere well and last longer.
Caring for and Maintaining Your Block Prints

Proper care and maintenance of your block prints guarantee they stay vibrant and in good condition for future use. To assure fabric care and color preservation, handle your prints gently. Always wash with cold water to prevent colors from fading, and avoid harsh detergents. When storing, keep your fabric flat or rolled to prevent creases. Protect your prints from direct sunlight, which can cause colors to fade over time. Additionally, avoid rubbing or scrubbing the design during cleaning. Consider using a mild, pH-neutral soap to maintain the fabric’s integrity. You can also spot clean stains immediately to prevent permanent damage. Proper storage and gentle handling will keep your block prints looking fresh, vibrant, and ready for your next project.
Frequently Asked Questions
How Do I Prevent Ink From Bleeding on My Fabric?
To prevent ink from bleeding on your fabric, start with proper fabric preparation by washing and ironing it to remove any finishes that hinder ink absorption. Use a thick, high-quality ink designed for fabric, and apply it evenly with a roller or stamp. Avoid over-inking your block, and press firmly to guarantee even ink transfer. Allow the ink to dry completely before handling or washing your fabric to prevent bleeding.
What Are Eco-Friendly Alternatives to Commercial Fabric Paints?
Looking for lovely, eco-friendly alternatives to commercial fabric paints? You can choose natural pigments and plant-based dyes that are safe, sustainable, and stunning. These eco-friendly options offer vibrant hues without harmful chemicals, making your fabric art both beautiful and biodegradable. By switching to natural pigments and plant-based dyes, you reduce environmental impact while creating colorful, creative designs that are kind to the planet and perfect for your home projects.
Can I Reuse Carved Blocks for Different Patterns?
Yes, you can reuse carved blocks for different patterns. To do so, use different carving techniques to alter your blocks, creating new textures or designs. Clean your blocks thoroughly between uses to prevent ink transfer. Experiment with various pattern designs by carving additional details or changing the way you apply ink. This approach maximizes your carved blocks’ potential, allowing you to explore diverse, eco-friendly fabric printing projects at home.
How Do I Store Leftover Fabric Paints or Inks?
Think of your fabric paints and inks as precious gems—you want to keep them shining. To store leftover fabric paint and preserve ink, tightly seal containers after use, keeping them upright to prevent leaks. Store them in a cool, dark place away from sunlight, which can cause drying or fading. Proper fabric paint storage and ink preservation guarantee your colors stay vibrant and ready for your next creative project.
What Safety Precautions Should I Take While Carving Blocks?
When carving blocks, prioritize safety by handling carving tools carefully to avoid injuries. Always carve away from your body and keep tools sharp for better control. Make certain your workspace has good ventilation to prevent inhaling dust or fumes. Wear protective gloves and glasses if needed, and work in a well-lit area. Taking these precautions helps you carve safely and enjoy your block printing projects without accidents.
Conclusion
As you explore block printing at home, you’ll discover how your unique patterns become part of a story you didn’t realize you were starting. Sometimes, a simple mistake leads to a new idea, creating unexpected beauty. With patience and practice, you’ll find that each print reflects more than just your design—it echoes your creativity and intuition. In this craft, every print becomes a reminder that sometimes, the best art comes from happy accidents.