To make tassels and pom-poms, start by gathering quality yarn or fabric strands in your chosen colors, and prepare your tools like scissors, a ruler, and a template or pom-pom maker. Cut your strands carefully to the desired length, wrap yarn around a template or your fingers, then secure and trim for neatness. Attach your finished tassels and pom-poms to projects with secure knots or glue. Keep exploring for tips to create flawless decorative accents.
Key Takeaways
- Wrap yarn around a template or fingers, then secure with a knot to form a tassel or pom-pom shape.
- Use sharp scissors to cut the yarn evenly for a clean, uniform look.
- Secure the wrapped yarn with a tight tie or yarn around the middle before cutting for a full pom-pom.
- Fluff and trim the yarn ends to achieve the desired shape and size.
- Attach tassels and pom-poms securely to your project using knots, sewing, or glue for durability.
Gathering Your Supplies and Tools
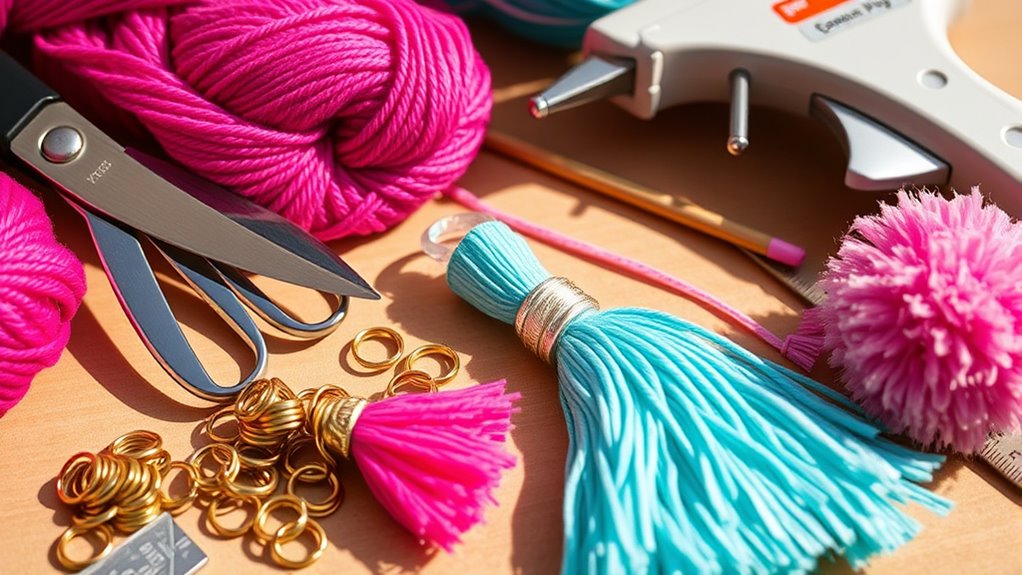
Before you begin making tassels and pom-poms, it’s important to gather all the necessary supplies and tools. Start with quality yarn or fabric strands, selecting colors that blend well together for a cohesive look. You’ll also need scissors, a ruler, and a, preferably, a fork or a pom-pom maker for shaping. Pay attention to thread tension when wrapping yarn; maintaining consistent tension guarantees your tassels and pom-poms look neat and professional. For color blending, consider using multiple shades in one project to create a gradient effect or a multi-colored appearance. Having everything ready before starting helps you work efficiently and reduces interruptions. Proper thread tension is essential for achieving neat and uniform tassels and pom-poms. With the right supplies and a focus on thread tension and color blending, you’ll be set for crafting beautiful tassels and pom-poms.
Cutting the Yarn or Fabric Strands
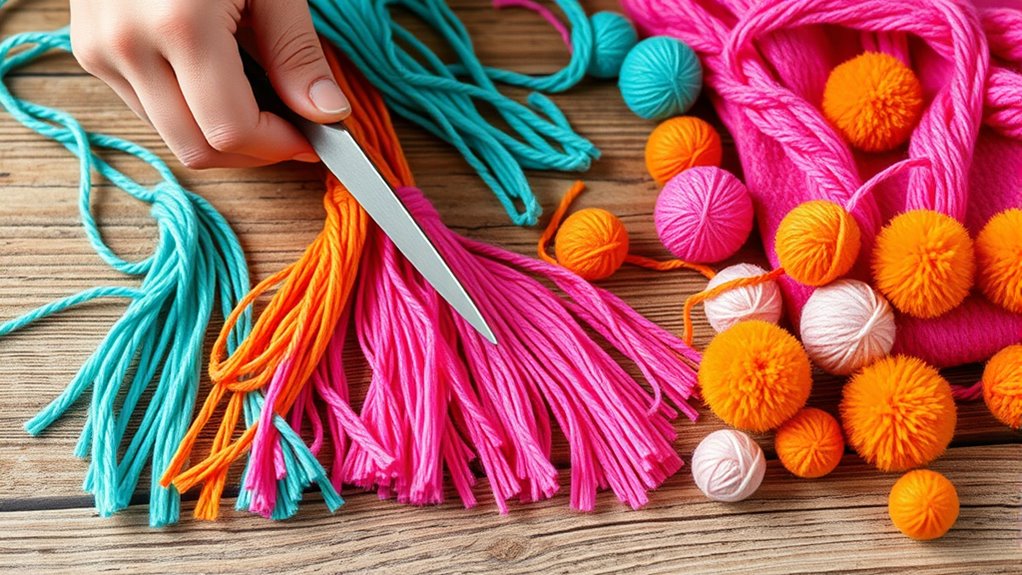
To begin cutting your yarn or fabric strands, first decide on the desired length for your tassels or pom-poms. Use sharp scissors to guarantee clean cuts and avoid uneven edges. When working with fabric, be mindful of fabric fraying; cut slowly and straight to minimize fraying and make trimming easier later. If you’re using yarn, watch out for yarn splitting, which can cause uneven strands or damage your scissors. To prevent splitting, cut with a smooth, steady motion and avoid pressing too hard. For fabric, you might consider sealing the edges with fray check or a similar product if fraying becomes an issue. Properly measuring and carefully cutting your strands will give your tassels or pom-poms a neat, professional appearance. Additionally, understanding the different types of headphone jacks can help ensure you choose the right connections for your devices.
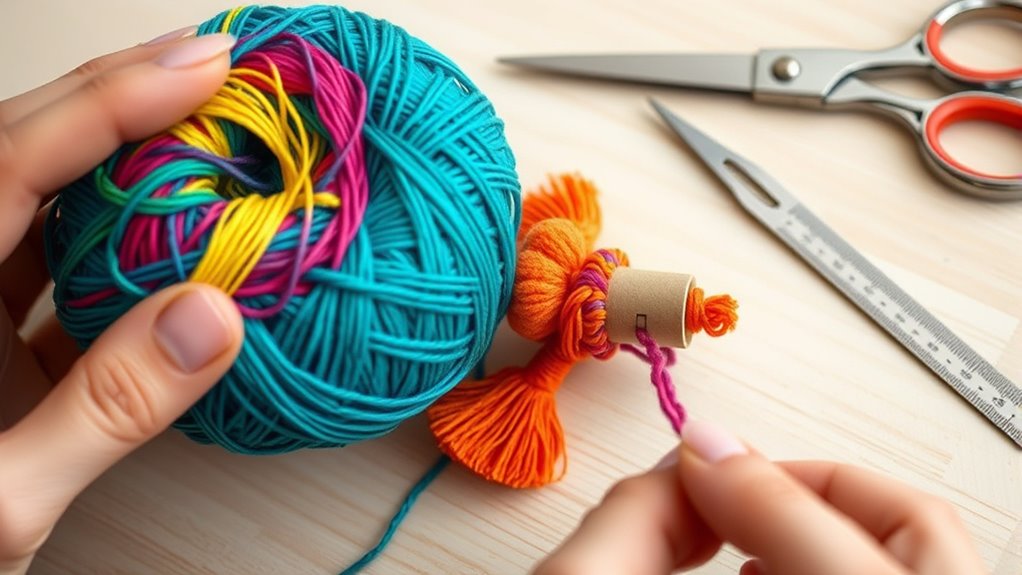
Creating a Basic Tassel Step-by-Step
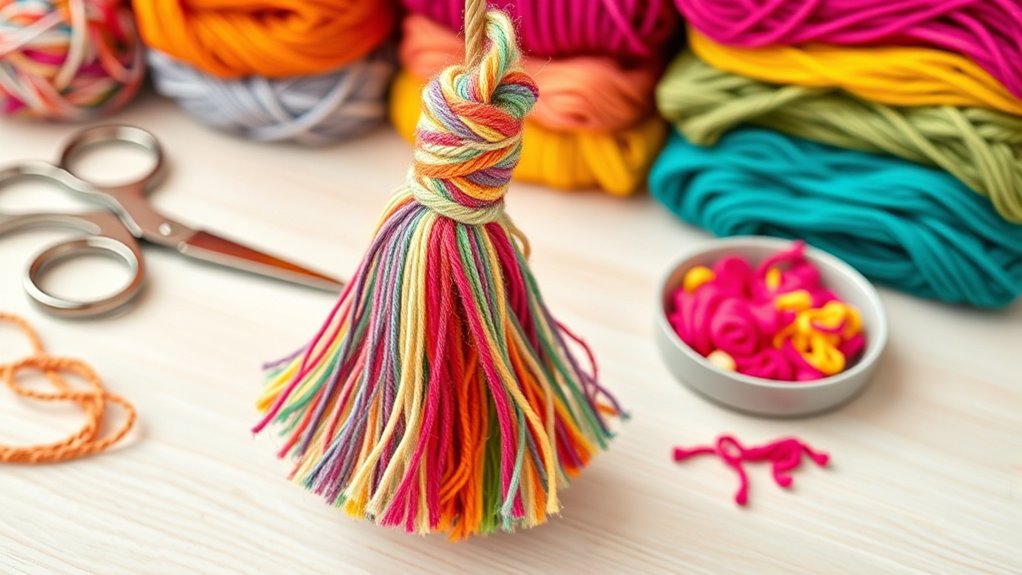
To create a basic tassel, start by gathering your materials and preparing your thread or yarn. Wrap the material around your fingers or a tool, then secure it tightly with a piece of thread. You can also consider color accuracy when choosing your yarn to ensure vibrant and true-to-life colors in your finished tassel. Finally, attach the tassel to your project and trim the ends for a clean, finished look.
Gather Your Materials
Gathering your materials is the first step to creating a beautiful tassel. Start by choosing fabric with a texture that suits your style—soft felt, silky silk, or textured burlap all create different looks. Consider the fabric’s weight and durability, especially if your tassel will hang outdoors or on heavy-use items. Next, pick your colors carefully; opt for a hue that complements your project or makes a statement. Gather sharp scissors, a sturdy needle, and strong thread that matches or contrasts nicely with your fabric. Having all your materials ready saves time and keeps your project flowing smoothly. Additionally, understanding the importance of digital literacy and critical thinking skills can help you make informed choices when selecting your materials and tools. Once everything is in place, you’ll be well-prepared to craft a tassel that’s both attractive and durable.
Wrap and Secure Thread
Have you ever wondered how to keep your tassel’s strands neatly bundled? To do this, wrap your thread around the bundle several times, maintaining consistent thread tension. This ensures the strands stay tight and aligned. Once wrapped, secure the thread with a knot, making sure it’s tight enough to prevent slipping. Proper knot security is key to a sturdy tassel. Use the table below to keep track of your wrapping process:
| Step | Tip |
|---|---|
| Wrap thread around bundle | Keep tension firm but gentle |
| Count wraps for evenness | Ensure consistent spacing |
| Tie initial knot | Double knot for security |
| Check knot tightness | Pull gently to test |
| Trim excess thread | Clean finish |
Following these steps guarantees a neat, secure tassel.
Attach and Trim Tassel
Once your tassel strands are securely wrapped and knotted, it’s time to attach it to your project. To do this, thread the loop or the top part of the tassel onto your desired item, such as a keychain, curtain, or jewelry. After attaching, you can perform fringe trimming to tidy up any uneven ends for a polished look. If your tassel has multiple colors, consider adjusting the tassel color by adding or removing strands for a balanced appearance. Make sure the tassel is securely fastened to prevent slipping. Additionally, selecting the right materials for your tassel can influence its durability and aesthetic appeal. Ultimately, trim any excess thread or frayed edges to give it a clean, professional finish. This step ensures your tassel looks neat, vibrant, and ready to enhance your project.
Making a Simple Pom-Pom Using a Cardboard Template
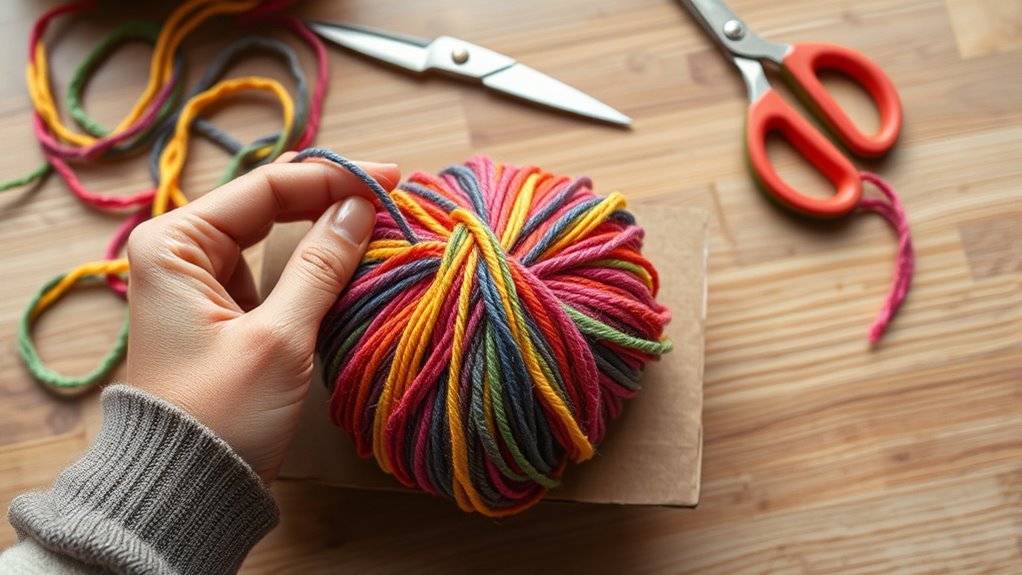
To make a simple pom-pom using a cardboard template, start by cutting out two identical circles from sturdy cardboard. Choose a template shape that suits your style—rounds are easiest, but you can try other shapes for fun. Wrap your yarn color around one of the circles, making sure to cover it completely. The more yarn you use, the fuller your pom-pom will be. Then, place the second circle on top and secure both with a piece of yarn tied tightly around the middle. Use scissors to cut through the yarn all around the edges, creating fringes. Fluff and trim the yarn to your desired shape and size for a perfect, homemade pom-pom. For an extra touch, you can use unique and wicked planters to display your finished pom-poms creatively.
Using a Pom-Pom Maker for Perfect Shapes
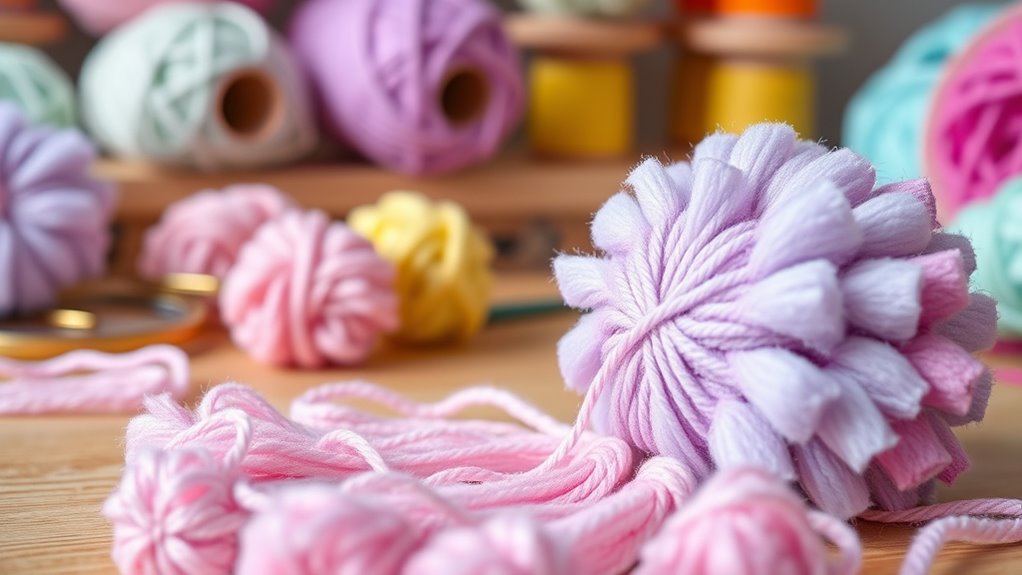
When choosing a pom-pom maker, pick the size that matches your project for the best results. Wrap the yarn evenly and tightly, following the maker’s design to guarantee a uniform shape. Keep these tips in mind to achieve perfect, professional-looking pom-poms every time.
Choosing the Right Size
Have you ever struggled to get your tassels or pom-poms the right size? Choosing the correct size is vital to achieving a polished look. When selecting a pom-pom maker, consider material compatibility—some materials work better with certain sizes to prevent snagging or uneven shapes. Consistency is also essential; using the same size maker ensures uniform results across your projects. Additionally, experimenting with different sizes can help you discover optimal proportions that best suit your aesthetic.
Wrapping Technique Tips
Mastering the wrapping technique with a pom-pom maker is key to achieving perfectly shaped and fluffy pom-poms. To guarantee even stitching techniques, wrap the yarn snugly around the maker, covering all edges without over-tightening. For a more vibrant look, try color blending by alternating shades during wrapping; this creates a beautiful, multi-tonal effect. Keep your wraps consistent in tension to avoid uneven density, which can affect the shape. When you finish wrapping, cut through the yarn carefully, leaving long tails for tying. Gently remove the pom-pom from the maker, and trim any uneven strands. Proper wrapping not only shapes your pom-pom perfectly but also enhances its fullness and texture, making your finished project look polished and professional. Additionally, choosing the right yarn material can influence the softness and durability of your pom-poms.
Customizing Tassels and Pom-Poms With Colors and Sizes
Customizing tassels and pom-poms with colors and sizes allows you to tailor your decorations to match any project or style. You can experiment with color blending to create smooth gradations or striking contrasts that enhance your design. Varying sizes adds visual interest, making your decorations more dynamic and textured. To customize effectively, consider these tips:
- Use color blending techniques like ombré or gradient effects for a unique look.
- Mix different sizes of tassels and pom-poms to add depth and dimension.
- Select colors that complement your overall color scheme for cohesive styling.
- Understanding the divorce statistics can help you appreciate the importance of personalization and thoughtful design in your projects.
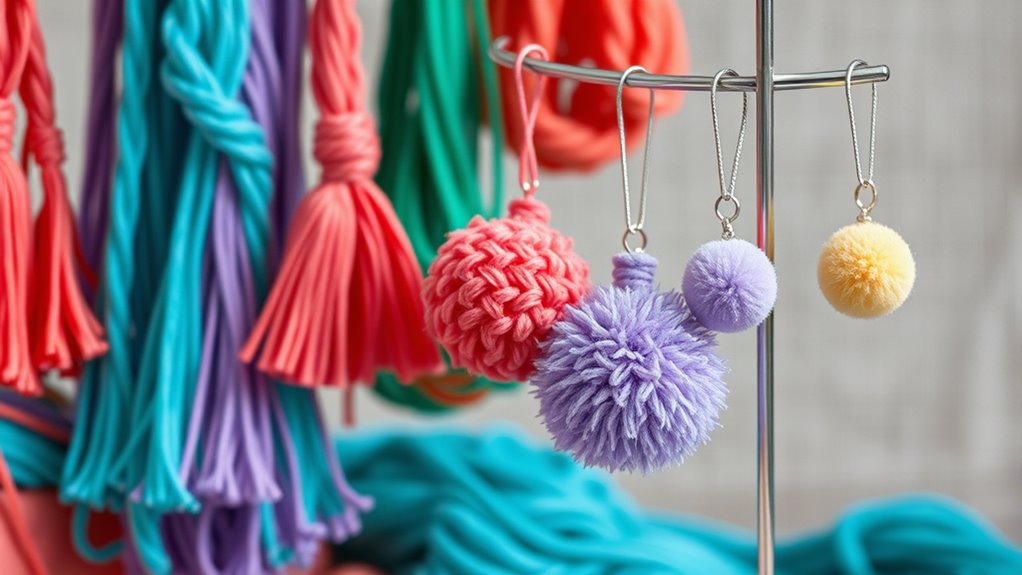
Attaching Tassels and Pom-Poms to Projects
When attaching tassels and pom-poms, you need to choose the right method to secure them firmly to your project. Make sure to tie strong knots so they stay in place and look neat. Don’t forget to hide any excess string for a clean, professional finish.
Choosing Attachment Methods
Choosing the right attachment method is essential to guarantee your tassels and pom-poms stay securely in place on your project. Your goal is to select effective attachment techniques and fastening options that suit your material and style. Consider these options:
- Sew directly onto the fabric for a sturdy hold
- Use hot glue or fabric adhesive for quick, secure attachment
- Attach with a loose loop or knot that allows for adjustment
Each method offers different benefits. Sewing provides durability, while glue offers speed and simplicity. Loops and knots give flexibility for repositioning. Choose based on your project’s weight, texture, and desired look. Proper attachment guarantees your tassels and pom-poms stay secure and look professional. Incorporating multi-functional furniture can also enhance the overall organization of your craft space, making it easier to access and store supplies.
Securing With Strong Knots
Ever wonder how to guarantee your tassels and pom-poms stay firmly attached? The key is using the right knot techniques combined with proper thread tension. Start by looping the thread around the attachment point, then create a secure knot, like a double knot or square knot, to prevent slipping. Keep consistent thread tension; too loose, and the knot may unravel, too tight, and it could damage your project or distort the shape. When tying, pull firmly but carefully to ensure the knot is snug. For extra security, you can add a dab of clear glue before tightening the knot. This ensures your tassels and pom-poms stay firmly secured, even with regular use or movement. Proper knot techniques and controlled thread tension are essential for a durable finish.
Hiding Excess String
To give your tassels and pom-poms a polished look, it’s important to hide any excess string after attaching them. This finishing technique guarantees your project looks clean and professional. Start by trimming the excess string close to the knot, then tuck the ends into the tassel or pom-pom to conceal them. You can also apply a small dab of glue for extra security and a seamless appearance. For decorative accents, consider wrapping a contrasting thread around the base or adding beads for detail. These finishing touches elevate your craft, making it visually appealing and durable. Remember, neat hiding of excess string not only enhances the overall look but also prolongs the life of your decorative accents.
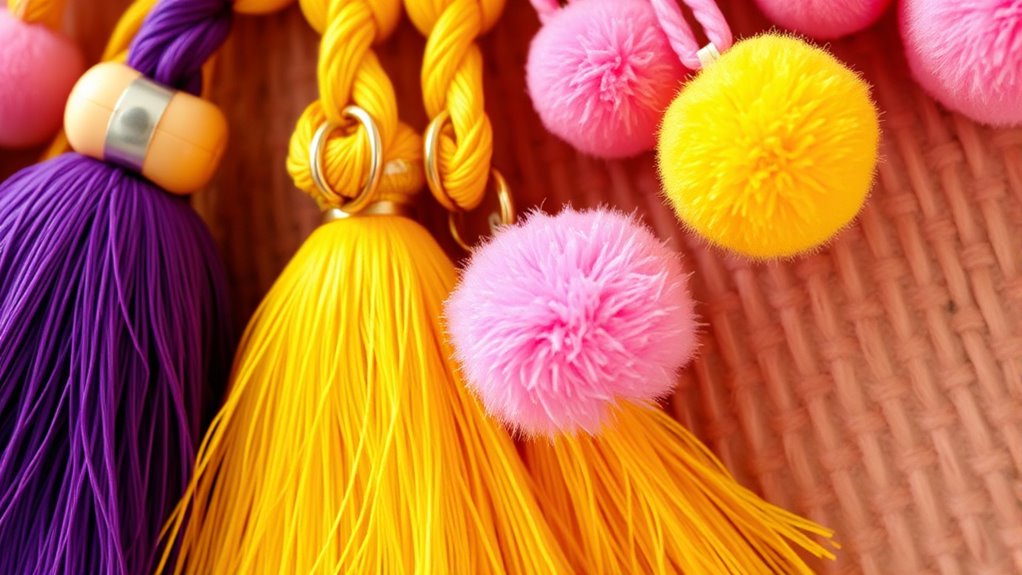
Adding Decorative Elements for a Unique Touch

Adding decorative elements can truly elevate your tassels and pom-poms, giving them a distinctive and personalized touch. You can experiment with different textile textures to add depth and interest—try pairing soft velvet with shiny metallic threads or rough burlap for a rustic feel. Incorporate bold or harmonious color combinations to make your creations stand out; contrasting colors create eye-catching effects, while complementary hues lend a more subtle elegance. Small details, like beads, sequins, or miniature charms, can also enhance your designs. Whether you’re attaching a tiny flower or a shimmering ribbon, these elements customize your tassels and pom-poms, making them unique to your style. Just remember to balance the decorative elements so they enhance, rather than overpower, your overall design.
Tips for Achieving Neat and Even Results
Achieving neat and even tassels or pom-poms requires attention to detail and proper techniques. Focus on consistent material selection to ensure uniformity in thickness and texture, which helps in creating a polished look. When working with color blending, choose complementary hues and blend gradually for smooth shifts. To keep results tidy, consider these tips:
Consistent materials and careful measurement ensure tidy, polished tassels and pom-poms.
- Use high-quality, uniform materials to maintain consistency in size and shape.
- Carefully measure and cut your strands to avoid uneven lengths.
- Practice color blending on scrap material first to achieve seamless transitions.
Creative Ideas for Using Tassels and Pom-Poms

Have you ever wondered how to add a playful or chic touch to your projects? Tassels and pom-poms are perfect for this. You can create eye-catching accessories by experimenting with color combinations—pair bright, bold hues for a fun look or soft pastel shades for elegance. Mix different texture options, like fluffy pom-poms with sleek tassels, to add visual interest. Attach them to curtains, pillows, or jewelry to instantly elevate your decor or style. Use tassels on bookmarks or gift wraps to make your gifts stand out. Pom-poms can embellish clothing or bags, adding a whimsical vibe. Combining various colors and textures allows you to personalize your craft projects, making them uniquely yours while adding a lively, textured element that catches the eye.
Frequently Asked Questions
Can I Make Tassels and Pom-Poms With Synthetic or Natural Fibers?
Yes, you can make tassels and pom-poms with both synthetic and natural fibers. Synthetic fibers often have smooth textures and vibrant dyeing options, making them ideal for bright, durable decorations. Natural fibers, like wool or cotton, offer rich fiber textures and can be dyed with various techniques, giving a more organic look. Choose your fibers based on the desired appearance and feel, and experiment with dyeing techniques for unique color effects.
How Do I Prevent the Yarn From Unraveling During Making?
Your yarn’s durability is like a fortress, so you can prevent unraveling by applying firm knot techniques. To keep your tassels and pom-poms intact, wrap the yarn tightly and secure it with multiple knots, especially at the base. Use a dab of glue on the knots for extra security, and trim any loose ends. This way, your creations stay flawless and resist the chaos of everyday handling.
What Are Alternative Materials for Creating Eco-Friendly Tassels and Pom-Poms?
You can create eco-friendly tassels and pom-poms using biodegradable materials like jute, hemp, or organic cotton, which break down naturally over time. Recycled textiles, such as old t-shirts, fabric scraps, or repurposed yarn, also work great and reduce waste. These alternatives help you make beautiful, sustainable decorations while minimizing environmental impact. Just guarantee the materials are clean and securely tied to prevent unraveling during use.
How Long Do Homemade Tassels and Pom-Poms Typically Last?
Homemade tassels and pom-poms typically last several months to a year, depending on your durability expectations and maintenance tips. To extend their lifespan, handle them gently, avoid excessive moisture, and store them in a dry place when not in use. Light cleaning with a soft brush or gentle spot cleaning helps maintain their appearance. With proper care, you can enjoy their charm for a longer period.
Can I Incorporate Beads or Charms Into My Tassels and Pom-Poms?
Ever wondered if you can personalize your tassels and pom-poms? Absolutely! You can easily incorporate beads or charms by choosing the right bead selection and carefully placing your charms. Attach beads to the tassel’s string before wrapping or add charms to the finished pom-pom for a unique touch. Don’t forget to secure everything tightly so your embellishments stay put, making your creations truly one-of-a-kind and full of personality.
Conclusion
Now that you’ve mastered making tassels and pom-poms, your creativity can soar like colorful fireworks in the night sky. Imagine your crafts blooming with lively tassels and fluffy pom-poms, transforming ordinary projects into vibrant masterpieces. With these simple techniques, you hold the brush to paint your world with playful textures and cheerful accents. So, go ahead—let your imagination spin and weave a tapestry of charming, handmade magic that’s uniquely yours.