
To install a dimmer switch, turn off power at the breaker and remove the existing switch carefully, noting how wires are connected. Match the new dimmer switch to your wiring, making secure connections with wire nuts—typically black or red hot wires, white neutrals, and green or bare grounds. Fix the switch in place, turn the power back on, and test the dimmer. For details about each step, continue exploring the installation process.
Key Takeaways
- Turn off power at the breaker and verify with a voltage tester before removing the existing switch.
- Carefully disconnect and label wires, noting if the switch is single-pole or three-way.
- Connect the dimmer switch wiring to existing wires, matching color codes and ensuring secure, tight connections.
- Secure the switch in the electrical box, restore power, and test for proper operation and safety.
- Adjust the dimmer settings for smooth lighting control and enjoy your customized lighting ambiance.
Turn Off Power and Prepare Your Workspace

Before beginning any electrical work, you need to turn off the power to the switch circuit and clear your workspace. Prioritizing electrical safety is essential to prevent shocks or accidents. Locate the correct circuit breaker and switch it off, then double-check with a voltage tester to confirm power is completely off. Once verified, organize your workspace by removing clutter and laying out all necessary tools within reach. Good workspace organization keeps you focused and reduces mistakes. Wearing insulated gloves and safety goggles adds extra protection. Keep a flashlight handy if lighting is poor. Taking these precautions minimizes hazards and creates a safe environment for working on your switch. Proper preparation ensures a smoother installation process and keeps you safe throughout the project. Additionally, understanding the role of electrical components can help you troubleshoot issues more effectively during installation.
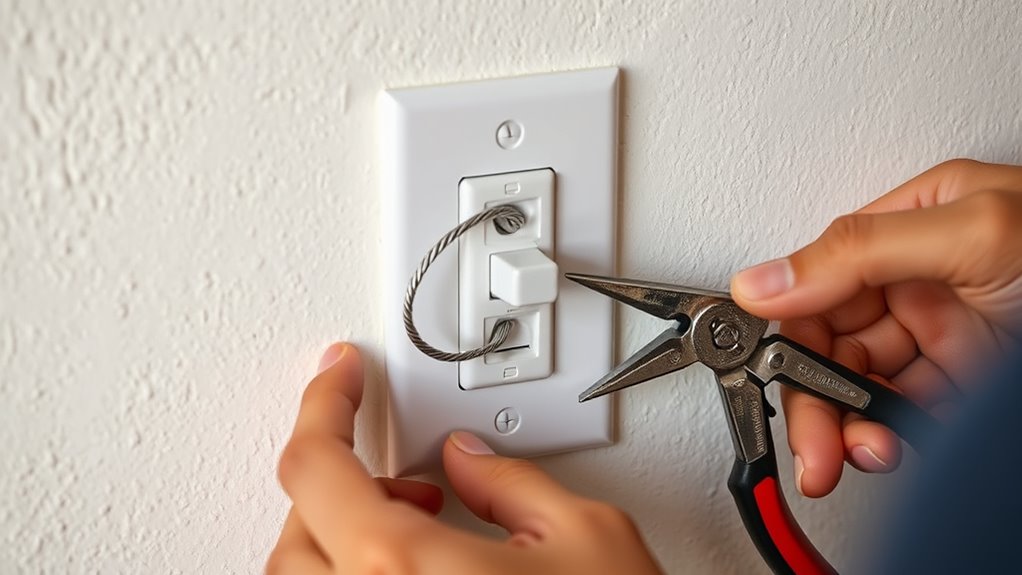
Remove the Existing Switch and Examine Wiring
To remove the existing switch, start by unscrewing the faceplate and carefully pulling it away from the wall. Once exposed, examine the wiring connected to the switch. Refer to wiring diagrams if needed to identify the different switch types—single-pole or three-way—that determine how wires are configured. Carefully disconnect the wires, noting their placement, as this helps during reinstallation. Take a photo if necessary for reference. Check for any loose or damaged wiring before proceeding. Understanding the wiring setup ensures you select the correct dimmer switch later. Remember, switch types vary, so recognizing whether you have a single-pole or multi-way switch improves safety and compatibility. Handling wiring carefully prevents accidental shocks and makes the transition smoother. Being aware of wiring configurations helps ensure a safe and successful installation.
Choose the Correct Dimmer Switch for Your Needs
To choose the right dimmer switch, you need to consider the types of bulbs in your fixtures and their compatibility. Think about the dimming range you want and whether a smart switch with remote control features fits your needs. Comparing standard and smart dimmers helps you decide which option offers the best control and convenience for your space.
Compatibility With Bulbs
Are you aware that not all dimmer switches work with every type of bulb? Choosing the right dimmer depends on bulb compatibility and the dimmer types available. Some switches are designed specifically for incandescent bulbs, while others support LEDs or CFLs. Using the wrong type can cause flickering or prevent dimming altogether. Check the packaging or manufacturer’s instructions to confirm compatibility. Here’s a quick overview:
| Bulb Type | Compatible Dimmer Types |
|---|---|
| Incandescent | Standard dimmers |
| LED | LED-compatible dimmers |
| CFL | CFL-compatible dimmers |
Matching the right dimmer type with your bulbs ensures smooth operation and longevity. Always verify compatibility before installation. Additionally, understanding the cost of different electric bikes can help you choose the right equipment for your needs.
Dimming Range Options
Have you considered how the dimming range of a switch impacts your lighting experience? The dimming range determines how smoothly and precisely you can control your lights, affecting the overall lighting ambience. If you prefer subtle adjustments, choose a dimmer with a wide dimming range to fine-tune brightness levels. Some switches offer minimal dimming capabilities, which may not suit your needs if you want complete control. Additionally, selecting a switch with an appropriate dimming range can enhance energy efficiency by preventing unnecessary brightness and reducing power consumption. Consider your lighting goals—whether creating a cozy atmosphere or bright task lighting—and choose a dimmer switch that offers the right range to meet those needs. Proper selection ensures ideal comfort, efficiency, and mood control in your space.
Smart vs. Standard Switch
Wondering whether to choose a smart or standard dimmer switch? Both options help you control lighting ambiance and improve energy efficiency, but they serve different needs. A standard dimmer is simple, affordable, and easy to install, perfect if you want basic dimming control. A smart switch offers remote control, scheduling, and integration with home automation systems, ideal for tech-savvy users. Consider these differences:
| Feature | Standard Dimmer | Smart Dimmer |
|---|---|---|
| Lighting Control | Manual | Remote, app control |
| Compatibility | Most bulbs | Compatible with smart devices |
| Cost | Lower | Higher |
| Energy Efficiency | Basic | Optimized with automation |
| Setup | Simple | Slightly complex |
Choose based on your lighting ambiance preferences and desired energy savings. Proper installation ensures safety and optimal performance.
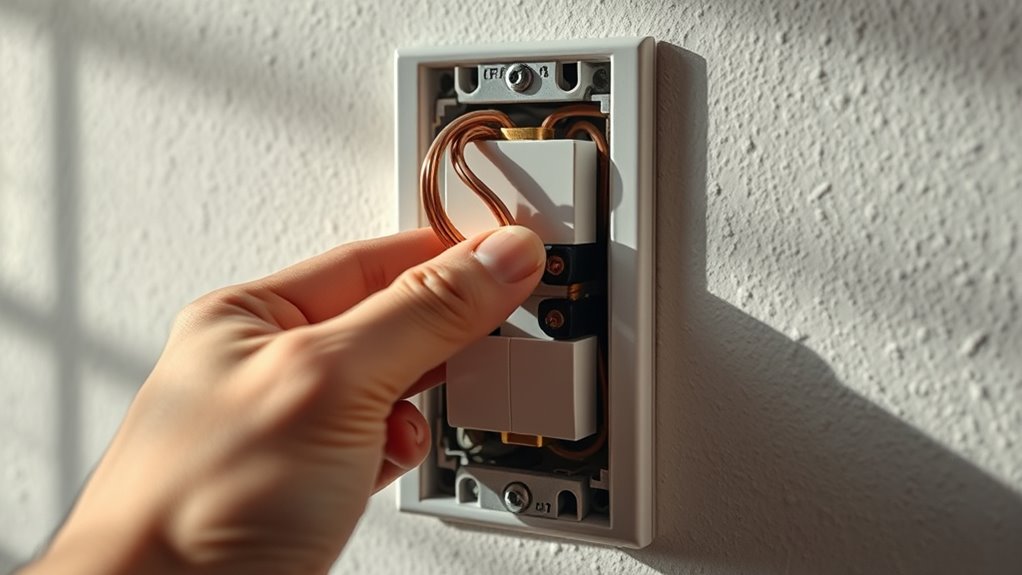
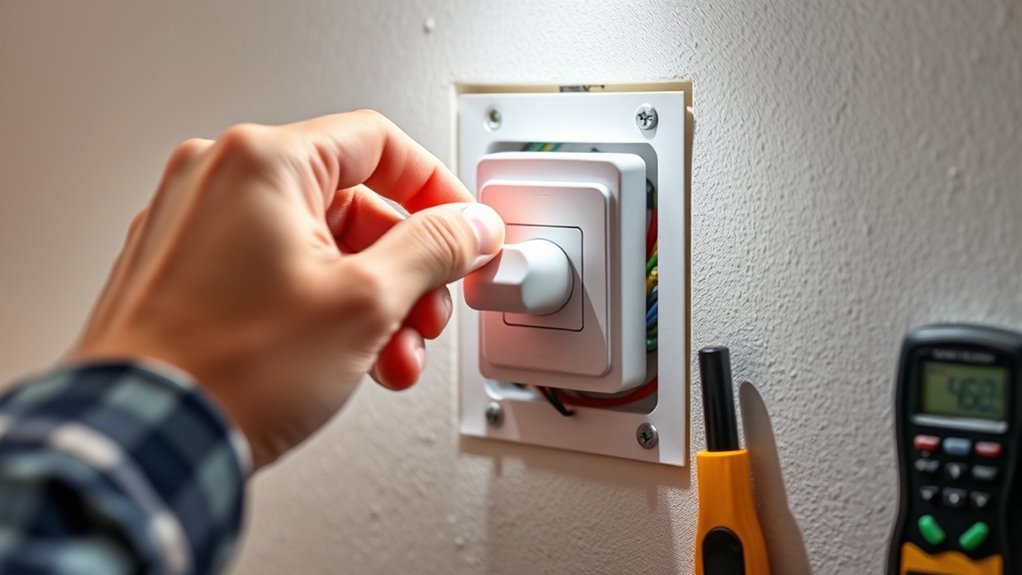
Connect the Dimmer Switch Wires Properly
To guarantee your dimmer switch works safely and correctly, you need to connect the wires properly. Make sure you match each wire color to its corresponding terminal, and tighten all connections securely. Taking these steps helps prevent electrical issues and guarantees reliable operation. Additionally, ensuring proper wiring is essential for electrical safety and the longevity of your installation.
Match Wires Correctly
Before connecting the wires, turn off the power at the breaker to guarantee safety. Start by matching the wire color to the corresponding terminal on the dimmer switch. Typically, the black or red wire is the hot wire, which connects to the dimmer’s hot terminal. The white wire is neutral and should connect to the switch’s neutral terminal if available. If your switch has a ground terminal, connect the green or bare copper wire to it. Confirm the wires are securely attached by matching each wire to its correct terminal—this prevents electrical issues and ensures proper operation. Double-check that all connections are tight and that no loose strands are exposed to avoid shorts. Properly matching wires is essential for a safe, functional installation. Additionally, referencing city dynamics and understanding local electrical codes can help ensure compliance and safety.
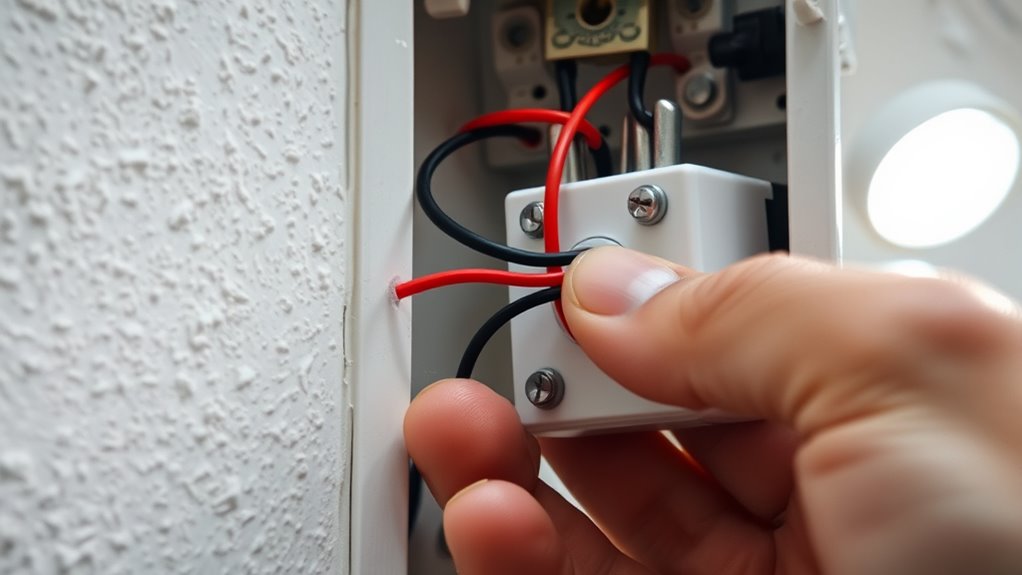
Secure Connections Firmly
Ensuring that the wires are securely connected is essential for a safe and reliable dimmer switch installation. Proper connections prevent electrical hazards and assure grounding safety. Use wire color coding as your guide: black or red for hot wires, white for neutral, and green or bare for ground. Tighten terminal screws firmly, avoiding loose connections. Properly organized wiring can also contribute to an overall home decor aesthetic by ensuring a clean and professional appearance.
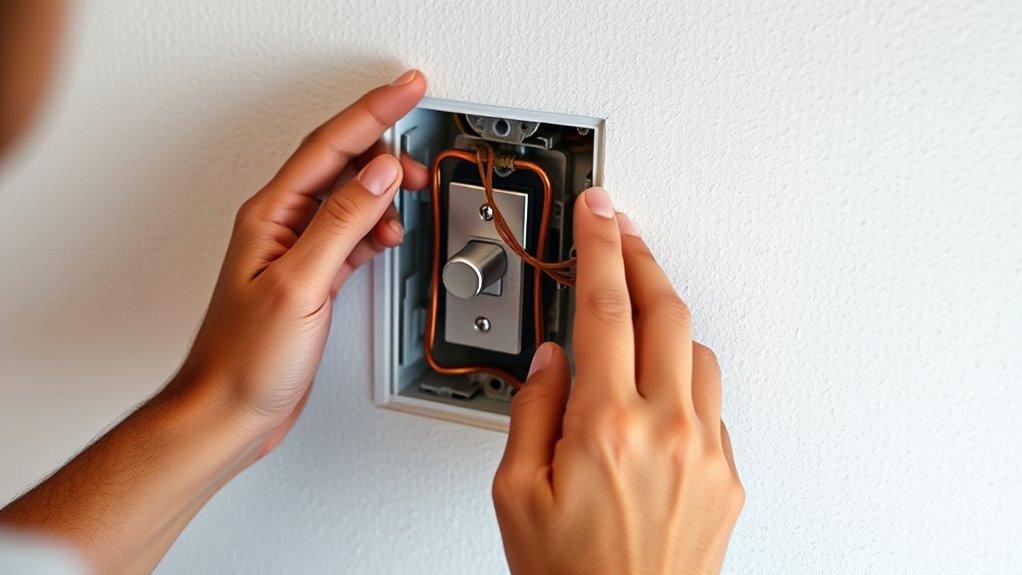
Secure the Switch and Restore Power
Once you’ve securely connected the dimmer switch to the wiring, it’s important to carefully secure the switch in its electrical box to prevent any movement or damage. Before restoring power, review safety precautions to make sure you’ve turned off the breaker and verified power is off. Choose the right tools—like a screwdriver and wire stripper—to tighten screws and secure wires properly. Gently push the switch into the box, making sure no wires are pinched or exposed. Once everything is in place, attach the faceplate securely. Finally, restore power at the breaker panel, and double-check that the switch operates correctly, ensuring safety and functionality. Taking these steps helps prevent electrical issues and keeps your installation safe. Proper wiring techniques are essential for a safe and effective installation process.
Test the Dimmer Switch and Adjust Settings
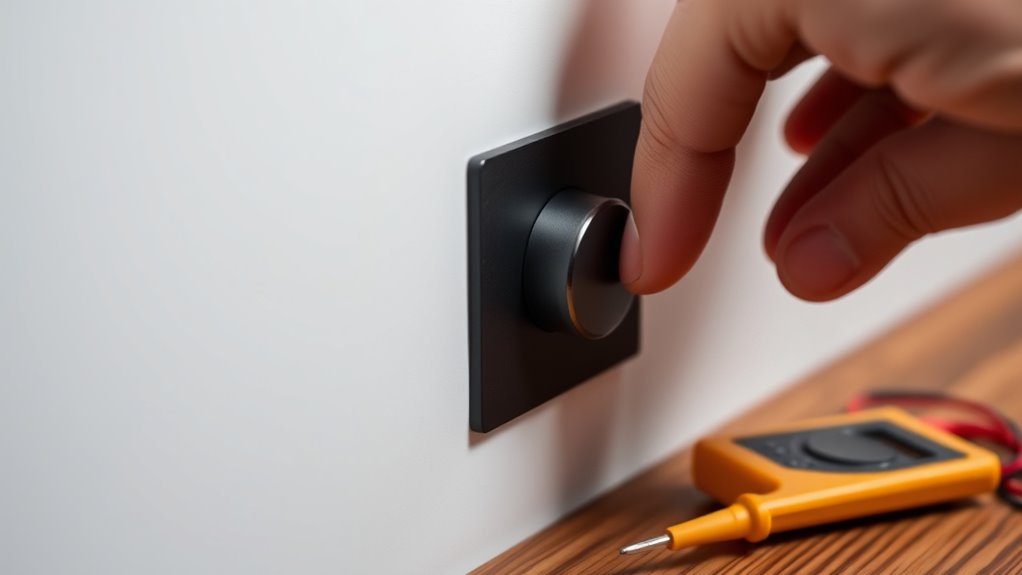
After securing the switch and restoring power, it’s time to test your new dimmer to make sure it works correctly. Turn on the light and slowly adjust the dimmer to see how it affects the lighting ambiance. Make certain the dimmer smoothly shifts from bright to dim without flickering or buzzing. If your model has adjustable settings, fine-tune them to match your preferred lighting levels and mood. Properly functioning dimmers improve energy efficiency by reducing unnecessary power use when lights are dimmed. Verify that the dimmer responds accurately to your adjustments, and make any necessary tweaks. Using tools to detect passive voice can help you ensure your writing remains clear and engaging. Once satisfied, you’ll enjoy customizable lighting and better energy savings, making your space more comfortable and eco-friendly.
Frequently Asked Questions
Can I Install a Dimmer Switch on Any Type of Light Fixture?
You can’t install a dimmer switch on any light fixture, as light fixture compatibility varies. Check if your fixture uses incandescent, halogen, or dimmable LED bulbs, since non-dimmable types won’t work with dimmers. Also, consider wiring considerations—make sure your wiring supports dimmer installation, especially with multi-switch setups or specialized fixtures. Always verify compatibility and consult the dimmer switch instructions to guarantee safe, effective operation.
Do I Need Special Tools to Install a Dimmer Switch?
Yes, you’ll need some special tools to install a dimmer switch. A wire stripper helps you remove insulation from wires, ensuring a clean connection. A voltage tester is essential to verify the power is off before you start working, keeping you safe. Additionally, having a screwdriver will help you secure the switch in place. With these tools, you can confidently install your dimmer switch safely and correctly.
How Do I Troubleshoot if the Dimmer Switch Doesn’T Work?
If your dimmer switch isn’t working, start troubleshooting by turning off power at the circuit breaker for electrical safety. Check the wiring connections to verify they’re secure and correct. Test the switch with a voltage tester to confirm it’s receiving power. If it still doesn’t work, replace the switch. Remember to always follow safety procedures and consult a professional if you’re unsure about any step in troubleshooting.
Are Dimmer Switches Compatible With Smart Home Systems?
Imagine your living room bathed in just the right glow, perfectly dimmed with a tap or voice command. Many dimmer switches now support smart home integration, making it easy to sync with your system. Look for models with voice control compatibility, so you can adjust lighting hands-free. Just confirm your switch is compatible with your smart home platform, like Alexa or Google Assistant, to enjoy seamless, effortless control.
What Safety Precautions Should I Take During Installation?
You should turn off the power at the circuit breaker to guarantee electrical safety before starting. Use insulated tools, wear rubber-soled shoes, and avoid water contact. Check for proper grounding to prevent shocks, and verify power is off with a tester. Follow all manufacturer instructions carefully. Taking these precautions minimizes risks, keeps you safe, and ensures a smooth installation process.
Conclusion
Now that you know how to install a dimmer switch, you’re ready to create the perfect lighting ambiance in your space. Remember, safety always comes first—did you visualize turning on the switch and immediately enjoying a cozy glow? With a little patience and caution, you can easily upgrade your lighting. So why settle for harsh or static lighting when you can effortlessly set the mood with just a flick of the switch?