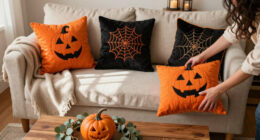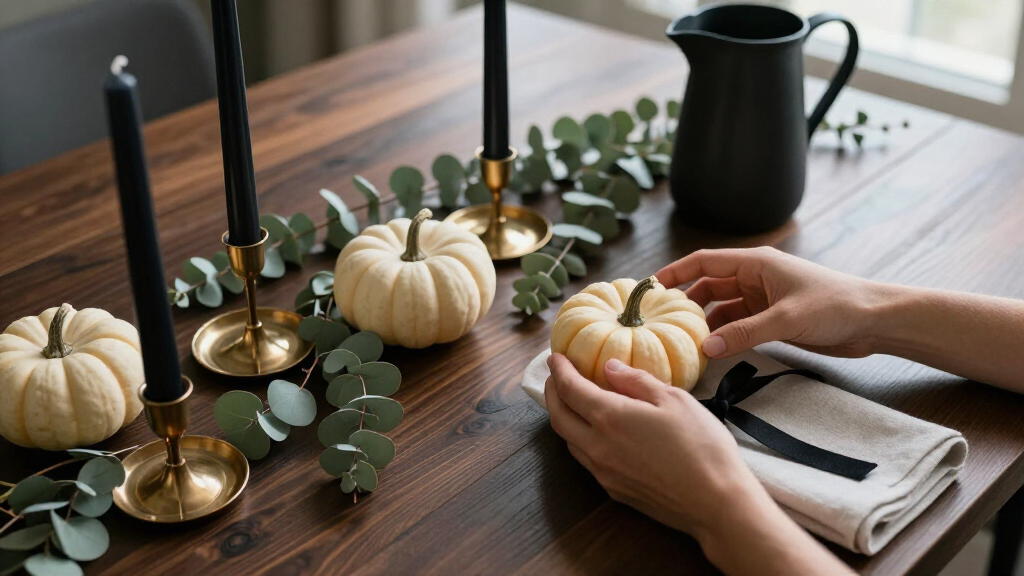

This guide shows you how to build a spooky Halloween table from scratch: a layered foundation, a dramatic centerpiece, dim moody lighting, themed place settings, and small finishing touches that make the whole display feel intentional. No crafting skills are required — everything here uses store-bought or household items assembled in a specific order. The finished table will hold together visually from across the room and up close, and it will be stable enough to survive guests actually using it for food and drinks.

Get furniture and decor delivered free — and shop member deals
- Fast, free delivery on millions of items
- Access to Prime Big Deal Days deals on October 6–7
- Prime Video, Amazon Music and more included

Halloween Ghost Figurine – Farmhouse Indoor Decoration for Tiered Tray, Shelf, and Mantel Display
- ✔ Material: Resin
- ✔ Craftsmanship: Handmade
- ✔ Style: Rustic / Farmhouse / Lodge

Primitive Halloween Ghost Decor Set of 3 with Wizard Hats and Wooden Stands
- ✔ Brand: LINLINGTOYS
- ✔ Pieces Included: 3 ghosts with wooden stands (small, medium, large)
- ✔ Materials: Cotton muslin, cheesecloth, jute

Dazzle Bright 12 Pack Halloween Spider Tea Lights Candles, Battery Operated LED Flameless Spider Candles
- ✔ Pieces Included: 12 spider tea light candles
- ✔ Dimensions (each): 3.3 x 2.4 x 1.8 inches
- ✔ Material: Plastic with LED components
This guide is for beginners hosting a Halloween dinner, party buffet, or simply decorating an entry table for the season. Total working time is 1-2 hours once you have your materials. The steps are ordered deliberately: foundation first, then height, then light, then detail. Skipping ahead to the small decorations before the structure is in place is the most common way these tables end up looking cluttered, so work through the steps in order.
Difficulty: Beginner | Time: 1-2 hours (plus optional shopping time)
What You’ll Need
Tools & Materials:
- Table (dining, console, or buffet) cleared and cleaned
- Tablecloth or fabric runner in black, deep purple, or dark gray
- Second runner or remnant fabric in a contrasting dark tone or gauze
- Battery-operated LED candles (5-9, assorted heights)
- Centerpiece anchor: faux black branches, dead flowers, a skull, a small pumpkin stack, or a cloche
- 2-4 small or medium pumpkins (real or faux, dark or white tones)
- Black or metallic chargers or placemats
- Dinner plates, napkins (black, white, or deep red), and napkin rings or ribbon
- Small accent items: plastic spiders, moss, cheesecloth, mini skulls, or faux cobwebs
- Wire cutters or heavy scissors (if using branches or faux flowers)
- Timer or remote for candles (optional but strongly recommended)
Knowledge:
- None required — all steps are beginner-friendly
- Basic table-setting order (plate, napkin, cutlery) if the table will be used for a meal
Gather everything before you start. Building a tablescape in stages works far better than stopping mid-way to hunt for candles. Check all battery candles by switching each one on once before placing it. If children or pets will be near the table, skip loose small items like plastic spiders on the tabletop edge and skip real flames entirely — battery LEDs only.
Halloween Ghost Figurine – Farmhouse Indoor Decoration for Tiered Tray, Shelf, and Mantel Display
If you want one piece that anchors an entire Halloween tablescape without any fuss, this is it. The Halloween Ghost Figurine stands out for its handmade resin construction, which gives it a smooth, finished feel and far more durability than the fabric-based competition. Compared with the Primitive Ghost Set of 3, this figurine is the safer choice if your decor gets handled often — resin will not fray, tear, or lose its shape the way cotton muslin and cheesecloth can over multiple seasons.Styling-wise, its whimsical pose makes it a natural focal point on a tiered tray or dining table, and its rustic character means it pairs well with wooden chargers, plaid runners, and other farmhouse staples. The tradeoff is honest: this is cute-spooky, not scary-spooky. If your goal is a haunted-house vibe, the Dazzle Bright spider tea lights will do more heavy lifting atmospherically. We also flag that the size may run smaller than some buyers picture, so check dimensions against your table before committing to it as a sole centerpiece. Indoors is the limit — resin decor like this is not built to weather an outdoor display.
Pros:
- Durable, smooth resin build that survives storage and handling
- Works as a focal point across trays, mantels, shelves, and tables
- Handmade quality gives it a finished, gift-worthy look
- Blends easily with rustic and farmhouse styling
Cons:
- Indoor use only
- Whimsical design leans cute rather than spooky
- May be smaller than expected as a standalone centerpiece
Best for: Farmhouse-style decorators who want one durable, low-maintenance centerpiece that anchors a cute Halloween tablescape.
Not ideal for: Anyone chasing a genuinely eerie or haunted-house aesthetic, or those needing outdoor-safe decor.
Bottom line: The most dependable all-around pick — durable, versatile, and charming, as long as cute-spooky fits your vision.
“The most dependable all-around pick — durable, versatile, and charming, as long as cute-spooky fits your vision.”
Primitive Halloween Ghost Decor Set of 3 with Wizard Hats and Wooden Stands
Where the single resin figurine gives you one focal point, this set from LINLINGTOYS gives you a whole composition. The three ghosts come in small, medium, and large sizes on wooden stands, and that graduation is the real draw — arranged along a mantel or down the center of a table, they create depth and rhythm that a single piece simply cannot match. For buyers working with long dining tables or tiered trays with multiple levels, this option makes the most sense for filling space without buying several separate items.The materials tell a different story than our top pick, though. Cotton muslin, cheesecloth, and jute give the ghosts an authentic primitive texture — the weathered, handmade look that mass-produced resin struggles to replicate — but that fabric demands gentler treatment. Compared with the Ghost Figurine, this set is more fragile in storage and less forgiving if children or party guests handle it. The wizard hats and vintage ‘BOO’ and ‘OCTOBER 31’ tags add charming period detail, but the overall effect is still rather than frightening, so skip it if you want horror vibes. Like the others here, it is strictly indoor decor.
Pros:
- Three graduated sizes enable layered, dynamic displays
- Authentic primitive textures suit vintage and farmhouse decor
- Wooden stands add stability and a finished look
- Versatile across mantels, shelves, trays, and centerpieces
Cons:
- Delicate fabric construction requires careful handling and storage
- Indoor use only
- No lighting or glow element for evening atmosphere
Best for: Buyers decorating long tables, mantels, or tiered trays who want a coordinated multi-piece arrangement at a lower per-piece cost.
Not ideal for: Households with rough handling expected, or anyone wanting a single bold centerpiece or a scary theme.
Bottom line: The smartest way to fill a large display surface with coordinated rustic charm — just handle it with care.
“The smartest way to fill a large display surface with coordinated rustic charm — just handle it with care.”
Dazzle Bright 12 Pack Halloween Spider Tea Lights Candles, Battery Operated LED Flameless Spider Candles
Neither ghost option on this list actually lights up, and that is exactly where the Dazzle Bright spider tea lights earn their place. This 12-pack delivers the thing a Halloween table arguably needs most after dark: glowing orange light without any fire risk. Each candle pairs a black spider with an LED tea light, and because they are flameless and battery-operated with an easy bottom switch, they are safe around children, pets, table linens, and crowded party tables — a genuine advantage over real candles that drip and burn.Compared with the figurine and the ghost set, this option shifts your decor from static to atmospheric. Twelve pieces also means serious coverage: you can line a banquet table, scatter them across a fireplace mantel, or tuck them into bookshelves and bedside tables throughout a party space. The plastic build is sturdy and reusable season after season, outlasting the fabric ghost set in durability. The catch is that these are accent lighting, not centerpieces — a tea light cannot anchor a tablescape the way the resin ghost can, and the playful spider design reads kitschy rather than refined farmhouse. For the fullest effect, we would actually pair them with one of the other two picks rather than choose one or the other.
Pros:
- Flameless LED design is safe around kids, pets, and linens
- 12 pieces provide coverage for large tables and party spaces
- Durable, reusable plastic build resists fading and damage
- Batteries included for immediate setup
Cons:
- Too small and lightweight to serve as a centerpiece on their own
- Novelty spider design may clash with farmhouse styling
- Batteries will eventually need replacing
Best for: Party hosts and families who want safe, glowing Halloween ambience spread across multiple surfaces.
Not ideal for: Buyers seeking a single statement centerpiece or a refined rustic aesthetic.
Bottom line: The best way to add safe, spooky glow to your Halloween table — as a complement to a figurine, not a replacement for one.
“The best way to add safe, spooky glow to your Halloween table — as a complement to a figurine, not a replacement for one.”
As an Amazon Associate we earn from qualifying purchases.
Before You Start
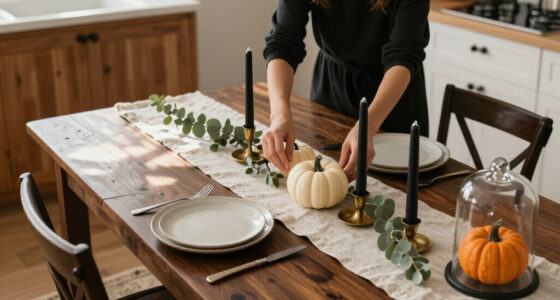
Clear the table completely and wipe it down. A tablescape layered over crumbs, mail, or leftover objects always looks off. Decide now whether the table is decorative-only or will serve food, because that determines how much surface you can decorate: a serving table should keep the center 60% clear, while a decorative table can be filled edge to edge. Also decide on one dominant color pair — for example black and gold, or purple and green — and stick to it. A single accent color repeated throughout is what separates a designed table from a pile of Halloween items.
Step-by-Step Instructions
Step 1: Set the foundation layers
Drape the main tablecloth or runner across the full length of the table so it hangs evenly on both sides. Smooth out wrinkles with your hands. Then lay the second, narrower runner or a strip of gauze diagonally or crosswise over the first, creating a visible overlap. If you want a distressed look, tear the edges of the gauze or cheesecloth rather than cutting it — torn edges read as aged, cut edges read as new fabric.
Step back and look at the table from a few feet away. The two layers should read as one surface with subtle depth, not two competing stripes.
Tip: Dark fabric absorbs candlelight and makes everything on top of it pop. If your only tablecloth is light, use a dark runner on top rather than the reverse.
Check: Fabric hangs evenly, covers the surface, and the two layers look deliberately layered rather than accidental.
Step 2: Build the centerpiece anchor
Place your largest centerpiece item slightly off-center along the length of the table — dead branches in a dark vase, a skull on a stack of books, or a cluster of three pumpkins. Off-center placement looks more natural and leaves room for place settings. If using branches, cut them with wire cutters so the tallest point sits roughly 1.5 times the height of your tallest candle; anything taller will block conversation across the table.
Add your second-tier items now: one or two medium pumpkins or a smaller skull placed beside the anchor, touching or slightly overlapping the base. Groupings that physically touch read as a composed arrangement; items floating apart read as scattered clutter.
Tip: Odd-numbered groupings (3 or 5 items) look more natural than even numbers. Resist adding more than five items to the main grouping.
Check: The centerpiece is visible from across the room, sits stable, and does not wobble when you nudge the table.
Step 3: Place the candles
Set out 5-9 battery candles in a loose zigzag down both sides of the centerpiece, mixing heights: tall in the back near the center, short toward the ends. Keep at least 3 inches between flames and any fabric, moss, cobwebs, or branches. Candles should surround the centerpiece, not sit inside it — this keeps the anchor item lit from all angles.
Turn every candle on now, before the finishing steps, and dim the room lights. Judge the placement by how it actually glows, not how it looks in full light. Move candles that disappear into dark fabric or cast awkward shadows on the wall behind the table.
Tip: Candles in glass holders or on small mirrors reflect the flame and double the apparent light for free.
Check: With room lights off, the centerpiece is clearly lit and you see pools of light down the length of the table.
Step 4: Set the place settings
Position a charger or placemat at each seat, aligned with the chair and about one inch from the table edge. Set a dinner plate on each charger, then fold or drape a napkin on the plate — a simple fold tied with black ribbon, or a napkin stuffed loosely into a napkin ring. If you want extra theme, tuck a single plastic spider, small sprig of faux berries, or a mini skull on top of each napkin.
Add cutlery only if the table will actually be used for a meal: fork left, knife and spoon right of the plate. For a decorative table, skip cutlery — bare plates with napkins photograph and display better.
Tip: Press or steam napkins first. Wrinkled napkins are the fastest way to make a detailed setting look sloppy.
Check: All place settings sit at consistent distance from the edge and mirror each other across the table.
Step 5: Add the texture layer
Fill the gaps between candles and centerpiece with texture: stretch faux cobwebs between the branch tips, tuck sheet moss around pumpkin bases, or drape a strip of cheesecloth across one corner of the table so it hangs slightly off the edge. Work in small pieces — tear cobwebs thin and pull moss apart so it sits flat. The goal is haze and shadow, not coverage.
Stop and photograph the table with the room lights off after every few additions. Camera views reveal overdone areas your eye forgives in person.
Tip: This is the easiest step to overdo. If you question whether an area needs more, it does not — remove one piece instead.
Check: Texture appears in patches and gaps, and every candle flame is still visible and clear of material.
Step 6: Scatter final accents and do the walk-around test
Place three to five tiny accents — plastic spiders, mini pumpkins, small bones — at varied points down the table where the eye travels between the centerpiece and place settings. Keep them off the chargers and away from candle flames. Then walk a full slow loop around the table, checking from every angle: straight-on from the doorway, from each end, and from a seated position at one chair.
Fix anything you noticed: straighten plates, re-center the runner, nudge a candle that blocks a view. Set your candle timer or remote so the display lights itself at dusk if you have one.
Tip: The seated view matters most on a dinner table — guests see the centerpiece from below and close up, where bottom-heavy arrangements look best.
Check: The table looks composed from every angle, nothing wobbles, and nothing flammable sits near a flame.
Common Mistakes to Avoid
- Decorating every square inch of the table — Leave visible negative space — bare fabric between groupings. Empty areas make the decorated areas read as designed rather than crowded.
- Mixing too many colors and themes — Choose one accent color plus black before shopping and assembling. Reject any item that falls outside the pair, even if it is a great piece on its own.
- Placing candles before the centerpiece — Always build height first, then light. Candles placed early get moved constantly and the spacing you carefully created is lost.
- A centerpiece too tall for conversation — Cap the centerpiece at roughly 18 inches for a dinner table so seated guests can see each other. Test it by sitting in a chair before you finish.
Troubleshooting
Problem: The table looks flat and boring despite having many items on it
Solution: You have height uniformity. Add one clearly taller element (branches, candlesticks, a cake stand under a pumpkin) and vary candle heights so the eye travels up and down the table.
Problem: The display looks great at night but messy in daylight
Solution: Daylight exposes clutter. Remove a third of the small accent items and tighten groupings so pieces touch. The night version will lose almost nothing.
Problem: Candles tip or wobble on the fabric
Solution: Melt a pea of museum putty or double-sided tape under each candle base, or stand candles on a tray or mirror to give them a solid shared surface.
Problem: The centerpiece dominates and place settings look like an afterthought
Solution: Shrink the anchor — remove one pumpkin or cut the branches shorter — and upgrade the place settings instead: add a napkin ring, a sprig, or swap in chargers with more contrast.
What Success Looks Like
Your table is finished when all of the following hold true: the foundation fabric is smooth and layered with no bare table showing; the centerpiece anchors the middle of the table without wobbling; with room lights off, the battery candles clearly illuminate the arrangement in pools down the table; every place setting sits at a consistent distance from the edge; texture and small accents appear in patches rather than covering everything; and a slow walk around the table reveals no cluttered zone, no blocked view, and nothing flammable near a flame. The final test: photograph the table from the doorway with lights dimmed. If the photo looks like a set piece rather than a collection of decorations, you are done.
Next Steps
If you plan to serve food on this table, do a dry run: set out every serving dish before the party to confirm the center 60% stays clear and nothing blocks candle light. Replace real pumpkins after two weeks indoors or if any soft spots develop, and swap out cut flowers or bare branches when they shed. After Halloween, store candle sets, chargers, and reusable accents in one labeled bin so next year’s build takes under an hour. If you enjoyed this build, apply the same layering formula — foundation, anchor, light, detail — to a mantel or entry table for other holidays.
Frequently Asked Questions
Can I use real candles instead of battery-operated ones?
You can, but only with strict clearance: keep flames at least 3-4 inches from any fabric, moss, cobwebs, or branches, never leave them unattended, and never use them on a table where guests will lean across or where children can reach. Battery LEDs placed inside glass holders deliver 90% of the effect with none of the risk, which is why this guide defaults to them.
How much should I expect to spend?
A full build from scratch typically runs $40-80 using discount-store and dollar-store items: fabric, a branch bundle, pumpkins, and a multi-pack of battery candles. You can cut that dramatically by using household items — black fabric you already own, candles from previous years, and pumpkins grouped free-form instead of in stands. The formula matters more than the price of any individual piece.
How do I make this work on a small table or a table that also serves food?
Shrink the centerpiece to a single anchor item, reduce candles to three, and run the arrangement as a narrow line down the center rather than a wide grouping. Keep everything under 12 inches wide so platters fit on both sides. The layering formula is identical — only the footprint changes.
Real or faux pumpkins?
Real pumpkins look better up close and cost less in season, but they last only 2-4 weeks indoors and must be removed at the first soft spot. Faux pumpkins cost more upfront but store and reuse for years. A practical mix: two or three real pumpkins for the fresh texture, faux for anything painted, stacked, or placed where moisture could damage fabric.
How far in advance of a party should I build the table?
Build the structure 1-2 days ahead — foundation, centerpiece, and candles all hold fine. Add fresh elements the day of: press the napkins, place any real flowers, and do the final walk-around and photo check an hour before guests arrive with the lights dimmed to party level.
Fall Picks
fall essentials
As an affiliate, we earn on qualifying purchases.