
To darn socks and sweaters, you’ll repair holes by weaving matching thread into the damaged fabric, reinforcing the fibers for added strength and durability. Gather essential tools like a needle, matching yarn, scissors, and a darning hoop or mushroom. Carefully prepare your garment, then choose the right technique—such as weaving or embroidery stitches—to seamlessly blend the repair. Mastering these steps helps you extend your clothing’s life while keeping repairs tidy; discover more tips for professional results below.
Key Takeaways
- Use matching yarn and appropriate darning techniques to seamlessly reinforce and repair holes in socks and sweaters.
- Prepare the garment thoroughly, securing the damaged area and selecting suitable tools for effective darning.
- Choose the right stitches—woven, cross-stitch, or zigzag—based on fabric type and tear size for durability and visual appeal.
- Maintain proper tension and work in small, even stitches to ensure a smooth, nearly invisible repair.
- Gently wash and store repaired items to preserve the integrity and extend the lifespan of the darning work.
Top picks for "darn sock sweater"
Open Amazon search results for this keyword.
As an affiliate, we earn on qualifying purchases.
Understanding the Basics of Darning

Darning is a simple yet effective way to repair holes and worn areas in your socks and sweaters. It involves weaving new thread into the damaged fabric, providing fiber reinforcement that restores strength and durability. To achieve a seamless repair, it’s important to match the color of your yarn or thread as closely as possible to the original fabric, ensuring the mend blends in naturally. Proper darning techniques involve creating a patchwork of stitches that reinforce the weakened fibers and prevent further tearing. When you understand the basics of fiber reinforcement and color matching, you’ll make repairs that not only extend the life of your clothing but also look tidy and professional. Using durable threads designed for fabric reinforcement can help ensure your repairs hold up over time. With patience, your darning skills will improve, making mending an efficient and satisfying process.
Gathering Your Darning Supplies and Tools

Start by gathering essential darning tools like a needle, thimble, and scissors, so you’re ready to repair. Next, choose the right darning threads that match your fabric’s color and weight for a seamless fix. Finally, organize your supplies in a way that keeps everything accessible, making your darning process smooth and efficient. It’s also helpful to understand the different cookie categories used on websites to better manage your online privacy preferences.
Essential Darning Tools
Before you begin mending your socks and sweaters, gather the essential tools that will make the process smoother. Start with a good darning needle, which should have a sharp point and an eye large enough to thread easily. Choosing the right thread is vital; opt for thread that matches your fabric’s color and weight for seamless repairs. A pair of scissors will help trim excess thread, while a thimble can protect your finger during sewing. Keep a clean, flat surface to work on, and consider having a needle threader if threading becomes difficult. Proper color accuracy ensures your repairs blend seamlessly with the original fabric, making your mending less noticeable. With these tools at hand, you’ll find darning more manageable and efficient, making your repairs durable and nearly invisible. Proper tools set the foundation for successful mending.
Choosing Darning Threads
Choosing the right darning threads can make a significant difference in how well your repairs hold up and how discreet they appear. When selecting thread color, match it closely to your fabric for a seamless look, or choose a contrasting shade for decorative effects. Thread strength is equally important; stronger threads ensure durability, especially in high-wear areas. Use this table to help pick the best thread:
| Thread Color | Thread Strength |
|---|---|
| Close to fabric | Heavy-duty for durability |
| Contrasting | Decorative or visible repairs |
The right combination ensures your darning is both functional and visually appealing, making your efforts worthwhile and your garments look as good as new. Additionally, understanding drivetrain components can help you select threads that withstand the stresses of frequent wear and washing.
Organizing Your Supplies
Organizing your supplies is essential for a smooth darning process. When you gather your tools, you’ll want to keep everything accessible and well-arranged. Imagine this:
- A variety of darning needles suited for different fabric types, from delicate knits to sturdy woven fabrics.
- An assortment of matching threads, including those that follow specific knitting patterns for seamless repairs.
- Small scissors to trim loose threads and prepare fabric edges.
- A darning mushroom or hoop to stabilize the fabric, especially when working with textured or patterned fabric types.
- Using appropriate thread strength can help ensure your repairs are durable and blend seamlessly with the fabric.
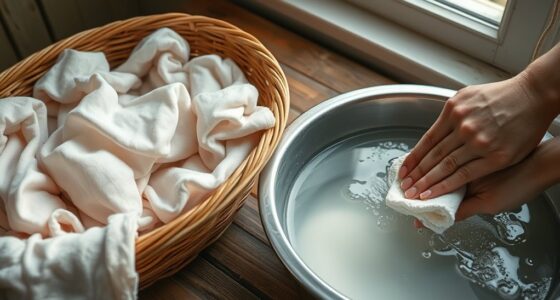
Preparing Your Garments for Darning

Before you start darning, check your garment carefully for any holes or frayed edges that need repair. Make sure you have all the necessary tools, like a needle, thread, and scissors, within reach. Taking these steps guarantees your darning process goes smoothly and effectively. Additionally, inspecting your clothing for wear and tear ensures you address all areas needing reinforcement before beginning the repair.
Inspect for Damage
Inspecting your garments for damage is a crucial first step before darning, as it helps you identify all areas that need repair. Look closely at the fabric to assess its durability, noting any holes, frayed edges, or thinning spots. This careful check ensures you don’t miss hidden damage that could worsen later.
Consider these key points:
- Check for holes or tears, focusing on weakened fabric.
- Examine frayed edges that may need reinforcement.
- Identify areas with thinning fabric that are prone to further damage.
- Match the fabric’s color to plan your repair and maintain consistency.
This inspection helps you understand the extent of damage and choose the right techniques, especially for color matching and preserving the garment’s integrity.
Gather Necessary Tools
To start darning effectively, gather all the tools you’ll need to repair your garments. Darning has a rich history, with roots that date back centuries, and holds cultural significance in many communities as a practical craft. You’ll want a darning needle, which is smaller and blunt, perfect for weaving through fabric. Have a darning mushroom or egg to stabilize the fabric, making your work easier. Prepare some matching or contrasting thread or yarn, depending on your desired aesthetic. Keep scissors handy to trim loose threads. Having these tools ready not only streamlines the process but also connects you to a tradition that’s been valued for generations. Proper preparation guarantees your darning is effective, efficient, and respectful of its historical and cultural importance. Additionally, understanding different darning techniques can help improve your skills and the durability of your repairs.
Choosing the Right Darning Technique

Choosing the right darning technique depends on the type of fabric and the size of the tear. For delicate fibers, like wool or silk, a fine, tight stitch preserves fiber blending and maintains softness. Larger holes may require a patch, while smaller tears benefit from a woven or zigzag stitch. Consider these options:
Choose darning methods based on fabric type and tear size for seamless, durable repairs.
- Fine cross-stitch for delicate, lightweight fabrics, emphasizing fiber blending.
- Running stitches for quick, sturdy repairs on thicker fabrics.
- Woven darning for seamless repairs that match color and texture.
- Zigzag or embroidery stitches for larger tears, ensuring proper color matching.
Matching the thread color closely to the fabric helps conceal the repair, while fiber blending ensures the darning integrates smoothly with the original material. Selecting the appropriate technique ensures durability and a neat appearance. Additionally, choosing the right tools and materials, such as specialized darning needles and suitable threads, can significantly improve the quality of the repair technique optimization.
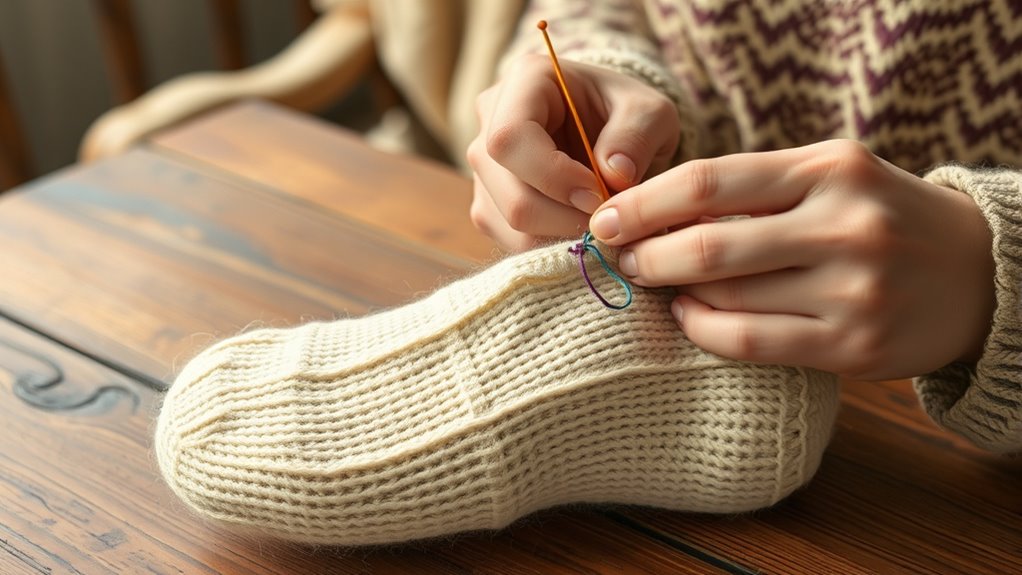
Step-by-Step Guide to Darning Socks

Darning socks effectively begins with preparing your materials and setting up a clean, well-lit workspace. Start by selecting the appropriate sock pattern that matches your sock’s size and shape, ensuring a seamless repair. Choose yarn types that match the original sock’s fiber; wool blends work well for elasticity, while cotton yarns suit summer socks. Gather a darning needle, scissors, and matching thread or yarn. Begin by turning the sock inside out and securing the area around the hole. Carefully thread your yarn or thread through the needle, then start weaving horizontal stitches across the damaged area, following the sock pattern’s natural grain. Next, weave vertical stitches over and under the horizontal ones, creating a sturdy patch. Remember, quality repair techniques can significantly extend the life of your socks and maintain their comfort and appearance. Finish by trimming excess yarn and turning the sock right side out to check your repair.
Repairing Sweaters With Darning Methods

When repairing sweaters with darning methods, you should start by preparing your workspace and gathering the right materials. First, choose a well-lit area with a flat surface. Next, gather matching yarn and a darning needle suitable for your fabric type. Then, select an appropriate knitting pattern that matches your sweater’s texture. Finally, have scissors and a hoop or frame ready to keep the fabric taut. Understanding fabric types is essential—wool, cotton, or synthetic fibers may require different yarns and techniques. Additionally, choosing the right keto-friendly yarn can help ensure your repair blends seamlessly with the original fabric and pattern. By preparing carefully, you guarantee your darning blends seamlessly with the original fabric and pattern. This attention to detail helps restore your sweater’s integrity and appearance, making it look almost new.
Tips for Achieving a Seamless Finish

To achieve a seamless finish when darning socks and sweaters, focus on blending the repaired area with the surrounding fabric. Use seamless finishing techniques like fine, even stitches that mimic the original knitting pattern. Carefully select matching yarn colors to guarantee the repair blends naturally, avoiding noticeable patches. When darning, work in small, consistent stitches that follow the fabric’s grain, creating a smooth progression. Pay attention to the tension—too tight can cause puckering, while too loose may leave gaps. Gradually blend the new yarn into the existing fabric by overlapping stitches slightly. Taking your time with these steps helps the repair become virtually invisible, giving your socks and sweaters a professional, seamless appearance that’s durable and discreet.
Maintaining and Caring for Darned Items

Proper care and maintenance are essential to guarantee your darned socks and sweaters stay in good condition and the repairs last. To preserve their durability, follow these steps:
Proper care ensures your darned socks and sweaters stay durable and looking their best.
- Gently wash your items using mild detergent, avoiding harsh chemicals that can damage the yarn or disrupt knitting patterns.
- When drying, lay them flat to prevent stretching or distortion, especially if you’ve used specific dyeing techniques to achieve vibrant colors.
- Store your sweaters folded, not hung, to maintain their shape and protect the darned areas.
- Occasionally inspect your repairs, reinforcing them if needed, and consider using dyeing techniques to touch up any faded areas, ensuring your darned items look fresh and well-maintained.
Frequently Asked Questions
How Often Should I Darn My Socks or Sweaters?
You should darn your socks and sweaters as soon as you notice small holes or signs of wear. Regular mending techniques help extend their life and keep fabric care in check. Don’t wait until the damage worsens, because timely repairs prevent bigger tears. Make it a habit to inspect your clothing regularly, and promptly darn any weak spots to maintain their durability and appearance.
Can Darning Extend the Life of My Garments Significantly?
Imagine giving your favorite garments a second chance at life, like restoring a faded painting. Darning can substantially extend their fabric durability by seamlessly repairing holes and weak spots. With proper darning techniques, you weave strength back into the fabric, transforming worn-out pieces into almost-new treasures. This simple act preserves quality and saves money, proving that a little skill can keep your wardrobe vibrant and lasting much longer.
Is Darning Suitable for All Fabric Types?
Darning isn’t suitable for all fabric types. You need to take into account fabric compatibility before starting, as some materials like delicate silks or stretchy knits may not respond well to traditional darning techniques. For sturdier fabrics like wool or cotton, darning works well and can extend your garment’s life. Always test a small area first, and choose the right darning techniques to ensure a durable, seamless repair.
What Are Common Mistakes to Avoid When Darning?
Think of darning as tending a delicate garden; avoid common mistakes by preventing puckering, which can distort your work. Always select appropriate needles that match your fabric’s thread weight, ensuring smooth stitching. Be mindful not to pull too tightly, as it causes puckering and weakens the repair. Also, don’t rush—patience maintains even tension, preserving the fabric’s strength and appearance, much like nurturing a thriving garden.
How Do I Choose the Best Thread Color for Darning?
When choosing thread color, prioritize thread selection that closely matches the fabric’s color for a seamless look. Use color matching techniques like holding the thread against the fabric in good light to see if it blends well. If you want the repair to be less visible, select a thread slightly lighter or darker than the fabric. Always test your choice on a hidden area before completing the darning to guarantee the best match.
Conclusion
Now that you know how to darn socks and sweaters, you’re not just fixing holes—you’re weaving resilience into your wardrobe. With each stitch, you’re turning worn-out garments into treasured keepsakes. So, embrace the craft, enjoy the process, and remember: every mend is a testament to your patience and care. Like a phoenix rising from the ashes, your darning skills will breathe new life into your clothes, making them last longer and telling their own stories.