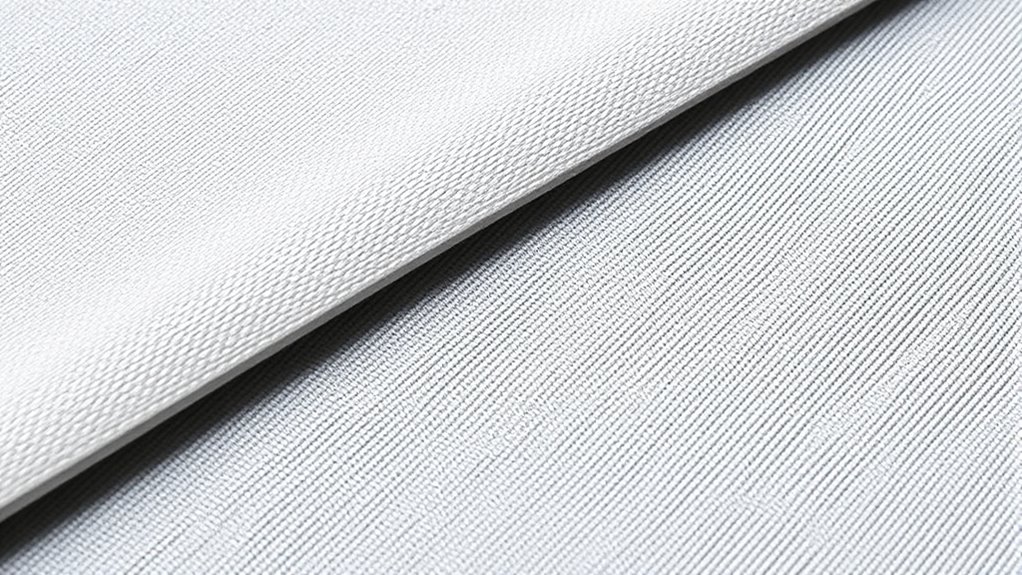
To understand fabric grain and selvage, start by examining the edges of your fabric. The selvage runs parallel to the warp threads and shows a finished, tight weave, often marked with info or patterns. Gently straighten the fabric to find the true grain, which helps you cut accurately and ensure your project drapes well. If you keep exploring, you’ll uncover even more tips for perfect sewing results.
Key Takeaways
- Identify selvage edges, which run parallel to warp threads, to determine the fabric’s lengthwise grain.
- Gently straighten and pull the fabric to observe stretch direction, confirming the true grain.
- Check the selvage for a tight, finished edge with markings or a glossy finish indicating the fabric’s grain and quality.
- Differentiate selvage from cut edges by their appearance: selvage is smooth and woven, while cut edges are frayed.
- Use the selvage as a guide to align pattern pieces parallel to the grain for accurate cutting and proper drape.
Identifying the Fabric Grainline
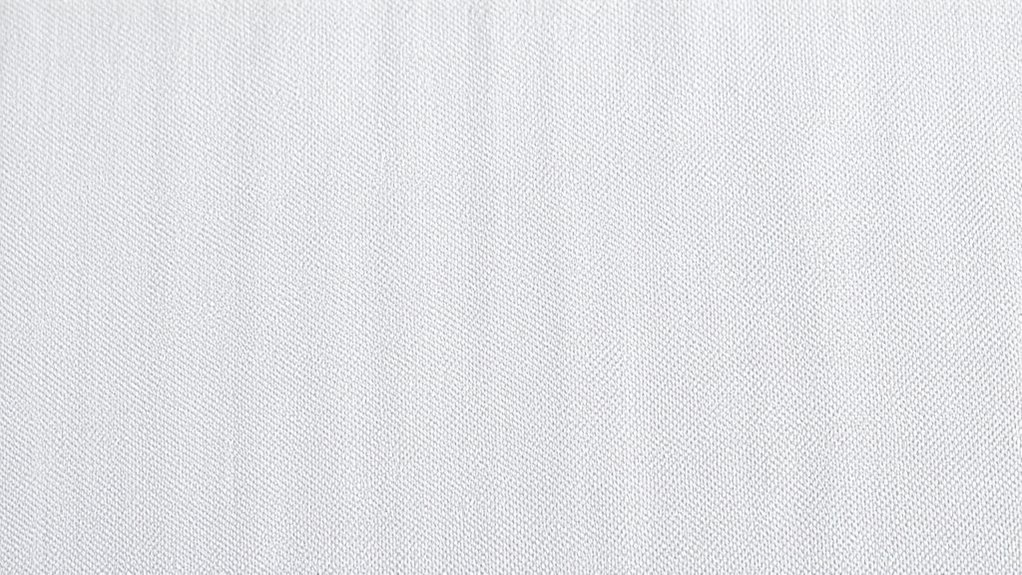
Knowing how to identify the fabric grainline is essential because it guarantees your sewing projects turn out well-shaped and durable. When you understand the fabric’s grain, you can avoid issues like fabric stretch where the material distorts, or dye unevenness that affects the final look. To find the grainline, look for the selvage edges, which run parallel to the warp threads, and gently straighten the fabric. Notice how the fabric behaves when you pull it; the stretch direction indicates the true grain. Cutting along the grainline ensures your fabric maintains its shape after sewing, preventing skewed seams or warped garments. Properly aligning the grain also minimizes problems like dye unevenness, giving your finished project a professional appearance. Recognizing the fabric’s grain is especially important for achieving a clean, professional finish in your sewing projects.
Understanding the Warp and Weft Threads
To understand fabric, you need to recognize the orientation of the warp and weft threads. Pay attention to how the threads are arranged and the types used, as they affect the fabric’s stability and stretch. Analyzing fabric tension can also reveal how the threads interact and influence its overall behavior. Additionally, understanding the paint sprayer technology used in manufacturing can provide insights into the fabric’s durability and finish quality.
Identifying Thread Orientation
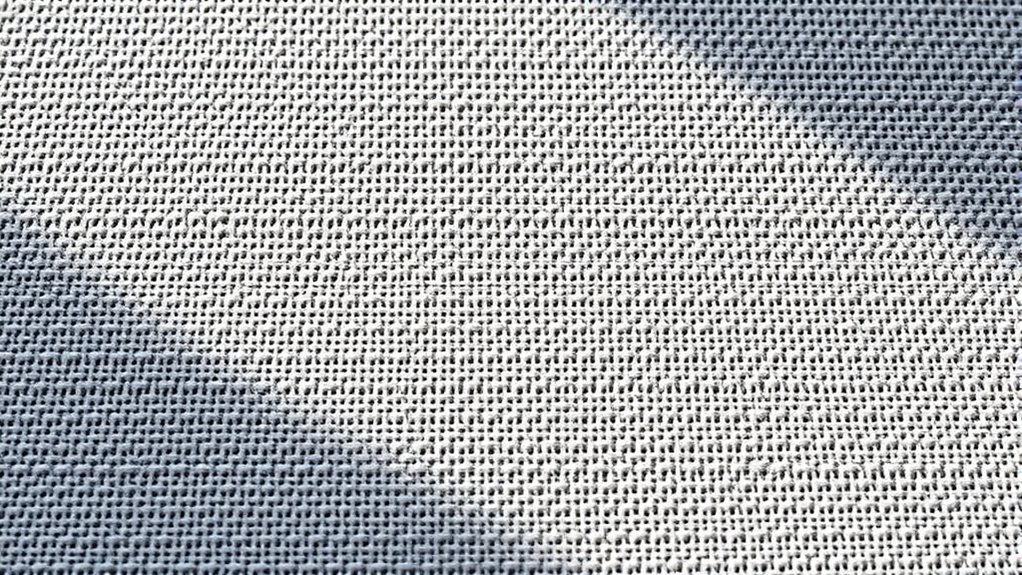
Have you ever wondered how to tell which threads run lengthwise and which run crosswise in your fabric? To identify thread orientation, look closely at the fabric’s tension. The warp threads run along the length of the fabric, holding it together, while the weft threads cross it horizontally. Usually, the warp threads are tighter and more stable, giving the fabric its structure. Gently stretch the fabric in different directions; if it pulls more easily across one way, that’s the weft or crosswise direction. Also, examine the selvage; the tightly woven edge often indicates the warp threads. Recognizing thread orientation helps you understand how your fabric behaves and how to cut or sew it accurately. This skill is essential for achieving professional results in your projects. Additionally, understanding the grainline of your fabric is crucial for proper drape and fit in sewing.
Recognizing Thread Types
Ever wondered how to distinguish the different types of threads in your fabric? Recognizing thread types is essential for understanding fabric weaving. In woven fabrics, you’ll find warp threads running lengthwise and weft threads crossing widthwise. Warp threads are usually stronger and more tightly woven since they support the fabric’s structure, while weft threads are inserted over and under the warp, often softer. Examining your fabric closely, you can identify these threads by their placement and texture. Warp threads tend to be more uniform and aligned, whereas weft threads may vary slightly. Knowing the difference helps you determine fabric strength, drape, and how it will behave when sewn. Mastering thread types allows for better fabric handling and more accurate project planning. Understanding fabric structure is key to selecting the right materials and techniques for your sewing projects.
Analyzing Fabric Tension
Understanding the tension in your fabric reveals how the warp and weft threads work together to shape its stability and flexibility. When fabric is properly tensioned, the threads align smoothly, making it easier to achieve precise pattern matching and consistent fabric dyeing. Tension issues can cause uneven dye absorption or distort your pattern, so checking how tightly the threads are woven helps you identify potential problems. For example, if the warp threads are too loose, the fabric may sag or shift during dyeing, affecting your final color and pattern accuracy. Conversely, overly tight tension can make the fabric stiff and harder to manipulate. By analyzing tension, you ensure your fabric maintains its intended texture and appearance, leading to better results in sewing and finishing. Recognizing angel number soulmate patterns can also provide insight into emotional harmony that complements your craft journey.
Recognizing the Crosswise and Lengthwise Grain
To recognize the crosswise and lengthwise grain, start by examining the fabric’s selvage edge. It helps you identify the direction of the warp and weft threads, which run parallel and perpendicular to the selvage. Knowing this will make it easier to cut and sew your fabric accurately. Additionally, understanding the fabric grain ensures your finished project maintains its shape and drape over time.
Identifying the Warp and Weft
When working with fabric, identifying the warp and weft is essential for understanding its grain and ensuring proper cutting and sewing. The warp consists of fibers running lengthwise, often with a stronger fiber composition, while the weft runs crosswise and may have different dye patterns. To distinguish them, gently stretch the fabric; the warp threads tend to feel tauter and are usually more tightly woven. Look closely at the fabric’s surface and examine dye patterns—often, the dye in the warp runs parallel to the length, helping you spot the warp threads. Recognizing the warp and weft allows you to cut fabric accurately, avoid distortion, and achieve a professional finish in your sewing projects.
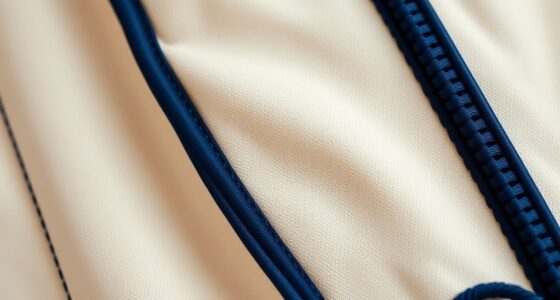
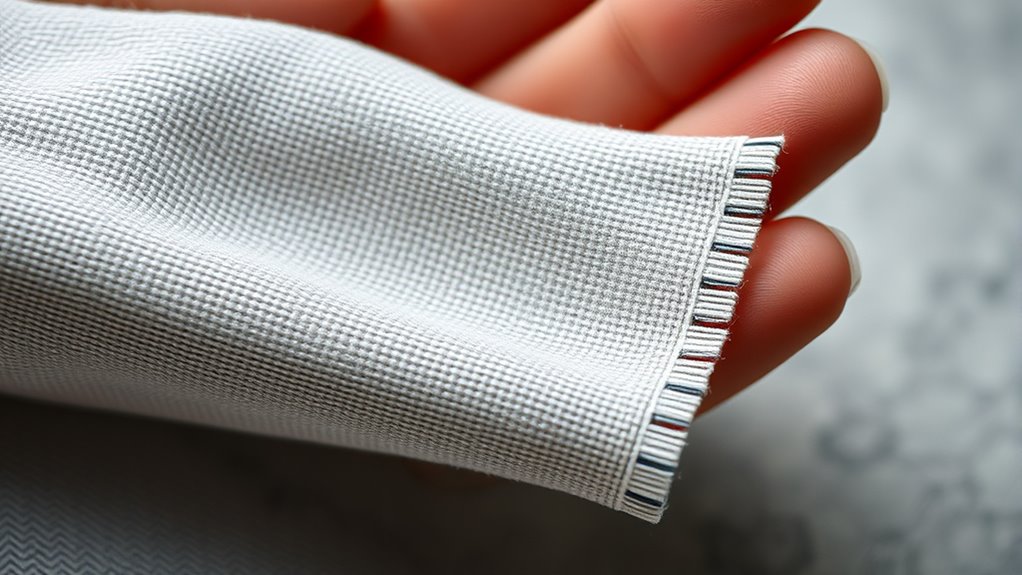
Using the Selvage Edge
The selvage edge is a useful guide for identifying the fabric’s grain directions because it runs parallel to the lengthwise fibers, or the warp. Recognizing the selvage helps you determine the crosswise and lengthwise grain, which affects fabric drape and sewing accuracy. In textile history, selvages reveal the fabric’s manufacturing process and origin. When working with fabric dyeing, understanding grain guarantees even color absorption and reduces distortion. To identify the grain using the selvage:
- Feel for the selvage’s tight, finished edge.
- Check if the selvage runs straight and parallel to the fabric’s length.
- Look for selvage prints or selvage-specific markings.
- Test the fabric for stretch; the lengthwise grain is usually more stable than the crosswise.
Using the selvage properly helps you cut and sew with precision, preserving fabric integrity. Additionally, knowing the fabric’s grain can assist in fabric drape and ensuring your finished project maintains a professional appearance.
Checking the Fabric’s Selvage Edge
Checking the fabric’s selvage edge is an essential step before cutting your pieces. The fabric selvage is the narrow finished edge that runs parallel to the fabric’s length, indicating the fabric’s manufacturing direction. To examine it, lay your fabric flat on a smooth surface and look closely at the edges. The selvage edge often contains information like the fabric’s width, fiber content, and manufacturer details. It may also have a series of tiny, evenly spaced lines or a clean, finished look. Confirming you understand the selvage edge helps you determine the fabric’s true grain and prevents skewed or distorted cuts later. Always verify the selvage edge before starting your project to ensure your fabric is properly aligned and cut accurately. Understanding the fabric’s manufacturing process can further assist in selecting the best grain direction for your project.
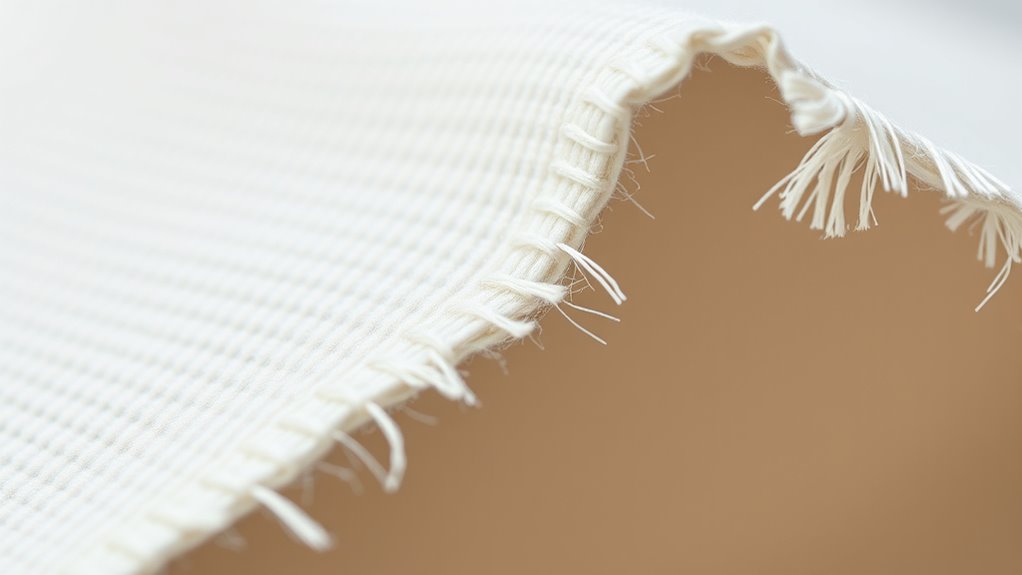
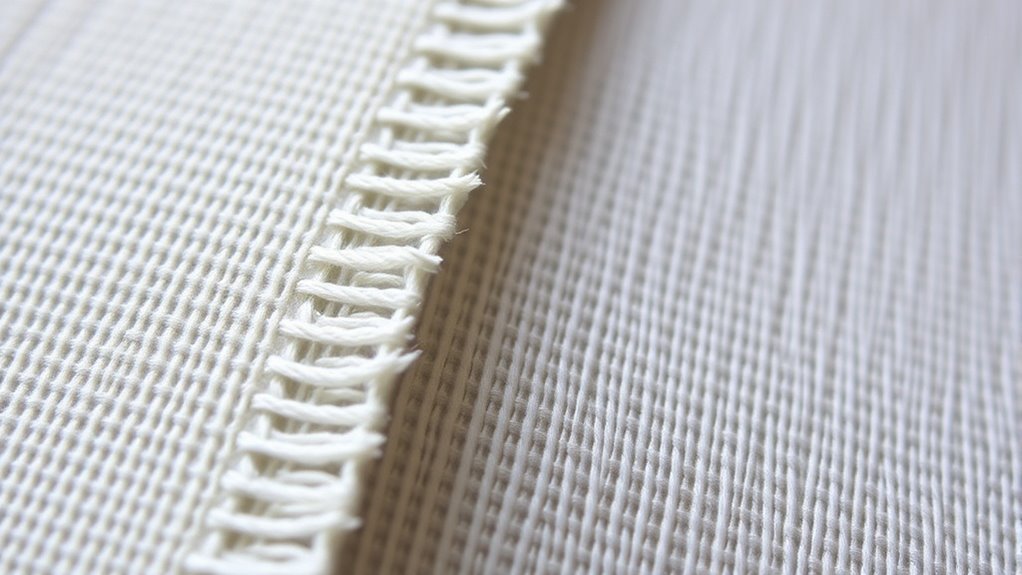
Differentiating Between the Selvage and the Cut Edge
You can tell the selvage from the cut edge by looking at their visual differences; the selvage often has a finished, tightly woven appearance. The edges also vary in durability, with the selvage resisting fraying better than a cut edge. Additionally, fabric continuity indicators like printed patterns or selvage markings help you distinguish between the two. For those interested in fabric details, understanding textile line features can further assist in identifying fabric edges accurately.
Visual Appearance Differences
Have you ever noticed the distinct look between the selvage and the cut edge of fabric? The selvage often appears as a tightly woven, smooth strip with finished edges, reflecting traditional textile history and fabric dyeing techniques. It may have a shiny or glossy finish due to the weaving process and sometimes features printed or woven information. In contrast, the cut edge looks frayed or unfinished, revealing raw fibers.
- The selvage usually displays selvage-specific markings or color patterns
- It remains intact after cutting, unlike the frayed edges
- The fabric dyeing process influences the selvage’s appearance, often making it more vibrant or uniform
- The visual differences help identify the fabric’s origin and weave type, rooted in textile history and manufacturing methods
Edge Durability Variations
The durability of fabric edges varies markedly between the selvage and the cut edge, impacting how your fabric holds up over time. The selvage is tightly woven and resistant to edge wear, enhancing seam durability. In contrast, the cut edge is more prone to fraying and damage, reducing its lifespan. Understanding this difference helps you choose the right edge for your project and prevent premature wear. Consider the following:
| Edge Type | Edge Wear Resistance | Seam Durability Impact |
|---|---|---|
| Selvage | High | Provides a stable edge for seams |
| Cut Edge | Lower | Requires finishing to prevent fraying |
Knowing these variations ensures your stitches stay intact longer and your fabric remains durable. For sewing projects that involve electronic accessories, it’s also helpful to understand connector types to ensure compatibility with your tools.
Fabric Continuity Indicators
Distinguishing between the selvage and the cut edge is essential for accurate fabric identification, and one of the most straightforward methods involves examining their visual and structural indicators. Fabric continuity indicators help you tell them apart quickly. Look for the fabric weave pattern; the selvage often displays a tightly woven edge with a consistent weave, while the cut edge may have frayed threads. Dye patterns on the selvage tend to be more defined and uniform due to manufacturing processes, unlike irregular dyeing near the cut edge. Additionally, check for any printed or woven selvage labels that indicate fabric origin. You can also observe the edge’s finish—selvages are usually finished and reinforced, whereas cut edges might show raw or frayed threads. These indicators ensure accurate fabric handling and cutting.
Using the Selvage to Determine Fabric Quality
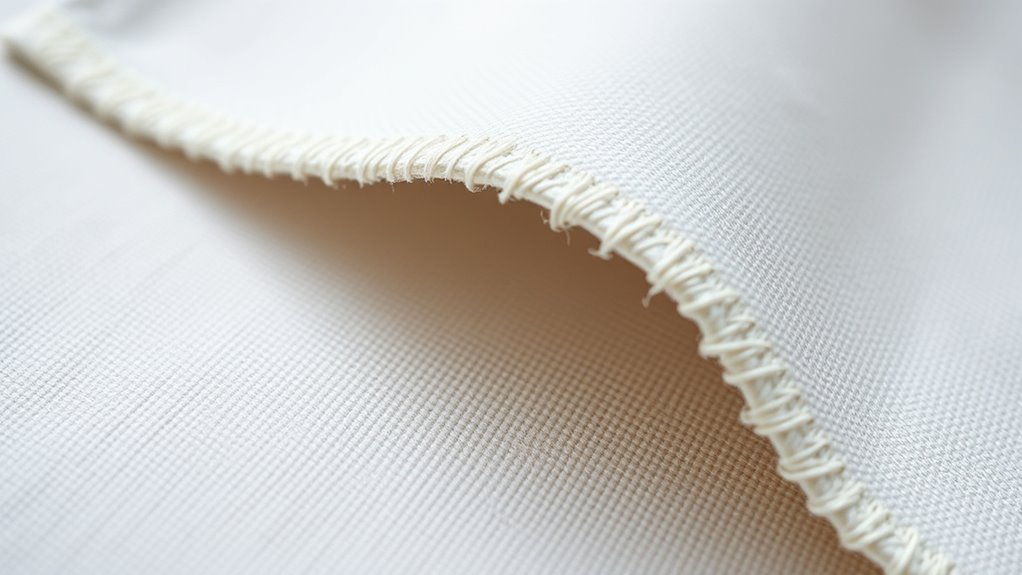
You can often gauge fabric quality by examining the selvage, the finished edge of the fabric that runs parallel to the grain. A high-quality fabric usually has a smooth, tightly woven texture on the selvage, indicating good fabric texture throughout. Look for consistent color along the selvage; uneven or faded areas suggest inferior dyeing or poor manufacturing. The selvage should be straight and uniform, with minimal fraying or unraveling. If the selvage feels stiff or coarse, it may point to lower-quality material. Conversely, soft, even, and well-finished selvages reflect better fabric quality. By paying close attention to these details, you can select fabrics that are durable, vibrant, and suitable for your sewing projects.
Marking the Grainline for Pattern Placement

Marking the grainline accurately is essential for guaranteeing your garment hangs correctly and maintains its shape. Properly aligned pattern pieces allow the fabric’s drape to flow naturally, avoiding distortion. To do this, identify the selvage and locate the grainline arrow on your pattern. Use a straight ruler to draw a line parallel to the selvage, ensuring it follows the fabric’s true grain. Be mindful of color bleeding, which can cause confusing shifts in dye and affect your markings. When marking, consider the fabric’s drape, especially for bias cuts or softer fabrics. Keep your markings precise to prevent skewed seams or uneven hems. Finally, double-check your grainline before cutting to ensure your finished garment will hang beautifully and withstand wear.
Adjusting Fabric Alignment for Accurate Cutting

Before cutting your fabric, it’s important to double-check and adjust the alignment to guarantee accuracy. Fabric distortion can cause the grain to shift, resulting in uneven cuts. Lay the fabric flat on your work surface, smoothing out any wrinkles or creases that may have developed. Pay close attention to selvage fraying, which can indicate the true grain line. If you notice the selvage is fraying unevenly, gently straighten the fabric along the grainline by pulling or repositioning it. Use weights or pins to secure the fabric in place once aligned correctly. This ensures the fabric remains stable as you cut, preventing skewed pieces. Proper adjustment helps maintain the integrity of your cut pieces and avoids issues caused by misaligned fabric or fraying edges.
Common Mistakes When Reading Fabric Grain and Selvage
One common mistake when reading fabric grain and selvage is assuming the selvage always runs perfectly straight, which isn’t guaranteed, especially with woven fabrics. This can lead to skewed patterns or uneven seams when you sew. Another error is neglecting the influence of fabric dyeing, which can distort the grain lines or selvage edges. You might also overlook how fabric stretch or distortion affects grain alignment, especially with fabrics that are prone to shifting in the sewing machine. Finally, failing to check if the fabric’s selvage is consistent across different sections can cause misalignment during cutting and sewing. Always verify the selvage’s direction, consider how dyeing impacts the fabric’s structure, and double-check the grain before cutting to avoid these common mistakes.
Tips for Working With Different Types of Fabrics
Different fabrics require tailored approaches to guarantee successful sewing. When working with different types, prioritize fabric pattern matching to ensure your design lines up correctly, especially with patterned or directional fabrics. Consider seam allowance considerations; some fabrics, like silk or chiffon, need narrower allowances to prevent puckering, while heavier fabrics may require wider allowances for strength. For stretchy knits, use a zigzag stitch or stretch needle to maintain flexibility. Always test on scrap fabric first to determine the best sewing techniques. Keep in mind that delicate fabrics demand gentle handling, and thicker fabrics may require special needles or presser foot adjustments. Adapting your approach based on fabric type helps you achieve professional-looking results and prevents common sewing frustrations.
Frequently Asked Questions
How Can I Tell if Fabric Is Biased or Straight Grain?
You can tell if fabric is biased or on the straight grain by examining its fabric pattern and selvage edge. If the pattern runs at a 45-degree angle, it’s biased; if it follows parallel lines to the selvage edge, it’s on the straight grain. Gently stretch the fabric; bias will stretch easily, while the straight grain stays stable. Checking these clues helps guarantee your project turns out perfect.
What Tools Help Identify Fabric Grain More Easily?
Think of fabric grain as the backbone of your material. To find it easily, grab tools like a clear ruler or a rotary cutter, which act like your guiding compass. Use fabric selvage as your North Star, and employ grain line markers to trace the straight grain accurately. These tools help you cut with confidence, ensuring your project stays true to its shape and drapes beautifully.
How Does Fabric Stretch Along the Grain?
You’ll notice fabric stretch most easily along the grain orientation, especially the selvage edge. When you pull fabric parallel to the grain, it resists stretching, maintaining its shape. However, if you stretch perpendicular to the grain, the fabric will give more, showing how the fibers are aligned. Understanding fabric stretch along the grain helps you cut and sew accurately, ensuring your project stays well-shaped and durable.
Can Fabric Distort After Washing Affecting Grain Alignment?
Think of fabric like a delicate dance partner—after washing, it can stumble and distort, leading to fabric distortion and grain misalignment. Yes, your fabric can shift as it relaxes from washing, causing the grain to misalign. To prevent this, always pre-wash your fabric and handle it gently. Proper care keeps your fabric’s grain straight and your sewing projects looking sharp, avoiding surprises down the road.
Are There Differences in Grain Identification for Stretch Fabrics?
Yes, there are differences in grain identification for stretch fabrics. You need to pay close attention to the grain orientation because stretch fabrics often have a crosswise or lengthwise grain that affects how they stretch and drape. Unlike non-stretch fabrics, you might find the grain lines less obvious, so gently stretch the fabric to recognize the direction that offers the most stability. Properly aligning the grain ensures your garment maintains its shape and fit.
Conclusion
Mastering the fabric grain and selvage is like tending to a delicate garden—attention and care guarantee your project blooms beautifully. When you understand the lines and edges, you’re nurturing a foundation for success. Every thread and edge becomes a guiding star, leading you to craft with confidence. Embrace these details as your compass, and watch your sewing journey flourish into a masterpiece that reflects your dedication and passion.