To create a DIY macramé wall hanging, start by gathering strong cords like cotton or jute and prepare them by measuring and sealing the ends. Set up your workspace with a sturdy dowel or branch, mark where you’ll hang your cords, and learn basic knots such as square and half hitch. Plan your design before tying knots, then finish by trimming ends, adding decorative accents, and hanging your piece securely. If you keep going, you’ll discover detailed tips to perfect your project.
Key Takeaways
- Gather materials like cords, a support rod, scissors, and measuring tools, and set up a clean, organized workspace.
- Measure and cut cords to desired length, seal ends, and mark the design layout on your wall or support surface.
- Practice essential knots such as square and half hitch knots to build confidence and plan your pattern.
- Attach cords to the support rod using lark’s head knots, then create your design with chosen knots and patterns.
- Finish your wall hanging by trimming uneven ends, adding decorative elements, and securely hanging for display.

FREEBLOSS DIY Macrame Leaf Wall Hanging Beginners Macrame Kit Leaf Woven Tapestry Feather Wall Hanging DIY Macrame Kit for Adults Birthday Gift
- Package Includes: Wooden stick, cotton ropes, beads, stickers, tools
- Bohemian Style Design: Vintage-inspired, artistic wall hanging decor
- Beginner Friendly: Clear instructions for easy crafting
As an affiliate, we earn on qualifying purchases.
As an affiliate, we earn on qualifying purchases.
Gathering Your Materials and Tools
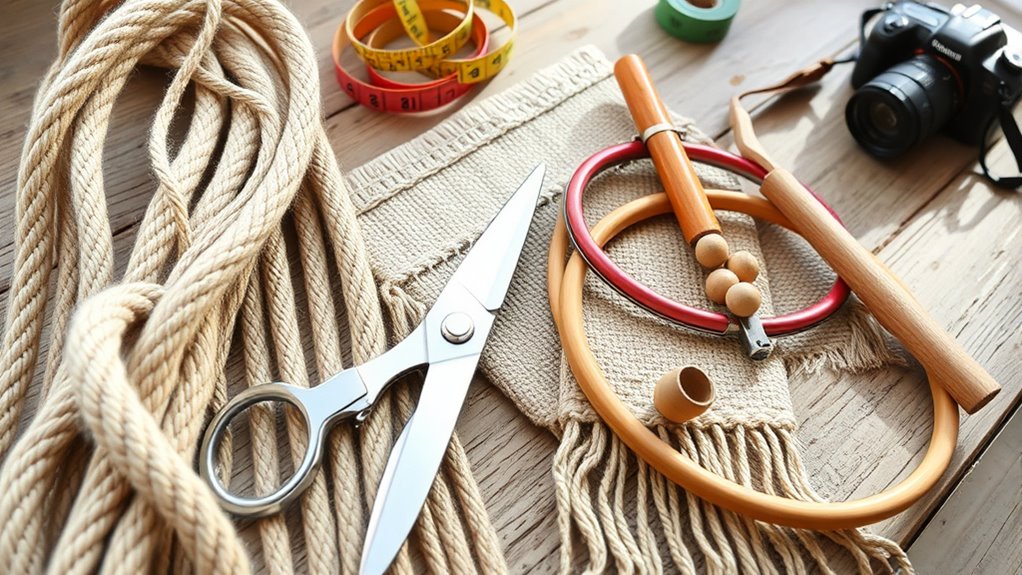
Before you begin your DIY macramé wall hanging, it’s important to gather all the necessary materials and tools. First, select your cords—preferably cotton or jute for a soft, natural look. Measure and cut them to your desired length, usually about four times the finished height. You’ll also need a sturdy dowel or branch to hang your creation. Keep a pair of scissors handy for trimming excess cords and a measuring tape to ensure accuracy. A metal or wooden ring can be helpful for certain designs. Additionally, having a clipboard or tape to secure your cords while working makes the process easier. Once you have everything together, you’re ready to start your project with confidence and convenience.
Cutting and Preparing Your Cords

Once you have gathered your materials, it’s time to cut and prepare your cords. Measure out the lengths you’ll need for your design, adding a few extra inches for tying knots. Use sharp scissors to cut each cord cleanly, avoiding frayed ends. If your cords are made of different materials or thicknesses, check that they’re all prepared uniformly to ensure a consistent look. For a neater finish, you can also burn the ends of synthetic cords slightly with a lighter to prevent fraying. If you’re using natural fibers, apply a small amount of clear glue to the ends to seal them. Take your time to ensure all cords are straight and even, which will make your knotting easier and your finished piece look more polished. Properly cord preparation can also help prevent fraying or unraveling over time. Additionally, ensuring even cord length contributes to a more professional appearance of your wall hanging.
Setting Up Your Workspace and Base Line

Start by gathering all your supplies and tools so everything is within reach. Choose a clean, flat work area where you have enough space to move freely. Then, mark your base line to make certain your wall hanging stays straight and evenly balanced. To ensure your project remains organized, consider creating a detailed plan before starting to visualize the final design. Incorporating rustic decor ideas can also inspire your layout and style choices. Additionally, planning ahead can help you identify potential payment security concerns that might arise during the creation process.
Gather Supplies and Tools
To create a beautiful macramé wall hanging, you need to gather the right supplies and tools first. Start with sturdy cords or ropes, ideally cotton or jute, in the length you need for your design. You’ll also want sharp scissors to make clean cuts and a measuring tape or ruler to keep everything precise. A wooden dowel, branch, or metal rod will serve as your base; choose one that fits your desired size. You might also need clips or pins to hold cords in place while working. Optional tools include a comb or dowel for fringe, and a spray bottle for dampening cords if needed. Gathering these essentials beforehand guarantees your workspace stays organized and your project proceeds smoothly. Being aware of legislative changes related to personal debt can also be useful in managing your finances during or after your creative projects. Additionally, incorporating textile techniques such as knotting and layering can elevate your macramé designs and add texture. Recognizing the importance of vibrational energy can also help you stay motivated and inspired as you craft. Also, choosing the right electric bike conversion kit can make transportation more efficient if you plan to incorporate eco-friendly commuting options into your lifestyle.
Choose a Work Area
Choosing a dedicated work area is the first step to creating an organized and efficient workspace. Pick a spot with enough room to spread out your supplies and work comfortably. A sturdy table or flat surface works best, ensuring stability while you work. Make sure the area has good lighting so you can see your project clearly. Keep your tools and materials within easy reach to avoid constant searching, which can disrupt your flow. Clear away clutter to stay focused and prevent accidents. If possible, set up near a power outlet if you need to use a glue gun or other electrical tools. Having a dedicated space helps you stay organized, minimizes mess, and makes the process more enjoyable. Additionally, dream symbols can sometimes emerge during creative activities, offering subconscious insights or inspiration.
Mark Your Base Line
Before you begin hanging your macramé wall piece, it’s important to mark a clear base line. This line will serve as a guide to guarantee your design hangs straight and at the desired height. Use a level and a pencil to draw a faint line across your wall where you want the bottom of your piece to sit. Measure carefully from the floor or ceiling to determine the perfect position. This step helps prevent slanting or uneven hanging. Once marked, you can hang your dowel or support rod along this line. Having a clear base line makes it easier to align your knots and ensures your finished wall hanging looks professional and balanced. Taking the time to embrace your home and create a personalized art piece can significantly enhance your living space. It’s also helpful to be aware of signs of spoilage when selecting materials or decorative elements, ensuring everything remains fresh and safe. Being precise at this stage can also simplify the process of city-to-country living, where attention to detail is key. Paying close attention to safety precautions during assembly ensures your wall hanging remains secure and durable. Additionally, understanding proper material selection can help ensure your project stays looking great over time. Take your time to mark it precisely before proceeding.
Learning Basic Knots for Macramé

Getting comfortable with basic knots is essential for your macramé project. You’ll learn different knot types and how to use them effectively. Practicing consistently helps guarantee your work stays neat and professional-looking. Understanding knot techniques can also improve the overall quality and durability of your wall hanging. Additionally, exploring celebrity transformations can inspire your creative process by showcasing how different styles and techniques evolve over time.
Knot Types and Uses
To create beautiful macramé wall hangings, mastering a few basic knots is essential. These knots form the foundation of your design and determine the overall look. The most common knots include the Square Knot, Lark’s Head, and Double Half Hitch. Each serves a specific purpose, from attaching cords to creating patterns. Here’s a quick overview:
| Knot Name | Primary Use |
|---|---|
| Lark’s Head | Attaching cords to your dowel |
| Square Knot | Creating flat, stable patterns |
| Double Half Hitch | Making horizontal or diagonal lines |
| Spiral Knot | Adding texture and curves |
| Gathering Knot | Grouping multiple cords together |
Practicing these knots will give you confidence and flexibility to design your unique wall hanging. Developing a keen understanding of sound design principles can also inspire creative approaches in your projects, even within craft-based art forms.
Practice for Consistency
Practicing the basic knots regularly is key to building consistency and confidence in your macramé work. When you dedicate time to mastering these foundational skills, your projects will improve in appearance and stability. Repetition helps you develop muscle memory, making knotting faster and more precise over time. To stay motivated, consider these tips:
- Set aside a few minutes daily to practice different knots.
- Keep a knot guide or reference nearby for quick review.
- Create small practice samples to track your progress.
Focusing on consistency in your knots ensures your wall hanging looks professional and polished. As you become more comfortable, you’ll notice your techniques improve naturally, making the entire process more enjoyable.
Creating Your Design and Pattern

Have you ever wondered how to turn your creative ideas into a stunning macramé wall hanging? The key is designing a pattern that reflects your style. Start by sketching your idea or browsing inspiration online. Consider the knot types and their arrangement to create balance and visual interest. Planning your pattern beforehand helps prevent mistakes and saves time during the actual knotting.
Here’s a quick comparison of common patterns:
| Pattern Type | Description |
|---|---|
| Symmetrical | Equal arrangement on both sides |
| Asymmetrical | Unique, uneven distribution |
| Geometric | Incorporates shapes like triangles, squares |
| Layered | Multiple levels or sections |
| Fringe | Adds finishing detail to the bottom |
Choose what suits your style, and start mapping out your design!
Finishing Touches and Hanging Your Artwork

Once you’ve finished knotting your macramé wall hanging, the next step is to add finishing touches that enhance its appearance and durability. Trim any loose or uneven ends for a clean, polished look. Consider adding decorative beads or charms to customize your design. To guarantee your piece hangs securely, attach a sturdy dowel or rod at the top, using a strong cord or twine. When hanging, choose a spot with good light and minimal disturbance to showcase your artwork. You might also want to:
Finish with neat ends, add beads or charms, and hang securely for a polished, lasting display.
- Use wall hooks or nails for secure mounting
- Adjust the length of the hanging cords for the perfect height
- Fluff and straighten the knots for a tidy finish
These tips help your wall hanging look professional and last longer.
Frequently Asked Questions
What Are the Best Types of Cords for Beginner Macramé Projects?
When choosing cords for beginner macramé projects, you want something easy to handle and durable. Cotton cords are your best bet—they’re soft, flexible, and come in various thicknesses, making knotting simpler. Jute and hemp are also good options if you prefer a rustic look, but they can be rougher to work with. Start with medium-thick cords, around 3-4mm, to make your knots more manageable.
How Long Does It Typically Take to Complete a Wall Hanging?
Creating a wall hanging can feel like a race against time, but it’s usually a rewarding journey. Typically, it takes you about 4 to 8 hours, depending on complexity and your skill level. You might spend an afternoon perfecting those knots or a weekend adding personal touches. Remember, patience is key—your masterpiece will be worth every moment, turning your space into an inspiring art piece you’ll love forever.
Can I Create a Custom Design Without Prior Experience?
You can definitely create a custom design even if you’re new to macramé. Start with simple patterns and gather inspiration from online tutorials or Pinterest. Don’t worry about perfection—practice helps improve your skills. Use basic knots like square and half hitch to form your design. With patience and creativity, you’ll craft a unique wall hanging that reflects your style, all without prior experience.
What Are Some Common Mistakes to Avoid in Macramé?
When you’re working on macramé, you wanna watch out for common mistakes like pulling too tight, which can distort your design, or using the wrong cord thickness for your project. You might also forget to check your knots regularly, leading to uneven patterns. To avoid these, take your time, keep tension consistent, and double-check your work as you go. Practice makes perfect, so don’t rush the process.
How Do I Properly Care for and Clean My Finished Wall Hanging?
Think of your macramé wall hanging as a delicate garden that needs gentle tending. To care for it, dust it regularly with a soft brush or cloth, avoiding harsh cleaners. If it gets dirty, spot clean with a damp cloth and mild soap. Keep it away from direct sunlight to prevent fading, and hang it in a space with good air circulation. Treat it with love, and it’ll stay beautiful.
Conclusion
Now that you’ve woven your own masterpiece, your wall becomes a canvas of your creativity, each knot a brushstroke of your personality. With patience and passion, you’ve turned simple cords into a mesmerizing tapestry that breathes life into your space. Hang it proud, knowing you crafted beauty from your hands—like a gardener tending to a blooming flower. Your DIY macramé wall hanging isn’t just decor; it’s a vibrant symbol of your artistry and spirit.