
To create safe, vibrant natural dyes at home, gather ingredients like turmeric, beetroot, berries, or onion skins from your kitchen or garden. Prepare fabrics with basic pre-treatments like washing and mordanting, then extract dyes by simmering plant materials and straining. Adjust shades with boiling time, and use fixatives to enhance color fastness. With these simple steps, you can achieve beautiful results and reveal creative dyeing techniques—keep exploring to master your natural dye projects.
Key Takeaways
- Collect and prepare natural plant materials like turmeric, beetroot, and berries for safe dye extraction.
- Pre-treat fabrics with natural fixatives such as alum or vinegar to enhance color fastness and safety.
- Control dye intensity by adjusting boiling time and reuse plant materials for richer, consistent shades.
- Use mordants to lock in colors, improve durability, and achieve vibrant, safe results on textiles.
- Follow proper washing, drying, and storage practices to preserve the vibrancy and longevity of natural dyes.
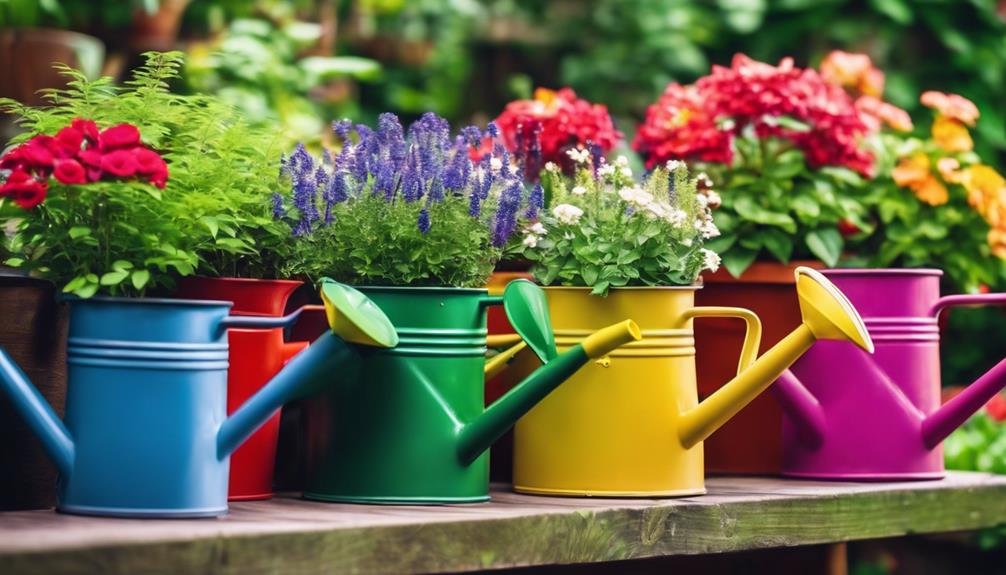
Gathering Natural Dye Materials From Your Kitchen and Garden
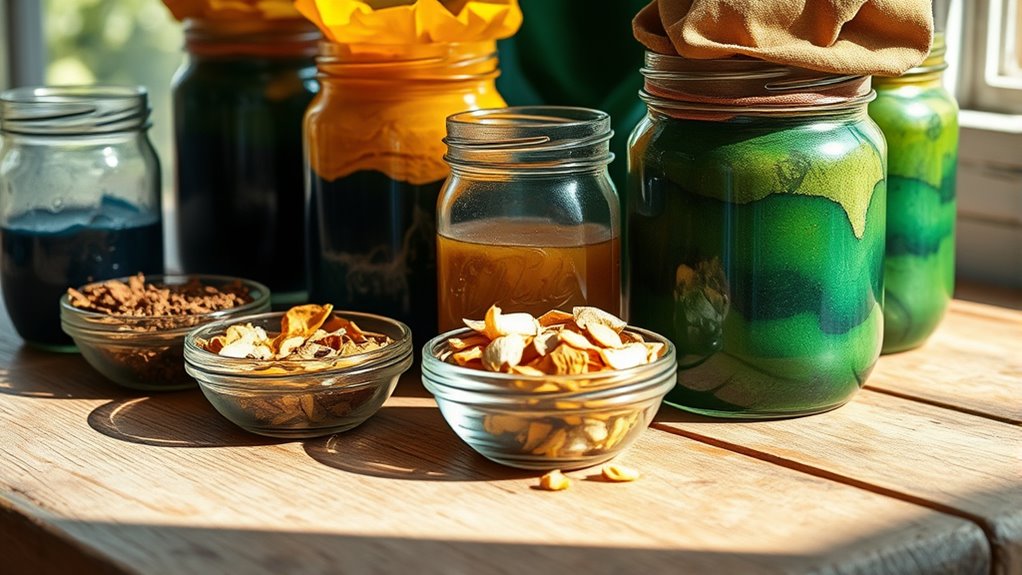
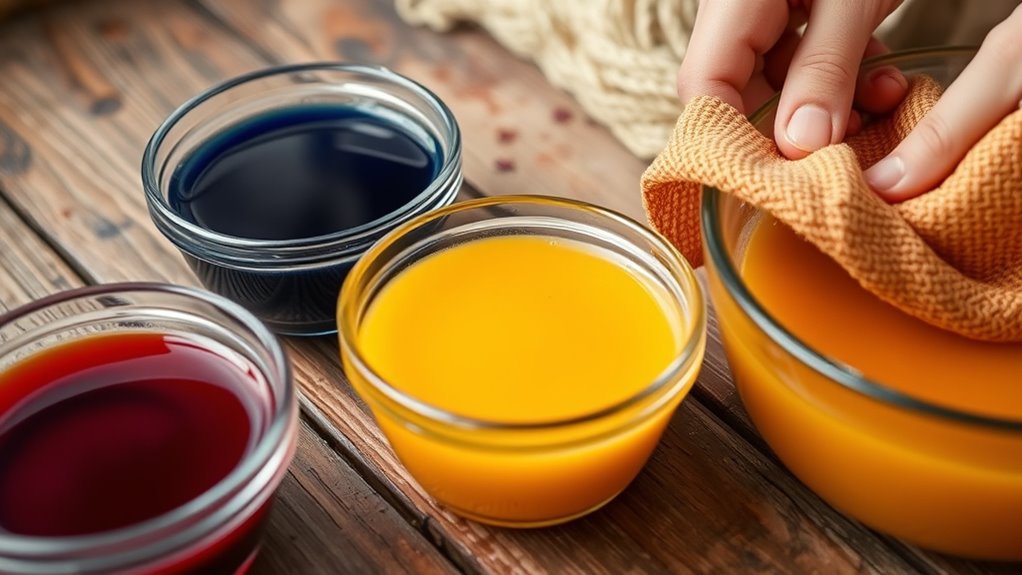
To start gathering natural dye materials, look around your kitchen and garden for vibrant plants and ingredients. Begin by harvesting herbs like turmeric, beetroot, or spinach, which can produce rich, natural colors. You might also find berries, onion skins, or avocado pits that add beautiful hues. As you collect, think about selecting mordants—substances like alum or iron—that will help fix the dye to your fabric later on. When harvesting herbs, choose healthy, fresh leaves or roots, avoiding any signs of disease. Keep your gathered plants in a cool, dry place until you’re ready to extract the dye. This careful collection ensures you have high-quality, vibrant materials that will yield stunning, natural colors in your fabric dyeing project. Additionally, understanding how precious metals are used in investment can help you diversify your approach to sustainable and secure dyeing practices.
Preparing and Pre-treating Fabrics for Dyeing

Before dyeing, you need to clean your fabric thoroughly to remove any oils or dirt that could affect color absorption. Using a gentle detergent or a natural cleaning method helps prepare the material for even dye uptake. Applying pre-dye fixatives can also improve color fastness and ensure your finished piece stays vibrant over time.
Fabric Cleaning Methods
Preparing your fabrics properly guarantees the dye adheres evenly and produces vibrant results. Start by thoroughly cleaning your fabric to remove oils, dirt, and residues that could interfere with dye uptake. Use hot water and a mild detergent or a natural cleaning method like baking soda or vinegar, which help maintain dye stability. Pre-washing ensures the fabric is free of contaminants, promoting better color layering and preventing dull or uneven spots. Avoid fabric softeners, as they can coat fibers and hinder dye absorption. Rinsing well after cleaning prepares the fabric for consistent dyeing, ensuring the color applies smoothly and evenly. Proper cleaning and pre-treatment set the foundation for vibrant, long-lasting dye results, making your project both successful and satisfying. Additionally, ensuring your workspace is free from fire hazards and well-ventilated can help prevent accidents during the dyeing process.
Pre-dye Fixatives
Applying a pre-dye fixative is a essential step that helps guarantee your fabric absorbs color evenly and maintains vibrancy. Using plant-based mordants or natural dye fixatives prepares your material, ensuring better color adherence and longevity. Before dyeing, soak your fabric in a mordant solution like alum or iron, which acts as a plant-based mordant or natural dye fixative. This pre-treatment enhances the intensity and durability of the colors. Additionally, pre-wetting the fabric reduces uneven dye absorption. For more complex results, consider experimenting with different mordant types to achieve unique shades. Proper preparation using these dye fixatives ensures your natural dyes bond well with the fabric, resulting in vibrant, lasting colors. This step is essential for achieving professional-looking, eco-friendly dyed textiles at home.
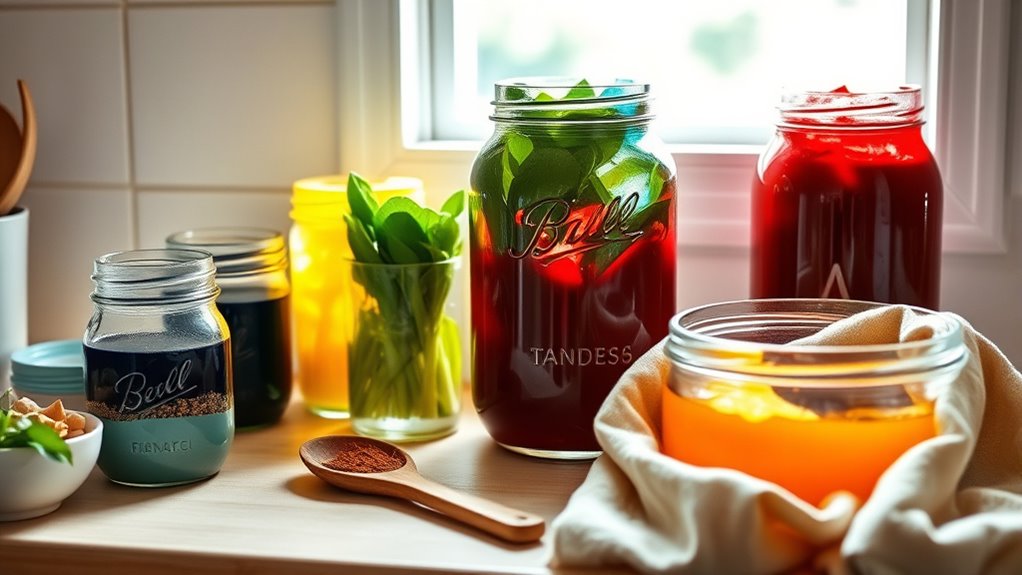
The Basic Process of Extracting Dye From Plants and Foods

To extract dye from plants and foods, you start by selecting the right materials, such as berries, leaves, or roots, which contain the pigment you want. This process, known as plant extraction, involves breaking down the plant material to release its color. You’ll typically chop or crush the plant parts to increase surface area. Then, simmer the material in water to extract the dye, stirring occasionally. For food-based dyes, this step is essential to guarantee vibrant results. Strain the mixture to remove solids, leaving behind a concentrated liquid dye. This extraction process is simple, safe, and effective for creating natural dyes at home. Remember, the quality of your dye depends on the freshness and type of plant material you choose, making selection key to successful results. Additionally, choosing energy-efficient appliances for your kitchen can help reduce energy consumption during your dyeing projects.
Achieving Different Shades Through Boiling and Steeping Techniques

By adjusting how long you boil or steep your plant material, you can create a range of shades from the same source. Longer boiling or steeping times typically lead to darker, more saturated dye extraction, resulting in richer shade variations. Conversely, shorter times yield lighter hues. The key is experimenting with timing to control the intensity of your color. Proper timing plays a crucial role in achieving consistent and vibrant natural dyes. Reusing plant material for multiple dye extractions can create subtle color gradations. Cooling the dye bath before dyeing can also influence the final shade outcome. Mastering these techniques allows you to tailor your natural dyes precisely, achieving the desired vibrancy and depth.
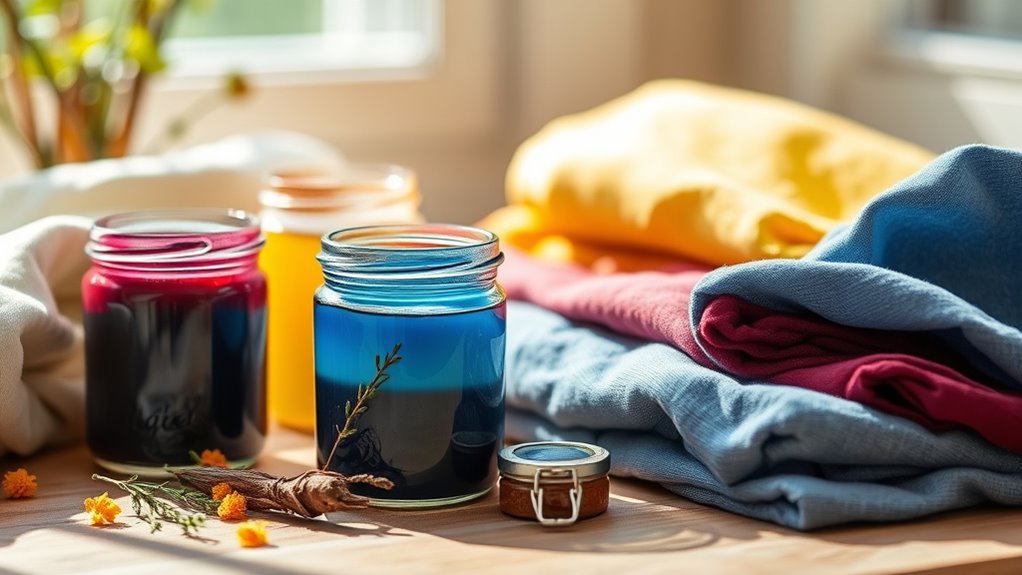
Enhancing Color Fastness With Fixatives and Mordants

Enhancing the color fastness of your natural dyes is essential to guarantee your creations stay vibrant over time. Using the right fixatives or mordants helps lock in color and resist fading. Selecting an appropriate mordant depends on your fabric and desired hue. Common mordants include alum, iron, and tannin, each affecting color fastness differently. Here’s a quick comparison:
| Mordant | Effect on Color Fastness | Suitable Fabrics | Typical Use | Color Shift |
|---|---|---|---|---|
| Alum | Improves brightness | Cotton, silk | Brightening shades | Slightly lighter tones |
| Iron | Enhances durability | Wool, cotton | Darkening or muted tones | Darker, muted shades |
| Tannin | Strengthens color | Wool, silk | Lightfastness boost | Slightly warm hues |
| Copper | Adds vibrancy | Cotton, linen | Bright, vivid shades | Shifts towards green or blue |
| None | Less color fastness | Any fabric | No mordant used | Fades faster |
Choose your mordant carefully to maximize color fastness and achieve your desired effect.
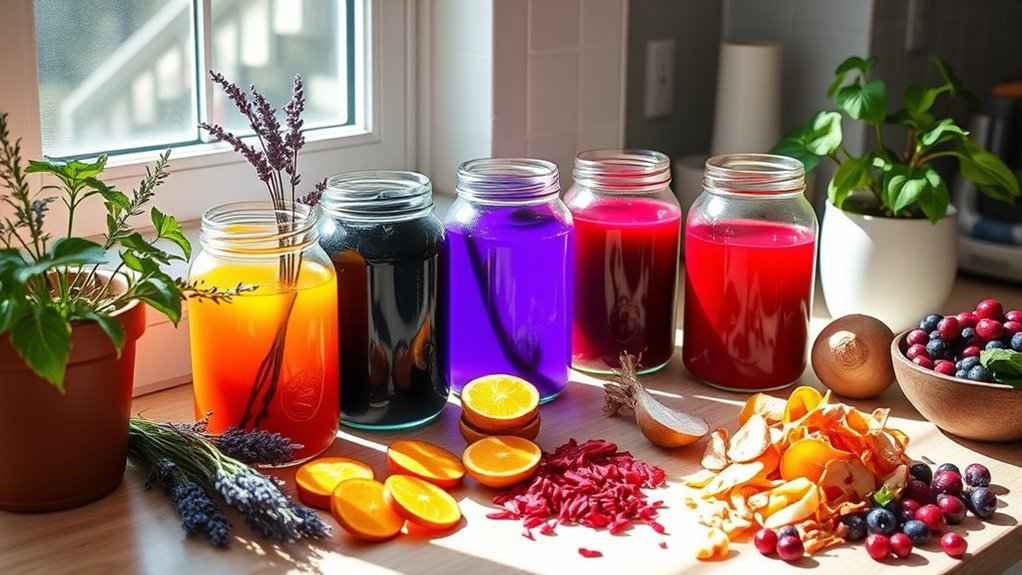
Experimenting With Multiple Natural Dyes to Create Unique Colors
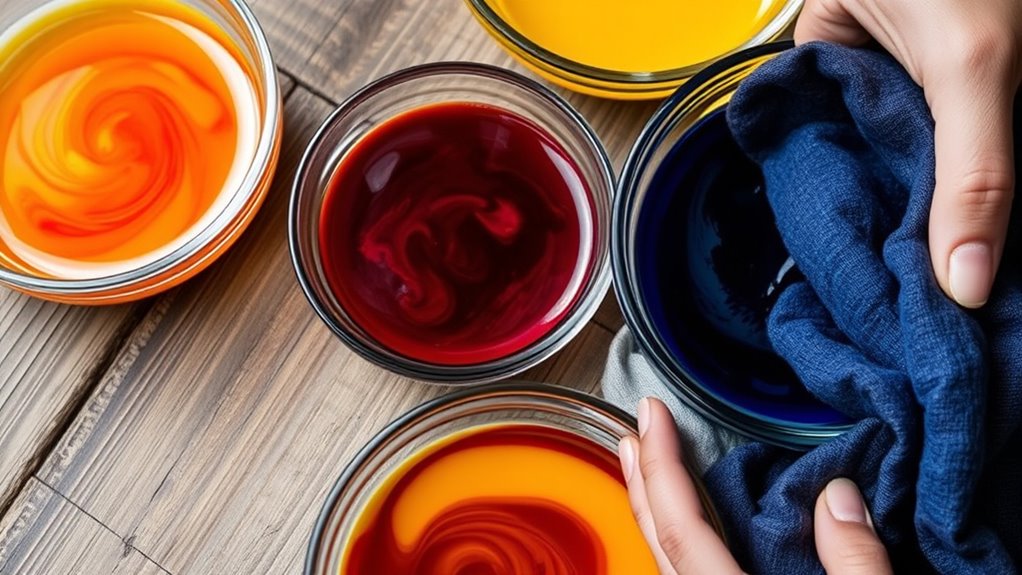
Combining different natural dyes opens up a world of possibilities for creating unique and complex colors. By experimenting with color blending and dye layering, you can craft shades that are truly one-of-a-kind. Start by applying one dye, then add another to see how they interact, forming new hues. Layering dyes allows you to deepen or shift colors, giving your fabric a rich, multi-dimensional look. To enhance your results, consider these techniques:
Mix and layer natural dyes to create vibrant, one-of-a-kind colors.
- Mix dyes before applying for gradient effects
- Use overlapping layers to build intensity
- Adjust dye concentrations for subtle variations
- Combine dyes from different plant sources for unexpected tones
- Incorporate predictive analytics to forecast color outcomes and optimize dye combinations
This approach transforms simple dye projects into personalized works of art, making each piece uniquely yours.
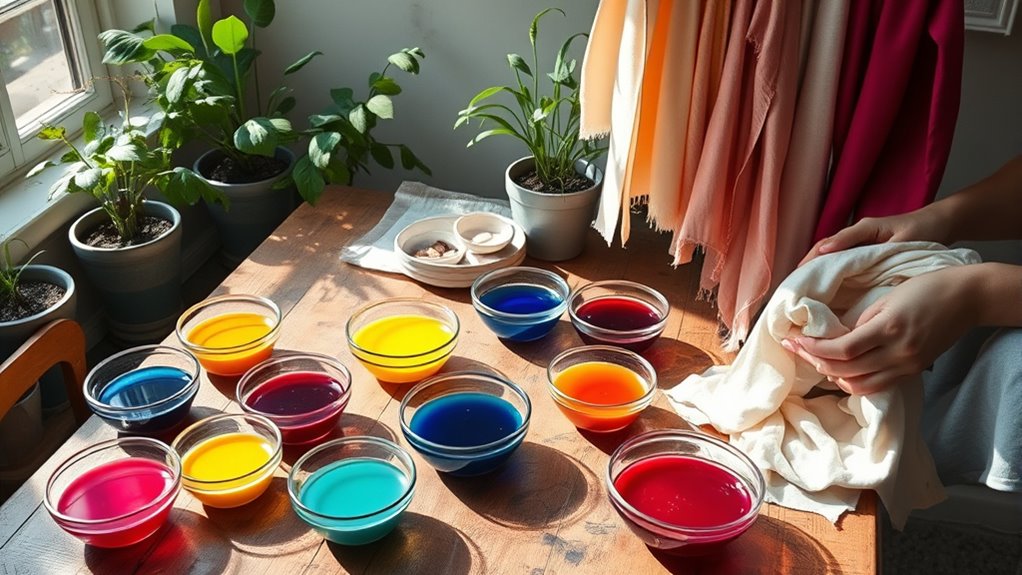
Tips for Dyeing Fabrics Uniformly and Achieving Consistent Results
Achieving uniform and consistent results in natural dyeing requires careful preparation and attention to detail. Start by evenly pre-soaking your fabric, ensuring the dye penetrates uniformly. When dyeing, maintain consistent temperature and timing to prevent uneven color absorption. Pay close attention to fabric weaving; tightly woven fabrics absorb dye more evenly, reducing patchiness. For color blending, mix your dyes thoroughly before applying them to avoid streaks or uneven patches. Stir the dye bath regularly during the process to promote uniformity. Keep your fabric submerged at a steady pace, avoiding movement that could create uneven spots. Additionally, choosing Vetted electric bike conversion kits that are compatible with your bike can help you transport your dyed textiles more efficiently and sustainably. By controlling these factors, you’ll produce vibrant, consistent colors that showcase the beauty of natural dyes across your textiles.
Caring for and Preserving Your Dyed Creations
Once you’ve invested time in dyeing your fabrics to achieve vibrant, consistent colors, proper care guarantees those hues last. To ensure ideal color preservation and maintain fabric durability, handle your dyed items carefully. Wash them in cold water with mild detergent, avoiding harsh chemicals that can fade colors. Turn garments inside out before washing to reduce abrasion. Air dry whenever possible, as high heat can weaken fibers and dull dyes. Store your dyed textiles away from direct sunlight, which accelerates fading. Regularly inspect for signs of wear, and avoid excessive washing. Proper maintenance not only preserves the vibrancy but also extends the life of your fabrics. With gentle handling, your natural dyes stay bright and your textiles remain durable over time.
- Wash in cold water and use mild detergents
- Turn garments inside out before washing
- Air dry instead of machine drying
- Store away from direct sunlight
Creative Projects and Ideas Using Natural Dyes
Now that your natural dyes are ready, it’s time to explore creative projects you can try at home. You can experiment with fabric dyeing techniques to create unique, colorful textiles or craft natural dye art pieces that showcase beautiful patterns. These projects allow you to express your creativity while making the most of your homemade dyes. For a truly authentic touch, consider incorporating rustic decor elements to complement your dyed textiles and enhance your overall farmhouse aesthetic.
Fabric Dyeing Techniques
Fabric dyeing with natural dyes offers a creative and eco-friendly way to personalize your textiles. To achieve vibrant, unique results, experiment with dye color blending to create custom shades. You can also manipulate the fabric texture effects by varying mordants and dyeing techniques, adding depth and dimension. For precise control, try immersion dyeing for even color or tie-dye methods for bold patterns. Understanding how different fabrics absorb dyes helps in selecting the right textile for your project. Additionally, pre-soaking fabrics or layering multiple dye baths can enhance color richness and complexity. These techniques allow you to craft one-of-a-kind pieces that showcase your style while embracing sustainable practices. Using natural dyes is also an environmentally friendly choice that supports eco-conscious crafting.
Natural Dye Art Projects
Natural dyes open up a world of creative possibilities beyond traditional fabric coloring. You can use them for art projects like painted textiles, handmade cards, or decorative paper, bringing vibrant, eco-friendly colors into your crafts. Understanding the natural dye history reveals how ancient cultures used plant dye chemistry to create lasting pigments, inspiring modern DIY projects. Experiment with different plant sources—such as beetroot for reds or turmeric for yellows—to produce a spectrum of hues. You might also try dyeing paper or creating layered artwork that highlights the unique shades achieved through natural processes. Incorporating sustainable practices into your projects not only benefits the environment but also enriches your creative experience. These projects not only result in beautiful, vibrant pieces but also deepen your appreciation for the science and history behind natural dyeing, making your craft both meaningful and sustainable.
Troubleshooting Common Challenges in Natural Dyeing
Even with careful preparation, natural dyeing can present unexpected challenges that might leave you frustrated. Common issues include color bleeding and uneven coloring. To fix color bleeding, rinse your fabric thoroughly before dyeing, and avoid overcrowding the dye bath. For uneven coloring, ensure your fabric is evenly pre-mordanted and submerged fully during the process. Sometimes, the dye concentration varies, so stir the dye bath regularly for consistency. If colors are dull or inconsistent, try adjusting dyeing time or adding a mordant booster. Additionally, temperature fluctuations can affect results, so maintain a steady heat. Keep in mind, patience is key—natural dyes often need time to develop fully. Understanding appliance maintenance plans can help ensure your dyeing setup remains safe and functional during your projects. With these tips, you can troubleshoot and achieve vibrant, even results.
Frequently Asked Questions
How Long Do Natural Dyes Typically Last on Fabrics?
Natural dyes typically last from 6 months to 2 years on fabrics, depending on factors like dye type, fabric, and care. To maximize dye longevity and colorfastness duration, wash your items in cold water, avoid harsh detergents, and dry them out of direct sunlight. Proper pre-treatment and setting techniques also help preserve vibrant colors longer, ensuring your handmade pieces stay beautiful over time.
Can Natural Dyes Be Used on Synthetic Fabrics?
Sure, you can use natural dyes on synthetic fabrics, but don’t expect vibrant absorption or lasting color. Synthetic fabrics often resist dye absorption, turning your efforts into a colorful disappointment. Their chemical makeup makes them less compatible with natural dyes, so your beautiful hues might wash out quickly or look dull. For best results, stick to natural fibers like cotton or silk, where your dyes can truly shine and last longer.
Are There Safety Precautions for Handling Plant-Based Dyes?
Yes, there are safety precautions you should follow when handling plant-based dyes. You should be aware of plant toxicity, as some plants can be harmful if ingested or contact your skin. Always wear gloves and protective clothing to prevent skin sensitivity or irritation. Work in a well-ventilated area, and wash your hands thoroughly afterward. By taking these steps, you guarantee a safe and enjoyable natural dyeing experience.
How Do Environmental Conditions Affect Dyeing Results?
Environmental conditions play a vital role in your dyeing success. Too much moisture can dilute the dye, leading to muted colors, while too little causes uneven absorption. Sunlight exposure can brighten hues or fade them over time. You need to find a balance—dry enough for vibrant saturation but not so dry that colors dull, and control sunlight to preserve your beautiful, natural results.
Can Natural Dyes Be Used for Dyeing Other Materials Besides Textiles?
Yes, you can use natural dyes for alternative dye materials and non-fabric applications. You might dye paper, wood, or even ceramics with these vibrant, eco-friendly options. Just keep in mind that different materials absorb dyes differently, so you may need to experiment with mordants or fixatives to achieve the best results. Natural dyes offer versatile, sustainable choices for various craft projects beyond textiles.
Conclusion
Natural dyes are safe, eco-friendly, and cost-effective ways to add vibrant color to your fabrics. Did you know that using kitchen scraps and garden plants, you can produce up to 100 shades? With a little patience and practice, you’ll enjoy beautiful results while reducing chemical use and waste. Embrace natural dyeing as a sustainable craft that connects you to nature and sparks your creativity—it’s easier than you think!