To match piping and welt cord seamlessly, pick colors that complement or contrast your main fabric, depending on your style. Choose textures and materials that work well together, ensuring they have similar properties for better control and appearance. Measure carefully and pin or clip your piping and welt cord before sewing, paying attention to placement and seam alignment. If you want tips for perfect matching and troubleshooting common issues, continue exploring these essential techniques.
Key Takeaways
- Match piping and welt cord colors to the main fabric for a seamless, cohesive look.
- Choose contrasting colors to highlight edges and add visual interest.
- Use fabric swatches to verify color compatibility before installation.
- Consider fabric and cord material compatibility to prevent puckering or mismatched textures.
- Pay attention to the thickness and flexibility of piping and welt cord for smooth contouring.
Understanding the Differences Between Piping and Welt Cord

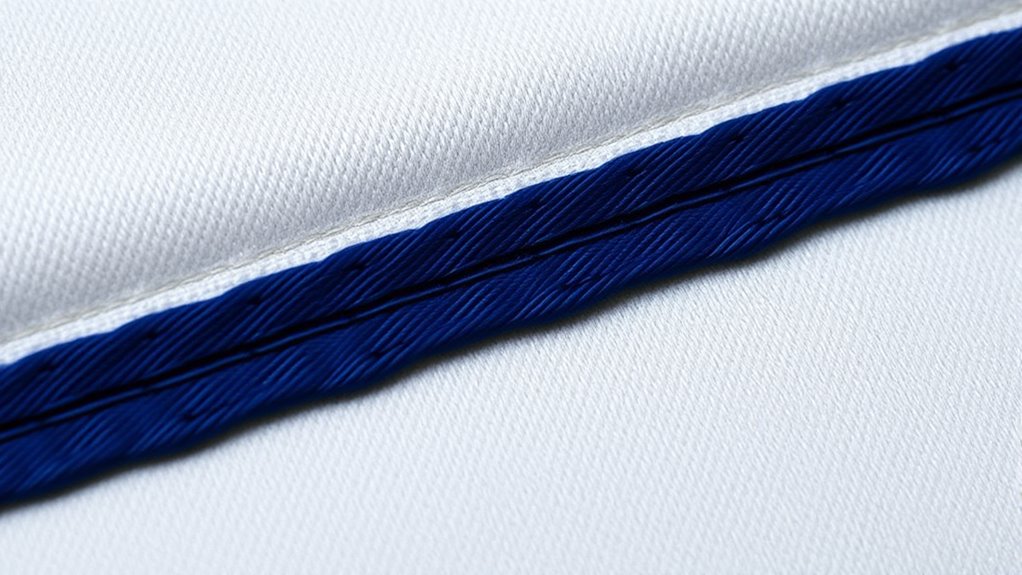
While piping and welt cord are both used to add decorative and structural detail to upholstery, they serve different purposes and have distinct characteristics. Your choice begins with fabric selection, which influences the cord types you’ll use. Piping typically features a flexible fabric exterior wrapped around a cord, making it ideal for smooth, rounded edges. Welt cord, on the other hand, is often made from sturdier materials like cotton or synthetic fibers, providing a firmer, more defined ridge. The cord types differ in thickness and flexibility, affecting how they contour to furniture shapes. Understanding these differences helps you select the right cord for your project, ensuring your upholstery looks polished and cohesive. Both piping and welt cord enhance the design, but their unique traits suit different stylistic and structural needs.
Selecting the Right Colors for Seamless Coordination

Choosing the right colors for piping and welt cord is essential to achieving a cohesive and polished look in your upholstery project. To guarantee seamless coordination, focus on color harmony, selecting shades that complement your fabric. Use contrast techniques to add visual interest without overwhelming the design. Here are four tips to guide you:
- Match piping and welt cord to the main fabric for a unified appearance.
- Use contrasting colors to highlight edges and create definition.
- Incorporate neutral tones for versatility and subtle elegance.
- Consider color saturation to balance boldness or subtlety in your design. Additionally, understanding color harmony principles can help you make more informed choices for a balanced and attractive outcome.
Choosing Textures and Materials for a Cohesive Look

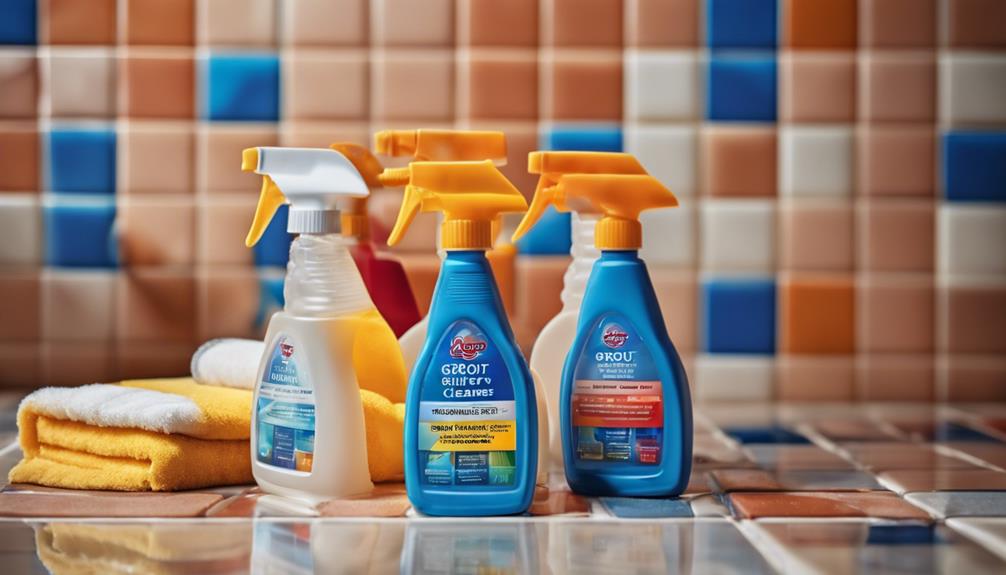
Selecting the right textures and materials is essential for creating a cohesive upholstery look that feels balanced and harmonious. You want fabric texture to complement your overall design, so consider smooth, plush, or woven surfaces that align with your style. Material durability also plays a key role; choose fabrics that withstand daily use without sacrificing appearance. For example, if your piece will see frequent activity, opt for sturdy materials like heavy-duty cotton or synthetic blends. Mixing different textures can add depth, but ensure they don’t clash—stick to a consistent material palette or subtly vary textures within the same family. By paying close attention to both fabric texture and material durability, you’ll create a unified, inviting look that lasts.
Preparing Your Fabric and Notions for Accurate Placement

Start by choosing fabric types that match in weight and texture to guarantee a seamless look. Use precise measurement techniques to cut and mark your fabric and notions accurately. Clearly mark your fabric to guide your piping and welt cord placement for perfect alignment. Incorporating fabric care considerations can help maintain the integrity of your materials during preparation.
Selecting Matching Fabric Types
To guarantee your piping and welt cord blend seamlessly, it’s essential to match the fabric types accurately. Start by selecting a fabric pattern that complements your decorative accents, ensuring visual harmony. Consider the fabric’s weight and texture to match the overall project feel, avoiding bulky or flimsy materials. Use these tips to guide your choice:
- Match the fabric pattern to maintain consistency across your design.
- Choose fabrics with similar weight and drape for a professional finish.
- Opt for durable fabrics if the project requires wear resistance.
- Ascertain the fabric’s texture aligns with your decorative accents for a cohesive look.
Matching fabric types carefully ensures your piping and welt cord enhance, rather than distract from, your project’s aesthetic.
Precise Notion Measurement Techniques
Accurate placement of piping and welt cord depends on precise measurement techniques when preparing your fabric and notions. To guarantee consistency, measure carefully, especially when fabric dyeing, as color variance can affect matching. Adjust your sewing machine settings for piping and welt cord attachment—use a narrow, consistent seam allowance to maintain alignment. Before sewing, mark your fabric accurately, considering the thickness of notions. Use a tailor’s ruler for exact measurements. Here’s a quick guide:
| Step | Focus | Tip |
|---|---|---|
| 1 | Fabric dyeing | Test dye on scrap for color consistency |
| 2 | Notion measurement | Use flexible tape for contours |
| 3 | Sewing machine settings | Adjust stitch length for piping |
| 4 | Marking | Lightly mark for placement |
| 5 | Final check | Confirm measurements before sewing |
These techniques help achieve precise, professional results. Additionally, understanding the importance of notion measurement ensures your project maintains high quality and visual appeal.
Marking for Accurate Placement
Proper marking is essential to guarantee piping and welt cord are precisely placed on your fabric. Accurate marking ensures the notions align correctly and stay within the seam allowance during fabric cutting. To achieve this, start by transferring pattern markings clearly onto your fabric using tailor’s chalk or a fabric pen. Next, mark the exact location for piping and welt cord, considering the seam allowance and fabric orientation. Here are key steps to follow:
- Double-check pattern placement before marking.
- Use a ruler for straight, accurate lines.
- Mark the piping and welt cord placement on both fabric pieces.
- Verify markings before fabric cutting to prevent misalignment.
Techniques for Attaching and Aligning Piping and Welt Cord

Attaching and aligning piping and welt cord requires careful precision to guarantee a smooth, professional finish. Start by adjusting your sewing machine settings, choosing a narrow, straight stitch for control and neatness. Use pins or clips to secure the piping or welt cord in place, ensuring it stays aligned as you sew. When necessary, switch to hand stitching techniques for tricky corners or tight curves, providing better control and accuracy. Maintain consistent seam allowances, and sew slowly to keep the piping flush with the fabric edge. Regularly check your work as you go to correct any misalignments immediately. Properly setting your machine and employing precise hand stitching techniques help achieve a clean, even finish that enhances the overall look of your project. Additionally, understanding the importance of attention to detail in sewing can significantly improve the quality and durability of your finished piece.
Tips for Ensuring Even and Consistent Stitching

To achieve even and consistent stitching, it’s essential to maintain steady control over your sewing machine and fabric. Proper stitching tension ensures your stitches are neither too tight nor too loose, which helps keep your seam allowance uniform. Here are four tips to help:
- Regularly check and adjust your sewing machine’s tension settings.
- Use a seam guide or markings to stay consistent with seam allowance.
- Sew at a steady pace, avoiding sudden speed changes.
- Keep your fabric flat and taut without stretching it, maintaining even feed.
- Understanding sewing machine mechanics can help troubleshoot tension issues and improve stitch quality.
Troubleshooting Common Challenges in Matching Piping and Welt Cord
Matching piping and welt cord often presents challenges, especially when seams don’t align or the piping puckers. To troubleshoot, start by checking color matching; mismatched shades can highlight unevenness. Ensure material compatibility since different fabrics expand or contract differently, affecting how the piping sits. When seams don’t align, adjust your placement or stitch tension. Puckering can be reduced by easing the piping into curves gradually. Here’s a quick guide:
| Issue | Solution | Tip |
|---|---|---|
| Color mismatch | Use fabric swatches for accurate matching | Test before sewing |
| Material mismatch | Select compatible fabrics | Check fabric properties beforehand |
| Seams misaligned | Adjust seam placement | Pin carefully before sewing |
| Puckering | Ease piping into curves gradually | Use appropriate stitch tension |
| Uneven piping | Mark piping placement precisely | Use chalk or fabric markers |
Additionally, piping installation can be made easier by practicing on scrap fabric first to perfect your technique. Stay patient, and you’ll achieve a seamless match.
Frequently Asked Questions
How Do I Measure Fabric Accurately for Piping and Welt Cord?
To measure fabric accurately for piping and welt cord, start by calculating the piping length needed, which involves measuring the perimeter of the area and adding extra for seams. Then, determine the fabric measurement by multiplying the piping length by the width of your fabric, guaranteeing enough for the piping and seam allowances. Remember, precise piping calculation helps prevent waste and ensures a perfect fit for your project.
What Tools Are Best for Attaching Piping and Welt Cord?
You need the right tools to attach piping and welt cord effectively—think of your sewing machine as your secret weapon. A zipper foot or piping foot is essential for precise attachment, especially with different piping and welt cord types. Adjust your sewing machine settings for sharp, consistent stitches. For best results, use scissors, pins, and clips to hold everything in place. These tools make the process smoother and give your finished piece a professional look.
Can I Customize Piping and Welt Cord for Unique Projects?
Yes, you can customize piping and welt cord for your unique projects. Explore various custom piping options to match your fabric and design preferences, and choose from different welt cord varieties to add distinctive finishes. By selecting custom colors, widths, and textures, you create a tailored look that enhances your project’s uniqueness. Customizing these details allows you to achieve a professional, personalized finish that stands out.
How Do I Prevent Puckering When Sewing Piping and Welt Cord?
To prevent puckering when sewing piping and welt cord, you should use proper seam finishing techniques like trimming excess fabric and pressing seams open. Also, choose the right needle and thread for your fabric, and sew slowly to maintain control. Keep the piping or welt cord flat and taut as you sew, and consider using a piping foot for even stitching. These steps help achieve smooth, professional-looking results without puckering.
Are There Eco-Friendly Options for Piping and Welt Cord Materials?
Did you know that the textile industry accounts for nearly 10% of global carbon emissions? You can choose eco-friendly manufacturing options by selecting piping and welt cord made from sustainable materials like organic cotton, hemp, or recycled polyester. These options reduce environmental impact and support sustainability. By opting for eco-friendly options, you not only improve your craft but also contribute to a greener future through responsible material choices.
Conclusion
Now that you know how to match piping and welt cord perfectly, you’ll create stunning, professional-looking pieces. Remember, attention to detail and patience make all the difference. Are you ready to elevate your sewing projects with flawless finishing touches that truly stand out? With practice and care, you’ll turn simple designs into beautiful, polished creations that showcase your skill and passion. So go ahead—your next masterpiece is waiting to be perfected!