To sew a zip cushion cover, start by measuring your cushion and cutting fabric with added seam allowances. Sew the main body pieces together, leaving an opening for the zipper. Attach the zipper carefully with a zipper foot for a clean finish, then finish the edges with a zigzag stitch or overlock to prevent fraying. Finally, insert the cushion, close the opening securely, and add any decorative trims. Keep going to discover detailed steps for a polished, professional look.
Key Takeaways
- Measure your cushion accurately and cut fabric with seam allowances, ensuring a proper fit.
- Sew the main body pieces together, leaving an opening for the zipper.
- Attach the zipper along the opening’s edge with a zipper foot for a neat finish.
- Sew the opening closed after inserting the cushion and finish raw edges for durability.
- Add decorative trims or details before completing the final sewing for a polished look.
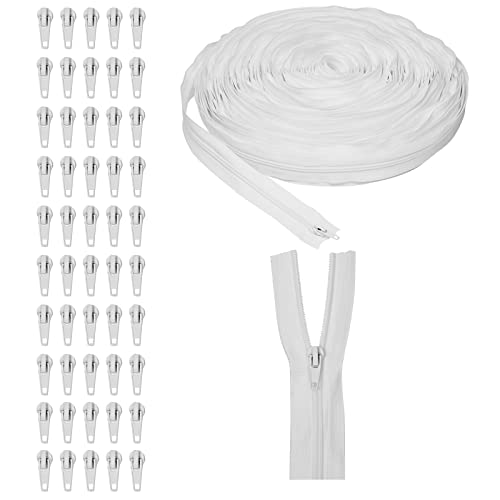
Juvale Zipper Sewing Kit – White Nylon 5 Coil, 50 Yards & 50 Metal Sliders – Bulk Zippers for Sewing Supplies & Repair
Juvale Zipper Kit: The Juvale Zipper Sewing Kit offers an extensive solution for sewing enthusiasts, equipped with 50…
As an affiliate, we earn on qualifying purchases.
As an affiliate, we earn on qualifying purchases.
Gathering Your Materials and Measuring Your Cushion
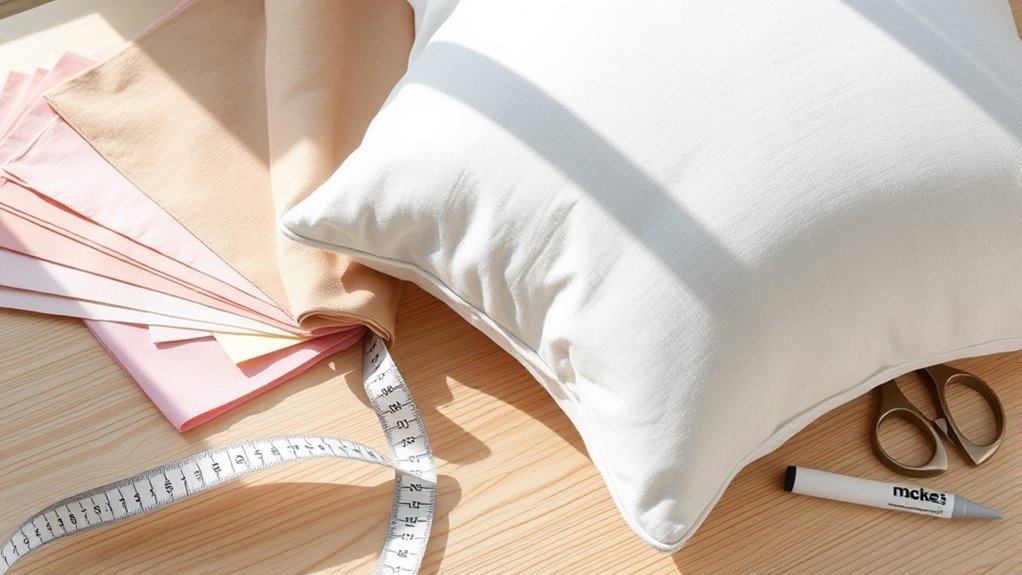
Have you gathered all the materials you need before starting your cushion cover project? The first step is selecting the right fabric. Choose a fabric that complements your decor, is durable, and easy to sew. Consider pattern matching early on if your fabric has a design; this ensures the pattern aligns nicely at the seams, giving your cushion a professional look. Measure your cushion carefully, noting its width, height, and depth. Add a seam allowance of about half an inch on all sides to ensure a perfect fit. Gather your fabric, scissors, sewing machine, and other essentials. Double-check your measurements and fabric choice before proceeding. Proper preparation now makes sewing smoother and results in a polished, well-fitted cushion cover. Incorporating layer textures through fabric selection can further enhance the farmhouse aesthetic of your space.

Zipper Foot Fits All Low Shank Snap-On Singer Brother Babylock Euro-Pro Janome Kenmore White Juki New Home Simplicity Elna Etc Domestic Sewing Machines (Small Zipper Foot)
🎈Simple and practical design, easy to operate;
As an affiliate, we earn on qualifying purchases.
As an affiliate, we earn on qualifying purchases.
Cutting the Fabric Pieces to Size

To get started, you need to measure your fabric carefully to guarantee the pieces fit your cushion perfectly. Don’t forget to add seam allowances so your finished cover will be the right size after sewing. Accurate measurements now save you time and hassle later. Additionally, ensuring your fabric is properly pre-washed can prevent shrinking and distortion after sewing.
Measuring Fabric Accurately
Accurate measuring is essential when preparing fabric for your cushion cover to guarantee all pieces fit together perfectly. Start by checking the fabric grain, ensuring it runs straight and true, which helps the seams stay strong and the pattern align properly. When measuring, double-check your dimensions and mark carefully with fabric chalk or a washable marker. To achieve clean pattern matching, lay your fabric flat and smooth out any wrinkles before measuring. Measure twice to confirm your cuts are precise, avoiding uneven edges or gaps later. Remember to account for the pattern’s direction, especially if it’s directional or has a nap. Taking these steps ensures your fabric pieces will fit together seamlessly, making the sewing process smoother and the finished cushion more polished.
Adding Seam Allowances
Once you’ve measured and marked your fabric pieces, it’s time to add seam allowances before cutting. A seam allowance is the extra fabric you leave around your pattern lines to sew the pieces together securely. Typically, a 1.5 cm (or 5/8 inch) seam allowance works well, but check your pattern instructions. To guarantee accurate fabric margins, use a ruler or a measuring tape to draw a second line outside your markings, extending the pattern edges by the seam allowance. This extra fabric will give you enough room to sew the seams without compromising the size of your cushion cover. Carefully mark all pieces, making sure the seam allowances are consistent on each edge. Properly adding seam allowances ensures a professional finish and helps prevent fraying or uneven seams. Once marked, you’re ready to cut along the outer lines.

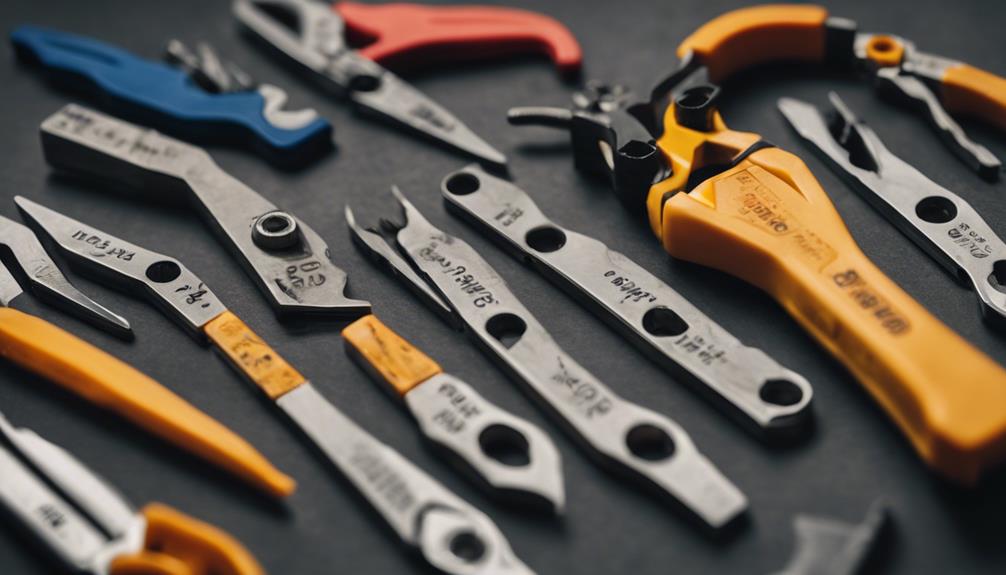
Fiskars RazorEdge Fabric Scissors, Heavy Duty Fabric Shears, Ultra-Sharp Stainless Steel Blades & SoftGrip Ergonomic Handle, 8”, White/Orange
RAZOREDGE FABRIC SCISSORS: Ultra-sharp, premium-grade stainless steel blades with a precisely honed edge for clean cuts to the…
As an affiliate, we earn on qualifying purchases.
As an affiliate, we earn on qualifying purchases.
Sewing the Main Body of the Cover
Now, you’ll measure and cut your fabric accurately for the main body of the cover. Next, pin the side seams carefully to guarantee a neat finish. Finally, sew along the edges, making sure your seams are straight and secure. If you want to ensure consistent moisture levels, consider adding self watering features to your cushion cover design.
Cutting and Measuring Fabric
Before you start cutting, carefully measure and mark your fabric to make certain the main body of the cushion cover fits perfectly. Pay attention to the fabric grain, ensuring it runs parallel to the edges for stability and a professional finish. Use a ruler or measuring tape to mark the dimensions accurately, adding seam allowances as needed. Check your thread tension before sewing to prevent puckering and ensure smooth stitches. When cutting, use sharp scissors or rotary cutters for clean edges. Take your time to cut straight lines, following your markings precisely. Proper measuring and cutting help achieve even seams and a polished look. Remember, precise fabric grain alignment and correct thread tension are key to sewing a neat, durable cushion cover. Fabrics and grain alignment are essential considerations to ensure the longevity and appearance of your finished cover.
Sewing the Side Seams
With your fabric pieces properly measured and cut, align the sides of the main body pieces right sides together. Confirm the fabric patterns match at the seams for a seamless look. Next, follow these steps:
- Set your sewing machine to a straight stitch with a 1/2-inch seam allowance, adjusting the tension if needed.
- Sew along the edge, keeping the fabric aligned and smooth, especially if working with directional fabric patterns.
- Backstitch at both ends to secure the seams and prevent fraying.
Using the correct sewing machine settings helps achieve neat, durable side seams. Take your time to keep the fabric flat and evenly fed through the machine, especially when working with patterned fabric, for a professional finish.

Brother XM2701 Sewing Machine, Lightweight, Full Featured, 27 Stitches, 6 Included Feet
27 Unique built-in stitches: The XM2701 includes 27 built-in stitches including decorative, blind hem, zigzag, and stretch stitches…
As an affiliate, we earn on qualifying purchases.
As an affiliate, we earn on qualifying purchases.
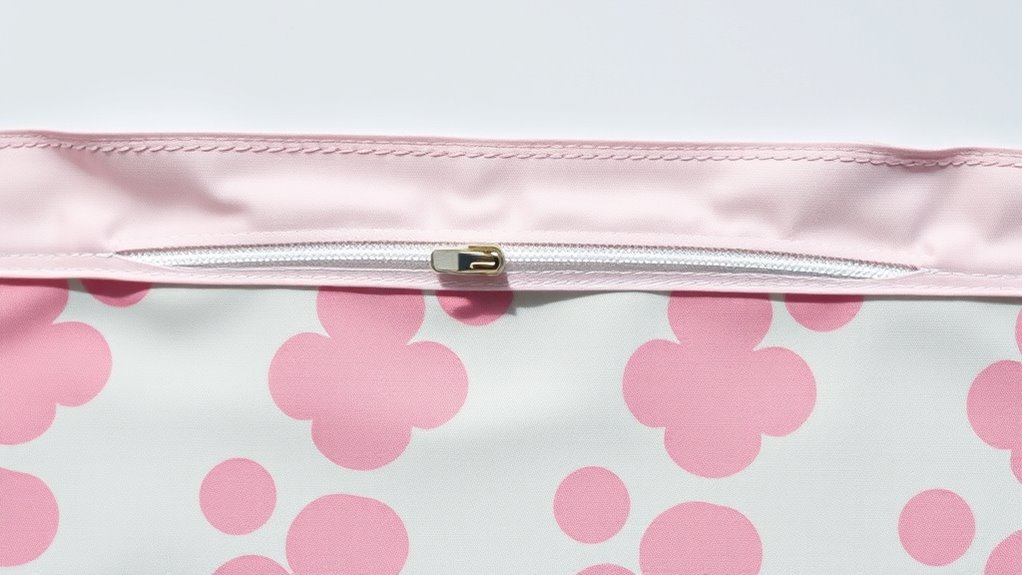
Attaching the Zipper for a Seamless Finish
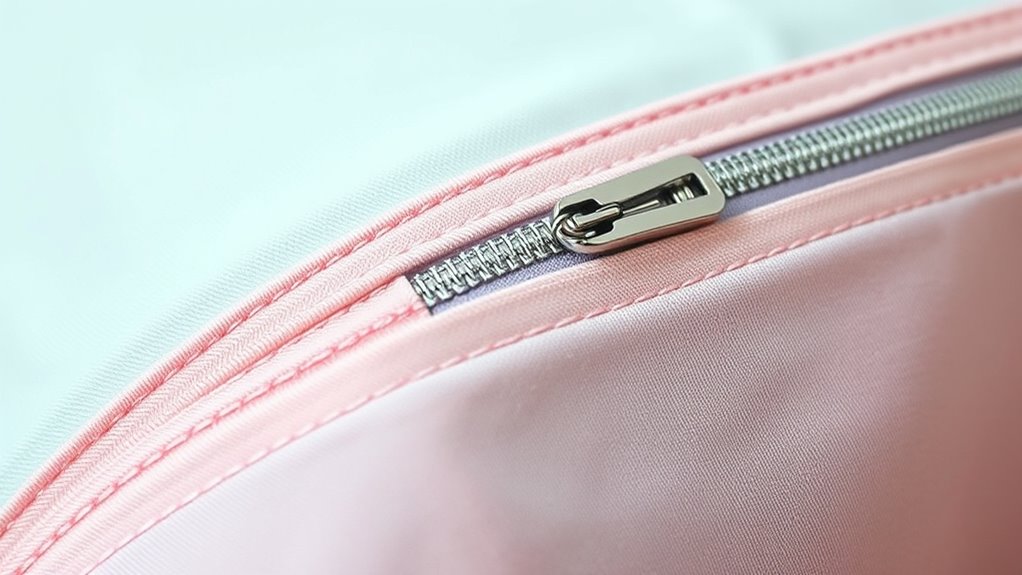
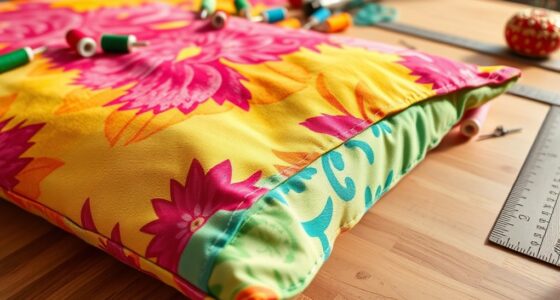
Attaching the zipper for a seamless finish requires careful alignment and precision. Begin by placing the zipper face down on the right side of one fabric edge, ensuring it’s aligned with the seam. Use pins or clips to hold the zipper in place, then sew the zipper using a zipper foot for even stitching. When doing the zipper installation, take your time to keep stitches straight and close to the zipper teeth. Once attached, fold the fabric over the zipper tape and press gently to flatten the seam. This method guarantees a smooth, professional look, making your cushion cover’s zipper nearly invisible. Proper zipper installation is key to achieving seamless finishing, giving your cushion cover a polished and tidy appearance. Additionally, understanding the importance of precision in sewing techniques helps ensure a professional result in your project.
Finishing the Edges and Assembling the Cover

Once you’ve sewn the zipper in place, it’s time to finish the edges of your fabric pieces to prevent fraying and create a polished look. Start by trimming edges evenly, removing excess fabric for a clean finish. Next, finish seams using your preferred method—either zigzag stitching, overlocking, or binding—to secure the raw edges. This step keeps the fabric from fraying over time. Finally, assemble the cover by aligning the pieces right sides together, pinning in place, and sewing around the edges, leaving an opening for the cushion. Remember to reinforce the corners for durability. When working with fabric, it’s also helpful to understand fabric finishes that can enhance the longevity of your project. By carefully trimming edges, finishing seams, and assembling the cover, you ensure a professional, long-lasting result that looks neat and well-crafted.
Inserting the Cushion and Final Touches
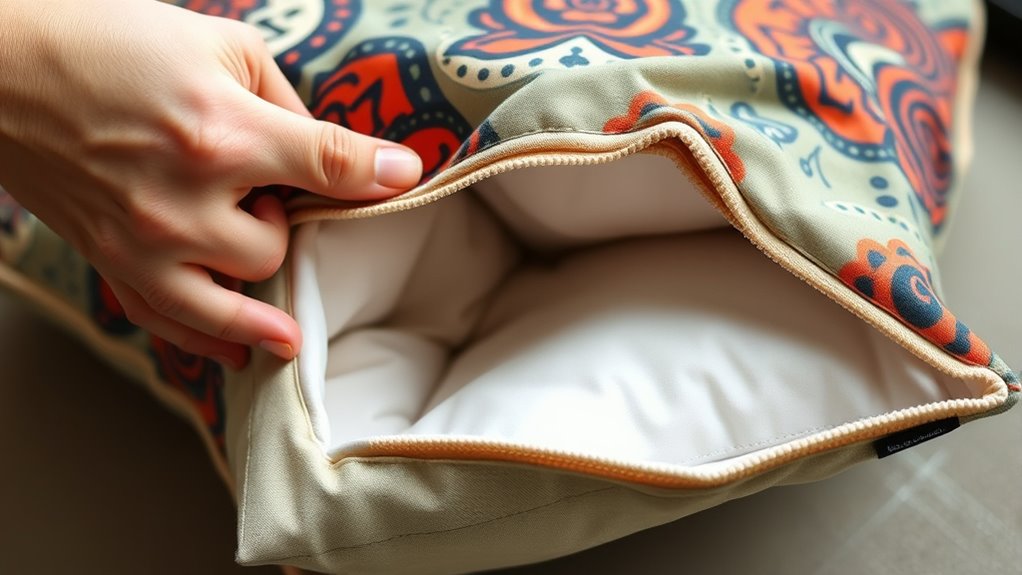
After finishing the sewing and trimming, gently turn the cushion cover right side out through the opening. Carefully insert your cushion filling, making sure it’s evenly distributed for a smooth finish. Once the cushion is inside, adjust the filling as needed to achieve your desired firmness. If you’ve added decorative trims, now’s the time to attach them securely along the edges or around the opening for an extra decorative touch. Smooth out any wrinkles or lumps, ensuring the cover fits snugly over the cushion. Close the opening using your chosen method, whether hand-stitching or sewing it shut. Your finished cushion looks polished with its decorative trims, and the filling inside provides comfort and support for your space. Being aware of pinball machine weight can help if you plan to move or transport your cushion or furniture.
Frequently Asked Questions
What Type of Zipper Is Best for Cushion Covers?
For cushion covers, a coil or nylon zipper works best because they’re flexible and blend seamlessly with various cushion cover styles. Coil zippers are durable and easy to sew, making them ideal for frequent use. Metal zippers, while sturdy, can be bulky and less flexible, so avoid them for softer cushion styles. Choose a zipper that complements your fabric and guarantees a smooth, secure closure for your cushion.
How Do I Prevent Fabric From Fraying?
In the blink of an eye, fraying prevention becomes essential. To keep your fabric from fraying, you should reinforce the edges with a zigzag stitch or serging. Applying fabric glue or fray check along raw edges also works wonders. For added durability, consider using bias tape or binding. These techniques not only prevent fraying but also give your cushion cover a polished, professional look.
Can I Sew a Zip Cushion Cover Without a Sewing Machine?
Yes, you can sew a zip cushion cover without a machine by using hand sewing techniques. Use a strong, even stitch like a backstitch for durability. For zipper installation tips, pin the zipper in place and sew carefully along the edges, ensuring the teeth stay aligned. Take your time, and you’ll create a neat, functional cushion cover. Hand sewing may take longer, but it’s perfect if you don’t have a machine.
What Fabric Options Are Most Durable for Cushion Covers?
For durable cushion covers, you should choose tightly woven fabrics like heavy-duty cotton, canvas, or denim. These fabrics withstand frequent washing and fabric care, making them ideal for daily use. If you want decorative textiles, opt for upholstery-grade fabrics or those with a stain-resistant finish. These options offer strength, longevity, and a stylish look, ensuring your cushion cover remains attractive and functional over time.
How Do I Clean and Maintain My Zip Cushion Cover?
Did you know that regular cleaning can extend your cushion cover’s lifespan by up to 50%? To keep it looking fresh, follow these cleaning tips: remove the cover and check care labels first. For stain removal, spot clean with a mild detergent and cold water. Machine wash if permitted, using gentle cycles. Always air dry or tumble dry on low to maintain your zip cushion cover’s quality and appearance.
Conclusion
Now that you’ve sewn your zip cushion cover, you’re officially a sewing pro! With a little practice, your skills will be so amazing, your friends will think you’ve mastered magic. Just imagine, this simple project transforms your space into a cozy paradise faster than you can say “DIY genius.” So, go ahead, enjoy your beautifully finished cushion cover and bask in the glory of your incredible crafting skills—you’ve created something truly spectacular!