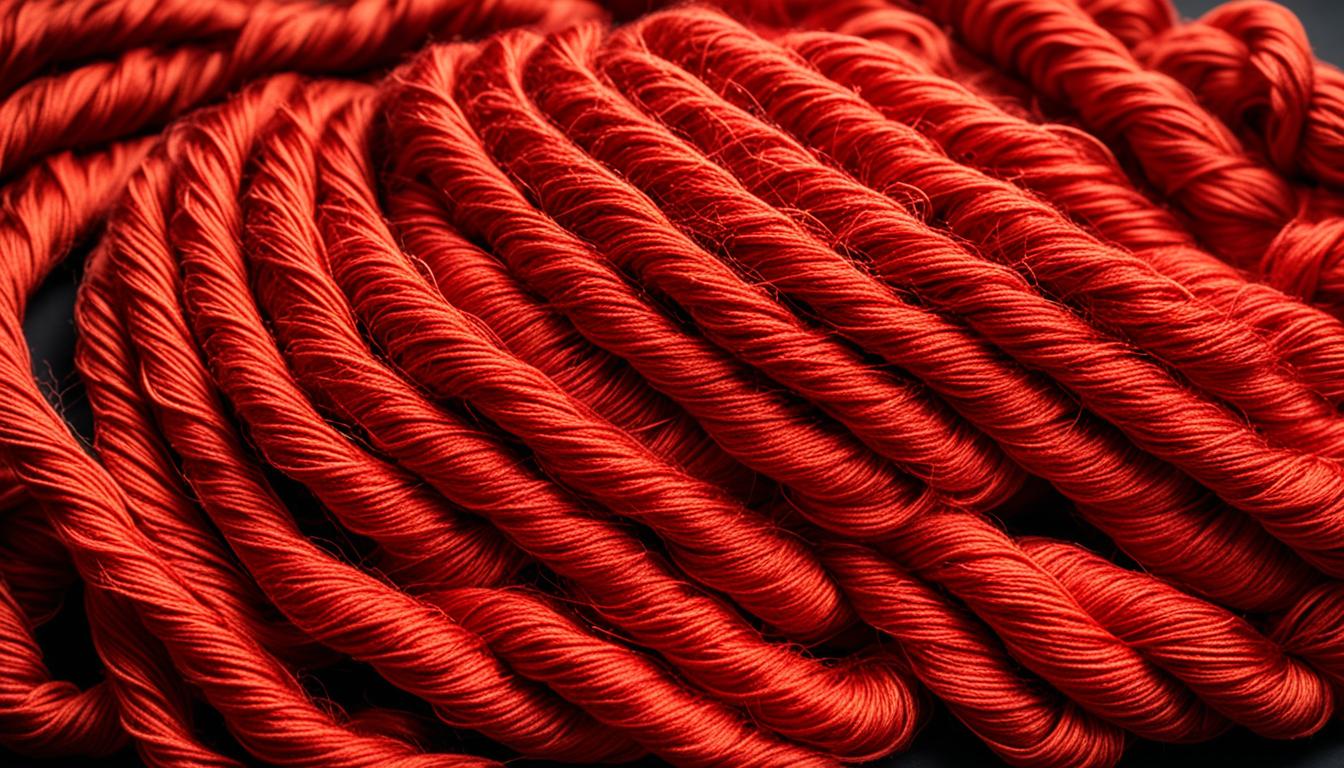
Have you ever thought about how to curl yarn and add a whimsical touch to your crafts and projects? We’re here to help unravel the mystery and give you all the tips and tricks you need to create perfectly curled yarn at home for your next creative project.
Whether you’re looking to add texture to a knit hat or create realistic doll hair, curling yarn can elevate your craft projects to a whole new level. Join us as we explore different methods of curling yarn and reveal step-by-step instructions for achieving stunning curls without breaking a sweat.
Key Takeaways:
- Curling yarn can add a whimsical touch to various crafts and projects.
- There are different methods for curling yarn, including heat and non-heat techniques.
- Choosing the right dowel size and yarn type is crucial for achieving the desired curl effect.
- Experimenting with different techniques can help you achieve unique curling effects.
- Curling yarn can be used for specific projects and special occasions, adding a personalized touch to your creations.
Curling Yarn with Heat: Oven Method
One popular method for curling yarn is using heat from an oven. This technique is perfect for crafters who want to achieve beautiful curls for their projects. To curl yarn using the oven method, follow these simple steps:
Materials Needed:
- Knitting needles or dowels
- Acrylic yarn
- Water spray bottle
- Oven preheated to 200 degrees Fahrenheit
Step 1: Prepare the Yarn
Start by selecting your knitting needles or dowels based on the desired size of the curls. The smaller the needle or dowel, the tighter the curls will be. Next, wrap the yarn tightly around the knitting needles or dowels, making sure it is secured in place.
Step 2: Wet the Yarn
Use a water spray bottle to lightly dampen the wrapped yarn. This will help the yarn hold its curl when exposed to heat.
Step 3: Heating Process
Place the knitting needles or dowels with the wrapped yarn in the preheated oven. Let them stay in the oven for about 15 minutes to allow the heat to work its magic on the yarn.
Step 4: Cooling and Unwrapping
Once the yarn has been heated, carefully remove the knitting needles or dowels from the oven and let them cool down. Once cool, gently unravel the yarn to reveal the beautifully curled strands.
The oven method is particularly ideal for acrylic yarn and can be used for various crafts. The curls created through this method add texture and visual interest to your projects.

SAVINA Loom Pen Tool, Yarn Helper, Yarn Guide for Loom Knitting, Handmade Tools to Make Crafts Quicker & Easier for Knitters
Easy Yarn Wrapping: Simplify your loom crafting with precision using our wooden loom pen. Its smooth design allows…
As an affiliate, we earn on qualifying purchases.
As an affiliate, we earn on qualifying purchases.
Curling Yarn without Heat: Iron Method
Looking for methods to curl yarn without using heat? The iron method offers a fantastic alternative. This technique is particularly useful for creating realistic curly hair for dolls or adding unique texture to various crafts. Let’s explore the step-by-step process of curling yarn using an iron.
Step 1: Prepare the Materials
Start by gathering the necessary materials: yarn, wooden dowels, water, a dish towel, and an iron.
Step 2: Wrap and Mist the Yarn
Take the desired length of yarn and tightly wrap it around a wooden dowel. Ensure that the yarn is wrapped evenly and securely. Next, lightly mist the wrapped yarn with water. This step helps the yarn hold its curl.
Step 3: Set Up the Ironing Area
Place a dish towel on a flat surface to create a protective barrier for the ironing process. Arrange the dowels with the wrapped yarn on top of the dish towel.
Step 4: Steam the Yarn
Place the iron on the steam setting and carefully steam the covered dowels. The heat and steam will help set the curls in the yarn. Make sure to follow the safety instructions and precautions for iron usage.
Step 5: Allow the Yarn to Dry
After steaming, allow the curled yarn to dry completely. This will ensure that the curls hold their shape once removed from the dowels.
Step 6: Remove the Curled Yarn
Once the yarn is dry, gently remove it from the wooden dowels. You will be left with beautifully curled yarn ready to be used in your crafts.
With the iron method, you can create different curl sizes depending on your wrapping technique and desired outcome. This method is versatile and suitable for various types of yarn.
Remember to always exercise caution when working with hot irons and follow the manufacturer’s instructions for safe use.
Now that you’re familiar with the iron method for curling yarn, you can confidently add curls to your projects without the need for heat.

| Methods | Recommended Yarn Types | Suitable for Curling at Home? | Common Curl Sizes |
|---|---|---|---|
| Heat method: Oven | Acrylic yarn | Yes | Various, depending on dowel size |
| Heat method: Iron | All types of yarn | Yes | Can be adjusted based on wrapping technique |
| No-heat method: Twisting/braiding | All types of yarn | Yes | Varies depending on technique |

Inscraft 52 Acrylic Yarn Skeins, 1820 Yards 52 Colors, 2 Crochet Hooks, 2 Weaving Needles, 10 Stitch Markers, 1 Bag, for Crocheting & Knitting, Gift Beginners and Adults
52 Colors Acrylic Yarn in Craft Suit:This fantastic value 100 % acrylic yarn pack contains 52 very wide…
As an affiliate, we earn on qualifying purchases.
As an affiliate, we earn on qualifying purchases.
Choosing the Right Dowel Size and Yarn
When it comes to curling yarn, the size of the dowel used can make all the difference in achieving the desired curl effect. Smaller dowels tend to create tighter, more defined curls, while larger dowels result in looser, more relaxed curls. Experimenting with different dowel sizes allows you to customize your yarn curls to match your creative vision.
It’s also important to consider the type and weight of the yarn you’re working with. Different yarns may react differently to the curling process, with some holding their curl better than others. For example, lightweight yarns may require smaller dowels to achieve tighter curls, while heavier yarns may need larger dowels for softer, more voluminous curls.
By selecting the right dowel size and yarn combination, you can create curls that perfectly complement your crafts. Whether you’re adding texture to amigurumi toys, creating decorative accents for hats, or transforming doll hair, choosing the right dowel and yarn ensures that your curls turn out exactly as you envision.

Tips for Choosing the Right Dowel Size and Yarn:
- Consider the desired curl size and tightness when selecting dowel sizes.
- Smaller dowels create tighter curls, while larger dowels create looser curls.
- Experiment with different dowel sizes to find the perfect match for your project.
- Take into account the weight and type of yarn you are using.
- Lightweight yarns typically require smaller dowels for tighter curls.
- Heavier yarns often need larger dowels for softer, more voluminous curls.
| Dowel Size | Curl Size |
|---|---|
| Small | Tight and defined |
| Medium | Moderate and versatile |
| Large | Loose and voluminous |

Textured Curly Yarn Like Teddy Fur, Teddy Bear Yarn 3 Skeins 150g/5.3oz,3mm Thickness, Comfortable and Soft to Touch,can be Used as Doll Hair Weaving, Suitable for Various handicrafts (Brown)
PREMIUM MATERIAL: Super soft and fluffy textured curly yarn with teddy fur-like appearance, perfect for creating cozy handmade…
As an affiliate, we earn on qualifying purchases.
As an affiliate, we earn on qualifying purchases.
Tips for Achieving Successful Curls
To achieve successful curls, we recommend following these tips and techniques:
- Wrap the yarn tightly around the dowels or knitting needles to ensure the curls hold their shape. This will help create defined and long-lasting curls.
- Before wrapping the yarn, lightly wet it with water. This moisture will aid in the curling process and enhance the yarn’s ability to hold its shape.
- After wrapping the yarn, allow it to dry completely before unwrapping it. This step is crucial to maintain the curl and prevent it from unraveling.
- Gently pull and manipulate the curls once they are dry to achieve the desired look. This can help loosen or tighten the curls, depending on your preference.
By following these curling yarn techniques, you can create beautiful and professional-looking curls for your crafts and projects. The key is to pay attention to the tightness of the wrapping, the moisture in the yarn, and the drying process. With a little practice and experimentation, you’ll become an expert in curling yarn and achieve stunning results.
Highlighted Quote:
“Wrap the yarn tightly, wet it, let it dry, and gently manipulate the curls for the perfect result.” – WeavingPro Magazine

| Technique | Advantages | Disadvantages |
|---|---|---|
| Wrapping tightly | Creates defined curls | May require practice to achieve consistent results |
| Wetting the yarn | Aids in the curling process | Requires additional drying time |
| Drying completely | Maintains the curl shape | Requires patience |
| Manipulating the curls | Allows for customization | Requires gentle handling |

INSCRAFT 113 Piece Crochet Kit with Yarn Set– 1600 Yards Assorted Yarn for Knitting and Crochet, 73PCS Crochet Accessories Set Including Ergonomic Hooks, Knitting Needles & More Ideal Beginner Kit
40 Colors Total of 1600 Yards Crochet Yarn: This fantastic value 100% acrylic yarn pack contains 40 very…
As an affiliate, we earn on qualifying purchases.
As an affiliate, we earn on qualifying purchases.
Curling Yarn for Specific Projects
When it comes to curling yarn, the possibilities are endless. Curling yarn can add a touch of whimsy and texture to a wide range of craft projects, allowing you to create unique and eye-catching designs. Whether you’re looking to create curly hair for dolls, add dimension to amigurumi toys, or make decorative accents for hats and accessories, curling yarn is a versatile technique that can elevate your craft projects to the next level.
Creating Curly Hair for Dolls
One popular use for curled yarn is creating curly hair for dolls. By curling yarn, you can achieve lifelike and enviable curls for your favorite dolls. To get started, choose the yarn color and texture that best matches the doll’s hair. Select a dowel or knitting needle with the desired curl size, and wrap the yarn tightly around it. Secure the ends of the yarn to keep the curl in place.
Once the yarn is wrapped, you can choose to use a heat method or a non-heat method to achieve the curls. For heat methods, follow the instructions provided earlier in this article, ensuring you select the appropriate heat method for the type of yarn you are using. If you prefer a non-heat method, you can tightly wrap the yarn around the dowel or knitting needle and allow it to air dry. Once dry, gently slide the curled yarn off the dowel or knitting needle, and you’ll have beautiful, curly hair for your dolls.
| Materials Needed: | Instructions: |
|---|---|
| Doll | 1. Select the yarn color and texture 2. Choose a dowel or knitting needle for the desired curl size 3. Wrap the yarn tightly around the dowel or knitting needle 4. Secure the ends of the yarn 5. Follow the appropriate heat or non-heat method to achieve the curls 6. Slide the curled yarn off the dowel or knitting needle carefully |
Adding Texture to Amigurumi Toys
If you enjoy making amigurumi toys, curling yarn can be a fantastic way to add texture and personality to your creations. Creating curled yarn accents on toys like teddy bears, rabbits, or other stuffed animals can make them feel even more cuddly and adorable.
To add curls to amigurumi toys, choose a dowel or knitting needle that matches the desired curl size. Wrap the yarn tightly around the dowel or knitting needle, securing the ends to hold the curls in place. Once wrapped, you can follow a heat or non-heat method to achieve the curls, as mentioned earlier in this article.
Decorative Accents for Hats and Accessories
Another fantastic use for curled yarn is creating decorative accents for hats and accessories. Adding curled yarn details to hats, headbands, or even earrings can elevate your accessories and give them a unique flair. Consider using a variety of curl sizes and yarn textures to create captivating visual interest.
To create decorative accents, select a dowel or knitting needle that corresponds to the desired curl size. Wrap the yarn tightly around the dowel or knitting needle and secure the ends. Follow the heat or non-heat method that works best for your chosen yarn, and once the curls have set, remove them from the dowel or knitting needle to adorn your hats and accessories.

With curling yarn, you have the power to transform your craft projects into works of art. Whether you’re creating curly hair for dolls, adding texture to amigurumi toys, or embellishing hats and accessories, curling yarn opens up a world of creative possibilities. Don’t be afraid to experiment with different techniques, sizes, and yarn types to achieve the perfect curl effect for your specific project. Let your imagination run wild and enjoy the process of curling yarn for your crafts!
Curling Yarn for Special Occasions
When it comes to special occasions like weddings, finding unique and personalized touches can make all the difference. One creative idea to enhance the celebration is by incorporating curled yarn accents. Whether it’s creating adorable bride and groom dolls or crafting beautiful wedding decorations, curled yarn can add a whimsical and enchanting touch to the overall aesthetic of the event.
By following the curling yarn techniques we discussed earlier, you can create intricate and eye-catching curls that will captivate your guests. These beautiful curls can be used in various ways, from adorning centerpieces to embellishing gift wrapping and more. Curling yarn for special occasions allows you to infuse your personal style into the event and create unforgettable memories.
What’s great about curling yarn is that it’s a versatile crafting technique. It can be tailored to suit your specific vision and can be used in a range of applications. Whether you prefer soft, loose curls or tight, spiral-like curls, you have the freedom to experiment and create the curl effect that perfectly matches the ambiance and theme of your special occasion.
To inspire you further, here’s an enchanting quote from a renowned wedding planner:
“Incorporating curled yarn accents into weddings adds a touch of whimsy and charm. It’s a fantastic way to personalize your decor and make your special day truly one-of-a-kind. The unique texture and visual interest that curled yarn brings can transform any wedding setting into a magical wonderland.”
Creating Curled Yarn Accents
To guide you in creating beautiful curled yarn accents for your special occasion, follow these steps:
- Select high-quality yarn that complements the color scheme and theme of your event.
- Choose the method of curling yarn that suits your project and desired curl effect (as discussed in previous sections).
- Securely wrap the yarn around the dowels or knitting needles, making sure it is tightly held in place to ensure the curls hold their shape.
- Follow the specific instructions for the chosen curling method (e.g., using heat or non-heat techniques) to achieve the desired curl.
- Allow the curled yarn to fully dry before gently unwrapping it from the dowels or needles.
- Incorporate the curled yarn accents into your wedding decorations, bride and groom dolls, or any other creative projects.
Remember to enjoy the process and let your creativity shine through. Curling yarn for special occasions allows you to infuse your personal touch into every detail, making your event truly memorable and magical.
Take a look at this beautiful curled yarn inspiration:
| Wedding Decor Idea | Crafted Bride and Groom Dolls |
|---|---|
 |
 |
Alternatives to Heat for Curling Yarn
If you’re looking for alternatives to using heat methods for curling yarn, there are various techniques you can explore. These alternative methods provide great results without the need for heat and can help you achieve unique and beautiful curling effects. When considering these alternatives, it’s important to take into account the type of yarn you’re using and how well it responds to different techniques.
Braiding Technique
One alternative technique to curl yarn without heat is the braiding technique. To use this method, start by dividing the yarn into three or more equal sections. Then, tightly braid the sections together and secure the end with a yarn knot. Allow the braided yarn to fully dry, and once dry, undo the braid to reveal the curled yarn. This technique can produce natural-looking curls and works well for various types of yarn.
Twisting Technique
The twisting technique is another effective way to curl yarn without using heat. Simply take a section of yarn and twist it tightly in one direction. Then, secure the ends of the twisted yarn with clips or pins to hold the twist in place. Allow the twisted yarn to dry completely. Once dry, release the clips or pins and gently untwist the yarn to reveal the curls. This technique works especially well for thinner yarns and can create tight, defined curls.

Finger Coiling Technique
The finger coiling technique is a simple yet effective method for creating curls without the use of heat. To use this technique, start by wrapping a section of yarn tightly around your finger. Slide the coiled yarn off your finger and secure it with a yarn knot. Allow the coiled yarn to dry completely before unraveling it to reveal the curls. This technique can be used with different yarn thicknesses and allows for customizable curl sizes.
Curling Spray
If you’re looking to enhance the curling effect without heat, consider using a curling spray product specifically designed for yarn. These sprays often contain ingredients that help the yarn hold its shape and create long-lasting curls. To use the curling spray, simply lightly mist the yarn before shaping or coiling it. Allow the yarn to dry completely, and the curls will maintain their shape. Curling sprays are a convenient option for adding curls to yarn without the need for additional techniques.
Experimenting with these alternative methods can provide you with a range of curling effects without the use of heat. Remember to consider the characteristics of your yarn and the specific curling effect you want to achieve. With these techniques, you can create unique and beautiful curls that elevate your yarn crafts and projects.
Curling Yarn for Specific Hair Styles
When it comes to curling yarn for specific hair styles, we need to consider the size and tightness of the curls to achieve the desired outcome. Whether you’re working on doll hair or other creative projects, tailoring the curling technique is key.
To create ringlet curls for doll hair, using a smaller dowel or knitting needle would be ideal. This will result in tighter and more defined curls that replicate the charm of natural ringlets. Alternatively, if you’re aiming for looser curls, opting for a larger dowel size will help you achieve that relaxed and bouncy look.
Experimentation is key in finding the perfect curling technique. Different curling methods, such as wrapping techniques or varying yarn types, can contribute to the desired hair style effect. Remember, each project may require different approaches to ensure the curls align with your creative vision.
Curling Yarn for Doll Hair: Step-by-Step Guide
- Select a smaller dowel or knitting needle to achieve tight ringlet curls.
- Prepare the yarn by selecting the color and type that best suits your project.
- Wrap the yarn tightly around the dowel or knitting needle, ensuring it holds securely.
- Depending on the desired effect, you can twist or braid the yarn before wrapping it around the dowel or knitting needle.
- Gently mist the wrapped yarn with water to dampen it slightly. Avoid soaking the yarn, as excessive moisture may affect the curling process.
- Allow the yarn to dry completely. You can speed up the drying process by placing the wrapped yarn in a well-ventilated area or using a blow dryer on low heat.
- Once the yarn is fully dry, carefully remove it from the dowel or knitting needle. Be gentle to avoid disrupting the formed curls.
By following these steps and experimenting with different techniques, you can create stunning curls for your doll’s hair or any other project that requires stylish and natural-looking curls.

| Small Dowel or Knitting Needle | Large Dowel or Knitting Needle |
|---|---|
| Tight ringlet curls | Looser, bouncy curls |
| Perfect for creating intricate hairstyles for dolls | Ideal for achieving a relaxed and playful look |
| Requires precision and attention to detail | Provides a more effortless and carefree aesthetic |
Experiment with different dowel sizes and yarn types to find the ideal combination that brings your creative vision to life. Whether you’re crafting doll hair or exploring other possibilities, curling yarn allows you to add a touch of magic to your projects.
Curling Yarn with Acrylic Fibers
Acrylic yarn is a popular choice for many craft projects. Its versatility and wide range of colors make it ideal for various creative endeavors. The good news is that acrylic yarn can be easily curled using the methods mentioned earlier. Whether you prefer using heat or non-heat techniques, you can achieve beautiful curls with acrylic yarn.
If you want to curl acrylic yarn using heat, you can follow the oven or iron method discussed in previous sections. These methods work well with acrylic fibers and allow you to create curls for different crafts and projects. Just make sure to follow the specific instructions for each method, taking into consideration the individual characteristics of the acrylic yarn you’re using.
For non-heat methods, such as twisting or braiding, you can also apply these techniques to acrylic yarn. These alternative methods provide unique curling effects without the need for heat. Whether you’re curling acrylic yarn with heat or without heat, it’s important to experiment and find the technique that works best for you and your specific project.
Curling Acrylic Yarn: Tips for Success
When curling acrylic yarn, there are a few tips to keep in mind:
- Choose the right-sized dowel or knitting needle: The size of the dowel or knitting needle can affect the size and tightness of the curls. Smaller dowels or needles will create tighter curls, while larger ones will produce looser curls. Experiment with different sizes to achieve the desired effect.
- Wrap the yarn tightly: To ensure the curls hold their shape, wrap the acrylic yarn tightly around the dowel or knitting needle. This will help the yarn maintain its curled form once it’s removed.
- Let the yarn fully dry: It’s important to allow the curled acrylic yarn to dry completely before removing it from the dowel or needle. This will help the curls set and maintain their shape.
By following these tips and techniques, you can confidently curl acrylic yarn and incorporate it into your crafting projects. Its vibrant colors and beautifully curled texture will add a unique touch to your creations.
| Pros of Curling Acrylic Yarn | Cons of Curling Acrylic Yarn |
|---|---|
| – Acrylic yarn is readily available and affordable. | – Acrylic yarn may not hold its curl as well as natural fibers. |
| – Acrylic yarn is durable and easy to care for. | – Overheating acrylic yarn can cause it to melt or lose its shape. |
| – Acrylic yarn comes in a wide variety of colors and textures. | – Acrylic yarn may not have the same natural feel as other fibers. |

Curling Yarn: Tips and Considerations
When it comes to curling yarn, there are a few important tips and considerations to keep in mind to ensure successful results and beautiful curls. Whether you’re following a curling yarn tutorial or experimenting with your own methods, these tips can help you achieve the desired curl effect for your projects.
Secure the Yarn
One of the key tips for curling yarn is to ensure that it is tightly secured to the dowel or knitting needle. This will prevent the yarn from unraveling during the curling process and help the curls hold their shape. Make sure to wrap the yarn snugly and secure it with knots or clips if needed.
Allow for Proper Drying
Another important consideration is to allow the curled yarn to fully dry before removing it from the dowel. This will help the curls maintain their desired shape and prevent them from unraveling. Patience is key here, as rushing the drying process may result in less defined curls or even straightening them out.
Experiment with Techniques
Feel free to experiment with different curling techniques to achieve the look you desire. There are various methods to curl yarn, including heat and non-heat techniques. You can try using a hot iron, oven, or even twist and braid the yarn before letting it dry naturally. By exploring different techniques, you can discover unique curling effects that suit your projects.
Remember to consider the type of yarn being used, as different yarns may respond differently to each technique. Acrylic yarn, for example, is particularly versatile and can be successfully curled using both heat and non-heat methods.

Size Matters
The size of the dowel or knitting needle you use can also impact the size and tightness of the curls. Smaller dowels or needles tend to create tighter curls, while larger ones produce looser curls. Don’t be afraid to experiment with different sizes to achieve the desired curl effect for each project.
Personalize Your Curls
Every project is unique, and that includes the curling yarn techniques you use. Don’t be afraid to personalize your curls to match your vision. Whether you’re creating doll hair, adding texture to toys, or embellishing accessories, finding the right curling method and size for your specific project is essential.
By keeping these tips and considerations in mind, you can confidently curl yarn and unleash your creativity in your craft endeavors.
Conclusion
Embarking on a creative journey with yarn? Look no further than curling yarn to add a touch of texture and visual allure to your crafts and projects. Whether you opt for heat or non-heat methods, rest assured that achieving stunning, curled yarn is within your reach. By following our step-by-step tutorials and taking into account the valuable tips and considerations we’ve shared, you’ll be able to curl yarn with confidence and tap into your artistic potential.
So, can yarn be curled? Absolutely! With the best way to curl yarn at your fingertips, you can enhance the overall aesthetic of your creations and bring your craft endeavors to life. By embracing the versatility of curling yarn for various projects, you’ll have endless opportunities to infuse your designs with charm and individuality.
Ready to dive in? Whether you’re a seasoned crafter or just starting out, curling yarn for crafts is a delightful technique to explore. Unleash your creativity, experiment with different methods, and let your imagination soar as you transform ordinary yarn into captivating curly wonders. The sky’s the limit when it comes to adding that extra flare to your next masterpiece!