If you enjoy knitting or crocheting, chances are you’ve used cotton yarn before. Cotton yarn is loved for its softness and breathability, making it a popular option for various projects. Have you ever wondered, though: Does cotton yarn shrink when washed?
Many crafters have different opinions on this matter, and it’s time to uncover the truth. In this article, we will explore the facts about cotton yarn shrinkage and provide care tips to help you maintain the quality of your cotton projects. Whether you’re a seasoned pro or a beginner, understanding how to prevent shrinkage in cotton yarn is essential for preserving the integrity of your creations.
Key Takeaways:
- Cotton yarn is known for its softness and breathability.
- There is a common question among crafters: does cotton yarn shrink when washed?
- In this article, we will explore the facts about cotton yarn shrinkage and provide care tips.
- Understanding how to prevent cotton yarn from shrinking is crucial for preserving the quality of your projects.
- Stay tuned to discover effective techniques for washing, drying, and storing cotton yarn.
Understanding the Unique Properties of Cotton Yarn
When it comes to choosing yarn for your knitting and crocheting projects, cotton yarn is a popular choice. Not only does it offer a soft and luxurious feel, but it also provides unique properties that make it ideal for various creations.
Cotton yarn is made from natural, plant-based fibers, giving it a lightweight and breathable quality. This breathability allows air to circulate through the fabric, making it perfect for warm weather garments and accessories.
Another standout feature of cotton yarn is its absorbency. It can readily absorb moisture, keeping you cool and comfortable when the temperature rises. This absorbency also makes cotton yarn suitable for items that require good moisture management, such as washcloths and bath accessories.
However, it’s important to note that cotton yarn has a tendency to shrink when washed. This is because the fibers can contract when exposed to moisture and heat. To prevent excessive shrinkage, it’s essential to follow proper care instructions for your cotton yarn projects.
“Cotton yarn offers breathability and absorbency, making it perfect for warm weather garments and items that require good moisture management.”
Affected by Color Fading
Another consideration when working with cotton yarn is its susceptibility to color fading. Cotton fibers, especially when exposed to sunlight, can gradually lose their vibrancy over time. This can affect the appearance of your finished projects, making them look dull or washed out.
To minimize color fading, it’s recommended to store your cotton yarn creations away from direct sunlight when not in use. Additionally, you can opt for yarns that are specifically designed to be colorfast, meaning they are less likely to fade even with frequent washing and exposure to light.
Understanding Shrinkage and Fading
To summarize, cotton yarn possesses unique properties that make it a popular choice for various projects. Its breathability and absorbency provide comfort in warm weather, while its shrinkage tendency and color fading require careful attention in terms of care and maintenance.
By understanding and properly managing the properties of cotton yarn, you can ensure the longevity and quality of your projects. In the next section, we will discuss washing techniques that will help you maintain your cotton yarn creations without compromising their integrity.

Havongki – 100 Pack – Handmade Care Instructions Hang Tags Cards Labels 2 x 3” Homemade Items Material Clothes Washing Care Instruction | White Black | for Knitted Crochet Shirt Blanket
[100 PACK! – Superior Quality & Sufficient quantity!] Introducing our robust publishing machine, grander than a limousine! Witness…
As an affiliate, we earn on qualifying purchases.
As an affiliate, we earn on qualifying purchases.
Washing Techniques for Cotton Yarn
When it comes to caring for your cotton yarn projects, knowing the right washing techniques is essential. Whether you are working on a delicate item or a heavily soiled piece, we have you covered with our hand washing and machine washing tips. Additionally, we will share some effective stain removal methods for cotton yarn.
Hand Washing Cotton Yarn
For delicate projects, hand washing is the way to go. This method ensures gentle treatment and reduces the risk of damage. Follow these steps:
- Fill a basin or sink with lukewarm water.
- Add a mild detergent suitable for delicate fabrics.
- Submerge the cotton yarn project in the soapy water.
- Gently agitate the project to remove dirt and stains.
- Rinse the project thoroughly with clean water.
- Press out excess water without wringing or twisting.
- Lay the project flat on a clean, dry towel to air dry.
This method keeps your delicate cotton yarn projects in excellent condition while effectively cleaning them.
Machine Washing Cotton Yarn
For larger or heavily soiled items, machine washing can be a time-saving option. Follow these steps to machine wash your cotton yarn projects:
- Place your cotton yarn project in a mesh laundry bag to protect it.
- Select a gentle or delicate cycle on your washing machine.
- Use cold or lukewarm water, as hot water can cause shrinkage.
- Add a mild detergent suitable for cotton fabrics.
- Start the washing machine and let it complete the full cycle.
- Remove the project from the machine and reshape if necessary.
- Lay the project flat on a clean, dry towel to air dry.
Machine washing saves time and can effectively clean larger or heavily soiled cotton yarn projects.
Stain Removal for Cotton Yarn
Accidents happen, but stains don’t have to ruin your cotton yarn projects. Try these stain removal techniques:
To remove food or drink stains: Blot the stain gently with a clean cloth or paper towel to absorb excess liquid. Mix a solution of mild detergent and water, and dab the stain with the solution using a clean cloth. Rinse with clean water and air dry.
To remove ink or dye stains: Soak the stained area in a mixture of equal parts vinegar and water for 30 minutes. Gently blot the stain with a cloth soaked in rubbing alcohol. Rinse with clean water and air dry.

Remember to treat stains as soon as possible for the best results. Always test any stain removal method on a small, inconspicuous area of your cotton yarn project before applying it to the entire stain.
By following these washing techniques and stain removal tips, you can keep your cotton yarn projects clean and looking their best.

Katech 100 Percent Cotton Yarn for Crocheting & Knitting–12-Color of 137 Yards/1.76 oz Baby Cotton Yarn Sport Weight CYC #2-Soft & Breathable-Ideal for Dishcloths, Baby Clothes, Potholders & Crafts(C)
1.Premium Pure Cotton Material: Crafted from high – quality pure cotton, our baby cotton yarn offers a soft,…
As an affiliate, we earn on qualifying purchases.
As an affiliate, we earn on qualifying purchases.
Choosing the Right Detergent for Cotton Yarn
When it comes to washing your precious cotton yarn projects, selecting the right detergent is key to maintaining their quality and longevity. Using a mild and gentle detergent specifically formulated for cotton yarn will help ensure that your projects stay soft, vibrant, and free from any damage or unwanted shrinkage.
But what should you look for in a detergent for cotton yarn?
First and foremost, avoid detergents that contain harsh chemicals or bleach, as these can strip away the natural softness and color of your cotton yarn. Instead, opt for a gentle detergent that is specifically designed for use on delicate fabrics, such as cotton.
Here are a few recommended detergents that are perfect for washing your cotton yarn:
- GentleCare – This detergent is specially formulated to provide a deep clean while being gentle on delicate fibers like cotton. It helps to preserve the softness and color of your cotton yarn, preventing any unwanted shrinkage.
- PureSoft – This detergent is made with natural ingredients and is free from harsh chemicals, making it suitable for washing cotton yarn. It not only cleans your projects effectively but also leaves them feeling soft and looking vibrant.
- CottonFresh – This mild detergent is specifically designed to care for cotton fabrics, including cotton yarn. It removes dirt and stains without compromising the integrity of the fibers, ensuring that your projects remain in pristine condition.
Remember to always follow the instructions on the detergent packaging for the best results.
Using a suitable detergent will go a long way towards keeping your cotton yarn projects looking their best. So, next time you reach for the washing machine or sink, make sure to choose a gentle detergent that will help preserve the beauty of your beloved cotton creations.

Caron All Day Cotton – 3 Pack of 173 Yards/3.52 oz Jungle Aqua 100% Mercerized Cotton Yarn
Content: 100% mercerized cotton, Care: This yarn for knitting, crocheting, amigurumi and craft projects is easy to care…
As an affiliate, we earn on qualifying purchases.
As an affiliate, we earn on qualifying purchases.
Proper Drying Techniques for Cotton Yarn
After washing your cotton yarn, it’s crucial to dry it properly to prevent shrinkage and maintain its shape. In this section, we will discuss two main drying methods: air-drying and machine drying. We will provide tips on how to air-dry cotton yarn and precautions to take when machine drying.
Air-Drying Cotton Yarn
Air-drying is a gentle and effective method for drying cotton yarn. To air-dry your yarn, follow these steps:
- Gently squeeze out excess water from the yarn without wringing or twisting it, as this can distort the fibers.
- Place a clean towel on a flat surface and lay the yarn on top of it, shaping it into the desired form.
- Avoid direct sunlight and choose a well-ventilated area to dry your yarn.
- Allow the yarn to air-dry completely before using or storing it for future projects.
Remember to frequently check the drying progress and adjust the position of the yarn to ensure even drying. Air-drying is recommended for delicate or hand-knit items to avoid any damage caused by machine drying.
Machine Drying Cotton Yarn
Machine drying is a convenient option for drying cotton yarn, especially for larger or heavily soiled items. However, it’s important to take certain precautions to prevent shrinkage:
- Before placing your cotton yarn in the dryer, make sure to read the care instructions on the yarn label. Some cotton yarns may not be suitable for machine drying.
- To protect the yarn, place it in a mesh laundry bag or pillowcase to reduce friction and prevent entanglement with other items.
- Set the dryer to a low or delicate heat setting to minimize the risk of shrinkage.
- Consider adding a clean towel to the dryer to absorb excess moisture and help speed up the drying process.
- Remove the yarn from the dryer promptly once it’s dry to prevent any additional heat exposure.
Keep in mind that machine drying may cause slight shrinkage or changes in texture. If you’re unsure about machine drying your cotton yarn, it’s best to opt for air-drying to ensure its integrity.
Remember, proper drying techniques are essential for maintaining the quality and shape of your cotton yarn projects. Whether you choose air-drying or machine drying, always handle your yarn with care to keep it in excellent condition.

| Factors | Air-Drying | Machine Drying |
|---|---|---|
| Method | Gentle and slow | Faster and more convenient |
| Shrinkage | Minimal to none | Possible, depending on heat settings |
| Texture | Retains original texture | May change slightly |
| Recommended for | Delicate or hand-knit items | Larger or heavily soiled items |
As seen in the table above, both methods have their advantages and considerations. Choose the drying technique that best suits your specific yarn and project requirements.

Caron All Day Cotton – 3 Pack of 173 Yards/3.52 oz Cream 100% Mercerized Cotton Yarn
Content: 100% mercerized cotton, Care: This yarn for knitting, crocheting, amigurumi and craft projects is easy to care…
As an affiliate, we earn on qualifying purchases.
As an affiliate, we earn on qualifying purchases.
Storage Tips for Cotton Yarn Projects
Proper storage is crucial to ensure the longevity and quality of your cotton yarn projects. By implementing the right storage techniques, you can prevent damage from pests and maintain the freshness of your projects. Additionally, organizing your cotton yarn collection will make it easier to find the perfect yarn for your next creation.
Storing Cotton Yarn
When it comes to storing cotton yarn, there are a few key considerations:
- Keep it in a cool, dry place: High humidity and heat can cause cotton yarn to lose its shape and become susceptible to mold or mildew. Store your yarn in a cool, dry area to maintain its quality.
- Protect it from pests: Cotton yarn is a favorite target for pests such as moths and beetles. To prevent infestations, store your yarn in airtight containers or bags. Consider adding a lavender sachet or cedar blocks to deter pests naturally.
- Avoid direct sunlight: Prolonged exposure to UV rays can fade the colors of your cotton yarn. Keep it away from windows or store it in opaque containers to protect it from sunlight.
Organizing Cotton Yarn Projects
Organizing your cotton yarn projects can help streamline your creative process. Here are some tips:
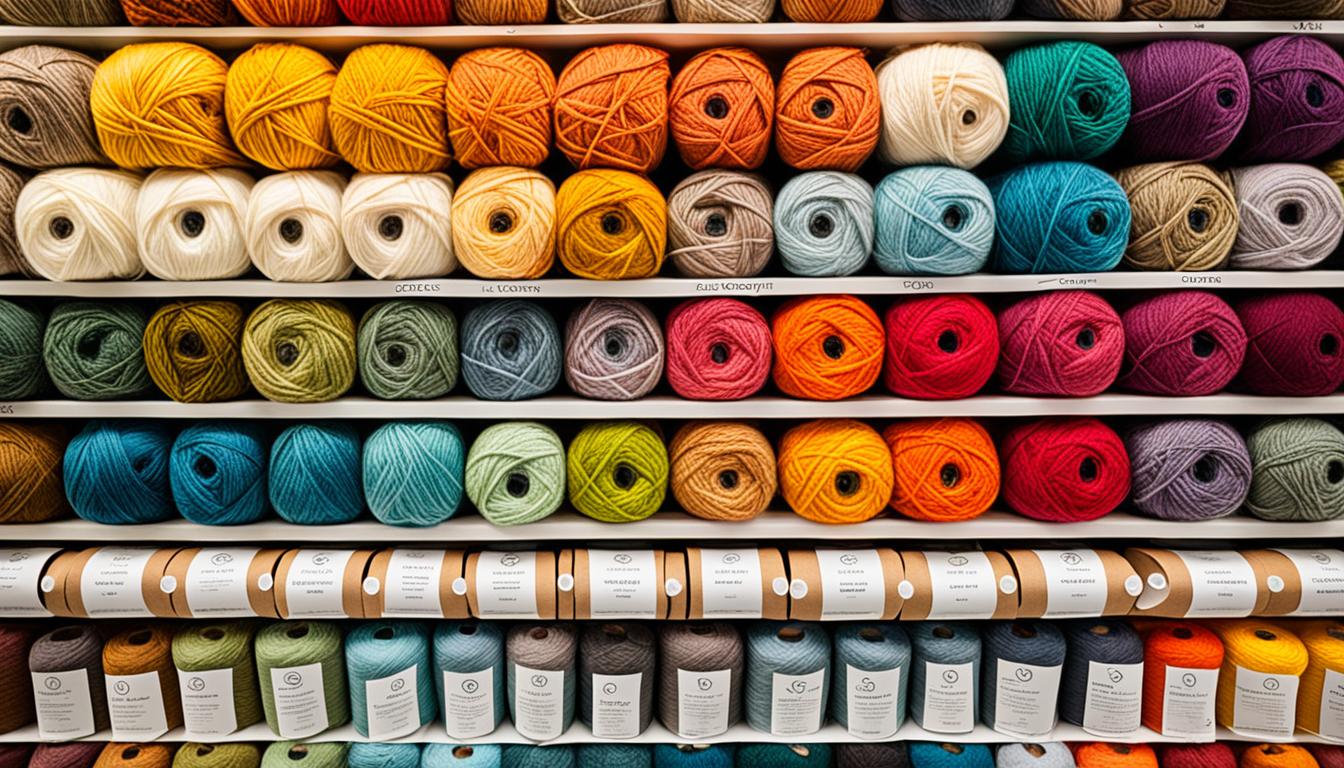
- Label your yarn: Use small tags or labels to mark each ball or skein of cotton yarn with important information such as color, weight, and project name. This will make it easier to find the specific yarn you need for each project.
- Sort by color or weight: Arrange your cotton yarn collection by color or weight to create a visually appealing and organized storage system. Consider using clear bins or cubbies to easily see and access your yarn.
- Utilize storage solutions: Invest in storage solutions such as yarn bins, shelves, or hanging organizers to keep your cotton yarn tidy and within reach. Optimize your space by utilizing vertical storage options.
Preventing Pests in Cotton Yarn
“Proper storage is your first line of defense against pests. By following these simple tips, you can protect your cotton yarn projects from unwanted visitors and preserve their quality.”
Preventing pests in cotton yarn starts with proper storage. However, there are additional precautions you can take:
- Inspect incoming yarn: Before adding new cotton yarn to your stash, thoroughly inspect it for any signs of pests or damage. Look for holes, silk webbing, or casings, which may indicate the presence of insects.
- Freeze yarn: If you suspect your cotton yarn may have been exposed to pests, seal it in a plastic bag and place it in the freezer for 48 hours. This will kill any eggs or larvae that may be present.
- Clean storage areas: Regularly clean and vacuum your storage areas to remove any potential food sources for pests. This will help deter them from seeking out your cotton yarn.
By following these storage tips and implementing proper pest prevention measures, you can ensure that your cotton yarn projects remain in optimal condition and ready for your creative endeavors.

Fixing Loose Ends and Wrinkles in Cotton Yarn
During the washing process, cotton yarn projects can sometimes develop loose ends and wrinkles. It’s important to address these issues to maintain the overall appearance and quality of your creations. In this section, we will provide you with guidelines on how to fix loose ends and prevent wrinkles in cotton yarn, as well as offer tips for removing wrinkles if they do appear.
Fixing Loose Ends in Cotton Yarn
Loose ends are common in knitted or crocheted cotton yarn projects, and they can detract from the final result. To fix loose ends, follow these steps:
- Thread a tapestry needle with the loose end of yarn.
- Weave the needle and yarn through the stitches on the wrong side of your project.
- Continue weaving the needle through several stitches to securely secure the loose end.
- Trim any excess yarn, leaving a small tail for added security.
By properly weaving in the loose end, you can ensure that it stays in place and doesn’t unravel, giving your cotton yarn project a clean and polished finish.
Preventing and Removing Wrinkles in Cotton Yarn
Wrinkles can make your cotton yarn projects look less neat and professional. Here are some tips to prevent wrinkles in cotton yarn:
- Always follow the recommended washing instructions for your cotton yarn project, including using the appropriate water temperature and washing method.
- Consider using a gentle detergent specifically designed for delicate fabrics, as harsh chemicals can cause shrinkage and wrinkles.
- Avoid overloading the washing machine, as overcrowding can lead to tangled yarn and increased friction, resulting in wrinkles.
- Remove your cotton yarn project from the washing machine as soon as the cycle is complete to prevent wrinkles caused by prolonged soaking.
- If you notice wrinkles on your cotton yarn project after washing, gently stretch and smooth out the fabric while it is still damp.
- Consider blocking your finished cotton yarn project to eliminate any remaining wrinkles and ensure the correct shape and size.
Remember, prevention is key when it comes to wrinkles in cotton yarn. By taking the necessary precautions during the washing and drying process, you can maintain the beautiful appearance of your cotton yarn projects.
Removing Wrinkles from Cotton Yarn
If wrinkles do appear on your cotton yarn project, don’t fret. Here are some tips to help you effectively remove wrinkles:
- Gently spritz your cotton yarn project with water using a spray bottle.
- Smooth out the fabric carefully with your hands to distribute the moisture evenly.
- Lay the project flat on a clean towel.
- Allow it to air dry naturally. The weight of the project combined with the moisture will help to relax the fabric and reduce the wrinkles.
For more stubborn wrinkles, you can also use a cool iron with gentle steam. Be sure to test a small, inconspicuous area first to ensure that the heat and steam do not damage the cotton yarn.
Remember to always handle your cotton yarn projects with care to prevent unnecessary wrinkles and maintain their overall appearance. With these guidelines, you’ll be able to fix loose ends and keep wrinkles at bay, ensuring that your cotton yarn creations look their best.

Dealing with Mildew Smell in Cotton Kitchen Items
Cotton kitchen items, such as crochet scrubbies, can develop a mildew smell due to their slower drying time. This can be a common issue, especially in humid environments or if the items are not properly dried before storage. Fortunately, there are steps you can take to remove the mildew smell from cotton kitchen items and keep them fresh and odor-free.
1. Washing Cotton Kitchen Items
The first step in removing the mildew smell from cotton kitchen items is to wash them thoroughly. Start by filling a basin or sink with warm water and add a small amount of gentle detergent specifically designed for cotton fabrics. Gently agitate the items in the soapy water to loosen any dirt or debris.
Next, rinse the items with clean water to remove the detergent. Make sure to squeeze out any excess water without wringing or twisting the fabric. Excessive wringing can damage the cotton fibers and affect the overall quality of the items.
2. Adding Vinegar or Baking Soda
If the mildew smell persists after washing, you can try adding vinegar or baking soda to the rinse cycle. Vinegar is known for its odor-eliminating properties, while baking soda helps neutralize any lingering smells.
For vinegar, add 1/2 to 1 cup of white vinegar to the rinse water and agitate the items for a few minutes. Rinse the items again with clean water to remove the vinegar smell.
Alternatively, you can add 1/2 cup of baking soda to the rinse water and let the items soak for about 15 minutes. Afterward, rinse them thoroughly to remove any residue.
3. Sun Drying
After washing, it’s essential to dry the cotton kitchen items thoroughly to prevent the growth of mildew. The best way to achieve this is by sun drying them. Find a sunny spot and lay the items flat on a clean towel or hang them on a clothesline.
Expose the items to direct sunlight for several hours, making sure to turn them occasionally to ensure even drying. Sunlight helps kill any remaining bacteria or fungi that may cause the mildew smell.

4. Storing the Items Properly
Proper storage is key to preventing the return of the mildew smell. Before storing the cotton kitchen items, make sure they are completely dry. Avoid folding them while damp, as this can create a breeding ground for mildew.
Place the items in a well-ventilated area and consider using storage containers or bags that allow airflow. Avoid storing them in airtight containers, as this can trap moisture and lead to mold growth.
Additionally, consider adding desiccant packets or silica gel packs to absorb any excess moisture in the storage area.
Additional Tips for Caring for Cotton Projects
When it comes to caring for your cotton projects, there are a few extra tips and techniques that can help you keep them looking their best. Whether you’re working on a cozy sweater, a delicate doily, or anything in between, these care tips will ensure that your cotton yarn creations last for a long time.
Blocking Techniques
Blocking is a vital step in finishing your cotton projects. It helps to shape the garment or accessory and evens out any uneven stitches. To block your cotton project, follow these simple steps:
- Start by gently soaking your finished item in lukewarm water with a mild detergent for around 15 minutes.
- Gently squeeze out the excess water without wringing or twisting.
- Lay your project on a clean, flat surface, shaping it to the desired measurements.
- Use rustproof pins to secure the edges and any specific shaping.
- Leave it to dry completely, undisturbed.
Blocking will give your cotton projects a professional finish and enhance their overall appearance.
Preventing Color Fading
To keep the vibrant colors of your cotton yarn from fading over time:
- Wash your cotton projects inside out to minimize direct exposure to sunlight.
- Use a gentle detergent specifically formulated for colored fabrics.
- Avoid using bleach or harsh chemicals when washing your cotton projects.
- Avoid hanging your colored cotton items in direct sunlight to dry.
Following these tips will help preserve the original colors and keep your cotton projects looking fresh and vibrant.
Maintaining Shape
Properly maintaining the shape of your cotton projects is key to ensuring they look their best. Here are a few pointers:
- When storing your finished cotton items, fold them neatly to avoid any stretching or deformation.
- Avoid overstretching or pulling your cotton projects during use.
- Consider using garment bags or pillowcases to protect your cotton creations from snagging or rubbing against other items.

By following these additional care tips, you’ll be able to maintain the quality and longevity of your cotton projects. Whether you’re gifting them to loved ones or keeping them for yourself, your cotton creations will continue to bring joy for years to come.
Conclusion
Proper care and maintenance are essential to ensure the longevity and quality of your cotton yarn projects. By following the tips and techniques mentioned in this article, you can prevent shrinkage, maintain color vibrancy, and keep your cotton projects in excellent condition for years to come. Remember to always check the yarn label for specific care instructions and share your own tips with fellow crafters. Happy crafting!