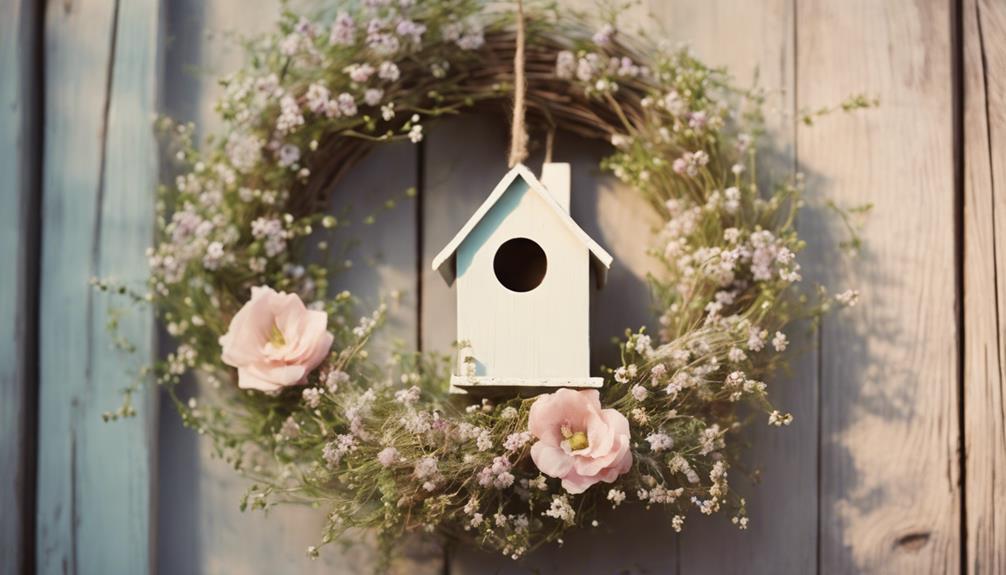

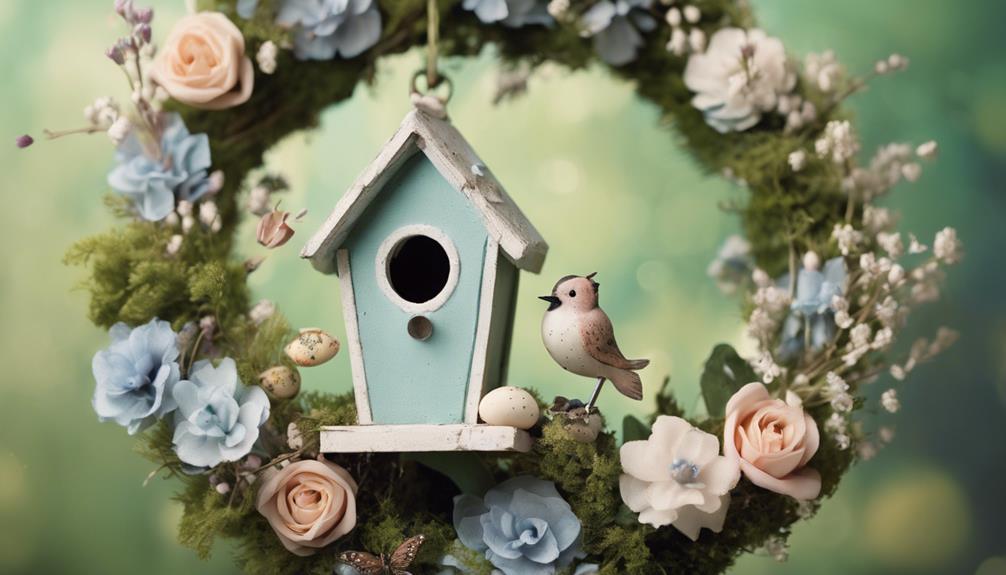
We're crafting a charming springtime wreath with a birdhouse as its centerpiece, capturing the essence of the season. To start, gather materials like burlap mesh, a work wreath, and silk sunflower stems. Prepare the birdhouse with chalk paint and consider distressing techniques for a rustic look. Create the wreath base using burlap mesh and ribbon, then add floral accents and the birdhouse. Finally, attach birds with wire and add a decorative bow. When complete, hang your wreath on a sturdy hook or nail and showcase it on a front door or interior wall. With these steps, we'll transform a simple idea into a stunning masterpiece, and as we explore further, we'll uncover even more creative possibilities.
Key Takeaways
• Use a burlap mesh and a work wreath as the foundation for a rustic and colorful accent.
• Attach a birdhouse to the wreath, securely using strong adhesive, nails, screws, glue, or tape.
• Strategically place bright, cheerful silk flowers like sunflowers around the wreath using a hot glue gun.
• Add floral bird accents and attach them to the wreath using wire for a charming scene.
• Finish the wreath with a beautiful bow made from a 1 1/2-inch ribbon for a decorative touch.

ANCTOR 3 Door Armoire Wardrobe Closet with Mirror, Large Wardrobe Closet with Doors, White Armoire for Bedroom with Hanging Rods & Shelves for Long Clothing, Short Clothing and Stacking, Modern
White Wardrobe Closet Size: 67.1"H x 47.2"W x 22.5"D
As an affiliate, we earn on qualifying purchases.
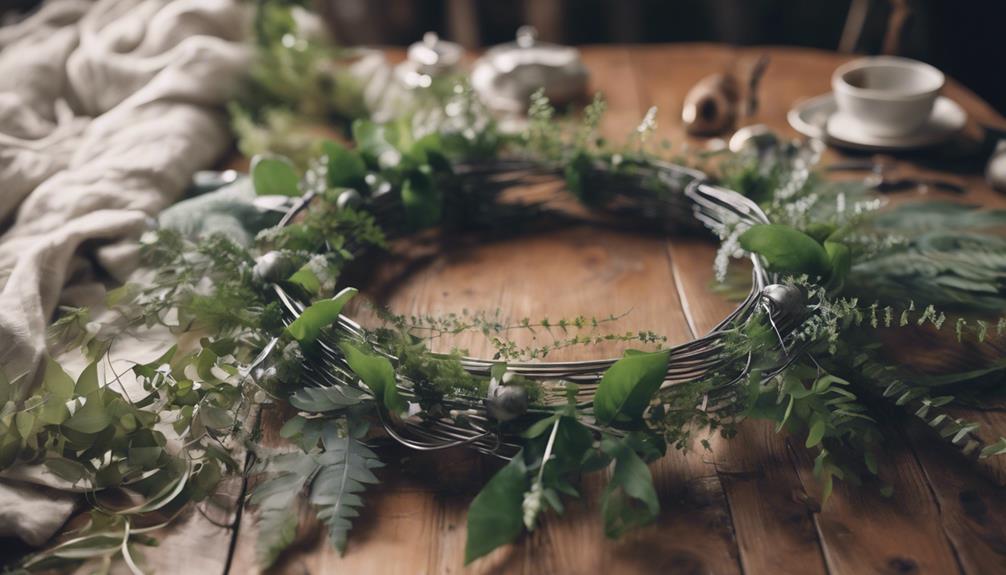
Gathering Your Materials
As we start our springtime wreath project, we'll need to gather a few essential materials to bring our vision to life. We're creating a Birdhouse Wreath, after all, and we want to make sure we've everything we need before we get started.
First, we'll need a roll of burlap mesh to cover our wreath frame and create a textured base for our decorations. A work wreath will provide the foundation for our project, and a roll of 1 1/2 ribbon will add a pop of color and a decorative touch.
We'll also need some floral accents, like silk sunflower stems, to add a touch of springtime charm. And, of course, no Birdhouse Wreath would be complete without a birdhouse and some floral bird accents to tie everything together.
With these materials in hand, we'll be ready to start constructing our wreath and bringing our springtime vision to life.

TIMELESS PIECES Metal Wardrobe Cabinets,Armoire Wardrobe Closet with Hanging Rod,Clothes Storage Cabinet with Adjustable Shelves and Doors,Clothing Cabinet for Bedroom,Office, Laundry Room
Oversized Storage Space:The inside of the wardrobe closet is really roomy. There's a dedicated area for the hanging...
As an affiliate, we earn on qualifying purchases.
Preparing the Birdhouse
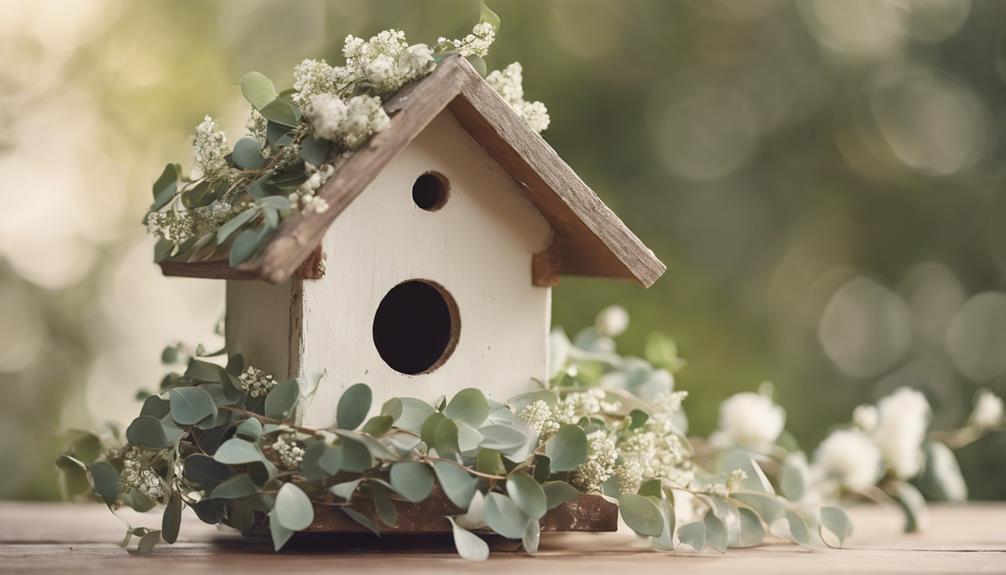
As we prepare our birdhouse, we'll focus on two key aspects: painting the birdhouse and attaching the roof.
We'll start by giving our birdhouse a fresh new look, using acrylic paint to add a base color and fine details like flowers or vines, and then sealing it with a clear varnish for protection.
Once our birdhouse is beautifully painted, we'll move on to attaching the roof, ensuring a sturdy and secure fit.
Painting the Birdhouse
With our design scheme in mind, we select a palette of colors that will bring our springtime wreath to life, starting with the birdhouse that will serve as its charming centerpiece.
We opt for a rustic, shabby chic look, using chalk paint in various colors to add depth and character to our bird houses. To guarantee a cohesive, polished appearance, we thoroughly cover the birdhouse with paint, making sure to achieve complete coverage. We let the paint dry completely, allowing the birdhouse to fully cure before handling or attaching it to the wreath.
To add an extra layer of visual appeal, we consider incorporating distressing techniques or decorative accents, such as ribbons or flowers, to give our birdhouse a unique, whimsical touch. By carefully selecting our colors and paint style, we can create a birdhouse that not only complements our wreath but becomes a stunning focal point in its own right.
Attaching the Roof
We move on to preparing the birdhouse by focusing on attaching the roof, a critical step that guarantees our charming centerpiece remains intact and secure. This step requires attention to detail to make sure the roof is securely attached to the birdhouse structure. We'll need to decide on the appropriate adhesive or fasteners to use, taking into account the weight and size of the roof in relation to the birdhouse.
| Roof Attachment | Description | Importance |
|---|---|---|
| Adhesive | Strong bonding agent | High |
| Nails | Secure fastening | High |
| Screws | Reliable anchoring | Medium |
| Glue | Temporary holding | Low |
| Tape | Weak holding | Very Low |
Once the roof is attached, we'll need to inspect for any gaps or loose areas that could compromise the structure. A gentle shake or move of the birdhouse will help us identify any weaknesses. By following these steps, we'll have a sturdy birdhouse that will proudly sit atop our springtime wreath, adding a touch of whimsy to our seasonal decor.

GarveeHome Armoire Wardrobe Closet with 2 Drawers,72 in Wooden Wardrobe Cabinet with Hanging Rod, Tall Clothing Armoire Cabinet with Doors and 18 Adjustable Shelves for Bedroom, Clothes,Walunt Brown
Armoire Wardrobe with DIY Adjustable Shelf: This wooden armoire cabinet offers 2 sturdy doors and 1 adjustable shelf...
As an affiliate, we earn on qualifying purchases.
Adding Floral Accents
We'll start by selecting a mix of bright, cheerful flowers that complement the birdhouse and wreath's overall aesthetic, ensuring our springtime wreath is bursting with color and texture.
As DIY enthusiasts, we understand that adding floral accents is an excellent way to elevate our wreath's design. For a cohesive look, we'll choose flowers that match the color scheme and style of our birdhouse wreath. Silk flowers, like sunflowers, are a great option as they add a pop of color and can withstand outdoor conditions.
To add the floral accents, we'll strategically place them around the wreath, creating a balanced and visually appealing design. A hot glue gun will secure the floral stems in place, ensuring they stay put on the wreath. This is an important step, as we want our wreath to look polished and professional.

WLIVE Fabric Dresser for Bedroom, 5-Drawer Tall Dressers, Storage Organizer with Fabric Bins, Wood Top, Sturdy Steel Frame, Chest of Drawers for Closet, Hallway, Rustic Brown Wood Grain Print
【Excellent Storage Capacity】Bedroom dresser with 5 drawers provides plenty of storage space, which can classify your messy items...
As an affiliate, we earn on qualifying purchases.
Creating the Wreath Base
As we begin creating our springtime wreath with a birdhouse, we'll start by gathering the necessary materials and forming the wire wreath base. This foundation is essential, as it will provide the structure for our design.
We'll need a wire wreath frame, which we'll use as the base for our project, and some wire cutters to shape it to our desired size.
Gather Materials Needed
We're starting with a sturdy work wreath, which will provide a solid foundation for our springtime masterpiece, and gathering the essential materials: burlap mesh and ribbon. These materials will help us create a beautiful and festive wreath that's perfect for our front door.
Here's a breakdown of the materials we'll need:
| Material | Quantity | Description |
|---|---|---|
| Work Wreath | 1 | Sturdy frame for our wreath |
| Burlap Mesh | 1 roll | Textured material for a rustic look |
| Ribbon | 1 spool | Colorful and festive accent |
With these materials, we'll be able to create a unique and eye-catching wreath that's sure to brighten up our front door. The burlap mesh will add a textured, rustic touch, while the ribbon will add a pop of color and festivity. By combining these materials, we'll create a beautiful and welcoming springtime wreath that's perfect for the season.
Form Wire Wreath Base
Now that we've our materials, let's shape our wire wreath base into a circular form, creating the foundation of our springtime masterpiece.
This sturdy foundation is essential for our wreath, as it provides structure and support for the decorative elements we'll be adding later. The wire wreath base is a versatile and durable option, available in various sizes to accommodate different wreath designs. We can reuse it for multiple projects, making it a cost-effective choice.
As we form the wire base, we're creating a solid foundation for our spring-inspired creation. The circular shape will provide a beautiful backdrop for our spring-themed embellishments, such as flowers, ribbons, and mesh. By using a wire wreath base, we're ensuring our wreath will be sturdy and long-lasting, perfect for welcoming the new season.
As we work on our springtime wreath, we can envision the final product: a beautiful, vibrant masterpiece that celebrates the beauty of spring.
Assembling the Wreath
Let's begin building our springtime wreath by gathering the essential materials, including burlap mesh and a work wreath, which will form the foundation of our design. These materials will provide a sturdy base for our spring wreath, allowing us to add embellishments and decorations with ease.
| Material | Description |
|---|---|
| Burlap Mesh | Provides a rustic, natural look to the wreath |
| Work Wreath | Forms the foundation of the spring wreath |
| Silk Sunflower Stems | Adds a pop of color and texture |
| Floral Bird Accents | Enhances the springtime theme |
As we assemble our spring wreath, we'll start by attaching the burlap mesh to the work wreath, creating a sturdy base for our design. Next, we'll add the silk sunflower stems and floral bird accents, which will enhance the overall aesthetic of our wreath. By doing so, we'll create a beautiful springtime wreath that's perfect for welcoming the new season.
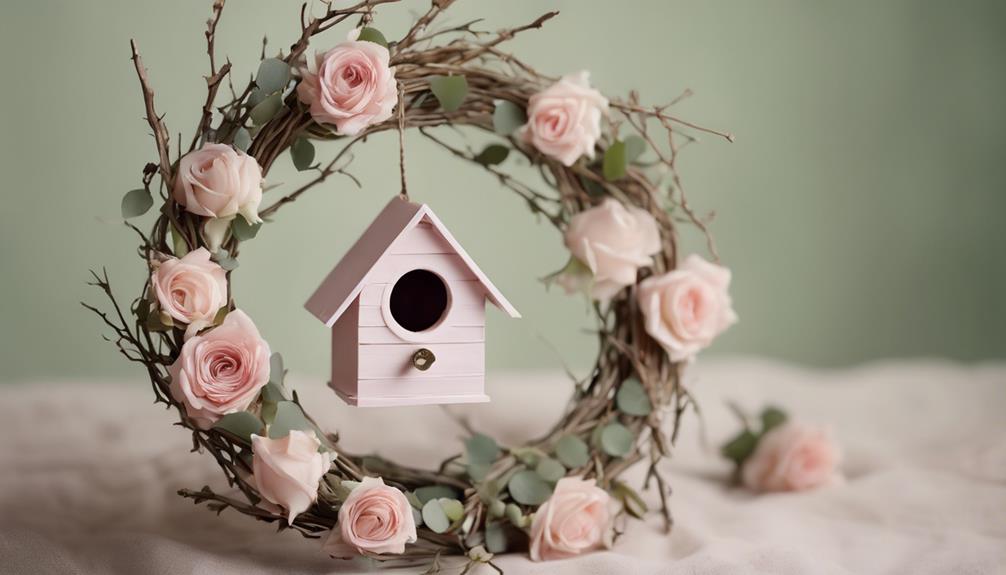
Adding Final Touches
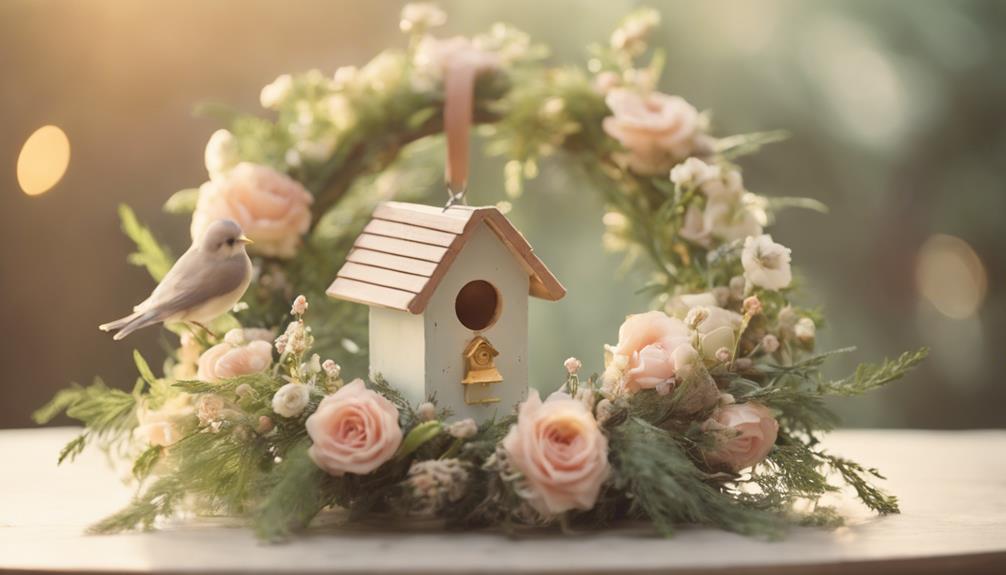
As we add the final flourishes to our springtime wreath, the birdhouse takes center stage, its miniature details and charming presence elevating our design to a whole new level.
Now, it's time to add some finishing touches to help you make this wreath truly unforgettable. To start, we'll attach some floral accents to the wreath, adding a natural and colorful touch that complements the birdhouse perfectly.
Next, we'll position the birdhouse creatively on the wreath to enhance the overall design, making sure it's securely attached with wire.
To add some whimsy, we can use wire to attach birds to the wreath, placing them in desired locations to create a charming scene.
Finally, we'll craft a beautiful bow from ribbon and attach it to the wreath for a decorative finish.
Consider adding some additional embellishments like butterflies or bees to give your wreath an extra touch of whimsy.
With these final touches, our springtime wreath is sure to be a showstopper!
Displaying Your Masterpiece
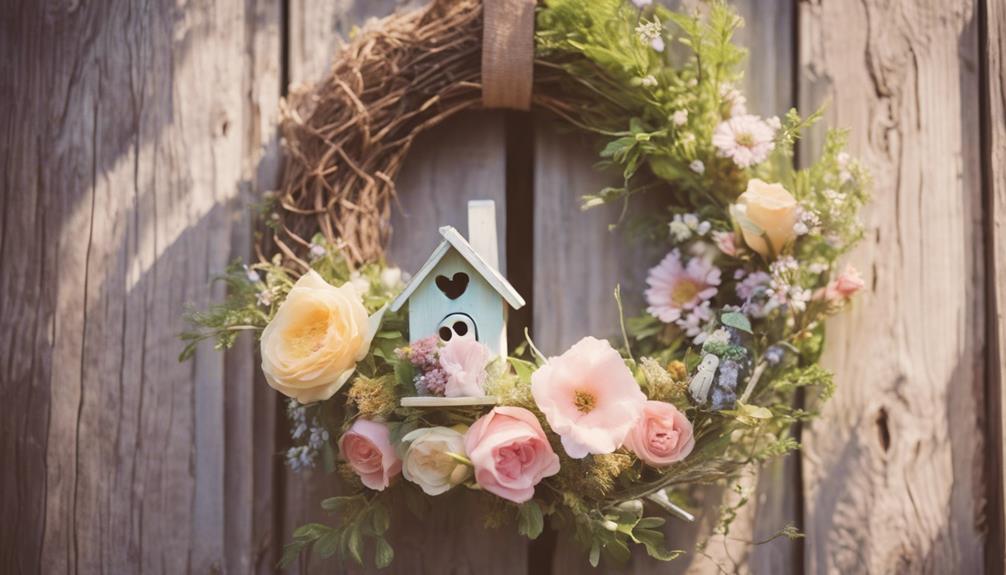
We hang our springtime wreath in a spot where it can be admired from all angles, carefully selecting a location that showcases its charm. After all the effort we put into creating our Round DIY birdhouse wreath, we want to make sure it gets the attention it deserves.
To display our masterpiece, we consider the following:
- Hang the wreath on a sturdy hook or nail to guarantee it's securely displayed.
- Showcase it on a front door, entryway, or interior wall to add a touch of springtime charm.
- Use a wreath hanger or ribbon to hang it at eye level for maximum visual impact.
- Pair it with coordinating décor such as potted plants, bird-themed accents, or seasonal banners to create a cohesive look.
Tips and Variations
Creativity takes flight as we explore innovative ways to personalize our springtime wreath. From vibrant silk flowers to bespoke birdhouse designs, we can add a pop of color with silk sunflowers. Alternatively, we can experiment with different types of birds or floral accents to create a one-of-a-kind look.
For a unique touch, we can try out different ribbon styles and colors to match our personal taste and decor. Additionally, we can customize the size of our birdhouse to fit the overall design of our wreath. To take it to the next level, we can paint or decorate the birdhouses to fit our desired theme or color scheme.
As we dive into this DIY Spring project, we can let our imagination run wild and create a masterpiece that reflects our personality. By incorporating these tips and variations, we can transform our simple springtime wreath into a stunning piece of art that's truly one-of-a-kind.
Frequently Asked Questions
How Do You Make a Live Spring Wreath?
We start by selecting a wreath base, then gather fresh greenery, flowers, and foliage to arrange on it, securing them with floral wire or hot glue, and finally add decorative elements to give it a personal touch.
How to Decorate a Spring Wreath?
We start by adding a base material like burlap mesh to our wreath frame, then we weave ribbon over it, creating a colorful contrast, before adding decorations like silk flowers and a birdhouse to finish our spring wreath.
How Do You Make a Summer Wreath for a Front Door?
As we welcome summer's warmth, we craft a vibrant wreath, symbolizing new beginnings. We'll choose a bright palette, incorporating seashells, starfish, and citrus-hued flowers to create an invigorating summer wreath that beckons sunshine to our front door.
Conclusion
As we step back to admire our handiwork, the anticipation builds – will our springtime wreath with a birdhouse charm the visitors or become a conversation starter?
We've carefully curated each element, from preparing the birdhouse to adding floral accents, crafting a wreath base, and assembling the final piece.
But the real magic happens when we display our masterpiece, and the suspense is killing us – will it bring a touch of whimsy to our doorstep or become a stunning focal point?