Connect with us

Home Decor

Master the Art of Antiquing With Chalk Paint in 10 Steps

Achieve a timeless, vintage aesthetic by following these expert tips to transform ordinary furniture into stunning, one-of-a-kind masterpieces.

Published

on

antiquing with chalk paint

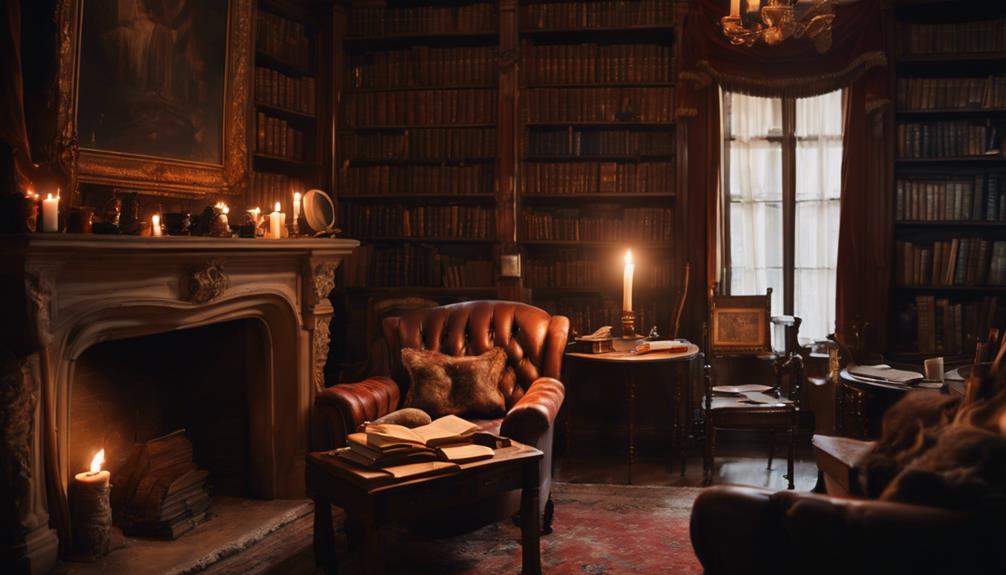
To master the art of antiquing with chalk paint, start by thoroughly cleaning and preparing your furniture piece, ensuring a strong bond between the paint and surface. Next, apply a high-quality primer and base coat, followed by distressing edges and details to achieve a vintage look. Use dark wax strategically to enhance the distressed appearance, and buff the piece for a smooth finish. Enhance with additional coats and decorative elements, and seal your masterpiece with a clear wax or polyurethane. As you work through these steps, you'll uncover the secrets to transforming ordinary furniture into stunning, one-of-a-kind pieces that exude character and charm.

Key Takeaways

• Thoroughly clean and prepare the surface for painting by repairing, sanding, and priming to ensure a strong bond between paint and surface.

• Apply high-quality chalk paint in thin coats, allowing each coat to dry completely, to achieve a smooth and even base coat.

• Distress edges and details using fine-grit sandpaper to create a visually appealing antique finish and add depth to the painted furniture.

• Use dark wax strategically to enhance the distressed appearance, building up layers for a deeper, richer look and adding texture for visual interest.

Advertisement

• Seal the finished piece with clear wax or polyurethane, applying thin coats and choosing a high-quality sealant to protect and showcase the artwork.

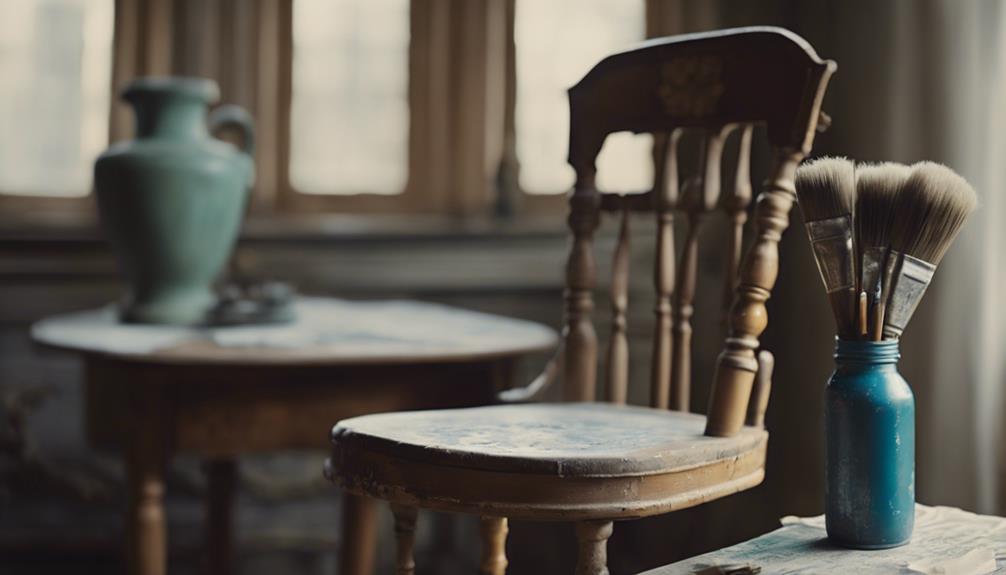
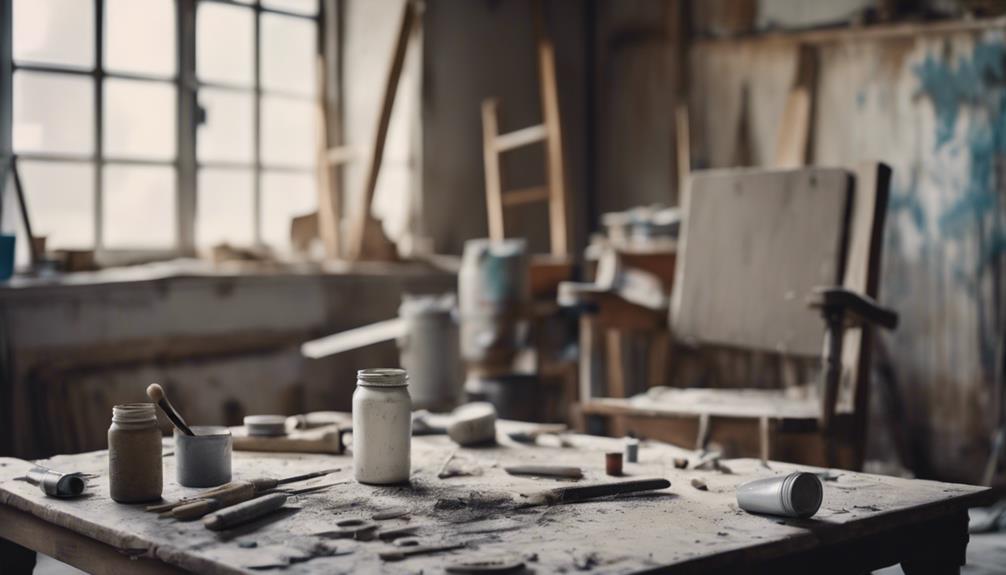
Prepare Your Furniture Piece

Before you can achieve a beautifully antiqued finish with chalk paint, thoroughly clean your furniture piece to remove dirt, grime, and any previous finishes that may interfere with the painting process. This essential step guarantees a strong bond between the paint and the surface, resulting in a durable and long-lasting finish.

Take the time to inspect your furniture piece carefully, making any necessary repairs to loose joints or cracks and dents. Once you've cleaned the surface, lightly sand it to create a smooth and even base for the chalk paint to adhere to. This gentle sanding will help the paint penetrate the surface more evenly, reducing the risk of unevenness or peeling.

Clean and Prime the Surface

prepare the surface before painting

Clean the furniture surface thoroughly with soapy water to remove dirt and grime, ensuring a strong bond between the chalk paint and the surface. This step is vital, as any dirt or grime left behind can compromise the adhesion of the paint. Use a soft-bristled brush to gently scrub away any stubborn dirt or stains.

Once the surface is clean, inspect it for any areas that may need priming. If your furniture piece has been previously painted or stained, it's a good idea to prime the surface to guarantee excellent adhesion. Use a high-quality primer specifically designed for chalk paint to promote durability and prevent bleed-through. Apply the primer according to the manufacturer's instructions, making sure the surface is completely dry before moving on to the next step.

Apply Base Coat of Chalk Paint

chalk paint base coat

With your surface clean and primed, you're ready to apply a base coat of chalk paint to your furniture, setting the stage for a beautifully distressed finish. This important step lays the groundwork for a stunning, vintage-inspired look.

When applying the base coat, remember to:

Advertisement
  1. Choose the right paint: Select a high-quality chalk paint in your desired color for a smooth, even finish.
  2. Apply thin coats: Guarantee even coverage by using thin coats of chalk paint, allowing each coat to dry completely before applying additional coats.
  3. Use the right tools: Opt for chalk paint brushes, designed specifically for easy and efficient application of the base coat.
  4. Be patient: Allow each coat to dry completely before moving on to the next step, ensuring a flawless finish.

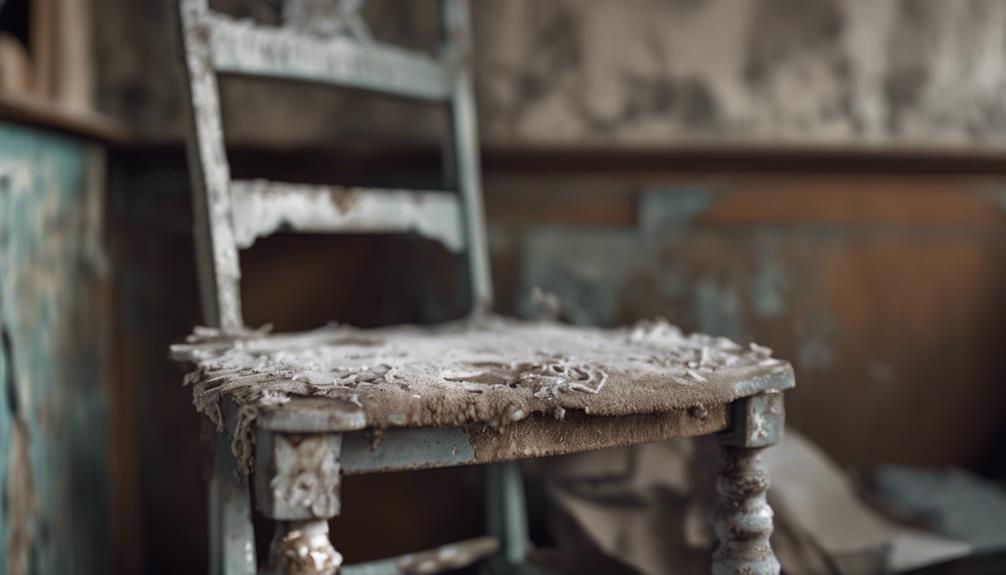
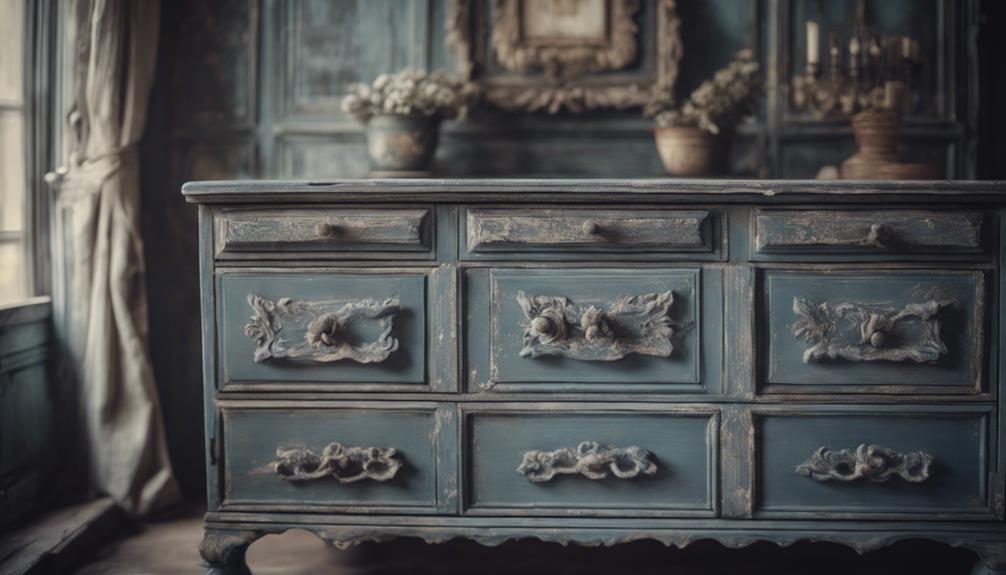
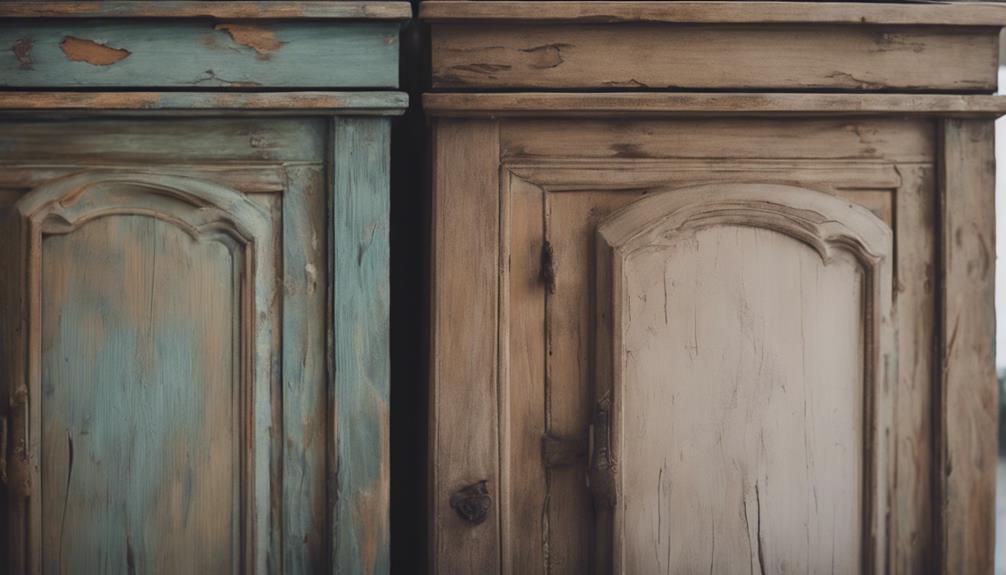
Distress the Edges and Details

distress for added character

Using fine-grit sandpaper, you'll carefully distress the edges and details of your furniture piece, focusing on areas that would naturally wear over time to achieve a realistic antique look. As you work, remember to highlight intricate carvings, corners, and edges for a more authentic distressed effect. This step is vital in adding depth and character to your painted furniture, giving it a rich, storied past.

Take your time distressing, as it's all about balance and restraint. You want to achieve a visually appealing antique finish, not a piece that looks like it's been ravaged by time. With Chalk Paint, you've got a solid foundation to work from, and now it's time to add the finishing touches.

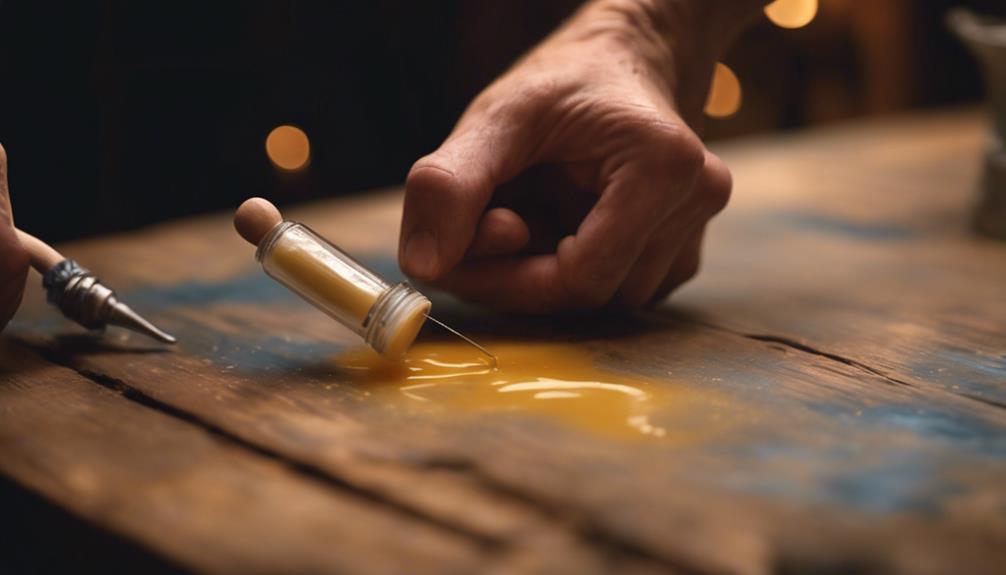
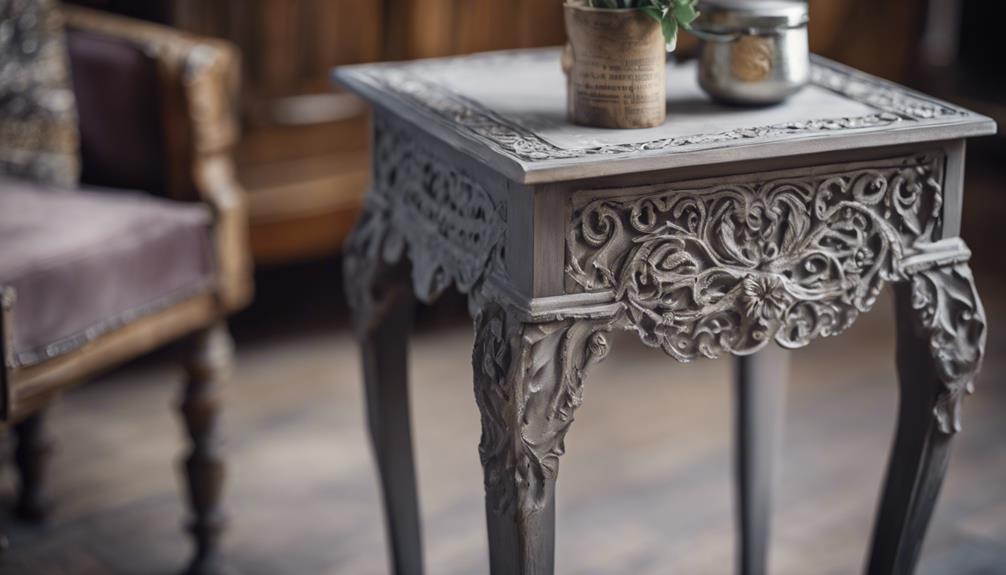
Add Dark Wax for Antique Effect

antique look with wax

As you move on to the next step in mastering antiquing with chalk paint, you'll learn how to effectively use dark wax to create a truly vintage look.

To achieve this, you'll need to master various dark wax techniques, such as strategically applying it to highlight specific details and contours, and waxing for distressing to accentuate the aged appearance.

Dark Wax Techniques

You can achieve a rich, antique look on your chalk-painted furniture by applying dark wax, which adds depth and age to the piece. This technique is a game-changer for creating a truly unique, one-of-a-kind piece.

To get started, apply dark wax after the paint has dried and sealed with clear wax. You can use it sparingly for a subtle effect or build it up in layers for a more dramatic antique look.

Here are some key tips to keep in mind when working with dark wax:

Advertisement
  1. Apply it strategically: Focus on crevices, corners, and edges to enhance the distressed appearance.
  2. Control the intensity: Buff the dark wax to tone down the antique effect if needed.
  3. Build it up: Apply multiple layers of dark wax for a deeper, richer look.
  4. Experiment with texture: Use dark wax to add texture and visual interest to your piece.

Waxing for Distressing

To achieve a truly aged appearance, apply dark wax strategically to the chalk-painted surface, focusing on areas that would naturally show wear and tear over time. As you wax for distressing, remember that dark wax is key to creating an antique effect.

By applying it over chalk paint, you'll enhance details, crevices, and texture, adding depth and dimension to the piece. To control the intensity of the antiquing effect, apply dark wax after clear wax.

Use a wax brush or lint-free cloth to apply the dark wax in a controlled manner, focusing on edges, corners, and areas where natural wear would occur. As you work, keep in mind that dark wax can be buffed or wiped off to achieve the desired level of antiquing, giving your furniture a rich, timeworn look.

Apply Clear Wax for Protection

protect furniture with clear wax

Now that you've achieved the perfect distressed look with dark wax, it's time to protect your masterpiece with a clear wax topcoat.

As you apply this important layer, you'll want to keep in mind some essential tips, including how to apply the wax for best coverage, how long it takes to dry, and what to do if you need to remove excess wax.

Wax Application Tips

After completing your chalk paint project, applying a clear wax coating is the next essential step towards safeguarding your beautifully crafted piece from damage and wear. This protective layer guarantees that your chalk paint finish remains vibrant and intact for years to come.

When applying clear wax, remember these essential tips:

Advertisement
  1. Use a wax brush: A wax brush is specifically designed for applying wax, allowing for smooth, even coats.
  2. Apply thin coats: Thin coats prevent pooling and ensure a smooth finish.
  3. Work in small sections: Divide your project into smaller areas to maintain even coverage and prevent wax buildup.
  4. Don't overdo it: Too much wax can lead to a sticky, uneven finish.

Wax Drying Time

You'll need to allow the clear wax to dry for at least 24 hours before using your beautifully transformed furniture. This drying time is important, as it allows the wax to fully absorb and harden, providing excellent protection for your chalk-painted furniture.

To guarantee a smooth, even application, make sure to apply the clear wax in thin, uniform coats, allowing each coat to dry before adding the next. This will prevent uneven drying and ensure a consistent finish. Remember, the clear wax is essential for enhancing the durability and longevity of your chalk paint finish.

Wax Removal Methods

With your beautifully waxed furniture finally ready, it's crucial to understand how to properly maintain its protected finish by mastering wax removal methods. To guarantee your furniture remains in pristine condition, it's important to grasp how to remove excess wax and maintain the protective layer.

Here are some crucial wax removal methods to keep in mind:

  1. Use a lint-free cloth: Gently buff the waxed surface with a clean, lint-free cloth to remove excess wax and achieve a smooth finish.
  2. Avoid harsh chemicals: Never use harsh chemicals or abrasive materials to remove wax, as they can damage the finish.
  3. Reapply clear wax regularly: Reapply clear wax every 6-12 months to maintain the protective layer on your distressed furniture.
  4. Inspect and maintain: Regularly inspect your furniture for signs of wear and tear, and reapply wax as needed to maintain the protective layer.

Buff the Piece for Smooth Finish

polish for a sheen

To achieve a smooth, polished finish, buff the piece in circular motions using a lint-free cloth, making sure to cover the entire surface. This essential step removes excess wax or paint residue, leaving your furniture with a clean, professional appearance.

As you buff, focus on the distressed areas, where the wax may have accumulated, and gently work the cloth in circular motions to enhance these sections. By doing so, you'll create a sophisticated, refined look that exudes a sense of antiquity.

Take your time when buffing, as this process requires patience and attention to detail. As you work, you'll notice the finish becoming increasingly smooth and polished, with a subtle sheen that adds depth and character to the piece.

Advertisement

Enhance With Additional Coats

add more paint layers

By layering additional coats of chalk paint, you can build depth, richness, and an authentic antique patina on your furniture. This process allows you to enhance the distressed look and deepen the color of your piece, creating a truly unique and customized antique finish.

Here are some benefits you can expect from layering coats of chalk paint:

  1. Deeper color: Each additional coat will deepen the color and create a richer, more authentic look.
  2. Distressed look: Layering coats of paint will help create a more pronounced distressed look, adding to the antique charm of your piece.
  3. Cover imperfections: Additional coats of paint can help cover any imperfections or uneven spots on the furniture surface.
  4. Customized finish: Experimenting with different colors or shades of chalk paint will give you a one-of-a-kind antique finish that reflects your personal style.

Remember to apply and dry each coat thoroughly before moving on to the next step.

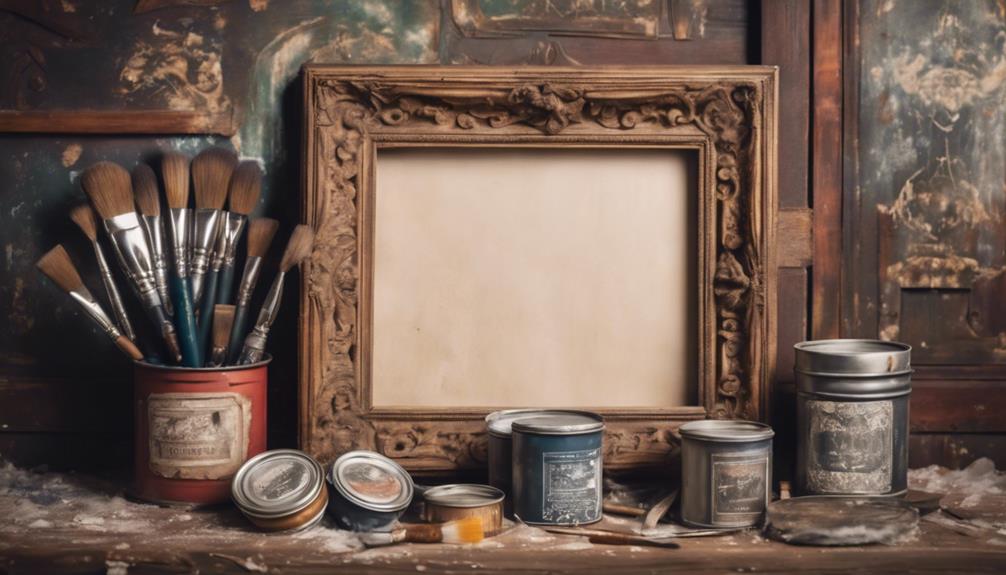
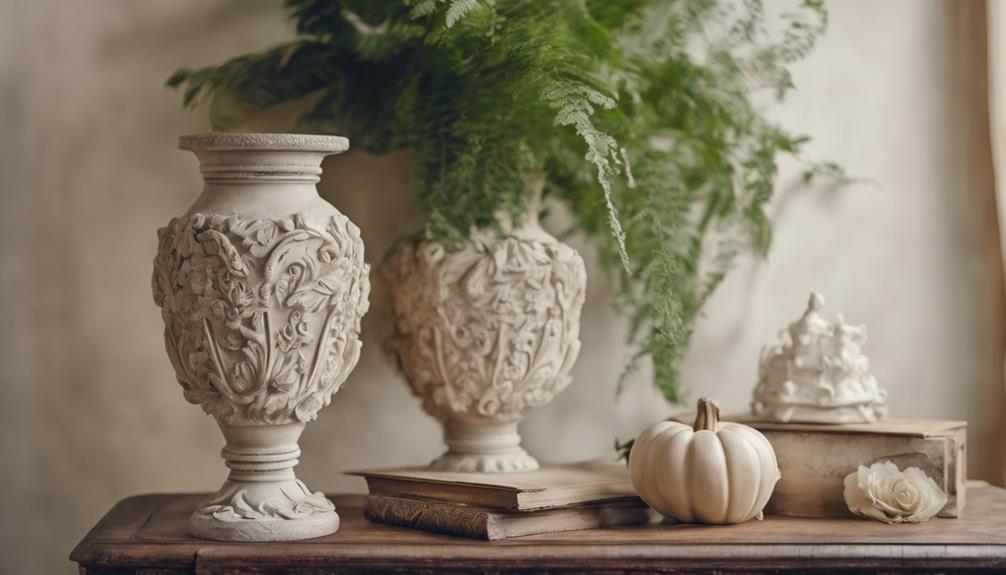
Add Finishing Touches and Embellishments

enhancing with intricate details

You can now add the perfect finishing touches to your antique-finished piece by incorporating decorative elements, distressing techniques, and aging methods that will elevate its unique character.

To enhance the antique look, experiment with distressing techniques like dry brushing or sanding, which will give your piece a worn, aged appearance.

Consider layering different chalk paint colors to add depth and dimension to your piece, creating a rich, complex finish.

Decorative elements like stencils, decals, or gilding can also be incorporated to add an extra layer of visual interest.

Don't forget to experiment with aging techniques such as crackling, patina, or faux wood grain to give your piece an authentic, vintage feel.

Advertisement

Finally, consider using dark wax or glaze to highlight details and create an aged appearance.

Seal and Enjoy Your Masterpiece

seal in freshness savor

Now that you've added the perfect finishing touches to your antique piece, it's time to think about protecting your masterpiece.

You'll want to seal your chalk paint finish with a clear wax or polyurethane to guarantee it withstands the wear and tear of daily use.

Finishing Touches

To guarantee your beautifully distressed piece is properly protected and the finish is enhanced, be sure to seal it with a high-quality clear wax or polyurethane. This step is essential in preserving your hard work and making your piece last for years to come.

Here are some essential tips to keep in mind when sealing your masterpiece:

  1. Apply thin coats: This ensures durability and longevity, preventing the sealant from pooling or becoming too thick.
  2. Choose a high-quality sealant: This will give your piece a professional-looking finish and protect it from damage.
  3. Select the right sealant: Clear wax, polyurethane, or polycrylic can all be used to seal your chalk-painted furniture, so choose the one that best suits your needs.
  4. Allow it to dry: Make sure the sealant is completely dry before using your furniture to prevent smudges or damage.

Protective Coatings

With your beautifully distressed piece complete, it's time to shield it from wear and tear with a protective coating that will make your masterpiece shine.

Now that you've achieved the perfect distressed look on your Chalk Paint furniture, it's important to seal it with a top coat to guarantee its durability. You can choose from various sealants, such as clear wax or polyurethane, to protect your paint job and enhance its longevity.

Advertisement

When applying the sealant, make sure to do it evenly in thin coats to achieve complete coverage. It's vital to select a high-quality sealant that won't compromise the integrity of your distressed finish. Clear wax, polyurethane, or polycrylic are all effective options for sealing your chalk-painted furniture.

Once you've applied the sealant, allow it to dry completely before putting your beautifully antiqued masterpiece to use. By following these steps, you'll be able to enjoy your beautifully distressed piece for years to come.

Frequently Asked Questions

How to Make Something Look Antique With Chalk Paint?

When you want to make something look antique with chalk paint, you'll need to think beyond a single coat of paint.

You'll achieve a more authentic look by applying layers of chalk paint in varying colors, allowing each layer to dry before adding the next.

Then, use sandpaper to distress the edges and corners, mimicking natural wear over time.

Advertisement

How Do You Chalk Paint Step by Step?

Imagine you're a master chef, expertly layering ingredients to create a culinary masterpiece. Similarly, when you chalk paint, you're building layers of color and texture to achieve a unique, distressed look.

To do it step by step, start by cleaning the surface, then apply thin coats of chalk paint, allowing each layer to dry.

Next, choose your distressing method, whether it's dry, wet, or wax, and finally, seal your work with clear wax or polyurethane to protect and enhance the finish.

What Grit Sandpaper for Chalk Paint Distressing?

When it comes to chalk paint distressing, you'll want to reach for fine-grit sandpaper, ideally between 120-220 grit. This will help you achieve a smooth, subtle distressed look without removing too much paint.

Using fine-grit sandpaper strategically allows for controlled distressing, gently wearing away the paint without damaging the surface.

Advertisement

Avoid coarse sandpaper, as it can strip away too much of the paint layers.

How Do You Get a Super Smooth Finish With Chalk Paint?

As you begin your chalk paint journey, remember that a super smooth finish is within your reach! To achieve it, start by investing in a high-quality paintbrush, which will make all the difference in the world.

Then, be sure to apply thin, even coats, and don't skip the essential step of sanding between coats with a fine grit sandpaper.

Conclusion

Now that you've mastered the art of antiquing with chalk paint, the possibilities are endless! You've transformed a piece of furniture into a stunning work of art, rich with character and history.

But don't stop here – experiment with new techniques, colors, and textures to create truly one-of-a-kind masterpieces. The thrill of the hunt for the perfect piece, the rush of creativity as you bring it back to life – it's all just beginning.

Advertisement

What'll you create next?

Continue Reading
Advertisement

Home Decor

Step-by-Step DIY Nest Building

Crafting a whimsical bird's nest from natural materials, discover the secrets to weaving a sturdy and visually stunning abode that sparks imagination.

Published

on

diy bird nest tutorial

To create your own DIY nest, start by gathering natural materials like twigs, grass, and moss, while drawing inspiration from different bird nests. Choose a location that mimics a bird's natural habitat, providing shelter and access to food and water. Weave the nest together using long, flexible stems, securing the foundation with natural materials. Test the nest's sturdiness by gently pressing and evaluating its weight capacity. Add decorative touches like colorful leaves or feathers to create a cozy environment. Finally, display your unique nest in a decorative tray or cloche, experimenting with heights and angles for visual interest – and that's just the beginning of your creative journey.

Key Takeaways

• Gather natural materials like twigs, grass, and moss, and observe bird nests for inspiration before collecting materials.

• Choose a location that mimics a bird's natural habitat, with shelter from harsh weather and access to food and water.

• Construct the nest by securely binding twigs, using long stems for the frame, and weaving materials tightly for insulation and protection.

• Test the nest's structural integrity, weight capacity, and resistance to environmental factors, and reinforce weak spots as needed.

Advertisement

• Add decorative elements like colorful leaves, flowers, or feathers to personalize the nest and create a cozy environment.

Gathering Materials and Inspiration

Gather natural materials like twigs, grass, leaves, and moss to get started on your DIY nest building project. You'll be amazed at how these simple elements can come together to create a beautiful and intricate nest.

As you collect your materials, take inspiration from the bird nests you observe in nature or online pictures. Notice the varying shapes and sizes, and think about the type of nest you want to build. Consider the size and shape of the nest you want to create before gathering materials, as this will help you determine the quantity of materials you'll need.

Take a cue from the birds in your area, and explore different types of nests they build. From intricately woven twig structures to cozy moss-lined cups, each nest is a reflection of the birds' remarkable engineering skills.

Choosing the Perfect Location

selecting the ideal wedding spot

Now that you've gathered your materials and have a sense of the type of nest you want to build, it's time to think about where to place it. Choosing the perfect location is vital for attracting the right birds and ensuring they build a nest successfully.

To increase your chances of attracting birds, select a location that mimics the natural habitat of the species you want to attract. Make sure the nesting area is sheltered from harsh weather conditions like wind and rain. It's also essential to position the nest in a spot with easy access to food sources and water for the birds.

Advertisement

Avoid high-traffic areas where human or animal disturbances could disrupt the nesting process. Consider installing the nest at a height suitable for the bird species, ensuring safety from predators.

Weaving the Nest Together

creating a cozy home

As you begin weaving your nest together, you'll need to focus on:

  • Binding twigs together securely
  • Assembling the frame of your nest
  • Establishing a sturdy foundation

These essential steps will provide the structure for your DIY decorative nest, ensuring it's both visually appealing and durable.

Binding Twigs Together

You'll start weaving twigs together by selecting sturdy, flexible branches that will form the foundation of your nest.

As you begin binding twigs, remember that birds use this technique to create a vital foundation for their nests. By intricately weaving twigs, you'll form a secure structure that can withstand the weight of eggs and chicks. This essential step provides stability and durability to the nest, ensuring the safety of the eggs and hatchlings.

As you weave, keep in mind that twigs are an essential component in building a bird's nest. By properly binding twigs, you'll create a safe and comfortable space for bird nesting.

This intricate process requires patience and attention to detail, but the end result is well worth the effort. By following these steps, you'll be well on your way to creating a cozy and secure nest, just like birds do in the wild.

Advertisement

Nest Frame Assembly

With your sturdy twig foundation in place, gather long, flexible plant stems to shape the main frame of your nest. These stems will form the primary structure of your nest, so choose ones that are sturdy yet pliable.

To weave the nest frame together, bend the plant stems into a loop and secure them in place with twine or string. This will create the basic shape of your nest.

Next, add smaller loops and shapes to the nest frame by weaving in additional plant stems or branches. As you build, make sure to maintain a sturdy and well-shaped structure, as this will be the foundation of your nest.

Sturdy Nest Foundation

How do you plan to weave your nest together to create a sturdy foundation that will protect your eggs or young birds from the elements and predators? This vital step in DIY nest building requires careful consideration of the materials and techniques used.

By incorporating a variety of natural materials like twigs, grass, and leaves, you can create a strong and durable structure for your bird nest.

Advertisement

Here are some essential tips to keep in mind:

  • Use a combination of flexible and sturdy materials to achieve the right balance of strength and flexibility.
  • Weave the materials together tightly to prevent gaps and holes.
  • Pay attention to the nest shape, ensuring it's deep enough to protect your eggs or young birds.
  • Use weaving techniques that allow for good insulation and protection from the elements.
  • Make sure the nest is well-anchored to prevent it from toppling over or being dislodged.

Testing the Nest's Sturdiness

stress testing the nest

As you test the nest's sturdiness, you're evaluating its structural integrity, weight capacity, and ability to resist environmental factors.

By gently pressing down on the nest, you'll determine if it can hold the weight of an egg without collapsing, a vital aspect of nest building.

A sturdy nest is one that can withstand wind, rain, and other harsh conditions, so it's imperative to get it right.

Nest Structural Integrity

You'll want to put your nest to the test by gently pressing down on it to check its sturdiness. This important step guarantees that your bird nest can withstand the elements and provide a safe haven for its future inhabitants. When testing the nest's sturdiness, you're verifying if it maintains its shape and structure when pressure is applied.

Here are some key takeaways to keep in mind:

Advertisement
  • A sturdy nest will retain its shape when pressed upon, indicating proper weaving and material placement.
  • The nest should securely hold its shape without collapsing or losing its form.
  • If the nest collapses or loses its shape easily, it may need additional weaving or reinforcement.
  • Ensuring the nest's sturdiness is essential for protecting eggs and providing a stable foundation for bird nesting.
  • Building nests that can withstand the elements requires careful attention to detail and a focus on structural integrity.

Nest Weight Capacity

To determine your nest's weight capacity, place weighted objects like eggs or small rocks inside the nest, gradually increasing the weight to test its importance. This critical step guarantees that your nest can support the weight of birds and their offspring without collapsing or losing its shape.

As you're building your nest, keep in mind that birds can build their nests to last, and yours should be no exception. When you make a bird nest, it's crucial to take into account the weight capacity to attract birds and make sure the nest's functionality.

Observe how the nest reacts to different weights to gauge its durability. You can use a bucket or container to hold the weighted objects during testing. As you add more weight, pay attention to any signs of strain or weakness in the nest's structure. A sturdy nest that can hold objects without breaking is crucial for its success.

Resisting Environmental Factors

Now that you've confirmed your nest can support the weight of its inhabitants, it's time to test its sturdiness against environmental factors that could threaten its structure. As a DIY nest builder, resisting environmental factors is vital to make sure your birds nest remains safe and cozy.

To evaluate your nest's sturdiness, follow these essential steps:

  • Gently press on the nest to see if it holds its shape.
  • Check for loose or weak spots that may need reinforcement.
  • Make sure the nest can withstand mild environmental factors like wind or light pressure.
  • Evaluate the nest's resilience by lightly shaking it to see if the structure remains intact.
  • Consider using additional materials or techniques to enhance the nest's durability against environmental factors.

Adding Decorative Touches

enhancing with decorative elements

With a solid foundation in place, it's time to elevate your nest's aesthetic appeal by incorporating decorative touches that reflect your personal style.

You can make your nest truly unique by experimenting with various textures and colors. For instance, you can add some green moss to give it a natural, earthy feel, similar to what some bird species use to make nests.

Advertisement

To add an extra layer of realism, you can place eggs inside the nest, which will give it a cozy, inhabited look. Decorative touches like feathers, bark, and other natural materials can enhance the visual appeal of your nest, making it a beautiful piece of art.

By incorporating these elements, you can create a visually appealing decorative nest that showcases your creativity and attention to detail.

Completing and Displaying the Nest

building a bird s nest

You've invested time and creativity into building a unique nest, and now it's time to showcase your masterpiece by displaying it in a way that highlights its beauty and charm. A well-designed display can elevate your nest from a simple craft project to a stunning work of art.

Here are some ideas to get you started:

  • Consider placing your nest on a decorative tray or in a cloche to add an extra layer of elegance.
  • Experiment with different heights and angles to create visual interest.
  • Add some natural elements, like pinecones or twigs, to bring the outdoors in.
  • Create a themed display by incorporating seasonal decorations, like holly or ornaments, around your nest.
  • Don't be afraid to think outside the box (or nest!) and try displaying your nest in a unique way, like on a handmade cake stand or with farmhouse elements for a rustic look.

Frequently Asked Questions

How Do You Make Your Own Nest?

You're wondering how to make your own nest?

Start by gathering long, flexible plant stems to form the main shape. Bend and tie them into a loop, then add smaller loops to shape the rest of the nest.

You can decorate it with feathers, bark, moss, and other scavenged materials to give it a cozy touch.

Advertisement

How Do You Make a Nest for Yourself?

Are you thinking, 'What's the point of making a nest for myself?'

Well, creating a cozy nook can be a therapeutic escape from the world.

To make a nest for yourself, start by identifying a quiet, comfortable spot, like a corner of your bedroom or a secluded outdoor area.

Then, gather materials like blankets, pillows, and soft fabrics to create a snug, inviting space that's all yours.

How Do You Make a Simple Nest for Kids?

When creating a simple nest for kids, you'll want to gather natural materials like twigs, grass, and leaves. Collect these materials in a bucket or container, and encourage kids to observe nearby bird nests for inspiration.

Advertisement

Building the nest on a tray makes it easy to work indoors, or you can take the activity outside. Once built, test the nest's sturdiness by placing small rocks or eggs inside.

How to Build a Bird Box Step by Step?

As you start building a bird box, remember that it's not just about providing a cozy home for your feathered friends, but also about creating a safe haven that mimics their natural habitat.

To get started, choose the right materials, such as wood, screws, and waterproof paint, and measure the wood pieces according to the species you want to attract.

Conclusion

As you step back to admire your handiwork, the nest's natural nuances nestled among the branches, you'll notice the intricate interplay of twigs, leaves, and feathers.

Softly swaying in the breeze, the nest's sturdy structure shines, a confirmation of your patient persistence.

Advertisement

With each delicate detail deliberately designed, your DIY masterpiece is now a cozy, calming sanctuary, waiting to cradle its new inhabitants.

Continue Reading

Home Decor

The Timelessness of Vintage Glass Globes

Holding a vintage glass globe, you're about to uncover the intricate craftsmanship, historical significance, and timeless charm that makes them treasured possessions.

Published

on

elegant vintage glass globes

As you hold a vintage glass globe, you're not just grasping a decorative ornament, but a tangible piece of history that distills the essence of a bygone era, its intricate craftsmanship, and cartographic precision evoking a deep sense of nostalgia and wonder. Vintage globes showcase meticulous craftsmanship, unique designs, and historical significance, making them timeless treasures. With their classic elegance, they blend seamlessly into modern spaces, illuminating the world's wonders and serving as educational tools. As you explore the world of vintage glass globes, you'll discover the artisanal craftsmanship, educational value, and nostalgic charm that make them truly timeless.

Key Takeaways

• Vintage glass globes evoke a sense of adventure and whimsy, transporting us to past eras with their timeless charm.

• Meticulous craftsmanship and unique designs make each vintage globe a one-of-a-kind masterpiece, exuding elegance and sophistication.

• As educational tools, vintage glass globes combine decorative and educational elements, illuminating geographical landscapes for students and scholars.

• Blending old and new, vintage glass globes add a touch of classic sophistication to modern spaces, creating a warm and inviting glow.

Advertisement

• As valuable resources, vintage glass globes confirm the art of antique cartography, holding a piece of history in your hands.

Capturing the Essence of the Past

As you gaze upon the intricate details of a vintage glass globe, you're instantly transported to an era that whispers tales of adventure, discovery, and exploration, capturing the essence of the past with remarkable precision.

The Replogle illuminated world globe, designed by Gustav Brueckmann in the late 1940s, is a prime example of this phenomenon. This 12-inch Library model, made in the USA, features identifying countries such as Germany, Korea, Israel, and French Indo China, showcasing a level of cartographical accuracy that was groundbreaking for its time.

The globe's glass shades, a hallmark of vintage lighting, add a touch of sophistication to any room. If you're looking for a similar piece, the Crams Imperial World Globe and the Replogle Stereo Relief Globe are also available, along with the Faries Bankers Lamp, which offers a unique blend of functionality and style.

Each of these vintage globe options offers a unique window into the past, allowing you to appreciate the artistry and craftsmanship of a bygone era.

Advertisement

Nostalgic Charm of Vintage Globes

vintage globes evoke nostalgia

As you explore the nostalgic charm of vintage globes, you'll discover a world of whimsy and adventure. From the beautifully illustrated maps of yesteryear to the forgotten era of exploration that inspired them, every aspect of these alluring orb-shaped treasures whispers stories of the past.

As you continue to uncover the allure of vintage glass globes, you'll find yourself enchanted by the intricate details and historical significance that make them truly special.

Whimsical Maps of Yesteryear

Stepping into a room adorned with a vintage glass globe is like taking a step back in time, as the whimsical maps of yesteryear transport you to an era of discovery and exploration. You can't help but marvel at the intricate details and historical cartography styles that showcase geographical representations from bygone eras.

These vintage globes evoke a sense of nostalgia, capturing the essence of exploration and discovery that defined the past. As you gaze upon the maps, you're reminded of the thrill of adventure and the uncharted territories that awaited brave explorers. The craftsmanship and unique features of these globes are a tribute to the skill of cartographers and artisans of the past.

Whether you're a collector, enthusiast, or simply someone who appreciates the beauty of history, vintage glass globes are a treasured find. They add a touch of character and history to any space, serving as a decorative piece that sparks conversation and inspires curiosity.

Forgotten Era of Exploration

You're instantly transported to a bygone era of exploration and discovery when surrounded by the nostalgic charm of vintage glass globes. These ornate decorations evoke a sense of adventure, taking you back to a time when cartographers meticulously mapped the world, and explorers bravely ventured into the unknown.

Advertisement

The intricate details and craftsmanship of these vintage globes reflect the artistry of cartographers from the past, showcasing historical cartography and design. As you gaze upon the aged patina and wear on these globes, you're reminded of their journey through time and history.

The nostalgic charm of vintage glass globes adds a touch of sophistication to any space, making them a prized collectible for enthusiasts. By displaying one of these treasures, you're not only showcasing a piece of history but also paying homage to the pioneers of exploration.

Whether you're a history buff, a collector, or simply someone who appreciates the beauty of the past, vintage glass globes are sure to captivate and inspire.

Captivating Orb-Shaped Treasures

With their enchanting orb-shaped design, vintage glass globes exude timeless charm, transporting you to an era of elegance and refinement. As you gaze at these captivating treasures, you can't help but feel a sense of nostalgia wash over you.

The intricate craftsmanship that went into creating these vintage glass globes is a tribute to the artisans of the past, who carefully blended artistry and functionality. Whether displayed in a home, office, or library, these globes add a touch of sophistication to any space.

Advertisement

The allure of vintage glass globes lies in their classic appeal and historical significance, making them a nostalgic treasure that transcends time. As you hold one of these vintage globes in your hands, you can almost imagine the explorers of yesteryear using similar instruments to navigate uncharted territories.

The timeless charm of vintage glass globes is undeniable, making them a treasured possession for anyone who appreciates the beauty of the past.

Artisanal Craftsmanship on Display

detailed and skilled craftsmanship

As you hold a vintage glass globe, you're struck by the precision and artistry that defines every delicate curve and intricate detail. It's a tribute to the skilled artisans who crafted these orbs, pouring their hearts and souls into every piece. Each globe is a unique work of art, a masterpiece that showcases the artisan's expertise.

Craftsmanship Materials Characteristics
Hand-blown glass High-quality glass Delicate curves, intricate details
Meticulous attention to detail Skilled artisans Timeless elegance, charm
Precision engineering Quality materials Stunning decorative pieces
Unique, one-of-a-kind designs Vintage charm Collector's items
Skilled craftsmanship Attention to detail Sophisticated, elegant decor

The level of craftsmanship within these globes is astounding, and it's no wonder they're highly sought after by collectors. When you purchase a vintage glass globe, you're not just buying a decorative piece – you're investing in a piece of history. And with a Money Back Guarantee, you can trust that you're getting a genuine, high-quality item that will open up a new world of wonder within your home.

Illuminating the World's Wonders

exploring global wonders brightly

Vintage glass globes like the Replogle Illuminated Glass Globe, designed and edited by Gustav Brueckmann, offer a fascinating glimpse into the world's wonders, bringing international landmarks and geographical features to life with their soft, warm glow.

As you gaze at this 12-inch Library model globe, you'll discover identifying countries like Germany, Korea, Israel, and French Indo China, taking you on a journey across the world.

This stunning item, estimated to be from 1948-49, stands 15 3/4 inches tall with a base diameter of 8 5/8 inches, making it a statement piece in any room. With its working light and 6 2 cord, you can enjoy the warm ambiance it provides.

Advertisement

Plus, with free domestic shipping to the 48 contiguous states, you can get this vintage beauty delivered right to your doorstep. And, with a Money Back Guarantee, you can shop with confidence.

If you're looking to finance your purchase, consider using your PayPal Credit account, which opens new window of payment options.

Vintage Glass in Modern Spaces

incorporating historical glass designs

As you bring vintage glass globes into your modern space, you're about to discover the magic of blending old and new, creating a look that's both nostalgic and contemporary.

By incorporating these timeless treasures, you'll revive classic elegance and add a touch of sophistication to your interior design.

With their versatility and enduring appeal, vintage glass globes become essential decor elements that elevate your space and transcend fleeting trends.

Mixing Old and New

By incorporating vintage glass globes into your modern space, you'll create a mesmerizing blend of past and present that adds depth and visual interest to your interior design. This eclectic touch brings a unique sophistication to contemporary design, making your space stand out from the crowd.

Advertisement

Here are three ways to successfully mix old and new styles with vintage glass globes:

  1. Play with contrast: Combine vintage glass globes with modern, sleek furniture to create a visually striking juxtaposition.
  2. Add a pop of color: Use vintage glass globes in bold, bright colors to add a fun and playful touch to your modern space.
  3. Create a focal point: Group vintage glass globes together to create a stunning centerpiece that draws the eye and sparks conversation.

Reviving Classic Elegance

You can bring a sense of refinement to your modern space by incorporating vintage glass globes, which infuse the room with a classic elegance that's hard to replicate with modern decor alone. These globes offer a timeless appeal that complements a variety of interior design styles, from modern minimalist to traditional and eclectic. By incorporating vintage glass globes into your decor, you can create a nostalgic atmosphere that transports you to a bygone era.

Benefits Description
Timeless Appeal Vintage glass globes add a touch of classic elegance to modern spaces
Versatility They complement a variety of interior design styles
Nostalgic Atmosphere They create a warm and inviting glow while showcasing intricate cartography
Historical Charm They elevate the aesthetic of a room with their historical charm

Timeless Decor Essentials

Your modern space can greatly benefit from the incorporation of vintage glass globes, which effortlessly merge nostalgic charm with sleek contemporary design. These decorative pieces add a touch of timeless elegance to any room, blending nostalgia with modernity.

Whether you're looking to create a cozy atmosphere in your living room or add a touch of sophistication to your home office, vintage glass globes are the perfect accent.

Here are just a few ways to incorporate vintage glass globes into your modern decor:

  1. Add a touch of whimsy: Hang a vintage glass globe from a pendant light or use it as a unique centerpiece for your dining table.
  2. Create a cozy reading nook: Place a vintage glass globe on a side table or bookshelf to add warmth and ambiance to your reading space.
  3. Elevate your home office: Use a vintage glass globe as a paperweight or desk decoration to add a touch of sophistication to your workspace.

When shopping for vintage glass globes, look for sellers that offer a Money Back Guarantee, such as eBay's Money Back Guarantee, to make a risk-free purchase. With their timeless charm and versatility, vintage glass globes are the perfect addition to any modern space.

Educational Tools of Yesteryear

obsolete teaching methods revisited

Discover the fascinating world of vintage glass globes, which played a significant role as educational tools of yesteryear, illuminating the geographical landscape for students and scholars alike.

As you explore the world of vintage globes, you'll realize that they were more than just decorative pieces – they were essential tools for learning.

Advertisement

Take, for instance, the Replogle 12 inch Library model, designed by Gustav Brueckmann in Chicago, Illinois. Made in the USA around 1948-49, this globe features a 6'2' cord and displays countries like Germany, Korea, Israel, and French Indo China. With its 15 3/4' height and 8 5/8' base diameter, this illuminated glass globe is both a decorative and educational masterpiece.

When purchasing vintage globes, you can rest assured with eBay's Money Back Guarantee, ensuring your purchase is protected. With free shipping within the 48 contiguous states, you can start exploring the world of vintage glass globes today!

The Allure of Antique Cartography

exploring vintage map treasures

As cartographers like Gustav Brueckmann poured over ancient maps and manuscripts, they crafted intricate, historically accurate representations of the world, which are now showcased in vintage glass globes. These globes are a confirmation to the art of antique cartography, where every detail, from country borders to geographic features, was meticulously researched and rendered. The allure of these vintage globes lies in their ability to transport you to a bygone era, where exploration and discovery were still unfolding.

Here are a few fascinating aspects of antique cartography in vintage glass globes:

  1. Historical accuracy: Cartographers like Brueckmann confirmed that their maps reflected the most up-to-date knowledge of the time, making these globes valuable resources for historians and researchers.
  2. Intricate details: From the subtle shading of mountains to the delicate rendering of coastlines, every aspect of these globes was carefully crafted to create an immersive experience.
  3. Timeless appeal: Despite being created decades ago, vintage glass globes like the Replogle Globes' 12-inch Library globe model continue to captivate audiences with their beauty and historical significance.

As you gaze upon these vintage globes, you're not just looking at a decorative piece – you're holding a piece of history in your hands.

Sophisticated Decor for Any Room

elegant and stylish furnishings

With their classic elegance and timeless appeal, vintage glass globes effortlessly elevate the ambiance of any room, adding a sophisticated touch to your interior design.

You can create a unique and elegant atmosphere in your space by incorporating these beautiful decorative pieces into your decor.

Whether you're looking to add a touch of nostalgia or a dash of sophistication, vintage glass globes are the perfect addition to any room.

Advertisement

They come in various sizes and styles, making it easy to find the perfect fit for your aesthetic preferences.

Use them as standalone decor pieces or as functional lighting fixtures – the possibilities are endless.

By incorporating vintage glass globes into your interior design, you'll be adding a timeless touch that exudes elegance and refinement.

They're a popular choice for those seeking a blend of nostalgia and style, and with their versatility and classic appeal, it's easy to see why.

Preserving History in Glass

capturing history in glass

You can own a piece of history with vintage glass globes like the Replogle Library Globe, which was meticulously designed by Gustav Brueckmann in the late 1940s. These unique pieces not only add a touch of sophistication to any room but also serve as a window to the past.

When preserving history in glass, it's crucial to take into account the following factors:

Advertisement
  1. Authenticity: Verify the globe is genuine and not a reproduction. Look for signs of aging, and confirm the manufacturer's marks.
  2. Condition: Inspect the globe's working condition, including any illumination features. A functioning globe can greatly enhance its value.
  3. Provenance: Investigate the globe's history, including its origins and previous owners. This can significantly impact its value and authenticity.

When purchasing a vintage glass globe, consider buying from reputable sellers who offer an eBay Money Back Guarantee. This ensures you're protected in case the globe doesn't match the description.

With the right precautions, you can own a stunning piece of history that will illuminate your space and spark conversations.

Frequently Asked Questions

Are Vintage Glass Globes More Valuable if Signed by the Artist?

When you're considering the value of vintage glass globes, one important factor is the signature of the artist. You'll often find that signed globes are more valuable due to their rarity and authenticity.

Typically, a signature from a renowned artist can increase the globe's worth by 20-50%. However, it's vital to verify the signature's authenticity through documentation or expert appraisal to make sure you're not buying a reproduction.

Can I Use Vintage Globes as Functional Decorations in My Office?

You're contemplating repurposing vintage globes as functional decorations in your office, but you might be wondering if they're more than just a quirky conversation starter.

Surprisingly, these ornate globes can add a touch of sophistication to your workspace. With a little creativity, you can transform them into unique pen holders, paperweights, or even mini planters.

Advertisement

Just make sure you clean and dust them regularly to maintain their elegance.

How Do I Properly Clean and Maintain My Vintage Glass Globe?

When it comes to cleaning and maintaining your vintage glass globe, you'll want to handle it with care. Gently dust the globe with a soft, dry cloth to remove any loose particles.

For more thorough cleaning, mix a solution of mild soap and distilled water, and gently wipe the globe with a soft-bristled brush or a lint-free cloth.

Avoid using harsh chemicals, abrasive materials, or excessive water, which can damage the globe's surface or cause it to deteriorate over time.

Can I Find Vintage Globes With Specific Geographical Features or Themes?

You're on the hunt for vintage globes with specific geographical features or themes – and you're not alone! Many collectors seek out globes showcasing particular regions, like antique maps of Europe or Asia, or globes highlighting historical events, such as the Age of Exploration.

Advertisement

You can find these unique globes at antique shops, estate sales, or online marketplaces like eBay or Etsy, where sellers often highlight the globe's distinct features in their descriptions.

Are Vintage Glass Globes Considered a Good Investment Opportunity?

As you consider investing in vintage glass globes, you're probably wondering if they're a good investment opportunity.

While some rare and limited-edition globes can appreciate in value over time, most vintage globes are more of a collectible hobby than a lucrative investment.

You'll need to research and find rare, high-demand globes in excellent condition to potentially see a return on your investment.

Conclusion

As you gaze upon the vintage glass globe, its intricate details and faded hues transport you to an era of discovery and exploration.

Advertisement

Like a time capsule, it holds secrets of the past, whispers of ancient cartographers, and the echoes of forgotten civilizations.

Will you be the keeper of its stories, the guardian of its timeless beauty?

Continue Reading

Home Decor

10 Stylish 34-Inch Tree Collars for Your Christmas Decor

Find the perfect finishing touch for your Christmas tree with these 10 stylish 34-inch tree collars that elevate your holiday decor.

Published

on

stylish 34 inch christmas tree

Elevate your Christmas decor with a stylish 34-inch tree collar that complements your unique holiday style. From modern sophistication to rustic charm, you'll find a collar to fit your theme. Choose from red velvet with sequins, burlap for a natural look, or a winter wonderland snowflake design. For a classic touch, opt for emerald green or galvanized steel for a farmhouse chic vibe. Alternatively, go for vintage glamour with gold sequins, Scandinavian minimalism in white, or a cozy country cottage look with a plaid pattern. Whichever style you choose, you'll add a touch of elegance to your holiday display, and there's more to discover.

Key Takeaways

• The Red Velvet Tree Collar offers modern sophistication with its double-layer velvet and sequins, fitting larger trees with its 34-inch diameter.

• The Scandinavian Minimalist Tree Collar provides a sleek, modern design in white, easily assembling and storing with its 34-inch size.

• The Rustic Charm Burlap Tree Collar brings natural texture and neutral color, fitting trees up to 11 feet tall for a cozy ambiance.

• The Winter Wonderland Snowflake Design Tree Collar features a white and silver color scheme, durable materials, and easy assembly for a festive display.

Advertisement

• Multiple stylish options, including galvanized steel and emerald green, cater to different decor styles, from rustic to elegant and sophisticated.

Modern Sophistication in Red Velvet

Adding a 34-inch red velvet tree collar to your Christmas decor instantly injects modern sophistication into your holiday display. This luxurious touch isn't just aesthetically pleasing, but also elevates your entire Christmas decor.

The double-layer velvet, sequins, and glitter used to craft this tree collar exude elegance and glamour, making it a stunning focal point for your holiday tree. Measuring 34 inches in diameter, this tree collar is perfect for larger trees, providing ample coverage for the base.

The rich red color and detailed design of the collar create a beautiful contrast against the green of your tree, drawing the eye upward. By incorporating this stylish tree collar into your decor, you'll seamlessly combine beauty and functionality, taking your Christmas display to the next level.

With its luxurious feel and modern design, this red velvet Christmas tree collar is the perfect addition to your holiday decor.

Advertisement

Rustic Charm With Burlap Accents

chic barn wedding d cor

You can bring rustic charm to your Christmas decor with a 34-inch burlap tree collar that wraps around your tree, introducing a natural, earthy tone to your holiday display. This type of Christmas tree collar is perfect for those who want to add a cozy and inviting vibe to their festive decorations. With its neutral color, burlap complements a wide range of tree styles and ornaments, making it a versatile choice for any home.

Feature Description Benefit
Natural Texture Burlap tree collars have a natural, earthy tone Adds rustic charm to your decor
Ample Coverage 34-inch tree collars fit trees up to 11 feet tall Ensures a cohesive look for larger trees
Neutral Color Burlap complements a wide range of tree styles and ornaments Versatile choice for any home

Winter Wonderland Snowflake Design

festive snowflake pattern creation

Thirty-four inches of Winter Wonderland Snowflake Design tree collar wraps around your tree, bringing an elegant touch to your holiday display with its intricate snowflake patterns. This stunning tree collar is perfect for larger Christmas trees, adding a touch of sophistication to your holiday decor.

The snowflake pattern is carefully crafted to create a beautiful, intricate design that catches the eye. Made from durable materials, this tree collar is built to last for multiple holiday seasons, ensuring it remains a staple in your festive decorations for years to come.

The white and silver color scheme of this collar complements a variety of Christmas tree themes and color schemes, making it easy to incorporate into your existing decor. Plus, its easy assembly and storage make it a practical choice for busy holiday enthusiasts.

Whether you're going for a winter wonderland theme or a more subtle holiday look, this snowflake design tree collar is a stylish and functional addition to your festive decorations. Its elegant design and durable construction make it a great choice for anyone looking to elevate their holiday decor.

Classic Elegance in Emerald Green

elegant emerald green style

Wrapping your tree with the Classic Elegance in Emerald Green tree collar brings a sophisticated touch to your holiday decor, evoking the luxurious feel of a winter forest. This stunning 34-inch tree collar is designed to add a touch of classic elegance to your Christmas decor. The rich emerald green color complements a variety of tree styles and decorations, making it a versatile option for any holiday setup. Crafted from durable materials, this tree collar provides a sturdy and stylish base for your tree, ensuring it remains secure and stable throughout the holiday season.

As a Christmas tree base collar, the Classic Elegance in Emerald Green is designed to conceal unsightly tree stands and create a polished, put-together look. The emerald green hue adds a pop of color to your holiday decor, creating a festive ambiance that's sure to impress.

Whether you're going for a traditional or modern look, this stylish tree collar is sure to enhance the festive feel of your home. So why settle for a plain tree stand when you can elevate your holiday decor with the Classic Elegance in Emerald Green tree collar?

Advertisement

Farmhouse Chic With Galvanized Steel

rustic farmhouse with metal

Add a rustic touch to your holiday decor with galvanized steel tree collars, which bring a modern farmhouse chic twist to your Christmas setup. These 34-inch tree collars provide ample coverage for trees up to 11 feet tall, guaranteeing your tree looks stunning from base to top.

The durable steel construction guarantees long-lasting use season after season, making it a worthwhile investment for your holiday decor. You'll love how easy it's to assemble these galvanized steel tree collars, which add a touch of industrial elegance to your holiday display.

By incorporating a galvanized steel tree collar into your decor, you'll enhance the overall aesthetic of your tree, creating a beautiful focal point in your home. The modern farmhouse chic look is perfect for those who want to add a rustic touch to their holiday decor without sacrificing style.

With its versatility and durability, a galvanized steel tree collar is an excellent choice for anyone looking to elevate their Christmas decor.

Whimsical Woodland Animal Print

playful forest creature design

For a more playful and whimsical take on your Christmas decor, you'll love the charming woodland animal print tree collar that brings a touch of the forest to your holiday setup. This 34-inch tree collar is perfect for larger Christmas trees and features a delightful design with various woodland animals like deer, foxes, and owls, adding a festive and playful touch to your holiday decor.

Here's a breakdown of this whimsical woodland animal print tree collar:

Feature Description Benefit
Material Durable and high-quality Functional and decorative
Design Woodland animal print Adds a unique and whimsical element
Size 34 inches in diameter Suitable for larger Christmas trees
Assembly Easy to assemble and store Stylish and practical solution

This tree collar is not only decorative but also functional, enhancing the overall look of your tree display. The woodland animal print adds a unique and whimsical element to your Christmas tree, perfect for nature-themed or rustic decor styles.

Advertisement

Coastal Vibes With Natural Jute

sustainable coastal decor elements

As you set out to create a coastal-themed Christmas display, consider incorporating the Coastal Vibes Natural Jute Tree Collar. This 34-inch diameter tree collar is crafted from natural jute material, offering a rustic charm that complements various tree styles and decorations. The neutral color of the jute collar guarantees it blends seamlessly with your existing decor, adding a touch of coastal vibes to your holiday display.

Here are three benefits of choosing the Coastal Vibes Natural Jute Tree Collar:

  1. Easy Assembly and Storage: This tree collar is easy to assemble and store, making it a convenient addition to your holiday decor.
  2. Rustic Charm: The natural jute material and neutral color of the collar add a touch of rustic charm to your tree display.
  3. Versatility: The Coastal Vibes Natural Jute Tree Collar complements a range of tree styles and decorations, making it a versatile addition to your holiday decor.

Vintage Glamour in Gold Sequins

sparkling gold sequin gown

You'll make a bold statement with the Vintage Glamour Gold Sequin Tree Collar, which wraps your tree in luxurious elegance and sophistication. This stunning tree collar features a dazzling gold sequin design that adds a touch of glamour to your Christmas decor.

Crafted to fit most tree bases up to 32 inches in diameter, this collar guarantees a seamless look that complements your tree's natural beauty. Easy to assemble and store, this tree collar is a convenient holiday decorating option that won't take up too much space.

With its elegant design and effortless installation, you'll elevate your holiday display and create a sophisticated ambiance that's perfect for the festive season. Whether you're hosting a holiday party or simply want to add a touch of luxury to your home, the Vintage Glamour Gold Sequin Tree Collar is the perfect accessory for your Christmas tree.

It's a stylish and eye-catching addition that's sure to impress your friends and family.

Scandinavian Minimalist in White

clean simple nordic style

If vintage glamour isn't your style, a Scandinavian Minimalist in White Tree Collar can bring a sleek, modern touch to your holiday decor. This stylish tree collar features a clean and minimalist design in white, perfect for complementing your Christmas decor. Made of durable materials, it's built to last and easy to assemble and store.

Here are three benefits of choosing a Scandinavian Minimalist in White Tree Collar:

Advertisement
  1. Modern elegance: The sleek design adds a touch of Scandinavian style to your holiday display.
  2. Easy to use: The tree collar is easy to assemble and store, making it a convenient addition to your Christmas decorations.
  3. Versatile: The 34-inch size is suitable for larger trees, and the white color complements a variety of decorating styles.

With its modern design and durable construction, this tree collar is an excellent choice for anyone looking to add a touch of Scandinavian chic to their holiday decor. Whether you're going for a minimalist look or want to add a pop of white to your Christmas tree, this tree collar is an excellent choice.

Country Cottage With Plaid Pattern

cozy plaid country retreat

This charming Country Cottage With Plaid Pattern tree collar brings a warm, rustic touch to your holiday decor, evoking feelings of coziness and traditional charm. As you adorn your tree with this stylish accessory, you'll create a warm and inviting atmosphere that's perfect for the holiday season.

The 34-inch tree collar features a charming country cottage design with a festive plaid pattern, adding a cozy and rustic touch to your Christmas decor. Made of durable materials, this tree collar guarantees longevity and enhances the overall appeal of your tree display. Plus, it's easy to assemble and fits most tree bases up to 32 inches in diameter for a seamless finish.

With its classic design, this tree collar is perfect for creating a warm and inviting holiday atmosphere in your home. You'll love how it brings a touch of rustic charm to your holiday decor, making it a great addition to your festive decorations.

Frequently Asked Questions

How Big Should a Christmas Tree Collar Be?

When choosing a Christmas tree collar, you're probably wondering how big it should be. The key is to take into account your tree's height, as the collar's size is based on that.

For trees between 7 and 11 feet tall, a 34-inch collar is a good fit. It can cover bases up to 32 inches in diameter, giving your tree a polished look.

Just make sure the collar fits snugly around the base to enhance the overall aesthetic.

Advertisement

Are Tree Collars Still Popular?

You might be wondering, are tree collars still the 'it' thing for Christmas decor? The answer is a resounding yes!

Despite the ever-changing trends, tree collars remain a popular choice for many. In fact, they've become a staple in modern holiday decorating, offering a sleek and polished look that's hard to resist.

How to Make an Inexpensive Tree Collar?

You're looking for an inexpensive tree collar solution. Repurpose a galvanized tub or bucket for a rustic look.

Alternatively, use a woven basket or large planter as a unique alternative.

If you're crafty, create a DIY collar using wood planks or lattice panels.

Advertisement

You can even wrap a decorative blanket or fabric around the base of the tree for a cozy look.

How Do I Make My Christmas Tree Collar Taller?

You're probably thinking, 'Why settle for a mediocre tree collar when you can have one that's towering above the rest?'

To make your Christmas tree collar taller, you're not limited to just one option. Consider using risers or platforms underneath the tree collar to add height, or opt for a taller design, like a 34-inch option, to increase the overall height.

Conclusion

As you step back to admire your Christmas tree, the 34-inch tree collar of your choice adds a finishing touch, like the perfect accessory to a stylish outfit.

Imagine the rustic charm of burlap accents or the vintage glamour of gold sequins complementing your festive decor.

Advertisement

Whatever your style, these tree collars bring a touch of sophistication, transforming your tree into a winter wonderland centerpiece that shines like a beacon of holiday joy.

Continue Reading

Trending