To create a stunning brick accent wall in your bedroom, start by choosing a wall with visual impact, ample natural light, and no large furniture pieces or electrical outlets. Prepare the surface by cleaning, repairing damaged areas, and applying a primer if necessary. Use a brick template to achieve consistent sizing and tape off bricks in sections for precision. Mix and apply joint compound evenly, working in small sections to maintain control. By following these initial steps, you're on your way to a textured, rustic accent wall that adds sophistication to your bedroom – and there's still more to explore to achieve a flawless finish.
Key Takeaways
• Choose a wall with high visual impact, ample natural light, and minimal furniture or obstructions for a stunning brick accent wall.
• Prepare the wall surface by cleaning, repairing damaged areas, and applying primer if necessary for a smooth finish.
• Use a brick template and tape off sections to achieve uniform brick sizes and precise application of joint compound for a realistic texture.
• Select a brick pattern that fits your style, such as running bond or herringbone, and consider horizontal or vertical layouts for visual interest.
• Apply joint compound evenly, using a putty knife or trowel in circular motions, to create a textured faux brick wall with a realistic finish.

Roman’s E-Z Hang Peel & Stick Wallpaper Helper, Clear, Non-Staining, 32 Fluid Ounces
EASY ADJUSTMENT - E-Z Hang provides ‘slip’ allowing you to float your wallpaper into position without having to...
As an affiliate, we earn on qualifying purchases.
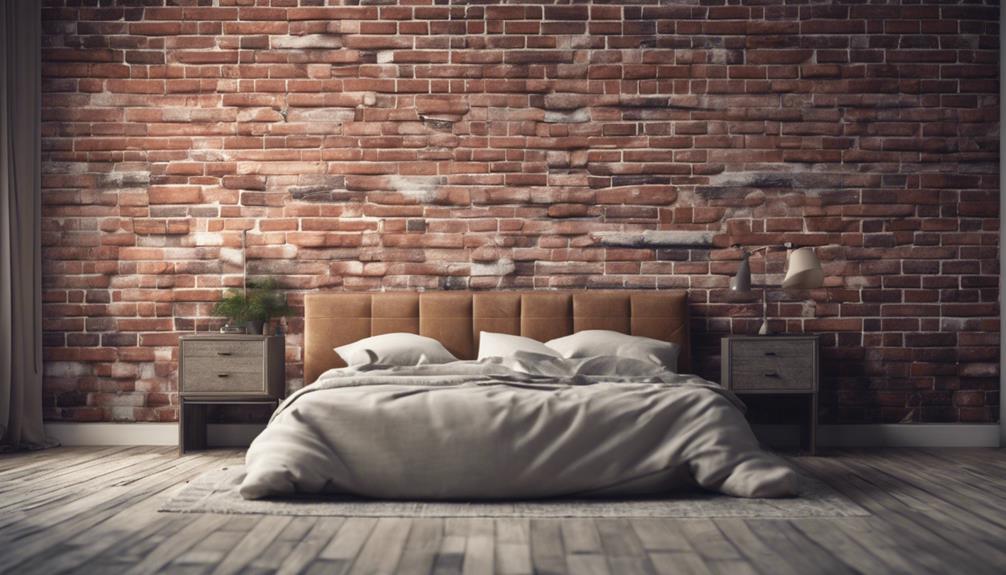
Choosing the Perfect Wall Location
When deciding where to create your brick accent wall, consider the walls that will have the greatest visual impact and create a stunning focal point in your bedroom. You'll want to choose a wall that receives ample natural light, as this will enhance the texture and color variations of the brick accent wall.
Evaluate the walls that will serve as a focal point when entering the bedroom, creating a striking visual impact. Opt for a wall without large furniture pieces or distractions, allowing the brick accent wall to take center stage. Additionally, select a wall that's free from electrical outlets or switches, maintaining the seamless look of the brick design.

JiffDiff Grasscloth Wallpaper Peel and Stick Cream Grassweave Stick on Wallpaper Textured Self Adhesive Contact Paper 17.3"x118"
𝐏𝐞𝐞𝐥 𝐚𝐧𝐝 𝐒𝐭𝐢𝐜𝐤 𝐖𝐚𝐥𝐥𝐩𝐚𝐩𝐞𝐫: Grasscloth Wallpaper features a simple, grooved design that creates a bright, breezy backdrop for...
As an affiliate, we earn on qualifying purchases.
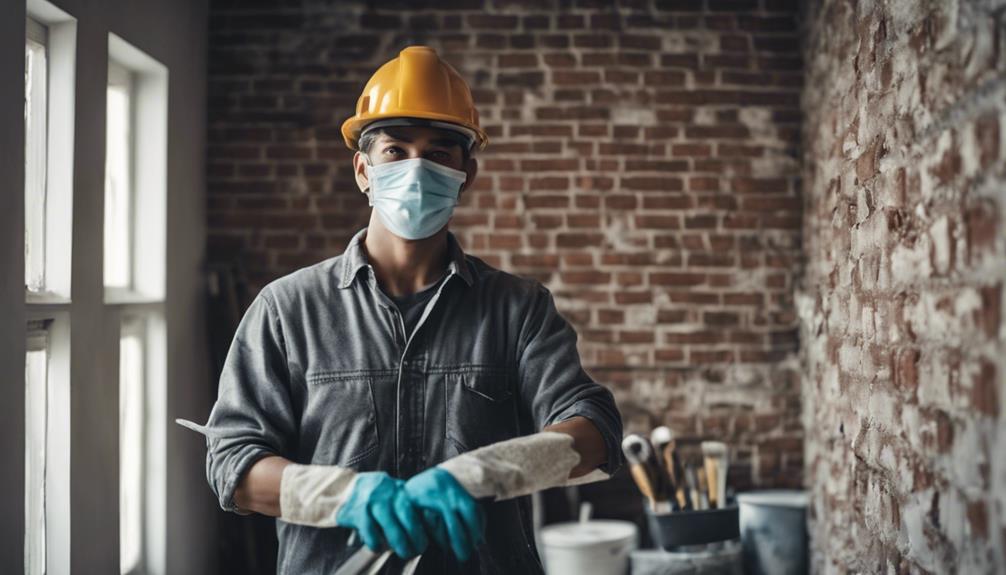
Preparing the Wall Surface
Now that you've chosen the perfect wall location, it's time to prepare the wall surface for your brick accent wall.
Before you start, you'll need to clean the wall thoroughly, check for damaged areas that need repair, and apply a primer if necessary to guarantee a smooth finish.
Clean the Wall Surface
Before you begin applying your faux brick material, clean the wall surface thoroughly to establish a strong bond between the wall and the new accent wall. A clean surface is crucial for a stunning brick accent wall in your bedroom.
Start by removing any dust, dirt, or debris from the wall surface using a damp cloth or sponge. For stubborn stains or grease marks, use a mild detergent solution to clean the area. Make sure to allow the wall to dry completely before proceeding with any further steps. This guarantees proper adhesion of the faux brick material and prevents any issues down the line.
As you clean the wall, inspect it for any cracks or imperfections that may need to be patched and repaired before applying the faux brick. A clean and smooth wall surface will provide the best foundation for your brick accent wall, ensuring a beautiful and long-lasting result.
Check for Damaged Areas
You've cleaned the wall surface, now inspect it for any cracks, holes, or damage that may need repair before applying the faux brick. This step is important in ensuring a smooth and even surface for your brick accent wall.
Take a close look at the wall and identify any areas that need attention. If you find any cracks or holes, fill them in with spackling or joint compound, and let it dry completely. Once dry, sand down the area to create a seamless surface.
Remember, a smooth surface is essential for a professional-looking brick accent wall. Any imperfections can affect the adhesion of the faux brick material, so take your time to get it right.
Apply Primer If Needed
If your wall surface still shows signs of imperfections or porosity after repairing damaged areas, apply a primer to create a smooth, even surface for best faux brick adhesion. This step is essential in ensuring a professional-looking finish. The primer will help cover any remaining imperfections and prevent uneven paint absorption, resulting in a more cohesive look.
Here's a breakdown of the benefits of using a primer:
| Reason | Benefit | Result |
|---|---|---|
| Covers imperfections | Smooth surface | Better faux brick adhesion |
| Prevents uneven paint absorption | Even paint distribution | Uniform color |
| Enhances durability | Longer-lasting finish | Professional-looking accent wall |

Brick Wallpaper Peel and Stick Wallpaper 17.3"x78.8" Grey and White 3D Brick Wallpapers Self Adhesive Vintage Wall Paper Removable Textured Contact Paper for Fireplace Kitchen Home Decoration Vinyl
Product Information: Brick peel and stick wallpaper. Size: 17.3"x78.8" ,with an area of 9.45 square feet. Material: PVC/Vinyl
As an affiliate, we earn on qualifying purchases.
Applying the Brick Pattern
As you start applying the brick pattern, you'll need to contemplate the design of your brick layout, including the spacing between bricks and the overall aesthetic you want to achieve.
You'll want to choose a brick pattern design that fits your personal style, whether it's a classic running bond or a more modern herringbone pattern.
Your brick layout strategy will ultimately depend on the look you're going for, so take some time to think about the visual impact you want to create.
Brick Pattern Design
To achieve a uniform brick pattern design, start by applying a brick template to guarantee consistent sizing and spacing. This is particularly important in a DIY project, where precision is key to achieving a professional-looking result.
When applying the brick pattern, it's vital to break down the process into manageable sections. To do this, tape off bricks in sections, making sure the tape is securely placed to define the brick shapes accurately. This will help you maintain a systematic approach and avoid errors.
Here are some additional tips to keep in mind:
- Apply joint compound evenly over the taped-off areas for a textured finish.
- Remove the tape while the joint compound is still wet to reveal the brick pattern effectively.
- Work in small sections to maintain control and precision.
- Use a level to make sure the bricks are straight and even.
Brick Layout Strategy
By choosing a brick layout strategy that complements your room's style and dimensions, you'll set the tone for a visually appealing accent wall that adds depth and character to the space.
Consider different brick patterns like running bond, herringbone, or basket weave for visual interest. Opt for a horizontal or vertical layout to complement the room's dimensions and style. You can also experiment with staggered brick placement for a more casual and dynamic look.
To create a striking visual impact, use contrasting grout colors to highlight the brick pattern. For a unique touch, create a focal point by incorporating a unique brick layout, such as a chevron or diagonal pattern. This will draw attention to the accent wall and make it a standout feature in your bedroom.
Brick Spacing Techniques
With your brick layout strategy in place, you're ready to apply the pattern, and consistent spacing between bricks is crucial to achieving a professional-looking accent wall. To guarantee uniformity, use a brick template or ruler to maintain consistent spacing between bricks. Measure and mark the distance between each brick to secure accuracy.
Here are some essential tips to keep in mind when it comes to brick spacing techniques:
- Use a standard spacing of 3/8 inch to achieve a traditional brick wall look.
- Experiment with different spacing options like 1/2 inch or 1 inch for a unique design.
- Consistent spacing enhances the overall aesthetic and professional finish of the brick accent wall.
- Measure and mark the distance between each brick to secure accuracy and maintain uniformity.

Fake Window Wall Decal Summer Beach Seascape Faux Window Sticker Office Poster Picture Art Decor,Stick and Peel Natural Scenery Landscape Coastal Ocean Scene Mural 48"x32"Set of 2 Sheets
【Size 】48"x32" size fits perfectly on most walls for a quick and easy way to revamp any room.perfect...
As an affiliate, we earn on qualifying purchases.
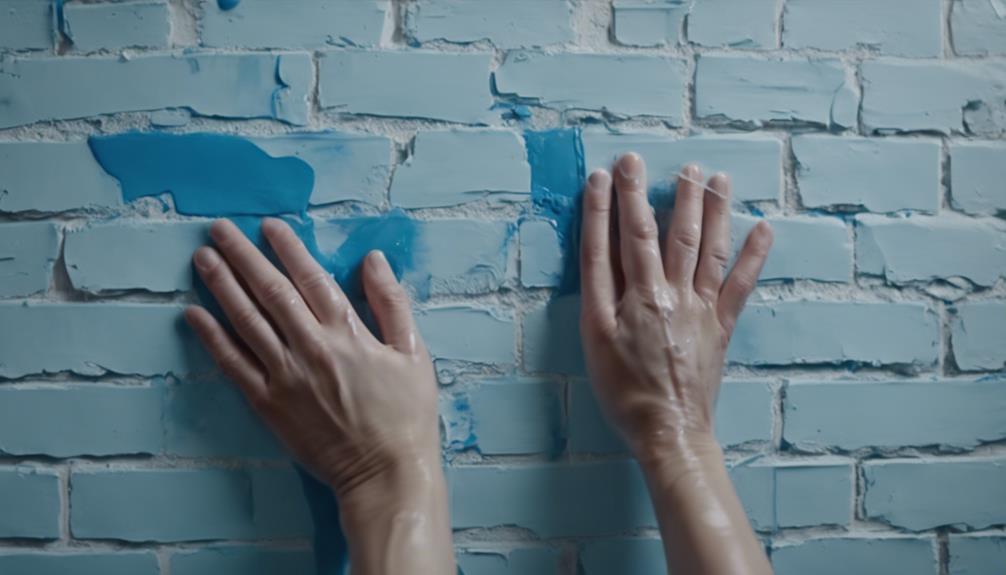
Mixing and Applying Compound
You'll need to mix the joint compound according to the manufacturer's instructions before applying it to the taped-off brick sections. Make sure to follow the instructions carefully, as the consistency of the compound can impact the final result.
Once mixed, use a trowel to apply the compound evenly over the taped-off areas, spreading it in a textured manner to mimic the brick texture. Guarantee full coverage of each brick area for a cohesive look.
As you apply the compound, make sure to fill in any gaps or corners thoroughly. Allow the joint compound to dry completely before moving on to the next step. This is important, as any moisture can affect the final finish.
After the compound has dried, you can remove the tape, revealing the defined brick shapes. Be patient and take your time, as this step sets the foundation for a stunning brick accent wall in your bedroom.
Creating a Textured Finish
As you move on to creating a textured finish, apply a second layer of joint compound to the brick shapes, using a putty knife or trowel to spread it evenly and achieve a raised, three-dimensional effect. This step is essential in creating a realistic faux brick accent wall.
When spreading the joint compound, make sure to cover the entire surface of the brick shapes, but avoid creating a uniform layer. You want to mimic the texture of real bricks, which can be uneven and rough.
Here are some key tips to keep in mind:
- Use a putty knife or trowel to spread the joint compound, as they provide more control over the application.
- Apply the compound in small, circular motions to achieve a textured finish.
- Don't overwork the compound, as it can become too smooth and lose its textured effect.
- Embrace the messy process, as the joint compound will dry to reveal a stunning textured finish that adds depth and dimension to your faux brick accent wall.
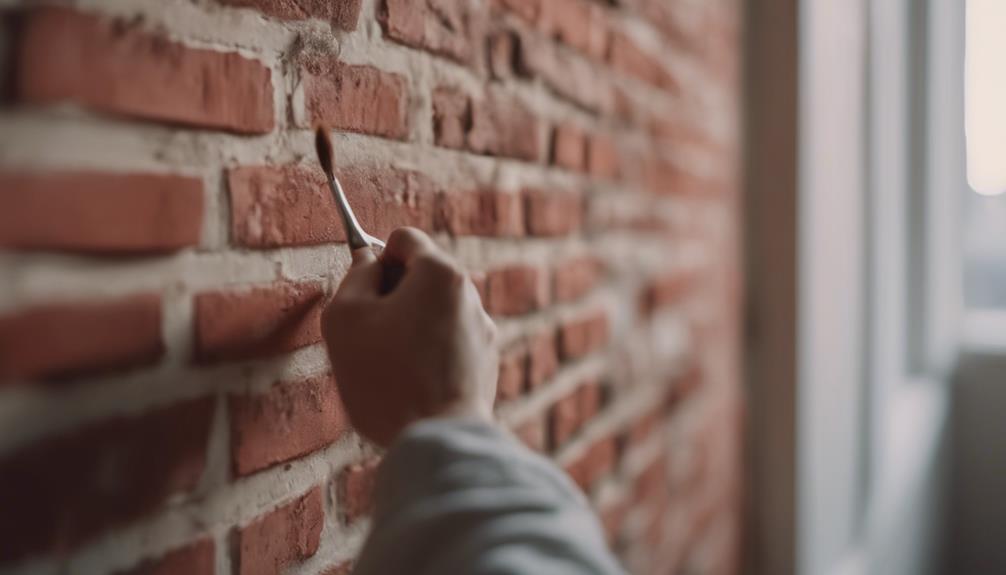
Removing Tape and Cleanup
Peel the tape away carefully to reveal the crisp, clean lines of your brick shapes. As you remove the tape, you'll start to see the fruits of your labor come to life. The defined edges and textures of your faux brick pattern will begin to emerge, and you'll feel a sense of excitement and accomplishment. Be sure to dispose of the tape remnants in a trash bag for easy cleanup as you go.
As you continue to remove the tape, you'll witness the transformation of your wall as the taped-off areas are revealed. The contrast between the painted and unpainted sections will be striking, and you'll start to envision the finished product. Take your time and work methodically to make certain that all the tape is removed, and don't forget to admire your handiwork along the way.
With the tape gone, you'll be ready to move on to the next steps in completing your stunning faux brick accent wall. Take a moment to appreciate the progress you've made so far, and get ready to take your project to the next level.
Touching Up Imperfections
With sandpaper in hand, smooth out any rough patches or uneven areas on the brick surface, making sure to wipe away any dust or debris as you work. This important step will guarantee a flawless finish for your accent wall.
Next, inspect the wall for any cracks or holes and fill them with a suitable patching compound, allowing it to dry completely.
To achieve a seamless look, you'll need to make some touch-ups along the way. Here are some key steps to follow:
- Fill in any cracks or holes with a suitable patching compound and allow it to dry completely.
- Apply a primer specifically designed for masonry surfaces to ensure better adhesion of paint or sealant.
- Use a small brush to touch up areas where the paint or sealant may have chipped or worn off.
- Inspect the entire wall for any remaining imperfections and make necessary touch-ups to achieve a flawless finish.
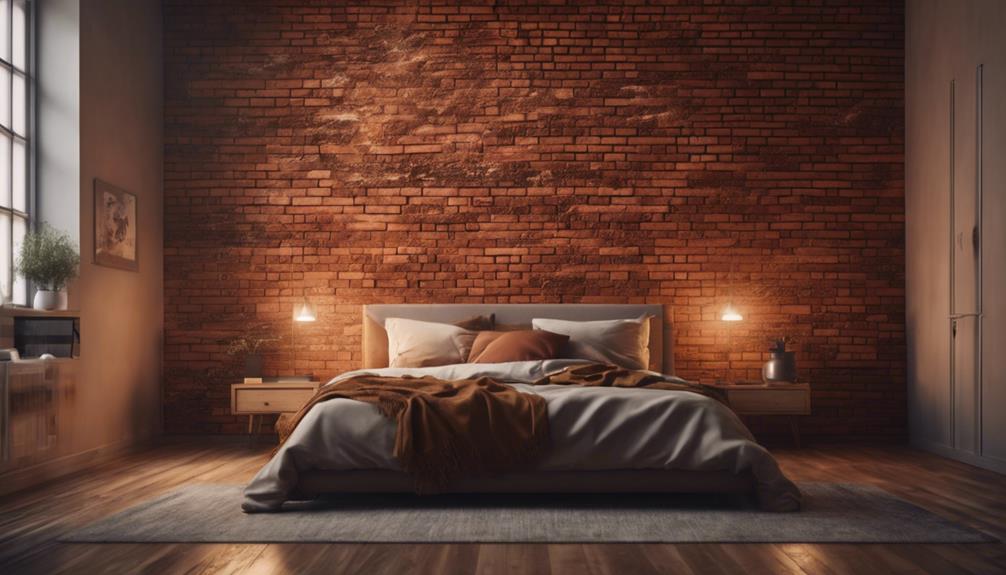
Sealing and Finishing Touches

Now that your brick accent wall is free of imperfections, it's time to protect it from the elements and enhance its appearance by applying a sealer and adding your desired finish.
A sealer helps shield your brick accent wall from moisture and stains, effectively extending its lifespan. To get started, choose a sealer that suits your brick type and desired finish, whether that's matte, glossy, or something in between. Apply the sealer evenly using a brush or roller, ensuring complete coverage. Be patient and let the sealer dry according to the manufacturer's instructions before moving on to the finishing touches.
You can then opt for a whitewash, paint, or leave the natural brick exposed, depending on the look you're going for. Remember, the sealer is essential in protecting your brick accent wall, so take your time and do it right.
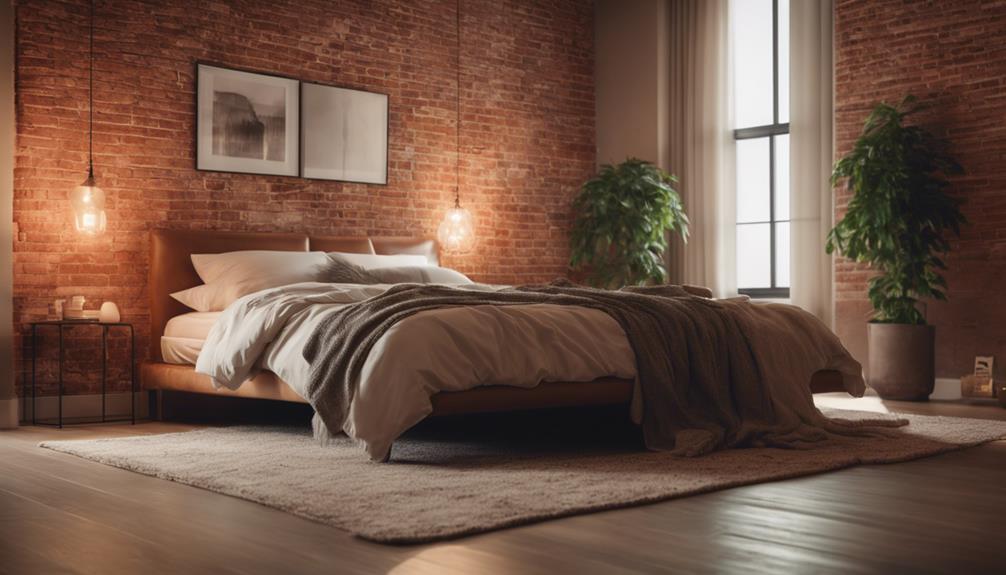
With the right sealer and finish, your bedroom's focal point will be a stunning brick accent wall that adds warmth and character to the space.
Frequently Asked Questions
How Can I Make My Brick Wall More Attractive?
To make your brick wall more attractive, you'll want to focus on adding depth and visual interest. Start by incorporating strategic lighting fixtures to highlight the texture of the brick.
You can also add some greenery or plants to soften the look. Consider using cozy textiles like wool or faux fur to create a warm atmosphere.
Experimenting with different wall art styles can also enhance the beauty of your brick wall.
How to Do an Accent Wall in a Bedroom?
You're considering adding an accent wall to your bedroom, but you're unsure where to start.
On one hand, it can be a game-changer, adding visual interest and depth to the room.
On the other hand, it can be overwhelming, especially with the numerous material options available.
How to Make Fake Brick Look?
When you want to make fake brick look realistic, you'll need to focus on the details.
To achieve a convincing texture, use joint compound and masking tape to create a faux brick pattern.
Apply the compound evenly, making sure to spread it smoothly over the taped-off areas.
Then, remove the tape while the compound is still wet to reveal a realistic brick design.
How to Decorate a Bedroom With Exposed Brick?
You're probably wondering how to decorate a bedroom with exposed brick.
To achieve a cozy atmosphere, balance the rawness of the brick with soft textiles like wool or faux fur.
Add some greenery and wall art to enhance the natural beauty of the brick.
Conclusion
With your brick accent wall now complete, step back and admire your handiwork! According to the National Association of Home Builders, 77% of homebuyers consider a decorative wall a 'must-have' feature in a bedroom.
You've not only added a touch of industrial chic to your space, but also increased its appeal to potential buyers.
Take pride in knowing you've created a stunning focal point that will be the envy of friends and family.