Connect with us

Home Decor

Chalk Paint Looks Like Wood: Achieving Wood-Like Effects

Harness the power of chalk paint to deceive the eye with remarkably realistic wood-like finishes that will leave you wondering what's real and what's not.

Published

on

faux wood with chalk

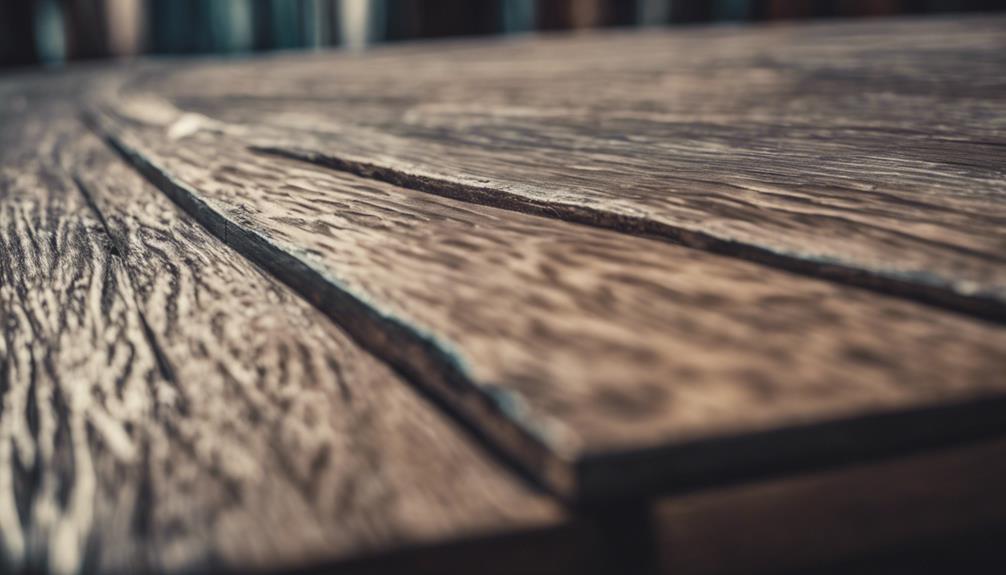
To achieve a wood-like finish with chalk paint, you'll need to select the right wood type, such as pine or plywood, and prepare the surface by sanding and wiping off dust. Choose warm, earthy tones and experiment with layering colors for depth and texture. Dry brushing and blending techniques can mimic the natural appearance of wood grain. To add realism, try painting knots and grains, and experiment with brush strokes and texture techniques. Finally, seal your work with clear wax and consider adding a distressed look. With these techniques, you're one step closer to creating a stunning, wood-like masterpiece – and there's still more to discover.

Key Takeaways

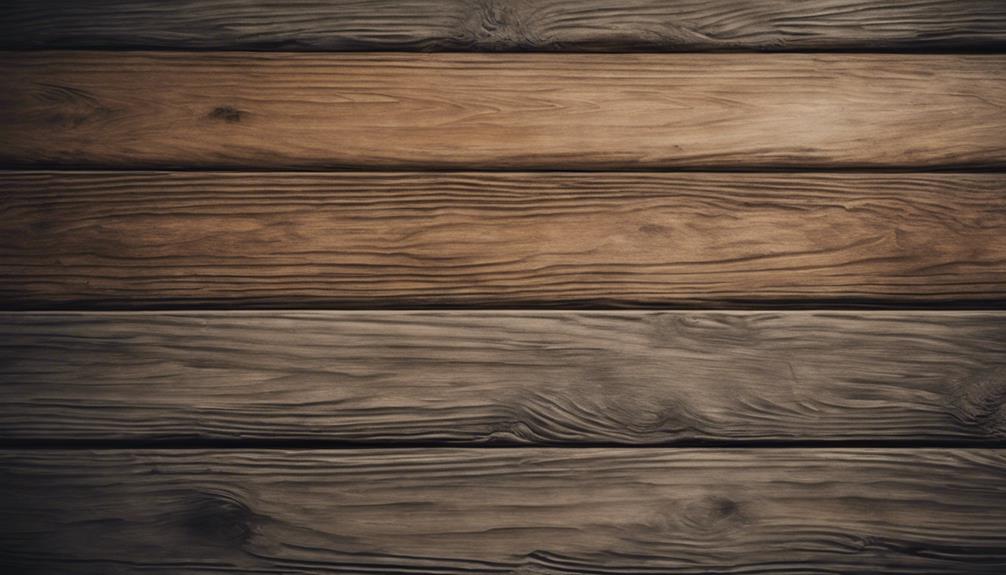
• Choose the right wood: Opt for pine or plywood, and avoid wood with heavy grain patterns for a realistic wood-like finish.

• Prepare the surface: Sand the wood thoroughly for smoothness and paint adhesion, and wipe off dust before applying the base coat of paint.

• Select earthy tones: Experiment with warm brown tones, earthy hues, and nature-inspired colors to create a convincing wood grain look.

• Master dry brushing: Use a nearly dry brush with light pressure to mimic the natural appearance of wood grain with long strokes.

Advertisement

• Add texture and details: Vary brushstrokes, add knots and grains, and experiment with blending chalk paint colors to achieve a realistic wood-like effect.

Selecting the Right Wood Type

When selecting the right wood for a realistic wood-like finish, opt for pine or plywood, as these types of wood will guarantee the best results with chalk paint.

Specifically, Annie Sloan Chalk Paint, a popular brand, works beautifully with these wood types.

Avoid using wood with heavy grain patterns, as they may disrupt the faux wood finish. Instead, choose wood planks that are approximately ¾ inch thick for a sturdy and realistic appearance.

Additionally, consider the size of your project and cut the wood planks to your desired lengths before applying chalk paint. This will guarantee a seamless finish and a more realistic wood-like effect.

Advertisement

Preparing the Wood Surface

wood surface preparation steps

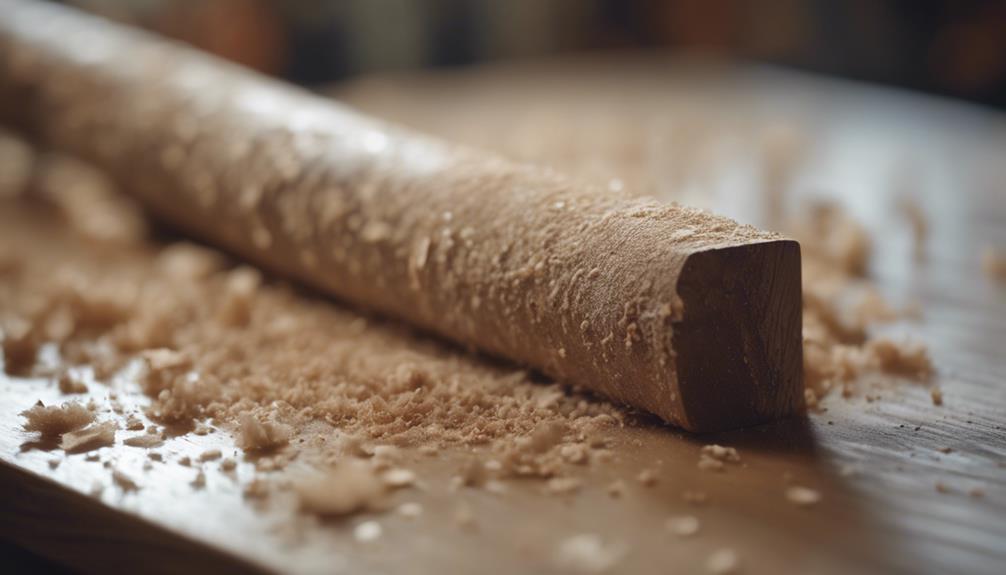
You'll achieve the best results by sanding the wood surface thoroughly to guarantee smoothness and enhance paint adhesion. This important step lays the foundation for a realistic wood-like finish with chalk paint.

As you sand, remember to wipe off any dust or debris from the surface before applying the base coat of paint. This secures a strong bond between the wood and the paint, reducing the likelihood of peeling or flaking.

Once you've applied the base coat, allow it to dry completely before proceeding with the next steps in the process. This patience will pay off when you're rewarded with a smooth, even finish.

For an added distressed look that mimics natural wood textures, lightly sand the dried base coat.

By following these steps, you'll be well on your way to achieving a wood-like finish that's both beautiful and convincing. Properly preparing the wood surface is essential, so take your time and don't rush through this critical step.

With a little patience and attention to detail, you'll be amazed at the results you can achieve with chalk paint.

Advertisement

Choosing the Perfect Colors

selecting the ideal color palette

Now that you've prepared your surface, it's time to contemplate the colors you'll use to create a realistic wood effect. You'll want to ponder a range of options, from earthy tones like brown and tan to grayer hues, as well as how to combine them to achieve the perfect wood grain look.

As you start exploring your color palette, you'll also want to reflect on finding inspiration in nature and testing out different combinations to get the look just right.

Color Palette Options

Your color palette options are essential in achieving a realistic wood look with Chalk Paint, and the right hues can make all the difference in mimicking the warmth and character of natural wood. Choosing the perfect colors can elevate your project from mediocre to magnificent.

Here are some color palette options to explore:

Color Palette Description
Warm Brown Tones Use 'Coco' or 'Arles' for a natural wood look
Rich Wood Grain Experiment with 'Graphite' or 'Graphite mixed with Florence' for a deep wood grain effect
Weathered Wood Layer 'Country Grey' and 'Paris Grey' with a touch of 'Old White' for a rustic finish
Classic Oak Finish Combine 'Chateau Grey' with 'Coco' and 'Provence' to mimic the warm tones of real wood

Wood Grain Inspiration

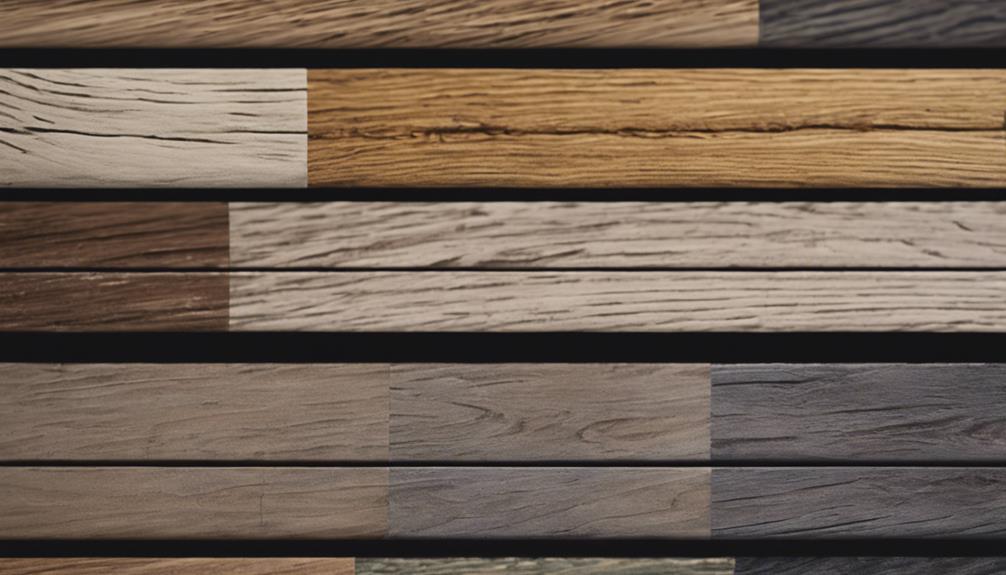
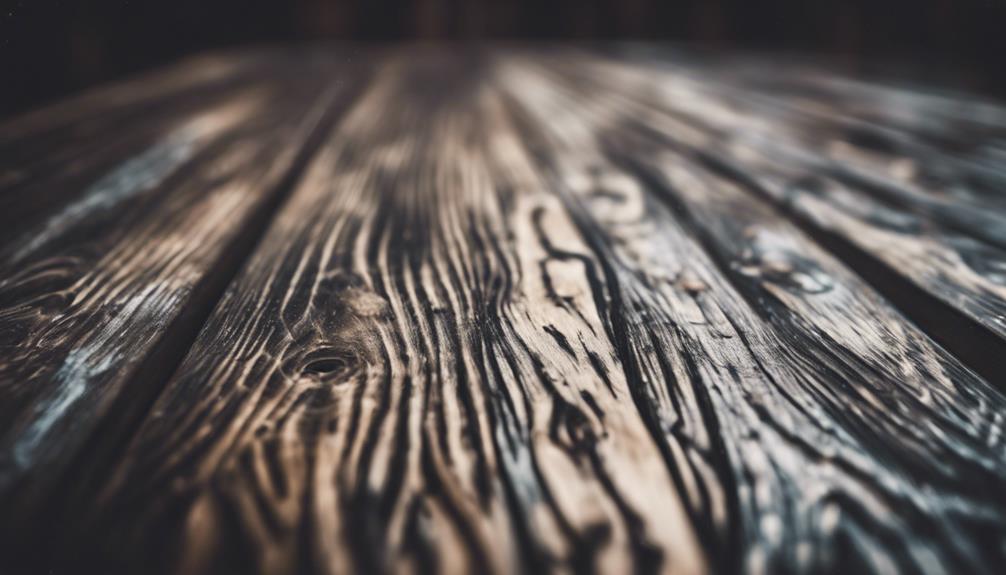
When it comes to capturing the essence of wood grain, earthy tones like browns, grays, and tans are your best friends, as they effortlessly mimic the natural warmth and character of real wood. These colors will help you achieve a wood-like effect that's both authentic and enchanting.

To add depth and variation to your wood grain design, mix different shades of paint to create a unique blend. Take inspiration from real wood textures like oak, pine, or walnut to get a realistic effect. Experiment with layering colors and blending techniques to achieve a lifelike wood appearance. Don't forget to use a fine brush to add intricate details like knots and grains for a more authentic look.

Advertisement

Nature-Inspired Hues

As you set out to capture the essence of wood grain, earthy tones become your trusted allies, guiding you towards a palette that echoes the natural world.

To achieve a realistic wood-like effect, you'll want to focus on hues that evoke the great outdoors. This means opting for warm, earthy tones like browns, grays, and beiges, which will help you create a convincing wood grain pattern.

When selecting your colors, keep the following tips in mind:

  • Warm undertones will help create a realistic wood grain effect
  • Mixing multiple shades of the same color can add depth and dimension to your design
  • Hints of green or blue can give your wood-like finish a weathered or aged appearance

Dry Brushing Techniques Explained

dry brushing skin benefits

To achieve a realistic wood-like finish, you'll use a nearly dry brush to apply paint in a controlled, gentle manner. This technique, known as dry brushing, creates a textured, wood-like effect by leaving some areas unpainted.

By using light pressure and long strokes, you can mimic the natural appearance of wood grain, adding depth and character to your surface. Experiment with different shades and layering to enhance the realism of your faux wood finish.

As you work, remember to maintain a gentle touch, as excessive pressure can result in an uneven, unnatural appearance. By mastering the art of dry brushing, you'll be able to create a wood-like finish that's both convincing and beautiful.

Advertisement

With practice, you'll develop a keen sense of how to manipulate the paint and brush to achieve the desired effect. So, take your time, be patient, and get ready to express your creativity.

Blending Colors for Realism

creating realistic artwork techniques

As you explore the world of blending colors for realism, you'll want to focus on mastering natural wood tones. Experimenting with color gradation techniques and layering for depth are essential techniques. By doing so, you'll be able to create a wood-like effect that's incredibly convincing.
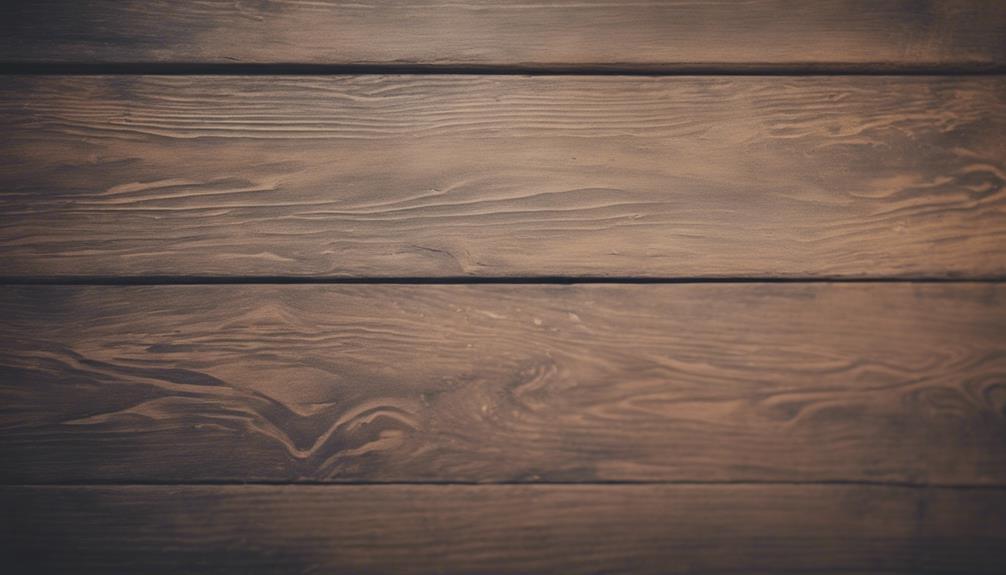
Natural Wood Tones

You can create a wide range of natural wood tones by blending different shades of chalk paint, allowing you to achieve a realistic look that's both convincing and visually appealing.

By experimenting with various color combinations, you can replicate the warmth and depth of real wood, adding authenticity to your faux wood planks.

To get started, try blending the following colors to achieve a natural wood tone:

  • Warm beige and golden brown for a light oak effect
  • Rich walnut and deep brown for a darker, more rustic look
  • Soft gray and beige for a weathered wood appearance.

Color Gradation Techniques

By layering chalk paint colors in a specific order, you can create a wood grain effect that's remarkably realistic. To achieve this, blend browns and grays to mimic the natural variations in wood grain.

Start with a base color and gradually layer darker or lighter shades for depth and dimension. Use a feathering technique with a dry brush to seamlessly blend different colors together, creating a smooth shift between shades.

Advertisement

Experiment with different paint application methods to mimic the natural variations in wood grain. For instance, you can use a dragging technique to create a wood grain pattern or a stippling technique to create a more textured look.

Before applying the color gradation technique to your entire project, practice on a small test surface to confirm the desired effect. By mastering this technique, you'll be able to create a wood-like finish that's both realistic and stunning.

Layering for Depth

To build depth and realism in your wood grain effect, layering different shades of chalk paint is key, allowing you to create a dimensional, textured look that mimics the natural variations found in real wood. By combining multiple shades, you can achieve a rich, multi-tonal appearance that captures the complexity of real wood.

To get started, select a base color that represents the dominant tone of the wood you're trying to replicate. Then, add darker and lighter shades to create contrast and visual interest. Finally, blend the colors together using a dry brush technique to create a seamless shift between shades.

Some key considerations to keep in mind as you layer your chalk paint include:

Advertisement

Focus on creating knots, grains, and patterns typical of wood for a realistic appearance.

Experiment with different color combinations and blending techniques to achieve the desired wood-like effect.

Don't be afraid to try new things and adjust your approach as needed to achieve the look you want.

Adding Knots and Grains

tying woodwork showcasing details

With a fine brush in hand, carefully craft knots and grains that convincingly mimic the natural textures found in wood. To add authenticity to your faux wood planks, focus on creating realistic wood textures.

Technique Description
Painting Knots Use a darker shade of paint to create small circular shapes, blending them into the surrounding area.
Painting Grains Apply long, thin lines using a lighter shade of paint to mimic natural wood patterns.
Varying Grains Change the direction and thickness of the grains to achieve an authentic wood-like appearance.
Brush Strokes Experiment with different brush strokes to achieve a realistic and textured finish.
Patience Take your time, as achieving a realistic wood-like effect requires patience and practice.

Texture and Dimension Techniques

exploring artistic texture techniques

You can create a remarkably realistic wood texture by using a dry brush technique with chalk paint, which helps to mimic the natural grain patterns found in wood. This technique is essential in achieving a wood-like effect, as it adds depth and dimension to your painted surface.

By using a dry brush, you can create a textured, layered look that resembles the natural grain of wood.

To take your wood-like effect to the next level, try these techniques:

Advertisement
  • Apply paint in long strokes, varying shades to create a natural, multi-tonal look.
  • Use a fine brush to add knots and grains, enhancing the wood-like effect.
  • Blend different colors to achieve depth and realism in the faux wood grain.

Clear Wax Finishing Touches

polished waxing for furniture

Your faux wood planks are now ready for a clear wax finish that seals and protects the chalk paint, giving your project a polished, professional look. This final step is essential in ensuring your hard work lasts for years to come.

By applying clear wax, you're not only sealing the paint but also making it more durable and resistant to wear and tear. After applying the wax, use a clean cloth to buff the surface, and you'll be left with a smooth, polished finish.

The clear wax will enhance the natural look of the wood grain effect you've created with chalk paint, making it almost indistinguishable from real wood. By adding this final layer of protection, you're guaranteeing a long-lasting, professional finish that will withstand the test of time.

With clear wax, you can be confident that your faux wood planks will remain vibrant and beautiful for years to come.

Creating a Distressed Look

distressed denim fashion trend

As you work on creating a distressed look, you're aiming to achieve a weathered wood appearance, where the paint layers appear faded and worn.

To get this effect, you'll focus on sanding specific areas, such as edges and corners, to reveal the underlying base coat and create a sense of age.

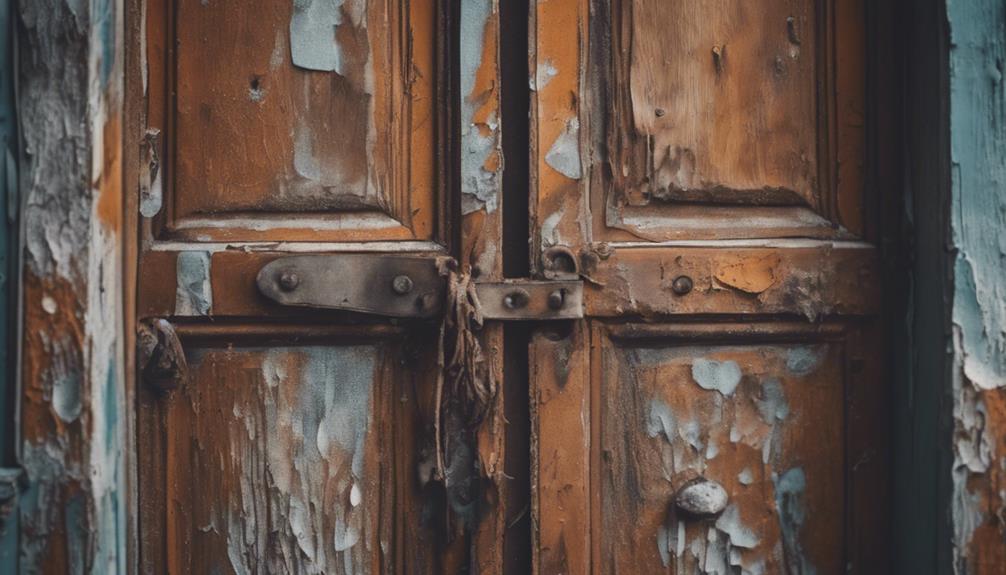
Weathered Wood Appearance

Achieving a weathered wood appearance with chalk paint requires a combination of subtle layering and deliberate distressing techniques. To create a realistic weathered wood look, you'll need to focus on building up layers of paint and strategically distressing the surface.

Advertisement

Here are some techniques to try:

  • Sand the base coat lightly to reveal the wood underneath and create a weathered appearance.
  • Apply additional layers of paint in different shades to mimic natural wood variations and imperfections.
  • Use a dark wax to enhance the distressed look and add depth to the faux wood grain.

When applying these techniques, focus on the edges and corners of your piece to create a more realistic weathered wood effect. Don't be afraid to experiment with different techniques like dry brushing and sanding to achieve a customized distressed look.

Faded Paint Layers

By strategically layering multiple coats of chalk paint in different shades, you can create a distressed look that captures the worn, weathered essence of aged wood. To achieve this faded, layered effect, allow each coat to dry completely before applying the next, gradually building up the color and texture.

As you work, use a sanding block or sandpaper to lightly distress the paint, revealing the underlying colors and creating a sense of depth and history. Focus on areas that would naturally wear over time, such as edges, corners, and high-traffic areas, to create a realistic, aged appearance.

Experiment with varying pressure and sanding techniques to achieve a truly unique, distressed look. By doing so, you'll add character and visual interest to your project, making it look like a genuine, weathered wood finish.

With a little patience and practice, you can master the art of creating faded paint layers that convincingly mimic the beauty of aged wood.

Advertisement

Tips for a Realistic Finish

realistic painting finish techniques

To achieve a realistic finish, you can employ a combination of techniques that mimic the natural patterns and colors of wood. By mastering these techniques, you'll be able to create a wood-like effect that's incredibly convincing.

Here are some essential tips to help you achieve a realistic finish:

  • Vary your brushstrokes: Apply paint in long, smooth strokes to mimic the natural look of wood grain, and use a dry brush technique with Annie Sloan Chalk Paint to create realistic wood grain on wood planks.
  • Play with colors: Vary shades of paint to imitate different wood tones and textures for a more authentic appearance. Blend colors together to achieve depth and dimension, enhancing the overall realism of the faux wood planks.
  • Add finer details: Use a fine brush to add knots and grains to enhance the wood-like effect, creating a more realistic finish.

Frequently Asked Questions

How to Get Chalk Paint to Look Like Wood?

To achieve a wood-like appearance with chalk paint, start by selecting the appropriate surface, such as pine or plywood, with a smooth finish.

Next, use a dry brush to simulate a wood-grain effect by applying different shades of chalk paint in long strokes.

For added authenticity, use a fine brush to incorporate knots and grains.

How Do You Make Painted Wood Look Like Real Wood?

To make painted wood look like real wood, you'll want to master a few techniques.

First, use a dry brush to apply paint in long, sweeping strokes, mimicking the natural grain of wood. Vary your strokes and shades to achieve depth and realism.

Advertisement

Add knots and grains with a fine brush, blending colors to create a textured appearance.

Finish with a clear wax coat for protection and a smooth finish, distressing as desired for an authentic look.

How Do You Paint Wood Like Effects?

You're looking to paint wood-like effects, and you're wondering how to achieve that realistic look.

To start, grab a dry brush and apply chalk paint in long strokes, varying shades to mimic wood grain.

Add knots and grains with a fine brush, blending colors for depth.

Advertisement

Finish with clear wax and buff for a smooth finish.

What Paint Makes Things Look Like Wood?

When it comes to painting surfaces to resemble wood, you're likely wondering what paint makes things look like wood. The answer lies in Annie Sloan Chalk Paint, a popular choice for achieving wood-like effects.

This paint allows for easy application and manipulation to create realistic wood grain patterns. By using a dry brush technique and varying shades of paint, you can mimic the natural look of wood, making it an ideal choice for your project.

Conclusion

As you step back to admire your handiwork, the grain of the wood seems to jump out at you, and the subtle nuances of the colors blend together in harmony.

The dry brushing and blending techniques have conspired to create an illusion so convincing, you can almost smell the wood.

Advertisement

You've managed to tame the chalk paint, bending it to your will to create a wooden masterpiece that's more than just a pretty facade – it's a work of art that whispers 'wood' to all who lay eyes on it.

Continue Reading
Advertisement

Alfresco

What Is Alfresco Painting? Artistic Techniques Explained!

An exploration of alfresco painting, a historical technique rooted in the Renaissance, revealing artistic secrets that elevate outdoor artistry.

Published

on

By

outdoor painting technique overview

Explore the historical artistry of alfresco painting, stemming from the Renaissance in Italy. Artists like Giotto and Michelangelo led the way, painting on wet plaster to craft vivid frescoes. For this technique, you'll need outdoor-grade paints such as oil paints, acrylics, or watercolors, along with suitable brushes and water containers. Prepping the plaster surface meticulously is essential for a flawless finish. As you paint, remember to use soft brushes on wet plaster, allowing pigments to chemically bond with the surface for depth. Delve into this technique further to uncover the intricate details and techniques that make alfresco painting truly unique.

Key Takeaways

  • Originates from Renaissance Italy, involving painting on wet plaster.
  • Requires outdoor-grade paints, suitable brushes, water containers, and portable easels.
  • Involves drawing directly on wet plaster and using soft brushes for blending.
  • Fresh plaster crucial for strong paint bonding, vibrant colors, and longevity.
  • Preservation entails curing, sealing, weather considerations, and regular maintenance.

Origins of Alfresco Painting

The origins of alfresco painting trace back to Italy during the Renaissance period, where artists pioneered the technique of painting on wet plaster to create enduring murals. This artistic practice, known as fresco, emerged as a popular method for decorating the walls and ceilings of churches, palaces, and public buildings in Italy.

During the Italian Renaissance, artists like Giotto and Michelangelo utilized fresco painting to produce magnificent works of art that showcased both their technical skill and creative vision.

Fresco painting involves applying water-based pigments on freshly laid wet plaster, allowing the colors to become an integral part of the surface as they dry. Artists would transfer their designs onto the wet plaster from a cartoon or outline drawing, enabling them to create intricate and long-lasting murals.

This technique not only provided a durable finish but also allowed for the creation of monumental and detailed artworks that adorned various architectural settings, contributing to the rich artistic legacy of the Italian Renaissance.

Materials Needed for Alfresco Painting

outdoor painting supplies required

For alfresco painting, you'll need specific materials to create your artwork outdoors. Common materials for fresco painting include outdoor-grade paints such as oil paints, acrylics, or watercolors. These paints are chosen based on the artist's preferences and the desired effect.

In addition to paints, you'll require brushes suitable for outdoor use, water containers for mixing paints, and portable easels to support your canvas or surface.

Advertisement

When painting alfresco, the natural light and surroundings play a significant role in influencing the colors and atmosphere of your artwork. This medium allows artists to capture changing light, shadows, and textures in real-time, providing a unique artistic experience.

Remember that preparing the plaster surface adequately is essential before beginning your alfresco painting to maintain the longevity and quality of your artwork.

Preparing the Plaster Surface

surface ready for plaster

To start preparing the plaster surface for alfresco painting, ensure it's smooth and free of imperfections. This step is vital as the success of the painting relies heavily on the quality of the plaster surface.

Artists often employ traditional fresco techniques to achieve the desired smoothness and flawlessness required for alfresco painting. Ensuring the plaster surface is completely dry is essential before commencing the painting process, as any moisture can compromise the adhesion of the pigments to the surface.

Properly preparing the plaster surface not only enhances the aesthetic appeal of the final artwork but also contributes to its longevity. By meticulously attending to the details of the plaster surface, artists set a strong foundation for the application of water-based pigments, which is the hallmark of alfresco painting.

Drawing the Design on Plaster

designing patterns on plaster

When drawing the design on plaster for alfresco painting, artists meticulously outline their vision directly onto the wet plaster surface. This technique for tracing serves as an essential guide for applying pigments and creating the mural.

Ensuring accuracy and cohesion in the final artwork, this step allows for the seamless integration of the design into the larger mural composition.

Advertisement

Plaster Design Preparation

Efficiently transferring the desired artwork onto the fresh plaster surface is a crucial step in the process of preparing the design for an alfresco painting. Artists utilize tools like brushes, pencils, or styluses to outline the design directly onto the prepared plaster surface.

These design outlines act as a roadmap for the artist, guiding them through the painting process in the alfresco technique. Precision and accuracy in this step are essential as they greatly impact the overall composition of the artwork.

Drawing the design on plaster marks the critical initial phase in creating vibrant and enduring alfresco paintings. By carefully tracing the design onto the plaster, artists lay the foundation for a visually captivating mural that withstands the test of time.

This meticulous process ensures that the artwork isn't only visually appealing but also structurally sound, enhancing its longevity and artistic impact.

Technique for Tracing

Using a sinopia sketch or cartoon, artists meticulously trace the design onto the fresh plaster surface to prepare for the alfresco painting process. Tracing is an essential step in fresco painting, as it allows artists to transfer the intricate details of their design onto the plaster with precision and accuracy.

Advertisement

By following the lines of the sketch or cartoon, artists can guarantee that the final composition reflects their original vision faithfully. This technique not only guides the artist during the painting process but also aids in the placement of elements within the composition. Through tracing, artists can achieve a level of detail and accuracy that would be challenging to attain freehand.

Ultimately, tracing plays a significant role in ensuring that the final fresco painting is a true representation of the intended design, capturing every nuance and detail with meticulous care.

Painting Techniques in Alfresco Painting

alfresco painting methods explained

To achieve intricate details and vibrant colors in alfresco painting, artists employ specific brushwork techniques on the freshly applied plaster. Working on wet plaster allows the pigments to bond chemically with the surface, ensuring the artwork becomes a permanent part of the wall in mural painting.

The technique involves using soft brushes to apply pigments to the wet surface, with the colors becoming brighter as the plaster dries. Artists must work swiftly and confidently to capture the desired hues and textures before the plaster sets. By blending and layering pigments on the wet surface, they can achieve depth and dimension in the mural.

This method of painting on wet plaster gives the artwork a matte finish and durability that's ideal for large-scale murals. The process of painting on wet plaster requires skill and precision to create lasting and visually stunning pieces of art.

Importance of Fresh Plaster in Painting

fresh plaster for painting

Fresh plaster plays a vital role in alfresco painting by ensuring that the paint adheres securely to the wall surface, enhancing its durability over time.

The porous nature of fresh plaster allows the pigments to be absorbed, creating a strong bond between the paint and the wall.

Advertisement

Artists find that painting on fresh plaster provides a smooth and receptive canvas for their artistic expression, resulting in vibrant and long-lasting colors on the wall.

Fresh Plaster Enhances

Enhancing the vibrancy and longevity of painted colors, fresh plaster plays an essential role in alfresco painting techniques. When working with fresco painting, fresh plaster acts as a pivotal foundation that allows the colors to bond effectively, creating lasting artwork. The porous nature of fresh plaster enhances the vibrancy of the colors, ensuring they remain vivid over time. Additionally, painting on fresh plaster provides artists with a smooth and even surface to work on, allowing for intricate details and precise brushwork.

To further illustrate the importance of fresh plaster in alfresco painting, consider the following table:

Benefits of Fresh Plaster in Alfresco Painting
Allows colors to bond effectively
Enhances color vibrancy and longevity
Provides a smooth surface for detailed work

Painting Adhesion and Durability

For ideal adhesion and durability in alfresco painting, fresh plaster plays a critical role in bonding water-based pigments to the wall surface. In fresco painting, the application of fresh plaster serves as the foundation for the paint to guarantee effective bonding, ensuring a long-lasting finish.

The interaction between the fresh plaster and water-based pigments is essential for creating a strong bond that withstands the test of time. Without the use of fresh plaster, the paint may not properly set on the wall surface, leading to potential issues such as flaking or peeling over time.

Advertisement

Fresh plaster in alfresco painting isn't just a surface preparation step but a fundamental component in enhancing the vibrancy and longevity of the colors applied. It allows for a seamless integration of the paint into the wall, becoming a permanent part of the structure.

The meticulous attention to using fresh plaster guarantees a durable and visually striking outcome in fresco painting.

Curing and Sealing the Fresco

preservation of ancient artwork

Curing and sealing the fresco is an essential final step in guaranteeing its longevity and preservation. The curing process involves allowing the fresco to dry naturally over several weeks. This period is vital for achieving full strength and durability as the pigments chemically bond with the plaster. Properly curing the fresco guarantees a lasting and vibrant artwork.

Sealing the fresco with a protective coating, such as a transparent glaze or wax, further enhances its longevity. This protective layer helps shield the fresco from environmental factors like dust, dirt, and moisture, preserving its colors and details for years to come. By properly curing and sealing the fresco, you aren't only maintaining its integrity but also ensuring its beauty withstands the test of time.

This meticulous process is fundamental for the long-term preservation of fresco paintings, making them a valuable and enduring art form.

Tips for Successful Alfresco Painting

outdoor painting success guide

When starting alfresco painting, keep in mind that the choice of location can greatly impact your artwork's outcome.

Considering the weather conditions is essential for a successful painting session outdoors.

Advertisement

Location Choice Matters

Selecting the right location is key to ensuring successful alfresco painting, as it greatly impacts the outcome of your artwork. When choosing a spot for your outdoor painting session, consider factors such as lighting, scenery, and ambiance. Here are some tips to help you make an informed decision:

Consideration Description Example
Lighting Opt for locations with natural light sources to enhance colors and shadows. Painting near a lake during sunset.
Scenery Choose settings that inspire your creativity and complement your artistic vision. A lush garden with vibrant flowers.
Ambiance Look for places that provide a peaceful and inspiring atmosphere to focus on your art. A quiet meadow with the sound of birds chirping.

Weather Considerations Crucial

Considering weather conditions is crucial for successful alfresco painting. It directly impacts the quality and process of your artwork.

Temperature plays a significant role in determining the drying times of your paints. Extreme heat can cause them to dry too quickly, affecting the blending and overall finish of your piece. On the other hand, cold temperatures can prolong drying times, leading to potential smudging or smearing if not carefully monitored.

Additionally, humidity levels in the air can influence how your paints adhere to the canvas, impacting the richness and depth of colors achieved. It's advisable to work during times when the temperature is moderate, avoiding peak sunlight hours that can accelerate drying excessively.

Inspirational Examples of Alfresco Art

outdoor art installations thrive

Explore a variety of awe-inspiring alfresco artworks that showcase the beauty and creativity of painting outdoors. Alfresco painting, with its roots in capturing the essence of nature, has produced some remarkable pieces throughout history.

One of the most iconic examples of alfresco art is Michelangelo's masterpiece in the Sistine Chapel. The intricate frescoes adorning the chapel's ceiling are a testament to the skill and dedication required for this painting technique.

Advertisement

Artists like Monet and Sargent also found inspiration in painting outdoors, using plein air techniques to convey the changing light and atmosphere in their works.

These influential artists paved the way for contemporary alfresco painters, who continue to create stunning pieces that blur the lines between art and nature. From vibrant landscapes to intimate portraits, alfresco art offers a unique perspective that can only be achieved by working directly from the natural world.

Preservation and Maintenance of Alfresco Paintings

conserving outdoor artwork masterpieces

To guarantee the longevity and beauty of alfresco paintings, preservation and maintenance are crucial steps in protecting these artworks from environmental damage. Preservation of fresco paintings involves safeguarding them from weather elements such as rain, sun exposure, and temperature fluctuations.

It's essential to maintain these pieces by regularly cleaning them to remove dirt, grime, and pollutants that could harm the artwork over time. Applying protective coatings or sealants can help extend the lifespan of alfresco paintings and prevent color fading.

In cases where restoration is necessary, conservators may repair cracks, reattach loose paint, and address any structural issues to ensure the durability of the artwork. Professional conservators utilize specialized methods and materials to safeguard fresco paintings, ensuring that their beauty and historical significance are preserved for future generations to appreciate.

Frequently Asked Questions

What Is the Fresco Painting Technique?

The fresco painting technique involves applying water-based pigments on freshly applied plaster, creating durable murals. Artists grind dry-powder pigments in water to create colors that dry and set with the plaster, allowing for detailed artworks.

Advertisement

What Does Al Fresco Mean in Painting?

Imagine painting under the open sky, capturing nature's essence with each brushstroke. 'Al fresco' in painting means embracing the outdoors. Artists use this term to signify creating art in the fresh air, connecting with nature's beauty.

How Does an Artist Create a True Fresco Painting?

To create a true fresco painting, you meticulously apply water-based pigments on fresh plaster while transferring your design. Each day, you paint sections on wet plaster, ensuring colors become permanent as they dry within the surface.

Why Is Fresco Painting Significant?

Fresco painting is significant due to its durability and ability to create monumental murals. Artists like Michelangelo favored it during the Italian Renaissance. Applying water-based pigments on wet plaster makes colors permanent, allowing detailed work.

Conclusion

To sum up, alfresco painting is a timeless art form that requires skill, patience, and attention to detail.

As you commence on your own alfresco painting journey, remember that like a fresco, life is a canvas waiting to be painted with vibrant colors and intricate designs.

Advertisement

So, take inspiration from the masters of the past, embrace the process of creating something beautiful, and let your creativity shine through in every brushstroke.

Happy painting!

Continue Reading

Home Decor

Set the Perfect Mood in Any Room With These Lighting Tips – You’Ll Be Amazed!

Unlock the secrets to transforming your space with simple lighting tips that will leave you amazed at the results!

Published

on

By

transform your space s ambiance

You can easily set the perfect mood in any room with just a few lighting tips. Start by using a mix of ambient and task lighting to create comfort and functionality. Dimming your lights softens the atmosphere for intimate gatherings, while warm-toned bulbs foster positivity. Layer your lighting with floor lamps, sconces, and colored LED bulbs to add depth and visual interest. Consider natural elements, like salt lamps, to enhance relaxation. These simple adjustments can transform your space. For even more ways to elevate your home's vibe, you'll want to explore additional creative lighting techniques!

Key Takeaways

  • Use dimmable fixtures or candles to easily adjust ambiance for gatherings or relaxation, creating a warm and inviting atmosphere.
  • Layer lighting with multiple sources, such as floor lamps and wall sconces, to enhance room aesthetics and depth.
  • Choose warm-toned bulbs to create a flattering environment that boosts confidence and enhances emotional connections.
  • Incorporate task lighting in functional areas to ensure safety and productivity while maintaining a cozy atmosphere.

Understanding Mood Lighting

Understanding mood lighting is essential because it can dramatically shape your emotions and experiences in any space. The right mood lighting creates an inviting atmosphere that enhances your feelings and interactions.

Ambient lighting, particularly when it has a warm glow, is vital for setting the tone. It not only softens harsh realities but also boosts confidence, especially in romantic settings.

Research shows that many people prefer dimmed lighting during intimate moments, often due to worries about body visibility and self-image. By using warm tones, you can create a more flattering environment that reduces self-consciousness and heightens enjoyment. This positive lighting can make a significant difference in how you and your partner connect, fostering deeper emotional ties.

Incorporating multiple light sources and adjusting colors can further enhance your space. You're not just illuminating a room; you're curating an experience that promotes well-being and satisfaction.

Types of Lighting to Consider

various lighting options available

To create the perfect atmosphere in your space, it's important to explore the different types of lighting available, each serving a unique purpose in enhancing your home's ambiance.

Start with ambient lighting, which sets the overall tone and mood of a room. Options like floor lamps and recessed lights provide a soft glow that enhances comfort and relaxation, making your space feel inviting.

Advertisement

Next, consider task lighting. This type is essential for functional areas where you need focused illumination. Under-cabinet lights in kitchens or desk lamps in home offices guarantee you can perform specific activities efficiently and safely. Task lighting not only aids productivity but also prevents eye strain.

Techniques for Effective Atmosphere

creating engaging atmosphere techniques

Creating the right atmosphere in your space involves a strategic blend of lighting techniques that cater to your specific needs and preferences.

Start by using dimmable light fixtures or candles to soften the ambiance, perfect for gatherings or relaxation. Multiple light sources, like floor lamps, wall sconces, and table lamps, allow you to adjust the mood effortlessly while enhancing the overall aesthetic of your room.

Consider incorporating smart home technology, which lets you customize brightness and color to suit different occasions. This adaptability guarantees your space feels just right, whether you're hosting friends or enjoying a quiet evening alone.

Opt for warm-toned lighting to boost self-confidence and create an inviting environment, fostering positive interactions. For a calming atmosphere, try adding natural elements like Himalayan salt lamps; they not only provide a gentle glow but also contribute to a soothing vibe.

Creating Intimacy With Light

illuminating connection through light

Soft lighting sets the mood for intimacy, helping you and your partner feel more relaxed and connected. When you dim the lights, the atmosphere transforms, inviting a sense of closeness. A warm, amber glow creates a cozy environment that encourages emotional bonding.

According to a Harris Poll, 62% of people prefer intimate moments with the lights off, emphasizing the power of reduced visibility in fostering comfort.

Advertisement

Incorporating ambient lighting solutions like Himalayan salt lamps or colored bulbs can greatly enhance the mood of a space. These options not only cast a soft light but also add a unique charm that can elevate your romantic experiences.

Warm tones in lighting improve appearance and boost self-confidence, allowing both you and your partner to feel at ease during those special moments.

Practical Lighting Tips for Rooms

effective room lighting strategies

Maximizing the effectiveness of your lighting can transform any room into a more inviting and functional space. Start by incorporating dimmer switches to easily adjust the lighting intensity, allowing you to create the right ambience for relaxation or social gatherings.

Layer your lighting with multiple sources, like floor lamps, table lamps, and recessed fixtures, to add depth and visual interest.

In spaces like living rooms and bedrooms, opt for warm-toned bulbs. They enhance appearance and boost confidence, making your environment feel more welcoming.

For functional areas like kitchens, utilize task lighting by combining overhead fixtures with under-cabinet lights. This guarantees ideal usability and safety while you cook.

Advertisement

Don't forget to experiment with strip lighting! It's perfect for accentuating architectural features or creating a cozy atmosphere in various spaces.

Consider using color-changing LED bulbs as well; they allow you to customize the atmosphere according to your mood or occasion. By mixing different shades and intensities throughout your rooms, you'll achieve a well-lit space that feels just right for any activity.

Frequently Asked Questions

How to Set the Mood With Lighting?

To set the mood with lighting, use warm-toned bulbs and multiple light sources. Incorporate soft lighting for comfort, and experiment with unique options like Himalayan salt lamps to create a playful, intimate atmosphere.

What LED Light Puts You in a Good Mood?

Imagine warm, soft oranges and yellows wrapping around you like a cozy blanket. Those LED lights lift your spirits, while playful purples spark joy, and calm blues keep you alert. Choose your mood, light it up!

How Does Room Lighting Affect Mood?

Room lighting affects your mood considerably. Warm tones can boost your confidence and create a relaxing atmosphere, while bright lights keep you alert. Adjusting lighting alters your feelings, enhancing intimacy and emotional satisfaction during interactions.

Advertisement

How Does Lighting Affect the Mood of a Scene?

You might think lighting doesn't matter much, but it profoundly shapes a scene's mood. Soft, warm tones create intimacy, while harsher lights can evoke tension. Carefully chosen lighting enhances emotions, fostering connections and making moments memorable.

Conclusion

Now that you've got the tools to set the perfect mood, imagine this: you're hosting a cozy dinner party.

Soft, warm lights flicker from strategically placed lamps, while candles on the table cast a gentle glow.

Friends laugh and share stories, feeling instantly relaxed in the inviting atmosphere you've created.

With these lighting tips, you can transform any space, making every gathering memorable and every moment special.

Advertisement

So go ahead, let your creativity shine!

Continue Reading

Home Decor

Ways to Incorporate Handmade Crafts Into Your Country Home Decor

Find inspiration in unique handmade crafts that will transform your country home decor into a cozy haven—discover the endless possibilities!

Published

on

By

handmade crafts for country decor

Incorporating handmade crafts into your country home decor adds a personal touch that enhances its cozy, rustic vibe. Start with thrifted items like wooden trays or vintage dishes to infuse character. Use natural elements, such as grapevine or jute ribbons, to layer textures. Adorn your dining table with burlap runners and mason jar centerpieces full of seasonal flowers. For lighting, try handcrafted pendant lights or rustic lanterns draped with twinkling fairy lights. Don't forget the walls; personalize with hand-painted frames or quilted fabric wall art for extra charm. Keep exploring to discover even more creative ideas!

Key Elements

essential components overview

When it comes to crafting for your country home, the right color scheme, materials, and textures can make all the difference.

You'll want to choose warm, earthy tones that reflect the natural beauty of the countryside.

Incorporating these elements will help create a cohesive and inviting atmosphere in your decor.

Color Scheme

How can you achieve a warm and inviting color scheme in your country home decor?

Start by embracing earthy tones like cashew and moss chalk paint. These colors can breathe new life into thrifted items, giving them a rustic touch that fits perfectly in a country setting.

Advertisement

Make sure to incorporate vintage-inspired colors such as yellow maze and night sky to create visual interest and depth in your handmade crafts.

To balance your decor, select floral arrangements featuring a mix of colors. Elements like blueberries, white flowers, and greenery should complement each other harmoniously, enhancing the overall aesthetic.

You can also implement natural elements and textures, like jute ribbon and grapevine, to add warmth and character while sticking to a cohesive color palette.

Materials

To create a truly authentic country home decor, select materials that reflect the rustic charm and warmth of your space. Start by incorporating thrifted items like wooden caddies, tin buckets, and vintage dishes. These unique finds add character and charm, making your decor feel lived-in and inviting.

Utilize natural elements, such as grapevine and faux greenery, to enhance your arrangements. These materials help create a cohesive, rustic aesthetic that emphasizes the beauty of nature.

Advertisement

Don't forget to add a personal touch with handmade tags made from coffee-stained manila paper. Use hand lettering and distressing techniques to elevate your decor further.

Experiment with floral arrangements, incorporating elements like blueberries and white flowers for whimsical accents. Remember to maintain visual balance by using odd numbers in groupings, which naturally draws the eye.

Finally, consider employing creative finishing techniques on thrifted wood items. A dry brushing of chalk paint or a touch of antique wax can give these pieces a vintage appearance, seamlessly blending them into your country decor.

Textures

Incorporating a variety of textures, like the roughness of distressed wood and the softness of jute, creates a warm and inviting atmosphere in your country home decor. You can easily find thrifted items that embody that rustic charm, enhancing the overall depth of your space. Natural elements, such as grapevine and faux greenery, not only add tactile appeal but also help unify your aesthetic.

To introduce softness, consider using jute ribbon or bows made from gingham or denim. These elements not only complement the country style but also add layers of interest. Mixing smooth surfaces, like painted jars, with the rough textures of sanded wood allows for striking contrasts in your decor.

Advertisement

Don't forget to layer materials for added richness. Think coffee-stained manila tags paired with antique wax finishes to achieve a vintage look that enhances your home's texture. By thoughtfully selecting and combining these various textures, you'll create an inviting space that reflects your personality and love for handmade crafts.

Embrace the beauty of these elements, and watch as your country home decor transforms into a cozy haven.

Essential Fixtures and Furniture

necessary items for living

When you think about essential fixtures and furniture for your country home, consider how a rustic wooden dining table can serve as the heart of your space.

An antique mason jar chandelier adds a unique touch, illuminating your gatherings with charm.

Don't forget woven basket wall hangings; they not only provide storage but also enhance the cozy, handcrafted vibe you're aiming for.

Rustic Wooden Dining Table

A rustic wooden dining table acts as the heart of country home decor, showcasing unique wood grains and imperfections that enhance its charm. This central piece invites family and friends to gather, infusing warmth and character into your space.

Advertisement

To personalize your table, incorporate handmade crafts like hand-carved wooden serving trays or custom burlap table runners. These additions not only complement the rustic aesthetic but also reflect your unique style.

Surrounding your dining table with antique or vintage chairs can create a cohesive look, which you can often find at thrift stores or flea markets. This combination reinforces the country theme and adds layers of history to your dining experience.

For an extra touch, decorate with mason jars filled with wildflowers or hand-painted wooden centerpieces. These elements elevate your table's visual appeal while maintaining a rustic feel.

Antique Mason Jar Chandelier

An antique mason jar chandelier not only illuminates your space but also enhances the rustic charm established by your wooden dining table. It serves as a stunning centerpiece, blending functional lighting with delightful vintage aesthetics. To create your chandelier, source vintage mason jars from thrift stores or flea markets; these can be repurposed as shades for light bulbs, casting a warm, inviting glow.

Mixing different sizes and styles of mason jars adds visual interest and unique character to your chandelier design. Consider using jute or hemp rope to hang the jars, which enhances the natural, rustic aesthetic that complements your country home decor beautifully. This approach not only keeps the look cohesive but also adds a touch of earthy texture.

Advertisement

For a personalized touch, you can embellish the jars with hand-painted designs or distressed finishes, reflecting your individual style and creativity. Crafting this chandelier becomes a rewarding project that showcases your handmade spirit while providing essential lighting.

Woven Basket Wall Hanging

Woven basket wall hangings add both charm and functionality to your country home decor, creating a striking focal point while providing storage solutions. These handcrafted pieces bring texture and warmth, enhancing the rustic feel of your space. By incorporating different sizes and shapes of woven baskets, you can create visual interest and depth on your walls.

To make the most of your woven baskets, consider layering them against a backdrop of farmhouse-style shiplap or muted paint colors. This contrast highlights their natural materials and craftsmanship beautifully. For an extra personal touch, combine the baskets with handmade tags or embellishments, like jute ribbon, to achieve a cohesive and charming aesthetic.

Don't forget to integrate faux greenery or florals within the baskets to introduce a splash of nature and color. This simple addition transforms your wall hanging into a dynamic element that breathes life into your decor.

Lighting Ideas

creative illumination concepts

When it comes to lighting your country home, you've got plenty of creative options to contemplate.

Rustic lantern string lights can set a cozy mood, while a vintage table lamp trio adds character to your space.

Advertisement

Don't forget about handcrafted ceramic pendant lights and rustic iron wall sconces, which can beautifully enhance your decor.

Rustic Lantern String Lights

Rustic lantern string lights add a warm, inviting glow to your country home decor, transforming any space into a cozy retreat. You can create these charming lights by repurposing thrifted lanterns, often found at second-hand stores for as low as $1.99. Simply fill them with fairy lights to achieve that perfect ambiance.

If you don't have lanterns, mason jars work just as well. Painting them with chalk paint gives them a distressed look, and adding LED string lights inside will enhance their appeal.

To further embrace the rustic aesthetic, wrap twine or jute ribbon around your lanterns or jars. This small detail ties your decor back to the country theme. Hang your handmade lantern string lights along porches, patios, or even inside your living spaces to create a cozy atmosphere, ideal for gatherings or quiet evenings.

Don't hesitate to experiment with different heights and arrangements. Cluster lanterns or jars together on a table or shelf, mixing them with floral arrangements for added visual interest.

Advertisement

With these simple touches, your country home will radiate warmth and charm, making it an inviting space for everyone.

Vintage Table Lamp Trio

Adding a vintage table lamp trio to your decor not only enhances the lighting but also brings a unique charm that complements your handmade crafts. Sourcing these lamps from thrift stores or flea markets can lead you to one-of-a-kind designs that encapsulate the essence of country decor.

Consider mixing styles, such as ceramic, metal, and glass, to create a visually interesting arrangement that adds depth to your lighting scheme.

To refresh old lamp bases, use cashew chalk paint or other soft hues that blend seamlessly with your rustic aesthetic. This simple update keeps the vintage feel while ensuring the lamps fit your overall decor.

You can further enhance their appeal by adding decorative elements like jute ribbon or distressed tags to the shades, tying them in with other handmade items in your home.

Advertisement

Position your trio strategically, whether on side tables or mantels, to create warm, inviting light. This setup not only illuminates your space but also highlights the beauty of your handmade crafts, making your country home feel cozy and welcoming.

With these lamps, you'll see how lighting can be both functional and a stylish statement.

Handcrafted Ceramic Pendant Lights

Handcrafted ceramic pendant lights bring a unique charm to your country home decor, showcasing artisanal craftsmanship through their distinct glazes and textures. These lights not only illuminate your space but also serve as stunning decorative pieces that reflect your personal style. You can choose from a variety of shapes and sizes, allowing for a customized look that complements your existing decor while adding a personal touch.

The natural materials used in these pendant lights, such as clay, resonate beautifully with the rustic aesthetic of country homes. They create a warm and inviting atmosphere, perfect for cozy gatherings with family and friends. To enhance your lighting's functionality and sustainability, consider incorporating energy-efficient LED bulbs, which work seamlessly with ceramic designs.

Position your ceramic pendant lights over key areas like kitchen islands or dining tables. This practical placement not only provides essential illumination but also establishes a focal point that elevates your overall design.

Advertisement

With their artisanal qualities and versatility, handcrafted ceramic pendant lights can transform any space, making them an essential addition to your country home decor.

Rustic Iron Wall Sconces

Iron wall sconces offer a perfect way to enhance your country home decor, providing ambient lighting while adding a vintage touch that complements your handcrafted ceramic pendant lights. These rustic sconces often come with intricate designs and a sturdy construction, making them ideal for showcasing your handmade crafts, like mason jar candle holders or floral arrangements.

When selecting wall sconces, consider pieces with a distressed finish, as they harmonize beautifully with other rustic elements, such as reclaimed wood furniture and vintage decor. You can also pair your sconces with natural materials like jute or burlap to add an inviting texture that emphasizes the handmade aesthetic.

Utilizing wall sconces to display seasonal decor, such as small wreaths or greenery, allows you to create a versatile styling option that can change with the seasons. This flexibility adds a dynamic element to your decor while maintaining a cohesive look throughout your home.

Incorporating rustic iron wall sconces not only illuminates your space but also serves as a stylish backdrop for showcasing your cherished handmade crafts, enhancing the overall charm of your country home.

Advertisement

Decorative Elements

artistic design features

When it comes to decorative elements, hand-painted wooden picture frames can add a personal touch to your walls.

You'll love the warmth of quilted fabric wall art, which brings a cozy, inviting feel to any room.

A rustic clay pot centerpiece can tie everything together, offering an earthy charm that perfectly complements your country home decor.

Hand-Painted Wooden Picture Frames

Customizing hand-painted wooden picture frames with chalk paint or acrylics adds a personal touch that beautifully complements your country home decor style. You can choose colors that match your existing palette or add a pop of vibrancy to your space. To achieve a rustic, vintage appearance, consider using distressing techniques like sanding and applying antique wax. This approach not only enhances the frame's character but also fits seamlessly into a country-themed aesthetic.

To further elevate your frames, you might add decorative elements such as jute ribbon, faux greenery, or small floral accents. These details can tie the frames into your overall decor theme and create a cohesive look throughout your home. For an extra layer of personalization, think about using manila tags with hand lettering or coffee staining. These charming labels can give each frame a unique story.

When arranging multiple frames on a wall, try incorporating a triangle pattern. This technique establishes visual balance and enhances the overall look of your decor, making your hand-painted frames a stunning focal point in your country home.

Advertisement

Quilted Fabric Wall Art

Handmade quilted fabric wall art beautifully complements hand-painted picture frames, adding warmth and texture that enhances the rustic charm of your country home decor. You can choose from various fabric patterns and colors to create a cohesive aesthetic that reflects your personal style. Incorporating patchwork designs not only evokes nostalgia but also connects to heritage, making these pieces meaningful focal points in your living spaces.

Using natural fibers like cotton or linen for your quilted wall art enhances its rustic appeal while ensuring durability and easy care. You can display quilted pieces in several ways, whether framed or hung as standalone art. This versatility allows you to mix and match with other decorative elements in your home.

To make your quilted fabric wall art truly unique, consider adding embellishments such as buttons, lace, or embroidery. These personal touches will express your creativity and elevate your decor. Overall, quilted fabric wall art serves as an inviting and beautiful addition to your country home, making it feel warm, welcoming, and full of character.

Rustic Clay Pot Centerpiece

A rustic clay pot makes a stunning centerpiece that effortlessly showcases seasonal floral arrangements and natural elements, enhancing the charm of your country home decor. You can fill the pot with a delightful mix of faux berries, white flowers, and greenery to create a lively, whimsical look that reflects nature's beauty.

To add visual interest, arrange your flowers using a triangle pattern, ensuring balance and symmetry within the display. This approach draws the eye and makes the centerpiece more appealing. For an extra touch of texture, consider wrapping jute ribbon or gingham fabric around the rim of the clay pot, perfectly complementing the rustic aesthetic.

Advertisement

Don't forget to personalize your centerpiece! Attaching handmade tags with hand-lettered messages can evoke a warm, inviting atmosphere, making your guests feel right at home. You might also incorporate natural elements like grapevine or faux greenery for a cohesive look that ties everything together.

Flooring

flooring installation and options

When it comes to flooring in your country home, you've got some charming options to contemplate.

Reclaimed barn wood planks can add a warm, rustic feel, while natural stone tile offers durability and elegance.

If you're looking for a unique touch, a cottage-style painted concrete floor might just be the creative expression your space needs.

Reclaimed Barn Wood Planks

Reclaimed barn wood planks bring unique character and history to your home, making them an ideal choice for rustic flooring. Sourced from old barns, these planks offer not just aesthetic appeal but also a sustainable option for your flooring needs. By repurposing materials that might otherwise end up in a landfill, you're making an environmentally friendly choice that aligns with sustainable building practices.

The rich grain patterns and color variations in reclaimed wood add warmth and charm, creating a cozy atmosphere that complements your country home decor. Plus, many of these planks undergo treatment to eliminate pests and enhance durability, ensuring they can handle daily wear while maintaining their natural beauty.

Advertisement

Installing reclaimed barn wood flooring can also boost your property value. It's often viewed as a high-quality feature by potential buyers who appreciate a rustic aesthetic. So, when you choose reclaimed barn wood, you're not just investing in flooring; you're enhancing the character of your home while making a smart investment.

Embrace the charm and sustainability of reclaimed barn wood planks, and watch your country home transform into a warm, inviting space.

Natural Stone Tile Flooring

Natural stone tile flooring complements the rustic elegance of reclaimed barn wood planks while adding durability and a timeless aesthetic to your country home decor. Each piece of natural stone is unique in color and texture, allowing you to create a personalized and visually appealing foundation for your living spaces. This flooring option not only enhances the charm of your home, but it also provides excellent resistance to wear and tear, ensuring it stands the test of time.

One of the practical benefits of natural stone tiles is their ability to improve indoor air quality. They help reduce allergens and dust accumulation, contributing to a healthier living environment for you and your family. With proper sealing, maintaining your natural stone tile flooring is relatively easy; regular sweeping and occasional mopping will keep it looking its best.

Available in various finishes like honed or polished, natural stone tiles can complement different styles of country decor, from farmhouse elegance to rugged lodge aesthetics. By incorporating natural stone tile flooring into your home, you'll create a beautiful and functional space that embodies the charm of country living.

Advertisement

Cottage-Style Painted Concrete Floor

A cottage-style painted concrete floor adds a charming and personalized touch to your country home, transforming a plain surface into a delightful centerpiece.

To achieve this look, start by cleaning and prepping the concrete, ensuring it's free from dirt and debris for ideal paint adhesion. Using chalk paint is an excellent choice, as it provides a matte finish and great coverage, allowing you to customize colors that complement your decor.

Begin with a primer coat in a neutral shade, then apply multiple coats of your chosen color for durability. This process helps prevent chipping and fading over time.

To enhance the rustic charm, consider using a dry brushing technique with a lighter shade. This creates a distressed effect that mimics aged wood or worn flooring, adding depth to your space.

Conclusion

Incorporating handmade crafts into your country home decor adds warmth and character that store-bought items just can't match.

Advertisement

By focusing on key elements like essential fixtures, unique lighting, and decorative accents, you can create a cozy, inviting space that reflects your personal style.

Don't forget about the flooring—natural materials can enhance the rustic feel.

Embrace your creativity, and let your handmade pieces shine, turning your home into a true expression of who you are.

Continue Reading

Trending