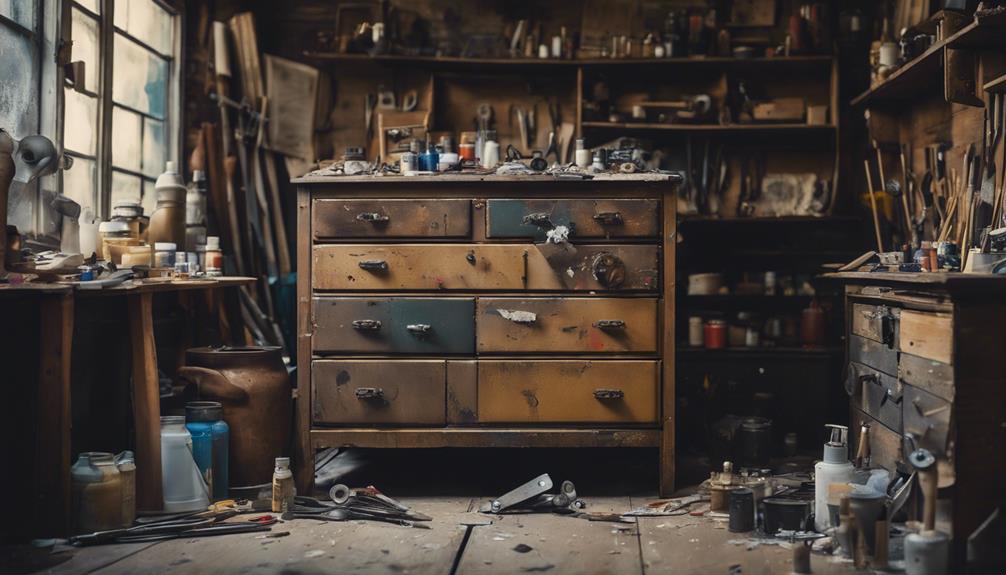
To evaluate an outdated dresser into a one-of-a-kind piece, start by examining its condition, inspecting drawers, structural integrity, and material quality. Prepare the surface by sanding, filling imperfections, and choosing a primer for painting. Next, select a design, such as converting it into a bench or shelf, and choose a paint color that complements your room's décor. Add decorative elements, update hardware, and apply a protective clear coat. Finally, add finishing touches, like new knobs or upholstery, to elevate the aesthetic appeal. With these 7 easy steps, you'll be well on your way to creating a unique, functional masterpiece that reflects your personal style.
Key Takeaways
• Assess the dresser's condition, inspecting drawers, structure, material, finish, and design quality before starting the repurposing process.
• Prepare the surface by sanding, filling imperfections, and choosing a primer for painting to ensure a smooth finish.
• Select a design, such as turning the dresser into a bench or shelf, and choose a paint color that complements the room's aesthetic.
• Update hardware with new knobs, handles, or pulls, and incorporate decorative elements like trim, molding, or appliques to elevate the look.
• Apply a protective top coat to seal the paint and add a clear coat finish to preserve the dresser's new look and protect it from scratches and stains.
Gorilla All Purpose Wood Filler, Natural Color, 6 Ounce Tube (Pack of 1) – Water Resistant for Indoor or Outdoor Projects and Repairs
Gorilla tough: Gorilla Wood Filler is the go-to product for strong water resistant repairs on cracks, gouges and…
As an affiliate, we earn on qualifying purchases.
As an affiliate, we earn on qualifying purchases.
Assess the Dresser's Condition
Before you start repurposing your old dresser, take a close look at its overall condition to identify any potential issues that need addressing. You'll want to inspect the drawers to see if they're intact and functional, as missing or damaged drawers may impact the dresser's usability for repurposing.
Check for any signs of structural damage, such as broken or wobbly parts, that may need to be repaired before you can start repurposing. Evaluate the overall quality of the dresser, including the material, finish, and design, to determine if it's suitable for the desired repurposing project.
Consider the size and dimensions of the dresser to make sure it fits the intended purpose or space for the repurposed project. Look for any signs of water damage, mold, or mildew that could affect the dresser's safety and suitability for repurposing into a new item.

1 Quart Bulls Eye 1-2-3 Primer Sealer Stain Killer
Designed for interior and exterior surfaces
As an affiliate, we earn on qualifying purchases.
As an affiliate, we earn on qualifying purchases.
Prepare the Surface for Painting

Now that you've assessed your dresser's condition, it's time to get it ready for a fresh coat of paint by thoroughly sanding the surface to remove any existing imperfections. This important step will guarantee a smooth, even finish.
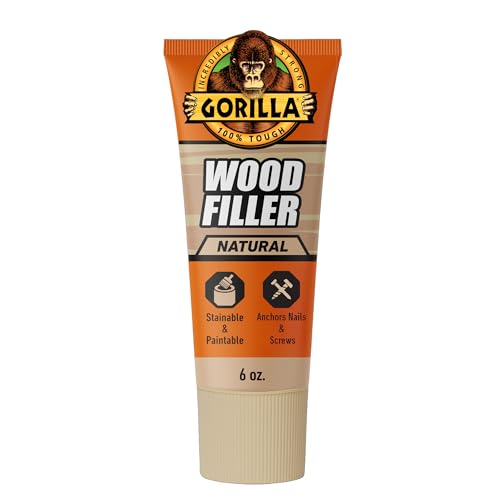
Using a sanding block or sandpaper, sand the entire dresser surface to remove old paint, varnish, or other imperfections. Don't forget to fill in any cracks, holes, or imperfections with wood filler to create a seamless finish.
Once you've sanded and filled, wipe down the surface with a damp cloth to remove any dust or debris. This will ensure a strong bond between the dresser and the primer.
Speaking of primer, choose a high-quality one to create a smooth, even surface for the paint to adhere to.

TinaKim Canvas Upholstery Fabric, Faux Linen Type Cloth Material,for Couch Chair Seat Repair (Beige 3, 2 Yard (57x 72 inch))
Material: 100% Polyester, faux linen fabric.
As an affiliate, we earn on qualifying purchases.
As an affiliate, we earn on qualifying purchases.
Choose a Design and Paint

With your dresser's surface prepped and primed, it's time to tap into your creativity and choose a design that breathes new life into this old piece of furniture. You've got the power to transform it into a functional piece that complements your home decor. Consider turning it into a bench, shelf, or storage unit – the possibilities are endless!
| Design Idea | Description |
|---|---|
| Bench | Add a cushion and legs for a one-of-a-kind seating area |
| Shelf | Remove drawers and add wooden planks for a rustic storage unit |
| Storage Unit | Keep the drawers and add a fresh coat of paint for a modern storage solution |
Once you've settled on a design, choose a paint color that fits your style and complements the room. Before you start painting, remember to sand the surface to guarantee a smooth finish. Apply multiple coats of paint for full coverage and durability. Finally, consider adding a protective top coat to seal the paint and prevent chipping or scratching. With these steps, you'll be well on your way to a beautifully repurposed dresser that's truly one-of-a-kind.

Biaungdo 6 Pcs White Ceramic Kitchen Cabinet Knobs and Pulls, Retro Vintage Round Drawer Knobs, Decorative Closet Door Handles
Package & size: The package includes 6 pcs white ceramic pull handles with 2 different sizes of screws….
As an affiliate, we earn on qualifying purchases.
As an affiliate, we earn on qualifying purchases.
Add Decorative Elements and Hardware

You can further personalize your repurposed dresser by incorporating decorative elements and updating the hardware to reflect your unique style. Consider adding decorative elements like trim, molding, or appliques to enhance the appearance of the repurposed dresser. These subtle additions can make a significant difference in the overall aesthetic of the piece.
Updating the hardware with new knobs, handles, or pulls can give the dresser a fresh and modern look. Choose hardware that complements the style and color scheme of the dresser to create a cohesive design. Mixing and matching different hardware styles can add visual interest and personality to the repurposed piece.
Swapping out old, worn-out hardware for new pieces can instantly elevate the overall look of the dresser transformation. By adding these finishing touches, you'll be able to put your own stamp on the dresser and make it truly one-of-a-kind.
Seal the Paint With a Clear Coat

Finishing your repurposed dresser with a clear coat is crucial to protecting the paint job and guaranteeing a long-lasting finish. This final step will seal in your hard work and add an extra layer of durability to the painted surface.
When choosing a clear coat, you can select from matte, satin, or glossy finishes, depending on the level of sheen you desire for your dresser. To apply the clear coat, use a brush or spray to achieve a smooth, even finish.
Make sure to follow the manufacturer's instructions and apply thin, uniform coats, allowing each layer to dry completely before adding the next. This will prevent any streaks or unevenness in the finish.
By adding a clear coat, you'll not only protect the paint from scratches and stains but also ensure a smooth, consistent finish that will last for years to come.
Once the clear coat is fully dry, your repurposed dresser is ready for use, and you can enjoy the fruits of your labor!
Add Final Touches and Details

Add a personal touch to your repurposed dresser by incorporating unique details that reflect your style and personality.
As you near the finish line of your DIY project, it's time to add those special touches that make your dresser truly one-of-a-kind. Consider adding decorative trim, such as molding or appliques, to enhance the dresser's final look.
You can also personalize the dresser with unique hardware, like vintage knobs or modern handles, for a customized touch. If you want to add a pop of color, try painting the edges or sides of the dresser to create visual interest.
Alternatively, use stencils or decals to add intricate designs or patterns to the dresser for a creative flair. Don't be afraid to experiment with distressing techniques, like sanding or antiquing, to achieve a shabby chic or rustic finish on the dresser.
Admire Your DIY Masterpiece

Now that your repurposed dresser is complete, take a step back and admire your handiwork – you've earned it!
It's time to proudly show off your DIY masterpiece, reveling in the satisfaction of transforming an old piece of furniture into something functional and beautiful.
As you display your handiwork, you'll appreciate the final touches you applied, and the sense of accomplishment will inspire you to take on more repurposing challenges.
Displaying Your Handiwork
Place your repurposed dresser in a prominent spot, like the entryway or living room, where you can't help but notice it every day. This way, you'll get to admire your DIY handiwork regularly, and it'll be a great conversation starter when you have guests over.
Use the dresser to showcase your favorite decor items, plants, or family photos, making it a beautiful and functional addition to your home decor.
As you display your repurposed dresser, remember the journey you took to transform it from a neglected piece of furniture to a stunning piece of DIY art. Invite friends and family to admire your handiwork, and share the story behind the dresser's transformation.
Enjoy the satisfaction of knowing you turned something old into something new and beautiful, and take pride in your DIY skills. By displaying your repurposed dresser prominently, you'll get to relive the excitement of your DIY project every time you walk by it.
Proudly Show It Off
As you step back to admire your repurposed dresser, the sense of pride and accomplishment washes over you, and you can't help but feel a deep connection to this new, functional piece of art that reflects your personal style and creativity.
You've successfully transformed an old piece of furniture into a beautiful, one-of-a-kind DIY dresser that adds a personal touch to your home decor. Take a moment to appreciate the fruits of your labor and bask in the satisfaction of a job well done.
| Before | After |
|---|---|
| Old, worn-out dresser | Unique, functional piece of art |
| Cluttered, outdated design | Personalized, stylish home decor |
| Expensive, brand-new furniture | Budget-friendly, eco-friendly DIY project |
| Lackluster, mass-produced piece | One-of-a-kind, handmade masterpiece |
| Forgotten, discarded item | Cherished, functional piece of furniture |
Final Touches Applied
With every brushstroke and hammer swing, you've carefully crafted a one-of-a-kind masterpiece, and it's time to put the finishing touches on your repurposed dresser.
To complete your project, start by adding new hardware, such as stylish knobs or pulls, that complement the dresser's fresh look.
Next, apply a coat of protective sealant to preserve the paint or stain and prevent damage.
Consider adding decorative trim or molding to enhance the overall appearance of the repurposed dresser.
If you've converted the dresser into a bench, place a cushion or upholstery on the seat for added comfort and style.
Finally, step back and admire your completed DIY project, showcasing your creativity and craftsmanship. Take pride in knowing that you've transformed an old piece of furniture into a functional work of art.
Your repurposed dresser is now ready to take its place in your home, serving as a testament to your ingenuity and creativity.
Frequently Asked Questions
How Can I Repurpose an Old Dresser?
You're looking to breathe new life into an old dresser, and rightly so! Repurposing it can be a cost-effective way to create functional furniture pieces for your home.
With some creativity, you can transform it into a unique shelving unit, workbench, or even a hidden workspace.
A fresh coat of paint can work wonders, and you'll be adding character to your space while reducing waste by giving old furniture a new purpose.
How to Refurbish a Cheap Dresser?
You're looking to refurbish a cheap dresser, and that's a great idea! By giving it a makeover, you can create a one-of-a-kind piece that fits your style.
Start by sanding down the dresser to smooth out any rough spots, then apply a fresh coat of paint to give it a fresh look.
Update the hardware or add decorative accents to give it a stylish touch. With a little creativity, you can turn that cheap dresser into a beautiful, functional piece that's all yours.
What Is Needed to Refurbish a Dresser?
When you decide to refurbish a dresser, you'll need some essential supplies.
First, you'll require sandpaper, primer, and paint to give it a fresh new look. Don't forget paintbrushes and new hardware to update the dresser's style.
You'll also need tools like a sander, screwdriver, and paint roller to get the job done.
With these must-haves, you'll be well on your way to transforming that old dresser into a stunning piece of furniture.
What Can I Use Old Drawers For?
As you gaze at those old drawers, imagine the hidden treasures waiting to be revealed. You can breathe new life into them by repurposing them into unique storage solutions, stylish decor pieces, or functional organizers.
Think under-bed storage, wall shelves, or planters, or even transform them into pet beds, dollhouses, or mini bookshelves. The possibilities are endless, and with a little creativity, you can turn discarded drawers into functional, eco-friendly, and budget-friendly additions to your home.
Conclusion
You've transformed a discarded dresser into a stunning work of art, a masterpiece that's the envy of interior designers and DIY enthusiasts alike!
With a few coats of paint, some creative hardware, and a dash of imagination, you've breathed new life into a forgotten piece of furniture, turning it into a showstopping centerpiece that commands attention and admiration.
Stand back, admire your handiwork, and bask in the glory of your incredible DIY achievement!