Connect with us

Home Decor

Diy Rustic Address Planter

Learn how to craft a charming rustic address planter that adds a touch of countryside charm to your home's exterior.

Published

on

creative rustic address display

When creating a DIY rustic address planter, we'll need a plastic planter, address numbers, screws, and a metal French cleat hanger, among other materials. We'll start by preparing the wall surface, cleaning it with mild detergent and treating any mold or mildew with bleach. Next, we'll attach the French cleat hanger to the wall, ensuring a level and sturdy connection. We'll then assemble the planter box using cedar boards and pocket hole screws, attaching it to the planked back. Finally, we'll mount the planter to the wall and add address numbers, plants, and decorations. As we continue, we'll explore more tips and tricks to perfect our rustic address planter creation.

Key Takeaways

• Prepare the wall surface by cleaning, removing old adhesive, and sanding for a polished finish.

• Attach a metal French cleat hanger to the wall, ensuring level alignment and a watertight seal.

• Assemble the planter box using cedar boards, Kreg Jig, and pocket hole screws for a sturdy rustic design.

• Mount the planter to the wall using the French cleat hanger, drilling pilot holes for a secure attachment.

Advertisement

• Add address numbers, plants, and decorations, finishing with a protective outdoor sealant for durability and maintenance.

Gathering Essential Materials

We start by gathering the essential materials needed to create our rustic address planter. Our planter box will require a few specific items to make sure a sturdy and attractive final product.

First, we'll need a plastic planter with a flat back, which will serve as the base of our address planter. We'll also need address numbers, which will be securely attached to the planter using screws and a suitable adhesive. A metal French cleat hanger is important for mounting the planter to the wall, providing a secure and level attachment.

Additionally, we'll need a drill, screwdriver, level, and pencil or marker to complete the project. To make sure a watertight seal, we'll use an exterior silicone-based sealant. By gathering these materials, we'll be well-prepared to create a beautiful and functional rustic address planter that will enhance our home's exterior.

Preparing the Wall Surface

preparing a smooth wall

As we prepare the wall surface for our rustic address planter, we need to focus on three essential points: cleansing the wall, removing old adhesive, and smoothing the surface.

We'll start by thoroughly washing the wall with a mild detergent to remove dirt, dust, and debris that could affect the adhesion of our planter. By doing so, we'll guarantee a smooth, even surface that provides a secure mounting base for our rustic address planter.

Advertisement

Cleansing the Wall

Let's scrub away dirt, grime, and debris from the wall surface with a mild detergent or cleaning solution to guarantee a clean slate for our rustic address planter.

We want to make sure a smooth and even surface for our planter to adhere to, so we'll use a soft-bristled scrub brush or sponge to gently scrub away any imperfections. A cleaning solution is vital in removing dirt and grime, allowing our planter to stick securely to the wall.

After scrubbing, we'll rinse the wall with clean water to remove any leftover cleaning solution and let it dry completely. It's essential to check for any mold or mildew growth on the wall and treat it with a bleach solution before proceeding with the installation.

We'll also smooth out any rough patches or imperfections on the wall surface to ensure a flat and even base for attaching the address planter. By following these steps, we'll have a clean and prepared surface for our rustic address planter to shine.

Removing Old Adhesive

With our wall surface now clean and dry, we tackle the remnants of old adhesives that might interfere with our rustic address planter's secure attachment. To remove these pesky residues, we'll employ a combination of heat, elbow grease, and specialized products.

Advertisement

First, we'll use a heat gun or hairdryer to soften the old adhesive, making it more pliable and easier to remove. Next, we'll gently scrape off the softened adhesive with a putty knife or scraper, taking care not to gouge the wall surface.

For particularly stubborn residue, we'll apply a commercial adhesive remover or rubbing alcohol, allowing it to penetrate and break down the adhesive bonds. Finally, we'll wipe down the wall with a damp cloth to remove any remaining adhesive or residue, ensuring a clean slate for our planter's installation.

With the wall surface now free of old adhesives, we can proceed with confidence, knowing our rustic address planter will adhere securely and beautifully.

Smoothing the Surface

We grab our sanding block or sandpaper to smooth out the wall surface, eliminating any rough patches or imperfections that could interfere with our rustic address planter's adhesion. A smooth surface is essential for a strong bond between the planter and the wall.

To achieve this, we need to sand the wall, removing any dirt, dust, or debris that may be present.

Advertisement

Here are the key steps to follow:

  • Sand the wall surface using a sanding block or sandpaper to create a smooth and even texture.
  • Remove any dirt, dust, or debris from the wall surface before proceeding with attaching the planter.
  • Smooth out any rough patches or imperfections on the wall to ensure proper adhesion of the planter.
  • Wipe down the wall with a damp cloth to clean off any remaining residue or particles after sanding.
  • A smooth wall surface will help the planter adhere securely and evenly for a polished finish.

Attaching the French Cleat Hanger

french cleat hanging system

As we progress with attaching the French cleat hanger, we'll need to focus on two critical aspects: hanger assembly tips and cleat placement essentials. By adhering to these guidelines, we can guarantee a secure and level connection between the planter box and the wall.

Hanger Assembly Tips

We position the French cleat hanger carefully on the wall, making sure it's securely attached with appropriate screws. This is an important step in assembling our rustic address planter. To guarantee a successful installation, we must pay attention to a few key details.

Here are some essential hanger assembly tips to keep in mind:

  • Make certain the French cleat hanger is securely attached to the wall with appropriate screws.
  • Use a level to confirm the hanger is straight for proper alignment with the planter box.
  • Seal around the screw holes with exterior silicone-based sealant to prevent water damage.
  • The hanger should be positioned at the correct height and distance from other elements on the wall.
  • Avoid over-tightening the screws when attaching the cleat hanger to the planter to prevent damage to the planter material.

Cleat Placement Essentials

When attaching the French cleat hanger, we'll ensure a sturdy connection by drilling pilot holes in the wall, which helps prevent the screws from splitting the material. This critical step guarantees that our DIY address planter remains securely in place.

Next, we'll seal around the screw holes with an exterior silicone-based sealant to prevent water damage and maintain a watertight seal. It's vital to make sure the cleat hanger is level both on the wall and on the planter box for proper alignment.

We'll avoid over-tightening the screws when attaching the cleat hanger to prevent damage to the planter. A secure attachment between the planter and the cleat hanger is crucial for stability and long-term use.

Advertisement

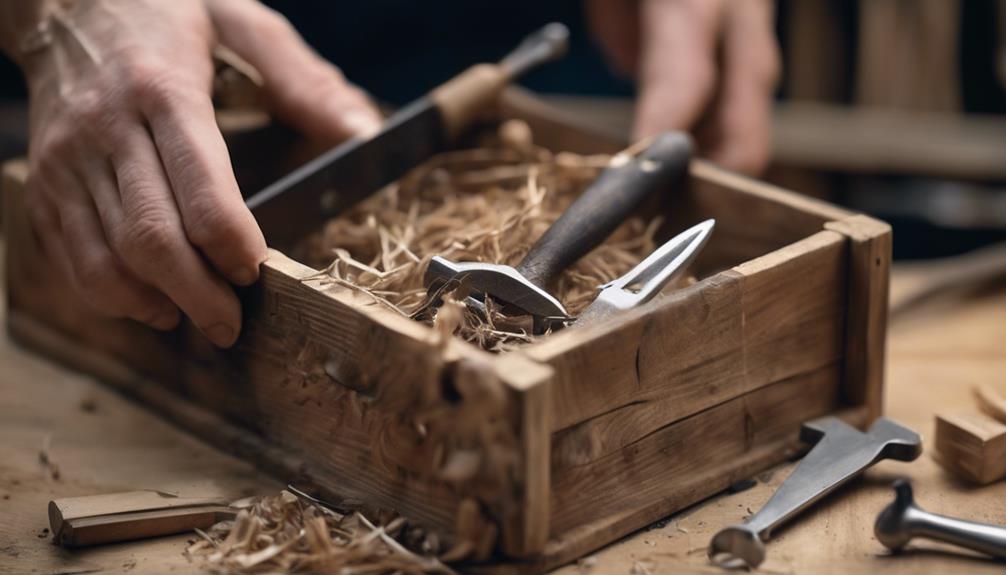
Assembling the Planter Box

building a wooden planter

We'll begin by cutting the cedar board into three equal pieces to create the sides of our planter box. After that, we'll use a Kreg Jig to add pocket holes for assembly, guaranteeing a sturdy construction.

Here's a breakdown of the assembly process:

  • Cut the cedar board into three pieces to create the sides of the planter box
  • Use a Kreg Jig to add pocket holes for assembly
  • Secure the boards together with pocket hole screws for a robust construction
  • Make cuts in the planked back to insert the planter box securely
  • Attach the planter box to the planked back to complete the rustic address planter

As we assemble the planter box, we'll make sure that it's strong enough to hold the weight of the plants and the mail. After all, we want our email address to be displayed proudly on our rustic address planter, don't we?

Mounting the Planter to Wall

securing planter on wall

With our planter box securely assembled, it's time to focus on mounting it to the wall, guaranteeing our rustic address planter remains stable and level. To achieve this, we'll use a metal French cleat hanger, which provides a sturdy attachment to the wall.

Before we start, we need to make sure the wall surface is clean and suitable for attachment. Next, we'll drill pilot holes for hard materials to avoid damaging the wall or the hanger. Once the holes are drilled, we'll secure the hanger to the wall, ensuring it's level and stable.

To add an extra layer of protection, we'll apply exterior silicone-based sealant around the screw holes. This will prevent water from seeping behind the planter and causing damage.

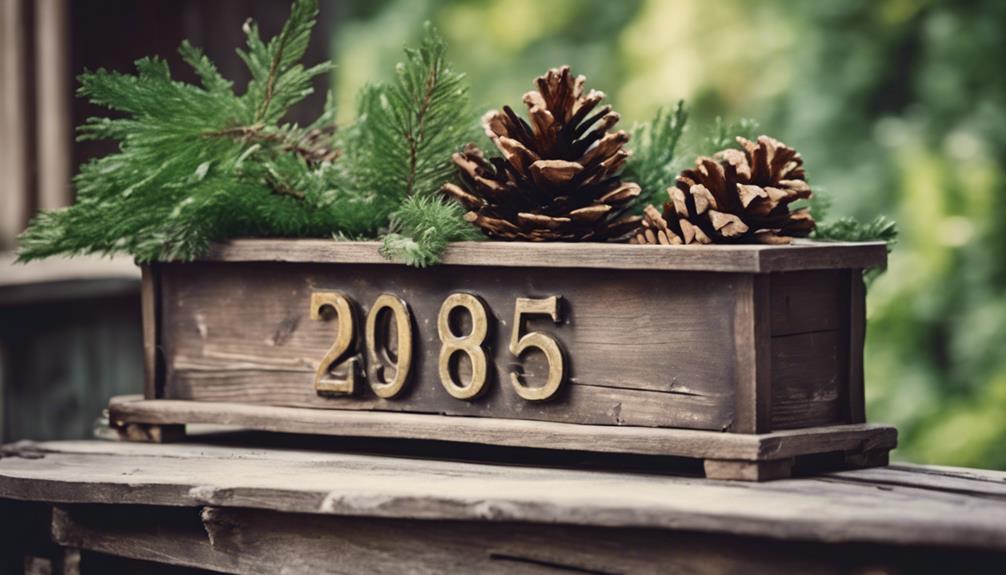
Installing Address Numbers

adding address numbers outside

Let's position our address numbers thoughtfully to achieve a balanced, visually appealing look on our rustic planter box. We want to guarantee our address numbers are easily readable and complement the overall design of our planter. To achieve this, we'll follow a few key guidelines.

  • Position the address numbers evenly on the planter box for a balanced look.
  • Use a level to make sure the numbers are straight and aligned properly.

Secure the address numbers to the planter box with screws or adhesive, depending on the material.

Consider painting or staining the address numbers to match the overall aesthetic of the planter.

Double-check the spacing and placement of the address numbers before finalizing their attachment.

Advertisement

Adding Plants and Decorations

incorporating greenery and accents

We're ready to bring our rustic planter box to life by adding plants and decorations that reflect our personal style.

After installing the address numbers, we can now focus on adding some greenery to our planter. We'll head to Home Depot to pick out some low-maintenance plants like succulents or herbs that will thrive in our rustic planter. To prevent water damage, we'll use a thin board or plastic liner to separate the plants from the wood.

To add some visual interest, we can incorporate decorative elements like faux moss or small garden figurines. We can also customize our planter with painted designs or stenciled patterns to match our home's aesthetic.

To add a seasonal touch, we can incorporate decorations like mini pumpkins for fall or small flags for holidays. By adding these finishing touches, we'll create a unique and inviting rustic address planter that reflects our personal style.

Final Touches and Maintenance

finalizing and maintaining the project

Now that our rustic address planter is complete, it's time to focus on the final touches and ongoing upkeep to guarantee it remains a beautiful and functional addition to our home's exterior.

To make sure our planter stays in top condition, we need to perform some essential maintenance tasks.

Here are the key steps to follow:

Advertisement
  • Apply a protective outdoor sealant to the planter box to guarantee durability and weather resistance.
  • Regularly clean the address numbers to maintain visibility and prevent build-up of dirt or debris.
  • Check the planter box for any signs of damage or wear and perform necessary maintenance as needed.
  • Consider seasonal decorations or plant changes to keep the address planter fresh and appealing.
  • Monitor the overall condition of the address planter to ensure it continues to enhance the exterior of your home.

Frequently Asked Questions

How to Build an Address Post?

We're building an address post by setting a 4×4 wooden post in concrete, attaching a decorative topper, and screwing on a metal address plate – it's sturdy, stylish, and easy to read from the street!

How Do You Make a Pallet Planter?

We once repurposed an old pallet into a charming planter, and it was a game-changer! To make one, we disassemble the pallet, cut it to size, add drainage holes, and line it with a protective layer before filling with potting mix and plants.

Conclusion

As we step back to admire our handiwork, our rustic address planter takes center stage, a charming fusion of rustic charm and modern functionality.

Like a perfectly placed punctuation mark, it elevates our home's curb appeal, making a bold statement about our sense of style.

And, as we tend to the plants and watch them thrive, we're reminded that, indeed, 'the smallest acts of beauty can have a profound impact' (Amy Stewart, The Drunken Botanist).

Advertisement

Continue Reading
Advertisement

Home Decor

Bookcase on Top of Dresser: How to Stack a Bookcase on a Dresser

Finding the perfect storage solution, learn how to securely stack a bookcase on top of a dresser to maximize space and style.

Published

on

stacking bookcase on dresser

You're about to transform your dresser into a functional and stylish storage space by stacking a bookcase on top of it. To get started, make sure your dresser is sturdy and stable, and clear the top surface of any clutter. Choose a bookcase that matches your dresser's style and consider one with adjustable shelves. Measure the dresser top and bookcase carefully to guarantee a secure fit. By following these steps and taking necessary safety precautions, you'll be able to create a stable and visually appealing stacked bookcase and dresser. Now, discover the detailed steps to achieve a successful and secure assembly.

Key Takeaways

• Ensure the dresser is sturdy and stable to support the weight of the bookcase before stacking.

• Measure the dresser top dimensions and bookcase weight capacity to ensure a secure fit.

• Mark the dresser top for bookcase placement and double-check measurements to prevent errors.

• Securely attach the bookcase to the dresser using L-brackets and anti-tip straps for added stability.

Advertisement

• Distribute weight evenly on the dresser and bookcase to maintain balance and prevent tipping or leaning.

Preparing the Dresser for Stacking

Before you start stacking, make sure your dresser is sturdy and stable enough to support the weight of a bookcase on top. You don't want your entire storage unit to come crashing down due to a flimsy dresser. Take a closer look at your dresser's construction and verify it can handle the added weight. If you're unsure, try painting the dresser a new color to give it a fresh look and distract from any structural weaknesses.

Next, clear the top surface of the dresser to provide a flat and level base for the bookcase. Remove any clutter or items that might be obstructing the surface. You want a smooth, even surface for the bookcase to sit on. This will help keep things stable and secure.

Choosing the Right Bookcase

selecting the perfect bookshelf

When choosing the right bookcase to stack on your dresser, you'll want to take into account a few key factors to guarantee a stable and stylish combination.

You'll need to think about the bookcase's size, bearing in mind the dresser's dimensions, as well as its style, which should complement or match the dresser's design.

Bookcase Size Matters

You'll want to measure the dimensions of the dresser top to make sure the bookcase fits securely, as a bookcase that's too large can be unstable and even topple over. A bookcase that's too small, on the other hand, mightn't provide enough storage space. To find the perfect fit, consider the following:

Advertisement
  • Measure carefully: Take precise measurements of the dresser top to make certain the bookcase fits snugly.
  • Check the weight capacity: Make sure the dresser can support the weight of the bookcase and its contents.
  • Think about style: Choose a bookcase that complements the dresser in terms of style, color, and design.
  • Adjustability is key: Opt for a bookcase with adjustable shelves to accommodate books and items of varying heights.

Bookcase Style Fits

Now that you've found a bookcase that fits the dresser's dimensions, it's time to think about the style of the bookcase that will work best for your needs. You want a bookcase that not only looks great but also complements the dresser and meets your storage requirements.

When choosing a bookcase style, consider the following factors:

Feature Description
Adjustable Shelves Provides flexibility in organizing items on top of the dresser
Stable Base Guarantees stability when stacked on the dresser
Secure Attachment Prevents the bookcase from toppling over
Complementary Design Matches the dresser's style for a cohesive look
Weight Capacity Can hold the weight of your items without overloading

Measuring and Marking the Space

precise spatial measurements taken

Measure the width and depth of the top of the dresser carefully to guarantee a secure fit for the bookcase. You want to make sure the bookcase sits snugly on top of the dresser, without any wobbling or instability. Take out your tape measure and record the dimensions of the dresser top. Don't forget to take into account the weight of the bookcase and its contents when measuring and marking the space.

Here are some key things to keep in mind:

  • Use a tape measure to determine the height clearance above the dresser for the bookcase.
  • Mark the areas on the dresser where the bookcase will sit to guide the placement.
  • Double-check the measurements and markings before placing the bookcase on top of the dresser to prevent any misalignment.
  • Take into consideration the overall weight of the bookcase and its contents when measuring and marking the space.

Assembling the Bookcase Top

building furniture with precision

Place the bookcase top onto the uprights, making sure it fits snugly and evenly, with the pre-drilled holes aligning perfectly for a secure attachment.

Once you've verified the top is properly aligned, you can start attaching it to the uprights using the provided screws or bolts. Be sure to tighten them firmly, but avoid overtightening, which can damage the material.

As you assemble the bookcase top, double-check that it's level and stable, as any imbalance can affect the overall structure's stability.

Additionally, make sure the top is securely attached to the uprights to prevent it from shifting or collapsing under the weight of the books or decorations you plan to place on it.

Advertisement

Remember to consult the manufacturer's instructions if you're unsure about any part of the assembly process.

Securing the Bookcase to Dresser

anchoring furniture for safety

You'll need to take extra precautions to make sure the bookcase remains stable and secure when positioned on top of the dresser. After all, you've invested time and effort into assembling the bookcase, and you want to guarantee it stays upright and functional.

To achieve this, follow these essential steps:

  • Use L-brackets to secure the bookcase to the dresser for added stability.
  • Ensure the dresser is sturdy enough to support the weight of the bookcase.
  • Anchor the bookcase to the wall for further security, especially if it's tall.
  • Position the bookcase evenly on top of the dresser to distribute weight evenly.

Adding Decorative Touches

enhancing with decorative elements

Now that your bookcase is securely positioned on the dresser, it's time to get creative and add some decorative flair to make this combo piece truly stand out.

You can start by considering adding decorative molding or trim to the top of the bookcase to create a smooth shift between the dresser and shelving units.

Another idea is to use adhesive wallpaper or contact paper to add a pop of color or pattern to the back of the bookcase for a stylish touch.

If you want to add some modern functionality, incorporate LED strip lights underneath the bookcase for a sleek and functional lighting solution.

Advertisement

To enhance the overall look of the dresser-shelving combo, display decorative items like plants, figurines, or framed photos on top of the bookcase.

Finally, experiment with different styling options, such as arranging books in a mix of vertical and horizontal stacks or organizing items by color for a visually appealing display.

Final Assembly and Placement

final assembly and arrangement

Now that you've added those final decorative touches, it's time to focus on securing your bookcase on top of the dresser.

In this final assembly and placement stage, you'll need to:

  • Secure the bookcase top
  • Position the bookcase unit
  • Finalize the assembly to guarantee a sturdy and visually appealing combination.

Secure the Bookcase Top

With the bookcase positioned securely on top of the dresser, make certain its top is evenly aligned and firmly attached to prevent any shifting or tilting. You want to guarantee that the bookcase is stable and won't topple over, causing damage or injury.

To achieve this, follow these essential steps:

  • Use anti-tip straps or brackets to secure the bookcase to the wall for added support.
  • Make sure the dresser is level and sturdy to support the weight of the bookcase.
  • Test the stability of the bookcase on the dresser by gently pushing and pulling on it.
  • Leave some space between the bookcase and the wall for ventilation and easy access to the dresser drawers.

Position the Bookcase Unit

Place the bookcase unit on the dresser, making sure it's centered and aligned for maximum stability.

Double-check that the weight distribution is even on the dresser to support the bookcase's weight. You don't want the dresser to tip or the bookcase to slide off.

Advertisement

To prevent this, place non-slip pads or rubber feet under the bookcase to keep it firmly in place. Additionally, consider using anti-tip hardware to secure the bookcase to the wall, eliminating any risk of tipping hazards.

Before you start loading the bookcase with books or items, test its stability to confirm everything is secure. Give the bookcase a gentle push or pull to check that it doesn't wobble or shift.

If you're satisfied with the setup, you're ready to start loading your bookcase with your favorite books or decorative items. Remember to maintain a balanced weight distribution to keep your stacked bookcase and dresser combination stable and safe.

Finalize the Assembly

You've confirmed the stability of your stacked bookcase and dresser, so it's time to finalize the assembly by securely attaching the bookcase to the dresser and making any necessary adjustments for a balanced and visually appealing arrangement.

This is the final step in creating a sturdy and attractive storage solution.

Advertisement

To guarantee a safe and secure setup, remember to:

  • Attach the bookcase to the dresser using appropriate connectors for stability
  • Ensure even weight distribution to prevent tipping or leaning
  • Double-check all connections and fastenings to assure a safe and secure setup
  • Test the stability by gently nudging the bookcase to confirm the dresser can support the weight

Safety Precautions and Tips

safety first always prepared

Prior to stacking a bookcase on a dresser, verify that the dresser is sturdy and stable enough to support the weight of the bookcase to avoid any potential hazards. You don't want the entire structure to come crashing down, causing damage or even injury.

To guarantee your safety, take some essential precautions. First, use anti-tip straps to secure the bookcase to the wall, preventing it from tipping over. Next, distribute the weight evenly on the dresser and bookcase to maintain balance. Avoid overloading the shelves with heavy items, as this can put undue strain on the dresser. Finally, regularly check and tighten the connections between the dresser and bookcase for added safety.

Frequently Asked Questions

Can I Put a Bookshelf on Top of a Dresser?

You're wondering if you can put a bookshelf on top of a dresser. The short answer is yes, but with caution. Make sure your dresser is sturdy enough to support the weight of the bookshelf, and consider the overall height and aesthetics.

You'll also want to secure the bookshelf to the dresser to prevent sliding or tipping. With careful planning, you can create a functional and stylish storage solution.

How Do You Stack a Bookcase?

As you contemplate the challenging task of stacking a bookcase, imagine a Jenga tower teetering on the brink of collapse – a delicate balancing act that demands precision and patience.

Advertisement

To stack a bookcase, you'll need to guarantee stability and levelness, aligning the edges of the dresser and bookcase, and securing it with brackets or wall anchors.

Don't forget to check the weight capacity of both pieces to avoid a catastrophic collapse.

How to Attach Two Bookcases Together?

To attach two bookcases together, you'll need to secure them at the top and bottom using L-brackets or corner braces. Confirm they're level and aligned before attaching them.

Drill pilot holes for the screws to prevent splitting the wood, and choose the right screws or bolts for the material.

Can I Stack BILLY Bookcases?

You're wondering if you can stack BILLY bookcases? The answer is yes, you can! IKEA designed these bookcases to be stackable, and they even come with the necessary hardware to secure them together.

Advertisement

Just make sure you follow the assembly instructions and verify that the dresser can support the added weight and height.

Conclusion

By following these steps, you've successfully stacked your bookcase on top of your dresser, creating a unique and functional storage solution. This space-saving hack not only adds extra storage but also creates a visually appealing display for your favorite books and decorative items.

Remember to always prioritize safety and stability when stacking heavy furniture, and don't be afraid to get creative with your design choices.

Continue Reading

Home Decor

Creating Your Own Tropical Escape at Home

Witness the transformation of your backyard into a vibrant tropical oasis, complete with lush plants, soothing water features, and cozy seating areas.

Published

on

By

tropical paradise in home

We're bringing the tropical vacation vibe into our backyards, with over 70% of homeowners considering outdoor spaces essential, according to the National Association of Landscape Professionals. To create our own tropical escape at home, we consider sunlight, soil type, and climate zone for plant selection, factoring in care and maintenance needs. We design with water features for a lush landscape, aiming for a functional and sustainable tropical garden. By mixing different plant species, incorporating water features, and creating cozy seating areas, we can achieve a vibrant and tranquil oasis. As we explore further, we'll uncover even more secrets to crafting our ultimate tropical retreat.

Key Takeaways

• Consider sunlight, soil type, and climate zone when selecting plants for your tropical garden to ensure their survival and thrive.

• Incorporate a mix of foliage plants, flowering plants, and ground covers to create a lush and vibrant garden.

• Design your tropical landscape with layers of foliage, varying heights, and textures to create a balanced and diverse look.

• Incorporate water features, such as ponds or fountains, to add visual interest and create a tranquil atmosphere.

Advertisement

• Add natural elements, such as bamboo benches and rattan furniture, to create a cozy outdoor seating area that complements your tropical garden.

Planning Your Tropical Oasis

As we embark on creating our tropical getaway, we must first take into account the unique conditions of our yard, including climate, sunlight levels, and soil type to choose the perfect tropical plants that will thrive in our outdoor space.

When planning our tropical sanctuary, we need to factor in elements such as the climate zone we're in, as this will dictate which plants will flourish and which will struggle. We must also contemplate the care and maintenance needs of the plants we choose, ensuring we can provide the necessary attention to keep them healthy.

Designing a tropical backyard requires thoughtful consideration, incorporating water features and layers of tall trees, midsize shrubs, and low-lying plants to create a lush and diverse landscape. By taking these aspects into account, we can create a tropical paradise that transports us to a tropical state of mind.

As we plan our oasis, we must remember that 'a well-designed tropical garden isn't just visually appealing, but also functional and sustainable' (Tropical Garden Design). By keeping these elements in mind, we can create a truly unforgettable tropical escape.

Advertisement

Selecting the Right Plants

choosing the perfect garden

We'll start by choosing the stars of our tropical show, selecting plants that will thrive in our unique outdoor conditions and create a lush, vibrant atmosphere. When it comes to tropical landscaping, we want a mix of height, texture, and color to achieve a balanced and visually appealing design. For a lush and vibrant tropical garden, we'll choose tropical plants like palms, elephant ears, bird of paradise, and ginger.

Plant Type Description
Foliage Plants Provide lush, vibrant foliage, e.g., palms, elephant ears
Flowering Plants Add pops of color, e.g., orchids, bromeliads
Ground Covers Add texture and visual interest, e.g., liriope, mondo grass

Creating Layers of Foliage

artistic exploration of nature

By combining plants of varying heights, textures, and colors, we can create a lush, multi-dimensional landscape that transports us to a tropical paradise. When it comes to creating layers of foliage, we're not just limited to a single type of plant. We can mix and match different species to achieve a diverse look that's reminiscent of a tropical jungle.

For instance, tall trees like palms or bamboo provide a canopy, while midsize shrubs like hibiscus add color and structure. Meanwhile, low-lying plants such as ferns and ground covers fill in gaps and create a dense, jungle-like atmosphere. Large-leaf plants like elephant ears or philodendrons add visual interest and a tropical rainforest feel to the garden.

Incorporating Water Features

enhancing spaces with water

To take our tropical escape to the next level, we're incorporating water features that not only soothe our senses but also create a thriving ecosystem. Ponds, for instance, can be a serene addition to our tropical garden, especially when adorned with aquatic plants like water lilies and lotus.

Adding fish like koi or goldfish not only enhances visual interest but also contributes to the ecosystem of our tropical oasis. We're also considering incorporating cascading waterfalls, babbling brooks, or fountains to create movement and a sense of tranquility.

By designing our water features to provide a habitat for wildlife, we can attract birds and butterflies, adding dynamic elements to the space. Whether it's a small fountain or a large pond, water features can serve as focal points in our tropical garden, enhancing the overall tropical paradise experience with their beauty and sound.

Designing a Cozy Seating Area

creating a comfortable space

As we create our own tropical escape at home, we're excited to design a cozy seating area that's perfect for relaxation. To achieve this, we'll focus on three essential elements:

Cozy Corner Essentials

Comforting Fabric Choices

Advertisement

Soothing Color Palette

These elements will work together to create a tranquil atmosphere that invites lounging and socializing. By incorporating these elements, we'll be able to craft a seating area that's both functional and aesthetically pleasing, making our tropical oasis feel like a true retreat.

Cozy Corner Essentials

We craft our cozy corner's inviting atmosphere by incorporating natural elements, like bamboo benches and hammocks, which instantly evoke the warmth and tranquility of a tropical escape.

As we design our seating area, we want to create a space that transports us to a tropical garden oasis. To achieve this, we focus on incorporating essential elements that evoke a sense of relaxation and tranquility.

Here are a few must-haves for our cozy corner:

Advertisement
  • Accent pillows and cushions in bold colors or tropical patterns to add a pop of color.
  • Tables for drinks and snacks to enhance functionality.
  • A Tiki bar as a focal point for a tropical backyard oasis.

Comforting Fabric Choices

We're wrapping ourselves in comfort with fabric choices that evoke the warmth and serenity of a tropical haven. When designing a cozy seating area, we opt for cozy fabric options like cotton, linen, and velvet, which provide the perfect blend of softness and durability.

To guarantee our outdoor space remains comfortable and low-maintenance, we incorporate outdoor fabrics that are weather-resistant and easy to clean. Tropical patterns, such as palm leaves and floral prints, add a touch of whimsy and vibrancy to our seating area. We also choose upholstery with tropical motifs like pineapples, flamingos, or exotic flowers for a fun and playful touch.

To further enhance the comfort level, we add throw pillows and blankets made from soft materials. By selecting these fabrics, we create a comfortable seating area that invites relaxation and tranquility, perfect for a tropical escape at home.

Soothing Color Palette

To evoke the serene ambiance of a tropical haven, we select a soothing color palette that calms the senses, setting the tone for a cozy seating area that beckons relaxation. When it comes to creating a tranquil atmosphere, our color choices play a significant role.

We opt for a palette that combines soft blues, greens, and neutrals to create a calming ambiance. To add a touch of vibrancy, we incorporate pops of tropical colors like coral, turquoise, and yellow.

Some tips to keep in mind:

Advertisement
  • Choose a soothing color palette that calms the senses
  • Incorporate tropical colors like coral, turquoise, and yellow for a vibrant touch
  • Balance bold colors with natural materials like rattan, bamboo, or teak for a cozy tropical feel

Attracting Wildlife to Your Yard

garden for wildlife conservation

By incorporating plants like Mexican salvia and bulbine, we can transform our outdoor space into a vibrant oasis that beckons in butterflies and hummingbirds. These specific plants are known to attract these beautiful creatures, creating a wildlife presence that enhances our outdoor space. To further attract butterflies, we can incorporate bright tropical colors in our garden, creating a cheerful ambiance that's perfect for a tropical escape.

Attracting Wildlife Tips
Butterflies Plant Mexican salvia, use bright tropical colors
Hummingbirds Plant bulbine, add tropical signs and bamboo wind chimes
Jungle-like atmosphere Incorporate specific plants, add Tiki masks

Adding Shade Options

customizing patio with awnings

Our tropical escape isn't complete without incorporating shade options to protect our plants and create a comfortable outdoor space. As we design our oasis, we need to ponder the importance of shade in creating a relaxing atmosphere. Not only does shade shield our plants from direct sunlight, but it also provides a comfortable spot to lounge and enjoy the outdoors.

To achieve this, we can integrate various shade options into our design. Here are a few ideas to get us started:

  • Adding a Palapa or thatch umbrella provides beauty and shade in our backyard, creating a perfect spot to relax.
  • Thatch umbrellas are movable and versatile, suitable for various areas in our tropical oasis.
  • Contemplate ordering an umbrella kit for convenience and easy assembly, allowing us to enhance our outdoor space with shade options.

Building a Focal Point

designing a striking architecture

We're now ready to create a show-stopping centerpiece that draws the eye and defines our tropical escape. A well-designed focal point can elevate our outdoor space, creating an unforgettable ambiance.

For us, this could be a stunning Tiki bar, complete with bamboo accents and thatched roofing, instantly transporting us to a tropical paradise. Alternatively, incorporating a fire pit adds a dramatic touch, perfect for cozying up on cool evenings.

To further enhance the ambiance, we can create natural stone pathways that lead to our focal point, such as a pool or outdoor kitchen. Adding shade with a Palapa or thatch umbrella not only provides comfort but also enhances the beauty of our backyard.

For a more hands-on approach, we can consider DIY projects like building a fire pit with stones, sand, and a steel ring for durability. By incorporating these elements, we can create a captivating focal point that becomes the heart of our tropical escape.

Designing Pathways and Walkways

creating outdoor walking areas

As we've crafted our focal point, let's now create inviting pathways that weave our tropical escape together, drawing visitors seamlessly from one enchanting area to the next.

To achieve this, we'll incorporate natural stone pathways that exude a magical and authentic tropical feel in our backyard. By leading these pathways to focal points like a Tiki bar or pool, we'll create a sense of unity and flow in our outdoor space.

Advertisement

To take it to the next level, we can:

  • Use native stones for our pathways to enhance the authenticity of our tropical oasis
  • Press coarse rock salt into wet concrete for a weathered look that adds character to our stone pathways
  • Link different areas of our yard with stone pathways to create a cohesive and inviting tropical escape

Completing the Paradise Look

creating a tropical paradise

To complete the transformation of our backyard into a tropical oasis, let's infuse it with the vibrant spirit of the islands by incorporating accents, décor, and unique elements that evoke a sense of paradise. We can create cozy seating areas with rattan furniture and vibrant accent pillows, perfect for a relaxing tropical retreat. To elevate the tropical oasis feel, we can incorporate tropical accents and décor like water features and tiki torches. For a more personalized touch, we can craft our own tropical décor, such as hand-carved masks and bamboo wind chimes, to create a festive atmosphere.

Element Description Benefit
Water Features Add a soothing sound to your oasis Creates a calming ambiance
Tiki Torches Illuminate your outdoor space Adds a warm, tropical glow
Rattan Furniture Comfortable seating for relaxation Defines cozy seating areas

Frequently Asked Questions

How to Create a Tropical Environment in Your Home?

"We're often asked how to create a tropical environment in our homes, and we're excited to share our tips, from choosing the right plants to incorporating natural materials and warm lighting, to transport ourselves to a tropical oasis."

How to Make Your Home Feel Tropical?

"We're craving a tropical vibe, so we're swapping heavy drapes for light, airy curtains and trading dark colors for bright hues to make our home feel like a sunny island getaway."

How to Make Your Backyard a Tropical Paradise?

We're turning our backyard into a tropical paradise by incorporating lush foliage, vibrant blooms, and soothing water features, creating an authentic oasis that's perfect for relaxation and attracting local wildlife.

How to Turn Your Backyard Into Paradise?

As we envision our backyard transforming into a haven, we'll turn it into a paradise by incorporating lush greenery, soothing water features, and cozy nooks, transporting us to a serene oasis, where our worries fade like morning dew.

Advertisement

Conclusion

As we conclude our journey to create a tropical escape at home, we've woven together the essential elements: lush plants, soothing water features, cozy seating areas, and meandering pathways.

By incorporating these design elements, we've crafted an oasis that transports us to a tranquil world. 'The key to a successful tropical garden is to create a sense of layers and textures,' notes landscape designer, Jamie Durie.

With these expert tips and a dash of creativity, our indoor or outdoor space has transformed into a serene retreat, perfect for relaxation and rejuvenation.

Continue Reading

Home Decor

10 Stunning Brick Wall Accent Wall Ideas

Yearning for a design element that adds texture and charm to your space?

Published

on

brick wall design inspiration

You're considering incorporating a stunning brick wall accent into your interior design. From exposed brick walls that add rustic charm to modern brick inlay designs that create visually appealing accents, there are numerous ways to inject texture, depth, and character into your space. Whitewashed brick walls can evoke a vintage-inspired charm, while industrial chic brick accent walls add a raw, urban vibe. Classic brick arch accent walls can elevate your space with timeless charm, and distressed brick accent walls can create a cozy, lived-in atmosphere. Each style offers a unique opportunity to make a statement – and there's more to discover as you explore the world of brick wall accent walls.

Key Takeaways

• Exposed brick accent walls inject rustic charm and industrial flair, elevating a room's character and creating a visual focal point.

• Rustic chic brick feature walls evoke warmth and character, adding a vintage charm and cozy focal point to a room.

• Modern brick inlay designs offer visually appealing accent walls with intricate designs that add depth and texture.

• Distressed brick accent walls add a weathered look charm to a room, creating a cozy, lived-in atmosphere with unique texture.

Advertisement

• Brick veneer accent walls provide a cost-effective solution with a realistic brick look, complementing interior design and creating unique focal points.

Exposed Brick Accent Wall Charm

Adding an exposed brick accent wall to your space injects a dose of rustic charm and industrial flair, instantly elevating the room's character. You'll love how this design element brings a unique blend of ruggedness and sophistication to your interior.

An exposed brick accent wall creates a striking visual interest, drawing the eye towards it and making it a natural focal point in the room. The industrial touch it adds works beautifully with various interior design styles, ensuring it will complement your existing décor.

What's more, you can customize your brick accent wall with different finishes and colors to achieve a personalized look that reflects your taste. Whether you're going for a rustic, industrial, or modern vibe, an exposed brick accent wall is an excellent way to add depth and character to your space.

Rustic Chic Brick Feature Wall

rustic charm modern design

You can evoke the warmth and character of a rustic hideaway by incorporating a rustic chic brick feature wall into your space. This design element adds a touch of vintage charm and character to modern interiors, creating a cozy focal point that draws the eye.

By incorporating a brick accent wall, you can easily enhance the ambiance and style of a room, making it feel more inviting and stylish.

Advertisement

Here are some ways to bring rustic chic charm to your space:

  • Imagine a whitewashed brick wall adding a soft, romantic glow to a bedroom or living room.
  • Picture a rough red brick wall creating a bold, industrial-chic statement in a modern loft or apartment.
  • Envision a brick accent wall dividing a large open-plan space, defining different areas for living and dining.
  • Visualize a brick feature wall adding warmth and texture to a minimalist space, creating a cozy retreat from the world outside.

Modern Brick Inlay Design

innovative brickwork techniques used

As you explore modern brick inlay design, you'll discover a world of possibilities for creating a unique and stylish accent wall. From choosing the perfect brick pattern to blending materials in innovative ways, you'll have plenty of options to make your design truly one-of-a-kind.

Now, let's take a closer look at the key points that will help you bring your modern brick inlay design to life:

brick pattern options,

unique material blends,

and inlay design variations.

Advertisement

Brick Pattern Options

Modern brick inlay designs offer a fresh, contemporary spin on traditional brick walls, allowing you to create a unique and visually appealing accent wall that elevates any room's style. With modern brick inlay designs, you can add a stylish touch to your space without sacrificing sophistication.

The intricate designs of modern brick inlay add depth and texture to the space, making it perfect for creating an accent wall.

Some popular brick pattern options include:

  • Herringbone patterns that create a sense of movement and energy
  • Chevron patterns that add a modern, edgy vibe
  • Alternating brick patterns that create a sense of rhythm
  • Interlocking brick patterns that add a touch of whimsy

These designs offer a contemporary twist on traditional brick walls, allowing you to create a one-of-a-kind accent wall that reflects your personal style.

Unique Material Blends

By blending traditional brick with materials like glass, metal, or reclaimed wood, unique material blends can add an extra layer of sophistication and visual interest to your modern brick inlay design. This fusion of old and new creates a striking focal point in your accent brick wall, perfect for making a statement in any room. With unique material blends, you can incorporate contemporary elements into your traditional brick walls, adding a personalized touch to your space.

Material Blend Visual Interest Design Flexibility
Brick + Glass Adds shine and reflection Can create a modern, sleek look
Brick + Metal Incorporates industrial chic Offers a rugged, edgy vibe
Brick + Reclaimed Wood Brings warmth and coziness Can evoke a rustic, natural feel

Inlay Design Variations

You can take your brick accent wall to the next level with inlay design variations that incorporate intricate patterns and geometric shapes, adding a contemporary touch to your space. These modern designs create visual interest and depth in a room, making your brick wall a stunning focal point.

Advertisement

With inlay designs, you can customize the patterns to fit your unique style, ensuring your space reflects your personality.

Here are some ideas to get you started:

  • Hexagonal patterns that add a touch of sophistication
  • Herringbone designs that create a sense of movement
  • Geometric shapes that add a pop of color
  • Nature-inspired patterns that bring the outdoors in

Distressed Brick Accent Wall Style

rustic brick wall decor

As you consider incorporating a distressed brick accent wall into your design, you'll want to think about the unique charm it can bring to a room.

The weathered look and rustic texture of distressed brick can add a level of character to your space that's hard to replicate with other materials.

Weathered Look Charm

Achieve a warm, inviting atmosphere in your home with a distressed brick accent wall, which instantly adds a weathered look charm that's both rustic and refined. This style of accent wall is perfect for creating a cozy, lived-in atmosphere that makes you feel like you're walking into a vintage retreat.

The distressed finish of the brick creates a sense of history and authenticity in the space, adding character and warmth to your interior.

Advertisement

Some of the key benefits of a distressed brick accent wall include:

  • A unique texture that adds depth and visual interest to your room design
  • A vintage aesthetic that adds character and warmth to your interior
  • A rustic appeal that creates a cozy, inviting atmosphere
  • An aged charm that makes your space feel like it's been lived in for years

Rustic Texture Accent

What's behind the enduring appeal of distressed brick accent walls, and how do they add a rustic texture to a room?

As you consider incorporating a brick wall into your design, you'll want to explore the distressed look, which brings a unique charm to any space.

The worn appearance of distressed brick creates a vintage and aged look that's perfect for industrial and farmhouse design themes.

This style of brick accent wall adds character and charm to the space, making it a popular choice for those seeking a one-of-a-kind focal point.

The texture of distressed brick provides a unique and eye-catching element in a room, drawing the eye towards its rustic beauty.

Advertisement

When you incorporate a distressed brick accent wall into your design, you'll be rewarded with a space that exudes warmth and personality.

Brick Veneer Accent Wall Ideas

enhancing interiors with bricks

By incorporating brick veneer accent walls into your design, you can instantly add a touch of sophistication and character to any room. This cost-effective solution offers a realistic brick look without the hefty price tag or structural modifications.

With a variety of colors, textures, and styles to choose from, you can easily find a brick veneer that complements your interior design.

Here are some inspiring ideas to get you started:

  • Create a modern, industrial-style kitchen with a white brick veneer accent wall that adds a touch of rustic charm.
  • Use brick veneer to add warmth and texture to a minimalist interior, creating a cozy atmosphere.
  • Incorporate brick veneer into your living room design to add character and create a unique focal point.
  • Pair brick veneer with sleek, modern furniture to create a striking contrast that elevates your interior style.

With brick veneer accent walls, the possibilities are endless, and the result is always a space that exudes style and sophistication.

Reclaimed Brick Decor Inspiration

brick wall revival ideas

Bring a touch of history into your home with reclaimed brick decor, which injects a dose of authenticity and uniqueness into your interior design.

By incorporating reclaimed brick accent walls, you'll add a rustic and authentic touch to your interior spaces. These walls are made from salvaged bricks with unique textures and colors, creating a warm and inviting atmosphere in any room.

Not only do they bring character to a space, but they're also sustainable and eco-friendly design elements. Incorporating reclaimed brick into your decor can add a sense of history and charm to your home, making it truly one-of-a-kind.

Advertisement

With reclaimed brick, you'll get a unique blend of rustic charm and modern style, perfect for creating a cozy retreat or a statement piece. So, why settle for ordinary walls when you can have a work of art that tells a story?

Get inspired by reclaimed brick decor and transform your space into a true masterpiece.

Thin Brick Wall Design Concepts

innovative thin brick ideas

As you explore thin brick wall design concepts, you'll discover the versatility of these accent walls lies in their ability to incorporate various brick patterns, which can add a unique visual flair to any room.

By combining different patterns, such as herringbone or running bond, you can create a one-of-a-kind design that showcases your personal style.

With thin brick accent walls, you can also experiment with texture, introducing an extra layer of visual interest to your space through the subtle variations in brick texture.

Brick Pattern Variety

You can create a one-of-a-kind accent wall by mixing and matching different brick patterns, such as herringbone, basket weave, and running bond, to add visual interest and texture to your interior space. With a brick pattern variety, you can achieve a unique accent wall that reflects your personal style.

Advertisement

Thin brick walls offer flexible design options, allowing you to experiment with different layouts to create a modern or traditional look.

Some popular brick patterns to consider include:

  • Herringbone: a classic pattern featuring alternating bricks that create a zigzag design
  • Basket weave: a pattern that resembles a woven basket, adding depth and texture to your wall
  • Running bond: a classic pattern featuring bricks laid in a staggered pattern
  • Stack bond or soldier course: modern patterns that add a sleek, contemporary touch to your space

Textured Visual Interest

Thin brick accent walls inject textured visual interest into interior spaces, offering an authentic brick look and feel that adds depth and character to any room. As you incorporate thin brick into your design, you'll notice the texture that will make your space feel cozier and more inviting.

The rustic charm of thin brick creates an ambience that's perfect for relaxed gatherings or intimate moments. By adding style to your interior, thin brick accent walls create a focal point that draws the eye and sparks conversation.

Plus, with a variety of colors and patterns available, you can customize your thin brick wall to suit your unique aesthetic. For a cool accent, consider a whitewashed brick wall that adds a touch of rustic elegance to your space. Alternatively, you can create a contrasting look by pairing thin brick with sleek, modern elements.

Whatever your design style, thin brick accent walls are sure to add style and visual interest to your space.

Advertisement

Industrial Chic Brick Accent Wall

modern urban style design

What kind of industrial chic vibe do you want to create in your space with an exposed brick accent wall?

With industrial chic brick accent walls, you can add a raw, urban vibe to any space. Exposed brick creates a visually striking and textural focal point in a room, making it a versatile design element suitable for modern, industrial, or eclectic styles.

Here are some ways to create an industrial chic brick accent wall:

  • Imagine a statement wall with exposed brick, contrasted with sleek, modern furniture for a striking contrast.
  • Envision a cozy reading nook surrounded by exposed brick, with plush armchairs and floor lamps.
  • Picture a spacious loft with an exposed brick accent wall, paired with industrial-chic lighting fixtures and reclaimed wood furniture.
  • Visualize a minimalist space with an exposed brick accent wall, complemented by monochromatic decor and sleek lines.

Whitewashed Brick Accent Wall Look

brick accent wall makeover

Whitewashing transforms brick into a charming, vintage-inspired accent wall that warms up any space with its soft, textured appeal. As you incorporate whitewashed brick into your design, you'll notice how it adds a touch of character to your room. The softening effect of whitewashing brick creates a warm and inviting atmosphere, perfect for cozying up your space.

Benefits Description
Adds Character Whitewashed brick accent walls offer a unique, vintage charm that adds character to any room.
Provides Texture The soft, textured appeal of whitewashed brick adds depth and visual interest to your space.
Versatile Backdrop Whitewashed brick provides a neutral, versatile backdrop that complements various design styles.
Fresh Twist Whitewashed brick accent walls offer a fresh and modern twist on traditional brick walls.
Warmth and Cozy Whitewashing brick softens its appearance, creating a warm and cozy atmosphere in your space.

Classic Brick Arch Accent Wall

brick arch accent wall

As you incorporate a classic brick arch accent wall into your design, you'll discover how its timeless charm and rustic appeal can elevate any space. This versatile design element can complement various interior styles, from industrial to farmhouse, adding a warm and inviting atmosphere to any room.

Here are some key benefits of incorporating a classic brick arch accent wall into your design:

  • Creates a focal point in the room, drawing attention and adding character
  • Adds a touch of rustic charm, perfect for creating a cozy atmosphere
  • Can be paired with traditional brick materials to create a cohesive look
  • Can be used to create a sense of warmth and intimacy in a large, open space

With its timeless design and rustic charm, a classic brick arch accent wall is sure to elevate any space. Whether you're looking to add a touch of industrial chic or cozy farmhouse charm, this design element is sure to impress.

Frequently Asked Questions

How Can I Make My Brick Wall More Attractive?

To make your brick wall more attractive, you'll want to highlight its natural texture and color variations. Consider incorporating lighting fixtures to showcase its unique features.

You could also add a pop of color by painting the brick in a bold or contrasting hue. Additionally, incorporate decorative elements like artwork, mirrors, or shelves to enhance the visual appeal.

Advertisement

How to Decorate a Brick Accent Wall?

As you stand before your brick accent wall, it's like a blank canvas waiting for your creative brushstrokes.

To decorate it, start by considering the room's style and theme. Add a statement piece, like a large piece of art or a mirror, to draw the eye towards the wall.

Then, balance it with complementary decor, such as vases, candles, or plants, to create a harmonious look that ties the room together.

How Do You Make a Stunning Accent Wall?

To create a stunning accent wall, you'll want to start by selecting a focal point, like a statement piece of art or a show-stopping light fixture.

Then, choose a color scheme that complements the room's overall aesthetic, and consider adding texture with materials like brick, wood, or fabric.

Advertisement

Don't be afraid to mix and match patterns, and don't forget to balance bold elements with neutral accents to avoid visual overload.

How to Modernize a Brick Wall?

As you start modernizing your brick wall, remember that 'Rome wasn't built in a day.'

Begin by painting the wall a neutral color to create a blank canvas.

Then, incorporate sleek shelving or artwork to introduce a contemporary flair.

Don't be afraid to mix materials, like wood and metal, to add depth and visual interest.

Advertisement

Conclusion

You've made it to the end of this brick-filled journey, and hopefully, you're not feeling like you've hit a wall (pun intended).

Ironically, the most challenging part of incorporating a brick accent wall into your design is probably deciding which stunning idea to choose from.

With these 10 striking concepts, you're bound to find the perfect blend of style and substance to elevate your space.

So, get ready to break out the bricks (or not, depending on your chosen design) and start building your dream space!

Advertisement

Continue Reading

Trending