You're about to create a rustic coat rack that exudes charm and functionality in just 7 easy steps. First, gather essential supplies like sturdy wood, durable hooks, and screws. Next, prepare the wood surface by sanding, cleaning, and stripping away any old finish. Then, assemble the frame, attach the hooks securely, and add a decorative touch with unique knobs or monograms. Mount the coat rack safely using heavy-duty hooks and anchors, and finally, inspect and refine your creation. By following these steps, you'll have a one-of-a-kind coat rack that complements your home's rustic charm – and with a little more effort, you'll uncover the secrets to making it truly exceptional.
Key Takeaways
• Choose the right wood and durable hooks to ensure a sturdy and visually appealing coat rack.
• Sand and clean the wood thoroughly to create a smooth surface for a rustic finish.
• Assemble the frame by cutting and joining wood boards, and pre-drill holes for hooks and screws.
• Attach hooks evenly spaced and securely, testing stability with varying weights for peace of mind.
• Mount the coat rack to the wall using heavy-duty hooks, anchors, and locating wall studs for strength.
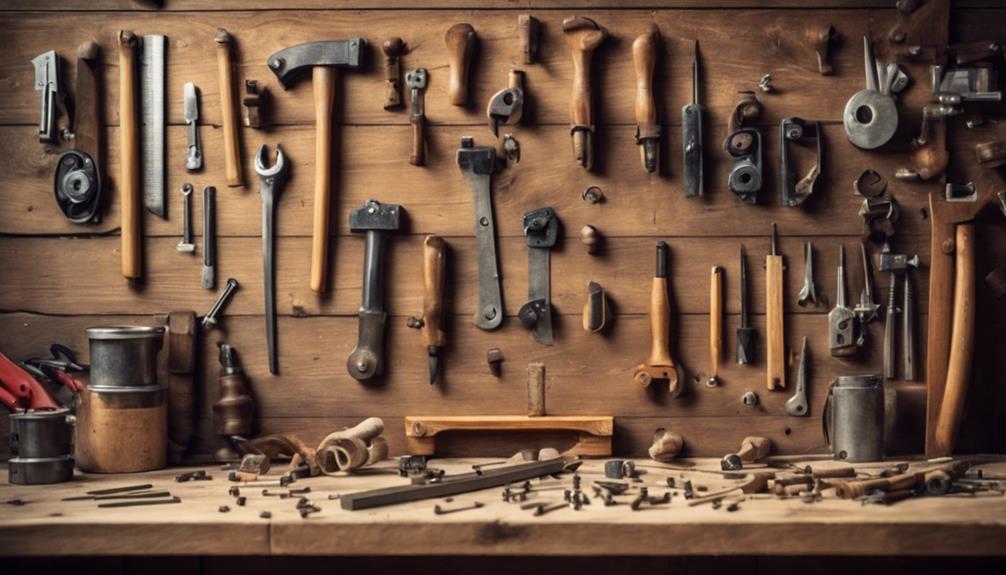
Gather Essential Supplies
What essential supplies will you need to create a rustic coat rack that's both functional and visually appealing? To get started, you'll need a few key materials.
First, choose a sturdy and visually appealing wood that fits your rustic design. This will serve as the backbone of your coat rack, so select a type that's both durable and aesthetically pleasing.
Next, you'll need some durable hooks that complement your rustic design. These will be responsible for holding your jackets, hats, and bags, so make sure they're up to the task.
You'll also need screws to attach the hooks to the wood. Be sure to select screws that are the correct size for secure attachment.
Additionally, you'll need a drill to make the necessary holes for the screws, as well as a measuring tape to guarantee accurate measurements.
With these essential supplies in hand, you'll be well on your way to creating a beautiful and functional rustic coat rack.
Prepare the Wood Surface
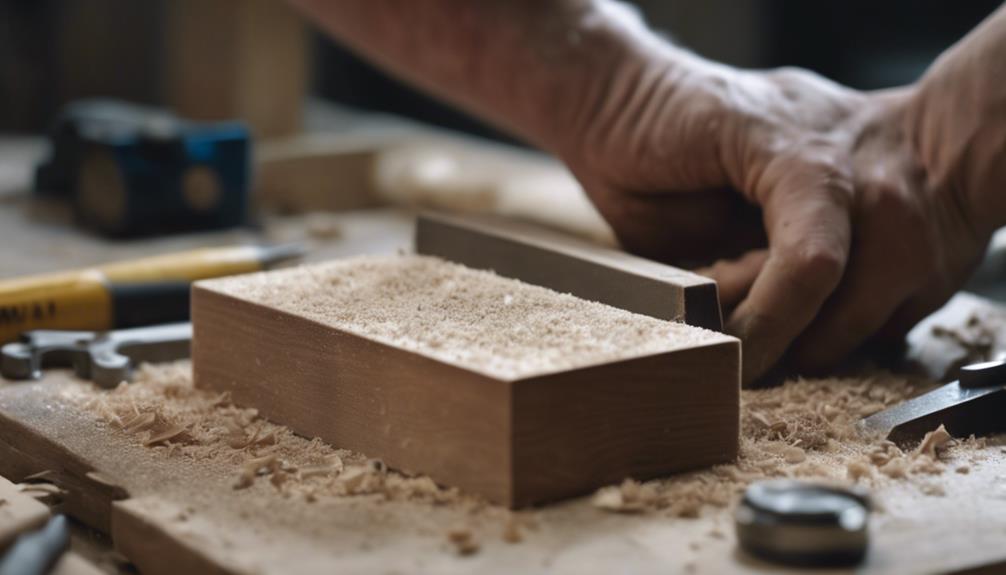
As you prepare the wood surface, you'll need to focus on sanding, cleaning, and removing any old finishes to guarantee a smooth, even base for your rustic coat rack.
You'll want to sand the wood smooth, removing any rough edges or imperfections, and then thoroughly clean the surface to eliminate dust and debris.
Sand the Wood Smooth
With your DIY coat rack project underway, you'll need to sand the wood smooth to prepare the surface for staining or painting. This important step guarantees a uniform and polished finish for your rustic wood coat rack.
To begin, grab a piece of fine-grit sandpaper and start smoothing out any rough spots or imperfections on the wood surface. Remember to sand in the direction of the wood grain to avoid creating scratches or marks on the surface. Be meticulous and sand all edges and corners evenly, making sure to cover every inch of the wood.
Once you've finished sanding, wipe down the wood with a tack cloth or damp cloth to remove any dust or debris. Properly sanding the wood will create a clean canvas for staining or painting in the next steps of your DIY project.
Remove Old Finish Completely
You'll need to strip away any existing finish or imperfections on the wood surface to ensure a successful stain or paint job, so grab your sanding tools and get to work. Sanding the wood surface thoroughly is essential to remove any old finish, ensuring a smooth surface for your new coat. Use a sanding block or orbital sander to efficiently remove the old finish, and don't forget to sand all corners and edges to create a seamless surface.
| Sanding Tool | Effectiveness |
|---|---|
| Sanding Block | 8/10 |
| Orbital Sander | 9/10 |
| Hand Sanding | 6/10 |
| Electric Sander | 8.5/10 |
Clean the Surface Thoroughly
Clean the wood surface thoroughly with a damp cloth or a mild cleaning solution to remove any residues or contaminants that might impact the finish. This important step guarantees the wood is free of dust, dirt, and debris, allowing the stain to adhere evenly and preventing imperfections in the finish. You'll be surprised at how a simple cleaning can make a huge difference in the final result.
After cleaning, take a few minutes to lightly sand the wood surface. This will smooth out any rough patches or imperfections, giving your coat rack a professional-looking finish. Remember, properly preparing the wood surface is key to achieving a smooth, flawless finish.
Assemble the Coat Rack Frame
Measure and cut the wood boards to the desired length for the coat rack frame, taking care to guarantee the pieces fit together seamlessly.
As you assemble the coat rack frame, it's crucial to make sure the boards fit together securely, creating a sturdy structure that can hold the weight of your coats and accessories. To do this, join the boards using screws or wood glue, making sure they're level and straight by using a level during assembly.
Consider adding additional support or braces for extra stability, depending on the size of your coat rack.
As you work on your DIY project, remember to predrill holes before attaching the hooks or mounting hardware to prevent splitting the wood.
Attach Rustic Hooks Securely

With your coat rack frame assembled, it's time to add the rustic hooks that will hold your outerwear, and it's important to attach them securely to guarantee they can bear the weight of your coats and accessories.
To do this, you'll need to pre-drill pilot holes in the wood to prevent splitting when attaching the rustic hooks. This step is essential, as it will make sure the hooks hold firmly and don't damage the wood.
Place the hooks evenly spaced on the front of the coat rack for a balanced look. When attaching the hooks, make sure the screws are long enough to secure them firmly to the wood.
Once the hooks are attached, test the stability of the coat rack by hanging items of varying weights to make sure the hooks are securely attached. This will give you peace of mind, knowing your coat rack can hold everything from light scarves to heavy coats.
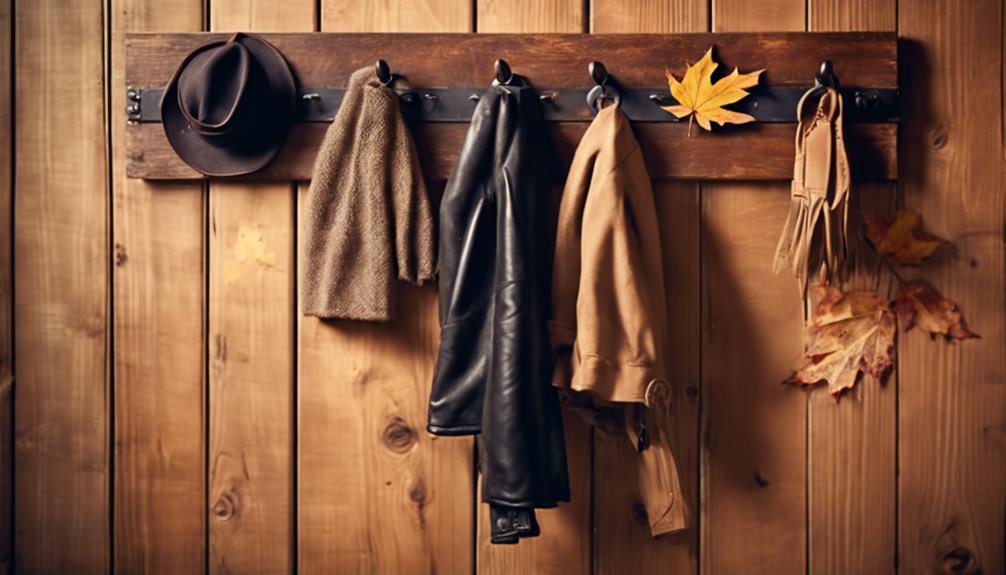
Add a Decorative Touch
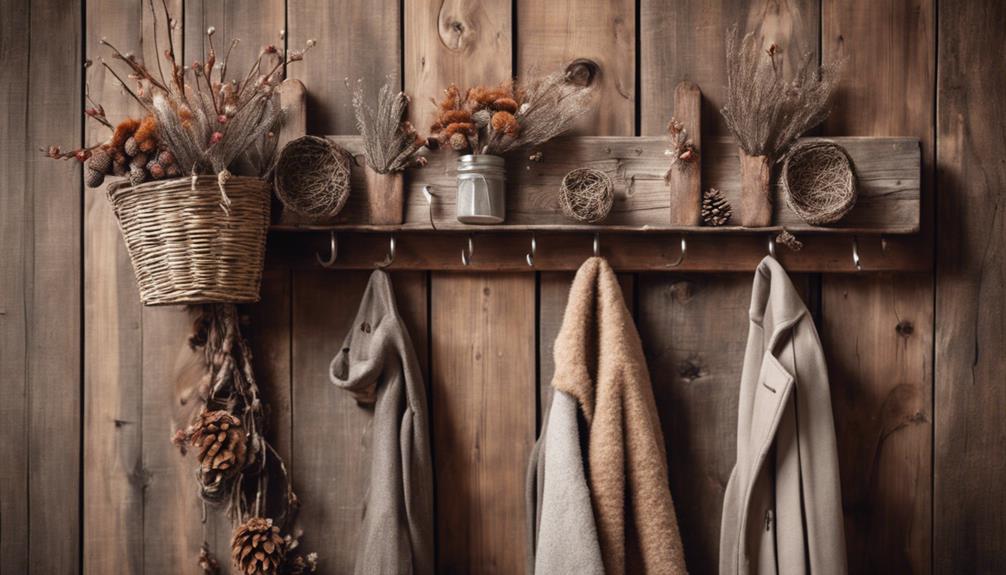
Add a personal touch to your rustic coat rack by incorporating decorative elements that reflect your personal style and complement your home's aesthetic. You can enhance the aesthetic appeal of your coat rack with decorative elements like rustic hooks or unique knobs. Consider adding a shelf above the coat rack for additional storage and display space.
| Decorative Elements | Description |
|---|---|
| Rustic Hooks | Add a touch of rustic charm to your coat rack |
| Shelf | Provide additional storage and display space |
| Monogrammed Hooks | Personalize your coat rack with customized hooks |
| Mirror | Add a functional and decorative touch |
| Distressed Finish | Achieve a unique, weathered look |
You can also personalize the coat rack with monogrammed hooks or painted designs for a unique look. Experiment with different finishes, such as distressed paint or weathered wood, to achieve a desired decorative effect. By incorporating these decorative elements, you can create a rustic coat rack that not only serves a functional purpose but also adds a touch of personality to your home's decor.
Mount the Coat Rack Safely
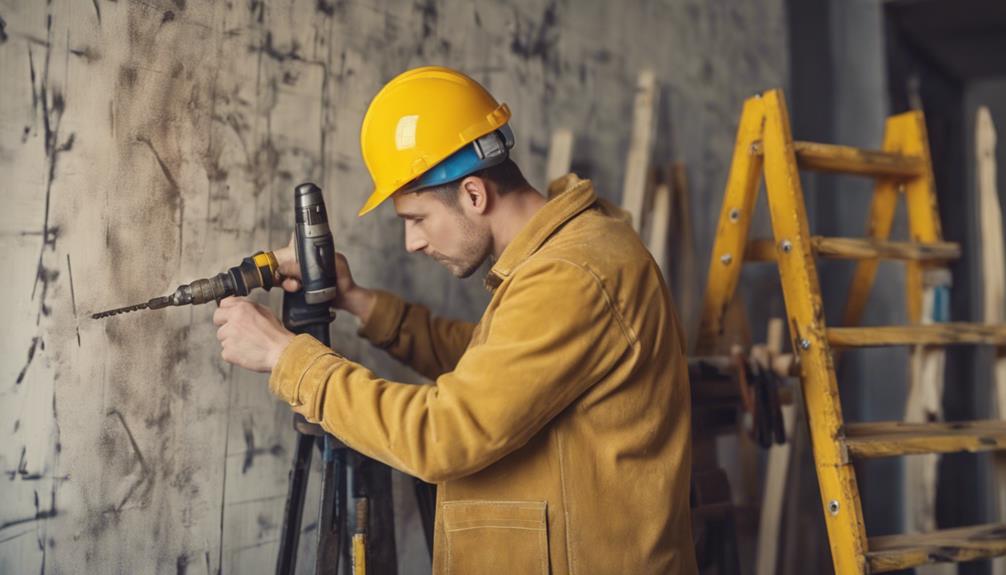
Now that your rustic coat rack is complete, it's time to securely attach it to the wall.
You'll want to explore wall anchor options that fit your specific needs, and master secure mounting techniques to guarantee your coat rack doesn't become a safety hazard.
Wall Anchor Options
You'll need to select the appropriate wall anchor to guarantee your DIY rustic coat rack stays securely mounted on your drywall. A sturdy wall anchor is essential to prevent your coat rack from crashing to the floor, taking your coats, hats, and bags with it.
When choosing a wall anchor, take into account the weight capacity of your coat rack. Here are three common wall anchor options to ponder:
- Plastic Expansion Anchors: Suitable for light to medium weight items, these anchors provide a secure hold without damaging the drywall.
- Toggle Bolts: Ideal for heavier items, toggle bolts can support more weight and are a great option for coat racks with multiple hooks.
- Molly Bolts: Providing strong support, molly bolts are versatile and can be used on various wall types, making them a great choice for your DIY project.
Remember to check the weight capacity of the wall anchors to make sure they can hold your coat rack securely. By selecting the right wall anchor, you'll enjoy a sturdy and reliable coat rack that will serve you well for years to come.
Secure Mounting Techniques
With your wall anchor chosen, it's time to focus on secure mounting techniques to make sure your DIY rustic coat rack stays firmly in place. You want to guarantee that your coat rack can hold the weight of your jackets, hats, and accessories without falling off the wall. To achieve this, it's important to follow some essential mounting techniques.
| Mounting Technique | Description | Importance |
|---|---|---|
| Use heavy-duty hooks | Provides stability and support | High |
| Locate wall studs | Adds strength and durability | High |
| Pre-drill holes | Prevents wall damage and ensures secure attachment | Medium |
When mounting your coat rack, make sure to pre-drill holes in the wall for screws to prevent damage and ensure a secure attachment. It's also important to check the weight capacity of the mounting hardware to ensure it can support the coat rack. If wall studs are not available for mounting, consider using anchors for additional support. By following these mounting techniques, you can rest assured that your rustic DIY coat rack will remain securely in place.
Final Touches and Inspection
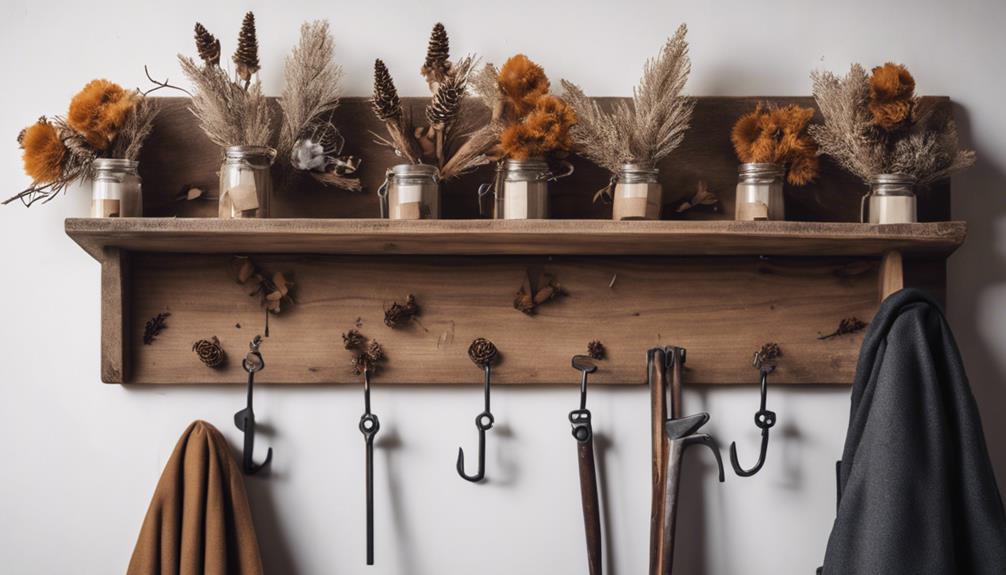
Sand the assembled boards thoroughly to achieve a smooth and even surface for staining, making sure that every inch of the wood is prepared for the rustic look you're aiming for.
Now, it's time to add the final touches to your DIY rustic coat rack project.
Next, apply a coat of your preferred stain color evenly to enhance the rustic look of the coat rack. Consider adding multiple coats of stain for a darker finish or to achieve the desired color depth.
Here are some important final steps to keep in mind:
- Install rustic hooks onto the front of the coat rack with even spacing for hanging items, such as coats, hats, and bags.
- Confirm that the coat rack is securely mounted to the wall using heavy-duty mounting hooks for stability and safety.
- Double-check that all parts are securely attached and the coat rack is level.
With these final touches, your DIY rustic coat rack is now complete and ready to hold your favorite coats, hats, and accessories.
This project is a great example of how DIY projects can add a personal touch to your home decor, and with a little creativity, you can create a unique coat hanger that reflects your personal style.
Frequently Asked Questions
How Can I Make My Own Coat Rack?
You're looking to create your own coat rack from scratch. That's a great DIY project!
To get started, decide on the design and material you want to use. Measure and cut the wood to the desired length, then pre-drill holes for the screws that will attach the hooks.
Choose rustic hooks for a farmhouse-style look, and don't forget to install heavy-duty mounting hooks for stability.
What Wood to Use for a Coat Rack?
When choosing wood for your coat rack, you're spoiled for options. Did you know that reclaimed barn wood is a top pick, with 70% of DIYers opting for its unique, weathered charm?
Consider oak, pine, or cedar for their durability and aesthetic appeal. Make sure the wood is thick enough to support the weight of coats and items, and don't forget to treat or seal it to prevent warping or damage over time.
How to Make Wooden Coat Hooks?
When creating wooden coat hooks, you'll want to select sturdy wood, like oak or maple, to guarantee durability. Use a drill to create evenly spaced holes for the hooks, then securely attach them using screws or nails.
Consider adding a protective finish, like varnish or lacquer, to prevent damage. You can also customize the hooks by staining or painting them in a color that complements your design, adding a personal touch to your project.
What Is the Spacing for Coat Rack Hooks?
When determining the spacing for your coat rack hooks, you'll want to take into account a few factors. Typically, hooks should be spaced between 5-7 inches apart to accommodate different sizes of coats and accessories.
This range allows for a balanced and visually appealing look, while also ensuring efficient organization and easy access to your belongings.
Conclusion
As you step back to admire your handiwork, the rustic coat rack's distressed finish and rugged hooks seem to transport you to a cozy cabin in the woods. Coincidentally, the exact same atmosphere you envisioned when you started this DIY project.
With every coat and hat hung neatly, the rustic charm is undeniable. You've not only created a functional piece but also a conversation starter.
Give yourself a pat on the back – you've successfully transformed a few wooden planks into a one-of-a-kind masterpiece.