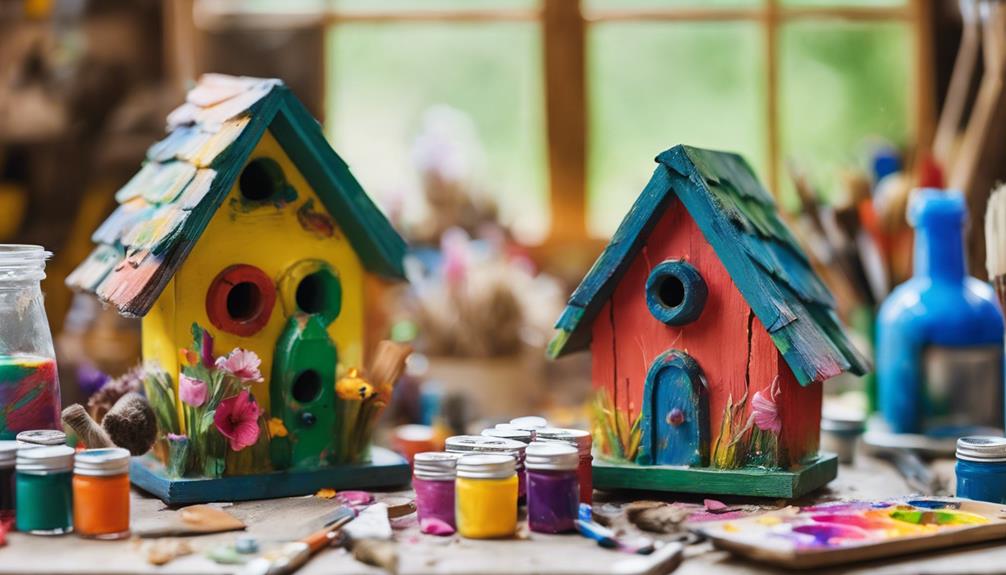
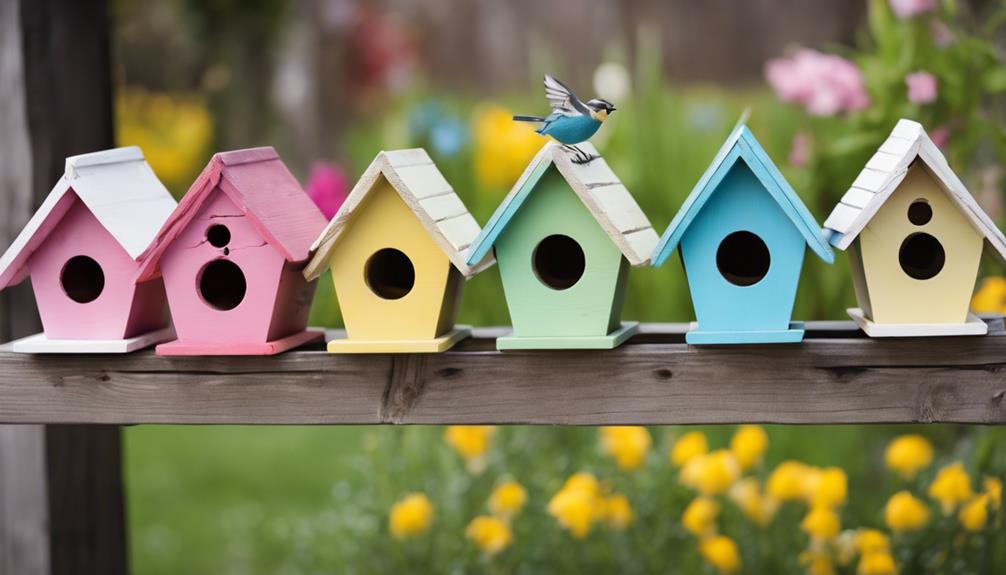
Creating Dollar Store Spring Cottage Birdhouses is a fun DIY project using affordable materials like Dollar Tree signs, paint, and decorations. Start by planning out the design, cutting and assembling pieces with precision, then painting with acrylic chalk paint and applying a protective finish. Add decorative details like flowers, butterflies, and moss for a charming look. Seal with clear sealant to protect from outdoor elements. Display your birdhouse indoors for a touch of spring charm. For more detailed steps on each stage, follow our step-by-step guide.
Key Takeaways
- Design birdhouse layout with decorative elements and dimensions in mind.
- Cut and assemble Dollar Tree signs using chop saw for precise cuts.
- Paint with acrylic chalk paint, add wax finish, and decorate with stencils.
- Incorporate details like window frames, flowers, and faux moss for a natural look.
- Seal with clear sealant to protect from outdoor elements and ensure longevity.

ANCTOR 3 Door Armoire Wardrobe Closet with Mirror, Large Wardrobe Closet with Doors, White Armoire for Bedroom with Hanging Rods & Shelves for Long Clothing, Short Clothing and Stacking, Modern
White Wardrobe Closet Size: 67.1"H x 47.2"W x 22.5"D
As an affiliate, we earn on qualifying purchases.
Materials Needed
What materials do we need to create these Dollar Store Spring Cottage Birdhouses?
To craft these charming birdhouses, we'll require six larger signs from Dollar Tree as the primary material. These signs will serve as the foundation for our DIY project. Additionally, white paint will be essential for giving the birdhouses a fresh and pristine look, adding a touch of springtime charm to our creations.
In terms of tools, having a chop saw and a utility knife on hand will be necessary for cutting and shaping the signs to the desired dimensions. For assembly support, tumbling tower blocks can be utilized, while Gorilla wood glue is recommended for securely bonding the pieces together.
These materials, when combined with a bit of creativity and effort, will enable us to craft budget-friendly and high-end birdhouses that will make delightful additions to our spring decor.

TIMELESS PIECES Metal Wardrobe Cabinets,Armoire Wardrobe Closet with Hanging Rod,Clothes Storage Cabinet with Adjustable Shelves and Doors,Clothing Cabinet for Bedroom,Office, Laundry Room
Oversized Storage Space:The inside of the wardrobe closet is really roomy. There's a dedicated area for the hanging...
As an affiliate, we earn on qualifying purchases.
Step 1: Planning and Design
Let's start by sketching out the layout of our birdhouse. This will help us visualize its dimensions, roof shape, and any decorative elements we want to include.
Once we've a clear plan, we can select the materials and tools needed to bring our vision to life.
Sketching Birdhouse Layout
When sketching the birdhouse layout, we make sure to visualize the design and dimensions before construction. Using a ruler and pencil, we draw the birdhouse's sides, front, back, and roof on paper. Including measurements for each piece guarantees accurate assembly during the DIY process. It's crucial to think about adding decorative elements like windows, doors, and trim in the sketch to enhance the overall look of the birdhouse. The sketch serves as a blueprint for the construction, guiding the placement of materials and detailing. To better understand the layout process, refer to the table below:
| Piece | Dimensions |
|---|---|
| Sides | 6' x 8' |
| Front | 6' x 8' |
| Back | 6' x 8' |
| Roof | 6' x 6' |
| Base | 6' x 6' |
Selecting Materials and Tools
To craft our Dollar Store Spring Cottage Birdhouses, we select materials and tools essential for the project's planning and design phase. For the base structure of the birdhouse, we opt for six larger signs from Dollar Tree, offering an affordable and easily accessible option for our home decor project.
Additionally, we gather tools such as a chop saw and utility knife to cut and shape the materials efficiently. To provide support during assembly, tumbling tower blocks can be considered. For a strong and durable bond between pieces, Gorilla wood glue is recommended.
Furthermore, thrift store items can be explored as optional additions to customize the birdhouse design according to individual preferences. By carefully selecting these materials and tools, we lay a solid foundation for creating charming and unique Dollar Store Spring Cottage Birdhouses that will be a delightful addition to any outdoor space.
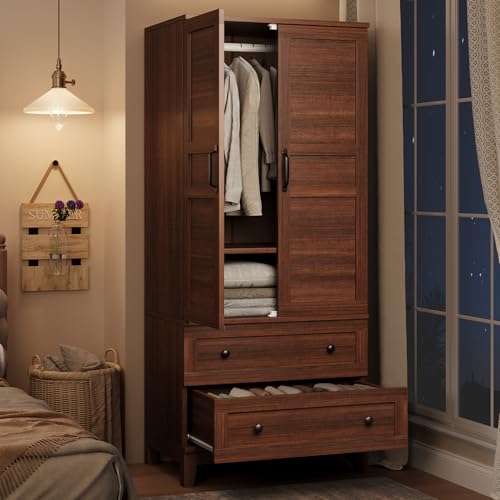
GarveeHome Armoire Wardrobe Closet with 2 Drawers,72 in Wooden Wardrobe Cabinet with Hanging Rod, Tall Clothing Armoire Cabinet with Doors and 18 Adjustable Shelves for Bedroom, Clothes,Walunt Brown
Armoire Wardrobe with DIY Adjustable Shelf: This wooden armoire cabinet offers 2 sturdy doors and 1 adjustable shelf...
As an affiliate, we earn on qualifying purchases.
Step 2: Cutting and Assembling
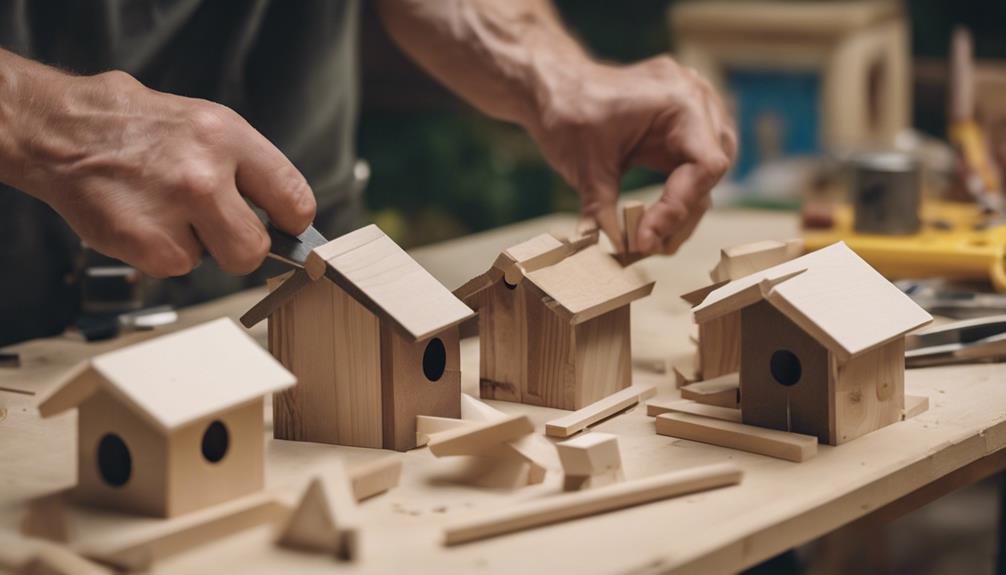
For the cutting and assembling process, make sure the Dollar Tree signs are cut to specific lengths for different parts of the birdhouse structure. Larger signs should be cut to 6 inches for the sides and 21 inches for the longer boards. Using a chop saw or utility knife guarantees precise cuts that allow the pieces to fit together seamlessly.
To support the structure during assembly, utilize tumbling tower blocks to guarantee proper alignment. When securing the cut pieces together, start by using hot glue for initial support and then apply Gorilla wood glue for long-lasting bonding.
Following a strategic gluing process is crucial to creating a sturdy birdhouse structure that can withstand outdoor elements. By carefully measuring and cutting the pieces and assembling them with the right glue, you'll be on your way to creating a beautiful and durable birdhouse for your garden.

Sweetcrispy 7 Drawer Dresser with Fabric Bins Fabric Storage Tower Organizer for Bedroom Closet Hallway Entryway Tall Chest of Drawers with Steel Frame Wood Top Easy Pull Handles,Black
【Perfectly Sized 7-Drawer Dresser】:Designed for modern living spaces,this dresser measures 39.6"D x 11.8"W x 30.4"H - compact enough...
As an affiliate, we earn on qualifying purchases.
Step 3: Painting and Decorating
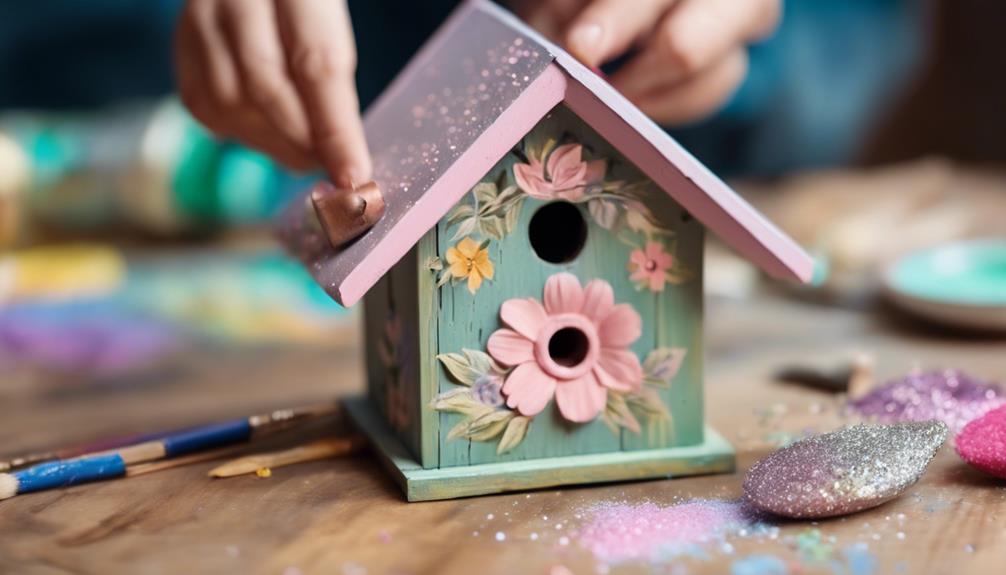
Let's begin by selecting acrylic chalk paint in white and gray shades to achieve a weathered wood effect on the birdhouse.
Once the base coat is dry, apply wax over the paint to create a protective and polished finish on the birdhouse.
Experiment with painting techniques like dry brushing to add texture and depth to the design.
Consider using stencils or stamps for intricate patterns and designs, enhancing the overall look of the birdhouse.
Adding embellishments such as faux moss, miniature birds, or flowers can further elevate the spring cottage theme.
These steps will transform a simple birdhouse into a charming decorative piece for your garden or home.
Remember to let your creativity shine through while painting and decorating, as it's the small details that can make a big difference in the final result.
Step 4: Adding Details and Accents
When it comes to adding details and accents to your birdhouse, consider painting window frames and door handles with contrasting colors to enhance its visual appeal.
You can also use small decorative items like miniature flowers, butterflies, or tiny bird figurines to add charm.
Experiment with faux moss, twigs, or small rocks around the base for a more natural look, and don't forget to personalize with a welcoming sign or the residents' names for that extra touch of character.
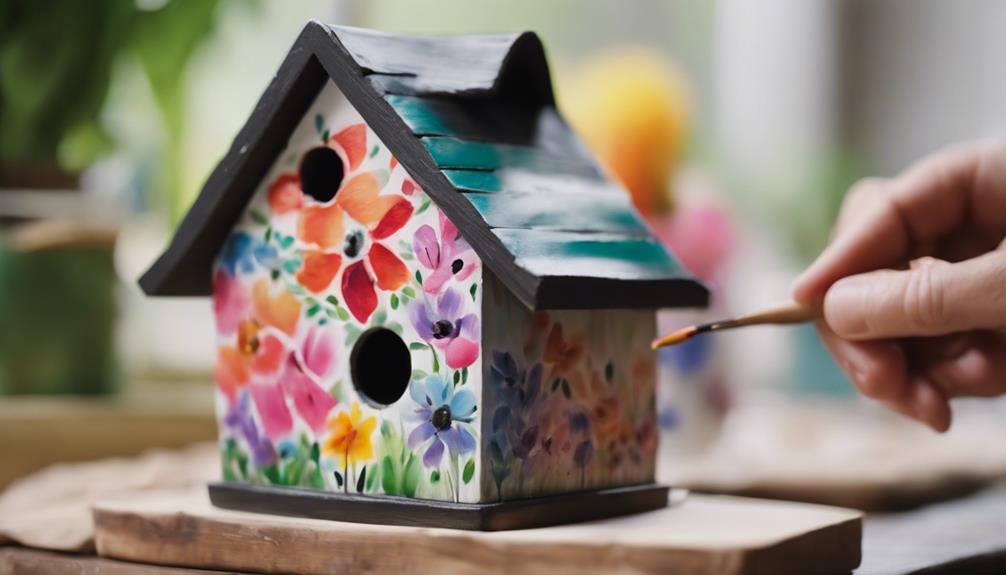
Paint Color Selection
Consider incorporating pastel colors like soft pink, light blue, and pale yellow when adding details and accents to your Dollar Store Spring Cottage birdhouses for a rejuvenating spring-inspired look.
When you're going to paint, add a little white or cream as base colors to create a fresh and clean appearance.
Next, opt for muted shades of green to mimic nature and introduce a calming effect to the design.
To conclude, experiment with metallic accents like gold or silver for a touch of elegance and glamour.
It's crucial to use a color palette that complements your overall decor theme and enhances the beauty of the birdhouse.
By selecting these gentle pastel hues and incorporating subtle metallic elements, you can achieve a charming and inviting aesthetic that reflects the essence of spring.
Remember to balance the colors harmoniously and let your creativity shine through as you transform your birdhouses into delightful spring cottages.
Embellishment Options
To enhance the overall charm and decorative appeal of your Dollar Store Spring Cottage birdhouses, consider incorporating various embellishments for a personalized touch. Adding cup hooks and wire can provide a charming and decorative element to your birdhouse.
Utilizing silver knobs painted in black can introduce a touch of elegance and contrast to the design. Enhance the roof with D cutout pieces for unique and eye-catching toppers. For a natural touch, decorate the top with greenery, moss, and small bird figurines.
These embellishments not only add visual interest but also create a whimsical and inviting atmosphere for your feathered friends. Additionally, using wine corks as feet can serve as a creative finishing detail.
We love to decorate, and incorporating these embellishments really helps in customizing your birdhouse to suit your style and preferences. Experiment with different options to create a one-of-a-kind spring cottage birdhouse that will delight both you and your avian visitors.
Finishing Touches
Adding the final touches to your Dollar Store Spring Cottage birdhouse involves incorporating various decorative elements like moss, birds, and greenery to enhance its natural aesthetic.
To achieve a charming and personalized look, consider the following steps:
- Utilize Leftover Materials: Get creative by repurposing leftover truffle or other materials for unique accents that add character to your birdhouse.
- Incorporate Upcycled Elements: Enhance the overall design by incorporating elements like wine corks as feet, cup hooks with wire, and painted knobs for decoration that will make your birdhouse stand out.
- Experiment with Contrasting Colors: Paint the front and sides of the birdhouse with contrasting colors, such as white, to create a visually appealing finish that highlights the details and adds depth to the overall look.
Make sure to start brushing on details like moss and greenery in a way that complements the design, adding texture and visual interest to your Dollar Store Spring Cottage birdhouse.
Experiment with different textures and materials to personalize your creation and elevate its aesthetic appeal.
Step 5: Final Touches and Sealant
Applying a clear sealant is crucial for safeguarding the birdhouse from outdoor elements and guaranteeing its longevity. You're going to need a brush or spray to evenly coat the entire surface of the birdhouse for maximum protection.
This sealant will help prevent water damage, fading, and warping of the wood over time. It's important to let you know that you should allow the sealant to dry completely according to the manufacturer's instructions before displaying the birdhouse.
Once the sealant is dry, your birdhouse will be ready to withstand the elements and provide a safe haven for our feathered friends. Remember, to maintain the appearance and durability of your birdhouse, consider reapplying sealant annually. This simple step will ensure that your birdhouse remains a charming addition to your outdoor space for years to come.
Now that your birdhouse is properly sealed and protected, it's almost time to find the perfect spot to display it and enjoy the beauty of nature.
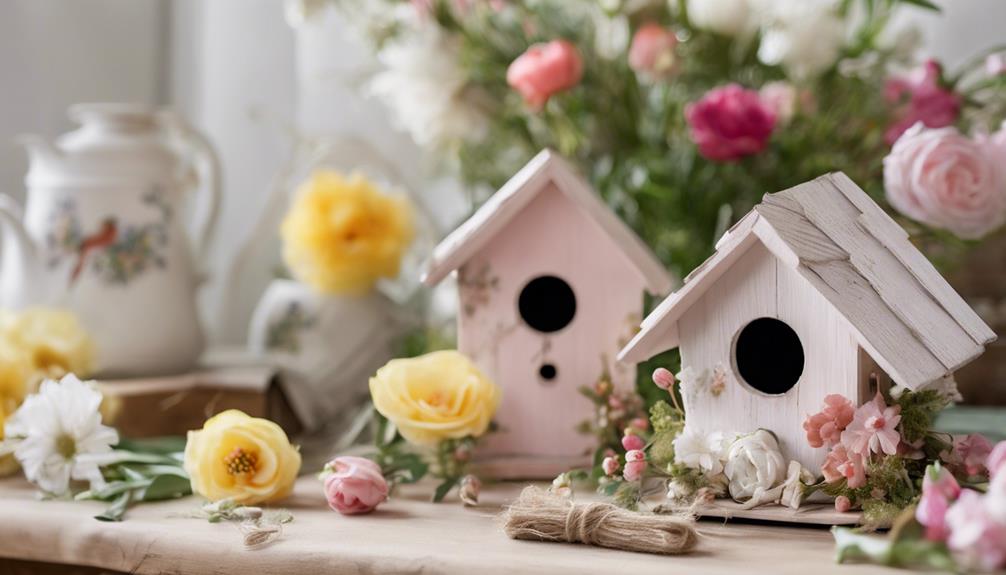
Display and Enjoy
Let's find the perfect spot to showcase and enjoy your Dollar Store spring cottage birdhouse! Once you've completed your DIY project, displaying it's the best part.
Here are some ideas to make the most of your new decor piece:
- Prominent Placement: Place the birdhouse on a prominent shelf or mantel where it can be admired by all who enter your home.
- Incorporate Into Decor: Consider incorporating the birdhouse into your existing home decor to create a cohesive and stylish look that seamlessly blends in with your surroundings.
- Seasonal Rotation: Rotate the birdhouse with other seasonal decorations to keep your space fresh and inviting, ensuring that it remains a focal point throughout the year.
Choosing where to display your birdhouse allows you to bring a touch of nature indoors and infuse your space with the charm of spring.
Enjoy the process of finding the perfect spot to showcase your creation and let it brighten up your home decor.
Frequently Asked Questions
How to Build a Birdhouse Step by Step?
When building a birdhouse step by step, start by measuring and cutting the materials to size.
Then, secure the pieces with hot glue for initial support and Gorilla wood glue for durability.
Create a slanted roof effect using small cutting boards or wood blocks, paint for a realistic finish.
Add decorative elements like handles, painted details, and feet from wine corks.
Experiment with painting techniques like acrylic chalk paint and wax for a weathered wood look.
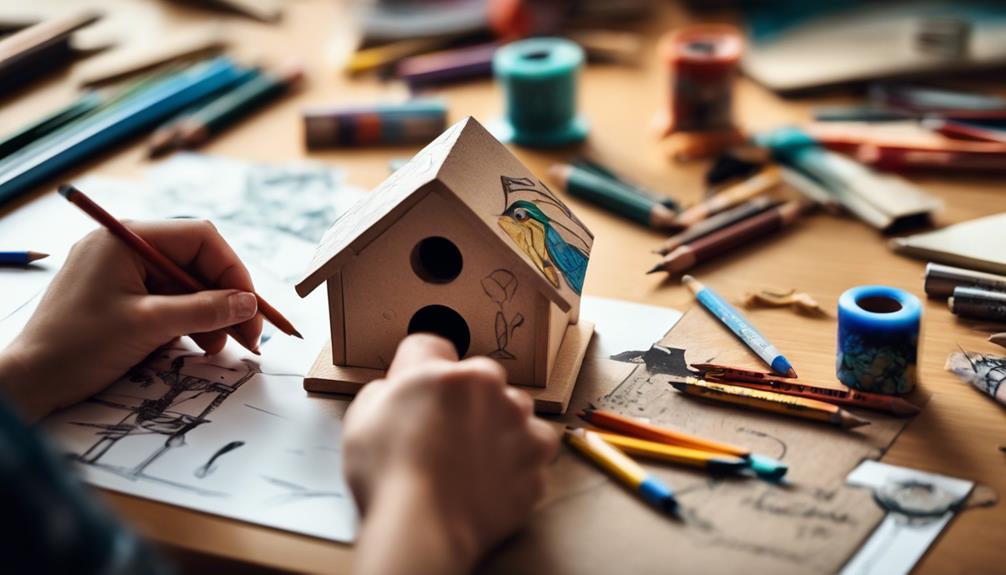
How to Make a Bird House With Cardboard?
To make a birdhouse with cardboard, you first need to cut out shapes for the walls, roof, and floor. Use glue to put these pieces together. Then, decorate the birdhouse with paint or markers, adding details like windows and perches. Once the birdhouse is complete, place it outside to attract birds. Remember to keep the birdhouse safe.
Making a birdhouse with cardboard involves cutting out shapes for the walls, roof, and floor. These pieces are then assembled using glue. Once the structure is in place, you can decorate the birdhouse with paint or markers, adding details like windows and perches. After completing the decoration, place the birdhouse outside to attract birds. It's essential to ensure that the birdhouse is safe for the birds.
How to Make a Bird House With Kids?
When making a birdhouse with kids, it's like setting off on a fun adventure together. Start by choosing safe materials like popsicle sticks and non-toxic glue. Opt for pre-cut kits to simplify assembly.
Encourage creativity with paint and decorations. Teach kids about bird species and nesting habits. Involve them in choosing the birdhouse's location.
This project offers a chance to bond, learn, and create a welcoming home for our feathered friends.
How to Decorate a Bird House?
To decorate a birdhouse, start by painting it with acrylic chalk paint and adding custom elements like handles or cup hooks. Personalize the design with texture and depth using different painting techniques.
For a natural finish, consider incorporating greenery, moss, and birds. Experiment with various decorative elements for a unique look.
These steps will help create a visually appealing birdhouse that stands out in your outdoor space.
Conclusion
In just a few easy steps, you can transform dollar store finds into charming birdhouses for your spring decor.
With a little creativity and a touch of paint, you can create a cozy cottage feel for your feathered friends.
So gather your supplies, follow our guide, and watch as your backyard becomes a welcoming haven for birds to enjoy.
Happy crafting!