To create a farmhouse DIY rustic coat rack, start by selecting a reclaimed barn door with character and charm. Sand down rough edges and apply a dark walnut stain to enhance the wood's natural beauty. Next, add farmhouse-style wood brackets and stain them to match the door. Attach metal coat hooks, spaced evenly, and add decorative elements like vintage doorknobs or typography. Assemble the coat rack, ensuring sturdy construction and proper weight capacity. Finally, style your coat rack with personal touches and hang it proudly. As you move forward, you'll uncover the nuances of rustic design and expert techniques to make your project truly unique.
Key Takeaways
• Choose a reclaimed barn door with rustic charm and sand down rough edges before applying dark walnut stain for a sturdy foundation.
• Select farmhouse-style brackets and confirm their weight capacity before securing them to the wall and staining for a cohesive look.
• Attach metal coat hooks evenly spaced and pre-drill pilot holes, opting for black metal for a farmhouse aesthetic.
• Securely attach hooks and shelves for a functional design, verifying proper spacing and alignment for visual appeal.
• Finish the coat rack with vintage hooks, distressed wood, and dark walnut stain to create a unique piece that reflects your personal style.
Prepare the Barn Door Base
Choose a reclaimed barn door that resonates with your desired level of rustic charm and character, considering factors like its age, wood type, and natural imperfections. This will serve as the base for your farmhouse DIY rustic coat rack.
Once you've selected the perfect door, it's time to prepare it for its new purpose. Start by sanding down the barn door to remove any rough edges or splinters, ensuring a smooth finish. This step is essential in creating a sturdy foundation for your coat rack.
Next, apply a coat of stain to enhance the natural beauty of the barn wood. A dark walnut stain is an excellent choice, as it adds depth and warmth to the wood, giving it a rustic look that's perfect for a farmhouse-inspired coat rack.
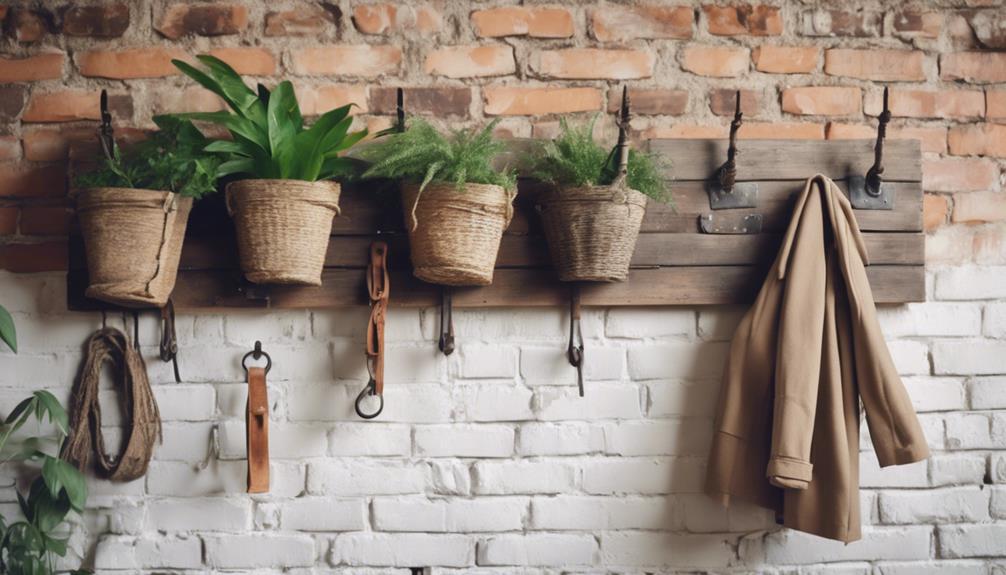
Add Wood Brackets for Shelf
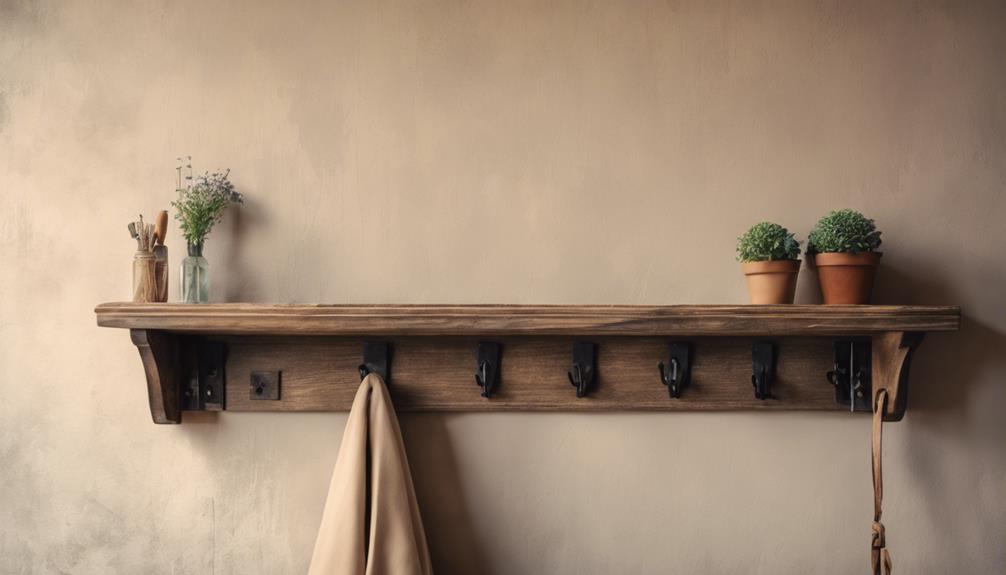
You'll add a functional and stylish touch to your coat rack by attaching wood brackets that can support a shelf for decorative items or extra storage. This design element not only enhances the overall aesthetic appeal of your coat rack but also provides a convenient spot to display farmhouse-inspired decor or store essential items.
When choosing wood brackets, consider the following:
- Select brackets that complement the farmhouse style of your coat rack, such as distressed or vintage-inspired pieces.
- Confirm the size and weight capacity of the brackets can support the shelf and any items you plan to place on it.
- Consider securing the brackets to the wall underneath the coat rack to create a cohesive and functional design.
- Think about the overall look you want to achieve and choose brackets that fit with your vision.
Stain the Entire Piece Dark
Now that you've added the wood brackets for the shelf, it's time to focus on giving your DIY rustic coat rack a rich, rustic finish.
You'll want to stain the entire piece dark, using a stain like Dark Walnut by Minwax, to bring out the natural wood grain and create a cohesive look.
Dark Wood Tones
By staining the entire coat rack a dark wood tone, you'll create a cohesive and rustic farmhouse look that adds depth and richness to the piece.
Dark wood tones, such as Dark Walnut by Minwax, enhance the natural beauty of the wood, making it perfect for farmhouse decor. This staining technique not only adds depth and richness but also provides a striking contrast against light-colored walls or decor.
Here are some benefits of using dark wood tones:
- Enhances the natural beauty of the wood
- Adds depth and richness to the coat rack
- Provides a striking contrast against light-colored walls or decor
- Helps achieve a weathered and aged appearance for a more authentic farmhouse feel
Staining Techniques
Staining the entire coat rack a dark wood tone, like Minwax's Dark Walnut, creates a cohesive and rustic farmhouse look that adds depth and richness to the piece. By doing so, you'll achieve a uniform stain color that complements the vintage hooks and barn wood accents, tying the farmhouse look together seamlessly.
To achieve the desired darkness, use rags to apply the stain evenly, making sure to cover the entire wood surface. Before staining, remember to sand the wood to create a smoother finish and help the stain adhere better. Dark stain colors, such as Dark Walnut, can bring out the natural beauty of the wood, adding character to your DIY rustic coat rack.
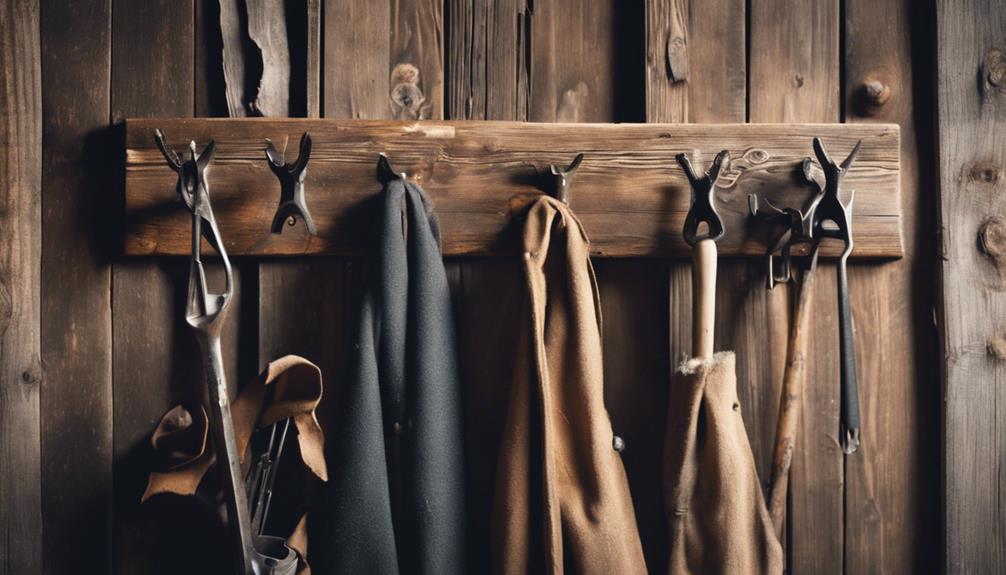
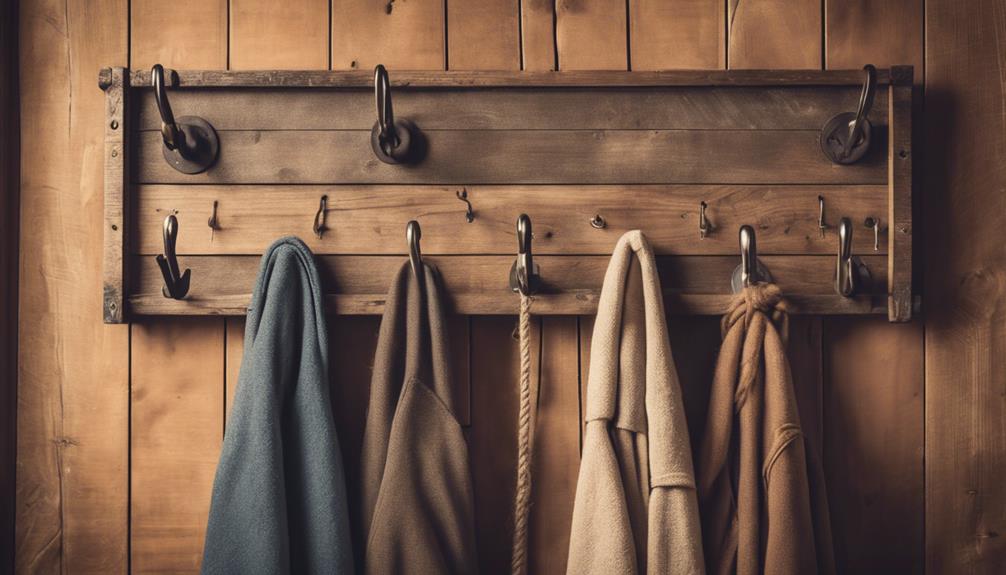
Attach Metal Coat Hooks Bottom
With your barn wood prepared, attach the metal coat hooks to the bottom of the wooden plank, making sure they're evenly spaced apart for convenient hanging of your coats, hats, and accessories. This step is essential in creating a functional and rustic coat rack that exudes a farmhouse charm.
To attach the hooks, use a cordless screwdriver to fasten them securely to the bottom of the barn wood. Be sure to pre-drill pilot holes to prevent splitting in the wood. For a cohesive look, opt for black metal hooks that provide sturdy support. Don't forget to check the weight capacity of the hooks to make sure they can hold the intended items without issues.
Here are some important tips to keep in mind:
- Pre-drill pilot holes to prevent wood splitting
- Use a cordless screwdriver for easy fastening
- Choose black metal hooks for a farmhouse look
- Check the weight capacity of the hooks for safe hanging
Add Decorative Elements Desired
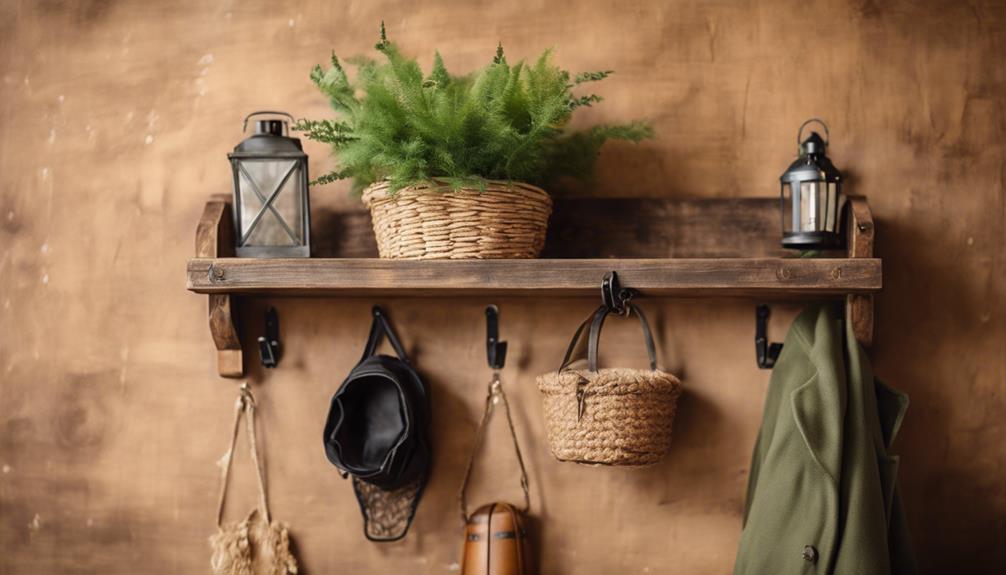
You can now add your personal touch to the coat rack by incorporating decorative elements that reflect your unique style and farmhouse charm. This is where you get to express your creativity and make the coat rack truly special.
Here are some ideas to get you started:
| Decorative Element | Description |
|---|---|
| Vintage doorknobs or hooks | Add a rustic touch with unique hardware |
| Typography/stenciling | Personalize with a message or design |
| Distressing with sandpaper | Enhance the rustic charm of the wood |
| Decorative brackets (corbels) | Elevate the design with ornate details |
Consider experimenting with different finishes, such as staining or painting, to match your desired decor style. The key is to have fun and get creative! With these decorative elements, you'll be able to create a one-of-a-kind DIY farmhouse coat rack that reflects your personal style.
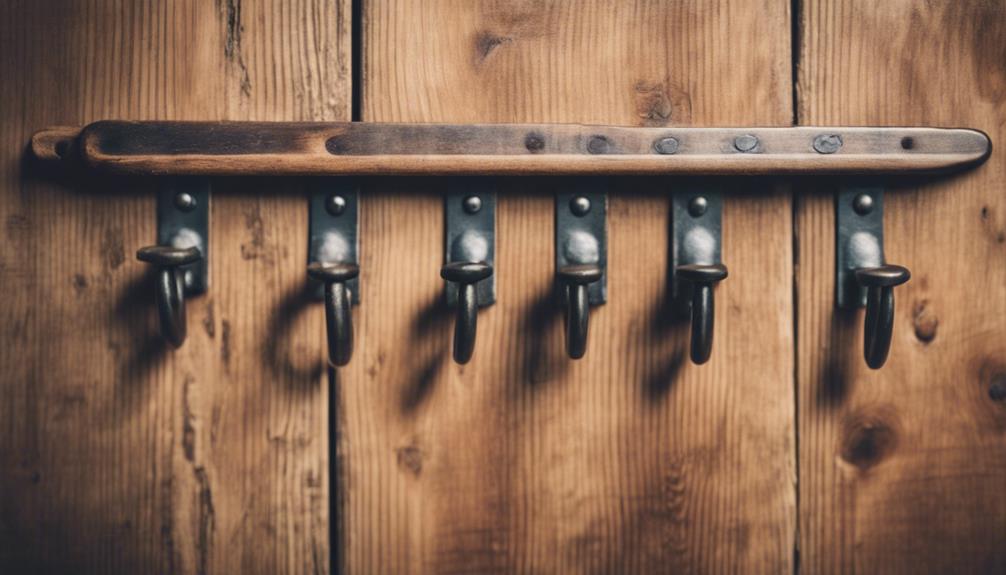
Finalize the Coat Rack Assembly
Now that you've added your desired decorative elements, it's time to finalize your coat rack assembly.
You'll need to secure the back panel, attach the hooks and shelves, and make sure everything is properly aligned.
In this final stage, attention to detail is vital, so take your time to carefully complete these remaining tasks.
Rack Assembly Overview
Secure the metal hooks to the barn wood, spaced evenly apart to accommodate your coats, hats, and bags, and make certain they're firmly attached to hold a substantial amount of weight. You'll want to guarantee the hooks are securely attached using wood glue to prevent them from coming loose over time.
Here are some essential tips to keep in mind when assembling your coat rack:
- Use a level to guarantee the barn wood is straight on the wall for a polished look.
- Pre-drill holes in the barn wood to prevent splitting when attaching to the wall.
- Find a stud with a stud finder for a secure and stable attachment of the coat rack.
- Add a personal touch by styling the coat rack with seasonal items like wreaths or hats.
Secure the Back Panel
With the rack assembly complete, turn your attention to attaching the back panel, an important step in finalizing your farmhouse DIY rustic coat rack. This step provides stability and support to the entire structure, preventing it from wobbling or coming loose.
To secure the back panel, use wood screws or nails to attach it to the assembled coat rack structure. Confirm the back panel is level and flush with the sides of the coat rack for a professional finish. Double-check the alignment of the back panel using a level before securing it in place.
Consider painting or staining the back panel to match the overall aesthetic of your farmhouse DIY rustic coat rack. A well-secured back panel is essential in maintaining the structural integrity of your coat rack, so take your time to get it right.
With the back panel securely in place, you'll have a sturdy and functional coat rack that's ready for use. By following these steps, you'll be able to create a beautiful and functional farmhouse DIY rustic coat rack that adds a touch of rustic charm to any room.
Attach Hooks and Shelves
You're ready to finalize your coat rack assembly by attaching farmhouse-style hooks and shelves that fit your specific needs and style preferences. This is where your DIY project starts to take shape, and you get to see your farmhouse coat rack come to life.
To complete this step, follow these essential tips:
- Securely attach farmhouse-style hooks to the barn wood for hanging coats and hats.
- Add shelves or brackets for additional storage space or decorative elements on the coat rack.
- Verify proper spacing and alignment of hooks and shelves for a visually appealing and functional design.
- Use a level to make sure the hooks and shelves are straight and balanced on the wall.
Style and Hang With Pride
Now that you've built your farmhouse DIY rustic coat rack, it's time to add the finishing touches and proudly display your personal style. As an essential element of your home decor, this rustic coat rack is more than just a functional piece – it's a reflection of your unique taste.
To truly make it shine, consider adding vintage hooks, distressed wood, and a dark walnut stain to give it a rustic charm. You can also hang navy blue and white striped beach towels on the coat rack to enhance the farmhouse decor and provide a stylish storage solution.
As a DIY project, the possibilities are endless. You can use the coat rack to hang hats, coats, canvas totes, or even pool towels and bags. The key is to have fun and get creative with your styling.
With your farmhouse DIY rustic coat rack, you can add a touch of rustic charm to your entryway or mudroom. So go ahead, style it with pride, and show off your personal touch. Remember, the beauty of DIY projects lies in their customization, so don't be afraid to experiment and make it your own.
Frequently Asked Questions
How to Make Your Own Coat Rack?
To make your own coat rack, start by selecting a piece of wood that fits your desired aesthetic, such as reclaimed barn wood or pine.
Stain the wood to achieve a weathered look, and add vintage hooks or doorknobs to hang your belongings.
Distress the wood with sandpaper for an aged finish, and consider adding decorative touches like striped towels for a stylish touch.
What Is the Spacing for Coat Rack Hooks?
You're probably wondering what the ideal spacing is for coat rack hooks.
Surprisingly, did you know that the average person owns around 12-15 coats and jackets?
When it comes to hook spacing, the general rule of thumb is to space them 5-7 inches apart. However, this can vary depending on your personal preference, the width of your coat rack, and the size and weight of the items you plan to hang.
How to Make Wooden Coat Hooks?
When making wooden coat hooks, you'll want to choose the type of wood that fits your aesthetic, such as oak, pine, or reclaimed barn wood.
Sand and stain the wood to enhance durability and visual appeal.
Before attaching the hooks, pre-drill pilot holes to prevent splitting.
What Is the Height of a Coat Rack?
When determining the height of your coat rack, you'll want to take into account a few factors. Typically, a coat rack is installed around 60 inches from the floor, allowing for easy hanging without straining.
However, you can adjust the height based on your household's average height for added convenience. If you have taller ceilings, you might want to mount it slightly higher for a balanced look.
Conclusion
You've crafted a rustic coat rack that's the perfect blend of farmhouse charm and functional design. Your DIY masterpiece now stands ready to corral clutter and add a touch of rural sophistication to your entryway.
As you step back to admire your handiwork, the rich, dark stain and metal hooks seem to whisper stories of the countryside, while the decorative elements add a hint of whimsy.
Your new coat rack is more than just a practical piece – it's a proof of your creativity and resourcefulness.

Vivienne – Your Content Companion Vivienne is your content companion, curating valuable tips, advice, and inspiration to guide you on your home decor journey. From insightful blog posts to informative product descriptions, she’s here to empower you with the knowledge you need to create your dream space.