Connect with us

Home Decor

Homemade Bird Nest Crafting: 3 Simple Steps

Prepare to take flight into the world of creative nesting, where natural beauty and personal touches come together in a unique decorative piece.

Published

on

crafting bird nests naturally

To craft a homemade bird nest, start by gathering natural materials like dried grass, twigs, and leaves from your yard or local parks. Next, mold the nest shape by wrapping angel hair vine filler around a bowl, securing it with thin wire. Finally, add decorative elements like feathers, dried flowers, or small twigs to enhance the natural look. Personalize your nest with ribbons, fabric scraps, or small ornaments to make it unique. With these three simple steps, you'll have a natural haven for birds and a stunning decorative piece for your home – and that's just the beginning of your creative journey.

Key Takeaways

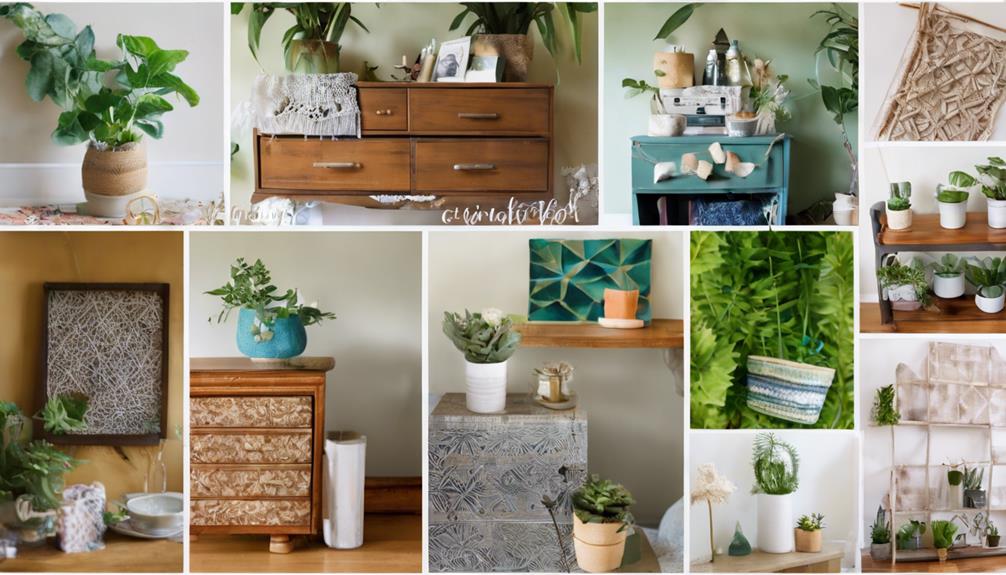
• Gather natural materials like dried grass, twigs, and Spanish moss to mimic the bird's natural environment.

• Create a nest structure by wrapping angel hair vine filler around a bowl and securing it with thin wire.

• Add decorative elements like Easter eggs, feathers, and dried flowers to enhance the natural look.

• Personalize your bird nest with ribbons, fabric scraps, or small ornaments to make it unique.

Advertisement

• Experiment with different elements to unleash your creativity and make your DIY project special.

Gathering Natural Materials

Head outdoors to scour your yard, local parks, or online retailers for natural materials like dried grass, twigs, leaves, and Spanish moss that will give your DIY bird nest an authentic look. This is the first step in making a homemade bird nest that will attract birds to your backyard.

You'll want to gather materials that mimic the natural environment, allowing your DIY nest to blend in seamlessly. As you forage for materials, keep in mind the type of bird you're trying to attract, as different species have unique nesting preferences.

Once you've collected your materials, prepare your workspace by covering it with craft paper, wearing gloves, and working in a well-ventilated area to prevent mess. With your materials and workspace ready, you'll be set to start crafting your DIY bird nest, making it an inviting home for your feathered friends.

Crafting the Nest Structure

creating a cozy home

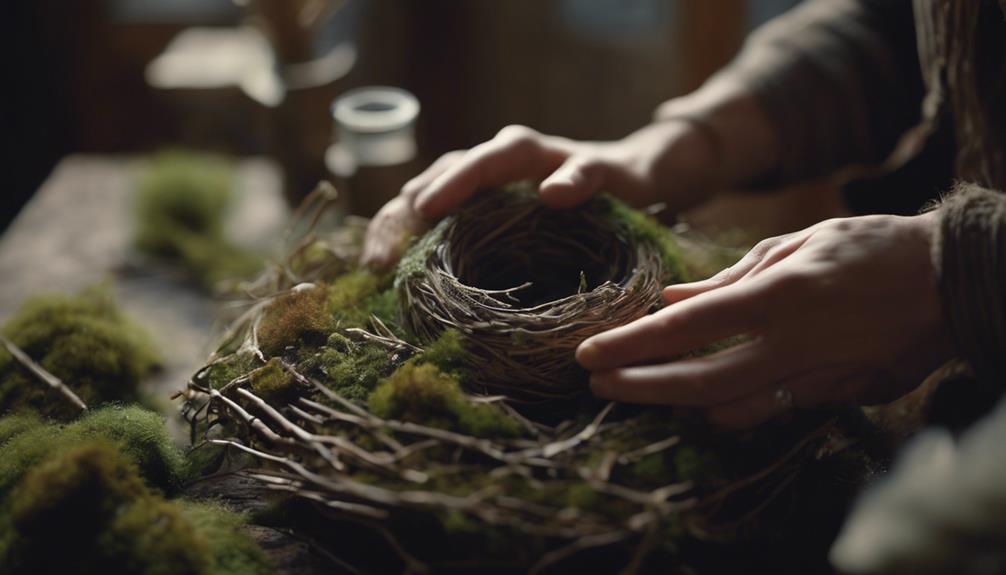
With your natural materials and workspace prepared, you're ready to start crafting the nest structure, the foundation of your DIY bird nest. This is the most essential step in creating a realistic bird nest, as it provides the base shape and form of the nest.

To craft the nest structure, follow these steps:

Advertisement
  • Wrap the angel hair vine filler around a bowl to mold the nest shape, using thin wire to secure it in place.
  • Continue wrapping the vine filler around the bowl, overlapping the layers to create a sturdy base.
  • Secure the sides of the nest together using thin wire, and trim any excess filler.
  • Once the nest is formed, carefully remove it from the bowl.

Adding Final Touches

creating a masterpiece together

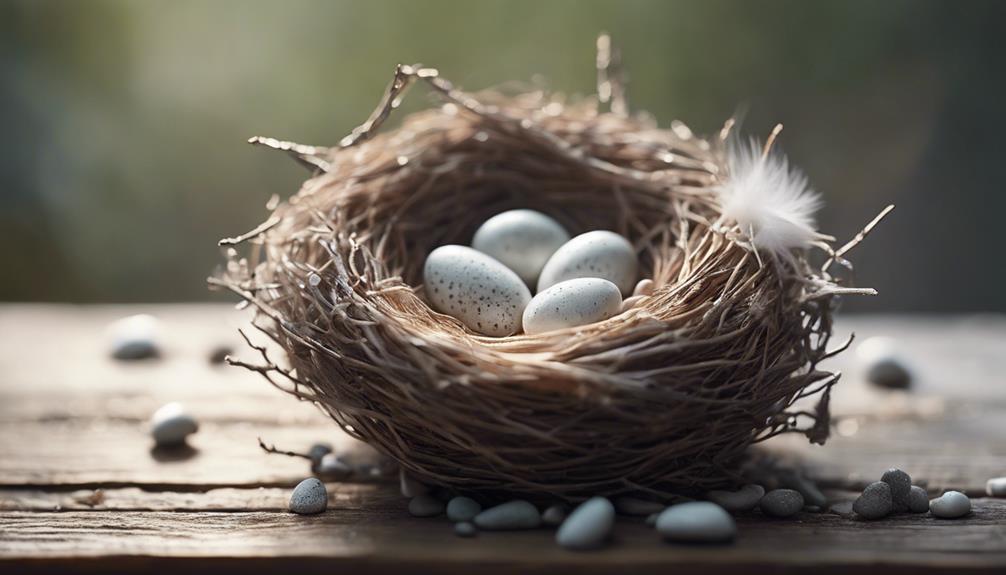
You can now add the perfect finishing touches to your DIY bird nest by incorporating decorative elements that reflect your personal style and flair.

Add a pop of color and texture to your bird nest with decorative Easter eggs or faux bird eggs, which can be easily attached using a hot glue gun.

To enhance the natural look of your nest, incorporate feathers, dried flowers, or small twigs, which will add a touch of whimsy and authenticity to your decoration.

Consider adding a miniature nest or a tiny bird figurine to create a charming and unique centerpiece.

Experiment with different elements like ribbons, fabric scraps, or small ornaments to personalize and customize your bird nest decoration.

Don't be afraid to get creative and try out new ideas – after all, customization is what makes your DIY project truly special.

Advertisement

Frequently Asked Questions

How to Build a Bird Nest Step by Step?

When you're wondering how to build a bird nest step by step, start by gathering natural materials like twigs, grass, and feathers for an authentic look.

Next, use a bowl as a mold to shape the nest and hold it together with thin wire.

How to Make a Craft Nest for Kids?

When you're looking to make a craft nest for kids, start by gathering materials like construction paper, glue, a bowl, and a paintbrush.

Cut the paper into strips and layer them inside the bowl, coated with a glue and water mixture.

Encourage kids to experiment with different colors and textures to create a unique nest, adding details like eggs or birds for a realistic touch.

Advertisement

How Do Birds Build Nests for Kids?

You might wonder how birds build their nests, and it's fascinating to learn about their unique techniques. Birds collect materials like twigs, leaves, and mud, carefully arranging them to create a safe space for their eggs.

Some species weave intricate nests, while others dig simple depressions in the ground. By observing birds build nests, you'll appreciate their remarkable resourcefulness and adaptability in using their surroundings to create homes.

How to Make Birds Nest With Paper?

Are you curious about how to make a bird's nest with paper? You're in luck!

To create a realistic bird's nest, you'll need to cut paper strips about 1/4 inch thick, mix Elmer's glue with water, and arrange the strips criss-crossing inside a bowl lined with plastic wrap.

You can experiment with different colors and textures of paper to create a unique design.

Advertisement

Conclusion

As you carefully place the final twig, your homemade bird nest begins to resemble a cozy little home, a tribute to nature's intricate design.

Like a master weaver, you've intertwined twigs, leaves, and feathers to create a snug sanctuary, a symbol of hope and new life.

Just as the nest cradles its precious cargo, your creativity has given birth to something beautiful, a reminder that even the smallest acts of craftsmanship can hold profound significance.

Continue Reading
Advertisement

Alfresco

Is It Al Fresco or Alfresco? Proper Usage Explained!

Wondering about the distinction between 'al fresco' and 'alfresco'? Delve into the proper usage to enrich your outdoor experiences and linguistic finesse.

Published

on

By

al fresco or alfresco

When deciding between 'al fresco' and 'alfresco,' it's crucial to recognize the nuanced distinctions to refine your portrayal of outdoor pursuits and dining occasions. Originating from Italian, 'al fresco' translates to 'in the cool air,' infusing a sense of natural vitality into experiences. Both terms are interchangeable for outdoor endeavors, with 'alfresco' being more prevalent in American English and 'al fresco' in British English. Embracing the accurate usage aids in effectively conveying outdoor settings. Misconceptions about these terms persist, but knowing their true breadth adds depth to your appreciation of alfresco encounters. Further insights await, shedding light on the vast domain of outdoor experiences.

Key Takeaways

  • 'Al fresco' and 'alfresco' are interchangeable for outdoor activities.
  • 'Alfresco' is more common in American English; 'al fresco' in British English.
  • Both terms mean 'in the fresh air' or 'cool air' in Italian.
  • Understanding nuances aids in accurate conveyance of outdoor dining or events.
  • Use 'al fresco' for elegance in writing about outdoor experiences.

The Origin of Al Fresco

The term 'Al Fresco' originates from the Italian language, meaning 'in the cool air.' It has become a popular phrase in English, often associated with dining or spending time outdoors. Italians originally used 'Al Fresco' to describe time spent in jail, but over time, it evolved to represent activities in the open air.

In contemporary usage, the term is commonly linked with outdoor dining experiences, enhancing the enjoyment of food by immersing individuals in a natural setting.

Webster's dictionary defines 'Al Fresco' as being in the open air, emphasizing the connection between the term and outdoor environments. The concept of dining 'Al Fresco' isn't merely about the food but also about the ambiance and atmosphere created by nature.

Whether it's a picnic in the park or a meal on a restaurant patio, the experience of eating outdoors adds a revitalizing element to the culinary adventure.

Al Fresco Vs. Alfresco: Any Differences?

spelling difference in dining

When distinguishing between 'al fresco' and 'alfresco,' it's crucial to take into account their meanings, regional variations, and common usage examples.

While both terms are used interchangeably to describe outdoor activities, 'alfresco' specifically translates to 'in the fresh air' in Italian.

Advertisement

Understanding these nuances can help accurately convey the context of outdoor dining or events held outside.

Meaning of Terms

Distinguishing between 'al fresco' and 'alfresco' may not be necessary as both terms share a similar meaning in describing outdoor activities or dining. In Webster's dictionary, 'alfresco' is defined as taking place or located in the open air. Both words originate from Italian and convey the idea of being 'in the cool air.' While 'alfresco' is more commonly used in American English, 'al fresco' is popular in British English. Understanding the distinction between the two can enhance your communication skills and vocabulary proficiency.

Term Definition Usage
Al Fresco Originates from Italian, meaning 'in the cool air' British English
Alfresco Defined as taking place or located in the open air American English

Knowing the nuances between 'al fresco' and 'alfresco' can help you accurately express the idea of outdoor activities or dining in your conversations or written communication.

Regional Variations

Understanding the regional variations between 'al fresco' and 'alfresco' can enhance your grasp of language nuances.

In different English-speaking regions, the choice between 'al fresco' and 'alfresco' may vary, with each spelling taking place or located outdoors in daily activities. Here are some key points to keep in mind:

Advertisement
  • The term 'al fresco' originates from Italian, while 'alfresco' is the English adaptation.
  • 'Al fresco' is more commonly used in British English, while 'alfresco' is preferred in American English.
  • Personal preference and adherence to specific style guides can influence the spelling choice.
  • Knowing regional differences, like 'al fresco' in British English and 'alfresco' in American English, aids in proper usage.
  • Both spellings are used interchangeably, but understanding the regional variations can help you employ the correct term in your writing or conversations every day.

Common Usage Examples

In everyday usage, you may wonder if there are any noticeable differences between 'al fresco' and 'alfresco' when describing outdoor activities or events. Both terms are widely accepted and essentially interchangeable, conveying the same meaning of outdoor experiences. The choice between using 'al fresco' or 'alfresco' typically comes down to personal preference, as they both refer to activities or events conducted outside, especially in pleasant weather conditions.

To provide a clearer understanding, let's take a look at some common usage examples:

Common Usage Examples
Enjoying a meal al fresco on the patio
Hosting a party alfresco in the backyard
Painting a landscape al fresco in the park

These instances showcase how 'al fresco' and 'alfresco' can be seamlessly integrated into everyday language when describing outdoor settings or events. Remember, whether you choose 'al fresco' or 'alfresco,' both terms are correct and convey the same idea of outdoor enjoyment.

Common Misconceptions About Al Fresco

outdoor dining myths debunked

Many people mistakenly associate al fresco solely with outdoor dining, overlooking its broader applications in open-air settings. Despite common misconceptions, al fresco doesn't exclusively refer to dining outside but encompasses various activities conducted in open-air environments.

Here are some key points to clarify misconceptions about the term:

  • Al fresco and alfresco are interchangeable spellings, originating from Italian and anglicized versions.
  • Al fresco extends beyond dining to include activities like painting, performances, and social gatherings outdoors.
  • The term is versatile and can denote any event or experience taking place in the open air, not limited to just meals.
  • While al fresco dining is prevalent, the concept of al fresco encompasses a wide array of outdoor experiences.
  • Understanding the true scope of al fresco can enhance appreciation for open-air activities in diverse settings.

When to Use Al Fresco in Writing

al fresco writing tips

When deciding when to use 'al fresco' in your writing, consider the context in which you're discussing outdoor activities or dining.

Remember that 'al fresco' is the traditional Italian term meaning 'in the cool air,' often used to evoke a sense of open-air enjoyment.

In English writing, both 'al fresco' and 'alfresco' are acceptable choices, so opt for the one that aligns best with your personal style or adherence to traditional spelling conventions.

Advertisement

Meaning of Al Fresco

To convey the experience of outdoor dining or activities, consider using 'al fresco' in your writing. The term 'al fresco' originates from Italian, meaning 'in the cool air,' and it's commonly used in English to describe activities conducted in outdoor settings.

Both 'al fresco' and 'alfresco' are accepted variations in English, with the latter also conveying the same meaning. When writing about outdoor events, using 'al fresco' can add a touch of elegance and specificity to your descriptions.

  • 'Al fresco' is the correct Italian term for outdoor activities.
  • The term is widely used in English to describe dining or activities done outdoors.
  • 'Alfresco' is an accepted variant of 'al fresco' in English.
  • Both 'al fresco' and 'alfresco' can be used interchangeably to refer to outdoor experiences.
  • Using 'al fresco' in your writing can enhance the clarity and sophistication of your descriptions of outdoor events.

Usage in Context

Consider incorporating 'al fresco' in your writing to add a touch of elegance and specificity when describing outdoor dining or activities. The term 'al fresco' originates from Italian and conveys a sense of dining or enjoying the outdoors in a cool and invigorating manner.

In formal writing or when discussing Italian culture, it's more appropriate to use 'al fresco' to maintain authenticity and cultural relevance. However, in casual or everyday English, 'alfresco' is widely accepted as an anglicized version of the term.

While 'alfresco' is often used interchangeably with 'al fresco,' purists may prefer the original Italian term for its specific meaning and cultural connotations. Understanding the distinction between 'al fresco' and 'alfresco' can enhance your communication skills and demonstrate cultural awareness in different contexts.

Alfresco Dining: Tips for Success

outdoor dining success tips

For successful alfresco dining, make sure you have the right utensils, plates, and drinks readily available. When dining outdoors, the experience can be greatly enhanced by paying attention to the details. Here are a few tips to guarantee your alfresco dining is a success:

  • Opt for durable and lightweight dishware: Choose plates and utensils that are sturdy enough to withstand outdoor conditions but also easy to handle.
  • Bring appropriate drinkware: Consider using insulated cups for beverages to keep them at the desired temperature for longer periods.
  • Pack essential condiments: Don't forget to bring salt, pepper, and any other seasonings you may need to enhance the flavor of your meal.
  • Prepare for potential weather changes: Have a backup plan in case the weather shifts unexpectedly, such as bringing along a portable canopy or umbrella.
  • Don't forget the essentials: Remember to bring napkins, wet wipes, and trash bags to keep your dining area clean and tidy throughout the meal.

Exploring Synonyms for Al Fresco

synonyms for outdoor dining

Explore various synonyms for 'al fresco' to expand your vocabulary and better convey outdoor experiences. When discussing dining or activities conducted in the open air, you can use terms like open-air, out-of-door, out-of-doors, outdoor, and outdoors interchangeably with 'al fresco.' These synonyms serve to clarify the setting and ambiance of outdoor experiences, aiding in precise communication.

Understanding and incorporating these alternative expressions can enrich your language skills by providing nuanced ways to describe outdoor settings and events. By utilizing a variety of synonyms for 'al fresco,' you can add depth and vibrancy to your descriptions, painting a more vivid picture for your audience.

Advertisement

Enhancing your vocabulary with these synonyms not only diversifies your language repertoire but also guarantees that your outdoor-related narratives are rich in detail and imagery. Embrace these synonyms to elevate your descriptions of outdoor escapades and capture the essence of nature-infused moments with eloquence.

Cultural Insights: Al Fresco Around the World

global dining traditions explored

When it comes to cultural insights on al fresco experiences around the world, the term 'al fresco' holds distinct meanings and significance across various countries and traditions.

In Italy, 'al fresco' carries a rather unexpected connotation, as it refers to spending time in jail, diverging from the English meaning of dining or engaging in activities outdoors.

Alfresco dining experiences span a wide spectrum, from intimate picnics to grand outdoor events like wedding receptions.

Throughout history, alfresco settings have served as inspiration for renowned artists such as Thomas Cole and Edward Hopper.

Alfresco film screenings, concerts, and art parks have become favored ways to savor outdoor entertainment.

Advertisement

The concept of alfresco dining and social gatherings boasts a rich legacy, tracing back to the early 19th century.

Al Fresco Etiquette: Dos and Don'ts

outdoor dining dos and don ts

When dining al fresco with proper etiquette, ensure you use suitable outdoor dinnerware and utensils. It's essential to bring insect repellent and sunscreen for protection during your outdoor meal.

When dining al fresco, avoid engaging in loud music or disruptive behavior that may disturb others enjoying the outdoor ambiance. Respect the environment by cleaning up after your al fresco dining experience, leaving the outdoor space as pristine as you found it.

Additionally, it's wise to contemplate the weather conditions and have a backup plan in case of sudden changes, ensuring your al fresco meal remains enjoyable regardless of unforeseen circumstances.

Frequently Asked Questions

Is It Alfresco or Al Fresco?

When asking about using 'alfresco' or 'al fresco,' remember both terms are correct, but 'alfresco' is more common in English. Use 'alfresco' for outdoor activities. Knowing this helps you communicate clearly about your outdoor experiences.

How Do You Use the Word Alfresco?

When dining outdoors, remember to use "alfresco" to describe your delightful experience in the open air. Enjoy the fresh breeze and delicious food, but watch out for pesky bugs and bring necessary utensils.

Advertisement

Is Eating Outside Called Al Fresco?

Eating outside is commonly referred to as "al fresco." Whether you choose "al fresco" or "alfresco," both terms mean dining in the open air. So, next time you dine outdoors, remember it's called "al fresco."

Do Italians Say "Al Fresco"?

When in Italy, Italians indeed say "al fresco." This term paints a picture of enjoying life in the fresh air. Understanding these cultural nuances enriches your experience and interactions, fostering a deeper connection with the local lifestyle.

Conclusion

To sum up, the debate between 'al fresco' and 'alfresco' may seem trivial, but understanding the correct usage can make a significant impact on your writing.

Like a well-prepared dish served under the open sky, choosing the right term can enhance the overall experience for your readers.

So, next time you dine outdoors or describe a scene in your writing, remember to use 'al fresco' for that touch of elegance and sophistication.

Advertisement

Continue Reading

Home Decor

Make Quick and Simple Terra Cotta Pumpkins

Gain a head start on autumn decor with this easy guide to creating stunning, realistically textured terra cotta pumpkins in just a few simple steps.

Published

on

By

craft terra cotta pumpkins

We'll kick start our terra cotta pumpkin project by gathering ceramic pumpkins, craft paint, and natural stems for an authentic look. Next, we'll mix terracotta paint colors by blending orange, white, and brown hues, experimenting with ratios for unique shades. Adding flour to the paint will give our pumpkins a textured look, while precision painting and chip brush strokes will create a professional finish. After layering on flour for a realistic texture, we'll distress our pumpkins with sandpaper and add an aged look with powder. Finally, we'll seal our masterpiece with fixatif spray, and with these simple steps, we'll have created stunning terra cotta pumpkins that exude autumnal charm – and with more techniques to explore, our creativity will flourish.

Key Takeaways

• Blend orange, white, and brown craft paint to create unique terracotta shades for your pumpkin.

• Use a small paintbrush or chip brush to apply paint with precision for a professional finish.

• Add flour to paint for a chunky texture or sprinkle it on almost dry paint for a realistic look.

• Sand edges and corners to distress and age your pumpkin, focusing on areas prone to natural wear and tear.

Advertisement

• Seal your masterpiece with fixatif spray, applying multiple light coats for adequate coverage and protection.

Gather Your Supplies

We'll need a few essential items to get started on our terra cotta pumpkin project. To create these DIY terracotta pumpkins, we'll gather ceramic pumpkins in various sizes and shapes. These will serve as the base for our decorative pumpkins.

Next, we'll need a selection of craft paint in autumnal shades, such as Spiced Pumpkin, Burnt Sienna, Honey Brown, Oyster Beige, and Khaki Tan, to give our pumpkins a warm, seasonal look. A small paintbrush or chip brush will come in handy for applying the paint evenly.

To add an aged texture to our pumpkins, we can use white flour or baby powder. For an authentic touch, consider using natural pumpkin stems to complete the look.

With these basic supplies, we'll be well on our way to creating beautiful, rustic terra cotta pumpkins that will add a cozy ambiance to our homes.

Advertisement

Mix Terracotta Paint Colors

playful terracotta paint hues

Mixing the perfect terracotta color requires a blend of orange, white, and brown craft paint. This can be achieved by combining these hues in a bowl and adjusting the proportions to suit our desired shade.

We can experiment with different ratios of orange to white to brown to create a unique terracotta color that complements our pumpkins. For a more textured look, we can add a pinch of flour to the paint mixture. This will give our pumpkins a more rustic, earthy feel.

By adjusting the amount of flour, we can achieve varying levels of texture, from subtle to dramatic. Once we're happy with our terracotta color, we can use a brush to evenly paint our pumpkins, transforming them into beautiful, autumnal decorations.

With a little practice, we can achieve a range of different terracotta shades, each one unique and eye-catching. By mixing and matching our paints, we can create a collection of pumpkins that add a touch of warmth and coziness to any room.

Paint Your Foam Pumpkin

creative halloween craft idea

As we continue to transform our foam pumpkins into terra cotta masterpieces, we'll focus on the essential steps to achieve a realistic, earthy look.

Now that we've mixed our terracotta paint colors, it's time to explore the various paint color options that will give our pumpkins depth and character, as well as the brush stroke techniques that will add texture and visual interest.

Paint Color Options

We're spoiled for choice when it comes to craft paint colors that evoke the warm, earthy tones of terracotta, with options like Spiced Pumpkin, Burnt Sienna, Honey Brown, Oyster Beige, and Khaki Tan offering a great starting point. These colors provide a solid foundation for achieving a realistic terracotta finish on our DIY foam pumpkin.

Advertisement

Of course, we can always mix and match colors to create a unique shade that suits our taste. By experimenting with different color combinations, we can personalize our pumpkin and make it truly one-of-a-kind. Remember, the key to a convincing terracotta look lies in selecting the right paint colors.

With a small paintbrush or chip brush, we can apply the paint with precision, ensuring a professional-looking finish. Whether we're going for a vibrant, orange-hued pumpkin or a more muted, earthy tone, the right paint colors can make all the difference. By choosing the perfect shades, we can create a beautiful, terracotta-inspired pumpkin that's perfect for our fall decor.

Brush Stroke Techniques

With our chosen paint colors in hand, let's pick up a chip brush and start applying thick, textured strokes to our foam pumpkin. We love the look of a rustic, handmade terracotta pumpkin, and the right brush stroke techniques can make all the difference.

To achieve this, we'll use long vertical brush strokes with our chip brush, applying thickened paint to our foam pumpkin. As we brush up and down, we'll create a textured finish that adds depth and visual interest to our pumpkin. We'll let the paint dry naturally, maintaining those beautiful brush strokes for a realistic look.

Experimenting with different painting techniques is key to achieving the desired terracotta effect on our foam pumpkin. By mixing orange and yellow paint in a 1.5:1 ratio, we can create a custom terracotta color that's uniquely our own.

Advertisement

With practice and patience, we can master these brush stroke techniques and make a stunning, one-of-a-kind terra cotta pumpkin that we'll love displaying in our home.

Sealant Application Tips

Applying a sealant is essential to protecting our painted foam pumpkin from wear and tear, and choosing the right one is critical to preserving its texture and color. As we search for the perfect sealant, it's important to experiment with different options to find the one that works best for our project.

Here are some valuable tips to keep in mind for sealant application:

  • Use a fixatif spray as a gentle sealant for your painted foam pumpkin.
  • Apply multiple light coats of fixatif spray for heavier flour areas.
  • Avoid using clear matte acrylic sealer on your painted foam pumpkin.
  • Experiment with different sealant options like Mod Podge acrylic sealant for best results.
  • Allow the fixatif spray to dry completely before handling your painted foam pumpkin.

Add Texture With Flour

enhancing dishes with flour

As we explore the next step in creating realistic terra cotta pumpkins, we're going to discuss how adding flour can elevate our design.

We'll examine the benefits of using flour as a thickener, the advantages of incorporating flour texture, and some valuable tips for mixing flour into our paint.

Flour as Thickener

We add a pinch of creativity to our terra cotta pumpkins by incorporating flour as a thickener, which brings an intriguing texture to our decorative pieces. This DIY technique allows us to achieve a unique, realistic look that mimics the natural texture of terracotta.

Advertisement

To get started, we can add flour to our paint to create a thick, chunky texture. For a more subtle effect, we can sprinkle flour onto almost dry paint, which helps create a realistic terracotta look.

Here are some tips to keep in mind:

  • Distribute flour on different areas of the pumpkin for a varied texture.
  • Use a dry paint brush to help evenly spread the flour on the surface.
  • Experiment with the amount of flour used to achieve different textures and effects on your pumpkins.
  • Flour can be used to create a raised, bumpy texture or a smooth, even one, depending on how it's applied.
  • Don't be afraid to experiment and try out different flour-to-paint ratios to achieve the desired effect.

Flour Texture Benefits

By incorporating flour into our painting process, we can reveal a range of unique textures that add depth and visual interest to our terra cotta pumpkins.

The flour texture benefits are undeniable, as it allows us to achieve a textured finish that elevates our pumpkins from basic to exceptional. By sprinkling flour on almost dry paint, we can create an aged and realistic look that's perfect for autumnal decorations.

To achieve a natural texture, we can use a dry paint brush to distribute the flour evenly, ensuring a subtle yet striking effect. The best part? We can adjust the amount of flour to our liking, depending on how much texture we desire.

Experimenting with flour can lead to different levels of texture, resulting in unique pumpkin designs that showcase our creativity. With flour, we can transform our terra cotta pumpkins into stunning centerpieces that exude warmth and character.

Advertisement

Flour Mixing Tips

Mixing flour with paint is a simple process that reveals a world of textures, enabling us to create unique terra cotta pumpkins that stand out from the crowd.

When it comes to adding texture to our pumpkins, we've found that flour is an excellent addition to our paint. But how do we get the most out of this combination? Here are some flour mixing tips to help us achieve the perfect texture:

  • Sprinkle flour on the almost dry paint to create a textured look that's simply stunning
  • Distribute flour on different parts of the pumpkin for a realistic finish that mimics the natural texture of a real pumpkin
  • Use a dry paint brush to help spread the flour evenly and avoid clumps
  • Experiment with the amount of flour used to achieve your desired texture – more flour means a more textured look, while less flour results in a smoother finish
  • Mix flour with paint in small increments, as it's easier to add more flour than it's to remove excess

Distress the Terracotta Pot

distressed terracotta pot image

To achieve a weathered, vintage look, we're distressing the painted terracotta pot by gently sanding away the edges and corners, where natural wear and tear would occur over time. This process, referred to as light distressing, helps create a worn-out appearance that adds character to our pumpkin.

When using sandpaper, we're focusing on the areas that would naturally wear out first, such as the edges and corners. By gently rubbing the sandpaper in circular motions, we're able to create a subtle, aged look. Ensuring not to over-distress is crucial, as we aim to strike a balance between an aged and clean aesthetic.

Experimenting with different grits of sandpaper allows us to achieve the desired level of distressing. Remember, the goal is to create a subtle, weathered look, not to completely wear away the paint.

With a little patience and practice, we can achieve a beautifully distressed terracotta pot that adds a touch of rustic charm to our pumpkin decoration.

Advertisement

Add a Real Pumpkin Stem

incorporate real pumpkin stem

As we move forward with adding a real pumpkin stem to our terra cotta pumpkin, we'll need to focus on two important points: picking the perfect stem and attaching it securely.

We'll explore the significance of selecting a stem that fits our pumpkin's size and how to use hot glue or a strong adhesive to guarantee a strong bond.

Picking the Perfect Stem

We scour the local pumpkin patches and farmer's markets for the perfect stem, knowing that a sturdy, curved stem will add a touch of authenticity to our terra cotta pumpkins. To achieve a natural look, we're particular about the stems we choose. Here's what we look for:

  • Sturdy stems that can hold their own against the terra cotta pumpkin's weight
  • A curved shape that mimics the natural curve of a real pumpkin stem
  • Freshness – we avoid wilted or rotten stems that can compromise the overall appearance
  • A natural color that blends seamlessly with the terra cotta pumpkin
  • A stem that's free of debris or dirt, ensuring a clean attachment to our pumpkin

Attaching the Stem Securely

With our perfect stem in hand, we're ready to attach it securely to our terra cotta pumpkin. To guarantee a strong bond, we'll use hot glue or a strong adhesive, making sure the pumpkin stem is clean and dry before attaching it.

We'll apply the adhesive to the base of the stem and press it firmly onto the pumpkin, holding it in place for a few minutes to allow the adhesive to set and bond effectively.

As we attach the stem, we'll make sure it's centered and even, ensuring our terra cotta pumpkin looks natural and realistic. Once the stem is securely attached, we'll let it dry completely before handling or displaying our beautiful terra cotta pumpkin.

Age the Pumpkin With Powder

speed up pumpkin aging

We dust our terra cotta pumpkins with a light layer of powder to introduce an air of vintage charm. This simple technique adds a realistic, weathered look to our creations, giving them a unique and rustic appeal.

To achieve this aged texture, we sprinkle white flour or baby powder on the almost dry paint. Using a small paintbrush, we lightly distribute the powder, adjusting the amount based on the level of aging we desire.

Advertisement

Here are the benefits of aging our terracotta pumpkins with powder:

  • Enhances the overall appearance of the pumpkin, giving it a unique and rustic charm
  • Adds a realistic, weathered look to the terracotta surface
  • Creates a beautiful, vintage-inspired texture
  • Allows for customization of the aging level to suit individual tastes
  • Is a simple and easy technique to master, even for beginners

Seal Your Masterpiece (Optional)

create with optional flair

To guarantee our terracotta pumpkins remain vibrant and protected, consider applying a fixatif spray to seal in the paint and texture. This optional step will make sure our masterpieces stay fresh and intact. When choosing a sealant, avoid using clear matte acrylic sealer, as it may not provide the desired finish.

Sealant Options Characteristics
Fixatif Spray Protects paint and texture, multiple light coats recommended
Mod Podge Acrylic Sealant Alternative option for added protection
Clear Matte Acrylic Sealer Not recommended, may not provide desired finish
Multiple Coats Necessary for adequate coverage, especially on textured areas
Drying Time Allow fixatif spray to fully dry before handling or displaying

Display Your Terra Cotta Pumpkin

terra cotta pumpkin decoration

Now that our terra cotta pumpkins are complete, let's creatively arrange them to create a festive fall display that showcases our handiwork.

We've put in the effort to create these easy DIY terra cotta pumpkins, and now it's time to show them off!

Here are some ways to display our masterpieces:

  • Place your terra cotta pumpkins on a mantle or shelf for a charming display.
  • Group different sized pumpkins together for visual interest.
  • Mix in real or faux fall foliage for a festive touch.
  • Add twinkling string lights around your pumpkins for a cozy ambiance.
  • Incorporate other fall decor elements like acorns or pine cones to enhance the seasonal theme.

Tips for Styling Your Pumpkins

decorate pumpkins with flair

By creatively arranging our terra cotta pumpkins, we can craft a visually appealing display that showcases our handiwork. To add some depth and dimension to our DIY Halloween decorations, we can mix and match different sizes and shapes of pumpkins. By using different shades of terracotta paint, we can create a unique and eye-catching arrangement.

To give our pumpkins a more realistic look, we can add a touch of white paint or flour to achieve a weathered and aged appearance. Displaying our pumpkins in terracotta pots or rustic containers can further enhance the overall theme. For an extra touch of authenticity, we can experiment with incorporating real pumpkin stems into our design. This won't only add a natural element to our decoration but also create a unique conversation piece.

Frequently Asked Questions

How to Make Plastic Pumpkins Look Like Terracotta?

We're wondering how to make plastic pumpkins look like terracotta, and we're in luck! We can mix craft paint to achieve a terracotta color, add flour for texture, and sprinkle more flour on top for a realistic look.

Advertisement

How to Make Terracotta Jack O'lantern?

We're excited to create terracotta jack-o'-lanterns! We'll transform plastic pumpkins by mixing paint colors to achieve a terracotta shade, adding flour for texture, and sprinkling flour on almost dry paint for an aged look.

How to Paint a Pumpkin With Baking Soda?

"Painting a pumpkin with baking soda is like adding a secret ingredient to a recipe – it elevates the entire experience! We mix acrylic paint with baking soda to create a textured, realistic terracotta look that's uniquely ours."

How to Make Faux Pumpkins?

We're making faux pumpkins, and we're excited! We start with foam or ceramic bases, then add texture and color with craft paint and flour or baby powder to achieve a realistic, aged look.

Conclusion

As we step back to admire our handiwork, the warm, earthy tones of our terra cotta pumpkins seem to glow with a soft, autumnal light.

The textures, the colors, the subtle distressing – it all comes together to evoke the feeling of a rustic, vintage find.

Advertisement

And the best part? These little treasures are entirely our own creation, born from a few simple supplies and a dash of creativity.

Continue Reading

Alfresco

Is Frenchic Alfresco Waterproof? Learn More!

Harness the power of Frenchic Alfresco paint's waterproof properties for your outdoor projects – discover its durability and protection against the elements here!

Published

on

By

frenchic alfresco waterproof details

Frenchic Alfresco paint is highly water-resistant, offering excellent moisture protection for outdoor surfaces. With self-sealing and self-priming properties, it provides durability against varying weather conditions. This paint's weatherproof nature enhances its performance, safeguarding against elements like rain and sun exposure. Ideal for projects like garden furniture and front doors, it boasts UV resistance and a range of colors for a professional finish. Curing for at least 3 weeks in favorable climates guarantees longevity by creating a strong protective layer. Routine cleaning and inspection maintain its vibrant appearance. Discover more about Frenchic Alfresco's waterproof features for your outdoor endeavors.

Key Takeaways

  • Frenchic Alfresco paint is highly water-resistant with excellent moisture protection.
  • Offers weatherproof properties due to self-sealing and self-priming features.
  • Provides durable UV resistance for outdoor projects.
  • Full curing for at least 3 weeks enhances waterproofing.
  • Regular maintenance ensures long-lasting waterproofing qualities.

Properties of Frenchic Alfresco Paint

Frenchic Alfresco paint offers a range of durable and weatherproof properties suitable for various indoor and outdoor surfaces. Being water-based, it provides excellent resistance to UV rays, making it ideal for projects exposed to sunlight.

This self-priming and self-sealing paint not only simplifies application but also guarantees a smooth and professional finish. Additionally, its algae-resistant feature minimizes the risk of mold growth, particularly important for outdoor applications.

The wide color palette of 26 best-selling colors, including limited editions, allows you to choose the perfect shade for your project. Whether you're painting wood, laminate, UPVC, composites, metal, render, or brick, Frenchic Al Fresco paint caters to a diverse range of surfaces.

With its exceptional durability and weatherproof characteristics, this paint stands out as a versatile option for both interior and exterior use, promising long-lasting results that maintain their quality over time.

Water-Resistance Vs. Waterproofing

understanding water protection levels

What distinguishes water-resistance from waterproofing in paint products?

When considering the water-resistance of Frenchic Al Fresco paint for exterior projects, it's important to grasp the distinction between water-resistance and waterproofing.

Advertisement
  1. Water-resistance: Frenchic Al Fresco paint offers high water-resistance, being durable, weatherproof, and UV resistant. This means it can withstand exposure to elements like rain and sun without significant damage.
  2. Moisture Protection: While not completely waterproof, the paint provides excellent moisture protection, preventing issues like flaking and peeling due to water exposure.
  3. Surface Durability: Designed for exterior projects, Al Fresco paint ensures a long-lasting finish on surfaces exposed to varying weather conditions, enhancing overall surface durability.
  4. Weatherproof: The self-sealing and self-priming properties of the paint not only reduce maintenance needs but also contribute to its weatherproof characteristics, further improving water-resistance.

Suitable Applications for Alfresco Paint

alfresco paint for outdoors

Al Fresco paint is best suited for a variety of outdoor projects, ranging from garden furniture to front doors, due to its durable and weather-resistant properties. The Al Fresco Range offers a versatile solution for enhancing the appearance of your outdoor spaces.

Whether you're looking to revamp your garden furniture or add a fresh coat to your front door, this water-based paint is designed to withstand the elements while maintaining a vibrant finish. Its self-priming and self-sealing nature make it a convenient choice for UPVC doors and various surfaces such as wood, laminate, composites, and metal.

The weatherproof and durable characteristics of Al Fresco paint guarantee long-lasting results, providing a protective layer that can endure outdoor conditions. With its UV resistance and ability to create a low, flat finish, this paint is ideal for both indoor and outdoor applications, offering a professional look that lasts.

Curing Process for Longevity

preserving meat through curing

Ensuring proper curing of the paint is essential for maximizing its longevity and waterproofing capabilities. When dealing with Frenchic Al Fresco, the curing process plays an important role in creating a durable and weatherproof protective layer.

Here are some key points to keep in mind for the curing process:

  1. Allowing the paint to fully cure for at least 3 weeks is necessary for enhancing its durability and longevity.
  2. Best results are achieved when curing takes place in a warmer and drier climate.
  3. Proper curing helps the paint form a strong protective layer, making it more resistant to the elements.
  4. Following the instructions provided on the tin for the curing process is crucial to ensuring the paint's waterproofing properties are fully realized.

Maintenance Tips for Alfresco Paint

outdoor paint care guide

To maintain the durability and weatherproof qualities of Frenchic Alfresco paint, regular cleaning and inspection are crucial. Frenchic paints, especially those from the Al Fresco Inside/Outside Range, are designed to withstand outdoor conditions, but proper maintenance can prolong their lifespan.

For outdoor furniture coated with this water-based, weatherproof paint, wiping down surfaces with a mild detergent and water solution every few months can help remove dirt and debris that may accumulate. Additionally, inspecting the painted wood for any signs of wear or damage allows for timely touch-ups, preventing further deterioration.

UV resistance in Frenchic paints minimizes color fading, but it's still advisable to keep items protected from prolonged sun exposure. By following these maintenance tips, you can guarantee that your outdoor projects retain their vibrant appearance and protective qualities for years to come.

Advertisement

Conclusion: Is Frenchic Alfresco Waterproof?

frenchic alfresco waterproof testing

Frenchic Alfresco paint is indeed waterproof, providing long-lasting protection for your outdoor projects. This durable and weatherproof Al Fresco paint is specifically crafted for outdoor use, offering a reliable shield against the elements for your exterior surfaces.

Here are four key points reinforcing its waterproof qualities:

  1. UV Resistant: Frenchic Al Fresco paint is formulated to withstand the harmful effects of UV rays, preventing discoloration and fading over time.
  2. Self-Sealing and Self-Leveling: The paint's self-sealing properties help establish a protective barrier, while its self-leveling feature ensures a smooth and even finish that enhances its waterproof capabilities.
  3. Versatile Application: Suitable for various surfaces like wood, laminate, UPVC, composites, and metal, this paint adapts well to different materials, increasing its effectiveness in outdoor settings.
  4. Algae and Mould Resistance: Frenchic Al Fresco is designed to resist algae and mould growth, reducing the need for frequent maintenance and preserving the integrity of your exterior surfaces.

Frequently Asked Questions

Is Frenchic Alfresco Waterproof?

Yes, Frenchic Al Fresco paint is waterproof. It's designed for outdoor use, with excellent weather resistance, UV protection, and algae/mould inhibitors. It works on various surfaces, making it ideal for outdoor projects like furniture, fences, and sheds.

Can You Water Down Frenchic Alfresco Paint?

You can water down Frenchic Al Fresco paint if desired for a smoother application or a wash effect. However, diluting the paint may impact coverage and durability, so it's essential to adhere to recommended guidelines for best results.

Do You Need to Seal Frenchic Alfresco?

You don't need to seal Frenchic Al Fresco paint. It's self-sealing, water-based, and designed to be weatherproof and UV resistant. The paint is self-priming with a durable finish, eliminating the need for additional sealing products.

What Is so Special About Frenchic Paint?

Frenchic paint is renowned for its water-based, durable, and weatherproof properties, making it ideal for both indoor and outdoor projects. With self-levelling technology, easy application, and a range of vibrant colors, it stands out for its versatility and eco-friendly nature.

Conclusion

To sum up, Frenchic Alfresco paint offers excellent water resistance properties, making it suitable for outdoor applications. While it may not be completely waterproof, proper curing and maintenance can guarantee its longevity in various weather conditions.

Advertisement

By following the recommended guidelines for application and upkeep, you can enjoy the beauty and protection of Frenchic Alfresco paint for years to come. Remember, a little care goes a long way in preserving the quality and durability of your outdoor surfaces.

Continue Reading

Trending