Connect with us

Home Decor

Create a Great Weathered Wood Finish in 10 Simple Steps

Harness the secrets to achieving a beautifully aged, distressed wood finish in just 10 easy steps, and unlock a world of creative possibilities.

Published

on

weathered wood finish guide

We're approaching a weathered wood finish project, transforming ordinary wood into a beautifully aged, distressed piece. First, we prepare the wood surface by roughening it with 120 grit sandpaper and applying a coat of primer. A neutral base coat sets the foundation, and then we add dimension with white paint and a weathered look with wax. Buffing enhances the texture, and dark stain deepens the color. Distressing techniques mimic natural wear and tear, and a polyurethane coat seals the finish. Finally, we refine the surface with sandpaper and add a protective coat. With these simple steps, we'll reveal a convincingly weathered wood finish – and there's more to explore.

Key Takeaways

• Prepare the wood surface by roughening it with 120 grit sandpaper, cleaning it, and applying a primer for a smooth base.

• Apply a neutral-colored chalk paint in smooth strokes to create an even base coat, setting the foundation for a distressed finish.

• Enhance the wood texture and character by diluting chalk paint for whitewashing techniques or using dry brushing for a subtle effect.

• Create a weathered look by applying dark wax in the direction of the wood grain, buffing it with a dry rag, and combining it with distressing techniques.

Advertisement

• Seal and protect the finish with polyurethane coats, choosing between water-based or oil-based options, and applying multiple thin coats for a smoother finish.

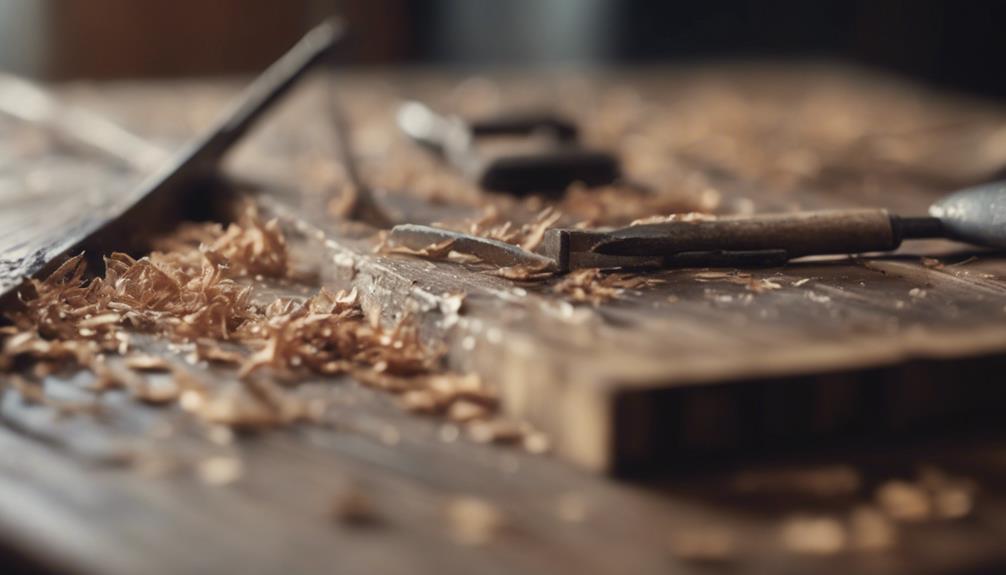
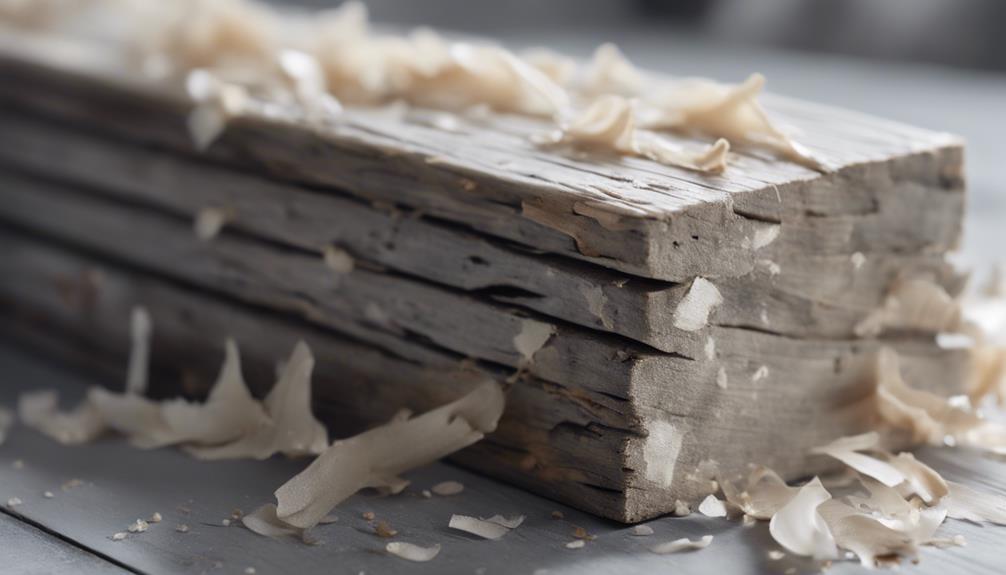
Prepare the Wood Surface

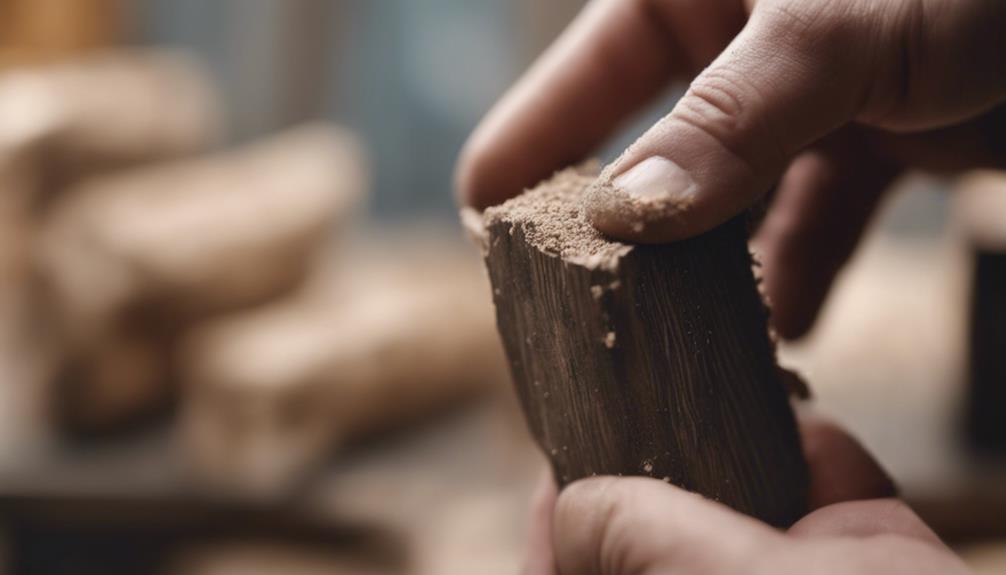
We'll start by roughening up the wood surface with 120 grit sandpaper to create a textured base that our paint can really grip. This helps guarantee a strong bond between the wood and the paint.

Next, we'll clean the wood surface thoroughly to remove any dust, dirt, or debris that could impact the finish. We don't want any imperfections to show through our weathered wood finish, so a clean slate is essential.

With our surface prepped, we'll apply a coat of primer to create a smooth base for the paint. This primer will help the paint adhere evenly and prevent any wood grain from showing through.

Now we're ready to think about the paint itself. We'll choose colors that mimic natural weathered wood tones for an authentic look. To achieve a realistic weathered wood appearance, we'll opt for matte or flat finish paint.

Advertisement

Apply Neutral Base Coat

protect nails before painting

With our primed surface ready, we're now going to lay the groundwork for our weathered wood finish by applying a neutral base coat of chalk paint to the wood surface. This is an important step in achieving that perfect weathered look.

We're using chalk paint because it's easy to work with and doesn't require any prep work. We opt for a neutral color like gray or beige, which will provide an excellent foundation for the weathered wood finish.

Using a chip brush, we apply the chalk paint in smooth strokes, covering the entire piece evenly. We make sure to cover every inch of the wood surface, ensuring a solid base for the weathered look we're going for.

The neutral base coat is vital, as it will help us achieve a natural, weathered appearance. With the base coat in place, we're one step closer to achieving that beautiful, distressed finish. We'll build upon this foundation in the next steps, but for now, we're happy with our solid start.

Add Dimension With White Paint

spruce up your space

As we add dimension to our weathered wood finish, we'll explore various whitewashing techniques to achieve a distressed look.

We'll discuss paint distressing methods that bring out the texture and character of the wood, and learn how layering for texture can enhance the overall aesthetic.

Whitewashing Techniques

We dilute chalk paint by 50% to create a base layer, effectively whitewashing our wood surface and setting the stage for a beautifully weathered finish. By doing so, we achieve a light, white tone that enhances the wood grain, giving our project a subtle, weathered wood look.

Advertisement

Whitewashing is a great way to add dimension to our wood surface before applying darker stains, creating a more realistic weathered wood finish. We can also experiment with dry brushing techniques to achieve a more subtle effect. This involves dragging an almost-dry brush across the wood surface, creating a soft, textured look.

When combined with dark staining, whitewashing helps to create a truly weathered wood finish that's both beautiful and realistic. By mastering these whitewashing techniques, we can add a new level of depth and character to our wood projects. With a little practice, we can achieve a stunning, weathered wood look that's sure to impress.

Paint Distressing Methods

By dry brushing white paint over the table, we enhance dimension and create a weathered wood effect that's both subtle and striking. To achieve this look, we make sure to paint in the direction of the wood grain for a natural appearance.

If you're new to dry brushing, watching a tutorial video can be super helpful in mastering the technique. When we dip our brush in paint, we ensure to blot off the excess to control the application. This prevents the paint from looking too heavy-handed.

Consistency is key, so we maintain a consistent direction when painting to achieve a cohesive finish. The result is a beautifully weathered wood finish that adds character to our table. With the white paint subtly peeking through, the wood grain takes center stage, giving our table a unique, rustic charm.

Advertisement

Layering for Texture

Building on our distressed base coat, we add an extra layer of white paint to introduce texture and depth to the weathered wood finish. This layering process allows us to create a more realistic, worn appearance that's reminiscent of aged wood.

Here are some key benefits of layering with white paint:

  • Adds subtle texture: Dry brushing white paint creates a subtle, distressed look that mimics natural wear and tear.
  • Highlights wood grain: White paint highlights the grain and details of the wood, enhancing the overall appearance.
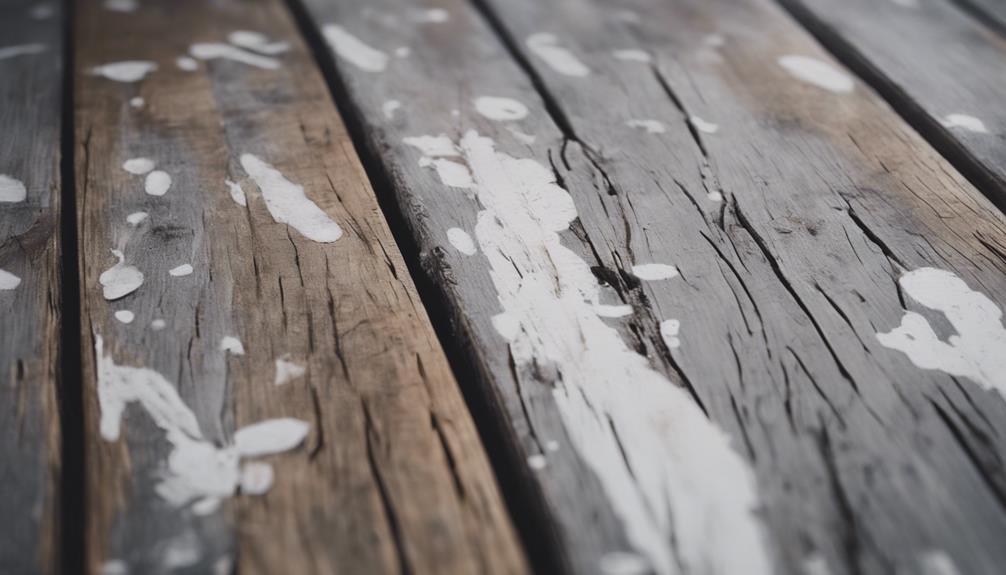
  • Replicates uneven fading: Applying white paint in random spots replicates the uneven fading often seen on weathered wood.
  • Provides contrast: The use of white paint in layering provides contrast and visual interest to the finished piece.

Create Weathered Look With Wax

achieve vintage aesthetic effortlessly

As we explore the world of weathered wood finishes, we're now going to focus on creating a weathered look with wax.

We'll discuss the best ways to apply wax, how to combine it with distressing for a unique look, and the importance of building up layers for a truly authentic finish.

Wax Application Tips

We achieve a beautifully weathered look on our piece by applying dark wax in a strategic way. To get the most out of this technique, we need to follow some essential tips.

Here are some key takeaways to keep in mind:

Advertisement
  • Apply dark wax in the direction of the wood grain to enhance the weathered look of the piece.
  • Use a small amount of dark wax as it goes a long way in achieving the desired finish.
  • Dark wax settles into the grooves and notches of the wood, creating a natural aged appearance.
  • Buff the piece with a dry rag to blend and smooth out the wax after application.

Wax and Distressing Combo

We'll combine dark wax with distressing techniques to create a rich, weathered look that accentuates the natural beauty of the wood.

By applying dark wax, like Annie Sloan's, in the direction of the wood grain, we enhance the natural look of the piece. The wax settles into grooves and notches, adding depth and character to the wood. When we buff the piece with a dry rag after applying wax, we achieve a smooth and aged finish.

Distressing techniques, such as sanding and scraping, help to create a worn, vintage look. As we distress the wood, we're creating opportunities for the wax to settle into the newly exposed crevices, adding to the weathered appearance.

Building Up Layers

How do we build up layers to achieve a weathered wood finish that exudes character and charm?

We've discovered that the key lies in applying multiple layers of stain, paint, and wax to create a rich, textured look. By building up these layers, we can mimic the natural aging process and create a truly unique piece.

Here's how we do it:

Advertisement
  • Apply a layer of paint over the stained wood to create a subtle, muted tone
  • Add a layer of dark wax, like Annie Sloan, to settle into the grooves and notches, enhancing the aged appearance
  • Use a chip brush to apply the wax in the direction of the wood grain for a natural look
  • Buff the piece with a dry rag to blend and smooth the finish, ensuring a seamless blend of layers

Buff the Piece for Texture

enhance the surface texture

After applying the dark wax, we take the next step in achieving a weathered wood finish by gently buffing the piece to create a rich, textured look. This process is essential in adding depth and character to our project.

By buffing the wax into the wood, we're able to blend it seamlessly, creating a natural, aged appearance. To do this, we use a dry rag to gently buff the wax in the direction of the wood grain. This direction is important, as it helps to maintain the wood's natural texture and pattern.

Be careful not to buff too vigorously, as this can remove too much wax and compromise the desired weathered effect. The buffing process helps to enhance the texture of the wood, giving it a beautifully aged look.

As we buff, we can see the wood transform before our eyes, taking on a rich, worn appearance that's perfect for a weathered wood finish. By taking the time to buff our piece, we're able to achieve a truly unique and authentic look that's full of character.

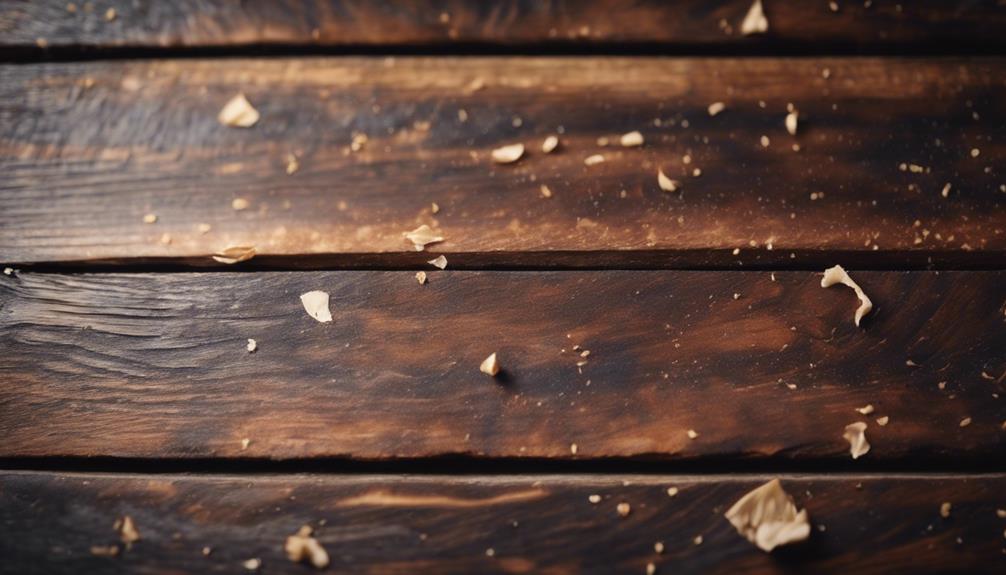
Enhance With Dark Stain

add depth and richness

Now that we've buffed our piece for texture, it's time to enhance it with a dark stain.

We'll apply the stain strategically to deepen the color and create a rich, weathered look.

Rich Stain Application

We take our weathered wood finish to the next level by applying a rich dark stain, like Minwax Dark Walnut, to create a beautiful, aged appearance. This stain application enhances the weathered wood finish, adding depth and contrast to the wood.

Advertisement
  • We apply the dark stain sparingly on edges and sides to achieve a grayish wood look with white undertones.
  • Distressing the wood before staining creates a more rustic and worn look.
  • Dark stains help create a beautiful and authentic weathered wood finish on our project.
  • By applying the stain strategically, we can achieve a unique, aged appearance.

Deepening the Color

To enhance our weathered wood finish, we apply a second layer of dark stain, carefully controlling the intensity of the color to achieve a rich, aged appearance.

We opt for a dark walnut stain like Minwax Dark Walnut, which adds depth and warmth to our weathered wood finish.

To create a more realistic look, we apply the stain sparingly to the edges and sides of the wood, focusing on areas that would naturally receive more wear and tear. By doing so, we achieve a grayish wood appearance with white undertones, reminiscent of weathered wood that's been exposed to the elements.

If we want to take it a step further, we can distress the wood before staining to create a more aged and weathered effect.

To apply the stain, we wipe it on and immediately wipe off the excess, controlling the intensity of the color and achieving the desired finish. This step is essential in creating a truly authentic weathered wood look.

Seal With Polyurethane Coat

protect wood with sealant

Applying a polyurethane coat is a crucial step in protecting our weathered wood finish from the elements and guaranteeing its longevity. This coat provides a protective barrier against moisture, scratches, and wear, enhancing the durability and longevity of our weathered wood appearance.

Here are some key points to keep in mind when applying a polyurethane coat:

Advertisement
  • Choose between water-based or oil-based polyurethane depending on your preference for application and finish.
  • Ensure proper ventilation when applying polyurethane and follow the manufacturer's instructions for best results.
  • Apply multiple thin coats of polyurethane for a smoother and more even finish.
  • Polyurethane coats can be used to enhance the appearance of our weathered wood finish, providing a glossy or matte finish depending on the type of polyurethane used.

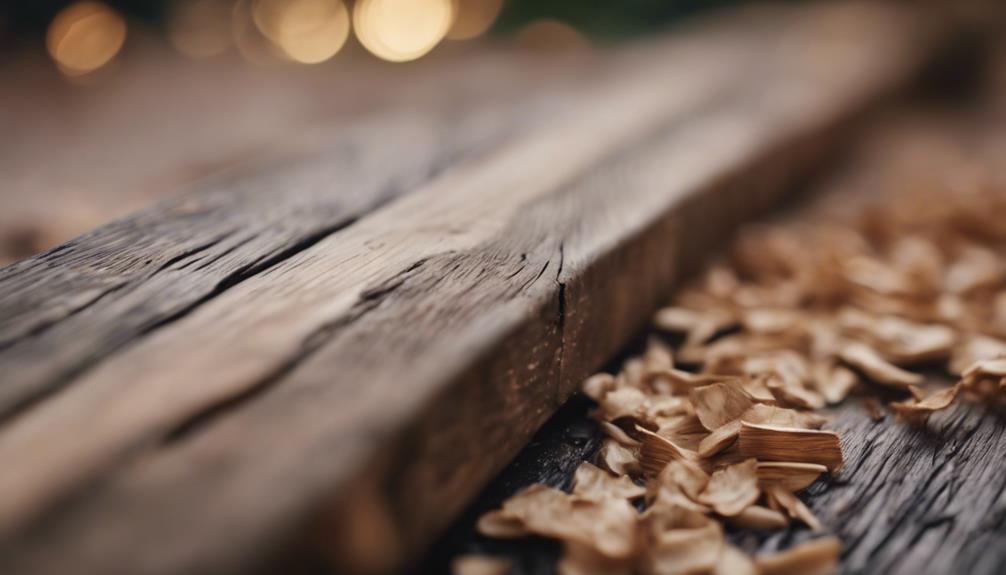
Distress for Authentic Look

vintage jacket adds character

Strategically damaging the wood's surface is crucial for creating a realistically weathered appearance that captures the essence of aged, worn wood. Distressing wood is a key step in achieving a weathered wood finish, especially for a DIY Farmhouse look. This involves intentionally damaging the surface to create an aged and weathered appearance.

Distressing Technique Description Effect
Sanding Removing wood fibers to create a worn look Smooth, worn surface
Denting Creating small dents to mimic natural wear Realistic, aged appearance
Scraping Removing wood layers to expose underlying grain Weathered, rustic look
Wormholes Creating small holes to mimic insect damage Authentic, aged appearance

When distressing wood, mimicking natural wear and tear is crucial for an authentic look. Proper distressing techniques can enhance the overall appearance of the weathered wood finish. We can distress the wood before or after staining, depending on the desired effect. By incorporating these techniques, we can achieve a convincingly weathered wood finish that adds character to any DIY project.

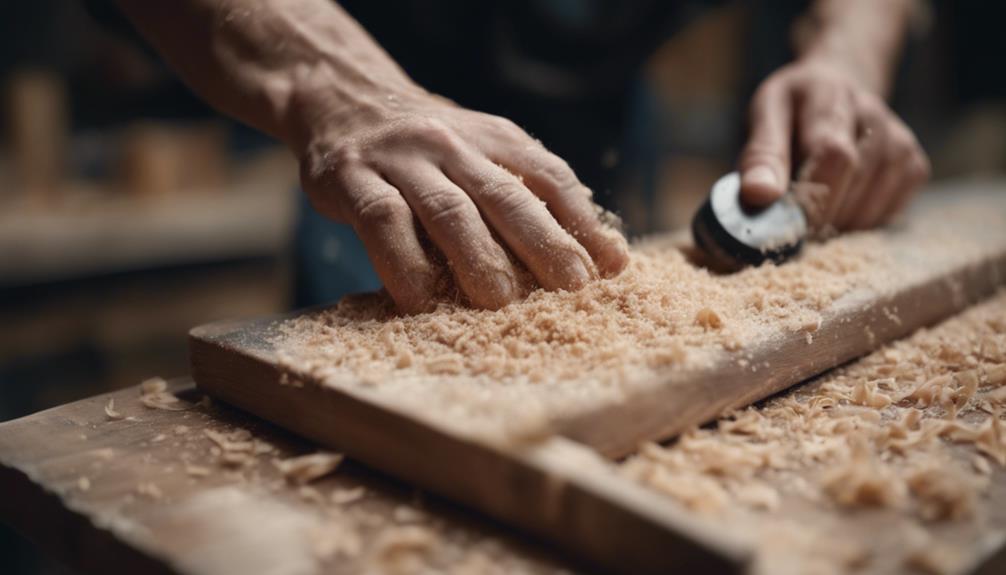
Refine With Sandpaper Touch

polishing with sandpaper precision

After strategically distressing our wood surface, we're ready to refine it with a sandpaper touch that will help create a convincingly weathered wood finish. This important step guarantees our wood surface is ready for painting and achieves the desired distressed look.

Here's what we need to do:

  • Use 120 grit sandpaper to roughen up the surface, allowing the paint to adhere better and creating a distressed look.
  • Lightly sand the edges and corners to give them a more worn appearance.
  • Make sure to clean off any dust or debris after sanding for a smooth finish.
  • Sanding helps to create a surface that's ready for painting, ensuring a strong bond between the wood and the paint.

Final Inspection and Touch-ups

final check before completion

We take a close look at our weathered wood finish, carefully inspecting every inch for any imperfections or areas that need a little extra attention. It's important to examine the entire piece with a critical eye, identifying any inconsistencies in the finish. This final inspection is our last chance to address any uneven application of paint or wax, ensuring a cohesive and blended weathered look.

During this stage, we're on the lookout for imperfections that might've been overlooked earlier. We scrutinize every nook and cranny, making note of areas that require touch-ups. If we find any uneven paint or wax application, we use specialized techniques to correct these issues. Our goal is to achieve a harmonious, weathered appearance that's consistent throughout the piece.

With a keen eye for detail, we make the necessary adjustments to get the desired final result. This is our opportunity to refine our work, ensuring that every aspect of the weathered wood finish meets our expectations. By taking the time to inspect and address any imperfections, we can confidently say we've created a truly exceptional piece with a beautiful, weathered wood finish.

Frequently Asked Questions

How Do You Make a Weathered Finish on Wood?

We make a weathered finish on wood by applying a base color, letting it dry, and then adding a darker stain or paint to edges and crevices for a distressed look.

Advertisement

We use dry brushing with white paint to add highlights, creating a weathered effect.

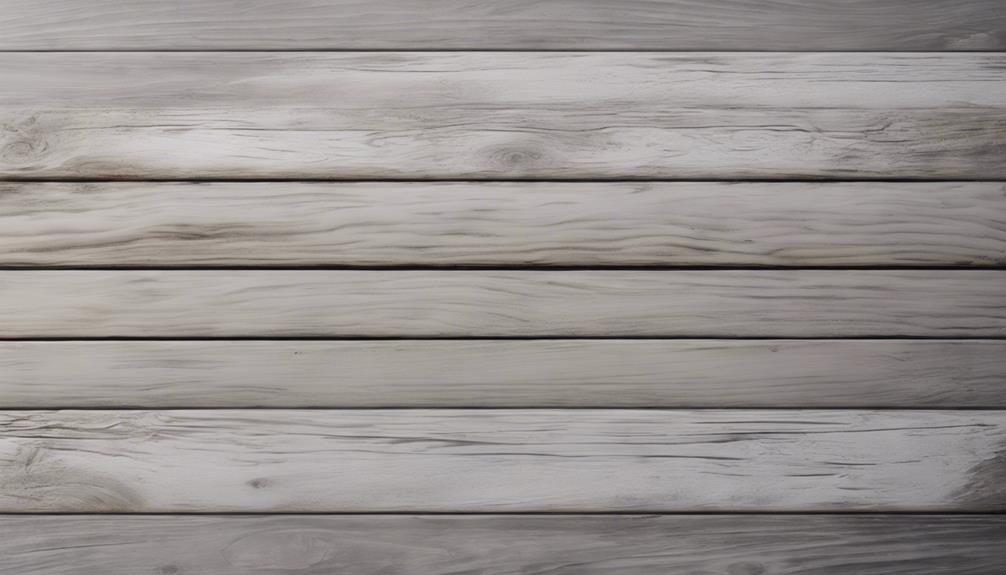
How to Make Wood Look Old and Gray?

We're often asked how to make wood look old and gray. To achieve this, we use a combination of techniques.

First, we apply a base coat of neutral chalk paint to create a uniform surface.

Next, we dry brush white paint to give it a distressed look.

What Finish to Use on Weathered Wood?

When it comes to choosing a finish for weathered wood, we consider a few key factors. We opt for a clear polyurethane or varnish to seal and protect the wood without altering its appearance.

Advertisement

A matte or satin finish provides a natural look that complements the weathered aesthetic. We avoid glossy finishes, which can detract from the wood's natural charm.

How to Create a Distressed Finish on Wood?

We're excited to explore creating a distressed finish on wood! To achieve this look, we'll intentionally age or weather the surface using techniques like sanding, scraping, or hammering.

Conclusion

With our 10-step guide, we've successfully created a beautiful, weathered wood finish. As the old adage goes, 'Rome wasn't built in a day,' and neither is a great weathered wood finish. But with patience and attention to detail, we've achieved a look that's both rustic and refined.

Now, it's time to step back and admire our handiwork. With our newly acquired skills, we can tackle any woodworking project and give it a unique, weathered charm that's sure to impress.

Advertisement

Continue Reading
Advertisement

Home Decor

Ways to Incorporate Handmade Crafts Into Your Country Home Decor

Find inspiration in unique handmade crafts that will transform your country home decor into a cozy haven—discover the endless possibilities!

Published

on

By

handmade crafts for country decor

Incorporating handmade crafts into your country home decor adds a personal touch that enhances its cozy, rustic vibe. Start with thrifted items like wooden trays or vintage dishes to infuse character. Use natural elements, such as grapevine or jute ribbons, to layer textures. Adorn your dining table with burlap runners and mason jar centerpieces full of seasonal flowers. For lighting, try handcrafted pendant lights or rustic lanterns draped with twinkling fairy lights. Don't forget the walls; personalize with hand-painted frames or quilted fabric wall art for extra charm. Keep exploring to discover even more creative ideas!

Key Elements

essential components overview

When it comes to crafting for your country home, the right color scheme, materials, and textures can make all the difference.

You'll want to choose warm, earthy tones that reflect the natural beauty of the countryside.

Incorporating these elements will help create a cohesive and inviting atmosphere in your decor.

Color Scheme

How can you achieve a warm and inviting color scheme in your country home decor?

Start by embracing earthy tones like cashew and moss chalk paint. These colors can breathe new life into thrifted items, giving them a rustic touch that fits perfectly in a country setting.

Advertisement

Make sure to incorporate vintage-inspired colors such as yellow maze and night sky to create visual interest and depth in your handmade crafts.

To balance your decor, select floral arrangements featuring a mix of colors. Elements like blueberries, white flowers, and greenery should complement each other harmoniously, enhancing the overall aesthetic.

You can also implement natural elements and textures, like jute ribbon and grapevine, to add warmth and character while sticking to a cohesive color palette.

Materials

To create a truly authentic country home decor, select materials that reflect the rustic charm and warmth of your space. Start by incorporating thrifted items like wooden caddies, tin buckets, and vintage dishes. These unique finds add character and charm, making your decor feel lived-in and inviting.

Utilize natural elements, such as grapevine and faux greenery, to enhance your arrangements. These materials help create a cohesive, rustic aesthetic that emphasizes the beauty of nature.

Advertisement

Don't forget to add a personal touch with handmade tags made from coffee-stained manila paper. Use hand lettering and distressing techniques to elevate your decor further.

Experiment with floral arrangements, incorporating elements like blueberries and white flowers for whimsical accents. Remember to maintain visual balance by using odd numbers in groupings, which naturally draws the eye.

Finally, consider employing creative finishing techniques on thrifted wood items. A dry brushing of chalk paint or a touch of antique wax can give these pieces a vintage appearance, seamlessly blending them into your country decor.

Textures

Incorporating a variety of textures, like the roughness of distressed wood and the softness of jute, creates a warm and inviting atmosphere in your country home decor. You can easily find thrifted items that embody that rustic charm, enhancing the overall depth of your space. Natural elements, such as grapevine and faux greenery, not only add tactile appeal but also help unify your aesthetic.

To introduce softness, consider using jute ribbon or bows made from gingham or denim. These elements not only complement the country style but also add layers of interest. Mixing smooth surfaces, like painted jars, with the rough textures of sanded wood allows for striking contrasts in your decor.

Advertisement

Don't forget to layer materials for added richness. Think coffee-stained manila tags paired with antique wax finishes to achieve a vintage look that enhances your home's texture. By thoughtfully selecting and combining these various textures, you'll create an inviting space that reflects your personality and love for handmade crafts.

Embrace the beauty of these elements, and watch as your country home decor transforms into a cozy haven.

Essential Fixtures and Furniture

necessary items for living

When you think about essential fixtures and furniture for your country home, consider how a rustic wooden dining table can serve as the heart of your space.

An antique mason jar chandelier adds a unique touch, illuminating your gatherings with charm.

Don't forget woven basket wall hangings; they not only provide storage but also enhance the cozy, handcrafted vibe you're aiming for.

Rustic Wooden Dining Table

A rustic wooden dining table acts as the heart of country home decor, showcasing unique wood grains and imperfections that enhance its charm. This central piece invites family and friends to gather, infusing warmth and character into your space.

Advertisement

To personalize your table, incorporate handmade crafts like hand-carved wooden serving trays or custom burlap table runners. These additions not only complement the rustic aesthetic but also reflect your unique style.

Surrounding your dining table with antique or vintage chairs can create a cohesive look, which you can often find at thrift stores or flea markets. This combination reinforces the country theme and adds layers of history to your dining experience.

For an extra touch, decorate with mason jars filled with wildflowers or hand-painted wooden centerpieces. These elements elevate your table's visual appeal while maintaining a rustic feel.

Antique Mason Jar Chandelier

An antique mason jar chandelier not only illuminates your space but also enhances the rustic charm established by your wooden dining table. It serves as a stunning centerpiece, blending functional lighting with delightful vintage aesthetics. To create your chandelier, source vintage mason jars from thrift stores or flea markets; these can be repurposed as shades for light bulbs, casting a warm, inviting glow.

Mixing different sizes and styles of mason jars adds visual interest and unique character to your chandelier design. Consider using jute or hemp rope to hang the jars, which enhances the natural, rustic aesthetic that complements your country home decor beautifully. This approach not only keeps the look cohesive but also adds a touch of earthy texture.

Advertisement

For a personalized touch, you can embellish the jars with hand-painted designs or distressed finishes, reflecting your individual style and creativity. Crafting this chandelier becomes a rewarding project that showcases your handmade spirit while providing essential lighting.

Woven Basket Wall Hanging

Woven basket wall hangings add both charm and functionality to your country home decor, creating a striking focal point while providing storage solutions. These handcrafted pieces bring texture and warmth, enhancing the rustic feel of your space. By incorporating different sizes and shapes of woven baskets, you can create visual interest and depth on your walls.

To make the most of your woven baskets, consider layering them against a backdrop of farmhouse-style shiplap or muted paint colors. This contrast highlights their natural materials and craftsmanship beautifully. For an extra personal touch, combine the baskets with handmade tags or embellishments, like jute ribbon, to achieve a cohesive and charming aesthetic.

Don't forget to integrate faux greenery or florals within the baskets to introduce a splash of nature and color. This simple addition transforms your wall hanging into a dynamic element that breathes life into your decor.

Lighting Ideas

creative illumination concepts

When it comes to lighting your country home, you've got plenty of creative options to contemplate.

Rustic lantern string lights can set a cozy mood, while a vintage table lamp trio adds character to your space.

Advertisement

Don't forget about handcrafted ceramic pendant lights and rustic iron wall sconces, which can beautifully enhance your decor.

Rustic Lantern String Lights

Rustic lantern string lights add a warm, inviting glow to your country home decor, transforming any space into a cozy retreat. You can create these charming lights by repurposing thrifted lanterns, often found at second-hand stores for as low as $1.99. Simply fill them with fairy lights to achieve that perfect ambiance.

If you don't have lanterns, mason jars work just as well. Painting them with chalk paint gives them a distressed look, and adding LED string lights inside will enhance their appeal.

To further embrace the rustic aesthetic, wrap twine or jute ribbon around your lanterns or jars. This small detail ties your decor back to the country theme. Hang your handmade lantern string lights along porches, patios, or even inside your living spaces to create a cozy atmosphere, ideal for gatherings or quiet evenings.

Don't hesitate to experiment with different heights and arrangements. Cluster lanterns or jars together on a table or shelf, mixing them with floral arrangements for added visual interest.

Advertisement

With these simple touches, your country home will radiate warmth and charm, making it an inviting space for everyone.

Vintage Table Lamp Trio

Adding a vintage table lamp trio to your decor not only enhances the lighting but also brings a unique charm that complements your handmade crafts. Sourcing these lamps from thrift stores or flea markets can lead you to one-of-a-kind designs that encapsulate the essence of country decor.

Consider mixing styles, such as ceramic, metal, and glass, to create a visually interesting arrangement that adds depth to your lighting scheme.

To refresh old lamp bases, use cashew chalk paint or other soft hues that blend seamlessly with your rustic aesthetic. This simple update keeps the vintage feel while ensuring the lamps fit your overall decor.

You can further enhance their appeal by adding decorative elements like jute ribbon or distressed tags to the shades, tying them in with other handmade items in your home.

Advertisement

Position your trio strategically, whether on side tables or mantels, to create warm, inviting light. This setup not only illuminates your space but also highlights the beauty of your handmade crafts, making your country home feel cozy and welcoming.

With these lamps, you'll see how lighting can be both functional and a stylish statement.

Handcrafted Ceramic Pendant Lights

Handcrafted ceramic pendant lights bring a unique charm to your country home decor, showcasing artisanal craftsmanship through their distinct glazes and textures. These lights not only illuminate your space but also serve as stunning decorative pieces that reflect your personal style. You can choose from a variety of shapes and sizes, allowing for a customized look that complements your existing decor while adding a personal touch.

The natural materials used in these pendant lights, such as clay, resonate beautifully with the rustic aesthetic of country homes. They create a warm and inviting atmosphere, perfect for cozy gatherings with family and friends. To enhance your lighting's functionality and sustainability, consider incorporating energy-efficient LED bulbs, which work seamlessly with ceramic designs.

Position your ceramic pendant lights over key areas like kitchen islands or dining tables. This practical placement not only provides essential illumination but also establishes a focal point that elevates your overall design.

Advertisement

With their artisanal qualities and versatility, handcrafted ceramic pendant lights can transform any space, making them an essential addition to your country home decor.

Rustic Iron Wall Sconces

Iron wall sconces offer a perfect way to enhance your country home decor, providing ambient lighting while adding a vintage touch that complements your handcrafted ceramic pendant lights. These rustic sconces often come with intricate designs and a sturdy construction, making them ideal for showcasing your handmade crafts, like mason jar candle holders or floral arrangements.

When selecting wall sconces, consider pieces with a distressed finish, as they harmonize beautifully with other rustic elements, such as reclaimed wood furniture and vintage decor. You can also pair your sconces with natural materials like jute or burlap to add an inviting texture that emphasizes the handmade aesthetic.

Utilizing wall sconces to display seasonal decor, such as small wreaths or greenery, allows you to create a versatile styling option that can change with the seasons. This flexibility adds a dynamic element to your decor while maintaining a cohesive look throughout your home.

Incorporating rustic iron wall sconces not only illuminates your space but also serves as a stylish backdrop for showcasing your cherished handmade crafts, enhancing the overall charm of your country home.

Advertisement

Decorative Elements

artistic design features

When it comes to decorative elements, hand-painted wooden picture frames can add a personal touch to your walls.

You'll love the warmth of quilted fabric wall art, which brings a cozy, inviting feel to any room.

A rustic clay pot centerpiece can tie everything together, offering an earthy charm that perfectly complements your country home decor.

Hand-Painted Wooden Picture Frames

Customizing hand-painted wooden picture frames with chalk paint or acrylics adds a personal touch that beautifully complements your country home decor style. You can choose colors that match your existing palette or add a pop of vibrancy to your space. To achieve a rustic, vintage appearance, consider using distressing techniques like sanding and applying antique wax. This approach not only enhances the frame's character but also fits seamlessly into a country-themed aesthetic.

To further elevate your frames, you might add decorative elements such as jute ribbon, faux greenery, or small floral accents. These details can tie the frames into your overall decor theme and create a cohesive look throughout your home. For an extra layer of personalization, think about using manila tags with hand lettering or coffee staining. These charming labels can give each frame a unique story.

When arranging multiple frames on a wall, try incorporating a triangle pattern. This technique establishes visual balance and enhances the overall look of your decor, making your hand-painted frames a stunning focal point in your country home.

Advertisement

Quilted Fabric Wall Art

Handmade quilted fabric wall art beautifully complements hand-painted picture frames, adding warmth and texture that enhances the rustic charm of your country home decor. You can choose from various fabric patterns and colors to create a cohesive aesthetic that reflects your personal style. Incorporating patchwork designs not only evokes nostalgia but also connects to heritage, making these pieces meaningful focal points in your living spaces.

Using natural fibers like cotton or linen for your quilted wall art enhances its rustic appeal while ensuring durability and easy care. You can display quilted pieces in several ways, whether framed or hung as standalone art. This versatility allows you to mix and match with other decorative elements in your home.

To make your quilted fabric wall art truly unique, consider adding embellishments such as buttons, lace, or embroidery. These personal touches will express your creativity and elevate your decor. Overall, quilted fabric wall art serves as an inviting and beautiful addition to your country home, making it feel warm, welcoming, and full of character.

Rustic Clay Pot Centerpiece

A rustic clay pot makes a stunning centerpiece that effortlessly showcases seasonal floral arrangements and natural elements, enhancing the charm of your country home decor. You can fill the pot with a delightful mix of faux berries, white flowers, and greenery to create a lively, whimsical look that reflects nature's beauty.

To add visual interest, arrange your flowers using a triangle pattern, ensuring balance and symmetry within the display. This approach draws the eye and makes the centerpiece more appealing. For an extra touch of texture, consider wrapping jute ribbon or gingham fabric around the rim of the clay pot, perfectly complementing the rustic aesthetic.

Advertisement

Don't forget to personalize your centerpiece! Attaching handmade tags with hand-lettered messages can evoke a warm, inviting atmosphere, making your guests feel right at home. You might also incorporate natural elements like grapevine or faux greenery for a cohesive look that ties everything together.

Flooring

flooring installation and options

When it comes to flooring in your country home, you've got some charming options to contemplate.

Reclaimed barn wood planks can add a warm, rustic feel, while natural stone tile offers durability and elegance.

If you're looking for a unique touch, a cottage-style painted concrete floor might just be the creative expression your space needs.

Reclaimed Barn Wood Planks

Reclaimed barn wood planks bring unique character and history to your home, making them an ideal choice for rustic flooring. Sourced from old barns, these planks offer not just aesthetic appeal but also a sustainable option for your flooring needs. By repurposing materials that might otherwise end up in a landfill, you're making an environmentally friendly choice that aligns with sustainable building practices.

The rich grain patterns and color variations in reclaimed wood add warmth and charm, creating a cozy atmosphere that complements your country home decor. Plus, many of these planks undergo treatment to eliminate pests and enhance durability, ensuring they can handle daily wear while maintaining their natural beauty.

Advertisement

Installing reclaimed barn wood flooring can also boost your property value. It's often viewed as a high-quality feature by potential buyers who appreciate a rustic aesthetic. So, when you choose reclaimed barn wood, you're not just investing in flooring; you're enhancing the character of your home while making a smart investment.

Embrace the charm and sustainability of reclaimed barn wood planks, and watch your country home transform into a warm, inviting space.

Natural Stone Tile Flooring

Natural stone tile flooring complements the rustic elegance of reclaimed barn wood planks while adding durability and a timeless aesthetic to your country home decor. Each piece of natural stone is unique in color and texture, allowing you to create a personalized and visually appealing foundation for your living spaces. This flooring option not only enhances the charm of your home, but it also provides excellent resistance to wear and tear, ensuring it stands the test of time.

One of the practical benefits of natural stone tiles is their ability to improve indoor air quality. They help reduce allergens and dust accumulation, contributing to a healthier living environment for you and your family. With proper sealing, maintaining your natural stone tile flooring is relatively easy; regular sweeping and occasional mopping will keep it looking its best.

Available in various finishes like honed or polished, natural stone tiles can complement different styles of country decor, from farmhouse elegance to rugged lodge aesthetics. By incorporating natural stone tile flooring into your home, you'll create a beautiful and functional space that embodies the charm of country living.

Advertisement

Cottage-Style Painted Concrete Floor

A cottage-style painted concrete floor adds a charming and personalized touch to your country home, transforming a plain surface into a delightful centerpiece.

To achieve this look, start by cleaning and prepping the concrete, ensuring it's free from dirt and debris for ideal paint adhesion. Using chalk paint is an excellent choice, as it provides a matte finish and great coverage, allowing you to customize colors that complement your decor.

Begin with a primer coat in a neutral shade, then apply multiple coats of your chosen color for durability. This process helps prevent chipping and fading over time.

To enhance the rustic charm, consider using a dry brushing technique with a lighter shade. This creates a distressed effect that mimics aged wood or worn flooring, adding depth to your space.

Conclusion

Incorporating handmade crafts into your country home decor adds warmth and character that store-bought items just can't match.

Advertisement

By focusing on key elements like essential fixtures, unique lighting, and decorative accents, you can create a cozy, inviting space that reflects your personal style.

Don't forget about the flooring—natural materials can enhance the rustic feel.

Embrace your creativity, and let your handmade pieces shine, turning your home into a true expression of who you are.

Continue Reading

Home Decor

Refresh Your Bedroom for Late Summer – The Before and After Will Shock You!

Feel the transformation as you refresh your bedroom for late summer—discover the simple changes that will leave you in awe!

Published

on

By

stunning bedroom makeover reveal

You can refresh your bedroom for late summer with just a few simple changes that'll leave you amazed at the transformation. Start by swapping heavy bedding for lighter materials and choose soothing pastel colors like blush pink or mint green for a calming vibe. Incorporate vibrant throw pillows and indoor plants for a lively touch. Brighten the space with dimmable lighting. Don't forget personal touches, like family photos or seasonal decor, to enhance your space. These updates can turn your bedroom into a serene retreat. Discover even more tips for an incredible makeover you won't want to miss!

Key Takeaways

  • Choose a soothing color palette of muted pastels to create a calming ambiance in your bedroom for late summer.
  • Swap out heavy bedding for lighter materials like linen or cotton to enhance comfort and airflow.
  • Incorporate plants and greenery to improve air quality and bring a refreshing summer vibe indoors.
  • Utilize functional storage solutions, such as decorative baskets and multi-functional furniture, to keep your space organized and clutter-free.

Importance of a Bedroom Refresh

Revitalizing your bedroom isn't just about aesthetics; it's an essential step to enhance your space's functionality and create a serene retreat that boosts your well-being.

The importance of a bedroom makeover lies in its ability to transform your environment, making it more inviting and reflective of your personal style. Small changes can make a significant difference, such as swapping out bedding or introducing new decor that aligns with the season.

Incorporating elements like plants or updated lighting can dramatically improve the ambiance without requiring extensive renovations. These updates not only rejuvenate the space but also foster a connection to the changing seasons, keeping your bedroom feeling alive and vibrant.

Regularly updating your bedroom maintains its role as your personal retreat, ensuring it remains a place for relaxation and rest. Opting for soft color palettes and natural materials helps create a calming atmosphere that promotes restful sleep.

Key Design Elements for Late Summer

late summer design essentials

As you refresh your bedroom for late summer, choosing the right color palette is essential for creating a soothing atmosphere.

Consider making functional decor updates that enhance both comfort and style, ensuring your space feels inviting.

Advertisement

With these key design elements, you can effortlessly shift your bedroom into a late summer retreat.

Color Palette Selection

A soothing color palette featuring muted pastels like blush pink, mint green, and light lavender sets the perfect backdrop for a late summer bedroom revitalization. This color palette selection not only evokes a calming atmosphere but also reflects the warmth of the season.

To enhance your space, consider these four key elements:

  1. Natural Fibers: Use linen and cotton for your bedding to promote comfort and align with the airy feel of late summer aesthetics.
  2. Vibrant Accents: Add pops of color through throw pillows and artwork to create a lively contrast against your neutral backdrop.
  3. Greenery Touch: Incorporate plants or faux greenery to improve air quality and bring a rejuvenating essence of summer indoors.
  4. Layered Textures: Introduce cotton velvet throw blankets and woven baskets to enhance visual interest and depth, making the room feel cozy yet sophisticated.

Functional Decor Updates

Functional decor updates can greatly enhance your late summer bedroom by combining style and practicality to create a revitalizing atmosphere.

Start by swapping out your heavy bedding for lighter materials like 100% cotton or linen. This won't only improve your comfort but also enhance airflow during those warm summer nights.

Next, consider incorporating soft color palettes, such as light blues and pastel pinks. These colors create a calming ambiance that reflects the vitality of the season. To promote sustainability and a connection with nature, opt for natural decor elements like wooden furniture and cotton accessories.

Advertisement

Don't forget about organization! Practical storage solutions, such as decorative baskets or demilune bedside tables, can keep your space clutter-free without sacrificing aesthetic appeal.

Lastly, implement dimmable lighting options, like adjustable wall sconces or bedside lamps. This allows you to control the room's mood, making it easy to adapt from relaxation to activity.

Functional Storage Solutions

efficient organizing and space saving

Maximizing your bedroom's storage options can create a more organized and serene space, perfect for late summer relaxation. To help you achieve that, consider these functional storage solutions that can replace your old one and provide a fresh feel:

  1. Demilune Bedside Tables: These stylish tables offer ample closed storage while keeping your space looking sleek.
  2. Baskets or Bins: Use them for frequently accessed items like books or chargers. They keep everything tidy and easily accessible.
  3. Multi-functional Furniture: Invest in ottomans that double as storage. They're perfect for smaller bedrooms, offering seating and space-saving solutions.
  4. Designated Spots: Create specific areas for everyday items to minimize clutter. This promotes a polished appearance and simplifies your nighttime routine.

Make sure to regularly assess and declutter your storage solutions. This little tour of your bedroom's functionality can enhance not only the organization but also your overall tranquility.

Embrace these smart strategies, and you'll transform your bedroom into a peaceful retreat just in time for late summer!

Lighting for Ambiance and Style

ambiance enhancing lighting design

Creating a serene and inviting atmosphere in your bedroom is just as important as having effective storage solutions, and lighting plays a key role in achieving that ambiance. For your bedroom refresh, consider incorporating dimmable lighting options that let you easily adjust the mood, whether you want a cozy setting for relaxation or a brighter space for activities.

Layered lighting is essential; mix ambient, task, and accent types to enhance versatility throughout the day. Adjustable wall sconces can add charm while providing focused light for reading, doubling as decorative elements. When you choose lighting for ambiance and style, think about the thoughtful placement of fixtures. Verify bedside tables are well-lit for nighttime reading and easy access to essentials.

Don't overlook the impact of window treatments and a stylish curtain rod, which can complement your lighting choices and enhance the overall aesthetic. With summer winding down, now's the perfect time to revamp your bedroom. Let the right lighting transform your space into a tranquil haven that reflects your unique style, making each moment in your bedroom feel special.

Advertisement

Personal Touches to Enhance Decor

enhancing decor with personalization

Incorporating personal touches into your bedroom decor not only reflects your unique style but also fosters a warm and inviting atmosphere. By integrating meaningful elements, you can create a space that resonates with who you are.

Here are some easy ways to enhance your decor:

  1. Family Photos: Display framed pictures of loved ones to keep cherished memories close at hand.
  2. Artwork: Choose pieces that inspire you, like a motivational print that aligns with your values, such as “Be Your Own Hero.”
  3. Seasonal Decor: Update throw pillows or add fresh floral arrangements to keep your space feeling connected to the changing seasons.
  4. Functional Decor: Incorporate wall hooks for jackets or bags, blending practicality with style.

These personal touches not only beautify your space but also enhance your emotional connection to it.

Engaging in DIY projects, like creating a cozy reading nook, allows for further customization. By making these small changes, you'll transform your bedroom into a true reflection of your personality, making it a sanctuary you love to retreat to.

Safety Considerations for Newborns

newborn safety precautions essential

When you're setting up your nursery, safety should be your top priority.

Make sure to secure furniture, choose non-toxic paints, and tackle baby-proofing essentials to create a safe environment for your little one.

Let's go over some key considerations to keep your newborn safe as they start to explore.

Furniture Securing Methods

Securing heavy furniture to the wall is vital for preventing dangerous tipping accidents in homes with newborns. When you're setting up your nursery or bedroom, it's important to implement proper furniture securing methods. Here are four effective ways to guarantee safety:

Advertisement
  1. Use Anti-Tip Straps: Attach these straps to heavy pieces like dressers and bookshelves. They anchor the furniture to the wall, greatly reducing the risk of tipping.
  2. Install Corner Guards: For furniture with sharp edges, corner guards and edge bumpers can help minimize injury risks as your baby begins to crawl or walk.
  3. Manage Cords and Blinds: Regularly inspect and secure any cords and blinds in the nursery. Keeping these out of reach prevents strangulation hazards.
  4. Check Detectors Monthly: Install smoke and carbon monoxide detectors in the bedroom, and remember to check them monthly to maintain a safe environment for your newborn.

Non-Toxic Paint Options

Choosing non-toxic paint for your nursery not only enhances the room's aesthetic but also guarantees a safer environment for your newborn. Non-toxic paints are formulated without harmful chemicals like volatile organic compounds (VOCs), making them a smart choice for improving indoor air quality. Brands like Benjamin Moore and Sherwin-Williams offer excellent zero-VOC and low-VOC options that maintain durability and color richness while prioritizing health.

When selecting non-toxic paint, pay attention to certifications such as Green Seal or Greenguard. These labels indicate that the product meets strict chemical emissions limits and safety standards, ensuring peace of mind as you create your baby's space.

Using non-toxic paints not only beautifies the nursery but also helps reduce the risk of respiratory issues and chemical exposure for your sensitive infant.

Baby-Proofing Essentials Checklist

Creating a safe environment for your newborn involves a thorough baby-proofing essentials checklist that addresses potential hazards throughout your home. You want to guarantee every space is secure, allowing your little one to explore safely. Here's a quick checklist to help you get started:

  1. Outlet Covers & Corner Guards: Install these to prevent electrical accidents and injuries from sharp furniture edges, especially in areas your baby frequents.
  2. Secure Furniture: Anchor all furniture to walls to avoid tipping hazards, particularly where your baby will be crawling or starting to walk.
  3. Baby Gates: Use baby gates to restrict access to unsafe areas in your home, guaranteeing a safe environment as your little one begins to explore.
  4. Inspect Cords & Blinds: Regularly check cords and blinds for strangulation hazards. Keep them out of reach or use cord shorteners and cleats.

Additionally, equip your home with smoke and carbon monoxide detectors, testing them regularly.

Creating a Cozy Reading Nook

cozy reading nook setup

Transform your bedroom into a cozy reading nook where children can immerse themselves in bedtime stories and enjoy casual reading. Start by making a new bookshelf the centerpiece, ideally filled with a variety of children's books for organized storage and easy access. This not only keeps the area tidy but also encourages a love for reading.

Next, add a soft and comfortable hanging chair. This inviting space complements the room's decor and becomes the perfect spot for snuggling up with a good book. To make it even more engaging, incorporate decorative elements like letter boards, artwork, and globes. These personal touches spark creativity and make the nook uniquely theirs.

Don't forget to establish a dedicated coloring area alongside the reading nook. This multifunctional space fosters creativity and play, making reading even more enjoyable. Utilize simple organizational tools like bins for craft supplies, ensuring everything has its place.

Advertisement

Upgrading Bedding and Accessories

bedding and accessories upgrade

Upgrading your bedding and accessories can instantly elevate the comfort and style of your bedroom, making it a perfect retreat for late summer evenings. With just a little effort, you can create a serene atmosphere that invites relaxation.

Here are four simple ways to refresh your space:

  1. Choose Luxe Fabrics: Opt for 100% cotton or linen bedding. Not only do they feel incredible against your skin, but they also promote sustainability in your decor.
  2. Soft Color Palettes: Integrate calming colors in your bedding. Shades like soft blues or muted pastels can transform your bedroom into a tranquil oasis.
  3. Decorative Touches: Add little elements like cotton velvet throw pillow covers. They provide a stylish upgrade and a hint of luxury without overwhelming your space.
  4. Adjustable Lighting: Install dimmable lighting options. They allow you to set the perfect ambiance, enhancing the overall feel of your upgraded bedding and accessories.

Community Engagement and Inspiration

empowering local voices together

Engaging with your audience not only fosters a supportive community around home decor but also sparks inspiration for revitalizing your spaces. When you encourage comments and feedback, you create a platform for exchanging ideas, allowing everyone to share their unique perspectives and insights. Highlighting specific design elements and their impact helps viewers appreciate the thoughtfulness behind each choice, prompting them to reflect on similar updates in their own homes.

By sharing DIY insights and project goals, you invite readers to participate actively in their own decor journeys. This not only strengthens their connection to your content but also cultivates a sense of belonging within the community. Regular updates on popular posts and upcoming projects keep the excitement alive, showcasing your commitment to creativity and continuous improvement.

Encouraging viewers to share their own bedroom refresh experiences can be incredibly motivating. When people see others commence their decor adventures, it inspires them to take action in their spaces. Your community engagement becomes a powerful catalyst for transformation, turning simple ideas into beautiful realities that everyone can appreciate.

Frequently Asked Questions

How to Rejuvenate Your Bedroom?

To rejuvenate your bedroom, choose soft pastel colors, upgrade to natural fiber bedding, add greenery for freshness, use dimmable lighting for ambiance, and utilize smart storage solutions to keep the space organized and inviting.

How to Update a Bedroom?

To update your bedroom, incorporate soft colors and natural materials, swap mismatched furniture for cohesive pieces, layer lighting for versatility, invest in smart storage, and refresh decor with personal touches that reflect your unique style.

Advertisement

Conclusion

As you immerse yourself in your bedroom refresh, think of it as painting a vibrant sunset on a blank canvas.

With each thoughtful design choice, you're not just changing a space, you're inviting warmth and serenity to your sanctuary.

Embrace the playful dance of light and texture, and let your personal touches sing.

This late summer transformation will cradle you in comfort, turning your bedroom into a dreamy retreat that whispers, “Welcome home.”

Advertisement

Continue Reading

Home Decor

Instantly Add Depth and Interest to Any Room With These Texture Tips!

Instantly transform your space with these texture tips that will leave your room inviting and visually striking—discover how to elevate your design!

Published

on

By

enhance room texture tips

Texturing your space transforms it from mundane to memorable. Start by layering diverse materials like plush rugs with sleek furniture to enhance depth. Mix soft fabrics with natural wood and metallic finishes for added complexity. Incorporate decorative items, such as patterned pillows or textured throws, to serve as focal points. Don't forget about lighting—ambient and accent lights can highlight key textures and create warmth. Also, consider natural elements, like plants or woven rugs, to bring life to your room. With simple adjustments, your space can become more inviting and visually striking. Keep going for more tips to elevate your design!

Key Takeaways

  • Layer different materials, such as plush textiles with rough surfaces, to create visual intrigue and depth in your space.
  • Incorporate natural elements like wooden furniture and greenery to enhance warmth and add varied heights for interest.
  • Use a mix of textures, such as soft fabrics and shiny metals, to enrich the tactile experience and prevent a flat appearance.
  • Strategically select a color palette that complements your textures, using bold colors to highlight depth and neutral tones to unify the design.

Importance of Texture in Design

Texture plays an essential role in design, as it adds depth and invites you to engage with your space on a deeper level. When you incorporate different textures, you can create visual interest that transforms an ordinary room into something special. A textured wall, for instance, can define the style and mood of your space, setting the tone for the entire decor.

Texture can help unify diverse decor elements, making your design feel cohesive and well thought-out. Whether you choose fluted paneling or scalloped designs, these textured features create a cozy atmosphere that draws people in. By strategically placing textured elements, you can elevate your interior design, turning plain walls into focal points that captivate the eye.

Incorporating texture doesn't have to be an expensive endeavor. Simple materials like fabric, wood, or stone can enhance the ambiance of your room without overwhelming it.

Understanding Texture and Its Impact

exploring texture s influential effects

The feel and visual appearance of surfaces can dramatically influence how you experience a room, making it essential to understand texture's impact on interior design. Texture adds depth and interest, engaging your senses in ways that color and shape alone cannot. By incorporating various materials and textures, you can create a dynamic environment that feels inviting and well-curated.

Layering textures is key to achieving this effect. For example, combining plush rugs with rough wooden furniture not only promotes visual interest but also encourages tactile experiences that draw you in. Each textural element contributes its own visual weight, guiding the eye and enhancing the overall complexity of the space.

When you thoughtfully mix natural fibers like jute with soft fabrics such as cushions, you create a harmonious balance that unifies diverse decor elements. On the flip side, a lack of texture can lead to flat, uninteresting rooms.

Advertisement

Techniques for Mixing Textures

mixing textures techniques guide

Mixing textures can transform your space into a vibrant and inviting environment.

By layering diverse materials and contrasting textural elements, you create visual interest that captures attention.

Let's explore some effective techniques to achieve this dynamic look in your home.

Layering Diverse Materials

Layering diverse materials not only creates visual intrigue but also invites a sensory experience that transforms your space into a cozy retreat.

By combining textures like plush textiles with rough surfaces such as wood or stone, you can add depth and dimension to any room. Think about mixing soft cushions with sleek glass elements or textured wall treatments to guide the viewer's eye throughout the space, enhancing the overall visual interest.

Don't shy away from experimenting with textiles. Pairing velvet pillows with knitted throws enriches the tactile experience, contributing to an inviting atmosphere that makes people feel at home.

Advertisement

Decorative items can further elevate your design; for instance, a marble table topped with a woven basket introduces diverse textures that serve as focal points while maintaining harmony.

Additionally, consider layering different finishes, like matte and glossy surfaces, to enhance the dynamic quality of your room. This not only adds texture but also creates a more luxurious feel.

Contrasting Textural Elements

Contrasting textural elements can breathe life into your space, inviting curiosity and creating a more engaging environment. By mixing different materials and textures, you can add visual interest and create focal points that draw the eye. For instance, combining plush velvet cushions with rough reclaimed wood not only adds depth but also enriches the overall aesthetic.

Here's a quick guide to help you explore contrasting textures:

Material Type Texture Description
Plush Textures Velvet cushions, soft rugs
Rough Textures Reclaimed wood, stone walls
Smooth Surfaces Glass tables, polished stone
Textured Fabrics Linen curtains, wool throws
Metallic Accents Brass fixtures, steel decor

Using these varying textures can create a visually stimulating environment, making your space feel lively and inviting. Experimenting with sleek leather sofas paired with chunky knit throws is another way to add complexity and character. Remember, adding depth through contrasting textures not only enhances the design but also makes the room feel more cohesive and well-rounded. So, don't shy away from mixing materials to achieve that perfect balance!

Advertisement

Common Texture Application Mistakes

texture application mistakes overview

When it comes to texture application, many people overlook scale and layering, which can really impact the look of your space.

If you pair large textures with smaller elements without considering balance, it can feel overwhelming.

Plus, skipping the layering process might leave your design flat and uninspiring instead of rich and engaging.

Ignoring Scale Considerations

Ignoring scale considerations can throw your design off balance, making large textures overpower small spaces or creating discord between mismatched decor. When you're adding texture to a room, it's vital to assess the scale of each element.

For instance, mixing oversized rugs or wall panels with smaller decor can create visual chaos rather than a harmonious setting. To help you create an inviting atmosphere, choose textures that complement the room's dimensions. A textured wall can add dimension to a room, but it should be paired with appropriately scaled furniture.

If you're working with neutral colors, this can be especially effective, as they don't compete with bold textures but rather enhance them. Regularly evaluating how textures interact with your space is fundamental. Keep in mind that textures should work together to create a cohesive look.

Advertisement

Overlooking Texture Layering

Overlooking texture layering can leave your space feeling flat and uninviting, as diverse textures are vital for creating visual interest and depth. When you layer different textures, you not only add depth but also create a sense of balance in a room. Without this careful consideration, your design may end up feeling cluttered and chaotic, rather than cohesive.

It's essential to assess how textures interact with colors to avoid discordant aesthetics. Certain combinations can clash, detracting from the inviting quality of your space. Regularly evaluating your decor helps you identify any mistakes in texture layering, ensuring that your chosen materials continue to foster a dynamic environment.

For instance, combining soft fabrics with sleek surfaces can enhance the overall atmosphere, while rough and smooth textures together can create an engaging visual narrative.

Choosing the Right Color Palette

selecting ideal color combinations

Choosing the right color palette is essential, as it not only influences the mood of your space but also affects how textures and furnishings interact within the room. To create a cozy atmosphere, consider using richly-pigmented tones like deep greens or warm burgundies. These colors can evoke feelings of comfort and intimacy, making your space feel more inviting.

When selecting colors, think about using a similar palette to create harmony. Neutral tones can serve as a solid foundation, allowing your textures and furnishings to stand out without overwhelming the space. This strategic color selection plays a significant role in achieving a cohesive design, enhancing the overall ambiance.

Bold colors can also be effective, as they highlight texture to create depth and visual interest. By adding interest with contrasting hues, you can bring sophistication to the room while maintaining balance.

Advertisement

Layering Textures for Depth

textural layering for depth

To create a visually dynamic space, layer different textures by combining plush rugs with sleek furniture, enhancing both richness and comfort in the room. Layering textures is key to achieving depth and visual interest. By mixing various materials—think soft fabrics, natural wood, and shiny metals—you can add interest and complexity that invites curiosity.

Consider incorporating decorative items like textured throws draped over a smooth sofa or a mix of patterned pillows. These elements not only elevate the overall aesthetic but also enhance comfort. Effective layering of contrasting elements, such as rough stone paired with soft textiles, prevents a flat appearance and encourages an engaging atmosphere.

Regularly assess your choices and experiment with different textures to find what resonates. This approach can lead to a cohesive design that feels curated and luxurious. Remember, the goal is to create a harmonious blend that showcases your style while providing tactile experiences.

Embrace the art of layering textures, and watch as your space transforms into an inviting haven full of depth and visual richness.

Incorporating Natural Elements

nature inspired design integration

Incorporating natural elements like wood, stone, and plants instantly breathes life into your space, adding warmth and a touch of rustic charm. When you bring these textures in, you're not just decorating; you're creating a more inviting room feel that enhances your overall ambiance.

Here are some effective ways to add these natural textures:

  • Use wooden furniture: A reclaimed wood table or shelving can serve as a stunning focal point.
  • Add plants: Incorporating greenery not only introduces color but also creates visual interest with varying heights and leaf shapes.
  • Layer with natural fibers: Rugs made of jute or sisal can add tactile warmth and comfort, making your room feel cozy.

Role of Lighting in Texture

illumination enhances surface detail

Lighting dramatically influences how textures appear in your space, enhancing their depth and character while creating a warm and inviting atmosphere. Different types of lighting can considerably alter the visual interest of textured surfaces.

By using a combination of ambient, task, and accent lighting, you can create layers that highlight various textures throughout the room. For instance, ambient lighting provides overall illumination, while task lighting focuses on specific areas, such as reading nooks or workspaces. Accent lighting, on the other hand, draws attention to key textural elements, like an accent wall or decorative textiles.

Advertisement

This strategic placement allows you to showcase the intricate details of your textures, making them more pronounced and inviting. Textured light fixtures made from glass or metal can also add another layer of visual dimension, reflecting and refracting light to create dynamic interactions with your decor.

Frequently Asked Questions

How Can Texture Add Depth and Interest to a Design?

Texture adds depth and interest to your design by creating contrasts that catch the eye. Mixing soft and hard materials, like plush pillows and wooden surfaces, invites curiosity and makes your space feel more dynamic and cozy.

How Do You Add Depth to a Room?

To add depth to a room, you've gotta transform it into a visual wonderland. Mix materials, layer textures, and play with lighting. Use accent pieces to create focal points that draw the eye and elevate the space.

What Does It Mean to Add Texture to a Room?

Adding texture to a room means incorporating different materials and surfaces, like soft fabrics or hard elements. It creates visual interest, enhances depth, and makes the space feel inviting and dynamic, enriching your overall atmosphere.

What Does Texture Visually Add to a Room?

Ever wondered how texture can transform your space? It visually adds depth and contrast, making your room dynamic. Mixing soft and hard textures invites exploration, creating an engaging, cozy atmosphere that feels intimately inviting.

Advertisement

Conclusion

Incorporating texture into your space is like weaving a vibrant tapestry; it adds richness and character to your home.

By being mindful of your choices and layering different materials, you can create a dynamic environment that invites warmth and interest.

Remember, lighting plays an essential role in highlighting these textures, so don't overlook it.

Embrace these tips, and watch your room transform into a cozy sanctuary that reflects your unique style and personality.

Advertisement

Continue Reading

Trending