Connect with us

Home Decor

How to Make a Bird Nest in 5 Simple Steps

Idealize your inner bird and craft a cozy abode in just five easy steps, but first, learn the secrets to making it truly remarkable.

Published

on

building a bird nest

To make a bird nest in 5 simple steps, start by gathering natural materials like dried grass, Spanish moss, sticks, and leaves, focusing on a variety of textures and colors. Next, set up your workspace with essential tools like scissors and adhesive spray, ensuring a well-ventilated area. Apply a thin layer of adhesive to shape the nest, spreading it evenly for a stable base. Then, add texture and depth with a mix of materials, experimenting with placement and arrangement. Finally, let the nest dry and set, showcasing your handiwork once complete. Now, discover the finer details that'll make your creation truly sing.

Key Takeaways

• Collect outdoor materials like dried grass, Spanish moss, sticks, and leaves, varying textures and colors for a natural look.

• Set up a workspace with essential tools, a well-ventilated area, and protected surface to ensure a smooth crafting process.

• Apply a thin layer of adhesive spray to shape the nest, spreading it evenly for a stable base and molding it into a sturdy cup.

• Add texture and depth by layering materials like moss, twigs, and leaves, experimenting with placement and arrangement for visual contrast.

Advertisement

• Allow the nest to dry and set for a few hours or overnight, ensuring the adhesive and sealant have dried thoroughly for a beautiful, decorative piece.

Gather Natural Materials

Head outdoors to collect dried grass, Spanish moss, sticks, and leaves, which will serve as the foundation of your realistic bird nest. You can find these natural materials in parks, your yard, or even purchase them online from retailers like Amazon for convenience. When gathering, look for a variety of textures and colors to add depth and realism to your DIY creation.

The Spanish moss, in particular, will help give your nest a soft, fluffy appearance. Sticks will provide the structural framework, while leaves and dried grass will fill in the gaps. Be sure to collect an assortment of shapes and sizes to create a natural, layered look.

Once you've gathered your materials, set them aside for now – you'll be using them to shape your nest in the next step. Remember, the key to a realistic bird nest is to incorporate a range of natural materials, so take your time and gather a diverse selection.

You won't be using the spray adhesive just yet, but it's essential to have all your materials ready before moving forward.

Advertisement

Prepare Workspace and Tools

set up work environment

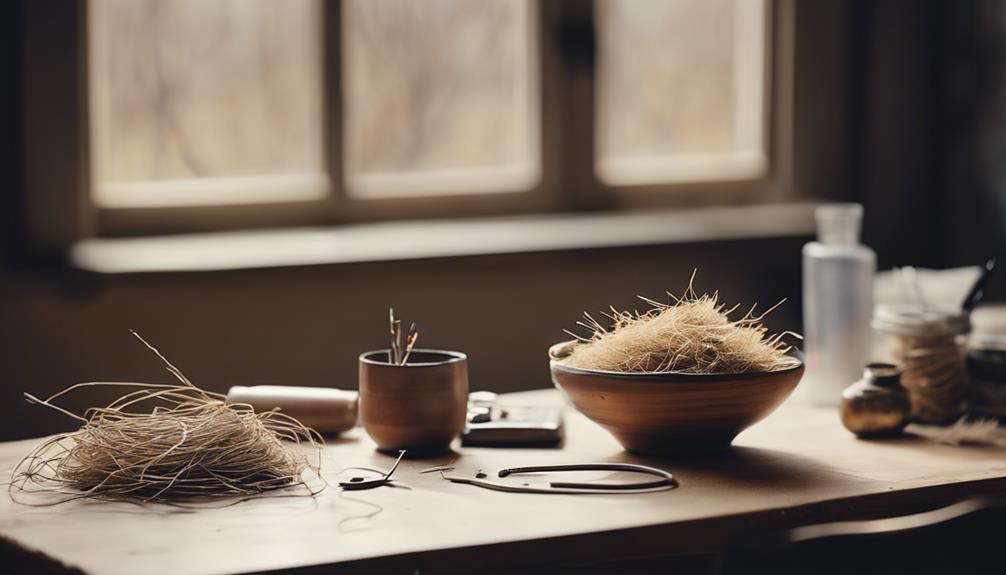
Clear your workspace and gather essential tools like scissors, adhesive spray, and moss to start building a realistic bird nest.

As you prepare your workspace, make sure you have a well-ventilated area to work in and protect your surface with craft paper or newspaper. Having all your materials and tools ready will make the process smoother and more efficient. Wearing gloves can help protect your hands while working with adhesive spray and natural materials.

By setting up your workspace properly, you'll be able to focus on crafting a beautiful bird nest in the following steps.

As you work on your bird nest, remember that birds love to build their homes in the Spring, and a cozy nest is vital for their survival. Your creation will be a perfect replica of a bird's home, complete with moss and other natural materials.

With your workspace and tools ready, you're one step closer to creating a stunning bird nest that'll be the perfect addition to your home.

Shape the Nest With Adhesive

build home with glue

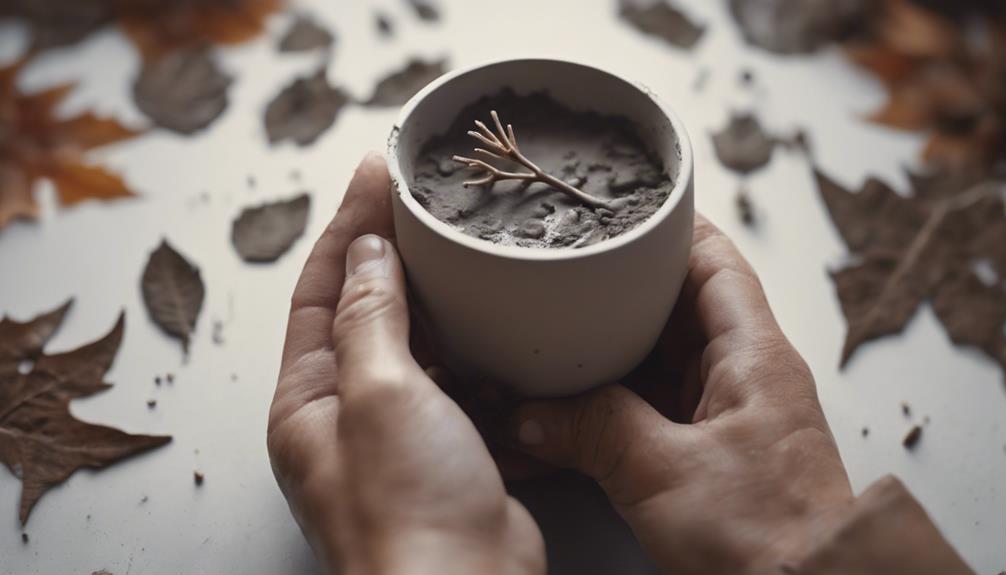
With spray adhesive in hand, you're ready to shape your bird nest by applying a thin, even layer to the center of the moss, allowing you to mold it into a sturdy, cup-like structure. The adhesive increases the malleability of the nest, making it easier to manipulate into the desired shape.

As you apply the adhesive, make sure it's spread evenly to hold the nest together securely. This will provide a stable base for adding twigs, boxwood stems, and other decorative elements later on. The spray adhesive also allows for flexibility in adding these elements, making it easier to create a natural-looking bird nest.

Advertisement

Once you've applied the adhesive, use your thumbs to gently push down the middle of the nest, shaping it into a sturdy cup. This will create a cozy space for the eggs and other decorative elements you'll add later. With the nest taking shape, you're one step closer to creating a beautiful, realistic bird nest.

Add Texture and Depth

add visual depth perception

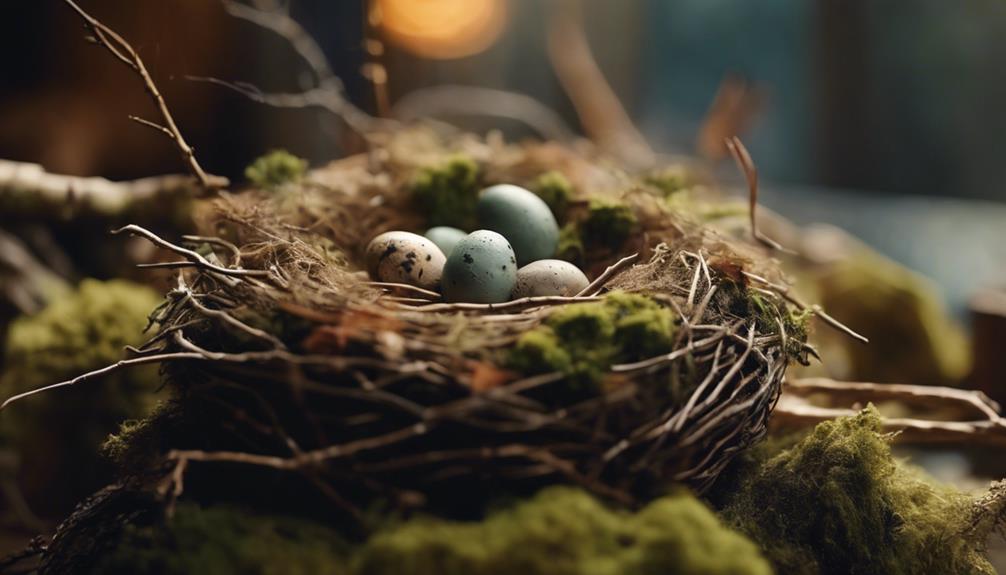
Now that your nest has taken shape, start adding texture and depth by layering a mix of materials like moss, twigs, and leaves to create a visually appealing and realistic bird nest. This is where you can get creative and have fun with the process.

To add texture and depth to your nest, try the following:

  • Vary the colors and shapes of the materials you use to create a visually appealing contrast.
  • Experiment with different placement and arrangement of materials to achieve the desired look for your bird nest.
  • Consider incorporating small feathers or tiny eggs to bring a touch of authenticity to the nest.

Allow to Dry and Finish

air dry before finishing

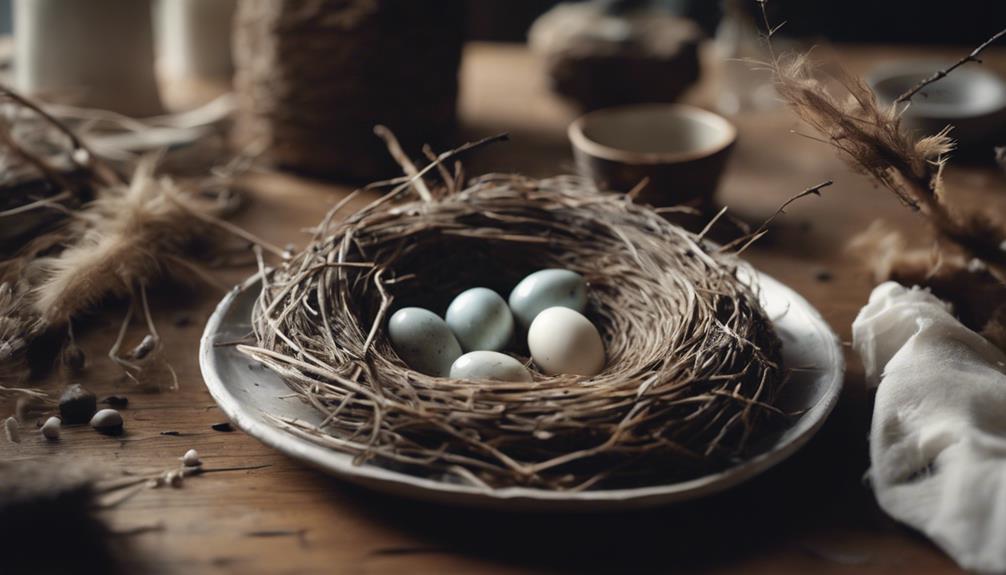
You've carefully crafted your bird nest, adding texture and depth with an assortment of materials, and now it's time to let it dry and set. This important step requires patience, as the drying time can vary depending on the materials used. Typically, a few hours to overnight is sufficient, but it's vital to make sure that the adhesive and any sealant applied have dried thoroughly for a sturdy and finished look.

Rushing the process can compromise the structure of your nest, causing elements to shift or fall apart. By exercising patience, you'll be rewarded with a beautiful, decorative piece that's ready to be displayed in your home or used as a charming addition to seasonal celebrations. Once fully dried, your bird nest is complete, and you can proudly showcase your handiwork.

With its unique texture and depth, it's sure to be a conversation starter. So, take a step back, let your nest dry, and get ready to enjoy the fruits of your labor.

Frequently Asked Questions

How to Make a Simple Bird Nest?

To make a simple bird nest, you'll need a few natural materials like twigs, moss, and feathers. Start by gathering your supplies and deciding on the size and shape of your nest.

Advertisement

You can use a wire or foam base to help hold the shape, or go for a more rustic look with just twigs and stems. Then, attach the twigs together with wire or hot glue, and fill in the gaps with moss and feathers for a cozy, natural look.

How Do Birds Make Nests for Kids?

When you wonder how birds make nests, you'll discover it's a remarkable process.

You'll find that birds use their beaks and feet to collect twigs, grass, feathers, and mud, carefully arranging these materials to create a safe space for their eggs and chicks.

Different species build unique nests, from cup nests to cavity nests, showcasing their impressive skills.

How to Make a Baby Bird Nest?

As you begin creating a baby bird nest, envision crafting a snug, intricate haven for tiny hatchlings. You're about to weave a cozy sanctuary, just like parent birds do.

Advertisement

Start by gathering materials like twigs, grass, and feathers. Collect soft, pliable items that can be shaped and molded.

Think about the nest's structure: it should be sturdy, yet comfortable.

Now, let's get started on building a baby bird nest that's both functional and adorable.

How Do You Make a Bird Nest at School?

When you're tasked with making a bird nest at school, you'll likely be working with limited materials and supervision. Start by gathering cardboard boxes, scissors, tape, and other basic craft supplies.

Consider partnering with classmates to brainstorm and divide tasks. Since you're in a school setting, be mindful of time constraints and potential distractions.

Advertisement

Focus on creating a sturdy, functional nest that can withstand outdoor conditions, and don't hesitate to ask your teacher for guidance when needed.

Conclusion

You've crafted a bird's nest, a marvel of twigs and twine, a reflection of your patience and ingenuity.

Yet, as you step back, you can't help but notice the irony – your creation, so meticulously constructed, is but a pale imitation of the intricate masterpieces birds weave with ease.

Still, take pride in your handiwork; after all, even the most seasoned birds likely started with humble beginnings, just like yours.

Advertisement

Continue Reading
Advertisement

Alfresco

Is Alfresco Leather Real Leather? Discover the Truth!

Get ready to uncover the truth about Alfresco leather, a luxurious and authentic choice that redefines the essence of real leather.

Published

on

By

alfresco leather truth revealed

Yes, Alfresco leather is indeed real leather, characterized by its exceptional softness, durability, natural markings, grainy texture, and unique aroma. This premium quality leather choice stands out due to its authentic feel and distinctive features. Genuine Alfresco leather showcases warmth, fat wrinkles, and imperfections that affirm its authenticity. The sensory experience of its rich scent and luxurious touch further confirms its premium quality. Understanding the distinct characteristics of real leather, like Alfresco leather, underscores its excellence and sophistication in the world of leather products, ensuring a high standard of quality and performance.

Key Takeaways

  • Alfresco leather is a genuine type of real leather.
  • Its authenticity is confirmed by natural markings, texture, and unique aroma.
  • Characteristics like warmth, fat wrinkles, and imperfections distinguish it from synthetics.
  • Genuine Alfresco leather exhibits exceptional durability and softness.
  • Sensory cues such as a rich natural scent and luxurious touch validate its premium quality.

Characteristics of Real Leather

Real leather, including Alfresco leather, boasts distinct characteristics that set it apart from synthetic materials. Let's take a look.

Alfresco leather is renowned for its exceptional softness and durability, making it a preferred choice for luxury furniture pieces like sofas. Genuine Alfresco leather can be identified by its natural markings, grainy texture, and unique aroma. When you touch Alfresco leather, it should feel warm and exhibit fat wrinkles, along with imperfections such as uneven edges, showcasing its authenticity.

Moreover, an essential aspect of determining genuine Alfresco leather is the sensory experience. When tested, authentic Alfresco leather will emit a rich, natural scent and offer a luxurious, supple feel to the touch. These sensory cues, combined with the visual indicators of natural markings and texture, confirm the premium quality of Alfresco leather.

As a high-quality material, Alfresco leather exemplifies the excellence and sophistication associated with genuine leather products.

Identifying Genuine Leather

distinguishing quality of leather

To determine if leather is genuine, examine its natural hide markings, texture, and aroma to distinguish it from synthetic materials.

When identifying genuine leather like Alfresco leather, pay attention to the following:

Advertisement
  • Look for rough or uneven edges: Genuine leather often has imperfections that synthetic materials lack, such as uneven edges or fat wrinkles.
  • Check for diverse pores: Real leather will have a varying pattern of pores on the surface, unlike faux leather, which may have a consistent and uniform pore pattern.
  • Feel for a warmer touch: Authentic leather tends to feel warmer to the touch compared to synthetic alternatives, which can sometimes feel colder or artificial.

Types of Leather Grades

different leather grades explained

When exploring types of leather grades, understanding the distinctions between various categories can guide your selection of the most suitable leather for your needs. Leather grades are typically categorized into several main groups, each offering different qualities and characteristics. Below is a table outlining common leather grades:

Leather Grade Description
Full Grain Highest quality, natural appearance, and durability
Top Grain Sanded and refined, maintains quality with a bit of processing
Genuine Made from real leather but with lower quality and durability
Bonded Made from scraps of leather bonded together with adhesives
Faux Leather Synthetic material designed to mimic real leather

Each leather grade serves a distinct purpose, with full grain being the top choice for its premium quality and natural appearance. Understanding the differences between these grades can assist you in selecting the ideal leather type for your specific requirements.

Choosing Quality Leather

quality leather selection guide

Exploring quality leather options involves considering factors like material composition, durability, and maintenance requirements to guarantee the ideal choice for your needs. When faced with the decision between Alfresco leather and genuine leather, it's important to delve into the specifics to make an informed choice.

Here are three key points to guide you in selecting quality leather:

  • Material Composition: Alfresco leather, a synthetic blend of polyester and polyurethane, offers durability and ease of cleaning. Genuine leather, on the other hand, boasts natural characteristics and a unique aging process that contributes to its appeal.
  • Durability: Genuine leather tends to be more robust and ages beautifully, developing a rich patina over time. In contrast, Alfresco leather provides a durable alternative that's resistant to stains and fading, ideal for those seeking longevity without the intricate aging of real leather.
  • Maintenance Requirements: Genuine leather may require more care and conditioning to maintain its quality, while Alfresco leather offers a low-maintenance option that's easy to clean and upkeep.

Caring for Real Leather

leather care essentials guide

Regularly cleaning your Alfresco real leather with a damp cloth helps remove dust and dirt, maintaining its appearance and longevity.

To guarantee your real leather stays in top condition, it's crucial to use a leather conditioner specifically formulated for real leather. This step will help keep the leather moisturized and supple, preventing it from drying out and cracking over time.

Additionally, avoid exposing your Alfresco real leather to direct sunlight for extended periods to prevent fading and drying of the material.

In case of spills, make sure to clean them up immediately to prevent stains and damage to the leather surface.

Advertisement

Finally, to promote even wear and maintain the overall appearance of your real leather sofa, remember to rotate the cushions regularly.

Frequently Asked Questions

How to Know if Leather Is Real or Fake?

To determine if leather is real or fake, inspect for natural imperfections like fat wrinkles, conduct a burn test for a burnt hair smell, and sniff for a genuine aroma. Avoid bi-cast leather, which lacks durability.

What Is the Most Authentic Leather?

When seeking the most authentic leather, opt for Full Grain leather. Its durability, natural imperfections, and ability to develop a unique patina over time set it apart. Embrace its luxurious feel and timeless elegance.

How Do I Tell if My Couch Is Real Leather?

To tell if your couch is real leather, look for natural hide markings, a rich, natural smell, and diverse pores. Check for imperfections, a soft touch, and variations in color or texture. Perform a burn test or check the label for confirmation.

What Is the Most Durable Leather for a Recliner?

So, you're pondering the most durable leather for a recliner. Opt for Full Grain leather, it's the champ – boasting natural imperfections that age like fine wine. Skip Bonded leather, it's as flimsy as a house of cards.

Advertisement

Conclusion

To sum up, only authentic leather possesses the unique characteristics that make it a durable and luxurious material. According to a recent study by the Leather Working Group, 86% of consumers prefer real leather products for their quality and longevity.

So, when considering purchasing alfresco leather or any other leather product, remember to look for the telltale signs of authenticity to make sure you're getting the real deal.

Continue Reading

Home Decor

How to Create a Stunning Bedroom With a Navy Accent Wall

Sophisticate your bedroom design with a striking navy accent wall that sets the tone for a cohesive and stylish space.

Published

on

navy accent wall decor

To create a stunning bedroom with a navy accent wall, start by choosing the perfect shade, considering undertones and nuances that harmonize with your existing decor. Test different shades on the wall, observing how natural lighting affects each one. Then, design the accent wall using materials like planked wood, panels, or tiles, adding texture and visual interest. Balance the boldness of the navy wall with gold accents, white or light-colored bedding, and pops of color. By incorporating complementary colors and navy blue accents, you'll create a cohesive look that reinforces the focal point of the accent wall, setting the tone for a sophisticated bedroom design that reflects your personal style – and there's more to explore in refining your unique aesthetic.

Key Takeaways

• Choose the perfect navy shade by considering undertones, harmonizing with existing decor, and testing samples on the wall.

• Design a unique accent wall with materials like planked wood, tiles, or paneling, and incorporate catchy textures and materials.

• Balance the boldness of the navy accent wall with complementary decor, such as gold accents, white bedding, and natural elements.

• Create a cohesive color scheme by selecting complementary colors, incorporating navy blue accents, and using varying shades of navy.

Advertisement

• Style the bedroom by reinforcing the accent wall with navy blue in bedding and throw pillows, pairing with lighter shades, and adding metallic accents.

Choosing the Perfect Navy Shade

When selecting the perfect navy shade for your accent wall, consider the undertones and nuances that will ultimately harmonize with your existing bedroom decor and furniture. You'll want to choose a shade that complements, rather than clashes with, your current design aesthetic.

To get started, test out different navy shades like dark navy, indigo, or midnight blue by painting samples on your wall. Observe how the colors look in your space, taking note of how the natural lighting in your room affects the appearance of each shade. This will help you determine which navy shade creates the desired mood or atmosphere in your bedroom.

Designing the Accent Wall

accent wall design process

Now that you've selected the perfect navy shade, it's time to think creatively about how to bring your accent wall to life. You can experiment with different materials like planked wood, panels, tiles, or paneling to create a unique navy accent wall. Acoustic panels can be a creative choice, adding texture and visual interest. If you're looking for a quick and easy option, consider using navy wallpaper for a stunning navy blue accent wall.

Here are some design ideas to get you started:

Material Description Benefits
Navy Wallpaper Quick and easy option Adds a pop of navy blue to the room
Planked Wood Adds texture and visual interest Creates a unique design style
Acoustic Panels Adds depth and texture Improves room acoustics
Tiles or Paneling Creates a stunning and stylish design Adds depth to the room

Incorporate catchy textures and materials to make your navy accent wall stand out in the room. Get inspired by navy tiles or paneling to create a stunning and stylish navy accent wall design. With these ideas, you can create a navy blue accent wall that complements your chosen paint color and adds depth to your bedroom's color schemes.

Advertisement

Adding Complementary Decor

enhancing with decorative elements

To create a harmonious and visually appealing space, you'll want to balance out the boldness of your navy accent wall with complementary decor that adds contrast, texture, and personality to the room.

One way to do this is by incorporating gold accents, like picture frames, lamps, or mirrors, which complement the richness of the navy blue wall. Adding white or light-colored bedding and curtains creates a striking contrast against the dark navy backdrop, making the space feel more balanced.

You can also introduce pops of color, such as coral, mustard yellow, or blush pink, through throw pillows or decor to add vibrancy to the room. Natural elements, like wood furniture, rattan baskets, or plants, bring warmth and balance to the space.

Creating a Cohesive Color Scheme

designing a harmonious color palette

By selecting a few complementary colors to pair with your navy accent wall, you can create a cohesive color scheme that ties the entire room together. To achieve this, choose colors that complement the navy blue, such as white, grey, gold, or coral. These colors will enhance the navy accent wall and create a balanced look.

Complementary Color Description Example
White Crisp and clean, adds contrast Bedding, curtains, or a statement piece of furniture
Grey Soft and calming, adds subtlety Throw pillows, a rug, or a side table
Gold Luxurious and sophisticated, adds glamour Decorative accents, lighting, or hardware
Coral Vibrant and playful, adds a pop of color Accent pillows, a throw blanket, or a vase

Incorporate navy blue accents in decor items like pillows, throws, and rugs to create a cohesive look. Use varying shades of navy in different elements of the room for depth and dimension. Consider incorporating natural materials like wood or rattan to complement the navy accent wall. By incorporating these elements, you'll create a balanced color scheme that ties the room together, resulting in a stunning bedroom design.

Styling the Bedroom With Navy

nautical navy bedroom decor

As you style your bedroom with navy, remember that every decorative element, from bedding to throw pillows, is an opportunity to reinforce the bold focal point created by the accent wall.

By incorporating navy blue in these elements, you can create a cohesive look that ties the room together. Pairing navy with lighter shades like white or gray can create a balanced and harmonious color scheme in the bedroom.

Adding metallic accents like gold or brass can elevate the navy accent wall, creating a luxurious and stylish look. Consider using textured materials like velvet, linen, or faux fur in navy blue to add dimension and visual interest to the bedroom decor.

Advertisement

These styling tips will help you create a stunning navy blue bedroom that exudes sophistication and elegance.

Frequently Asked Questions

What Color Goes Best With a Navy Accent Wall?

When deciding what color goes best with a navy accent wall, you'll find that several options complement its rich, dark tone.

White creates a crisp contrast, while gold accents add luxury and warmth.

Light wood tones, like oak or pine, bring a natural feel, and coral or peach accents create a vibrant look.

If you prefer a more modern aesthetic, grey is a sophisticated choice that offers a chic, timeless vibe.

Advertisement

Ultimately, the right color for you'll depend on your personal style and the mood you want to create.

How to Decorate a Room With Navy Blue Walls?

As you venture into decorating a room with navy blue walls, you'll find that balancing boldness with subtlety is key.

Silky smooth surfaces, such as velvet or linen, complement navy's richness, while natural materials like wood and rattan add warmth.

To avoid overwhelming the space, incorporate light-colored bedding and textiles to create a cozy contrast.

How to Style a Navy Bedroom?

As you style your navy bedroom, remember that it's all about balance and contrast.

Advertisement

You're not limited to navy blue; incorporate complementary colors like gold, beige, or white to create a sophisticated look.

Add textures like velvet or linen to deepen the space.

Don't forget to balance dark walls with lighter accents, and consider adding greenery to bring in a natural touch.

How Do I Make My Bedroom Accent Wall Stunning?

As you stand before your bedroom's blank canvas, envision a masterpiece unfolding.

To make your accent wall stunning, start by choosing a rich, high-quality navy paint or a textured wallpaper with subtle patterns.

Advertisement

Then, balance the boldness with contrasting metallic accents, light-colored furniture, and strategic lighting.

Conclusion

You may think a navy accent wall will overwhelm your bedroom, but trust us, when done correctly, it can elevate the entire space.

By choosing the perfect shade, designing the accent wall thoughtfully, and adding complementary decor, you can create a stunning retreat.

Remember, a cohesive color scheme is key to tying the room together. So, take the plunge and add a navy accent wall to your bedroom – you might just find yourself sleeping better, and loving your new sanctuary.

Advertisement

Continue Reading

Home Decor

Creative Ways to Repurpose Flower Pots

Pondering new purposes for old planters, discover surprising storage solutions and decorative accents waiting to be unearthed.

Published

on

upcycling flower pots creatively

By repurposing old flower pots, you can unleash new life into discarded items, reveal hidden storage potential, and add a touch of creativity to indoor and outdoor spaces. Transform small planters into organizers for personal belongings, or fill terracotta pots with pampas grass for a rustic or modern look. You can also repurpose old planters in the bathroom for storage and organization, or create a whimsical fairy garden in a whiskey barrel. With a little creativity, you can turn ordinary items into extraordinary decor pieces, and discover even more innovative ways to repurpose flower pots as you explore further.

Key Takeaways

• Repurpose old flower pots as functional storage solutions for indoor spaces, such as storing keys, wallets, and bathroom essentials.

• Transform flower pots into unique decorative accents, like centerpieces or organizers, to add a touch of whimsy to events or home decor.

• Use small planters to create a potted herb garden or add a touch of greenery to indoor decor, perfect for cooking and outdoor decor.

• Turn vintage items into charming plant containers for a rustic charm, or utilize unconventional planters like mugs or rain gutters for herb gardens.

Advertisement

• Get creative with outdoor spaces by repurposing old metal birdbaths, flower pots, or bricks to create enchanting oases or raised garden beds.

Transforming Indoor Spaces

By repurposing old flower pots, you can transform your indoor spaces into functional and visually appealing areas. For instance, you can use small planters to organize your personal belongings, such as keys, wallets, or hair accessories. This not only keeps your space clutter-free but also adds a touch of greenery to your indoor decor.

If you have an old terracotta pot, consider filling it with pampas grass for a rustic or modern look that adds texture and visual interest to your room. You can also repurpose old planters in the bathroom to store cotton swabs, cotton balls, or even makeup brushes. This is a great way to keep your bathroom organized and within reach of the essentials you need.

With a little creativity, you can turn old flower pots into functional and stylish pieces that enhance your indoor spaces. By thinking outside the box, you can breathe new life into old planters and create a space that reflects your personal style.

Whimsical Outdoor Creations

playful garden sculptures artfully crafted

Step into the world of whimsical outdoor creations, where discarded items transform into vibrant planters, and ordinary spaces become enchanting oases.

As you explore the realm of repurposing, you'll discover the magic of transforming old, weathered items into unique planters. Take, for instance, an old metal birdbath or a large flower pot with drainage holes – these can be repurposed as durable planters for your outdoor plants.

Advertisement

You can also create a whimsical fairy garden in a whiskey barrel, complete with small plants and fairy supplies, adding a touch of enchantment to your yard.

For a more rustic look, consider building a DIY raised garden bed using old bricks, which is both easy to assemble and durable in nature.

By adopting these creative and eco-friendly ideas, you'll not only reduce waste but also add a personal touch to your outdoor space.

With a little imagination, you can turn your yard into a vibrant oasis, perfect for relaxation and entertainment.

Unconventional Planter Ideas

creative and unique planters

As you explore unconventional planter ideas, you'll find that thinking outside the box (or pot) can lead to some truly innovative and functional designs.

For instance, you might create a potted herb garden that not only adds freshness to your cooking but also elevates your outdoor decor.

Advertisement

Potted Herb Garden

Transform your kitchen with a fresh and fragrant twist by repurposing old flower pots into a thriving potted herb garden, perfect for snipping a sprig of rosemary or thyme anytime. You can utilize unconventional planters like mugs, shoes caddies, or rain gutters for a unique herb garden display. By repurposing various containers into herb planters, you can save space and add a touch of greenery to any area.

Herb Container Size
Basil Small (6-8 inches)
Thyme Small (6-8 inches)
Rosemary Medium (10-12 inches)
Parsley Medium (10-12 inches)
Cilantro Large (14-16 inches)

Create a functional and decorative herb garden with repurposed items like cloth shoe caddies or coffee mugs. This will not only add a fresh and aromatic element to your living space but also provide you with a constant supply of fresh herbs for cooking. By exploring creative ways to repurpose flower pots as herb planters, you'll bring a touch of nature indoors and elevate your cooking game.

Unique Centerpiece Ideas

You can add a touch of personality to your event or home decor by repurposing flower pots as unique centerpieces that showcase your creativity and style. Think beyond traditional planters and use unconventional items like rain gutters, cardboard boxes, or cloth shoe caddies to add a creative twist.

If you're looking for a more rustic charm, transform vintage items like farmhouse sinks, wagons, or antique chamber pots into charming plant containers. You can also repurpose everyday items like coffee mugs, umbrellas, or old tires as distinctive planters.

For a more rustic or country-inspired look, consider using large, woven baskets, whiskey barrels, or even birdbaths as unique plant displays. Alternatively, use cinder blocks, old bricks, metal antiques, or wooden chairs to create a one-of-a-kind centerpiece.

Advertisement

Repurposed Decorative Accents

upcycled vintage home decor

With a dash of creativity, your old flower pots can be reborn as stylish decorative accents that add a touch of personality to your bathroom.

You can repurpose those flowerpots hanging around to store extra bathroom essentials, making your bathroom organization a breeze.

Here are some ideas to get you started:

  • Use small planters to store cotton balls, swabs, and rounds, keeping them within easy reach.
  • Turn old succulent planters into stylish organizers for your makeup and hair brushes.
  • Repurpose flower pots as decorative accents to store bath bombs, soaps, and washcloths.
  • Utilize planters to keep bathroom essentials organized and easily accessible, adding a decorative and practical touch to your bathroom.

Functional Storage Solutions

creative organization for homes

Beyond decorative accents, your old flower pots can also serve as functional storage solutions, providing a creative way to organize and declutter your living and working spaces. You can repurpose small flower pots for seed storage, keeping them organized and easily accessible. They can also make perfect nightstand organizers for storing small items like jewelry or eyeglasses. Additionally, you can turn small flower pots into vanity organizers for makeup brushes or hair accessories.

Functional Storage Solution Description
Seed Storage Keep seeds organized and easily accessible
Desk Organizer Hold utensils, pens, paper clips, or other office supplies
Toy Storage Create a neat and functional space in children's rooms

When repurposing flower pots for storage, ensure proper drainage to prevent water accumulation. You can also use small flower pots for Hose Storage, keeping your outdoor spaces organized. With a little creativity, your old flower pots can become functional storage solutions, making your life easier and more organized.

Artistic Expressions in Clay

creative pottery making process

Clay flower pots offer a versatile canvas for artistic expressions, inviting you to express your creativity through painting, carving, or decoupage. With a little imagination, you can transform an old pot into a unique piece of art that adds a personal touch to your garden decor.

Take an old, worn-out pot and give it a fresh coat of paint to breathe new life into it. You can also upcycle a large planter into a stunning masterpiece that becomes the centerpiece of your outdoor space.

Here are some ways to make your clay pot a one-of-a-kind creation:

Advertisement
  • Carve intricate designs or patterns into the clay to create a textured and visually appealing surface.
  • Decoupage the pot with decorative paper or fabric to add a touch of elegance.
  • Add a protective sealant to your painted design to make sure it withstands the outdoor elements.
  • Experiment with different painting techniques, such as ombre or marbling, to create a truly unique piece of art.

Frequently Asked Questions

What Can I Do With Old Plant Pots?

You're wondering what to do with old plant pots? Well, you've got plenty of options!

You could repurpose them as organizers for keys, utensils, or small items around the house. Or, use them to store bathroom essentials like soaps and washcloths.

You could even turn them into a DIY bird bath or create a unique plant stand.

The possibilities are endless, and with a little creativity, you can give new life to those old pots.

What Can I Do With Leftover Pots?

You're wondering what to do with leftover pots, and you're not alone! You've probably accumulated a few from past plants or gardening projects.

Instead of letting them collect dust, think creatively. You can repurpose them as organizers for small items, seed storage, or even as a nightstand or desk organizer.

Advertisement

Get creative and turn them into something functional and useful, giving new life to what would otherwise be discarded.

How to Upcycle Plant Pots?

As you gaze at the stack of leftover pots, you wonder: how to upcycle plant pots? Instead of letting them collect dust, transform them into functional items that add charm to your space.

You can convert them into organizers, decorative elements, or even outdoor focal points. With a dash of creativity, you can breathe new life into these discarded pots, turning them into unique pieces that showcase your personal style.

How to Decorate a Planter Without Plants?

When you're looking to decorate a planter without plants, you have plenty of creative options. You can fill the planter with decorative rocks, sand, or glass beads for a visually appealing display.

Alternatively, you can add some magic with LED string lights or fairy lights for a whimsical ambiance.

Advertisement

If you want to create a soothing atmosphere, consider adding a small tabletop fountain or water feature.

Conclusion

As you repurpose those flower pots, you're not just giving old items new life – you're cultivating a mindset of resourcefulness and creativity.

Just as a garden blooms with care and attention, your imagination flourishes when nurtured with innovative thinking.

By transforming discarded pots into something new, you're tending to the seeds of ingenuity, allowing your unique perspective to take root and blossom into something truly remarkable.

Advertisement

Continue Reading

Trending