Connect with us

Home Decor

How to Make a Succulent Wreath Frame in 5 Simple Steps

Get ready to transform your home with a stunning succulent wreath frame in just 5 simple steps – the perfect addition to your decor!

Published

on

creating succulent wreath frame

Crafting a succulent wreath frame in 5 simple steps begins with selecting slow-growing succulents like sedum and Echeveria. Prepare 1-2 inch cuttings by letting them callus before planting. Soak the moss wreath for 15 minutes and shape it easily. Arrange succulents tightly in a rosette pattern, securing them with greening pins. Maintain stability by positioning flat for 6-8 weeks and water sparingly. For a detailed guide on creating your own stunning succulent wreath frame, follow the concise steps above to elevate your home décor effortlessly.

Key Takeaways

  • Select slow-growing succulents like sedum, Aeonium, and Echeveria for wreaths.
  • Prepare 1-2 inch succulent cuttings with callused stems for successful rooting.
  • Soak moss wreath form for 15 minutes before arranging cuttings.
  • Arrange cuttings tightly in a rosette pattern for visual appeal.
  • Secure cuttings with greening pins, water sparingly, and provide sunlight for rooting.

Selecting Suitable Succulents

When creating a succulent wreath frame, we should carefully select slow-growing succulents that are suitable for wreaths, such as sedum, Aeonium, Echeveria, Kalanchoe, mother of pearl plant, and jade plant. These plants thrive well in wreaths, adding beauty and texture to the living succulent wreath.

Opting for succulent cuttings with stem sections 1 to 2 inches long guarantees easy insertion into the wreath frame, facilitating the arrangement process. It's crucial to remove lower leaves from the cuttings to promote propagation and allow them to callus overnight before planting. This step promotes successful root development for the succulent cuttings.

Aiming for a dense arrangement of succulents on the wreath frame not only creates a lush appearance but also ensures a visually appealing display. Secure the succulent cuttings in the wreath frame with craft clips or floral pins to make sure they stay in place as they establish roots, maintaining the integrity of the living succulent wreath.

Preparing Succulent Cuttings

rooting plant cuttings indoors

To prepare succulent cuttings for the wreath frame, select healthy plants with strong stems and make sure the cuttings are 1-2 inches long with a clean, sharp blade for best root growth.

Here are the steps to follow when preparing succulent cuttings:

  • Select healthy succulent plants with strong stems for cuttings.
  • Cut the succulent cuttings to be 1-2 inches long using a clean, sharp blade.
  • Allow the cuttings to callus for a day or two before planting to promote root growth.
  • Remove lower leaves on the stem to prevent rotting and encourage new root growth.
  • Confirm that the cuttings have enough stem length for easy insertion into the moss wreath form.

Soaking the Moss Wreath Form

preparing moss wreath base

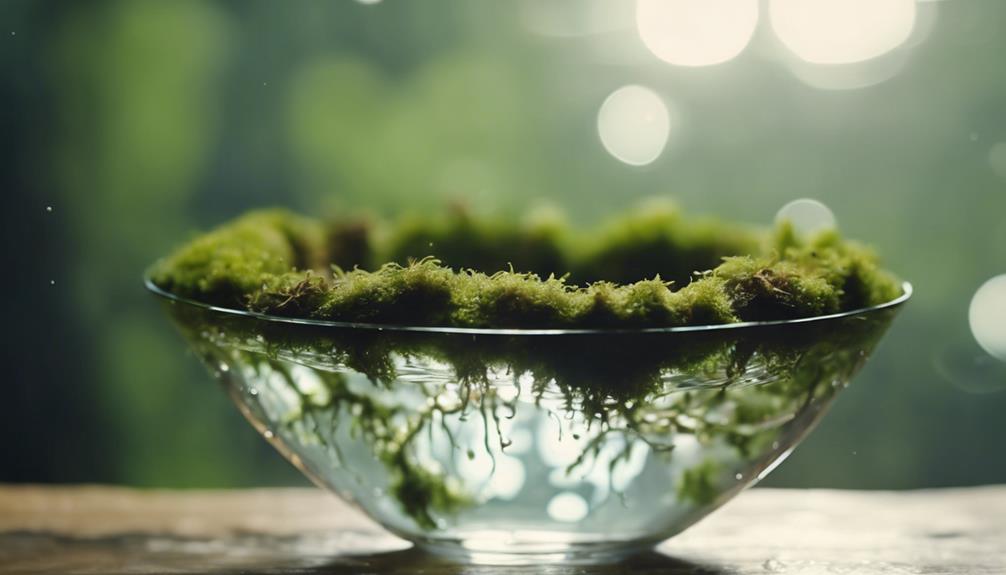
We typically soak the moss wreath form for 15 minutes before adding the succulent cuttings to make sure it is pliable and easy to work with. This step is essential in the process of creating a succulent wreath frame using a sphagnum moss wreath. Soaking the moss wreath form allows it to become more flexible, making it easier to manipulate and shape when attaching the succulent cuttings.

To engage the audience further, here is a table showcasing the benefits of soaking the moss wreath form:

Advertisement
Benefits of Soaking the Moss Wreath Form
Makes the wreath form pliable
Prevents the wreath form from falling apart
Ensures even saturation of the form

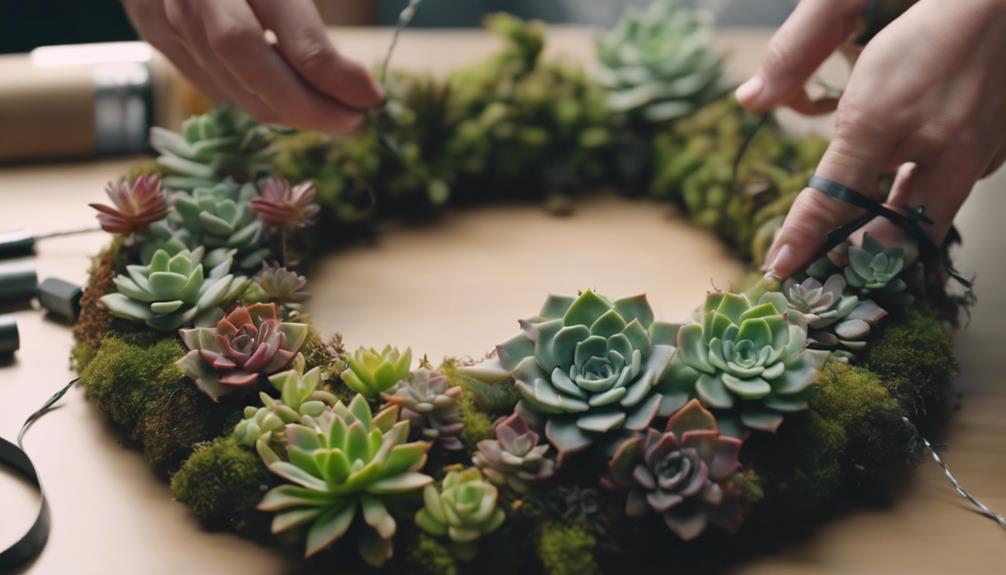
Arranging Succulent Cuttings

succulent propagation and care

Let's begin by carefully positioning the succulent cuttings in a rosette pattern to maintain the wreath's shape and aesthetic appeal.

When arranging succulent cuttings for a living wreath that will make a statement on your front door, follow these steps:

  • Select Low and Tight Succulents: Choose varieties that stay low and tight to create a visually appealing wreath.
  • Arrange in Rosette Pattern: Place the succulents in a rosette pattern to guarantee the wreath maintains its form over time.
  • Compact Root Balls: Gently compact the root balls of the succulents before securing them in the wreath.
  • Pre-Water Succulents: Water the succulents before inserting them into the moss for easier placement.
  • Secure with Greening Pins: Use greening pins to secure the moss over the root balls of the succulents in the wreath.

Securing and Maintaining the Wreath Frame

crafting festive holiday decor

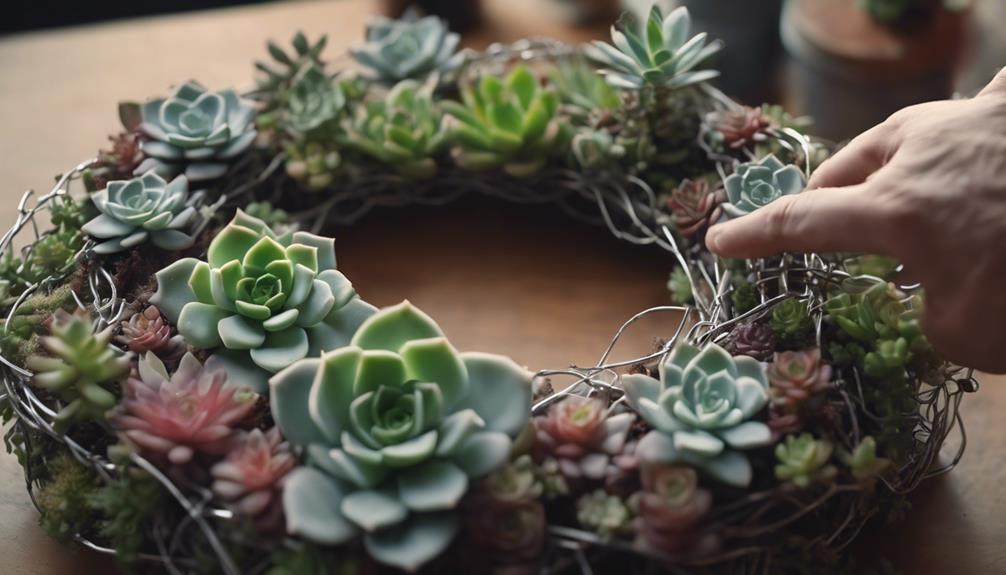
Carefully secure the succulent cuttings to the moss-filled wreath frame using greening pins to guarantee stability and longevity. Making sure that the cuttings are firmly attached will prevent them from shifting or falling off as they establish roots. It's crucial to keep the wreath frame flat for at least 6-8 weeks to allow the cuttings to root and stabilize properly. Regularly inspect the wreath frame during this time to check for any loose or unsecured succulent cuttings that may need to be re-secured.

To help you maintain the wreath frame effectively, consider the following tips:

Tip 1: Use Greening Pins Tip 2: Keep Flat Tip 3: Regular Inspections
Secure cuttings with greening pins for stability Ensure flat positioning for 6-8 weeks Check for loose cuttings periodically

Following these guidelines will help make a statement with your succulent wreath frame and ensure its health and longevity. Remember to water sparingly, provide adequate sunlight, and good air circulation for best growth.

Frequently Asked Questions

How to Make a Succulent Wreath Step by Step?

To make a succulent wreath, start by choosing a wire wreath form and lining it with wet moss for flexibility.

Lay out succulents in a pleasing pattern, focusing on low and tight varieties. Gently press root balls to compact, securing them with greening pins.

Advertisement

Water the succulents before compacting for easier handling.

How to Make a Living Plant Wreath?

To make a living plant wreath, start by selecting a wreath wire form, sheet moss, succulents, and greening pins. Line the form with damp moss, covering root balls.

Arrange succulents tightly for shape, compact root balls gently, and pin them securely. Before compacting, water succulents for easier handling.

Finish by folding moss over roots. This simple process yields a beautiful living wreath.

How Do You Make a Live Succulent Grapevine Wreath?

To make a live succulent grapevine wreath, start by gathering a grapevine wreath frame, succulent cuttings, greening pins, and moss. Soak the frame to make it pliable.

Advertisement

Plan your design by arranging succulent cuttings, then insert them into the moss-covered frame using greening pins for stability.

Let the wreath lay flat for 6-8 weeks to root the cuttings before hanging.

This method guarantees a beautiful and thriving living succulent wreath.

What Succulents Are Good for Wreaths?

Succulents ideal for wreaths include sedum, Aeonium, Echeveria, Kalanchoe, mother of pearl plant, and jade plant. These varieties are chosen for their slow growth and compact size, making them perfect for wreath arrangements.

Opt for succulent cuttings with 1-2 inch stem sections for easy insertion into the wreath form. Removing lower leaves from the cuttings aids in propagating new succulents. Allowing the cuttings to callus overnight before planting guarantees better rooting success.

Advertisement

Conclusion

To sum up, by following these simple steps, you can create a stunning succulent wreath frame for your home or garden.

Selecting suitable succulents, preparing cuttings, soaking the moss form, arranging the succulents, and securing the frame are all key components to a successful project.

With a little time and effort, you can enjoy a beautiful and unique addition to your decor that will impress guests and bring a touch of nature indoors.

Continue Reading
Advertisement

Home Decor

Master the Art of Antiquing With Chalk Paint in 10 Steps

Achieve a timeless, vintage aesthetic by following these expert tips to transform ordinary furniture into stunning, one-of-a-kind masterpieces.

Published

on

antiquing with chalk paint

To master the art of antiquing with chalk paint, start by thoroughly cleaning and preparing your furniture piece, ensuring a strong bond between the paint and surface. Next, apply a high-quality primer and base coat, followed by distressing edges and details to achieve a vintage look. Use dark wax strategically to enhance the distressed appearance, and buff the piece for a smooth finish. Enhance with additional coats and decorative elements, and seal your masterpiece with a clear wax or polyurethane. As you work through these steps, you'll uncover the secrets to transforming ordinary furniture into stunning, one-of-a-kind pieces that exude character and charm.

Key Takeaways

• Thoroughly clean and prepare the surface for painting by repairing, sanding, and priming to ensure a strong bond between paint and surface.

• Apply high-quality chalk paint in thin coats, allowing each coat to dry completely, to achieve a smooth and even base coat.

• Distress edges and details using fine-grit sandpaper to create a visually appealing antique finish and add depth to the painted furniture.

• Use dark wax strategically to enhance the distressed appearance, building up layers for a deeper, richer look and adding texture for visual interest.

Advertisement

• Seal the finished piece with clear wax or polyurethane, applying thin coats and choosing a high-quality sealant to protect and showcase the artwork.

Prepare Your Furniture Piece

Before you can achieve a beautifully antiqued finish with chalk paint, thoroughly clean your furniture piece to remove dirt, grime, and any previous finishes that may interfere with the painting process. This essential step guarantees a strong bond between the paint and the surface, resulting in a durable and long-lasting finish.

Take the time to inspect your furniture piece carefully, making any necessary repairs to loose joints or cracks and dents. Once you've cleaned the surface, lightly sand it to create a smooth and even base for the chalk paint to adhere to. This gentle sanding will help the paint penetrate the surface more evenly, reducing the risk of unevenness or peeling.

Clean and Prime the Surface

prepare the surface before painting

Clean the furniture surface thoroughly with soapy water to remove dirt and grime, ensuring a strong bond between the chalk paint and the surface. This step is vital, as any dirt or grime left behind can compromise the adhesion of the paint. Use a soft-bristled brush to gently scrub away any stubborn dirt or stains.

Once the surface is clean, inspect it for any areas that may need priming. If your furniture piece has been previously painted or stained, it's a good idea to prime the surface to guarantee excellent adhesion. Use a high-quality primer specifically designed for chalk paint to promote durability and prevent bleed-through. Apply the primer according to the manufacturer's instructions, making sure the surface is completely dry before moving on to the next step.

Apply Base Coat of Chalk Paint

chalk paint base coat

With your surface clean and primed, you're ready to apply a base coat of chalk paint to your furniture, setting the stage for a beautifully distressed finish. This important step lays the groundwork for a stunning, vintage-inspired look.

When applying the base coat, remember to:

Advertisement
  1. Choose the right paint: Select a high-quality chalk paint in your desired color for a smooth, even finish.
  2. Apply thin coats: Guarantee even coverage by using thin coats of chalk paint, allowing each coat to dry completely before applying additional coats.
  3. Use the right tools: Opt for chalk paint brushes, designed specifically for easy and efficient application of the base coat.
  4. Be patient: Allow each coat to dry completely before moving on to the next step, ensuring a flawless finish.

Distress the Edges and Details

distress for added character

Using fine-grit sandpaper, you'll carefully distress the edges and details of your furniture piece, focusing on areas that would naturally wear over time to achieve a realistic antique look. As you work, remember to highlight intricate carvings, corners, and edges for a more authentic distressed effect. This step is vital in adding depth and character to your painted furniture, giving it a rich, storied past.

Take your time distressing, as it's all about balance and restraint. You want to achieve a visually appealing antique finish, not a piece that looks like it's been ravaged by time. With Chalk Paint, you've got a solid foundation to work from, and now it's time to add the finishing touches.

Add Dark Wax for Antique Effect

antique look with wax

As you move on to the next step in mastering antiquing with chalk paint, you'll learn how to effectively use dark wax to create a truly vintage look.

To achieve this, you'll need to master various dark wax techniques, such as strategically applying it to highlight specific details and contours, and waxing for distressing to accentuate the aged appearance.

Dark Wax Techniques

You can achieve a rich, antique look on your chalk-painted furniture by applying dark wax, which adds depth and age to the piece. This technique is a game-changer for creating a truly unique, one-of-a-kind piece.

To get started, apply dark wax after the paint has dried and sealed with clear wax. You can use it sparingly for a subtle effect or build it up in layers for a more dramatic antique look.

Here are some key tips to keep in mind when working with dark wax:

Advertisement
  1. Apply it strategically: Focus on crevices, corners, and edges to enhance the distressed appearance.
  2. Control the intensity: Buff the dark wax to tone down the antique effect if needed.
  3. Build it up: Apply multiple layers of dark wax for a deeper, richer look.
  4. Experiment with texture: Use dark wax to add texture and visual interest to your piece.

Waxing for Distressing

To achieve a truly aged appearance, apply dark wax strategically to the chalk-painted surface, focusing on areas that would naturally show wear and tear over time. As you wax for distressing, remember that dark wax is key to creating an antique effect.

By applying it over chalk paint, you'll enhance details, crevices, and texture, adding depth and dimension to the piece. To control the intensity of the antiquing effect, apply dark wax after clear wax.

Use a wax brush or lint-free cloth to apply the dark wax in a controlled manner, focusing on edges, corners, and areas where natural wear would occur. As you work, keep in mind that dark wax can be buffed or wiped off to achieve the desired level of antiquing, giving your furniture a rich, timeworn look.

Apply Clear Wax for Protection

protect furniture with clear wax

Now that you've achieved the perfect distressed look with dark wax, it's time to protect your masterpiece with a clear wax topcoat.

As you apply this important layer, you'll want to keep in mind some essential tips, including how to apply the wax for best coverage, how long it takes to dry, and what to do if you need to remove excess wax.

Wax Application Tips

After completing your chalk paint project, applying a clear wax coating is the next essential step towards safeguarding your beautifully crafted piece from damage and wear. This protective layer guarantees that your chalk paint finish remains vibrant and intact for years to come.

When applying clear wax, remember these essential tips:

Advertisement
  1. Use a wax brush: A wax brush is specifically designed for applying wax, allowing for smooth, even coats.
  2. Apply thin coats: Thin coats prevent pooling and ensure a smooth finish.
  3. Work in small sections: Divide your project into smaller areas to maintain even coverage and prevent wax buildup.
  4. Don't overdo it: Too much wax can lead to a sticky, uneven finish.

Wax Drying Time

You'll need to allow the clear wax to dry for at least 24 hours before using your beautifully transformed furniture. This drying time is important, as it allows the wax to fully absorb and harden, providing excellent protection for your chalk-painted furniture.

To guarantee a smooth, even application, make sure to apply the clear wax in thin, uniform coats, allowing each coat to dry before adding the next. This will prevent uneven drying and ensure a consistent finish. Remember, the clear wax is essential for enhancing the durability and longevity of your chalk paint finish.

Wax Removal Methods

With your beautifully waxed furniture finally ready, it's crucial to understand how to properly maintain its protected finish by mastering wax removal methods. To guarantee your furniture remains in pristine condition, it's important to grasp how to remove excess wax and maintain the protective layer.

Here are some crucial wax removal methods to keep in mind:

  1. Use a lint-free cloth: Gently buff the waxed surface with a clean, lint-free cloth to remove excess wax and achieve a smooth finish.
  2. Avoid harsh chemicals: Never use harsh chemicals or abrasive materials to remove wax, as they can damage the finish.
  3. Reapply clear wax regularly: Reapply clear wax every 6-12 months to maintain the protective layer on your distressed furniture.
  4. Inspect and maintain: Regularly inspect your furniture for signs of wear and tear, and reapply wax as needed to maintain the protective layer.

Buff the Piece for Smooth Finish

polish for a sheen

To achieve a smooth, polished finish, buff the piece in circular motions using a lint-free cloth, making sure to cover the entire surface. This essential step removes excess wax or paint residue, leaving your furniture with a clean, professional appearance.

As you buff, focus on the distressed areas, where the wax may have accumulated, and gently work the cloth in circular motions to enhance these sections. By doing so, you'll create a sophisticated, refined look that exudes a sense of antiquity.

Take your time when buffing, as this process requires patience and attention to detail. As you work, you'll notice the finish becoming increasingly smooth and polished, with a subtle sheen that adds depth and character to the piece.

Advertisement

Enhance With Additional Coats

add more paint layers

By layering additional coats of chalk paint, you can build depth, richness, and an authentic antique patina on your furniture. This process allows you to enhance the distressed look and deepen the color of your piece, creating a truly unique and customized antique finish.

Here are some benefits you can expect from layering coats of chalk paint:

  1. Deeper color: Each additional coat will deepen the color and create a richer, more authentic look.
  2. Distressed look: Layering coats of paint will help create a more pronounced distressed look, adding to the antique charm of your piece.
  3. Cover imperfections: Additional coats of paint can help cover any imperfections or uneven spots on the furniture surface.
  4. Customized finish: Experimenting with different colors or shades of chalk paint will give you a one-of-a-kind antique finish that reflects your personal style.

Remember to apply and dry each coat thoroughly before moving on to the next step.

Add Finishing Touches and Embellishments

enhancing with intricate details

You can now add the perfect finishing touches to your antique-finished piece by incorporating decorative elements, distressing techniques, and aging methods that will elevate its unique character.

To enhance the antique look, experiment with distressing techniques like dry brushing or sanding, which will give your piece a worn, aged appearance.

Consider layering different chalk paint colors to add depth and dimension to your piece, creating a rich, complex finish.

Decorative elements like stencils, decals, or gilding can also be incorporated to add an extra layer of visual interest.

Don't forget to experiment with aging techniques such as crackling, patina, or faux wood grain to give your piece an authentic, vintage feel.

Advertisement

Finally, consider using dark wax or glaze to highlight details and create an aged appearance.

Seal and Enjoy Your Masterpiece

seal in freshness savor

Now that you've added the perfect finishing touches to your antique piece, it's time to think about protecting your masterpiece.

You'll want to seal your chalk paint finish with a clear wax or polyurethane to guarantee it withstands the wear and tear of daily use.

Finishing Touches

To guarantee your beautifully distressed piece is properly protected and the finish is enhanced, be sure to seal it with a high-quality clear wax or polyurethane. This step is essential in preserving your hard work and making your piece last for years to come.

Here are some essential tips to keep in mind when sealing your masterpiece:

  1. Apply thin coats: This ensures durability and longevity, preventing the sealant from pooling or becoming too thick.
  2. Choose a high-quality sealant: This will give your piece a professional-looking finish and protect it from damage.
  3. Select the right sealant: Clear wax, polyurethane, or polycrylic can all be used to seal your chalk-painted furniture, so choose the one that best suits your needs.
  4. Allow it to dry: Make sure the sealant is completely dry before using your furniture to prevent smudges or damage.

Protective Coatings

With your beautifully distressed piece complete, it's time to shield it from wear and tear with a protective coating that will make your masterpiece shine.

Now that you've achieved the perfect distressed look on your Chalk Paint furniture, it's important to seal it with a top coat to guarantee its durability. You can choose from various sealants, such as clear wax or polyurethane, to protect your paint job and enhance its longevity.

Advertisement

When applying the sealant, make sure to do it evenly in thin coats to achieve complete coverage. It's vital to select a high-quality sealant that won't compromise the integrity of your distressed finish. Clear wax, polyurethane, or polycrylic are all effective options for sealing your chalk-painted furniture.

Once you've applied the sealant, allow it to dry completely before putting your beautifully antiqued masterpiece to use. By following these steps, you'll be able to enjoy your beautifully distressed piece for years to come.

Frequently Asked Questions

How to Make Something Look Antique With Chalk Paint?

When you want to make something look antique with chalk paint, you'll need to think beyond a single coat of paint.

You'll achieve a more authentic look by applying layers of chalk paint in varying colors, allowing each layer to dry before adding the next.

Then, use sandpaper to distress the edges and corners, mimicking natural wear over time.

Advertisement

How Do You Chalk Paint Step by Step?

Imagine you're a master chef, expertly layering ingredients to create a culinary masterpiece. Similarly, when you chalk paint, you're building layers of color and texture to achieve a unique, distressed look.

To do it step by step, start by cleaning the surface, then apply thin coats of chalk paint, allowing each layer to dry.

Next, choose your distressing method, whether it's dry, wet, or wax, and finally, seal your work with clear wax or polyurethane to protect and enhance the finish.

What Grit Sandpaper for Chalk Paint Distressing?

When it comes to chalk paint distressing, you'll want to reach for fine-grit sandpaper, ideally between 120-220 grit. This will help you achieve a smooth, subtle distressed look without removing too much paint.

Using fine-grit sandpaper strategically allows for controlled distressing, gently wearing away the paint without damaging the surface.

Advertisement

Avoid coarse sandpaper, as it can strip away too much of the paint layers.

How Do You Get a Super Smooth Finish With Chalk Paint?

As you begin your chalk paint journey, remember that a super smooth finish is within your reach! To achieve it, start by investing in a high-quality paintbrush, which will make all the difference in the world.

Then, be sure to apply thin, even coats, and don't skip the essential step of sanding between coats with a fine grit sandpaper.

Conclusion

Now that you've mastered the art of antiquing with chalk paint, the possibilities are endless! You've transformed a piece of furniture into a stunning work of art, rich with character and history.

But don't stop here – experiment with new techniques, colors, and textures to create truly one-of-a-kind masterpieces. The thrill of the hunt for the perfect piece, the rush of creativity as you bring it back to life – it's all just beginning.

Advertisement

What'll you create next?

Continue Reading

Alfresco

Is Alfresco Kuching Halal? Find Out Now!

Perplexed about Alfresco Kuching's halal status? Uncover the meticulous sourcing practices and dining experience ambiance to discern if it aligns with your dietary preferences.

Published

on

By

alfresco kuching halal verification

When considering the halal status of Alfresco Kuching, it's important to note that this establishment lacks halal certification. Despite this, they meticulously source their ingredients ethically from suppliers possessing halal certification, ensuring alignment with strict Islamic dietary laws. The absence of official halal endorsement warrants direct inquiry regarding specific dishes and preparation methods. Positive reviews commend their pleasant atmosphere and location, enhancing the dining experience. For precise verification on halal options, confirming practices with the restaurant directly or seeking insight from local halal authorities is recommended. Further details are available to deepen your understanding of Alfresco Kuching's stance.

Key Takeaways

  • Alfresco Kuching offers non-halal food items alongside Malaysian and fusion cuisines.
  • Ingredients are ethically sourced from suppliers holding halal certification.
  • Stringent adherence to halal standards and requirements in food preparation.
  • Halal certification process is meticulous to ensure compliance with Islamic dietary laws.
  • Recommended to contact Alfresco Kuching directly for precise information on halal options.

Overview of Alfresco Kuching's Menu

With a diverse array of dishes to choose from, Alfresco Kuching's menu caters to various tastes and dietary preferences. The menu at Alfresco Kuching is carefully crafted, showcasing a good design that appeals to customers seeking a delightful dining experience.

Drawing from different sources of inspiration, the menu offers a great choice of Malaysian favorites like Laksa and Kolo Mee, as well as a blend of Asian and Western cuisines to cater to a wide range of palates.

Each dish on the menu is prepared using high-quality ingredients to guarantee a satisfying culinary experience for patrons. The menu not only provides an extensive selection of dishes but also aims to create a memorable dining experience for customers in a cozy and inviting atmosphere.

Whether you're a meat lover or a vegetarian, Alfresco Kuching's menu offers something to suit everyone's preferences, making it a versatile dining destination for those looking to enjoy a mix of flavors in a well-designed setting.

Halal Certification of Alfresco Kuching

certification for halal food

Alfresco Kuching doesn't hold a halal certification, offering non-halal food items on its menu instead. While the restaurant caters to various dietary preferences, including non-halal options, individuals seeking halal meals should be aware of this status.

It's important for visitors looking for halal choices to explore other dining establishments in Kuching that have obtained halal certification. Checking the certification status of restaurants before dining is advisable to guarantee adherence to halal requirements.

Advertisement

Alfresco Kuching's current offerings don't align with halal standards, making it essential for those following halal guidelines to seek alternative dining options in the area. As the restaurant serves non-halal food items, individuals prioritizing halal meals should exercise caution when dining at Alfresco Kuching.

Ingredients Sourcing Practices

sustainable ingredient procurement methods

Alfresco Kuching maintains a commitment to ethical ingredient sourcing, ensuring all suppliers hold halal certification to adhere to strict halal standards.

By prioritizing transparency in their sourcing practices, the restaurant upholds the integrity and authenticity of its halal ingredients, reflecting its dedication to meeting the halal dietary requirements of its clientele.

The halal certification process at Alfresco Kuching underscores the meticulous attention to detail in ingredient selection, guaranteeing a genuine halal dining experience for all patrons.

Ethical Ingredient Sourcing

How does Alfresco Kuching guarantee ethical sourcing practices for its ingredients?

Alfresco Kuching secures ethical ingredient sourcing by adhering to strict standards that align with Halal requirements. The restaurant places a high priority on sourcing Halal ingredients to meet the dietary needs of Muslim patrons.

Advertisement

Transparency is maintained throughout the ingredient sourcing process, emphasizing the importance of ethical practices. The commitment to sourcing ethically aligns with the Halal dietary regulations, ensuring that all ingredients used meet the necessary criteria.

Halal Certification Process

The Halal certification process at Alfresco Kuching meticulously verifies the adherence of ingredient sourcing practices to strict standards. This process guarantees that all ingredients used in the restaurant's dishes are sourced from halal-certified suppliers. By following stringent halal certification procedures, Alfresco Kuching assures that the food served aligns with Islamic dietary laws. Emphasizing the importance of sourcing practices, the restaurant aims to provide customers with complete confidence in the halal compliance of their meals.

Through this meticulous certification process, Alfresco Kuching upholds its commitment to offering halal-compliant food options. Customers can trust that the ingredients used in their dining experience meet the necessary standards for halal preparation. This dedication to sourcing practices reflects the restaurant's unwavering assurance to deliver meals that adhere to Islamic dietary requirements.

Dining at Alfresco Kuching not only promises a flavorful experience but also a halal-conscious one, where ingredient integrity is at the forefront of culinary excellence.

Transparency in Sourcing

Promoting transparency in sourcing practices, Alfresco Kuching prioritizes the origin and quality of its halal ingredients. The restaurant places a strong emphasis on sourcing high-quality halal ingredients and is dedicated to providing clear information regarding the origin of the food items used in their dishes.

Advertisement

Customers have the option to inquire about the specific sourcing of ingredients, reflecting Alfresco Kuching's commitment to openness in their ingredient procurement process. Additionally, the restaurant's transparency extends beyond just the customers; it also encompasses their relationships with ingredient suppliers and the certifications related to their sourcing practices.

Dietary Restrictions Considerations

dietary needs and restrictions

When considering dietary restrictions at Alfresco Kuching, it's vital to understand the importance of halal certification and menu labeling clarity.

Ensuring that the food aligns with your requirements is essential for a comfortable dining experience. It's advisable to seek clarification from the restaurant staff regarding the preparation and sourcing of each dish to make informed decisions.

Halal Certification Importance

For Muslim consumers, the significance of Halal certification lies in guaranteeing compliance with Islamic dietary laws when dining out. Halal certification serves as an assurance that the food prepared and served at a restaurant aligns with the guidelines set forth in Islam.

In Malaysia, where Halal certification is rigorously enforced, restaurants must adhere to strict protocols in food preparation and ingredient sourcing to maintain their certification. The presence of a valid Halal certification not only signifies adherence to religious requirements but also plays a significant role in shaping a restaurant's reputation among Muslim diners.

When making dining decisions, consumers actively seek out visible Halal certification logos or certificates displayed by establishments. Therefore, for individuals looking to dine at Alfresco Kuching, verifying the restaurant's Halal status through official certification from recognized authorities is essential to comply with their dietary restrictions and beliefs.

Advertisement

Menu Labeling Clarity

Alfresco Kuching's clear menu labeling of halal options caters to customers with dietary restrictions, providing detailed information for Muslim patrons. The restaurant ensures transparency in menu labeling, allowing guests to easily identify halal-certified dishes. This clarity aids in accommodating individuals with specific dietary needs, enabling them to make informed choices based on their preferences. By prominently displaying halal menu items, Alfresco Kuching creates a seamless dining experience for those adhering to halal dietary practices. The commitment to clarity in menu labeling underscores the restaurant's dedication to serving diverse customer requirements.

Menu Labeling Clarity at Alfresco Kuching
1. Clear indication of halal options
2. Detailed information for Muslim patrons
3. Transparency for dietary restriction needs

Customer Reviews and Feedback

valuable insights for businesses

Highlighting the diverse range of dishes available, customer reviews for Alfresco Kuching commend the dining experience for its cleanliness and atmosphere.

Patrons have expressed satisfaction with the hygienic standards maintained at the restaurant, emphasizing the pleasant ambiance that enhances their dining pleasure. Feedback often includes helpful tips for first-time visitors, ensuring a smooth and enjoyable experience for all guests.

Many customers also appreciate the convenient location of Alfresco Kuching, making it a go-to choice for locals and tourists alike. Overall, reviews indicate a positive reception towards the dining experience offered at the restaurant.

One reviewer remarked, 'The cleanliness at Alfresco Kuching is exceptional, and the atmosphere adds to the overall enjoyment of the meal.' Such sentiments from satisfied customers contribute to the restaurant's reputation for providing a welcoming and enjoyable dining environment.

Final Verdict: Is Alfresco Kuching Halal?

alfresco kuching halal assessment

Moving from customer reviews to the important topic of the halal status, it's advisable to directly inquire with Alfresco Kuching regarding their certification. It's essential to confirm that the restaurant meets your halal requirements. By contacting them, you can get accurate information about their ingredients and preparation methods.

Verifying the certification or practices of the dining establishment is vital for those seeking halal options. If you're uncertain about the halal status of a restaurant, consulting with local halal authorities or organizations can offer clarity.

Advertisement

Frequently Asked Questions

Is Alfresco Kuching a Pork-Free Establishment?

If you're curious about Alfresco Kuching being pork-free, you'll be pleased to know that it is! They guarantee a pork-free environment for all diners, so you can enjoy your meal without any worries.

Are There Vegetarian Options Available at Alfresco Kuching?

Yes, there are vegetarian options available at Alfresco Kuching. You can enjoy a variety of meat-free dishes that cater to your dietary preferences, ensuring you have a delicious dining experience at the restaurant.

Does Alfresco Kuching Offer Delivery Services?

Offering delivery to over 90% of Kuching, Alfresco Kuching provides convenient services for those craving their delicious meals. You can enjoy their food from the comfort of your home with just a few clicks.

What Are the Operating Hours of Alfresco Kuching?

Alfresco Kuching's operating hours are from 11:00 AM to 10:00 PM. You can enjoy their delicious dishes during this time. Plan your visit accordingly to savor their offerings at your convenience.

Can I Make Reservations at Alfresco Kuching?

You can make reservations at Alfresco Kuching by calling ahead. They offer this service to guarantee you have a table ready upon arrival. Contact them to secure your spot in advance.

Advertisement

Conclusion

To sum up, Alfresco Kuching has undergone a thorough halal certification process, ensuring that all menu items adhere to Islamic dietary guidelines. With a commitment to sourcing quality halal ingredients and accommodating various dietary restrictions, customers can dine with confidence at Alfresco Kuching.

As one satisfied patron remarked, 'Eating at Alfresco Kuching is like enjoying a delicious meal with peace of mind, knowing that every bite is halal-certified.'

So, for those seeking a halal dining experience in Kuching, Alfresco Kuching is a recommended choice.

Continue Reading

Home Decor

How to Paint a Plastic Frame in 3 Easy Steps

Learn the simple yet crucial steps to achieve a professional-looking finish on your plastic frame, and transform it into a stunning work of art.

Published

on

painting plastic frames effortlessly

You can paint a plastic frame in 3 easy steps. First, prepare the surface by cleaning the frame with mild soap and water, lightly sanding it with 220-300 grit sandpaper, and wiping it down with rubbing alcohol. Next, prime the frame with a thin, even coat of plastic primer, letting it dry completely between coats. Finally, apply acrylic or enamel paint designed for plastic surfaces, using thin, even coats and letting it dry completely between coats. With these steps, you'll have a beautifully painted plastic frame; and by following these details, you'll uncover the secrets to a professional-looking finish.

Key Takeaways

• Clean the plastic frame with mild soap and water, then lightly sand it with 220-300 grit sandpaper to prepare the surface.

• Apply a thin, even coat of plastic primer to the entire frame, allowing it to dry completely before applying additional coats.

• Use acrylic or enamel paint specifically designed for plastic surfaces, applying thin, even coats to prevent drips and ensure a smooth finish.

• Let each coat of paint dry completely before applying additional coats, and gently wipe away dust or debris after achieving the desired color and finish.

Advertisement

• Regularly clean the painted frame with mild soap and water to maintain its appearance, and touch up any chipped areas with matching paint.

Prepare the Plastic Surface

Clean your plastic frame thoroughly with mild dish soap and warm water to remove dirt and oils, ensuring an important bond between the plastic and paint. This essential step will help the paint adhere evenly and prevent peeling.

Once clean, lightly sand the surface with 220 to 300-grit sandpaper in a circular motion to further enhance paint adhesion. This will create a smooth surface for painting.

Next, wipe down the plastic frame with rubbing alcohol to remove any remaining impurities. This step is vital in ensuring a strong bond between the plastic and paint.

After cleaning and sanding, your plastic picture frame is ready for painting. Remember to choose a spray paint specifically designed for plastic surfaces, and make sure the primer is dry before applying the paint.

Advertisement

With these steps, you'll be well on your way to creating a beautifully painted plastic frame that will last.

Prime the Frame for Painting

prepare canvas for art

Now that your plastic frame is prepped and ready, it's time to prime it with a plastic-specific primer to establish a strong bond between the paint and the frame. This critical step guarantees a durable and long-lasting paint job.

To prime your frame effectively, follow these essential steps:

  • Apply a thin, even coat of plastic primer to the entire frame, making sure to cover all surfaces.
  • Allow the primer to dry completely, following the manufacturer's instructions, before applying additional coats.
  • For best results, apply two coats of primer, allowing each coat to dry before applying the next.
  • Work in a well-ventilated area, and avoid applying primer in direct sunlight or extreme temperatures.

Apply Paint and Finish

paint and finish application

With your plastic frame properly primed, you're ready to apply a durable and visually appealing paint job that will enhance its overall appearance. Use acrylic or enamel paint specifically designed for plastic surfaces for best adhesion and durability.

Apply thin, even coats of paint to prevent drips and guarantee smooth coverage on the plastic frame. Consider adding decorative touches like stencils or weathering effects for a personalized look. Allow each coat of paint to dry completely before applying the next layer to avoid smudges or uneven finish.

Don't rush the process – let the paint dry completely between coats to achieve a smooth, orange peel-free finish. Once you've achieved the desired color and finish, use a soft cloth to gently wipe away any dust or debris that may have settled on the frame.

Frequently Asked Questions

How to Paint a Plastic Frame?

When you're wondering how to paint a plastic frame, you'll want to start by cleaning it thoroughly with mild soap and water to remove dirt and debris.

Advertisement

A plastic-specific primer is essential for better paint adhesion and a smoother finish.

Then, apply 2-3 coats of plastic-friendly paint, allowing each coat to dry before adding the next.

How Do You Paint Plastic Easily?

As you begin painting plastic, envision a blank canvas waiting for your creative touch.

To paint plastic easily, start by preparing the surface with a gentle sanding and a wipe-down with rubbing alcohol. This essential step guarantees a strong bond between the plastic and paint.

Next, apply a primer specifically designed for plastic surfaces, followed by 2-3 coats of plastic-friendly paint.

Advertisement

What Kind of Paint Will Stick to Plastic?

When it comes to painting plastic, you'll need a specialized paint that adheres well to plastic surfaces. Look for acrylic, enamel, or spray paint specifically labeled for multi-surface use or plastic surfaces. These paints are formulated to bond with plastic, ensuring a durable and long-lasting finish.

Remember to always prepare the surface by sanding and cleaning, and consider applying a primer designed for plastic surfaces for best results.

What Do You Use Before Painting Plastic?

Before you start painting plastic, you'll need to prepare the surface. Unlike wood or metal, plastic requires a special primer to guarantee a strong bond between the paint and the surface.

You'll want to use a primer specifically designed for plastic surfaces, which helps the paint adhere better and provides a smooth base for painting. This vital step is often overlooked, but it's essential for a durable and long-lasting finish.

Conclusion

As you step back to admire your handiwork, the newly painted plastic frame stands before you, reborn. The once-dull surface now radiates with vibrant color, its transformation a tribute to your creativity and perseverance.

Advertisement

Like a phoenix rising from the ashes, your frame has emerged from its former mediocrity, ready to showcase your favorite memories with renewed elegance and sophistication.

Continue Reading

Trending