Connect with us

Home Decor

10 Steps to Make Impressive Decor From Thrift Store Finds

Inventive ways to transform thrift store treasures into stunning decor pieces will inspire your creative side and elevate your space.

Published

on

decorating with thrift store items

Craft an impressive decor scheme using thrift store gems by making a strategic shopping list, picturing how items fit into your space, and revitalizing finds through proper cleaning and repurposing. Experiment with mixing various textures, heights, and styles to create visual interest, and group items in odd numbers for an aesthetically pleasing display. Don't shy away from taking decorating risks and diving into refinish and DIY projects. Blend thrifted treasures seamlessly into your decor, create cozy nooks, and explore unconventional ways to showcase your unique style. Embrace the challenge of crafting a standout decor collection while staying budget-friendly.

Key Takeaways

  • Clean and repurpose thrifted items for a fresh look.
  • Mix textures, heights, and styles for visual interest.
  • Group and display creatively for a unique decor arrangement.
  • Embrace unconventional decor choices for a standout design.
  • Experiment with bold colors to add flair and excitement.

Make a Thrift Store Shopping List

Let's kick off our thrift store decor journey by drafting a strategic shopping list.

When creating our thrift store shopping list, it's crucial to focus on versatile and timeless decor items that can seamlessly blend into our existing space. Prioritizing these versatile pieces guarantees that they can adapt to different styles and layouts, providing long-term value.

To make the most of our thrift store finds, we should include specific measurements or specifications for furniture and decor items on our list. This step helps us avoid purchasing items that won't fit or complement our space.

Additionally, researching current thrift store trends can guide our choices, ensuring our decor remains stylish and on-point.

Considering any DIY projects or upcycling opportunities when crafting our thrift store shopping list can open up a world of creative possibilities.

Advertisement

Visualize Items in Your Space

arrange items for harmony

When visualizing items from our thrift store shopping list in our space, it's important to take into account the size, color, and style to make sure they seamlessly blend with our existing decor.

Here are some practical steps to help you visualize the thrifted items in your space:

  1. Utilize a Room Layout Tool: Use a room layout tool or physically move the thrifted items around to see how they interact with your current decor. This will give you a better idea of where each piece should be placed.
  2. Measurements Matter: Take precise measurements of both your space and the thrifted items. Ensuring a proper fit is essential for creating a cohesive look in your room.
  3. Experiment with Arrangements: Try out different arrangements and placements to find the most visually appealing display. Don't be afraid to mix and match until you find the perfect setup.
  4. Consider Lighting: Visualize how natural light and shadows will affect the thrifted items in your space. This will help you determine the best placement for each item to enhance its visual impact.

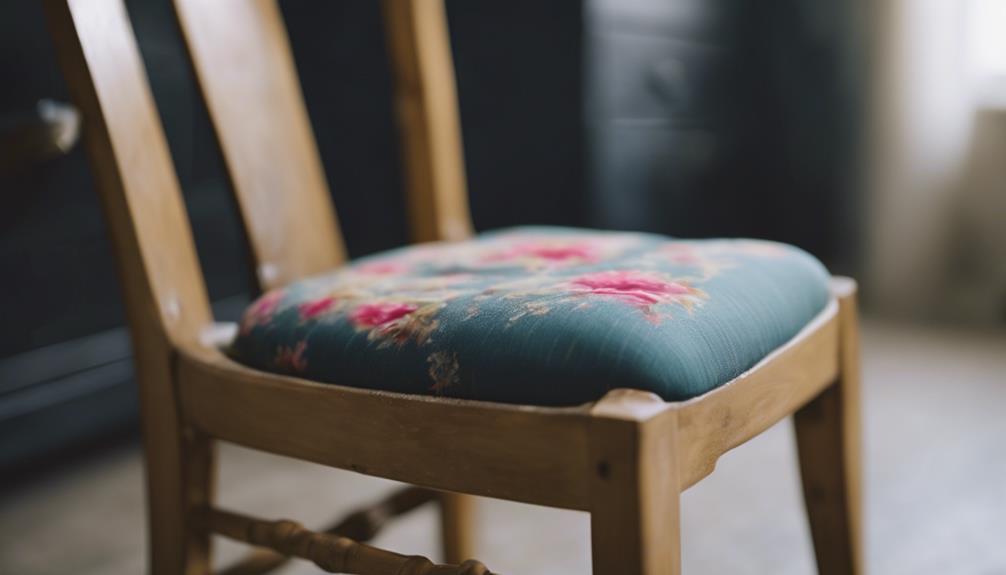
Clean and Repurpose Finds

reusing found objects creatively

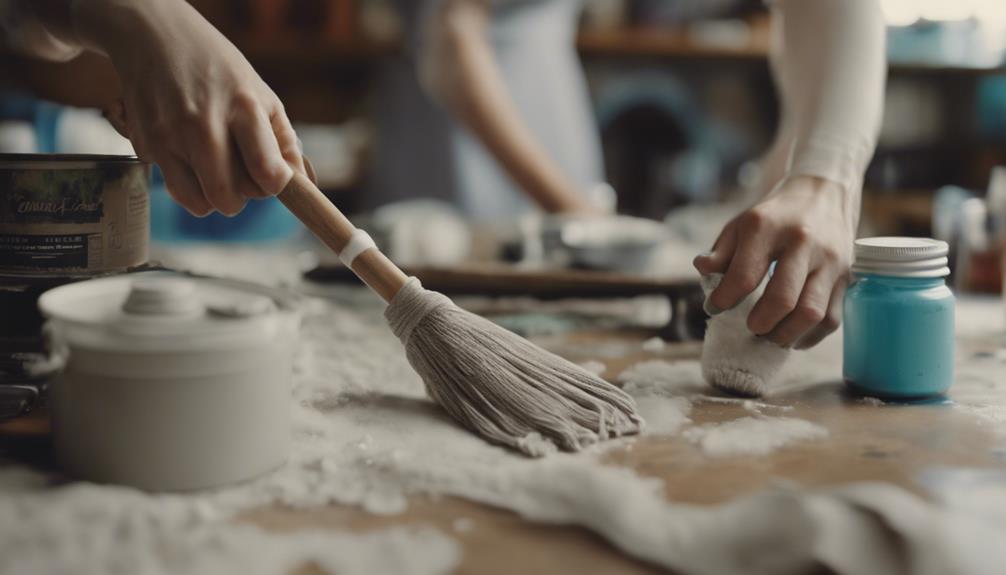
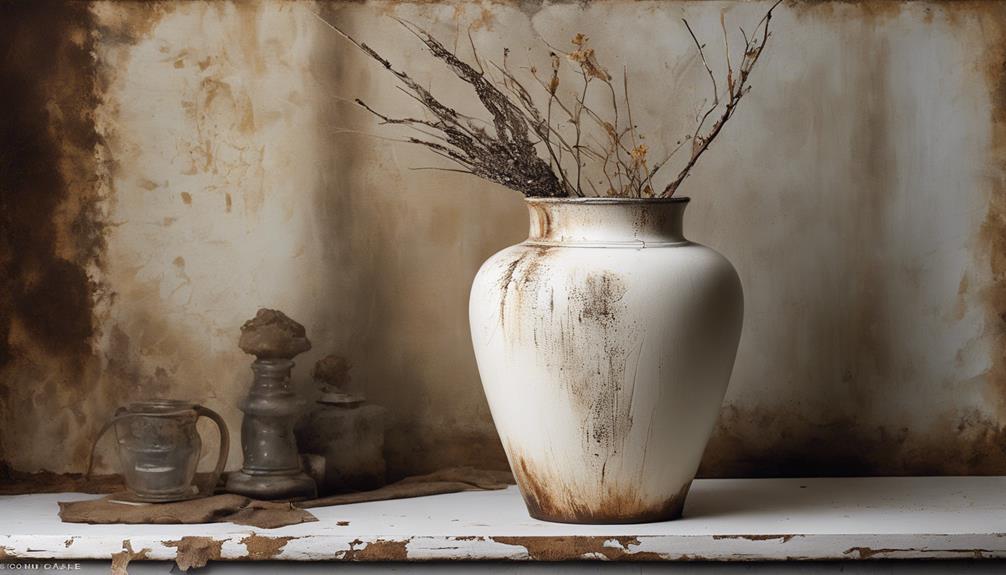
Thoroughly cleaning and creatively repurposing thrift store finds is essential to transforming them into unique decor pieces for our home. When we bring items from a thrift store into our living space, ensuring they're thoroughly cleaned is the first step towards a fresh start. Different materials require specific cleaning methods to remove dirt, dust, and any lingering odors.

Once cleaned, we can explore various ways to repurpose these treasures. Refinishing or painting furniture can give it a new lease on life while aligning with our home decor style. DIY techniques such as decoupage, stenciling, or distressing offer opportunities to customize thrifted items and make them truly stand out.

Upcycling old items into functional decor pieces is another fantastic option, like transforming a vintage ladder into a unique bookshelf or repurposing a wooden crate as a rustic storage solution. By cleaning and creatively repurposing thrift store finds, we can turn them into impressive additions to our home decor.

Mix Textures, Heights, Styles

blend textures heights styles

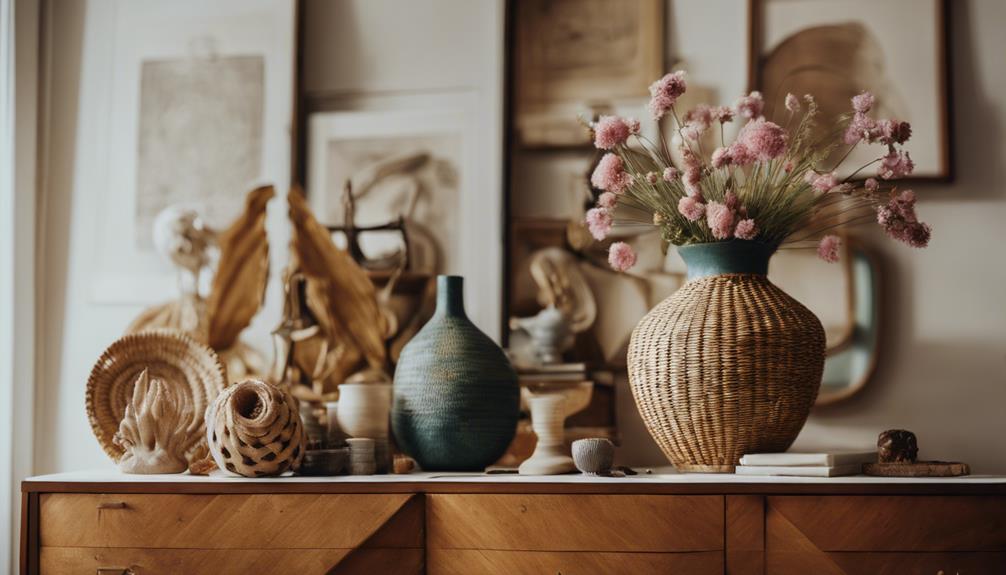
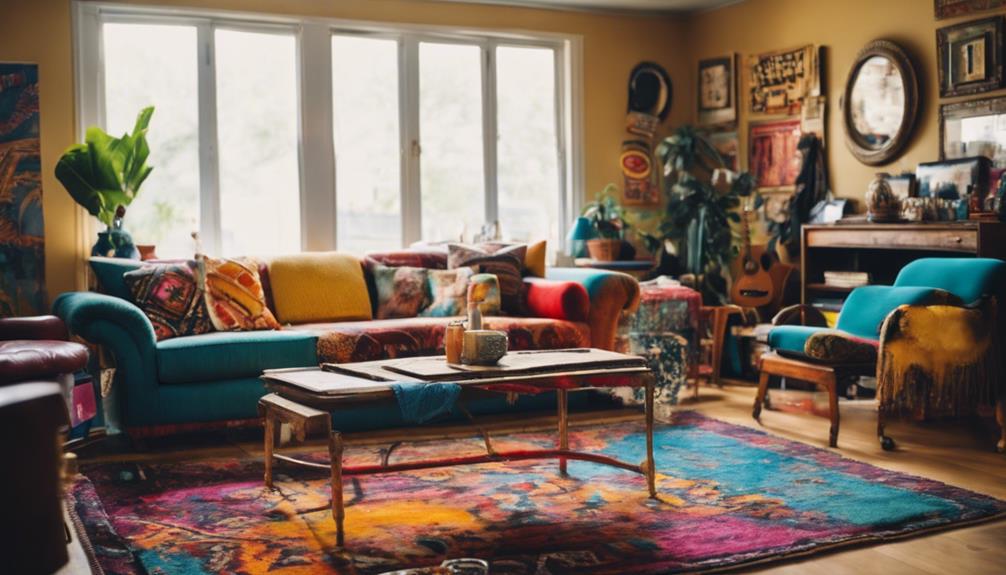
Mixing textures, heights, and styles is key to creating a visually engaging and dynamic decor scheme in your home. When decorating with thrifted items, it's important to mix textures, vary heights, combine styles, and experiment with materials to achieve a cohesive and interesting look.

Here's how to achieve this:

  1. Mix Textures: Incorporate a blend of smooth glass, rough wood, and soft fabric to add visual interest and depth to your decor.
  2. Vary Heights: Use tall vases, medium-sized candle holders, and low bowls to create a dynamic display that draws the eye in different directions.
  3. Combine Styles: Mix modern, vintage, and bohemian elements to achieve a unique and eclectic look that reflects your personal style.
  4. Experiment with Materials: Try integrating metal, ceramic, and wicker pieces to add dimension and variety to your decor.

Remember to also incorporate patterns, colors, and finishes to create a harmonious mix that ties all these elements together seamlessly.

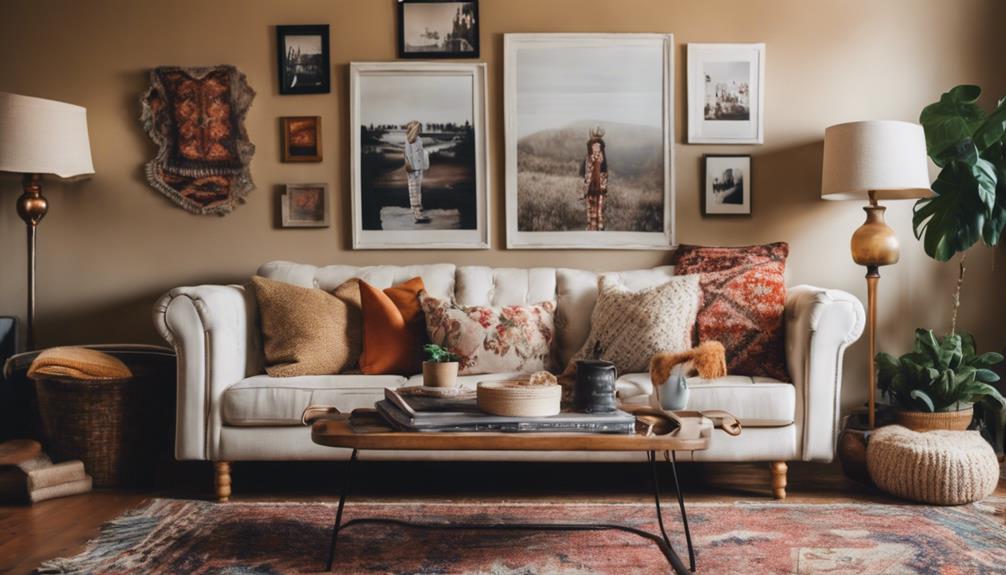
Group Items in Odd Numbers

odd number organization method

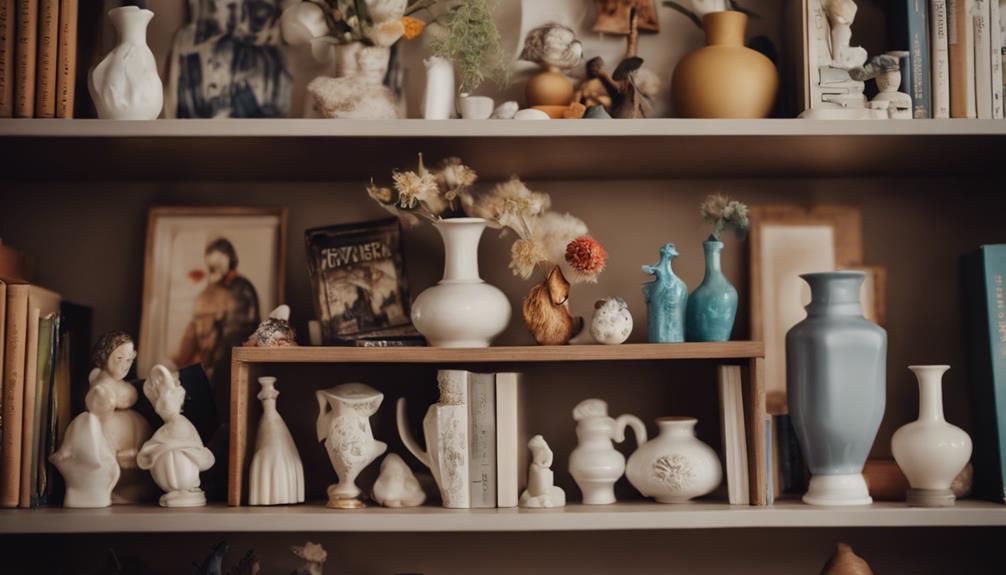
When styling your decor, remember that grouping items in odd numbers, like 3 or 5, can make a big impact. This technique adds balance and visual interest to your arrangements.

Odd Numbers for Impact

Grouping decor items in odd numbers is a simple yet effective way to create visual impact and enhance the overall aesthetic appeal of your space. When arranging thrift store finds, consider using odd-numbered groupings to achieve a balanced and harmonious display. Here are some reasons why odd numbers can make a significant impact:

Advertisement
  • Dynamic Arrangements: Odd-numbered groupings, such as sets of 3, 5, or 7 items, are more visually pleasing and dynamic compared to even-numbered arrangements. They catch the eye and add interest to your decor.
  • Balanced Display: Utilizing odd numbers helps establish a sense of balance in your arrangements. It ensures that the elements in your decor are distributed evenly, creating a cohesive look.
  • Harmonious Visual Appeal: Odd-numbered groupings add a sense of rhythm and flow to your decor, making the overall display more harmonious and engaging.
  • Focal Points: By incorporating odd numbers, you can create focal points in your decor that draw attention and create visual interest throughout your space.

Balance in Arrangement

To achieve a balanced and visually appealing decor arrangement, consider organizing thrifted items in odd numbers. Grouping items in sets of 3 or 5 can create visual interest and harmony in your space. This interior decorating technique adds a dynamic touch to your decor arrangement, compared to even-numbered groupings. Odd-numbered groupings bring a sense of balance and variety, enhancing the overall look of your thrifted decor. When arranging these items, place larger pieces in the center and smaller ones on the sides for a well-balanced display. Experiment with different combinations to find the right mix that resonates with your style. The table below provides a quick guide on how to achieve balance and harmony by grouping thrifted items in odd numbers:

Thrifted Decor Arrangement Tips
Group items in odd numbers
Place larger pieces in the center
Experiment with different combinations
Create visual interest and balance
Add harmony to your decor arrangement

Visual Interest Techniques

Creating visual interest in decor arrangements can be effectively achieved by grouping thrifted items in odd numbers. This technique adds a dynamic and enthralling element to your space, making it more visually appealing and balanced.

Here are four ways odd numbers can enhance your decor:

  1. Balance and Harmony: Grouping items in odd numbers, such as 3 or 5, creates a sense of balance and harmony in your arrangements.
  2. Organic Feel: Odd-numbered groupings of items provide a more organic and natural look to your decor, avoiding a static or overly symmetrical appearance.
  3. Focal Point: Placing odd-numbered groupings strategically draws the eye and serves as a focal point in the room, creating visual intrigue.
  4. Enhanced Aesthetic: Utilizing odd numbers in your decor compositions is a simple yet effective design principle that can elevate the overall aesthetic of your space, making it more inviting and engaging.

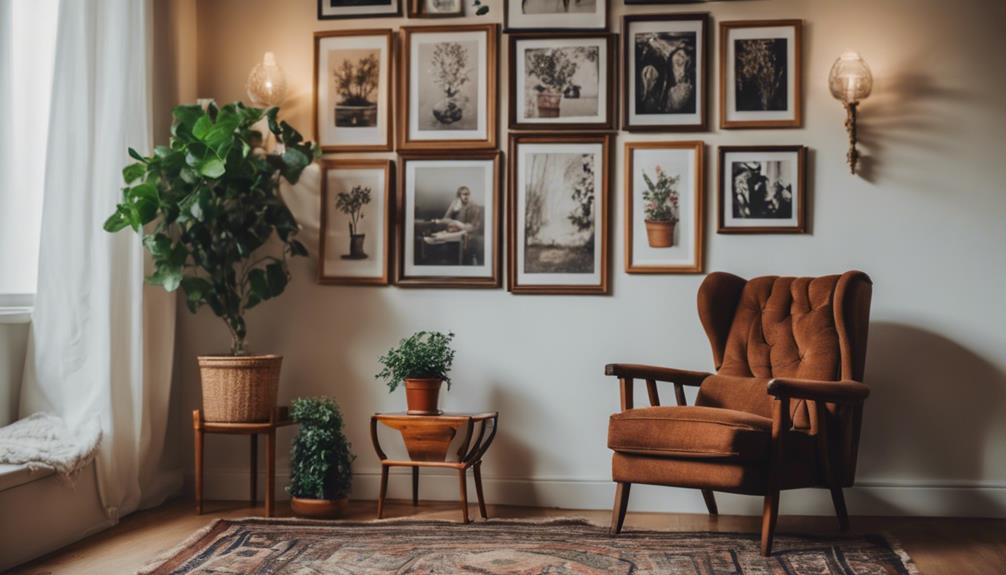
Embrace Unique Thrifted Decor

embrace unique secondhand treasures

Let's fully embrace the charm and character that unique thrifted decor brings to our living spaces.

Embracing thrifted decor allows us to showcase our individuality by incorporating items with imperfections and quirks, creating an eclectic and personalized atmosphere.

These distinctive pieces tell stories and add a sense of history to our homes, making them stand out in a sea of mass-produced items.

Take Decorating Risks

bold decorating choices encouraged

When decorating with thrifted finds, we encourage embracing unconventional decor pieces, experimenting with bold colors, and mixing and matching styles to create a unique and eclectic space.

By taking decorating risks, such as repurposing items in creative ways or incorporating unexpected elements, you can add personality and character to your home.

Advertisement

Don't be afraid to step out of your comfort zone and let your individuality shine through in your decor choices.

Embrace Unconventional Decor

We can elevate our decor by daring to incorporate unexpected and bold thrift store finds. When embracing unconventional decor, we open the door to a world of creativity and personality in our living spaces. Here are some tips to help you achieve a unique and eclectic look:

  1. Mix Styles and Eras: Blend vintage pieces with modern elements for a dynamic and interesting decor scheme.
  2. Bold Colors and Patterns: Don't shy away from vibrant hues or eye-catching patterns that can make a statement in any room.
  3. Upcycle Thrifted Items: Get creative with repurposing thrift store finds to add a touch of originality to your decor.
  4. Incorporate Quirky Accessories: Consider adding unique and eclectic pieces like vintage signage or industrial accents to infuse character into your space.

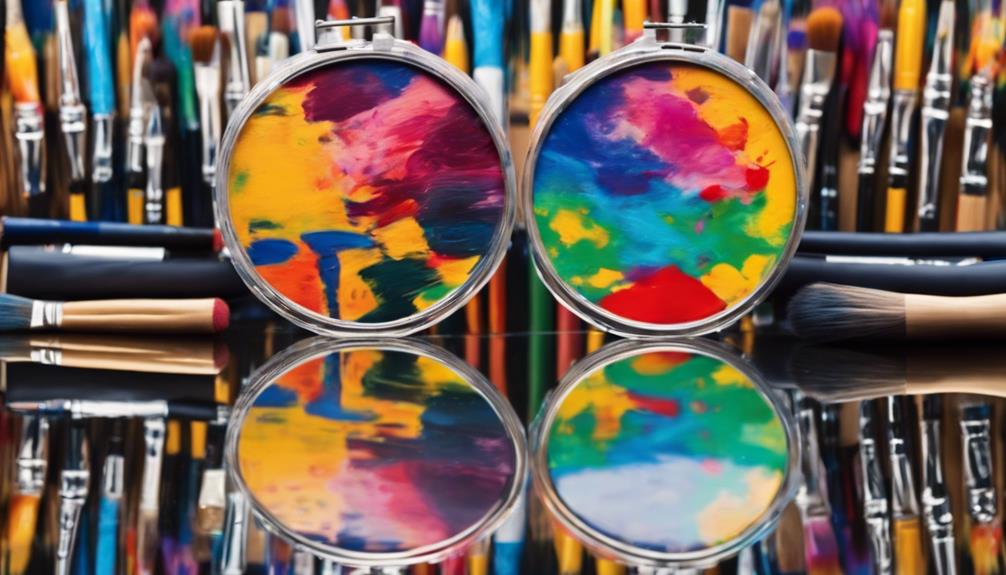
Experiment With Bold Colors

Embracing bold colors in decor allows for a daring exploration of vibrant hues that can transform thrifted finds into standout pieces. When decorating with thrift store items, experimenting with bold colors can breathe new life into your space. Consider incorporating eye-catching shades like emerald green, mustard yellow, or royal blue to add a pop of personality and make your thrifted treasures truly stand out.

Mixing and matching different color combinations is key to creating a visually striking and eclectic look. Don't shy away from painting thrifted furniture or accent pieces in bold colors to create statement pieces that spark conversation. Taking risks with bold colors can inject excitement and flair into your home decor, making your space feel unique and personalized.

Next time you go thrift shopping, keep an eye out for items that could be transformed with a fresh coat of paint in a bold, unexpected hue. With a little creativity and a willingness to step out of your comfort zone, your thrift store decor can become a reflection of your individual style and taste.

Mix and Match Styles

Exploring the art of mixing and matching styles in decor can lead to exciting and unexpected design outcomes. When combining vintage and modern elements, you create a dynamic space that showcases your eclectic charm.

Advertisement

To achieve this look, consider the following:

  1. Mixing Styles: Blend vintage pieces with modern furniture to add a unique touch to your decor.
  2. Bold Colors: Dare to use vibrant hues to make a statement and add personality to the space.
  3. Patterns: Incorporate different patterns like stripes, florals, or geometric shapes to create visual interest.
  4. Unusual Pieces: Don't shy away from incorporating quirky or unusual thrift store finds to bring individuality to your design.

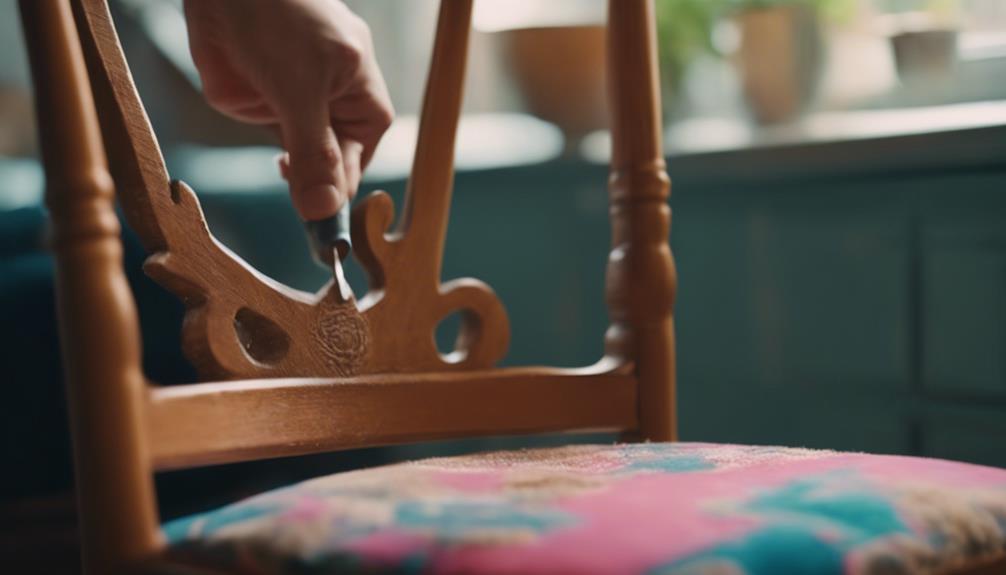
Refinish and DIY Projects

home improvement and creativity

Our thrift store decor truly shines when we immerse ourselves and get involved in refinishing and DIY projects. Refinishing thrifted furniture not only gives it a fresh and modern look but also extends its lifespan, making it a sustainable choice for home decor.

DIY projects with thrifted items offer the opportunity for customization and personalization, allowing you to tailor pieces to fit your unique style. Upcycling thrift store finds through repurposing, painting, reupholstering, or refinishing can transform them into one-of-a-kind statement pieces that add character to your space.

These creative endeavors aren't only fun and fulfilling but also budget-friendly ways to enhance your home decor without breaking the bank. By investing time and effort into these projects, you can breathe new life into thrifted items, creating a cohesive and impressive decor aesthetic that reflects your personality and creativity.

Incorporate Finds Into Decor

incorporate nature into decor

Let's enhance our decor by seamlessly blending thrift store finds with modern pieces for a unique and eclectic aesthetic.

When incorporating thrift store finds into your decor, consider the following:

  1. Group Similar Items: Arrange thrifted items in clusters to create visual interest and cohesiveness in your space.
  2. Seasonal Switch-Ups: Use thrifted items to refresh your decor with each season, injecting a touch of novelty into your home.
  3. Mix Textures and Styles: Combine different textures, heights, and styles of thrift store finds to craft a visually dynamic decor that stands out.
  4. Embrace Uniqueness: Take risks by embracing the unique qualities of thrifted decor. Let these pieces add character and personality to your living space, making it truly your own.

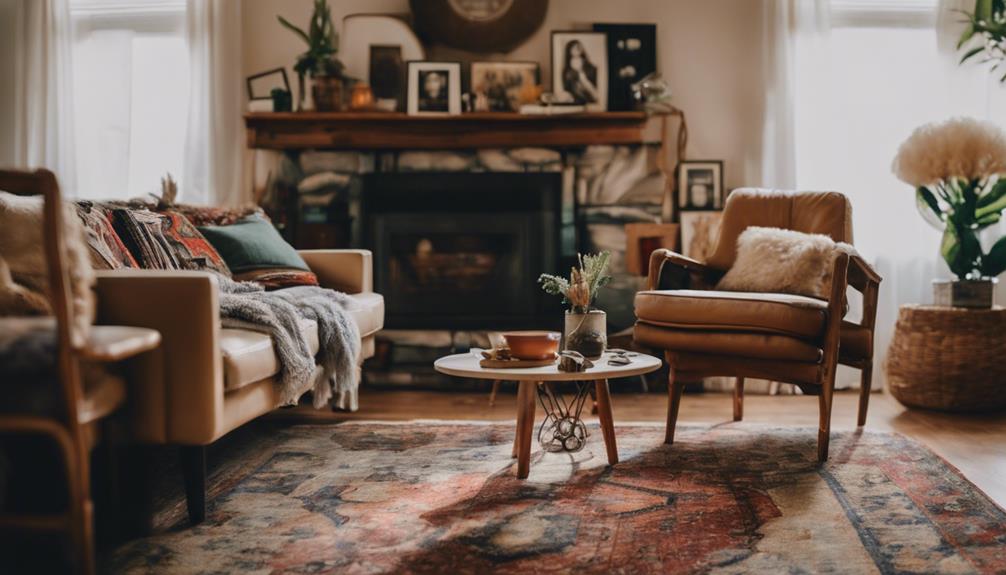
Display and Create Cozy Spaces

design cozy and inviting spaces

Let's talk about how to turn those cozy corners into stylish retreats with thrifted finds. By mixing vintage treasures with modern pieces, you can create a decor that's truly one-of-a-kind and reflects your personal taste.

Enhance the warmth and comfort of your home by strategically placing thrifted items like books, frames, and linens to craft inviting spaces where you can unwind.

Advertisement

Cozy Corners With Style

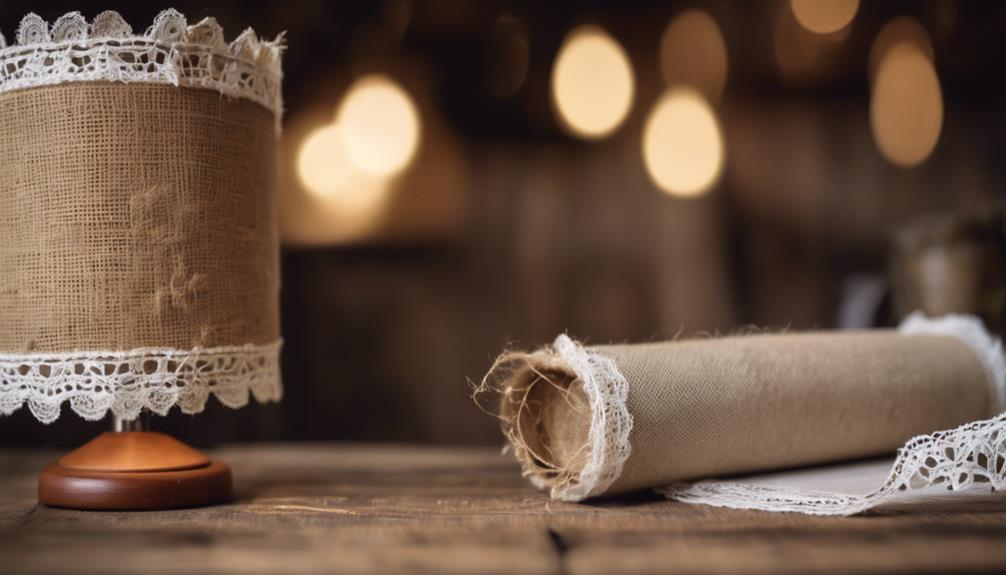
Creating cozy corners with style involves incorporating thrifted items like plush throw blankets, vintage pillows, and unique accent chairs. To achieve a warm and inviting atmosphere, consider the following:

  1. Cozy Rugs: Lay down a soft, thrifted rug to define the space and add comfort underfoot.
  2. Floor Cushions: Mix in some thrifted floor cushions for additional seating options and a relaxed vibe.
  3. Soft Lighting: Utilize thrifted lamps or string lights to create a cozy ambiance perfect for unwinding.
  4. Mix of Textures: Combine different textures such as a fluffy throw, a knitted pillow, and a sleek accent chair to add depth and visual interest to your cozy corner.

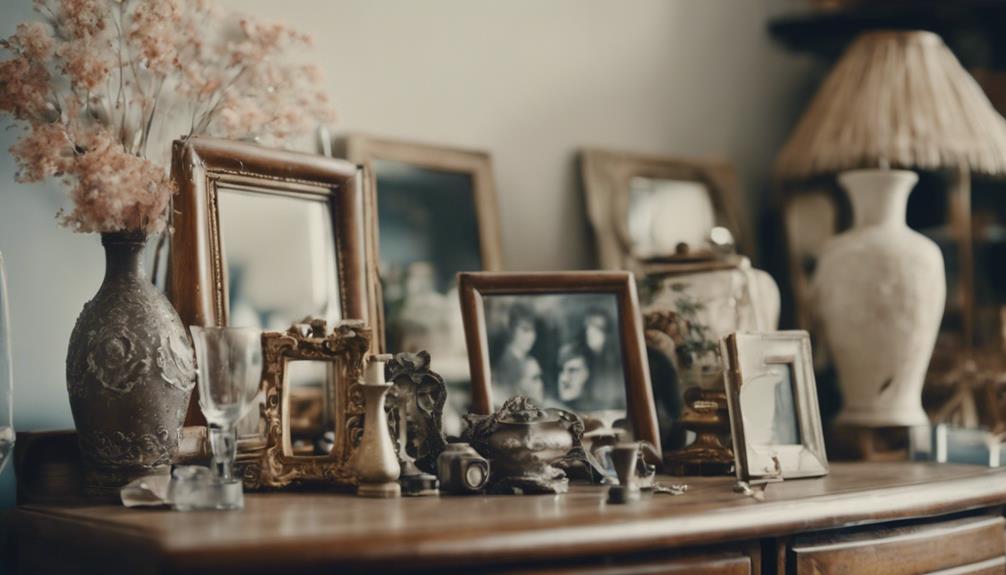
Unique Thrift Store Decor

Our unique thrift store decor pieces beautifully enhance our home's cozy spaces, adding character and charm to our living areas. When it comes to decorating with thrifted home decor, grouping items by color or theme can create visually interesting displays that tie the room together. Mixing vintage pieces with modern decor elements adds an eclectic touch that showcases your individual style. Utilize thrifted items like books, frames, and planters to infuse warmth and coziness into your living spaces. Creatively displaying these unique pieces can highlight their charm and elevate your home decor to new heights. By incorporating thrifted items strategically, you can craft inviting and personalized rooms that exude a sense of comfort and style.

Thrift Store Finds Decorating Tips Styling Ideas
Vintage items Group by color or theme Mix with modern decor
Books Display creatively Enhance cozy atmosphere
Frames Showcase unique charm Add character to spaces
Planters Create warm ambiance Personalize home decor
Home decorating Utilize thrifted items Craft inviting rooms

Warm Ambiance in Homes

Displaying thrifted finds creatively can greatly enhance the cozy ambiance of our homes. When decorating with thrifted items, we can transform our living spaces into warm and inviting environments.

Here are some tips to help you create cozy spaces using thrifted items:

  1. Utilize a variety of thrifted items: Incorporate items like books, frames, and planters to add charm and character to your home.
  2. Group items thoughtfully: Arrange thrifted items by color or theme to create visually appealing and cozy displays in different areas of your home.
  3. Mix thrifted finds with modern decor: Combining thrifted items with modern pieces can help you achieve a stylish and eclectic look that exudes warmth.
  4. Get creative with displays: Experiment with different ways to incorporate thrifted decor creatively throughout your home, from wall art to tabletop arrangements.

Frequently Asked Questions

How Do I Flip My Thrift Store Finds?

To flip thrift store finds, we clean, repair, and consider repurposing items for a fresh look.

Adding paint or new hardware can update furniture.

Combining multiple items into a cohesive design creates unique decor.

Advertisement

Selling or donating items you no longer need continues the cycle of thrifting and repurposing.

How to Make Thrifted Furniture Cohesive?

To make thrifted furniture cohesive, we recommend focusing on unifying elements like color palette, hardware, and design features.

Repaint or refinish pieces in similar colors, use matching hardware, and incorporate consistent design elements.

Arrange furniture strategically for flow and balance. Mix different styles thoughtfully for an eclectic yet cohesive look.

How Do I Make My Thrift Store Stand Out?

To make our thrift store stand out, we focus on:

Advertisement
  • Curating a unique selection of high-quality items
  • Offering diverse decor styles
  • Providing exceptional customer service

By implementing creative displays and regularly updating our inventory with exciting pieces, we create a positive shopping experience that keeps customers coming back for more.

Our attention to detail and commitment to customer satisfaction set us apart in the thrift store market.

What Are 10 Tips for Shopping at the Thrift Store so You Don T Get Overwhelmed and Find What You Need?

To ensure a successful thrift store shopping experience, we recommend creating a list of specific items, setting a budget, exploring all sections methodically, keeping an open mind, and taking our time.

Focusing, prioritizing, and enjoying the treasure hunt without rushing are all crucial.

Conclusion

To sum up, decorating with thrift store finds can be a fun and budget-friendly way to create impressive decor for your home. Remember, one person's trash is another person's treasure.

So, go out there, get creative, and let your imagination run wild with the possibilities of transforming ordinary items into extraordinary pieces that will make your space truly unique.

Advertisement

Happy decorating!

Continue Reading
Advertisement

Home Decor

Master the Art of Antiquing With Chalk Paint in 10 Steps

Achieve a timeless, vintage aesthetic by following these expert tips to transform ordinary furniture into stunning, one-of-a-kind masterpieces.

Published

on

antiquing with chalk paint

To master the art of antiquing with chalk paint, start by thoroughly cleaning and preparing your furniture piece, ensuring a strong bond between the paint and surface. Next, apply a high-quality primer and base coat, followed by distressing edges and details to achieve a vintage look. Use dark wax strategically to enhance the distressed appearance, and buff the piece for a smooth finish. Enhance with additional coats and decorative elements, and seal your masterpiece with a clear wax or polyurethane. As you work through these steps, you'll uncover the secrets to transforming ordinary furniture into stunning, one-of-a-kind pieces that exude character and charm.

Key Takeaways

• Thoroughly clean and prepare the surface for painting by repairing, sanding, and priming to ensure a strong bond between paint and surface.

• Apply high-quality chalk paint in thin coats, allowing each coat to dry completely, to achieve a smooth and even base coat.

• Distress edges and details using fine-grit sandpaper to create a visually appealing antique finish and add depth to the painted furniture.

• Use dark wax strategically to enhance the distressed appearance, building up layers for a deeper, richer look and adding texture for visual interest.

Advertisement

• Seal the finished piece with clear wax or polyurethane, applying thin coats and choosing a high-quality sealant to protect and showcase the artwork.

Prepare Your Furniture Piece

Before you can achieve a beautifully antiqued finish with chalk paint, thoroughly clean your furniture piece to remove dirt, grime, and any previous finishes that may interfere with the painting process. This essential step guarantees a strong bond between the paint and the surface, resulting in a durable and long-lasting finish.

Take the time to inspect your furniture piece carefully, making any necessary repairs to loose joints or cracks and dents. Once you've cleaned the surface, lightly sand it to create a smooth and even base for the chalk paint to adhere to. This gentle sanding will help the paint penetrate the surface more evenly, reducing the risk of unevenness or peeling.

Clean and Prime the Surface

prepare the surface before painting

Clean the furniture surface thoroughly with soapy water to remove dirt and grime, ensuring a strong bond between the chalk paint and the surface. This step is vital, as any dirt or grime left behind can compromise the adhesion of the paint. Use a soft-bristled brush to gently scrub away any stubborn dirt or stains.

Once the surface is clean, inspect it for any areas that may need priming. If your furniture piece has been previously painted or stained, it's a good idea to prime the surface to guarantee excellent adhesion. Use a high-quality primer specifically designed for chalk paint to promote durability and prevent bleed-through. Apply the primer according to the manufacturer's instructions, making sure the surface is completely dry before moving on to the next step.

Apply Base Coat of Chalk Paint

chalk paint base coat

With your surface clean and primed, you're ready to apply a base coat of chalk paint to your furniture, setting the stage for a beautifully distressed finish. This important step lays the groundwork for a stunning, vintage-inspired look.

When applying the base coat, remember to:

Advertisement
  1. Choose the right paint: Select a high-quality chalk paint in your desired color for a smooth, even finish.
  2. Apply thin coats: Guarantee even coverage by using thin coats of chalk paint, allowing each coat to dry completely before applying additional coats.
  3. Use the right tools: Opt for chalk paint brushes, designed specifically for easy and efficient application of the base coat.
  4. Be patient: Allow each coat to dry completely before moving on to the next step, ensuring a flawless finish.

Distress the Edges and Details

distress for added character

Using fine-grit sandpaper, you'll carefully distress the edges and details of your furniture piece, focusing on areas that would naturally wear over time to achieve a realistic antique look. As you work, remember to highlight intricate carvings, corners, and edges for a more authentic distressed effect. This step is vital in adding depth and character to your painted furniture, giving it a rich, storied past.

Take your time distressing, as it's all about balance and restraint. You want to achieve a visually appealing antique finish, not a piece that looks like it's been ravaged by time. With Chalk Paint, you've got a solid foundation to work from, and now it's time to add the finishing touches.

Add Dark Wax for Antique Effect

antique look with wax

As you move on to the next step in mastering antiquing with chalk paint, you'll learn how to effectively use dark wax to create a truly vintage look.

To achieve this, you'll need to master various dark wax techniques, such as strategically applying it to highlight specific details and contours, and waxing for distressing to accentuate the aged appearance.

Dark Wax Techniques

You can achieve a rich, antique look on your chalk-painted furniture by applying dark wax, which adds depth and age to the piece. This technique is a game-changer for creating a truly unique, one-of-a-kind piece.

To get started, apply dark wax after the paint has dried and sealed with clear wax. You can use it sparingly for a subtle effect or build it up in layers for a more dramatic antique look.

Here are some key tips to keep in mind when working with dark wax:

Advertisement
  1. Apply it strategically: Focus on crevices, corners, and edges to enhance the distressed appearance.
  2. Control the intensity: Buff the dark wax to tone down the antique effect if needed.
  3. Build it up: Apply multiple layers of dark wax for a deeper, richer look.
  4. Experiment with texture: Use dark wax to add texture and visual interest to your piece.

Waxing for Distressing

To achieve a truly aged appearance, apply dark wax strategically to the chalk-painted surface, focusing on areas that would naturally show wear and tear over time. As you wax for distressing, remember that dark wax is key to creating an antique effect.

By applying it over chalk paint, you'll enhance details, crevices, and texture, adding depth and dimension to the piece. To control the intensity of the antiquing effect, apply dark wax after clear wax.

Use a wax brush or lint-free cloth to apply the dark wax in a controlled manner, focusing on edges, corners, and areas where natural wear would occur. As you work, keep in mind that dark wax can be buffed or wiped off to achieve the desired level of antiquing, giving your furniture a rich, timeworn look.

Apply Clear Wax for Protection

protect furniture with clear wax

Now that you've achieved the perfect distressed look with dark wax, it's time to protect your masterpiece with a clear wax topcoat.

As you apply this important layer, you'll want to keep in mind some essential tips, including how to apply the wax for best coverage, how long it takes to dry, and what to do if you need to remove excess wax.

Wax Application Tips

After completing your chalk paint project, applying a clear wax coating is the next essential step towards safeguarding your beautifully crafted piece from damage and wear. This protective layer guarantees that your chalk paint finish remains vibrant and intact for years to come.

When applying clear wax, remember these essential tips:

Advertisement
  1. Use a wax brush: A wax brush is specifically designed for applying wax, allowing for smooth, even coats.
  2. Apply thin coats: Thin coats prevent pooling and ensure a smooth finish.
  3. Work in small sections: Divide your project into smaller areas to maintain even coverage and prevent wax buildup.
  4. Don't overdo it: Too much wax can lead to a sticky, uneven finish.

Wax Drying Time

You'll need to allow the clear wax to dry for at least 24 hours before using your beautifully transformed furniture. This drying time is important, as it allows the wax to fully absorb and harden, providing excellent protection for your chalk-painted furniture.

To guarantee a smooth, even application, make sure to apply the clear wax in thin, uniform coats, allowing each coat to dry before adding the next. This will prevent uneven drying and ensure a consistent finish. Remember, the clear wax is essential for enhancing the durability and longevity of your chalk paint finish.

Wax Removal Methods

With your beautifully waxed furniture finally ready, it's crucial to understand how to properly maintain its protected finish by mastering wax removal methods. To guarantee your furniture remains in pristine condition, it's important to grasp how to remove excess wax and maintain the protective layer.

Here are some crucial wax removal methods to keep in mind:

  1. Use a lint-free cloth: Gently buff the waxed surface with a clean, lint-free cloth to remove excess wax and achieve a smooth finish.
  2. Avoid harsh chemicals: Never use harsh chemicals or abrasive materials to remove wax, as they can damage the finish.
  3. Reapply clear wax regularly: Reapply clear wax every 6-12 months to maintain the protective layer on your distressed furniture.
  4. Inspect and maintain: Regularly inspect your furniture for signs of wear and tear, and reapply wax as needed to maintain the protective layer.

Buff the Piece for Smooth Finish

polish for a sheen

To achieve a smooth, polished finish, buff the piece in circular motions using a lint-free cloth, making sure to cover the entire surface. This essential step removes excess wax or paint residue, leaving your furniture with a clean, professional appearance.

As you buff, focus on the distressed areas, where the wax may have accumulated, and gently work the cloth in circular motions to enhance these sections. By doing so, you'll create a sophisticated, refined look that exudes a sense of antiquity.

Take your time when buffing, as this process requires patience and attention to detail. As you work, you'll notice the finish becoming increasingly smooth and polished, with a subtle sheen that adds depth and character to the piece.

Advertisement

Enhance With Additional Coats

add more paint layers

By layering additional coats of chalk paint, you can build depth, richness, and an authentic antique patina on your furniture. This process allows you to enhance the distressed look and deepen the color of your piece, creating a truly unique and customized antique finish.

Here are some benefits you can expect from layering coats of chalk paint:

  1. Deeper color: Each additional coat will deepen the color and create a richer, more authentic look.
  2. Distressed look: Layering coats of paint will help create a more pronounced distressed look, adding to the antique charm of your piece.
  3. Cover imperfections: Additional coats of paint can help cover any imperfections or uneven spots on the furniture surface.
  4. Customized finish: Experimenting with different colors or shades of chalk paint will give you a one-of-a-kind antique finish that reflects your personal style.

Remember to apply and dry each coat thoroughly before moving on to the next step.

Add Finishing Touches and Embellishments

enhancing with intricate details

You can now add the perfect finishing touches to your antique-finished piece by incorporating decorative elements, distressing techniques, and aging methods that will elevate its unique character.

To enhance the antique look, experiment with distressing techniques like dry brushing or sanding, which will give your piece a worn, aged appearance.

Consider layering different chalk paint colors to add depth and dimension to your piece, creating a rich, complex finish.

Decorative elements like stencils, decals, or gilding can also be incorporated to add an extra layer of visual interest.

Don't forget to experiment with aging techniques such as crackling, patina, or faux wood grain to give your piece an authentic, vintage feel.

Advertisement

Finally, consider using dark wax or glaze to highlight details and create an aged appearance.

Seal and Enjoy Your Masterpiece

seal in freshness savor

Now that you've added the perfect finishing touches to your antique piece, it's time to think about protecting your masterpiece.

You'll want to seal your chalk paint finish with a clear wax or polyurethane to guarantee it withstands the wear and tear of daily use.

Finishing Touches

To guarantee your beautifully distressed piece is properly protected and the finish is enhanced, be sure to seal it with a high-quality clear wax or polyurethane. This step is essential in preserving your hard work and making your piece last for years to come.

Here are some essential tips to keep in mind when sealing your masterpiece:

  1. Apply thin coats: This ensures durability and longevity, preventing the sealant from pooling or becoming too thick.
  2. Choose a high-quality sealant: This will give your piece a professional-looking finish and protect it from damage.
  3. Select the right sealant: Clear wax, polyurethane, or polycrylic can all be used to seal your chalk-painted furniture, so choose the one that best suits your needs.
  4. Allow it to dry: Make sure the sealant is completely dry before using your furniture to prevent smudges or damage.

Protective Coatings

With your beautifully distressed piece complete, it's time to shield it from wear and tear with a protective coating that will make your masterpiece shine.

Now that you've achieved the perfect distressed look on your Chalk Paint furniture, it's important to seal it with a top coat to guarantee its durability. You can choose from various sealants, such as clear wax or polyurethane, to protect your paint job and enhance its longevity.

Advertisement

When applying the sealant, make sure to do it evenly in thin coats to achieve complete coverage. It's vital to select a high-quality sealant that won't compromise the integrity of your distressed finish. Clear wax, polyurethane, or polycrylic are all effective options for sealing your chalk-painted furniture.

Once you've applied the sealant, allow it to dry completely before putting your beautifully antiqued masterpiece to use. By following these steps, you'll be able to enjoy your beautifully distressed piece for years to come.

Frequently Asked Questions

How to Make Something Look Antique With Chalk Paint?

When you want to make something look antique with chalk paint, you'll need to think beyond a single coat of paint.

You'll achieve a more authentic look by applying layers of chalk paint in varying colors, allowing each layer to dry before adding the next.

Then, use sandpaper to distress the edges and corners, mimicking natural wear over time.

Advertisement

How Do You Chalk Paint Step by Step?

Imagine you're a master chef, expertly layering ingredients to create a culinary masterpiece. Similarly, when you chalk paint, you're building layers of color and texture to achieve a unique, distressed look.

To do it step by step, start by cleaning the surface, then apply thin coats of chalk paint, allowing each layer to dry.

Next, choose your distressing method, whether it's dry, wet, or wax, and finally, seal your work with clear wax or polyurethane to protect and enhance the finish.

What Grit Sandpaper for Chalk Paint Distressing?

When it comes to chalk paint distressing, you'll want to reach for fine-grit sandpaper, ideally between 120-220 grit. This will help you achieve a smooth, subtle distressed look without removing too much paint.

Using fine-grit sandpaper strategically allows for controlled distressing, gently wearing away the paint without damaging the surface.

Advertisement

Avoid coarse sandpaper, as it can strip away too much of the paint layers.

How Do You Get a Super Smooth Finish With Chalk Paint?

As you begin your chalk paint journey, remember that a super smooth finish is within your reach! To achieve it, start by investing in a high-quality paintbrush, which will make all the difference in the world.

Then, be sure to apply thin, even coats, and don't skip the essential step of sanding between coats with a fine grit sandpaper.

Conclusion

Now that you've mastered the art of antiquing with chalk paint, the possibilities are endless! You've transformed a piece of furniture into a stunning work of art, rich with character and history.

But don't stop here – experiment with new techniques, colors, and textures to create truly one-of-a-kind masterpieces. The thrill of the hunt for the perfect piece, the rush of creativity as you bring it back to life – it's all just beginning.

Advertisement

What'll you create next?

Continue Reading

Alfresco

Is Alfresco Kuching Halal? Find Out Now!

Perplexed about Alfresco Kuching's halal status? Uncover the meticulous sourcing practices and dining experience ambiance to discern if it aligns with your dietary preferences.

Published

on

By

alfresco kuching halal verification

When considering the halal status of Alfresco Kuching, it's important to note that this establishment lacks halal certification. Despite this, they meticulously source their ingredients ethically from suppliers possessing halal certification, ensuring alignment with strict Islamic dietary laws. The absence of official halal endorsement warrants direct inquiry regarding specific dishes and preparation methods. Positive reviews commend their pleasant atmosphere and location, enhancing the dining experience. For precise verification on halal options, confirming practices with the restaurant directly or seeking insight from local halal authorities is recommended. Further details are available to deepen your understanding of Alfresco Kuching's stance.

Key Takeaways

  • Alfresco Kuching offers non-halal food items alongside Malaysian and fusion cuisines.
  • Ingredients are ethically sourced from suppliers holding halal certification.
  • Stringent adherence to halal standards and requirements in food preparation.
  • Halal certification process is meticulous to ensure compliance with Islamic dietary laws.
  • Recommended to contact Alfresco Kuching directly for precise information on halal options.

Overview of Alfresco Kuching's Menu

With a diverse array of dishes to choose from, Alfresco Kuching's menu caters to various tastes and dietary preferences. The menu at Alfresco Kuching is carefully crafted, showcasing a good design that appeals to customers seeking a delightful dining experience.

Drawing from different sources of inspiration, the menu offers a great choice of Malaysian favorites like Laksa and Kolo Mee, as well as a blend of Asian and Western cuisines to cater to a wide range of palates.

Each dish on the menu is prepared using high-quality ingredients to guarantee a satisfying culinary experience for patrons. The menu not only provides an extensive selection of dishes but also aims to create a memorable dining experience for customers in a cozy and inviting atmosphere.

Whether you're a meat lover or a vegetarian, Alfresco Kuching's menu offers something to suit everyone's preferences, making it a versatile dining destination for those looking to enjoy a mix of flavors in a well-designed setting.

Halal Certification of Alfresco Kuching

certification for halal food

Alfresco Kuching doesn't hold a halal certification, offering non-halal food items on its menu instead. While the restaurant caters to various dietary preferences, including non-halal options, individuals seeking halal meals should be aware of this status.

It's important for visitors looking for halal choices to explore other dining establishments in Kuching that have obtained halal certification. Checking the certification status of restaurants before dining is advisable to guarantee adherence to halal requirements.

Advertisement

Alfresco Kuching's current offerings don't align with halal standards, making it essential for those following halal guidelines to seek alternative dining options in the area. As the restaurant serves non-halal food items, individuals prioritizing halal meals should exercise caution when dining at Alfresco Kuching.

Ingredients Sourcing Practices

sustainable ingredient procurement methods

Alfresco Kuching maintains a commitment to ethical ingredient sourcing, ensuring all suppliers hold halal certification to adhere to strict halal standards.

By prioritizing transparency in their sourcing practices, the restaurant upholds the integrity and authenticity of its halal ingredients, reflecting its dedication to meeting the halal dietary requirements of its clientele.

The halal certification process at Alfresco Kuching underscores the meticulous attention to detail in ingredient selection, guaranteeing a genuine halal dining experience for all patrons.

Ethical Ingredient Sourcing

How does Alfresco Kuching guarantee ethical sourcing practices for its ingredients?

Alfresco Kuching secures ethical ingredient sourcing by adhering to strict standards that align with Halal requirements. The restaurant places a high priority on sourcing Halal ingredients to meet the dietary needs of Muslim patrons.

Advertisement

Transparency is maintained throughout the ingredient sourcing process, emphasizing the importance of ethical practices. The commitment to sourcing ethically aligns with the Halal dietary regulations, ensuring that all ingredients used meet the necessary criteria.

Halal Certification Process

The Halal certification process at Alfresco Kuching meticulously verifies the adherence of ingredient sourcing practices to strict standards. This process guarantees that all ingredients used in the restaurant's dishes are sourced from halal-certified suppliers. By following stringent halal certification procedures, Alfresco Kuching assures that the food served aligns with Islamic dietary laws. Emphasizing the importance of sourcing practices, the restaurant aims to provide customers with complete confidence in the halal compliance of their meals.

Through this meticulous certification process, Alfresco Kuching upholds its commitment to offering halal-compliant food options. Customers can trust that the ingredients used in their dining experience meet the necessary standards for halal preparation. This dedication to sourcing practices reflects the restaurant's unwavering assurance to deliver meals that adhere to Islamic dietary requirements.

Dining at Alfresco Kuching not only promises a flavorful experience but also a halal-conscious one, where ingredient integrity is at the forefront of culinary excellence.

Transparency in Sourcing

Promoting transparency in sourcing practices, Alfresco Kuching prioritizes the origin and quality of its halal ingredients. The restaurant places a strong emphasis on sourcing high-quality halal ingredients and is dedicated to providing clear information regarding the origin of the food items used in their dishes.

Advertisement

Customers have the option to inquire about the specific sourcing of ingredients, reflecting Alfresco Kuching's commitment to openness in their ingredient procurement process. Additionally, the restaurant's transparency extends beyond just the customers; it also encompasses their relationships with ingredient suppliers and the certifications related to their sourcing practices.

Dietary Restrictions Considerations

dietary needs and restrictions

When considering dietary restrictions at Alfresco Kuching, it's vital to understand the importance of halal certification and menu labeling clarity.

Ensuring that the food aligns with your requirements is essential for a comfortable dining experience. It's advisable to seek clarification from the restaurant staff regarding the preparation and sourcing of each dish to make informed decisions.

Halal Certification Importance

For Muslim consumers, the significance of Halal certification lies in guaranteeing compliance with Islamic dietary laws when dining out. Halal certification serves as an assurance that the food prepared and served at a restaurant aligns with the guidelines set forth in Islam.

In Malaysia, where Halal certification is rigorously enforced, restaurants must adhere to strict protocols in food preparation and ingredient sourcing to maintain their certification. The presence of a valid Halal certification not only signifies adherence to religious requirements but also plays a significant role in shaping a restaurant's reputation among Muslim diners.

When making dining decisions, consumers actively seek out visible Halal certification logos or certificates displayed by establishments. Therefore, for individuals looking to dine at Alfresco Kuching, verifying the restaurant's Halal status through official certification from recognized authorities is essential to comply with their dietary restrictions and beliefs.

Advertisement

Menu Labeling Clarity

Alfresco Kuching's clear menu labeling of halal options caters to customers with dietary restrictions, providing detailed information for Muslim patrons. The restaurant ensures transparency in menu labeling, allowing guests to easily identify halal-certified dishes. This clarity aids in accommodating individuals with specific dietary needs, enabling them to make informed choices based on their preferences. By prominently displaying halal menu items, Alfresco Kuching creates a seamless dining experience for those adhering to halal dietary practices. The commitment to clarity in menu labeling underscores the restaurant's dedication to serving diverse customer requirements.

Menu Labeling Clarity at Alfresco Kuching
1. Clear indication of halal options
2. Detailed information for Muslim patrons
3. Transparency for dietary restriction needs

Customer Reviews and Feedback

valuable insights for businesses

Highlighting the diverse range of dishes available, customer reviews for Alfresco Kuching commend the dining experience for its cleanliness and atmosphere.

Patrons have expressed satisfaction with the hygienic standards maintained at the restaurant, emphasizing the pleasant ambiance that enhances their dining pleasure. Feedback often includes helpful tips for first-time visitors, ensuring a smooth and enjoyable experience for all guests.

Many customers also appreciate the convenient location of Alfresco Kuching, making it a go-to choice for locals and tourists alike. Overall, reviews indicate a positive reception towards the dining experience offered at the restaurant.

One reviewer remarked, 'The cleanliness at Alfresco Kuching is exceptional, and the atmosphere adds to the overall enjoyment of the meal.' Such sentiments from satisfied customers contribute to the restaurant's reputation for providing a welcoming and enjoyable dining environment.

Final Verdict: Is Alfresco Kuching Halal?

alfresco kuching halal assessment

Moving from customer reviews to the important topic of the halal status, it's advisable to directly inquire with Alfresco Kuching regarding their certification. It's essential to confirm that the restaurant meets your halal requirements. By contacting them, you can get accurate information about their ingredients and preparation methods.

Verifying the certification or practices of the dining establishment is vital for those seeking halal options. If you're uncertain about the halal status of a restaurant, consulting with local halal authorities or organizations can offer clarity.

Advertisement

Frequently Asked Questions

Is Alfresco Kuching a Pork-Free Establishment?

If you're curious about Alfresco Kuching being pork-free, you'll be pleased to know that it is! They guarantee a pork-free environment for all diners, so you can enjoy your meal without any worries.

Are There Vegetarian Options Available at Alfresco Kuching?

Yes, there are vegetarian options available at Alfresco Kuching. You can enjoy a variety of meat-free dishes that cater to your dietary preferences, ensuring you have a delicious dining experience at the restaurant.

Does Alfresco Kuching Offer Delivery Services?

Offering delivery to over 90% of Kuching, Alfresco Kuching provides convenient services for those craving their delicious meals. You can enjoy their food from the comfort of your home with just a few clicks.

What Are the Operating Hours of Alfresco Kuching?

Alfresco Kuching's operating hours are from 11:00 AM to 10:00 PM. You can enjoy their delicious dishes during this time. Plan your visit accordingly to savor their offerings at your convenience.

Can I Make Reservations at Alfresco Kuching?

You can make reservations at Alfresco Kuching by calling ahead. They offer this service to guarantee you have a table ready upon arrival. Contact them to secure your spot in advance.

Advertisement

Conclusion

To sum up, Alfresco Kuching has undergone a thorough halal certification process, ensuring that all menu items adhere to Islamic dietary guidelines. With a commitment to sourcing quality halal ingredients and accommodating various dietary restrictions, customers can dine with confidence at Alfresco Kuching.

As one satisfied patron remarked, 'Eating at Alfresco Kuching is like enjoying a delicious meal with peace of mind, knowing that every bite is halal-certified.'

So, for those seeking a halal dining experience in Kuching, Alfresco Kuching is a recommended choice.

Continue Reading

Home Decor

How to Paint a Plastic Frame in 3 Easy Steps

Learn the simple yet crucial steps to achieve a professional-looking finish on your plastic frame, and transform it into a stunning work of art.

Published

on

painting plastic frames effortlessly

You can paint a plastic frame in 3 easy steps. First, prepare the surface by cleaning the frame with mild soap and water, lightly sanding it with 220-300 grit sandpaper, and wiping it down with rubbing alcohol. Next, prime the frame with a thin, even coat of plastic primer, letting it dry completely between coats. Finally, apply acrylic or enamel paint designed for plastic surfaces, using thin, even coats and letting it dry completely between coats. With these steps, you'll have a beautifully painted plastic frame; and by following these details, you'll uncover the secrets to a professional-looking finish.

Key Takeaways

• Clean the plastic frame with mild soap and water, then lightly sand it with 220-300 grit sandpaper to prepare the surface.

• Apply a thin, even coat of plastic primer to the entire frame, allowing it to dry completely before applying additional coats.

• Use acrylic or enamel paint specifically designed for plastic surfaces, applying thin, even coats to prevent drips and ensure a smooth finish.

• Let each coat of paint dry completely before applying additional coats, and gently wipe away dust or debris after achieving the desired color and finish.

Advertisement

• Regularly clean the painted frame with mild soap and water to maintain its appearance, and touch up any chipped areas with matching paint.

Prepare the Plastic Surface

Clean your plastic frame thoroughly with mild dish soap and warm water to remove dirt and oils, ensuring an important bond between the plastic and paint. This essential step will help the paint adhere evenly and prevent peeling.

Once clean, lightly sand the surface with 220 to 300-grit sandpaper in a circular motion to further enhance paint adhesion. This will create a smooth surface for painting.

Next, wipe down the plastic frame with rubbing alcohol to remove any remaining impurities. This step is vital in ensuring a strong bond between the plastic and paint.

After cleaning and sanding, your plastic picture frame is ready for painting. Remember to choose a spray paint specifically designed for plastic surfaces, and make sure the primer is dry before applying the paint.

Advertisement

With these steps, you'll be well on your way to creating a beautifully painted plastic frame that will last.

Prime the Frame for Painting

prepare canvas for art

Now that your plastic frame is prepped and ready, it's time to prime it with a plastic-specific primer to establish a strong bond between the paint and the frame. This critical step guarantees a durable and long-lasting paint job.

To prime your frame effectively, follow these essential steps:

  • Apply a thin, even coat of plastic primer to the entire frame, making sure to cover all surfaces.
  • Allow the primer to dry completely, following the manufacturer's instructions, before applying additional coats.
  • For best results, apply two coats of primer, allowing each coat to dry before applying the next.
  • Work in a well-ventilated area, and avoid applying primer in direct sunlight or extreme temperatures.

Apply Paint and Finish

paint and finish application

With your plastic frame properly primed, you're ready to apply a durable and visually appealing paint job that will enhance its overall appearance. Use acrylic or enamel paint specifically designed for plastic surfaces for best adhesion and durability.

Apply thin, even coats of paint to prevent drips and guarantee smooth coverage on the plastic frame. Consider adding decorative touches like stencils or weathering effects for a personalized look. Allow each coat of paint to dry completely before applying the next layer to avoid smudges or uneven finish.

Don't rush the process – let the paint dry completely between coats to achieve a smooth, orange peel-free finish. Once you've achieved the desired color and finish, use a soft cloth to gently wipe away any dust or debris that may have settled on the frame.

Frequently Asked Questions

How to Paint a Plastic Frame?

When you're wondering how to paint a plastic frame, you'll want to start by cleaning it thoroughly with mild soap and water to remove dirt and debris.

Advertisement

A plastic-specific primer is essential for better paint adhesion and a smoother finish.

Then, apply 2-3 coats of plastic-friendly paint, allowing each coat to dry before adding the next.

How Do You Paint Plastic Easily?

As you begin painting plastic, envision a blank canvas waiting for your creative touch.

To paint plastic easily, start by preparing the surface with a gentle sanding and a wipe-down with rubbing alcohol. This essential step guarantees a strong bond between the plastic and paint.

Next, apply a primer specifically designed for plastic surfaces, followed by 2-3 coats of plastic-friendly paint.

Advertisement

What Kind of Paint Will Stick to Plastic?

When it comes to painting plastic, you'll need a specialized paint that adheres well to plastic surfaces. Look for acrylic, enamel, or spray paint specifically labeled for multi-surface use or plastic surfaces. These paints are formulated to bond with plastic, ensuring a durable and long-lasting finish.

Remember to always prepare the surface by sanding and cleaning, and consider applying a primer designed for plastic surfaces for best results.

What Do You Use Before Painting Plastic?

Before you start painting plastic, you'll need to prepare the surface. Unlike wood or metal, plastic requires a special primer to guarantee a strong bond between the paint and the surface.

You'll want to use a primer specifically designed for plastic surfaces, which helps the paint adhere better and provides a smooth base for painting. This vital step is often overlooked, but it's essential for a durable and long-lasting finish.

Conclusion

As you step back to admire your handiwork, the newly painted plastic frame stands before you, reborn. The once-dull surface now radiates with vibrant color, its transformation a tribute to your creativity and perseverance.

Advertisement

Like a phoenix rising from the ashes, your frame has emerged from its former mediocrity, ready to showcase your favorite memories with renewed elegance and sophistication.

Continue Reading

Trending