Connect with us

Home Decor

Painting the Mirror Frame: 10 Steps

Necessitating a fresh new look, discover the 10 essential steps to transform your mirror's frame with a stunning, professionally-painted finish.

Published

on

diy mirror frame painting

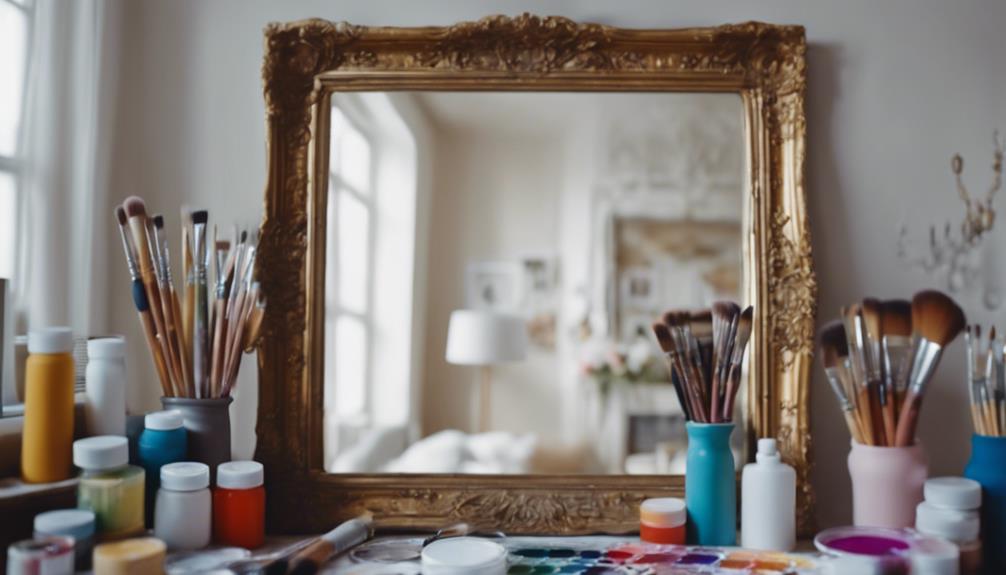
You're about to transform your mirror's frame with a fresh coat of paint, and these 10 steps will guide you through the process. Start by preparing the frame, cleaning it thoroughly, and sanding off any old paint or debris. Safeguard your mirror with painter's tape or remove it to prevent damage. Next, apply primer to guarantee a smooth, durable finish. Paint the frame evenly, using high-quality brushes or rollers, and remove excess paint carefully. Follow up with techniques for distressing and aging, then apply a second coat and seal the finished frame with wax or poly topcoat. As you continue, you'll uncover the secrets to achieving a beautifully transformed look that reflects your personal style.

Key Takeaways

• Clean and sand the mirror frame to ensure a smooth surface for painting and remove old paint or debris.

• Apply primer to the frame for improved adhesion and durability, choosing the right primer for the frame material.

• Paint the frame evenly with smooth, consistent strokes using a high-quality paintbrush or roller for even coverage.

• Distress the frame using techniques like edge wear, frame edge distressing, and roughening the edges for a vintage look.

Advertisement

• Seal the finished frame with wax or poly topcoat for protection and reattach hardware securely for hanging the mirror.

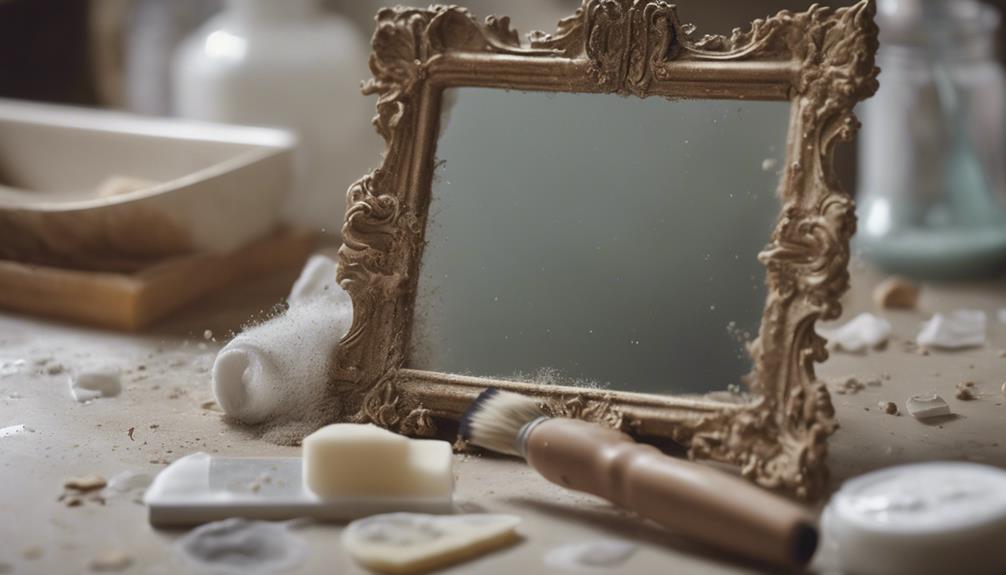
Prepare the Mirror Frame

Before you begin painting, how clean is your mirror frame, and is it free of any debris that might affect the painting process? It's important to prepare the mirror frame before applying paint, guaranteeing a smooth and successful painting experience.

Clean the mirror frame thoroughly to remove any dust or debris that may impact the painting process. This step is vital, as any remaining dirt or dust can cause the paint to adhere unevenly or even flake off prematurely. If the old paint is chipping, consider sanding the frame to create a smooth surface for the new paint to adhere to.

Additionally, remove the mirror from the frame if possible, or use painters tape and paper to protect it from accidental paint spills or splatters. By taking the time to properly prepare the mirror frame, you'll ensure a professional-looking finish that complements your newly painted frame.

Clean the Frame Thoroughly

clean and maintain artwork

Clean the mirror frame thoroughly with a general cleaner to remove any dust and dirt buildup that may impact paint adhesion. This vital step guarantees a strong bond between the frame and the paint, resulting in a durable and long-lasting finish.

Cleaning Steps Importance
Use a general cleaner Removes dust and dirt buildup
Confirm the frame is dry Prevents paint adhesion issues
Avoid using painter's tape on the mirror Prevents damage or residue
Use a tack cloth before painting Removes sanding dust for a smooth finish
Scuff sand the frame (next step) Creates a rough surface for paint adhesion

Scuff Sand the Frame

scuff sanding metal frame

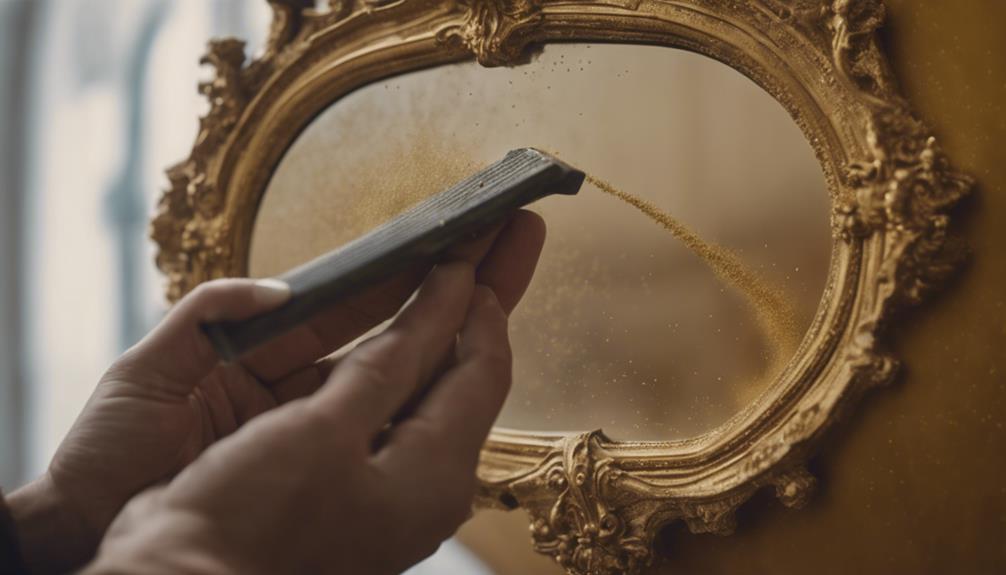
With your frame sparkling clean, it's time to roughen up the surface with some scuff sanding to make sure the paint really grabs on. Scuff sanding is an essential step in preparing your mirror frame for painting, as it helps the paint adhere better to the surface. To do this, you'll need to use 220-grit sandpaper to gently roughen up the surface of the frame.

Here are some key benefits of scuff sanding:

Advertisement
  1. Improved paint adhesion: Scuff sanding creates a surface for the paint to bond to, ensuring a strong and durable finish.
  2. Removes imperfections: Scuff sanding helps to remove any existing finish or imperfections on the frame, leaving a smooth surface for painting.
  3. Professional finish: Proper scuff sanding is essential for a professional and long-lasting paint finish on your mirror frame.
  4. Ensures a smooth paint job: By cleaning the frame before sanding, you'll get a smooth and even surface for painting.

Apply Primer to the Frame

protective primer on metal

As you get ready to apply primer to the frame, you'll need to make sure you have the right essentials, including a high-quality primer and a suitable brush. Before you start, it's important to check the frame's surface readiness, ensuring it's smooth and even.

Primer Preparation Essentials

You'll need to prime the entire mirror frame to guarantee a smooth, even surface for painting. This essential step ensures a durable and long-lasting finish. Applying primer helps to prevent the original color of the frame from bleeding through the new paint, and it also promotes better adhesion and longer-lasting results.

Here are the key primer preparation essentials to keep in mind:

  1. Choose the right primer: Select a quality primer suitable for the type of material your mirror frame is made of, such as wood or metal.
  2. Ensure a smooth surface: Primer helps create a smooth surface for painting, which is important for a professional-looking finish.
  3. Promote adhesion: Primer ensures better adhesion of the paint to the frame, resulting in a more durable finish.
  4. Allow it to dry: Let the primer dry completely before applying the paint to achieve the best results.

Frame Surface Readiness Check

What's the current state of your mirror frame – are there any imperfections or damage that need attention before you apply primer? Take a closer look and inspect the frame surface carefully, as any flaws can affect the adhesion of the primer and, ultimately, the painting process.

If you notice any rough spots or damage, lightly sand the frame to create a smooth surface for the primer to adhere to. This step is vital in ensuring a strong bond between the primer and the frame, which is essential for a durable and long-lasting finish.

Remember, a well-prepared frame surface is key to achieving a professional-looking result when painting a mirror frame. By taking the time to inspect and prepare the frame, you'll be rewarded with a beautifully finished mirror that will be the focal point of any room.

Now that your frame is ready, it's time to apply the primer, a critical step in the process that will guarantee a flawless finish.

Advertisement

Primer Application Techniques

With your frame surface now ready, pick up a high-quality primer and a paintbrush, and start applying the primer to the frame, working in sections to maintain even coverage. When applying primer, it's crucial to follow the direction of the wood grain to guarantee a smooth finish. This is particularly important when painting a light color over a dark or stained frame.

Here are some key benefits to keep in mind when applying primer:

  1. Improved adhesion: Primer helps the paint adhere better to the frame, providing a more durable finish.
  2. Smooth surface: Primer creates a smooth surface for painting, reducing the risk of unevenness and rough patches.
  3. Enhanced color: Primer ensures that the paint color appears vibrant and true, without being affected by the underlying frame color.
  4. Durability: Primer adds an extra layer of protection to the frame, making it more resistant to wear and tear.

Remember to allow the primer to dry completely before applying the first coat of paint. By following these primer application techniques, you'll be well on your way to a beautifully painted mirror frame.

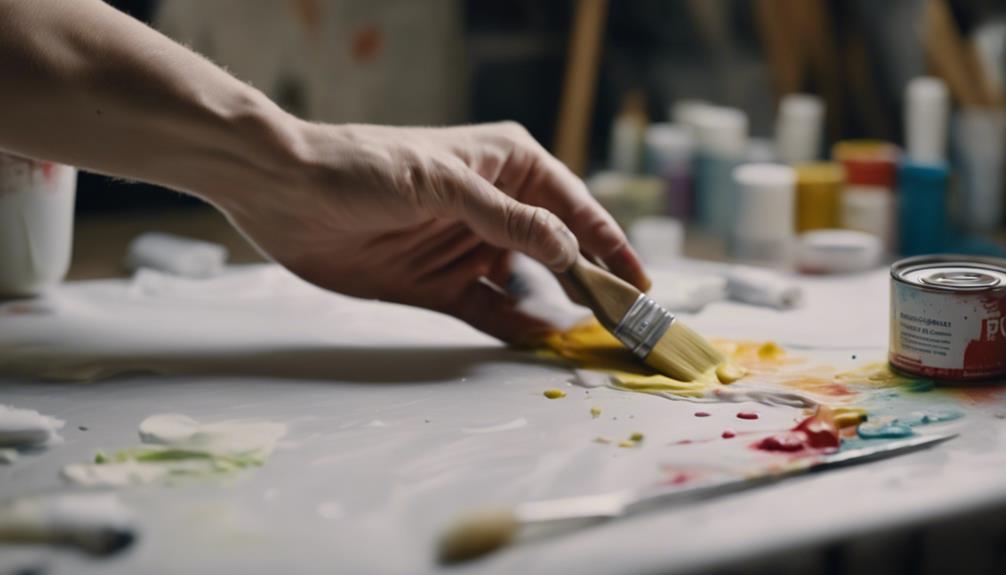
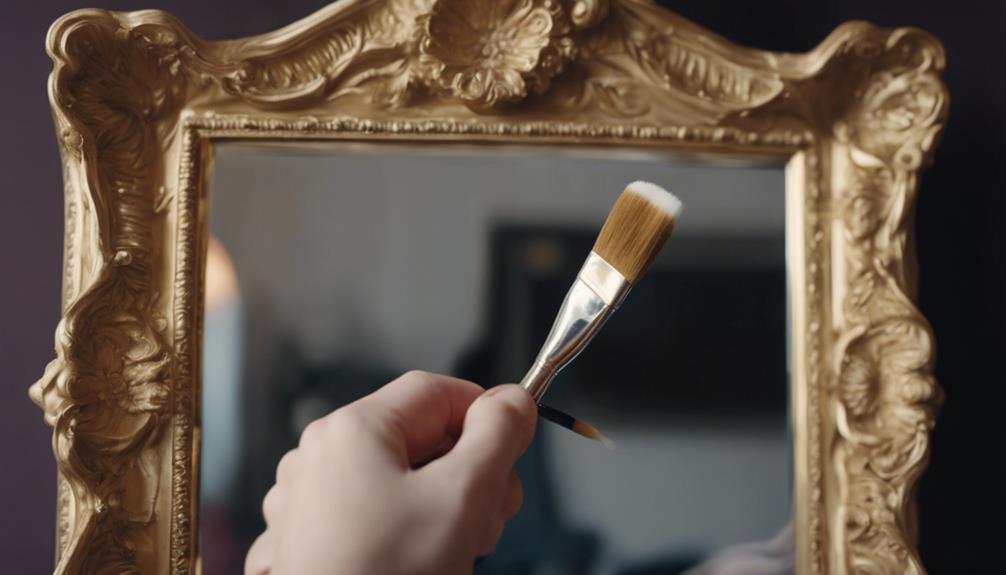
Paint the Frame Evenly

capture the essence accurately

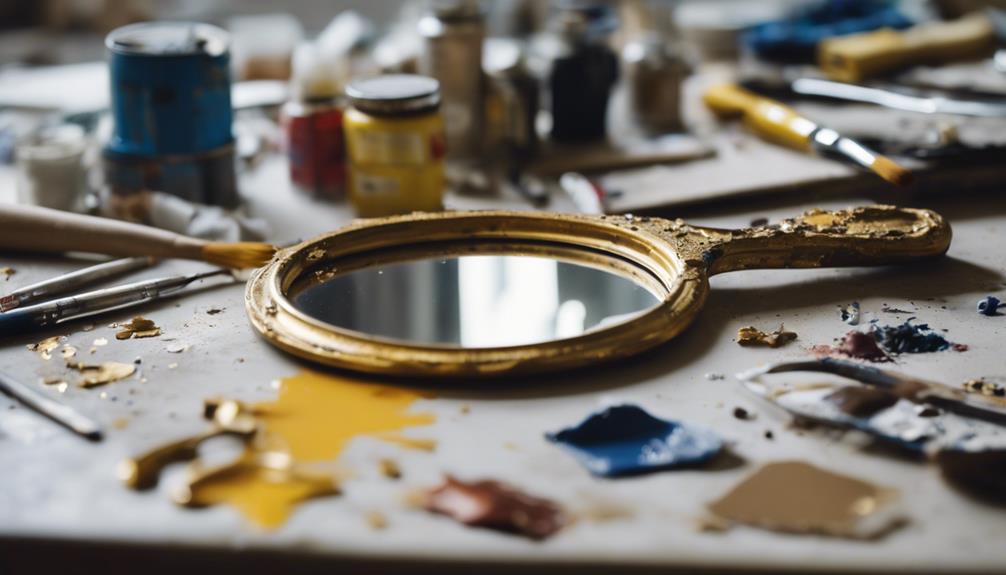
Now that your frame is prepared, apply a coat of paint in smooth, consistent strokes to guarantee uniform coverage. As you paint a mirror frame, remember to maintain even coverage by using a high-quality paintbrush or roller. This will secure a professional finish and avoid any uneven areas on the frame surface.

Take your time, and work in sections to prevent drips or pooling of paint. Hold the brush or roller at a consistent angle, and apply gentle to moderate pressure, depending on the type of paint you're using. Check the frame from different angles to secure even coverage and a uniform finish.

If you notice any missed spots, don't hesitate to touch them up. Remember, the goal is to achieve a smooth, even coat that showcases your frame's beauty. By following these steps, you'll be well on your way to a beautifully painted mirror frame that adds a touch of elegance to any room.
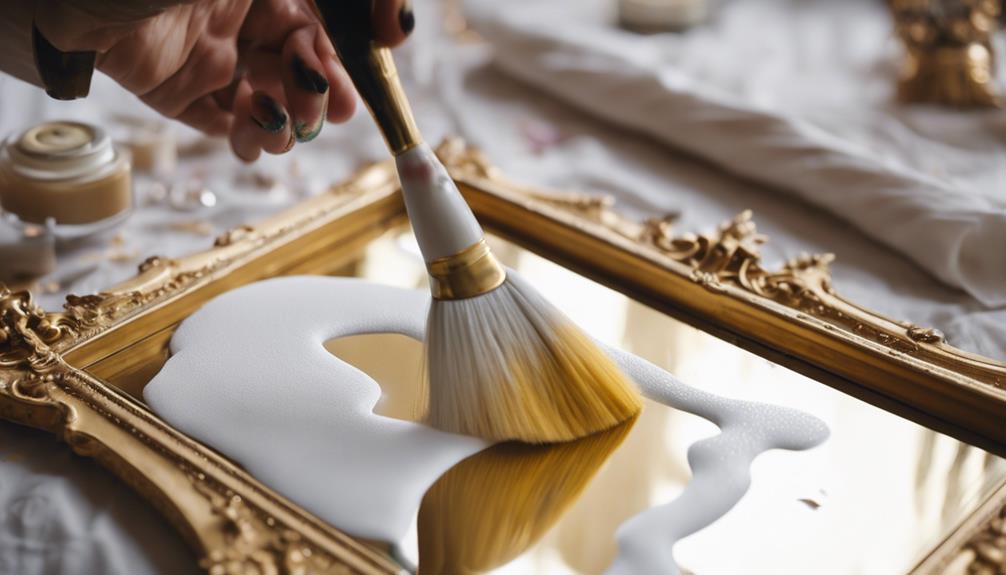
Remove Excess Paint

clean up messy painting

After applying a smooth, even coat of paint to your mirror frame, focus on removing any excess paint that may have gotten onto the mirror itself. This step is important to make sure your mirror frame looks professional and polished.

To remove excess paint, follow these steps:

Advertisement
  1. Scrape carefully: Use a razor blade to scrape off excess paint from the mirror, taking care not to scratch the surface.
  2. Wipe clean: Use a clean cloth to wipe away any remaining paint residue from the mirror.
  3. Glass cleaner: Consider using a glass cleaner to make sure the mirror is completely free of paint.
  4. Take your time: Remove paint slowly and deliberately to avoid damaging the mirror.

Remember to take your time and be gentle when removing excess paint to avoid scratching the mirror. By following these steps, you'll be able to remove excess paint and achieve a beautiful, professional-looking mirror frame.

Distress the Frame Edges

stress on picture frames

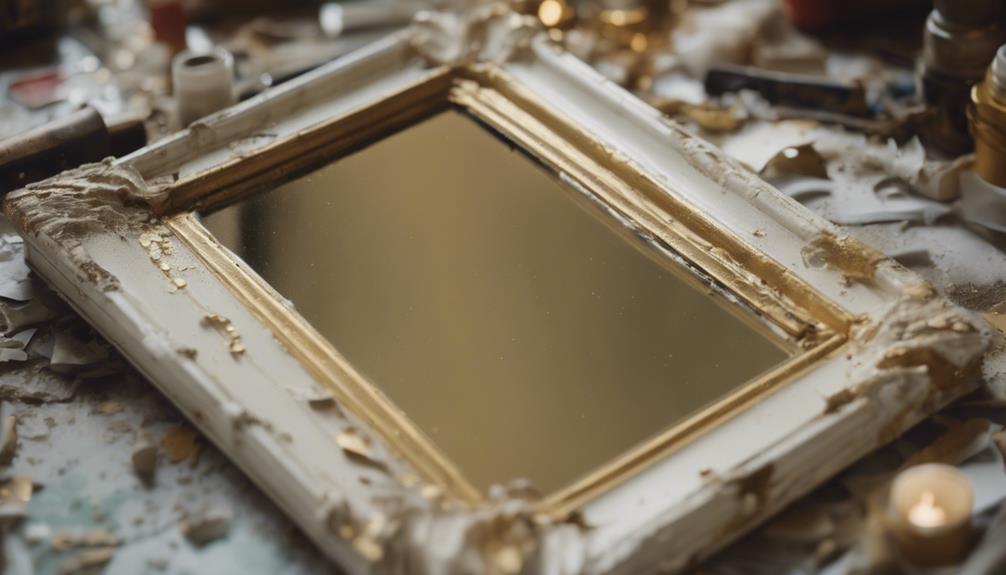
When distressing the frame edges, you'll want to explore the various techniques for achieving the perfect level of wear. You'll experiment with different edge wear techniques, such as roughening the edges or using sandpaper to gently rub away the surface, to create a unique, distressed look.

Edge Wear Techniques

Sand lightly into the edges of your mirror frame with sandpaper to create a beautifully distressed look that's reminiscent of years of gentle wear. This technique, known as edge wear, adds character to your frame and gives it an old, vintage feel. To achieve this look, focus on the corners, edges, and areas that would naturally wear over time, such as the points where the frame's molding meets.

Here are some tips to keep in mind when distressing your frame's edges:

  1. Use a gentle hand when distressing to control the amount of wear and maintain the frame's integrity.
  2. Experiment with different sandpaper grits to achieve varying levels of distressing for a customized finish.
  3. Focus on areas that would naturally wear over time for a realistic effect.
  4. Wipe away excess dust from distressing before sealing the frame to preserve the aged appearance.

Frame Edge Distressing

To create a truly unique, distressed look, you'll want to focus on distressing the edges of your mirror frame. Use sandpaper or a sanding block to wear down the wood in areas that would naturally show signs of aging. This technique adds a vintage or rustic touch to your mirror frame, giving it a one-of-a-kind appearance.

When distressing the frame edges, use gentle strokes to wear down the wood, focusing on areas that would naturally experience wear and tear over time. By doing so, you'll create a shabby chic or weathered appearance that adds character to your mirror frame. Experiment with different levels of distressing to achieve the desired aesthetic.

Roughening the Edges

By focusing on the frame's edges, you can strategically roughen them to create a naturally weathered appearance that adds character to your mirror frame. This process, known as distressing, involves lightly sanding or scraping the edges to create a worn and aged look. To achieve this, you can use sandpaper with a higher grit, such as 220-grit, to effectively distress the edges.

Here are some key considerations to keep in mind when roughening the edges:

Advertisement
  1. Strategic distressing: Focus on corners and raised areas to create a natural weathered appearance.
  2. Even distressing: Take care to distress the edges evenly to avoid an uneven look.
  3. Vintage charm: Distressing can add a vintage or rustic charm to your mirror frame.
  4. Harmonizing with the style: Make sure that the distressing complements the overall style of the mirror frame.

Apply a Second Coat

perfecting the paint job

You'll likely need to apply a second coat of paint to guarantee a flawless, professional-looking finish on your mirror frame. This additional layer ensures a uniform finish, filling in any areas that might've been missed during the first coat.

As you prepare to apply the second coat, make sure the first coat is completely dry to prevent smudging or uneven application. This patience will pay off, as the second coat provides a more vital and long-lasting finish on your mirror frame.

Take your time, and allow sufficient drying time between coats – it's crucial to achieve a professional-looking result. By doing so, you'll be rewarded with a beautifully painted mirror frame that's sure to impress.

Seal the Finished Frame

frame sealing protection complete

With your beautifully painted mirror frame now complete, it's time to add a protective seal to guarantee its beauty lasts for years to come. This essential step safeguards your hard work doesn't go to waste, and your frame remains vibrant and stunning.

To seal the finished frame, you'll need to choose between a wax or poly topcoat. Here are some key benefits to ponder:

  1. Protection: Sealing your frame shields the paint from wear and tear, ensuring it remains vibrant and stunning.
  2. Finish options: Wax provides a matte finish, enhancing the vintage look of your frame, while poly topcoat offers a more durable and glossy finish.
  3. Easy application: Apply your chosen sealant evenly over the painted frame for a professional and long-lasting result.
  4. Long-term benefits: Sealing your frame guarantees its beauty will last for years to come, making it a worthwhile investment of your time and effort.

Reattach Hardware

reattaching loose cabinet hardware

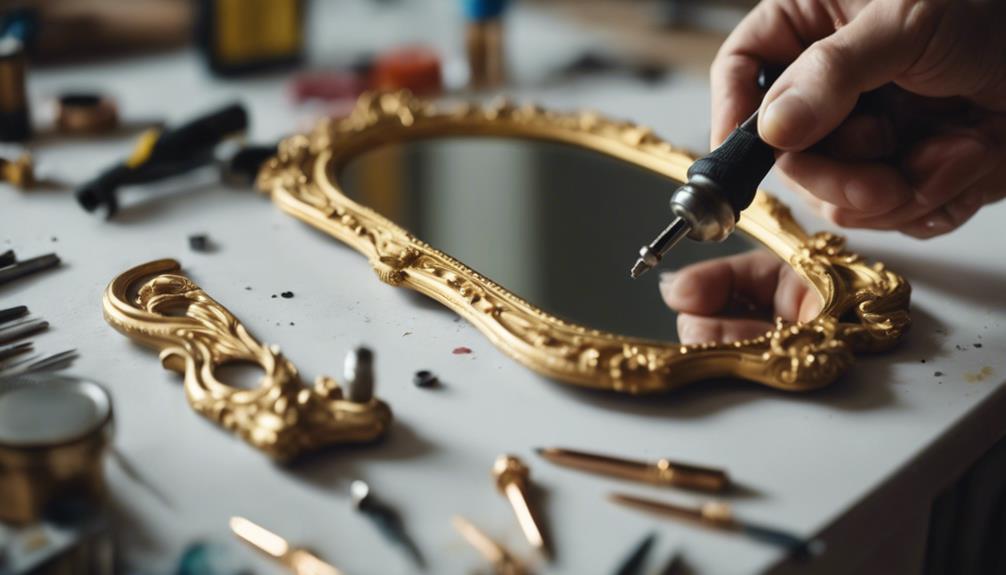
Now that your beautifully painted frame is sealed, it's time to reattach the original hooks and hardware to hang your mirror securely.

To do this, gather the original hooks and hardware that you removed from the mirror frame before painting. Using appropriate tools, such as a screwdriver, reattach the hardware securely, ensuring that the hooks are aligned properly for hanging the mirror.

Double-check the stability of the hardware to support the weight of the mirror. You don't want your hard work to go to waste if the hardware fails.

Advertisement

Confirm that all hardware is firmly attached before hanging the mirror back on the wall. Make sure everything is tightened properly to avoid any accidents. By reattaching the hardware correctly, you'll be able to hang your mirror with confidence, admiring your beautifully painted frame.

With the hardware securely in place, you can now hang your mirror, stepping back to appreciate the final result of your hard work.

Frequently Asked Questions

How to Paint the Frame of a Mirror?

When you decide to paint the frame of a mirror, start by cleaning it thoroughly to remove dust and debris.

Next, use painters tape to protect the mirror's surface from paint splatter.

Then, apply a primer coat to guarantee better paint adhesion and coverage.

Advertisement

With a quality paint brush, apply even coats of paint, allowing each coat to dry properly.

You can also add decorative elements or distressing techniques for a unique finish.

How to Upcycle a Mirror Frame?

Like a blank canvas, your old mirror frame awaits transformation.

To upcycle it, start by cleaning and prepping the surface, removing any dirt or grime.

Next, choose a paint that fits your desired look – chalk paint for vintage, spray paint for modern.

Advertisement

Apply multiple coats for full coverage, protecting the mirror with petroleum jelly or tape.

How to Chalk Paint a Metal Mirror Frame?

When you decide to chalk paint a metal mirror frame, remember to clean and dry the surface first for better paint adhesion.

Next, grab a round brush and apply the chalk paint evenly, taking advantage of its quick-drying properties.

If you're going for a shabby chic look, lightly sand the frame after painting to distress it.

With these simple steps, you'll achieve a beautifully updated mirror frame with a unique, vintage finish.

Advertisement

How to Decorate a Mirror Frame?

You're probably aware that 75% of homeowners consider decorative mirrors an essential element in interior design.

When it comes to decorating a mirror frame, you're spoiled for choice. Consider adding a vintage touch with chalk paint or experimenting with bold colors to match your room's aesthetic.

You can take it up a notch by applying decorative transfers or embellishments to add texture and visual interest.

Conclusion

With your newly painted mirror frame, you've transformed a dull, lackluster piece into a stunning work of art that's ready to hang proudly in your home.

Like a phoenix rising from the ashes, your once-bland frame now radiates a fresh, vibrant energy, waiting to be admired.

Advertisement

By following these 10 steps, you've successfully given your mirror frame a brilliant makeover, and it's now ready to shine in all its glory.

Continue Reading
Advertisement

Home Decor

August Home Accessories You Can’t Live Without – Upgrade Your Space!

Navigate your home upgrade journey with essential August accessories that promise convenience and security—discover what you can't afford to miss!

Published

on

By

essential august home upgrades

If you're looking to upgrade your space, August home accessories are a must-have. Start with the August Smart Lock for keyless entry and remote access. Pair it with the Connect Wi-Fi Bridge to manage guest access effortlessly. The Auto-Lock feature brings peace of mind by securing your home automatically. For added convenience, integrate it with voice assistants like Alexa and Google Assistant. You'll enjoy seamless control and real-time notifications about your door's status. These upgrades not only enhance security but also transform your daily routine. Keep exploring to discover more accessories that can elevate your home experience even further!

Key Takeaways

  • Connect Wi-Fi Bridge: Essential for remote locking and guest management, allowing control from anywhere for just $79.99.
  • Yale Keypad: Offers keyless entry with customizable codes, enhancing convenience and security from $69.99.
  • August View Swappable Battery: A rechargeable battery option for $29.99, ensuring long-lasting power for your smart lock.
  • Auto-Lock Feature: Automatically secures your door after closing, customizable timings enhance family safety and peace of mind.

Essential Smart Lock Features

When it comes to securing your home, the August Smart Lock offers essential features that make access and control easier than ever.

With the August app, you can remotely lock and open your door from anywhere, giving you complete control over your home security. Imagine the convenience of being able to open your door for a friend or family member without needing to be there—thanks to the guest access feature, you can send secure virtual keys instantly.

The Auto-Open feature takes ease of access a step further by automatically opening your door as you approach it, so you don't have to fumble with keys when your hands are full.

You can also enjoy peace of mind knowing that the August Smart Lock uses DoorSense technology to provide real-time notifications about your door's status, letting you know if it's securely locked or ajar.

Plus, it integrates seamlessly with voice assistants like Alexa and Google Assistant, making hands-free operation a breeze.

Advertisement

With these features, the August Smart Lock guarantees that your home remains secure while providing the utmost convenience.

Top August Home Accessories

trending august home decor

August offers a range of smart home accessories that enhance your security and convenience beyond just the smart lock itself. The August Smart Lock is central to this ecosystem, enabling keyless entry with customizable codes.

To further enhance your experience, consider adding the Connect Wi-Fi Bridge. Priced at $79.99, it allows you to lock or open your August Smart Lock from anywhere, plus manage guest access remotely.

If you prefer physical access, the Yale Keypad is a fantastic addition. Starting at $69.99, it provides another layer of keyless entry, letting you enter codes without needing a traditional key.

For those who want continuous functionality, the August View Swappable Battery is a great investment at $29.99. It's rechargeable and offers an impressive three-month average battery life, ensuring that your smart lock stays operational without hassle.

Lastly, don't forget the Open Device, which pairs seamlessly with any August Smart Lock. It's powered by two AAA batteries (included) and provides keyless access anytime.

Advertisement

These accessories not only upgrade your space but also streamline how you secure your home.

Enhancing Home Security

improving residential safety measures

When it comes to enhancing your home security, the right accessories can make all the difference.

With features like Auto-Lock, remote access control, and activity tracking, you can stay connected and in control of your home at all times.

Let's explore how these tools can give you peace of mind and protect what matters most.

Auto-Lock Feature Benefits

The Auto-Lock feature automatically secures your door after closing, giving you instant peace of mind without any extra effort. This innovative technology enhances your home's security, allowing you to focus on what really matters.

With the added benefit of DoorSense technology, you can trust that the Auto-Lock engages only when the door is fully closed, eliminating the risk of false locking.

Advertisement

Here are three key benefits of the Auto-Lock feature:

  1. Flexible Timing: You can customize the Auto-Lock timing, locking between 30 seconds and 30 minutes after closing, fitting seamlessly into your routine.
  2. Enhanced Safety for Families: This feature considerably reduces the chances of leaving your doors unsecured, providing an extra layer of safety for your loved ones.
  3. Convenient Monitoring: With remote access through the August app, you can manage and check the Auto-Lock status from anywhere, ensuring security even when you're away.

Embracing the Auto-Lock feature not only enhances your home security but also offers you the peace of mind you deserve. You won't have to worry about whether you locked the door again!

Remote Access Control

Remote access control takes home security to the next level, allowing you to lock and open your door from anywhere with just your smartphone.

With the August Smart Lock, you can easily manage your home's security without needing to be physically present. By adding a Wi-Fi Bridge to your existing lock, you gain the ability to remotely lock or release your door, making it incredibly convenient for granting access to trusted guests.

The August app enhances your experience by letting you provide keyless entry to visitors and family members. You can control who enters your home and when, all while maintaining peace of mind.

The Smart Lock features Auto-Lock and Auto-Release, ensuring that your door secures itself when closed and recognizes your arrival for seamless access.

Advertisement

What's more, the system uses bank-level encryption to safeguard your data, ensuring that your remote access is secure. This means you can rest easy knowing that your home is protected against unauthorized entry.

Embracing remote access control not only simplifies your life but also fortifies your home security in today's fast-paced world.

Activity Tracking and Alerts

Enhancing your home security becomes effortless with the August Smart Lock's robust activity tracking and alert system, which keeps you informed about who enters and exits your home. This feature not only enhances your security awareness but also provides peace of mind, knowing you're always in the loop.

Here are three key benefits of the August Smart Lock's activity tracking and alerts:

  1. Real-Time Notifications: With Smart Alerts, you'll receive instant notifications via the August app whenever your door's status changes—whether it's locked, opened, or ajar.
  2. Detailed Activity Feed: You can access an extensive log of entry and exit times, helping you track who accessed your home and when, ensuring you always know who's coming and going.
  3. Control Over Access: If you share virtual keys, the activity tracking functionality allows you to revoke access easily, so you can maintain control over who enters your home at all times.

With data encryption and two-factor authentication, your information remains secure, giving you confidence that only authorized users can access your lock data.

Seamless Smart Home Integration

connected home technology solutions

Seamlessly integrating with popular voice assistants like Siri, Alexa, and Google Assistant, the August Smart Lock gives you hands-free control over your door locks. You can manage your smart locks effortlessly, whether you're at home or away. With the August app, you can lock or open your door remotely, making guest access a breeze.

If you have an existing smart home setup, the August Smart Lock enhances your automation experience by connecting with other devices, like Samsung SmartThings. You'll love the convenience of the Auto-Lock and Auto-Open features, which use geo-fencing technology to secure your home automatically as you leave or approach. This means you don't have to fumble for keys when your hands are full.

Advertisement

The Activity Feed in the August app keeps you informed about who's coming and going, tracking entry and exit times in real-time. This provides peace of mind, knowing you can monitor your home's security with ease.

The combination of these features makes the August Smart Lock an essential addition to your smart home, ensuring both convenience and safety at your fingertips.

Unique Entry Options

diverse access methods available

When it comes to unique entry options, keyless access can truly transform your daily routine.

You'll appreciate how secure guest management works seamlessly with the August Smart Lock, allowing you to grant temporary access without the hassle of physical keys.

Plus, enhanced home security features mean you can feel at ease knowing your home's safety is a top priority.

Keyless Access Convenience

Keyless access convenience redefines how you manage entry to your home, offering unique options that simplify your life and enhance security. With the August Smart Lock, you can effortlessly control access without the hassle of physical keys.

Advertisement

Here are three standout features that elevate your home security:

  1. Unique Entry Codes: Create custom codes for keyless access, allowing you to manage who can open your door. You can easily change codes for added security whenever needed.
  2. Instant Virtual Keys: Using the August app, you can send secure virtual keys to trusted individuals in seconds, ensuring convenience for guests or service personnel while you retain control of access.
  3. Auto-Open Feature: The Smart Lock detects your arrival and automatically opens, so you never have to fumble for keys when your hands are full.

The Smart Lock seamlessly integrates with your existing deadbolt, so you maintain the functionality of traditional keys while enjoying modern convenience.

Embrace keyless access and transform how you enter your home!

Secure Guest Management

Managing guest access has never been easier with unique entry options from the August Smart Lock, allowing you to give trusted visitors secure entry without the hassle of physical keys. You can send secure keys to friends and family through the August app, ensuring they've the right access when they need it. With unique entry codes, you can provide temporary access for guests or service providers, enhancing both convenience and security.

The Auto-Release feature automatically detects when a registered guest approaches, seamlessly opening the door. This means no more fumbling for keys, making visits as smooth as possible. Plus, you can manage guest access remotely, giving you full control over who enters your home.

The Activity Feed keeps you informed by tracking entry and exit times for each guest, so you always know who's coming and going. This feature is especially useful for vacation rental hosts looking to maintain oversight while providing a welcoming experience for their guests.

Advertisement

With August Smart Lock, you've got secure guest management covered, making your life easier while ensuring your home stays safe.

Enhanced Home Security

August Smart Lock's unique entry options empower you to enhance your home security effortlessly, providing trusted individuals with secure access without the need for physical keys. With keyless access, you can easily manage who enters your home while maintaining complete control over your security.

Here are three features that elevate your home security:

  1. Auto-Lock Feature: This feature automatically secures your door after it closes, ensuring your home remains protected without you having to lift a finger.
  2. DoorSense Technology: This innovative technology lets you know if your door is securely closed or ajar, giving you peace of mind about your home's security status in real-time.
  3. Activity Feed: The August app's activity feed tracks entry and exit times, providing you with a detailed overview of who accesses your home and when. This transparency enhances your security and helps you stay informed.

Together, these features make the August Smart Lock an essential tool for anyone looking to bolster their home's security. Enjoy enhanced security and convenience, knowing you have the latest technology at your fingertips.

User Experience Insights

user experience analysis strategies

Users enjoy the effortless installation of the Smart Lock, often completing it in under 30 minutes without the need for drilling. This makes it a fantastic choice for both homeowners and renters looking to enhance their security quickly and easily.

The Smart Lock with Keypad integrates seamlessly with your existing keys, allowing you to maintain traditional access methods while enjoying modern tech features.

The August app offers a user-friendly interface, making it simple to lock, open, and track your door's activity from anywhere. You'll appreciate the convenience of the Auto-Open feature that detects your arrival and opens the door automatically—no more fumbling for keys when your hands are full.

Advertisement

While some users have reported occasional connectivity issues with the WiFi bridge, the Bluetooth range generally provides reliable operation. This guarantees you have consistent access to your Smart Lock, whether you're at home or on the go.

Installation and Compatibility

setup and system requirements

Installing the Smart Lock is a breeze, typically taking less than 10 minutes to secure over your existing single-cylinder deadbolt without any drilling or modifications. This easy-to-install feature makes it perfect for anyone looking to upgrade their home security quickly and efficiently.

Here are three key benefits of the August Smart Lock regarding installation and compatibility:

  1. Renter-Friendly: The installation process is designed to guarantee that tenants can easily maintain the original exterior appearance of their locks while enjoying the benefits of a smart lock.
  2. Broad Compatibility: August Smart Locks are compatible with most standard single-cylinder deadbolt types, allowing you to enhance your security without the hassle of replacing your entire door hardware.
  3. Key Functionality: You'll retain the functionality of your existing traditional keys, providing a seamless shift to keyless entry while keeping backup options available.

With these features, you can confidently upgrade your home's security without the stress of complex installation processes. Embrace the convenience and functionality of the August Smart Lock today!

Customer Feedback Overview

customer feedback summary report

With a solid customer rating of 4.4 out of 5 stars from nearly 2,800 ratings, the feedback on the Smart Lock reveals a largely positive reception among homeowners.

Many users rave about the ease of use and the smart lock's design, highlighting how the remote access feature allows for convenient management of entry for families and guests alike.

However, some customer feedback indicates connectivity challenges, particularly with the WiFi bridge. Maintaining a reliable connection within its 10-foot range can sometimes be an issue, which may affect your experience.

Additionally, several customers emphasize the importance of installation accuracy, noting that proper alignment is vital for the lock's best performance.

Advertisement

Frequently Asked Questions

Are Yale and August the Same Company?

No, Yale and August aren't the same company, but they're both under the Assa Abloy Group. Yale focuses on traditional locks, while August specializes in smart lock technology, making them distinct yet compatible brands.

What Is an August Smart Lock?

Imagine a keyless world where convenience reigns supreme. An August Smart Lock transforms your door into a guardian, letting you access it with your phone, while creating unique entry codes for enhanced security and peace of mind.

How Many August Locks to One Bridge?

You can connect multiple August Smart Locks to a single August Connect Wi-Fi Bridge, allowing you to manage all your locks from one app. Just remember, each lock connects to only one bridge at a time.

What Is the Best Automatic Door Lock in 2024?

When considering the best automatic door lock in 2024, you can't go wrong with the August Wi-Fi Smart Lock. Its remote access, Auto-Lock features, and compatibility with voice assistants make it incredibly convenient and secure for your home.

Conclusion

Incorporating August home accessories isn't just about style; it's about transforming your living space into a smart haven.

Advertisement

You might think you can live without these upgrades, but once you experience the convenience of seamless integration and enhanced security, you'll wonder how you ever managed before.

So, why not explore the future of home living? Embrace these essentials, and you'll access a lifestyle that's not only modern but also incredibly secure and user-friendly.

Continue Reading

Home Decor

Diy Burlap Lamp Shade

Transform your space with a unique, rustic lamp shade made from burlap fabric, and discover the easy DIY steps to create it.

Published

on

By

crafting with burlap fabric

We're about to create a unique and rustic DIY burlap lamp shade that not only adds warmth and character to any room but also offers a cost-effective alternative to expensive store-bought options. By gathering essential supplies like burlap fabric, spray adhesive, and a glue gun, we can customize our lamp shade with binding colors and designs that reflect our personal style. With accurate measurements and cutting, we can guarantee a snug and tailored fit. As we assemble the lamp shade, we'll explore various techniques for attaching the burlap fabric, adding decorative trims, and securing the shade to the base. Now, let's get started and uncover the steps to craft a beautiful, one-of-a-kind lamp shade that adds a touch of rustic charm to our home.

Key Takeaways

• Gather essential supplies, including a lamp shade, burlap fabric, spray adhesive, Heat n Bond, and a glue gun, to create a unique DIY burlap lamp shade.

• Measure the lamp shade accurately, adding a few inches for a tailored fit, and cut the burlap fabric precisely for a polished appearance.

• Attach the burlap fabric to the lamp shade frame using a strong adhesive or stitching method, and secure the edges with Heat n Bond and a glue gun.

• Add decorative embellishments, such as trim, fabric rosettes, or jeweled pins, to enhance the lamp shade's style and reflect personal taste.

Advertisement

• Secure the lamp shade to the base using a lamp harp and finial, ensuring a snug and centered fit, and test the lamp for proper functionality.

Gathering Materials and Supplies

We'll need a solid color lamp shade as the base for our DIY burlap lamp shade project, so grab one that fits your desired size and shape. This will provide a sturdy foundation for our burlap creation.

Next, we'll need to gather the essential supplies, including burlap fabric, spray adhesive, Heat n Bond, and a trusty glue gun. The amount of burlap needed will depend on the size of our lamp shade, but a general rule of thumb is to have 1-2 yards on hand, with more needed for larger shades. Having these materials ready will guarantee a smooth and successful project.

With our supplies in order, we can start thinking about customizing our lamp shade with binding colors and designs that reflect our personal style. By taking on this DIY project, we can enjoy significant cost savings compared to buying a similar lamp shade at a retail store.

Measuring and Cutting Burlap Fabric

crafting with burlap fabric

Measuring and cutting burlap fabric accurately is essential, so we carefully measure our lamp shade, taking note of its dimensions and adding a few inches to our calculations to guarantee a snug, tailored fit.

We understand that precision is key in this step, as it directly impacts the overall appearance of our DIY lamp shade. To guarantee a seamless and professional-looking cover, we take our time to measure twice and cut once.

Advertisement

When cutting the burlap fabric, we use a clever trick: we pull out a thread along the desired cutting line, creating a straight edge for a clean finish. This technique allows us to achieve a precise cut, which is crucial for a polished finish.

Assembling the Lamp Shade

putting together a lamp

Now that we've successfully measured and cut our burlap fabric, it's time to bring our lamp shade to life by assembling the various components.

We'll start by shaping the frame to provide a sturdy base for our shade, then carefully attach the burlap fabric using a strong adhesive or stitching method.

Shaping the Frame

As we assemble the lamp shade, shaping the frame is the essential first step that sets the tone for the entire project. We're not just creating a lamp shade, we're building a foundation that will support the entire structure.

Proper frame shaping is important for guaranteeing the lamp shade fits securely on the lamp base. We need to adjust the frame to accommodate different types of lamp bases and lamp shade styles. This process involves bending, molding, and securing the frame to achieve a balanced and visually appealing design.

Attaching the Burlap

We're prepared to bring our lamp shade to life by attaching the burlap fabric. This won't only add texture and visual interest but also tie the entire design together. To guarantee a secure and even application, we'll use a spray adhesive to attach the burlap fabric to the lampshade.

Advertisement

For a polished look, we can use Heat n Bond to create a finished edge on the burlap fabric.

Here are a few tips to keep in mind when attaching the burlap:

  • Secure the binding to the top and bottom edges of the lampshade using a glue gun for a neat and professional finish.
  • Consider using bias tape for a different binding look, adding a unique touch to the burlap lampshade design.
  • Customize the binding color to match your decor scheme, such as brown or cream, for a cohesive and stylish look.

Adding the Trim

With our burlap fabric securely in place, we'll elevate our lamp shade's style by adding a decorative trim that complements its rustic charm. We love how trim can transform the overall look of our DIY project, and we're excited to share our process with you.

When choosing a trim, we recommend selecting a style that complements the burlap fabric, such as ribbon, lace, or decorative braiding. To attach the trim, we'll use fabric glue or a glue gun to securely fasten it to the top and bottom edges of the lamp shade.

This won't only add a decorative touch but also help cover any imperfections in the fabric edges, creating a seamless look. We can experiment with different trim styles and widths to achieve the desired aesthetic for our burlap lamp shade.

Adding Decorative Embellishments

enhancing with ornamental details

We can take our burlap lamp shade to the next level by adding decorative embellishments that reflect our personal style. This is where we can get creative and make our lamp shade truly unique. By incorporating decorative elements, we can add a touch of elegance or whimsy to our DIY project.

Here are some ideas to get us started:

Advertisement
  • Fabric rosettes or jeweled pins can add a touch of glamour to our lamp shade
  • A monogram or personalized message can create a special and meaningful piece
  • Utilizing the burlap's hemmed edge on the bottom of the shade can provide a clean and finished appearance

When customizing our lamp shade with embellishments, we can experiment with different trims and decorative elements to enhance the overall design. Through affiliate links, we can find a wide range of materials and inspiration to help us customize our lamp shade.

Attaching the Shade to Base

assembly instructions for lamp

As we progress with attaching the shade to the base, we'll need to focus on securing the shade properly to guarantee a sturdy and stable lamp.

We'll use a combination of glue gun or fabric glue to attach the burlap-covered shade to the lamp base, making sure it's centered and straight before securing it in place.

Securing the Shade

We'll secure the lampshade to the base using a lamp harp and finial, guaranteeing a sturdy and stylish attachment. Before we start, we'll double-check that the lampshade fits snugly on the base. A little rotation will help us find the perfect position, making sure it sits straight and securely.

Here are some key steps to keep in mind:

  • Rotate the lampshade to guarantee it's properly aligned on the base
  • Adjust the harp's height to position the lampshade correctly
  • Tighten the finial to hold the lampshade firmly in place

Final Assembly Steps

Now that our lampshade is securely covered in burlap, it's time to attach it to the base, guaranteeing a sturdy and stylish final assembly. To do this, we'll use a glue gun to firmly attach the lampshade to the base.

Before applying the glue, we'll make sure the lampshade is centered and straight to avoid any unevenness. Once the glue is applied, we'll double-check that the lampshade is securely attached to prevent any accidents.

Next, we'll test the lamp to confirm it functions properly before placing it in its final location.

Advertisement

This DIY burlap lamp shade is almost complete, and we can't wait to enjoy the rustic and stylish lighting addition to our home.

As a reminder, 'a DIY burlap lamp shade is a great way to add a touch of rustic charm to any room' (DIY Home Decor).

With our glue gun and some patience, we'll have a beautifully crafted lamp shade that's both functional and aesthetically pleasing.

Finishing Touches and Display

perfecting the final details

We're putting the final flourishes on our burlap lamp shade, and that means it's time to add those special touches that make it truly one-of-a-kind.

Now that our shade is assembled, we can focus on the finishing touches that will give it a custom look.

Here are a few ideas to get you started:

Advertisement
  • Add a fabric rosette or jeweled pin to give your shade a touch of elegance
  • Experiment with different trims to create a unique design that reflects your personal style
  • Consider adding a monogram for a personal touch that makes your lamp shade truly one-of-a-kind.

Frequently Asked Questions

What Is the Best Fabric to Cover a Lampshade?

We're deciding on the best fabric to cover a lampshade – it depends on the vibe we want. For rustic, we'd choose burlap or linen, while cotton offers a softer look, and velvet or silk add luxury and sophistication.

Can You Make a Lampshade Out of Any Fabric?

We're wondering if we can make a lampshade out of any fabric, and the answer is yes, as long as it's heat-resistant and allows light to pass through.

What Can I Use as a Temporary Lamp Shade?

"Like a ray of sunshine, temporary solutions brighten up our lives! We can repurpose paper, fabric, or even a basket as a makeshift lamp shade – a quick fix for our lighting needs."

What Can I Use to Make a Lamp Shade?

We're considering various materials to make a lamp shade, and we think paper, fabric, or even recycled materials like old maps or book pages could work well, depending on the desired look and ambiance.

Conclusion

As we step back to admire our handiwork, the burlap lamp shade radiates a warm, earthy glow, reminiscent of a rustic country cottage. Like a master weaver, we've intertwined threads of creativity and practicality, crafting a unique piece that illuminates not only a room, but also our imagination.

As designer Rachel Ashwell once said, 'The beauty of DIY is that it's all about self-expression.' And in this case, our self-expression shines brightly, casting a warm, inviting light on our creative endeavors.

Advertisement

Continue Reading

Home Decor

Incredible Ways to Use Natural Elements in Your Home – The Transformation Will Amaze You!

Discover how simple natural elements can revolutionize your home's ambiance, leaving you wondering what stunning transformations await within your space!

Published

on

By

transform your home naturally

You can transform your home into a serene oasis by incorporating natural elements in creative ways. Start with water features like tabletop fountains for soothing sounds and visuals. Embrace weekly flower deliveries to add vibrant life to any room. Introduce indoor plants for improved air quality and a calming atmosphere; think low-maintenance succulents or unique fiddle leaf figs. Choose natural textiles like jute and linen for comfort, and consider rustic furniture to create warmth. Use natural lighting to enhance your space. Explore these ideas, and you'll discover even more stunning transformations waiting for you.

Key Takeaways

  • Incorporate water features like tabletop fountains or slate walls to create soothing atmospheres and enhance relaxation in your home.
  • Embrace weekly flower deliveries for vibrant decor that brings seasonal beauty and warmth to any room.
  • Add indoor plants to improve air quality and foster a calming environment, with options for every lifestyle.
  • Utilize natural textiles such as jute and linen to create comfort and visual harmony in your furnishings.

Water Features for Serenity

Water features, like slate water walls and tabletop fountains, can instantly transform your home into a serene oasis. These elements mimic the calming sound of natural waterfalls, bringing relaxation and tranquility to any space. By incorporating water features into your decor, you create an inviting atmosphere that not only impresses guests but also enhances your well-being.

Slate water walls are perfect for larger areas, providing a stunning visual and auditory focal point. You'll find that the sound of flowing water greatly boosts your mood, making it a great addition to your home office or meditation room.

If you're looking for something more affordable, tabletop fountains offer a simple yet effective way to incorporate serenity into your surroundings. They serve as soothing centerpieces, allowing you to enjoy the gentle sound of water without overwhelming your space.

With various types of water features available, you can easily choose one that suits your budget and style. Whether you opt for an elaborate installation or a low-maintenance design, the calming effect of water will create a peaceful environment that promotes relaxation and harmony in your home.

Embrace Weekly Flower Deliveries

enjoy fresh floral arrivals

Embracing weekly flower deliveries can elevate your home's ambiance and boost your mood with vibrant, fresh blooms. Regularly receiving seasonal flowers not only enhances your home decor but also creates a lively atmosphere filled with natural light and color. Companies like FTD allow you to customize arrangements, ensuring you enjoy a variety of blooms throughout the year.

Incorporating flowers into your decor acts as an instant upgrade, transforming any room into a more inviting space. Whether you place them in your living room, kitchen, or even your home office, the presence of fresh flowers fosters a warm, welcoming environment. This connection to nature promotes tranquility and well-being, making your home feel more serene.

Advertisement

Moreover, having fresh flowers regularly encourages mindfulness and appreciation for beauty in everyday life. You'll find that taking a moment to admire your blooms can greatly enhance your overall mental health.

Incorporate Indoor Plant Life

enhance home with plants

Incorporating indoor plants can transform your space while offering numerous benefits, like improved air quality and a vibrant atmosphere.

You'll find a variety of ideal selections, from low-maintenance succulents to eye-catching fiddle leaf figs, perfect for any skill level.

Plus, creative display ideas can help you showcase your greenery, making your home feel more alive and inviting.

Benefits of Indoor Plants

Indoor plants not only elevate your home's aesthetic but also greatly enhance air quality and well-being. By incorporating natural materials like indoor plants, you're not just beautifying your space; you're also creating a healthier environment. Studies show that plants can filter toxins and increase oxygen levels, making your home a healthier sanctuary.

Benefits Details
Improved Air Quality Filters toxins and increases oxygen levels.
Reduced Stress Can decrease anxiety by 37%.
Enhanced Productivity Boosts productivity by up to 58%.
Low Maintenance Ideal for busy lifestyles with easy-to-care-for options.
Adaptable to Lighting Thrives in various light conditions, perfect for any space.

Incorporating indoor plant life into your home allows you to experience these benefits firsthand. Whether you place a snake plant in your office or herbs in your kitchen, you'll enjoy the fresh ingredients and vibrant ambiance. Don't underestimate the impact of greenery; it can transform your daily living experience while promoting healthier habits.

Advertisement

Ideal Plant Selections

Choosing the right plants can dramatically enhance your home's atmosphere while providing numerous benefits. By incorporating indoor plants, you not only improve air quality but also add natural beauty to your space.

For a low-maintenance option, consider snake plants and pothos. They filter toxins and thrive even in busy lifestyles, making them perfect for you.

If you're looking to add height and visual interest, fiddle leaf figs and rubber plants are excellent choices. They thrive in bright, indirect light and greatly enhance your decor.

For those who prefer less frequent watering, succulents like jade and aloe vera are ideal. These hardy plants can be creatively displayed in various pots, fitting seamlessly into your design.

If you love cooking, a wall-mounted herb garden featuring fresh basil and mint can optimize your kitchen space while bringing in delightful fragrances.

Advertisement

Mixing indoor plants with varying leaf shapes and colors creates a vibrant, dynamic indoor garden that elevates your home's ambiance. By selecting the right combination of indoor plants, you can transform your living space into a natural oasis, promoting both relaxation and well-being.

Creative Display Ideas

Transform your space by creatively displaying plants in ways that enhance both their beauty and your home's atmosphere. Incorporating indoor plants not only connects you with the natural world but also elevates your design aesthetic.

Here are three inspiring display ideas to contemplate:

  1. Succulent Gallery: Create a visually striking arrangement using a mix of sizes and pots. This unique setup can fit any design style and adds visual interest to your space.
  2. Wall-Mounted Herb Garden: Maximize your kitchen's potential by installing a wall-mounted herb garden. It provides easy access to fresh herbs while enhancing culinary experiences and overall aesthetics.
  3. Decorative Plant Stands: Use decorative plant stands or hanging planters to elevate your greenery. This technique adds dimension to your decor, drawing the eye upward and creating an illusion of taller ceilings.

Natural Textiles for Comfort

comfortable natural textile fabrics

Natural textiles like jute, wool, and linen provide you with comfort and durability, making them ideal choices for rugs and soft furnishings in your home. These materials not only enhance your living space but also promote a cozy atmosphere that invites relaxation.

For instance, using undyed linen curtains allows natural light to filter through while ensuring your privacy, creating a bright and airy environment.

You'll find that cushions made from unwoven wool add a soft, inviting texture, transforming any seating area into a snug retreat. Incorporating these natural textiles in your decor not only brings warmth but also contributes to eco-friendly living by minimizing the use of synthetic materials. This choice reflects a commitment to sustainability while enriching your home's aesthetic.

Advertisement

The diverse textures and colors available in natural textiles add visual appeal, making your interiors feel more dynamic. By choosing these materials, you create a harmonious balance between comfort and style, ensuring your home is both inviting and environmentally conscious.

Embrace the beauty and practicality of natural textiles, and watch how they elevate your living spaces.

Accent With Rustic Furniture

rustic furniture home accent

Incorporating rustic furniture into your home not only complements the comfort of natural textiles but also adds a unique character that enhances your overall decor. By integrating these pieces, you create a warm atmosphere that invites connection to nature, bridging the gap between rustic charm and modern design.

Consider adding these three rustic furniture items to your space:

  1. Farmhouse Table: Perfect for family gatherings, it evokes a sense of togetherness while showcasing the beauty of natural wood.
  2. Reclaimed Wood Shelves: These not only display your favorite decor but also tell a story, adding depth and personality to your walls.
  3. Unfinished Wood Bench: A versatile seating option that encourages creativity; you can customize it to fit your specific style.

Rustic furniture often features natural materials like reclaimed wood, making each piece a conversation starter. Its organic imperfections enhance the tactile experience, while its ability to complement various design styles—from modern to traditional—ensures seamless integration into your home.

Embrace the charm of rustic furniture and watch how it transforms your living space!

Enhance With Natural Lighting

illuminate with natural light

Brightening your home with ample natural light can instantly lift your mood and create a welcoming atmosphere. To maximize natural light, consider installing skylights, especially in small or poorly lit rooms. They allow sunlight to flood in, making your space feel larger and more inviting.

Sheer curtains are another great option. They maintain your privacy while letting in plenty of sunlight, promoting a light, airy feel throughout your home. If you want to enhance the natural light even further, strategically placing mirrors can reflect that sunlight, making your rooms appear brighter and more expansive.

Advertisement

Additionally, choose neutral lighting fixtures that complement natural elements in your décor. This creates a harmonious and serene environment, allowing the beauty of natural light to shine through.

Use Elements of Nature

harnessing nature s powerful forces

Bringing elements of nature into your home not only creates a calming atmosphere but also enhances your space's overall aesthetic by reflecting the beauty of the outdoors. By incorporating natural elements, you'll transform your living space into a serene retreat. Here are three impactful ways to do it:

  1. Wood and Stone: Use wooden furniture and stone accents to introduce warmth and texture. These materials evoke a sense of durability and connection to nature.
  2. Indoor Plants: Adding greenery with indoor plants not only beautifies your space but also improves air quality. Choose low-maintenance varieties like succulents or herbs for an effortless touch of nature.
  3. Water Features: Consider a small fountain or aquarium. The soothing sounds of water create a peaceful ambiance, making your space feel more tranquil.

Maximizing natural light with large windows or skylights can also enhance the feel of your living space.

These natural elements come together to create a harmonious environment that rejuvenates your spirit and makes your home a true sanctuary.

Embrace nature, and watch your home flourish!

Frequently Asked Questions

What Are Three Examples of Natural Elements?

You might consider wood, stone, and plants as three natural elements. Wood adds warmth, stone introduces durability, and plants improve air quality, creating a serene atmosphere in your space while connecting you to nature.

Why Use Natural Materials in Interior Design?

Using natural materials in interior design enhances aesthetics, boosts indoor air quality, and promotes sustainability. You'll enjoy unique textures, durability, and increased property value, making your space healthier and more inviting for everyone who visits.

Advertisement

Conclusion

By incorporating these incredible natural elements into your home, you can create a space that feels both inviting and rejuvenating.

Imagine walking into a room filled with the soothing sound of water, vibrant plants, and warm sunlight.

Isn't it time you transformed your living environment into a sanctuary that reflects the beauty of nature?

Embrace these ideas and watch as your home evolves into a stunning oasis that captivates and inspires all who enter.

Advertisement

Continue Reading

Trending