Connect with us

Home Decor

Creative Ideas for Large Empty Frame

Fill a large empty frame with endless possibilities, from rustic decor to unique art displays, and discover the perfect creative solution.

Published

on

utilizing empty frames creatively

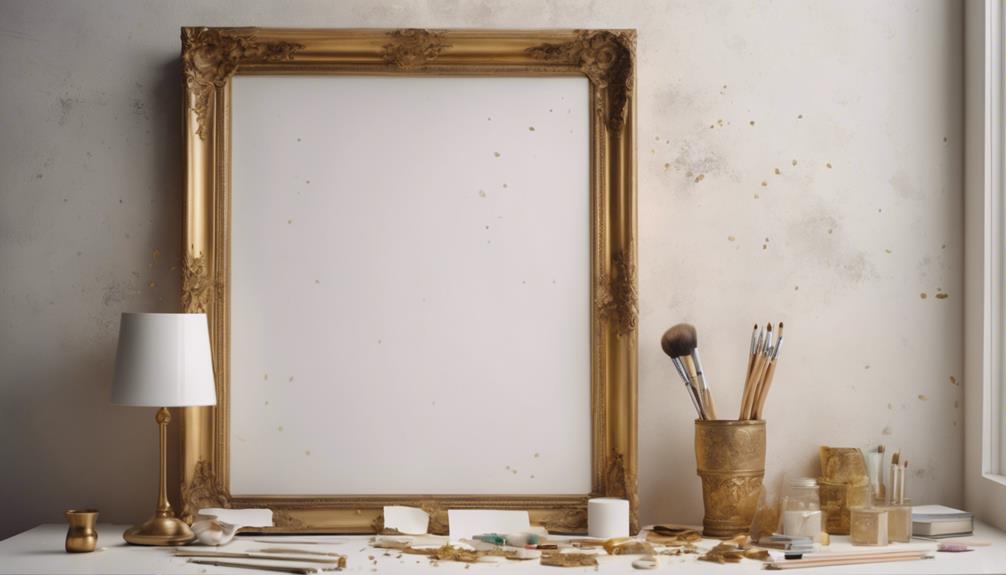
With a large empty frame, you're holding a blank canvas waiting to be transformed into a unique piece of art or functional decor. You can repurpose it with twine and clips, highlight your favorite plates, or use frames inside frames for a unique look. Consider displaying a wreath inside the frame, creating a one-of-a-kind window display, or adding a rustic touch with burl wood or ornate gold frames. You can even showcase art with canvas floaters. With frames available for as low as $10, the possibilities are endless. Take your creative vision to the next level and discover more inspiring ideas.

Key Takeaways

• Transform a large empty frame with twine and clips for a unique display, perfect for showcasing favorite items or mementos.

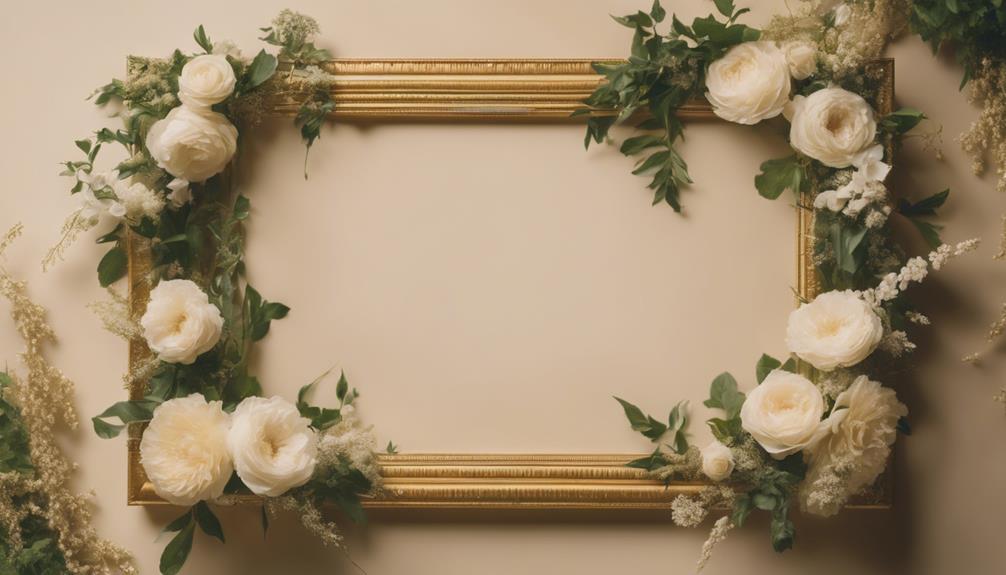
• Repurpose a large empty frame as a wreath display for various occasions, adding flowers or ribbons for a unique look.

• Use a large empty frame to showcase and highlight favorite plates, creating a personalized and eclectic display.

• Incorporate a large empty frame within a larger frame or with other frames for a creative and layered effect.

Advertisement

• Hang a large empty frame on a deck or porch ceiling for an enchanting window display that adds visual interest to outdoor spaces.

Repurposing With Twine and Clips

You can transform a large empty frame into a unique display piece by repurposing it with twine and clips. This allows you to easily hang and swap out pictures, postcards, greenery, or ornaments to match your mood or season.

This creative idea isn't only affordable but also versatile, enabling you to change up your decor to suit different styles or seasons. To get started, you can purchase empty frames for as low as $10 from online marketplaces like Facebook Marketplace or local selling sites.

Once you have your frame, simply secure twine to the back, and you're ready to hang your chosen displays. This DIY project is an excellent way to add a personalized touch to your home decor without breaking the bank.

With twine and clips, you can effortlessly switch out your displays to match your mood, season, or personal style. By repurposing empty frames, you can create a unique and dynamic display piece that reflects your personality and style.

Advertisement

Wreath Display Inside the Frame

festive wreath framed decor

As you explore the idea of displaying a wreath inside a large empty frame, you'll want to take into account a few key factors to make the most of this creative decor solution.

First, you'll need to decide on the type of wreath that will work best within your frame, taking into consideration the season, personal style, and overall aesthetic you're aiming for.

From there, you'll need to make sure your frame is the right size and explore the various hanging options that will showcase your wreath to its fullest potential.

Wreath Types to Use

Your frame can beautifully showcase a variety of wreath types, from seasonal evergreen and holly to festive floral and decorative fruit-and-ribbon designs. When choosing a wreath to display inside your empty frame, consider the occasion, season, or personal style.

For a rustic, natural look, opt for a wreath made from dried flowers, branches, or pinecones. Alternatively, add a pop of color with a vibrant floral wreath or festive holly and berry design.

Empty frames can serve as decorative accents for wreaths, adding a unique touch to the display. By hanging a wreath inside a frame, you can elevate the overall aesthetic of the decor. Plus, this creative idea allows for easy customization and switching out of wreaths for various styles and themes.

Advertisement

Whether you're celebrating a holiday, welcoming a new season, or simply adding a decorative touch to your home, a wreath inside an empty frame is a beautiful and versatile way to do so.

Frame Size Matters

When selecting a wreath to display inside your frame, consider the frame's size in relation to the wreath's dimensions to achieve a visually appealing arrangement. A large empty frame can be an ideal canvas for showcasing a beautiful wreath, but it's important to balance the proportions. If the wreath is too small, it might get lost in the frame, and if it's too large, it might overwhelm the space.

Here's a general guideline to follow:

Frame Size Wreath Size
16×20 inches 12-14 inches
20×24 inches 16-18 inches
24×36 inches 20-22 inches
30×40 inches 24-26 inches
36×48 inches 28-30 inches

Hanging Options

You can create a stunning visual display by hanging your wreath inside the frame using a sturdy wire or fishing line attached to the top of the frame and the wreath's center. This unique hanging option adds a creative twist to traditional wreath displays, and it's surprisingly easy to set up.

By suspending your wreath inside an empty frame, you can create a beautiful, eye-catching focal point in any room. Plus, the empty frame serves as a decorative accent, elevating your seasonal decor and adding a personalized touch to your space.

Advertisement

To take your display to the next level, consider adding flowers, ribbons, or other embellishments to your wreath. This won't only enhance the overall aesthetic but also make the piece truly one-of-a-kind.

Large empty frames are ideal for displaying wreaths in bedrooms or living spaces, and they offer a simple yet creative way to showcase your favorite wreaths. By experimenting with different hanging options, you can breathe new life into your decor and create a truly unique visual display.

Highlighting Favorite Plates

favorite food choices showcased

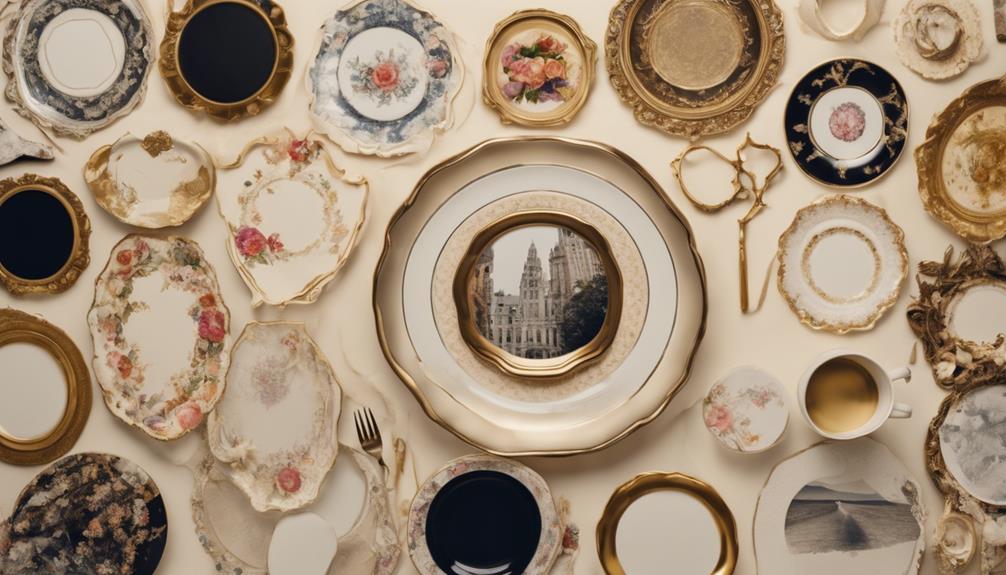
By creatively repurposing an empty frame, you can transform a favorite plate into a stunning work of art that adds a personal touch to your dining area.

This unique decor idea allows you to showcase special plates or platters in a way that's both visually appealing and personalized.

Empty frames, which can be purchased at affordable prices, such as $19.99 from stores like Kirkland's, offer a cost-effective solution for adding a touch of elegance to your walls or dining area.

Combining Frames for Charm

blending frames with style

As you start combining frames for charm, you'll soon discover the endless possibilities for creating unique and mesmerizing displays.

You can try framing a frame, crafting a mixed media masterpiece, or designing an eclectic gallery wall that showcases your personal style.

Advertisement

Frame Within a Frame

Nesting smaller frames within a larger one creates a visually appealing look that adds depth and interest to your display. This technique, known as 'frame within a frame,' allows you to combine multiple frames in a single display, creating a unique and artistic arrangement.

By using frames within frames, you can create a focal point in the room and draw attention to your artwork or photos. Experiment with different sizes, colors, and styles of frames to achieve a personalized and eclectic design. You can mix and match ornate gold frames with sleek black ones, or combine vintage frames with modern ones. The possibilities are endless, and the result is a visually stunning display that adds character to your space.

With the 'frame within a frame' technique, you can showcase your favorite pictures or artwork in a stylish manner that's sure to impress. So, get creative and start combining frames to create a one-of-a-kind display that reflects your personal style!

Mixed Media Masterpiece

You can craft a stunning mixed media masterpiece by combining frames of different sizes, shapes, and finishes to add charm and visual interest to your space. By experimenting with various frame styles, you'll achieve a unique and eclectic look that's sure to impress.

Layering frames on a wall creates a dynamic and personalized gallery that tells a story. For instance, mixing ornate gold frames with rustic wood frames blends sophistication and warmth in your decor.

Advertisement

Empty frames can serve as a backdrop to highlight other artwork or decorative elements within your living space. By combining frames, you can create a visually appealing display that draws the eye.

Don't be afraid to think outside the box and get creative with your frame selection. Combine modern frames with vintage ones, or pair sleek metal frames with distressed wood ones. The possibilities are endless, and the result will be a one-of-a-kind mixed media masterpiece that reflects your personal style.

Eclectic Gallery Wall

By combining frames of varying sizes, shapes, and styles, you'll create an eclectic gallery wall that exudes charm and character, drawing the eye with its visually interesting contrasts. To achieve this look, mix ornate gold frames with rustic wood frames, creating a striking contrast that adds depth to your gallery wall.

Experiment with varying frame widths and colors to add more dimension to your display. You can also incorporate vintage frames with contemporary styles to create a unique and personalized look.

When arranging the frames, aim for a balanced yet asymmetrical layout to create an eye-catching and dynamic design. This will guarantee that your eclectic gallery wall is visually appealing and draws the viewer's attention.

Advertisement

Using Frames Inside Frames

nesting frames for structure

To add a touch of whimsy to your decor, try placing frames inside frames to create a unique and visually appealing display of your most cherished possessions. This creative approach allows you to showcase special memories or sentimental items in a way that's both personalized and visually enchanting.

By using empty frames as a canvas, you can create a layered effect that adds depth and visual interest to your decor. For instance, you can place a small frame containing a vintage photo inside a larger frame, creating a beautiful contrast between the old and the new. This technique is ideal for highlighting adoption tags, cherished mementos, or other keepsakes in a creative way.

Creating Unique Window Displays

eye catching window displays

Beyond showcasing cherished possessions, empty frames can also be repurposed to create enchanting window displays that add a touch of elegance to your outdoor spaces.

You can hang them on your deck or porch ceiling to create a unique visual appeal. This is an excellent way to add a decorative element to your outdoor space without breaking the bank.

When choosing the frames, select ones that complement the style of your outdoor space. For instance, if you have a modern-themed patio, opt for sleek, minimalist frames. On the other hand, if your outdoor space has a vintage vibe, ornate empty frames would be a great fit.

Adding Rustic Touch With Burl Wood

enhancing decor with burlwood

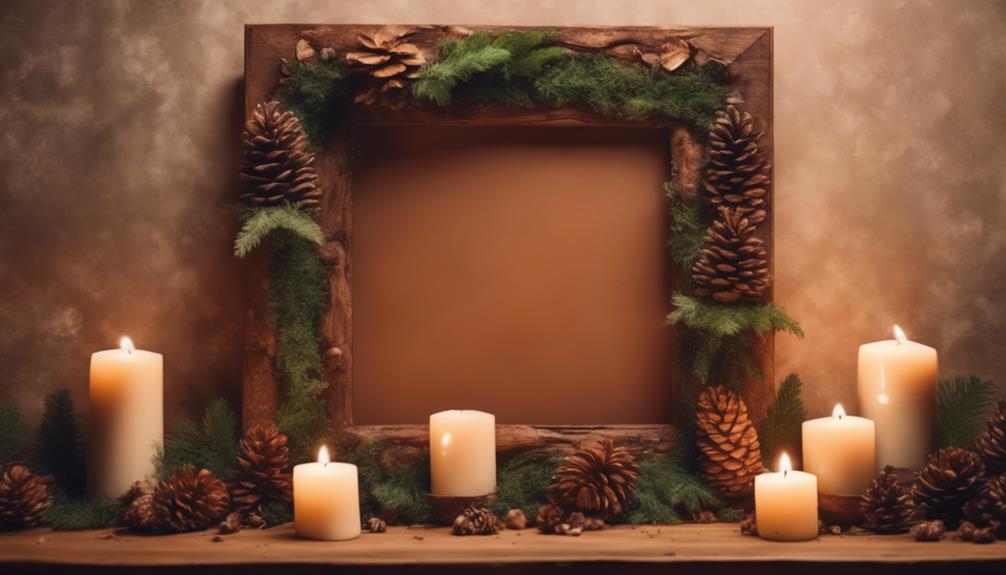
As you explore ways to infuse your space with a rustic charm, consider incorporating burl wood frames, which bring a unique blend of natural elegance and earthy sophistication to any room.

These frames, crafted from burl wood, are renowned for their intricate grain patterns, adding an unparalleled level of character to your decor. The rich tones and textures of burl wood frames will add warmth to your space, making them an excellent choice for filling large empty frames.

One of the most appealing aspects of burl wood frames is their versatility; they seamlessly complement various decor styles, from traditional to modern. Furthermore, their one-of-a-kind look and durability make them a popular choice for those seeking a distinctive touch.

Advertisement

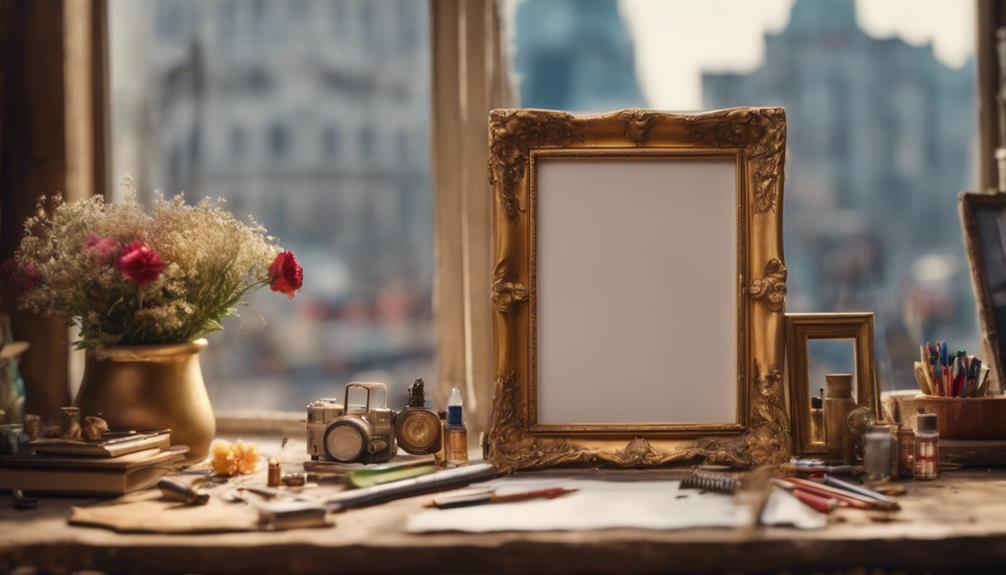
Transforming With Ornate Gold Frames

gold frames adorn transformation

Elevate your empty frame from ordinary to extraordinary with a single, luxurious touch by considering ornate gold frames. These frames, offered by Etsy seller FOUNDATIONframes, can add a touch of sophistication and elegance to any artwork or photograph. Starting at a sale price of $17.70 with a discount of up to 30% off, these frames are a great choice for enhancing your decor.

With intricate details and a gold finish, these frames bring a luxurious and timeless aesthetic to your space. Here are some benefits of transforming your empty frame with ornate gold frames:

  • Available in sizes suitable for wedding, portrait, and custom pictures
  • Enhance any artwork or photograph with a touch of sophistication and elegance
  • The intricate details and gold finish create a luxurious and timeless aesthetic

Showcasing Art With Canvas Floaters

displaying art with style

You can elevate your empty frame to a stunning display piece by opting for canvas floater frames, which offer a sleek and modern way to showcase your artwork. These frames boast a contemporary gold finish, measuring 1 3/4 inches in width and 1 5/8 inches in rabbet depth.

You can purchase them from Etsy seller CustomPictureFrames1 for $64.95, complete with free shipping. Canvas floater frames are designed to provide a stylish and modern display option for your artwork, adding depth and dimension to the piece.

The unique design of these frames creates a sophisticated presentation for your canvas art, making your empty frame a stunning focal point in any room. By choosing canvas floater frames, you can transform your empty frame into a beautiful work of art that showcases your personal style.

Whether you're an art enthusiast or a homeowner looking to elevate your decor, canvas floater frames are an excellent choice for showcasing your favorite artwork in a modern and elegant way.

Frequently Asked Questions

What Can I Do With a Large Empty Picture Frame?

You're wondering what to do with that large empty picture frame collecting dust in your attic. Well, you're not alone. Many people struggle to find a purpose for these vacant frames.

Advertisement

But don't worry, with a little creativity, you can transform it into a stunning piece of art or a functional decor item. You could frame a beautiful mirror, create a unique headboard, or even use it to display a decorative wreath.

The possibilities are endless, and we're about to explore some amazing ideas to get you started.

What Can I Do With a Very Large Picture Frame?

You've got a massive picture frame on your hands, and you're wondering what to do with it.

Did you know that 80% of people underestimate the potential of large empty frames? Don't be one of them!

With a very large picture frame, you can create a stunning room divider, hang it as a unique mirror, or even convert it into a floor-to-ceiling chalkboard or whiteboard for a creative workspace.

Advertisement

The possibilities are endless, so get creative and think outside the frame!

What Can I Put in a Frame Besides a Picture?

You're wondering what you can put in a frame besides a picture. Well, the possibilities are endless!

You could display pressed flowers, leaves, or botanical prints for a natural look. Alternatively, showcase special memorabilia like concert tickets, postcards, or handwritten notes for a personalized touch.

You could even turn your frame into a functional piece, like a unique wall clock or a jewelry organizer.

The key is to think outside the box (or frame!) and get creative!

Advertisement

What Can I Make With Old Frames?

You're probably familiar with the phrase 'one person's trash is another person's treasure.' This rings especially true when it comes to old frames.

Instead of tossing them, you can repurpose them into unique and functional items. You can turn them into a gallery wall display, a jewelry organizer, a memo board, a chalkboard, or even a decorative tray.

The possibilities are endless, and with a little creativity, you can give new life to an old frame.

Conclusion

As you gaze upon your newly transformed large empty frame, the once-barren space now bursts with personality, a tribute to your creativity.

Like a masterful conductor, you've orchestrated a symphony of textures, colors, and shapes, weaving together disparate elements into a harmonious whole.

Advertisement

Your frame, once a blank canvas, now tells a story, whispers secrets, and radiates a sense of style that's unmistakably yours.

Continue Reading
Advertisement

Alfresco

What Is Alfresco Painting? Artistic Techniques Explained!

An exploration of alfresco painting, a historical technique rooted in the Renaissance, revealing artistic secrets that elevate outdoor artistry.

Published

on

By

outdoor painting technique overview

Explore the historical artistry of alfresco painting, stemming from the Renaissance in Italy. Artists like Giotto and Michelangelo led the way, painting on wet plaster to craft vivid frescoes. For this technique, you'll need outdoor-grade paints such as oil paints, acrylics, or watercolors, along with suitable brushes and water containers. Prepping the plaster surface meticulously is essential for a flawless finish. As you paint, remember to use soft brushes on wet plaster, allowing pigments to chemically bond with the surface for depth. Delve into this technique further to uncover the intricate details and techniques that make alfresco painting truly unique.

Key Takeaways

  • Originates from Renaissance Italy, involving painting on wet plaster.
  • Requires outdoor-grade paints, suitable brushes, water containers, and portable easels.
  • Involves drawing directly on wet plaster and using soft brushes for blending.
  • Fresh plaster crucial for strong paint bonding, vibrant colors, and longevity.
  • Preservation entails curing, sealing, weather considerations, and regular maintenance.

Origins of Alfresco Painting

The origins of alfresco painting trace back to Italy during the Renaissance period, where artists pioneered the technique of painting on wet plaster to create enduring murals. This artistic practice, known as fresco, emerged as a popular method for decorating the walls and ceilings of churches, palaces, and public buildings in Italy.

During the Italian Renaissance, artists like Giotto and Michelangelo utilized fresco painting to produce magnificent works of art that showcased both their technical skill and creative vision.

Fresco painting involves applying water-based pigments on freshly laid wet plaster, allowing the colors to become an integral part of the surface as they dry. Artists would transfer their designs onto the wet plaster from a cartoon or outline drawing, enabling them to create intricate and long-lasting murals.

This technique not only provided a durable finish but also allowed for the creation of monumental and detailed artworks that adorned various architectural settings, contributing to the rich artistic legacy of the Italian Renaissance.

Materials Needed for Alfresco Painting

outdoor painting supplies required

For alfresco painting, you'll need specific materials to create your artwork outdoors. Common materials for fresco painting include outdoor-grade paints such as oil paints, acrylics, or watercolors. These paints are chosen based on the artist's preferences and the desired effect.

In addition to paints, you'll require brushes suitable for outdoor use, water containers for mixing paints, and portable easels to support your canvas or surface.

Advertisement

When painting alfresco, the natural light and surroundings play a significant role in influencing the colors and atmosphere of your artwork. This medium allows artists to capture changing light, shadows, and textures in real-time, providing a unique artistic experience.

Remember that preparing the plaster surface adequately is essential before beginning your alfresco painting to maintain the longevity and quality of your artwork.

Preparing the Plaster Surface

surface ready for plaster

To start preparing the plaster surface for alfresco painting, ensure it's smooth and free of imperfections. This step is vital as the success of the painting relies heavily on the quality of the plaster surface.

Artists often employ traditional fresco techniques to achieve the desired smoothness and flawlessness required for alfresco painting. Ensuring the plaster surface is completely dry is essential before commencing the painting process, as any moisture can compromise the adhesion of the pigments to the surface.

Properly preparing the plaster surface not only enhances the aesthetic appeal of the final artwork but also contributes to its longevity. By meticulously attending to the details of the plaster surface, artists set a strong foundation for the application of water-based pigments, which is the hallmark of alfresco painting.

Drawing the Design on Plaster

designing patterns on plaster

When drawing the design on plaster for alfresco painting, artists meticulously outline their vision directly onto the wet plaster surface. This technique for tracing serves as an essential guide for applying pigments and creating the mural.

Ensuring accuracy and cohesion in the final artwork, this step allows for the seamless integration of the design into the larger mural composition.

Advertisement

Plaster Design Preparation

Efficiently transferring the desired artwork onto the fresh plaster surface is a crucial step in the process of preparing the design for an alfresco painting. Artists utilize tools like brushes, pencils, or styluses to outline the design directly onto the prepared plaster surface.

These design outlines act as a roadmap for the artist, guiding them through the painting process in the alfresco technique. Precision and accuracy in this step are essential as they greatly impact the overall composition of the artwork.

Drawing the design on plaster marks the critical initial phase in creating vibrant and enduring alfresco paintings. By carefully tracing the design onto the plaster, artists lay the foundation for a visually captivating mural that withstands the test of time.

This meticulous process ensures that the artwork isn't only visually appealing but also structurally sound, enhancing its longevity and artistic impact.

Technique for Tracing

Using a sinopia sketch or cartoon, artists meticulously trace the design onto the fresh plaster surface to prepare for the alfresco painting process. Tracing is an essential step in fresco painting, as it allows artists to transfer the intricate details of their design onto the plaster with precision and accuracy.

Advertisement

By following the lines of the sketch or cartoon, artists can guarantee that the final composition reflects their original vision faithfully. This technique not only guides the artist during the painting process but also aids in the placement of elements within the composition. Through tracing, artists can achieve a level of detail and accuracy that would be challenging to attain freehand.

Ultimately, tracing plays a significant role in ensuring that the final fresco painting is a true representation of the intended design, capturing every nuance and detail with meticulous care.

Painting Techniques in Alfresco Painting

alfresco painting methods explained

To achieve intricate details and vibrant colors in alfresco painting, artists employ specific brushwork techniques on the freshly applied plaster. Working on wet plaster allows the pigments to bond chemically with the surface, ensuring the artwork becomes a permanent part of the wall in mural painting.

The technique involves using soft brushes to apply pigments to the wet surface, with the colors becoming brighter as the plaster dries. Artists must work swiftly and confidently to capture the desired hues and textures before the plaster sets. By blending and layering pigments on the wet surface, they can achieve depth and dimension in the mural.

This method of painting on wet plaster gives the artwork a matte finish and durability that's ideal for large-scale murals. The process of painting on wet plaster requires skill and precision to create lasting and visually stunning pieces of art.

Importance of Fresh Plaster in Painting

fresh plaster for painting

Fresh plaster plays a vital role in alfresco painting by ensuring that the paint adheres securely to the wall surface, enhancing its durability over time.

The porous nature of fresh plaster allows the pigments to be absorbed, creating a strong bond between the paint and the wall.

Advertisement

Artists find that painting on fresh plaster provides a smooth and receptive canvas for their artistic expression, resulting in vibrant and long-lasting colors on the wall.

Fresh Plaster Enhances

Enhancing the vibrancy and longevity of painted colors, fresh plaster plays an essential role in alfresco painting techniques. When working with fresco painting, fresh plaster acts as a pivotal foundation that allows the colors to bond effectively, creating lasting artwork. The porous nature of fresh plaster enhances the vibrancy of the colors, ensuring they remain vivid over time. Additionally, painting on fresh plaster provides artists with a smooth and even surface to work on, allowing for intricate details and precise brushwork.

To further illustrate the importance of fresh plaster in alfresco painting, consider the following table:

Benefits of Fresh Plaster in Alfresco Painting
Allows colors to bond effectively
Enhances color vibrancy and longevity
Provides a smooth surface for detailed work

Painting Adhesion and Durability

For ideal adhesion and durability in alfresco painting, fresh plaster plays a critical role in bonding water-based pigments to the wall surface. In fresco painting, the application of fresh plaster serves as the foundation for the paint to guarantee effective bonding, ensuring a long-lasting finish.

The interaction between the fresh plaster and water-based pigments is essential for creating a strong bond that withstands the test of time. Without the use of fresh plaster, the paint may not properly set on the wall surface, leading to potential issues such as flaking or peeling over time.

Advertisement

Fresh plaster in alfresco painting isn't just a surface preparation step but a fundamental component in enhancing the vibrancy and longevity of the colors applied. It allows for a seamless integration of the paint into the wall, becoming a permanent part of the structure.

The meticulous attention to using fresh plaster guarantees a durable and visually striking outcome in fresco painting.

Curing and Sealing the Fresco

preservation of ancient artwork

Curing and sealing the fresco is an essential final step in guaranteeing its longevity and preservation. The curing process involves allowing the fresco to dry naturally over several weeks. This period is vital for achieving full strength and durability as the pigments chemically bond with the plaster. Properly curing the fresco guarantees a lasting and vibrant artwork.

Sealing the fresco with a protective coating, such as a transparent glaze or wax, further enhances its longevity. This protective layer helps shield the fresco from environmental factors like dust, dirt, and moisture, preserving its colors and details for years to come. By properly curing and sealing the fresco, you aren't only maintaining its integrity but also ensuring its beauty withstands the test of time.

This meticulous process is fundamental for the long-term preservation of fresco paintings, making them a valuable and enduring art form.

Tips for Successful Alfresco Painting

outdoor painting success guide

When starting alfresco painting, keep in mind that the choice of location can greatly impact your artwork's outcome.

Considering the weather conditions is essential for a successful painting session outdoors.

Advertisement

Location Choice Matters

Selecting the right location is key to ensuring successful alfresco painting, as it greatly impacts the outcome of your artwork. When choosing a spot for your outdoor painting session, consider factors such as lighting, scenery, and ambiance. Here are some tips to help you make an informed decision:

Consideration Description Example
Lighting Opt for locations with natural light sources to enhance colors and shadows. Painting near a lake during sunset.
Scenery Choose settings that inspire your creativity and complement your artistic vision. A lush garden with vibrant flowers.
Ambiance Look for places that provide a peaceful and inspiring atmosphere to focus on your art. A quiet meadow with the sound of birds chirping.

Weather Considerations Crucial

Considering weather conditions is crucial for successful alfresco painting. It directly impacts the quality and process of your artwork.

Temperature plays a significant role in determining the drying times of your paints. Extreme heat can cause them to dry too quickly, affecting the blending and overall finish of your piece. On the other hand, cold temperatures can prolong drying times, leading to potential smudging or smearing if not carefully monitored.

Additionally, humidity levels in the air can influence how your paints adhere to the canvas, impacting the richness and depth of colors achieved. It's advisable to work during times when the temperature is moderate, avoiding peak sunlight hours that can accelerate drying excessively.

Inspirational Examples of Alfresco Art

outdoor art installations thrive

Explore a variety of awe-inspiring alfresco artworks that showcase the beauty and creativity of painting outdoors. Alfresco painting, with its roots in capturing the essence of nature, has produced some remarkable pieces throughout history.

One of the most iconic examples of alfresco art is Michelangelo's masterpiece in the Sistine Chapel. The intricate frescoes adorning the chapel's ceiling are a testament to the skill and dedication required for this painting technique.

Advertisement

Artists like Monet and Sargent also found inspiration in painting outdoors, using plein air techniques to convey the changing light and atmosphere in their works.

These influential artists paved the way for contemporary alfresco painters, who continue to create stunning pieces that blur the lines between art and nature. From vibrant landscapes to intimate portraits, alfresco art offers a unique perspective that can only be achieved by working directly from the natural world.

Preservation and Maintenance of Alfresco Paintings

conserving outdoor artwork masterpieces

To guarantee the longevity and beauty of alfresco paintings, preservation and maintenance are crucial steps in protecting these artworks from environmental damage. Preservation of fresco paintings involves safeguarding them from weather elements such as rain, sun exposure, and temperature fluctuations.

It's essential to maintain these pieces by regularly cleaning them to remove dirt, grime, and pollutants that could harm the artwork over time. Applying protective coatings or sealants can help extend the lifespan of alfresco paintings and prevent color fading.

In cases where restoration is necessary, conservators may repair cracks, reattach loose paint, and address any structural issues to ensure the durability of the artwork. Professional conservators utilize specialized methods and materials to safeguard fresco paintings, ensuring that their beauty and historical significance are preserved for future generations to appreciate.

Frequently Asked Questions

What Is the Fresco Painting Technique?

The fresco painting technique involves applying water-based pigments on freshly applied plaster, creating durable murals. Artists grind dry-powder pigments in water to create colors that dry and set with the plaster, allowing for detailed artworks.

Advertisement

What Does Al Fresco Mean in Painting?

Imagine painting under the open sky, capturing nature's essence with each brushstroke. 'Al fresco' in painting means embracing the outdoors. Artists use this term to signify creating art in the fresh air, connecting with nature's beauty.

How Does an Artist Create a True Fresco Painting?

To create a true fresco painting, you meticulously apply water-based pigments on fresh plaster while transferring your design. Each day, you paint sections on wet plaster, ensuring colors become permanent as they dry within the surface.

Why Is Fresco Painting Significant?

Fresco painting is significant due to its durability and ability to create monumental murals. Artists like Michelangelo favored it during the Italian Renaissance. Applying water-based pigments on wet plaster makes colors permanent, allowing detailed work.

Conclusion

To sum up, alfresco painting is a timeless art form that requires skill, patience, and attention to detail.

As you commence on your own alfresco painting journey, remember that like a fresco, life is a canvas waiting to be painted with vibrant colors and intricate designs.

Advertisement

So, take inspiration from the masters of the past, embrace the process of creating something beautiful, and let your creativity shine through in every brushstroke.

Happy painting!

Continue Reading

Home Decor

Set the Perfect Mood in Any Room With These Lighting Tips – You’Ll Be Amazed!

Unlock the secrets to transforming your space with simple lighting tips that will leave you amazed at the results!

Published

on

By

transform your space s ambiance

You can easily set the perfect mood in any room with just a few lighting tips. Start by using a mix of ambient and task lighting to create comfort and functionality. Dimming your lights softens the atmosphere for intimate gatherings, while warm-toned bulbs foster positivity. Layer your lighting with floor lamps, sconces, and colored LED bulbs to add depth and visual interest. Consider natural elements, like salt lamps, to enhance relaxation. These simple adjustments can transform your space. For even more ways to elevate your home's vibe, you'll want to explore additional creative lighting techniques!

Key Takeaways

  • Use dimmable fixtures or candles to easily adjust ambiance for gatherings or relaxation, creating a warm and inviting atmosphere.
  • Layer lighting with multiple sources, such as floor lamps and wall sconces, to enhance room aesthetics and depth.
  • Choose warm-toned bulbs to create a flattering environment that boosts confidence and enhances emotional connections.
  • Incorporate task lighting in functional areas to ensure safety and productivity while maintaining a cozy atmosphere.

Understanding Mood Lighting

Understanding mood lighting is essential because it can dramatically shape your emotions and experiences in any space. The right mood lighting creates an inviting atmosphere that enhances your feelings and interactions.

Ambient lighting, particularly when it has a warm glow, is vital for setting the tone. It not only softens harsh realities but also boosts confidence, especially in romantic settings.

Research shows that many people prefer dimmed lighting during intimate moments, often due to worries about body visibility and self-image. By using warm tones, you can create a more flattering environment that reduces self-consciousness and heightens enjoyment. This positive lighting can make a significant difference in how you and your partner connect, fostering deeper emotional ties.

Incorporating multiple light sources and adjusting colors can further enhance your space. You're not just illuminating a room; you're curating an experience that promotes well-being and satisfaction.

Types of Lighting to Consider

various lighting options available

To create the perfect atmosphere in your space, it's important to explore the different types of lighting available, each serving a unique purpose in enhancing your home's ambiance.

Start with ambient lighting, which sets the overall tone and mood of a room. Options like floor lamps and recessed lights provide a soft glow that enhances comfort and relaxation, making your space feel inviting.

Advertisement

Next, consider task lighting. This type is essential for functional areas where you need focused illumination. Under-cabinet lights in kitchens or desk lamps in home offices guarantee you can perform specific activities efficiently and safely. Task lighting not only aids productivity but also prevents eye strain.

Techniques for Effective Atmosphere

creating engaging atmosphere techniques

Creating the right atmosphere in your space involves a strategic blend of lighting techniques that cater to your specific needs and preferences.

Start by using dimmable light fixtures or candles to soften the ambiance, perfect for gatherings or relaxation. Multiple light sources, like floor lamps, wall sconces, and table lamps, allow you to adjust the mood effortlessly while enhancing the overall aesthetic of your room.

Consider incorporating smart home technology, which lets you customize brightness and color to suit different occasions. This adaptability guarantees your space feels just right, whether you're hosting friends or enjoying a quiet evening alone.

Opt for warm-toned lighting to boost self-confidence and create an inviting environment, fostering positive interactions. For a calming atmosphere, try adding natural elements like Himalayan salt lamps; they not only provide a gentle glow but also contribute to a soothing vibe.

Creating Intimacy With Light

illuminating connection through light

Soft lighting sets the mood for intimacy, helping you and your partner feel more relaxed and connected. When you dim the lights, the atmosphere transforms, inviting a sense of closeness. A warm, amber glow creates a cozy environment that encourages emotional bonding.

According to a Harris Poll, 62% of people prefer intimate moments with the lights off, emphasizing the power of reduced visibility in fostering comfort.

Advertisement

Incorporating ambient lighting solutions like Himalayan salt lamps or colored bulbs can greatly enhance the mood of a space. These options not only cast a soft light but also add a unique charm that can elevate your romantic experiences.

Warm tones in lighting improve appearance and boost self-confidence, allowing both you and your partner to feel at ease during those special moments.

Practical Lighting Tips for Rooms

effective room lighting strategies

Maximizing the effectiveness of your lighting can transform any room into a more inviting and functional space. Start by incorporating dimmer switches to easily adjust the lighting intensity, allowing you to create the right ambience for relaxation or social gatherings.

Layer your lighting with multiple sources, like floor lamps, table lamps, and recessed fixtures, to add depth and visual interest.

In spaces like living rooms and bedrooms, opt for warm-toned bulbs. They enhance appearance and boost confidence, making your environment feel more welcoming.

For functional areas like kitchens, utilize task lighting by combining overhead fixtures with under-cabinet lights. This guarantees ideal usability and safety while you cook.

Advertisement

Don't forget to experiment with strip lighting! It's perfect for accentuating architectural features or creating a cozy atmosphere in various spaces.

Consider using color-changing LED bulbs as well; they allow you to customize the atmosphere according to your mood or occasion. By mixing different shades and intensities throughout your rooms, you'll achieve a well-lit space that feels just right for any activity.

Frequently Asked Questions

How to Set the Mood With Lighting?

To set the mood with lighting, use warm-toned bulbs and multiple light sources. Incorporate soft lighting for comfort, and experiment with unique options like Himalayan salt lamps to create a playful, intimate atmosphere.

What LED Light Puts You in a Good Mood?

Imagine warm, soft oranges and yellows wrapping around you like a cozy blanket. Those LED lights lift your spirits, while playful purples spark joy, and calm blues keep you alert. Choose your mood, light it up!

How Does Room Lighting Affect Mood?

Room lighting affects your mood considerably. Warm tones can boost your confidence and create a relaxing atmosphere, while bright lights keep you alert. Adjusting lighting alters your feelings, enhancing intimacy and emotional satisfaction during interactions.

Advertisement

How Does Lighting Affect the Mood of a Scene?

You might think lighting doesn't matter much, but it profoundly shapes a scene's mood. Soft, warm tones create intimacy, while harsher lights can evoke tension. Carefully chosen lighting enhances emotions, fostering connections and making moments memorable.

Conclusion

Now that you've got the tools to set the perfect mood, imagine this: you're hosting a cozy dinner party.

Soft, warm lights flicker from strategically placed lamps, while candles on the table cast a gentle glow.

Friends laugh and share stories, feeling instantly relaxed in the inviting atmosphere you've created.

With these lighting tips, you can transform any space, making every gathering memorable and every moment special.

Advertisement

So go ahead, let your creativity shine!

Continue Reading

Home Decor

Ways to Incorporate Handmade Crafts Into Your Country Home Decor

Find inspiration in unique handmade crafts that will transform your country home decor into a cozy haven—discover the endless possibilities!

Published

on

By

handmade crafts for country decor

Incorporating handmade crafts into your country home decor adds a personal touch that enhances its cozy, rustic vibe. Start with thrifted items like wooden trays or vintage dishes to infuse character. Use natural elements, such as grapevine or jute ribbons, to layer textures. Adorn your dining table with burlap runners and mason jar centerpieces full of seasonal flowers. For lighting, try handcrafted pendant lights or rustic lanterns draped with twinkling fairy lights. Don't forget the walls; personalize with hand-painted frames or quilted fabric wall art for extra charm. Keep exploring to discover even more creative ideas!

Key Elements

essential components overview

When it comes to crafting for your country home, the right color scheme, materials, and textures can make all the difference.

You'll want to choose warm, earthy tones that reflect the natural beauty of the countryside.

Incorporating these elements will help create a cohesive and inviting atmosphere in your decor.

Color Scheme

How can you achieve a warm and inviting color scheme in your country home decor?

Start by embracing earthy tones like cashew and moss chalk paint. These colors can breathe new life into thrifted items, giving them a rustic touch that fits perfectly in a country setting.

Advertisement

Make sure to incorporate vintage-inspired colors such as yellow maze and night sky to create visual interest and depth in your handmade crafts.

To balance your decor, select floral arrangements featuring a mix of colors. Elements like blueberries, white flowers, and greenery should complement each other harmoniously, enhancing the overall aesthetic.

You can also implement natural elements and textures, like jute ribbon and grapevine, to add warmth and character while sticking to a cohesive color palette.

Materials

To create a truly authentic country home decor, select materials that reflect the rustic charm and warmth of your space. Start by incorporating thrifted items like wooden caddies, tin buckets, and vintage dishes. These unique finds add character and charm, making your decor feel lived-in and inviting.

Utilize natural elements, such as grapevine and faux greenery, to enhance your arrangements. These materials help create a cohesive, rustic aesthetic that emphasizes the beauty of nature.

Advertisement

Don't forget to add a personal touch with handmade tags made from coffee-stained manila paper. Use hand lettering and distressing techniques to elevate your decor further.

Experiment with floral arrangements, incorporating elements like blueberries and white flowers for whimsical accents. Remember to maintain visual balance by using odd numbers in groupings, which naturally draws the eye.

Finally, consider employing creative finishing techniques on thrifted wood items. A dry brushing of chalk paint or a touch of antique wax can give these pieces a vintage appearance, seamlessly blending them into your country decor.

Textures

Incorporating a variety of textures, like the roughness of distressed wood and the softness of jute, creates a warm and inviting atmosphere in your country home decor. You can easily find thrifted items that embody that rustic charm, enhancing the overall depth of your space. Natural elements, such as grapevine and faux greenery, not only add tactile appeal but also help unify your aesthetic.

To introduce softness, consider using jute ribbon or bows made from gingham or denim. These elements not only complement the country style but also add layers of interest. Mixing smooth surfaces, like painted jars, with the rough textures of sanded wood allows for striking contrasts in your decor.

Advertisement

Don't forget to layer materials for added richness. Think coffee-stained manila tags paired with antique wax finishes to achieve a vintage look that enhances your home's texture. By thoughtfully selecting and combining these various textures, you'll create an inviting space that reflects your personality and love for handmade crafts.

Embrace the beauty of these elements, and watch as your country home decor transforms into a cozy haven.

Essential Fixtures and Furniture

necessary items for living

When you think about essential fixtures and furniture for your country home, consider how a rustic wooden dining table can serve as the heart of your space.

An antique mason jar chandelier adds a unique touch, illuminating your gatherings with charm.

Don't forget woven basket wall hangings; they not only provide storage but also enhance the cozy, handcrafted vibe you're aiming for.

Rustic Wooden Dining Table

A rustic wooden dining table acts as the heart of country home decor, showcasing unique wood grains and imperfections that enhance its charm. This central piece invites family and friends to gather, infusing warmth and character into your space.

Advertisement

To personalize your table, incorporate handmade crafts like hand-carved wooden serving trays or custom burlap table runners. These additions not only complement the rustic aesthetic but also reflect your unique style.

Surrounding your dining table with antique or vintage chairs can create a cohesive look, which you can often find at thrift stores or flea markets. This combination reinforces the country theme and adds layers of history to your dining experience.

For an extra touch, decorate with mason jars filled with wildflowers or hand-painted wooden centerpieces. These elements elevate your table's visual appeal while maintaining a rustic feel.

Antique Mason Jar Chandelier

An antique mason jar chandelier not only illuminates your space but also enhances the rustic charm established by your wooden dining table. It serves as a stunning centerpiece, blending functional lighting with delightful vintage aesthetics. To create your chandelier, source vintage mason jars from thrift stores or flea markets; these can be repurposed as shades for light bulbs, casting a warm, inviting glow.

Mixing different sizes and styles of mason jars adds visual interest and unique character to your chandelier design. Consider using jute or hemp rope to hang the jars, which enhances the natural, rustic aesthetic that complements your country home decor beautifully. This approach not only keeps the look cohesive but also adds a touch of earthy texture.

Advertisement

For a personalized touch, you can embellish the jars with hand-painted designs or distressed finishes, reflecting your individual style and creativity. Crafting this chandelier becomes a rewarding project that showcases your handmade spirit while providing essential lighting.

Woven Basket Wall Hanging

Woven basket wall hangings add both charm and functionality to your country home decor, creating a striking focal point while providing storage solutions. These handcrafted pieces bring texture and warmth, enhancing the rustic feel of your space. By incorporating different sizes and shapes of woven baskets, you can create visual interest and depth on your walls.

To make the most of your woven baskets, consider layering them against a backdrop of farmhouse-style shiplap or muted paint colors. This contrast highlights their natural materials and craftsmanship beautifully. For an extra personal touch, combine the baskets with handmade tags or embellishments, like jute ribbon, to achieve a cohesive and charming aesthetic.

Don't forget to integrate faux greenery or florals within the baskets to introduce a splash of nature and color. This simple addition transforms your wall hanging into a dynamic element that breathes life into your decor.

Lighting Ideas

creative illumination concepts

When it comes to lighting your country home, you've got plenty of creative options to contemplate.

Rustic lantern string lights can set a cozy mood, while a vintage table lamp trio adds character to your space.

Advertisement

Don't forget about handcrafted ceramic pendant lights and rustic iron wall sconces, which can beautifully enhance your decor.

Rustic Lantern String Lights

Rustic lantern string lights add a warm, inviting glow to your country home decor, transforming any space into a cozy retreat. You can create these charming lights by repurposing thrifted lanterns, often found at second-hand stores for as low as $1.99. Simply fill them with fairy lights to achieve that perfect ambiance.

If you don't have lanterns, mason jars work just as well. Painting them with chalk paint gives them a distressed look, and adding LED string lights inside will enhance their appeal.

To further embrace the rustic aesthetic, wrap twine or jute ribbon around your lanterns or jars. This small detail ties your decor back to the country theme. Hang your handmade lantern string lights along porches, patios, or even inside your living spaces to create a cozy atmosphere, ideal for gatherings or quiet evenings.

Don't hesitate to experiment with different heights and arrangements. Cluster lanterns or jars together on a table or shelf, mixing them with floral arrangements for added visual interest.

Advertisement

With these simple touches, your country home will radiate warmth and charm, making it an inviting space for everyone.

Vintage Table Lamp Trio

Adding a vintage table lamp trio to your decor not only enhances the lighting but also brings a unique charm that complements your handmade crafts. Sourcing these lamps from thrift stores or flea markets can lead you to one-of-a-kind designs that encapsulate the essence of country decor.

Consider mixing styles, such as ceramic, metal, and glass, to create a visually interesting arrangement that adds depth to your lighting scheme.

To refresh old lamp bases, use cashew chalk paint or other soft hues that blend seamlessly with your rustic aesthetic. This simple update keeps the vintage feel while ensuring the lamps fit your overall decor.

You can further enhance their appeal by adding decorative elements like jute ribbon or distressed tags to the shades, tying them in with other handmade items in your home.

Advertisement

Position your trio strategically, whether on side tables or mantels, to create warm, inviting light. This setup not only illuminates your space but also highlights the beauty of your handmade crafts, making your country home feel cozy and welcoming.

With these lamps, you'll see how lighting can be both functional and a stylish statement.

Handcrafted Ceramic Pendant Lights

Handcrafted ceramic pendant lights bring a unique charm to your country home decor, showcasing artisanal craftsmanship through their distinct glazes and textures. These lights not only illuminate your space but also serve as stunning decorative pieces that reflect your personal style. You can choose from a variety of shapes and sizes, allowing for a customized look that complements your existing decor while adding a personal touch.

The natural materials used in these pendant lights, such as clay, resonate beautifully with the rustic aesthetic of country homes. They create a warm and inviting atmosphere, perfect for cozy gatherings with family and friends. To enhance your lighting's functionality and sustainability, consider incorporating energy-efficient LED bulbs, which work seamlessly with ceramic designs.

Position your ceramic pendant lights over key areas like kitchen islands or dining tables. This practical placement not only provides essential illumination but also establishes a focal point that elevates your overall design.

Advertisement

With their artisanal qualities and versatility, handcrafted ceramic pendant lights can transform any space, making them an essential addition to your country home decor.

Rustic Iron Wall Sconces

Iron wall sconces offer a perfect way to enhance your country home decor, providing ambient lighting while adding a vintage touch that complements your handcrafted ceramic pendant lights. These rustic sconces often come with intricate designs and a sturdy construction, making them ideal for showcasing your handmade crafts, like mason jar candle holders or floral arrangements.

When selecting wall sconces, consider pieces with a distressed finish, as they harmonize beautifully with other rustic elements, such as reclaimed wood furniture and vintage decor. You can also pair your sconces with natural materials like jute or burlap to add an inviting texture that emphasizes the handmade aesthetic.

Utilizing wall sconces to display seasonal decor, such as small wreaths or greenery, allows you to create a versatile styling option that can change with the seasons. This flexibility adds a dynamic element to your decor while maintaining a cohesive look throughout your home.

Incorporating rustic iron wall sconces not only illuminates your space but also serves as a stylish backdrop for showcasing your cherished handmade crafts, enhancing the overall charm of your country home.

Advertisement

Decorative Elements

artistic design features

When it comes to decorative elements, hand-painted wooden picture frames can add a personal touch to your walls.

You'll love the warmth of quilted fabric wall art, which brings a cozy, inviting feel to any room.

A rustic clay pot centerpiece can tie everything together, offering an earthy charm that perfectly complements your country home decor.

Hand-Painted Wooden Picture Frames

Customizing hand-painted wooden picture frames with chalk paint or acrylics adds a personal touch that beautifully complements your country home decor style. You can choose colors that match your existing palette or add a pop of vibrancy to your space. To achieve a rustic, vintage appearance, consider using distressing techniques like sanding and applying antique wax. This approach not only enhances the frame's character but also fits seamlessly into a country-themed aesthetic.

To further elevate your frames, you might add decorative elements such as jute ribbon, faux greenery, or small floral accents. These details can tie the frames into your overall decor theme and create a cohesive look throughout your home. For an extra layer of personalization, think about using manila tags with hand lettering or coffee staining. These charming labels can give each frame a unique story.

When arranging multiple frames on a wall, try incorporating a triangle pattern. This technique establishes visual balance and enhances the overall look of your decor, making your hand-painted frames a stunning focal point in your country home.

Advertisement

Quilted Fabric Wall Art

Handmade quilted fabric wall art beautifully complements hand-painted picture frames, adding warmth and texture that enhances the rustic charm of your country home decor. You can choose from various fabric patterns and colors to create a cohesive aesthetic that reflects your personal style. Incorporating patchwork designs not only evokes nostalgia but also connects to heritage, making these pieces meaningful focal points in your living spaces.

Using natural fibers like cotton or linen for your quilted wall art enhances its rustic appeal while ensuring durability and easy care. You can display quilted pieces in several ways, whether framed or hung as standalone art. This versatility allows you to mix and match with other decorative elements in your home.

To make your quilted fabric wall art truly unique, consider adding embellishments such as buttons, lace, or embroidery. These personal touches will express your creativity and elevate your decor. Overall, quilted fabric wall art serves as an inviting and beautiful addition to your country home, making it feel warm, welcoming, and full of character.

Rustic Clay Pot Centerpiece

A rustic clay pot makes a stunning centerpiece that effortlessly showcases seasonal floral arrangements and natural elements, enhancing the charm of your country home decor. You can fill the pot with a delightful mix of faux berries, white flowers, and greenery to create a lively, whimsical look that reflects nature's beauty.

To add visual interest, arrange your flowers using a triangle pattern, ensuring balance and symmetry within the display. This approach draws the eye and makes the centerpiece more appealing. For an extra touch of texture, consider wrapping jute ribbon or gingham fabric around the rim of the clay pot, perfectly complementing the rustic aesthetic.

Advertisement

Don't forget to personalize your centerpiece! Attaching handmade tags with hand-lettered messages can evoke a warm, inviting atmosphere, making your guests feel right at home. You might also incorporate natural elements like grapevine or faux greenery for a cohesive look that ties everything together.

Flooring

flooring installation and options

When it comes to flooring in your country home, you've got some charming options to contemplate.

Reclaimed barn wood planks can add a warm, rustic feel, while natural stone tile offers durability and elegance.

If you're looking for a unique touch, a cottage-style painted concrete floor might just be the creative expression your space needs.

Reclaimed Barn Wood Planks

Reclaimed barn wood planks bring unique character and history to your home, making them an ideal choice for rustic flooring. Sourced from old barns, these planks offer not just aesthetic appeal but also a sustainable option for your flooring needs. By repurposing materials that might otherwise end up in a landfill, you're making an environmentally friendly choice that aligns with sustainable building practices.

The rich grain patterns and color variations in reclaimed wood add warmth and charm, creating a cozy atmosphere that complements your country home decor. Plus, many of these planks undergo treatment to eliminate pests and enhance durability, ensuring they can handle daily wear while maintaining their natural beauty.

Advertisement

Installing reclaimed barn wood flooring can also boost your property value. It's often viewed as a high-quality feature by potential buyers who appreciate a rustic aesthetic. So, when you choose reclaimed barn wood, you're not just investing in flooring; you're enhancing the character of your home while making a smart investment.

Embrace the charm and sustainability of reclaimed barn wood planks, and watch your country home transform into a warm, inviting space.

Natural Stone Tile Flooring

Natural stone tile flooring complements the rustic elegance of reclaimed barn wood planks while adding durability and a timeless aesthetic to your country home decor. Each piece of natural stone is unique in color and texture, allowing you to create a personalized and visually appealing foundation for your living spaces. This flooring option not only enhances the charm of your home, but it also provides excellent resistance to wear and tear, ensuring it stands the test of time.

One of the practical benefits of natural stone tiles is their ability to improve indoor air quality. They help reduce allergens and dust accumulation, contributing to a healthier living environment for you and your family. With proper sealing, maintaining your natural stone tile flooring is relatively easy; regular sweeping and occasional mopping will keep it looking its best.

Available in various finishes like honed or polished, natural stone tiles can complement different styles of country decor, from farmhouse elegance to rugged lodge aesthetics. By incorporating natural stone tile flooring into your home, you'll create a beautiful and functional space that embodies the charm of country living.

Advertisement

Cottage-Style Painted Concrete Floor

A cottage-style painted concrete floor adds a charming and personalized touch to your country home, transforming a plain surface into a delightful centerpiece.

To achieve this look, start by cleaning and prepping the concrete, ensuring it's free from dirt and debris for ideal paint adhesion. Using chalk paint is an excellent choice, as it provides a matte finish and great coverage, allowing you to customize colors that complement your decor.

Begin with a primer coat in a neutral shade, then apply multiple coats of your chosen color for durability. This process helps prevent chipping and fading over time.

To enhance the rustic charm, consider using a dry brushing technique with a lighter shade. This creates a distressed effect that mimics aged wood or worn flooring, adding depth to your space.

Conclusion

Incorporating handmade crafts into your country home decor adds warmth and character that store-bought items just can't match.

Advertisement

By focusing on key elements like essential fixtures, unique lighting, and decorative accents, you can create a cozy, inviting space that reflects your personal style.

Don't forget about the flooring—natural materials can enhance the rustic feel.

Embrace your creativity, and let your handmade pieces shine, turning your home into a true expression of who you are.

Continue Reading

Trending