Connect with us

Home Decor

Make Quick and Simple Terra Cotta Pumpkins

Gain a head start on autumn decor with this easy guide to creating stunning, realistically textured terra cotta pumpkins in just a few simple steps.

Published

on

craft terra cotta pumpkins

We'll kick start our terra cotta pumpkin project by gathering ceramic pumpkins, craft paint, and natural stems for an authentic look. Next, we'll mix terracotta paint colors by blending orange, white, and brown hues, experimenting with ratios for unique shades. Adding flour to the paint will give our pumpkins a textured look, while precision painting and chip brush strokes will create a professional finish. After layering on flour for a realistic texture, we'll distress our pumpkins with sandpaper and add an aged look with powder. Finally, we'll seal our masterpiece with fixatif spray, and with these simple steps, we'll have created stunning terra cotta pumpkins that exude autumnal charm – and with more techniques to explore, our creativity will flourish.

Key Takeaways

• Blend orange, white, and brown craft paint to create unique terracotta shades for your pumpkin.

• Use a small paintbrush or chip brush to apply paint with precision for a professional finish.

• Add flour to paint for a chunky texture or sprinkle it on almost dry paint for a realistic look.

• Sand edges and corners to distress and age your pumpkin, focusing on areas prone to natural wear and tear.

Advertisement

• Seal your masterpiece with fixatif spray, applying multiple light coats for adequate coverage and protection.

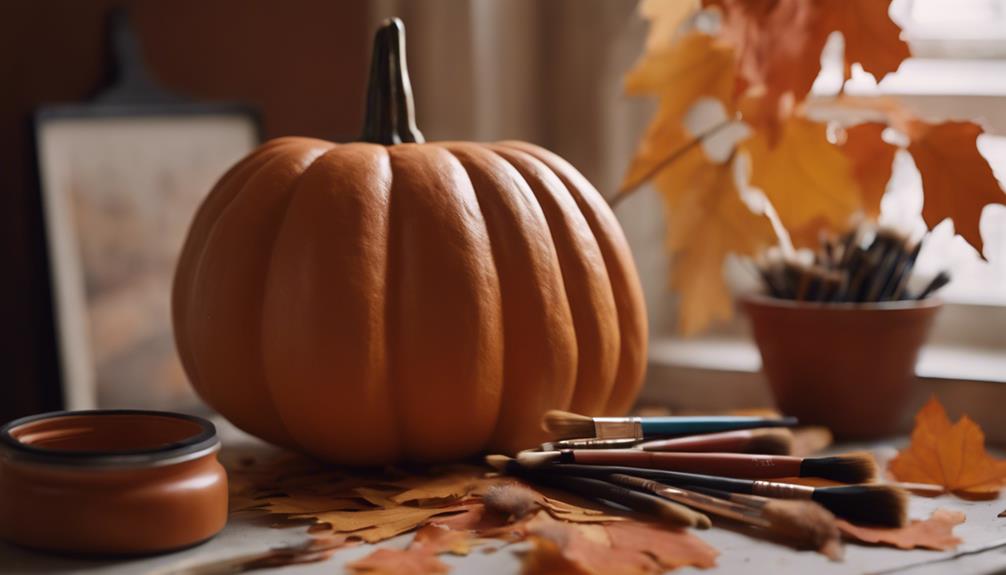
Gather Your Supplies

We'll need a few essential items to get started on our terra cotta pumpkin project. To create these DIY terracotta pumpkins, we'll gather ceramic pumpkins in various sizes and shapes. These will serve as the base for our decorative pumpkins.

Next, we'll need a selection of craft paint in autumnal shades, such as Spiced Pumpkin, Burnt Sienna, Honey Brown, Oyster Beige, and Khaki Tan, to give our pumpkins a warm, seasonal look. A small paintbrush or chip brush will come in handy for applying the paint evenly.

To add an aged texture to our pumpkins, we can use white flour or baby powder. For an authentic touch, consider using natural pumpkin stems to complete the look.

With these basic supplies, we'll be well on our way to creating beautiful, rustic terra cotta pumpkins that will add a cozy ambiance to our homes.

Advertisement

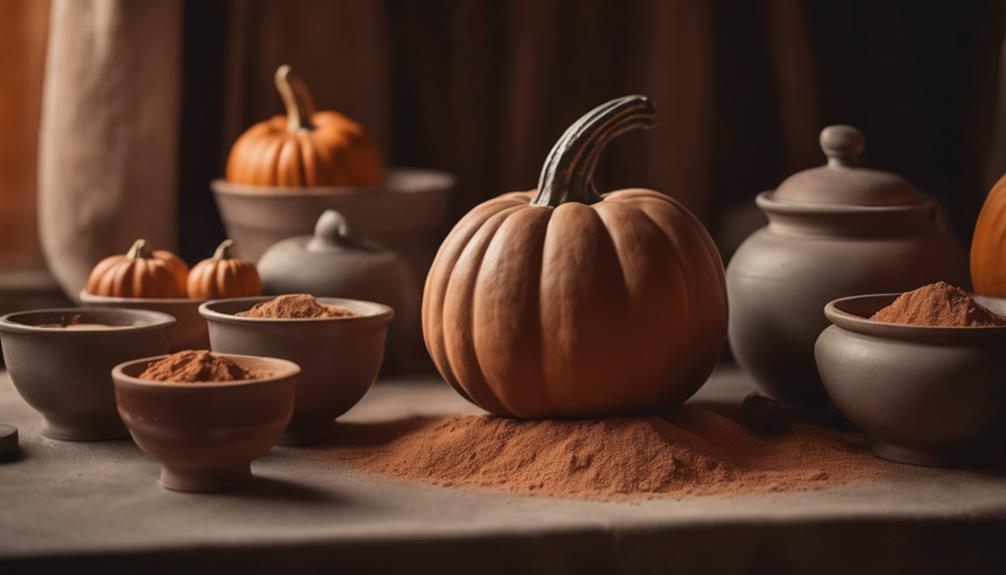
Mix Terracotta Paint Colors

playful terracotta paint hues

Mixing the perfect terracotta color requires a blend of orange, white, and brown craft paint. This can be achieved by combining these hues in a bowl and adjusting the proportions to suit our desired shade.

We can experiment with different ratios of orange to white to brown to create a unique terracotta color that complements our pumpkins. For a more textured look, we can add a pinch of flour to the paint mixture. This will give our pumpkins a more rustic, earthy feel.

By adjusting the amount of flour, we can achieve varying levels of texture, from subtle to dramatic. Once we're happy with our terracotta color, we can use a brush to evenly paint our pumpkins, transforming them into beautiful, autumnal decorations.

With a little practice, we can achieve a range of different terracotta shades, each one unique and eye-catching. By mixing and matching our paints, we can create a collection of pumpkins that add a touch of warmth and coziness to any room.

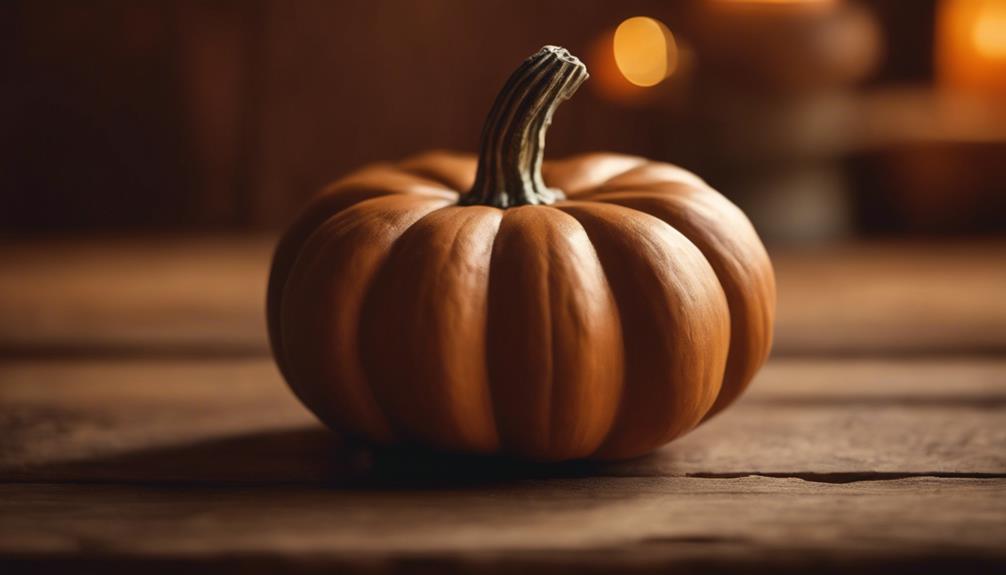
Paint Your Foam Pumpkin

creative halloween craft idea

As we continue to transform our foam pumpkins into terra cotta masterpieces, we'll focus on the essential steps to achieve a realistic, earthy look.

Now that we've mixed our terracotta paint colors, it's time to explore the various paint color options that will give our pumpkins depth and character, as well as the brush stroke techniques that will add texture and visual interest.

Paint Color Options

We're spoiled for choice when it comes to craft paint colors that evoke the warm, earthy tones of terracotta, with options like Spiced Pumpkin, Burnt Sienna, Honey Brown, Oyster Beige, and Khaki Tan offering a great starting point. These colors provide a solid foundation for achieving a realistic terracotta finish on our DIY foam pumpkin.

Advertisement

Of course, we can always mix and match colors to create a unique shade that suits our taste. By experimenting with different color combinations, we can personalize our pumpkin and make it truly one-of-a-kind. Remember, the key to a convincing terracotta look lies in selecting the right paint colors.

With a small paintbrush or chip brush, we can apply the paint with precision, ensuring a professional-looking finish. Whether we're going for a vibrant, orange-hued pumpkin or a more muted, earthy tone, the right paint colors can make all the difference. By choosing the perfect shades, we can create a beautiful, terracotta-inspired pumpkin that's perfect for our fall decor.

Brush Stroke Techniques

With our chosen paint colors in hand, let's pick up a chip brush and start applying thick, textured strokes to our foam pumpkin. We love the look of a rustic, handmade terracotta pumpkin, and the right brush stroke techniques can make all the difference.

To achieve this, we'll use long vertical brush strokes with our chip brush, applying thickened paint to our foam pumpkin. As we brush up and down, we'll create a textured finish that adds depth and visual interest to our pumpkin. We'll let the paint dry naturally, maintaining those beautiful brush strokes for a realistic look.

Experimenting with different painting techniques is key to achieving the desired terracotta effect on our foam pumpkin. By mixing orange and yellow paint in a 1.5:1 ratio, we can create a custom terracotta color that's uniquely our own.

Advertisement

With practice and patience, we can master these brush stroke techniques and make a stunning, one-of-a-kind terra cotta pumpkin that we'll love displaying in our home.

Sealant Application Tips

Applying a sealant is essential to protecting our painted foam pumpkin from wear and tear, and choosing the right one is critical to preserving its texture and color. As we search for the perfect sealant, it's important to experiment with different options to find the one that works best for our project.

Here are some valuable tips to keep in mind for sealant application:

  • Use a fixatif spray as a gentle sealant for your painted foam pumpkin.
  • Apply multiple light coats of fixatif spray for heavier flour areas.
  • Avoid using clear matte acrylic sealer on your painted foam pumpkin.
  • Experiment with different sealant options like Mod Podge acrylic sealant for best results.
  • Allow the fixatif spray to dry completely before handling your painted foam pumpkin.
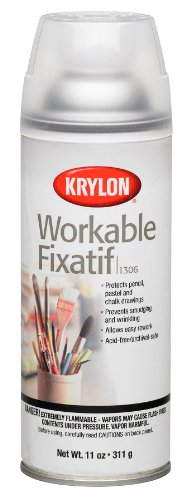
Add Texture With Flour

enhancing dishes with flour

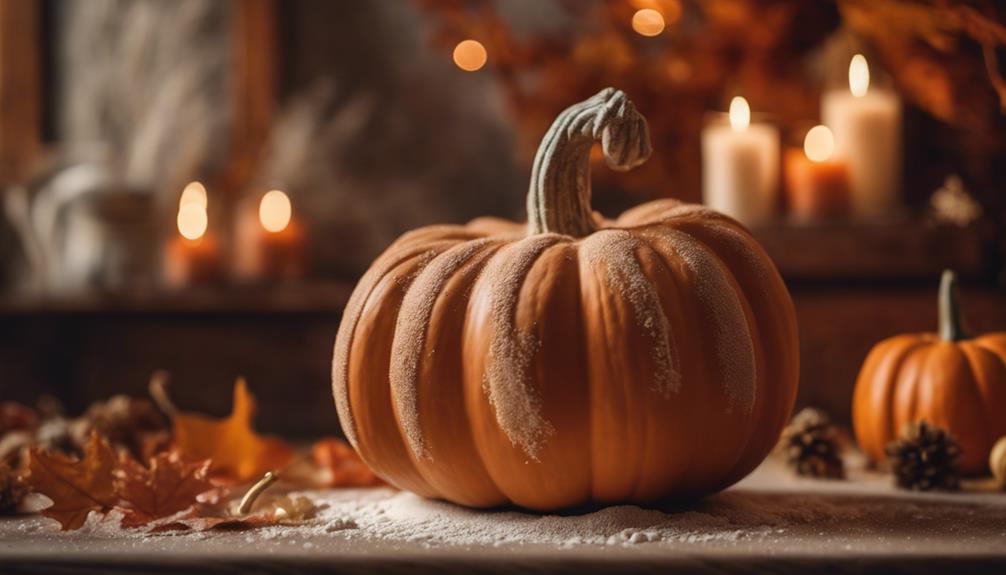
As we explore the next step in creating realistic terra cotta pumpkins, we're going to discuss how adding flour can elevate our design.

We'll examine the benefits of using flour as a thickener, the advantages of incorporating flour texture, and some valuable tips for mixing flour into our paint.

Flour as Thickener

We add a pinch of creativity to our terra cotta pumpkins by incorporating flour as a thickener, which brings an intriguing texture to our decorative pieces. This DIY technique allows us to achieve a unique, realistic look that mimics the natural texture of terracotta.

Advertisement

To get started, we can add flour to our paint to create a thick, chunky texture. For a more subtle effect, we can sprinkle flour onto almost dry paint, which helps create a realistic terracotta look.

Here are some tips to keep in mind:

  • Distribute flour on different areas of the pumpkin for a varied texture.
  • Use a dry paint brush to help evenly spread the flour on the surface.
  • Experiment with the amount of flour used to achieve different textures and effects on your pumpkins.
  • Flour can be used to create a raised, bumpy texture or a smooth, even one, depending on how it's applied.
  • Don't be afraid to experiment and try out different flour-to-paint ratios to achieve the desired effect.

Flour Texture Benefits

By incorporating flour into our painting process, we can reveal a range of unique textures that add depth and visual interest to our terra cotta pumpkins.

The flour texture benefits are undeniable, as it allows us to achieve a textured finish that elevates our pumpkins from basic to exceptional. By sprinkling flour on almost dry paint, we can create an aged and realistic look that's perfect for autumnal decorations.

To achieve a natural texture, we can use a dry paint brush to distribute the flour evenly, ensuring a subtle yet striking effect. The best part? We can adjust the amount of flour to our liking, depending on how much texture we desire.

Experimenting with flour can lead to different levels of texture, resulting in unique pumpkin designs that showcase our creativity. With flour, we can transform our terra cotta pumpkins into stunning centerpieces that exude warmth and character.

Advertisement

Flour Mixing Tips

Mixing flour with paint is a simple process that reveals a world of textures, enabling us to create unique terra cotta pumpkins that stand out from the crowd.

When it comes to adding texture to our pumpkins, we've found that flour is an excellent addition to our paint. But how do we get the most out of this combination? Here are some flour mixing tips to help us achieve the perfect texture:

  • Sprinkle flour on the almost dry paint to create a textured look that's simply stunning
  • Distribute flour on different parts of the pumpkin for a realistic finish that mimics the natural texture of a real pumpkin
  • Use a dry paint brush to help spread the flour evenly and avoid clumps
  • Experiment with the amount of flour used to achieve your desired texture – more flour means a more textured look, while less flour results in a smoother finish
  • Mix flour with paint in small increments, as it's easier to add more flour than it's to remove excess

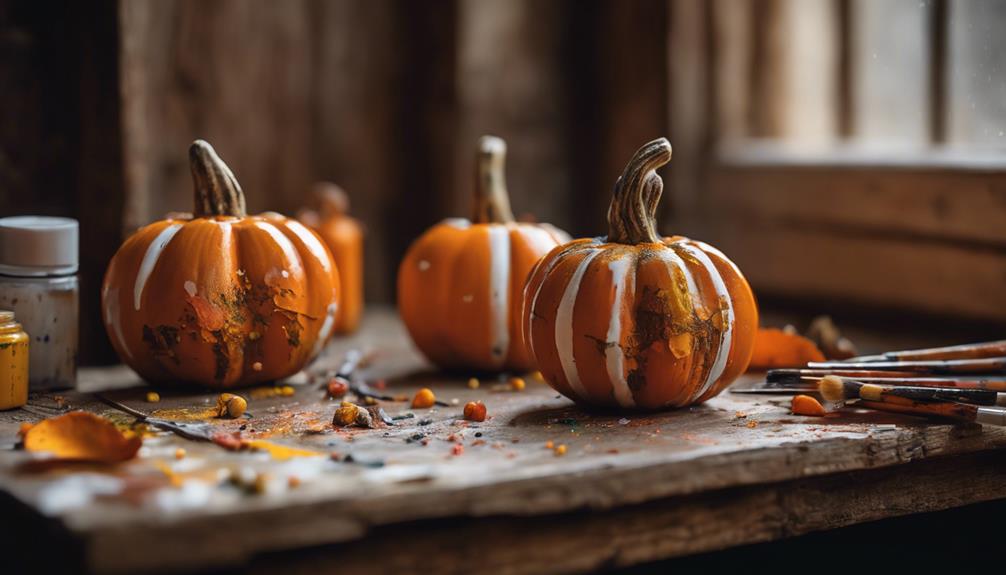
Distress the Terracotta Pot

distressed terracotta pot image

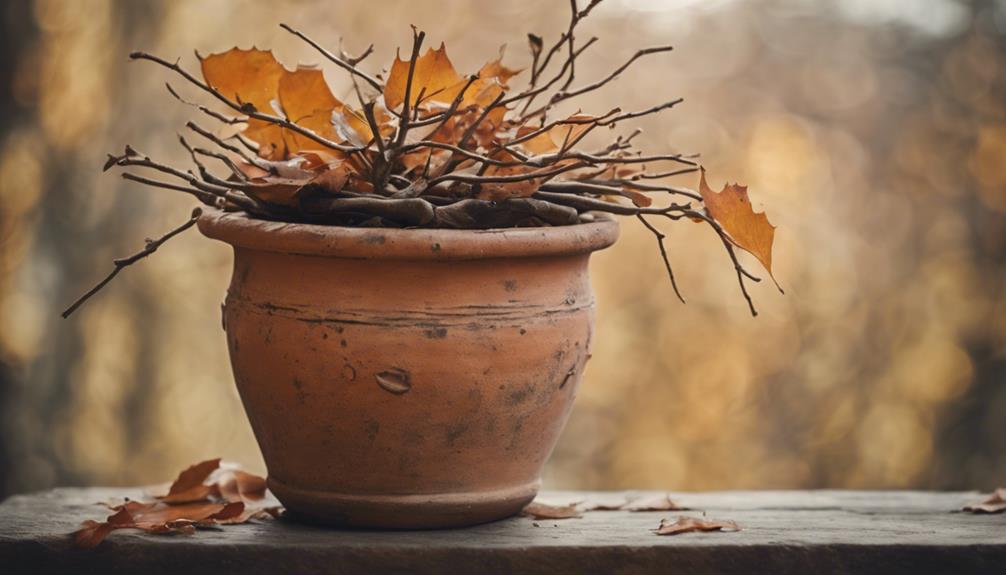
To achieve a weathered, vintage look, we're distressing the painted terracotta pot by gently sanding away the edges and corners, where natural wear and tear would occur over time. This process, referred to as light distressing, helps create a worn-out appearance that adds character to our pumpkin.

When using sandpaper, we're focusing on the areas that would naturally wear out first, such as the edges and corners. By gently rubbing the sandpaper in circular motions, we're able to create a subtle, aged look. Ensuring not to over-distress is crucial, as we aim to strike a balance between an aged and clean aesthetic.

Experimenting with different grits of sandpaper allows us to achieve the desired level of distressing. Remember, the goal is to create a subtle, weathered look, not to completely wear away the paint.

With a little patience and practice, we can achieve a beautifully distressed terracotta pot that adds a touch of rustic charm to our pumpkin decoration.

Advertisement

Add a Real Pumpkin Stem

incorporate real pumpkin stem

As we move forward with adding a real pumpkin stem to our terra cotta pumpkin, we'll need to focus on two important points: picking the perfect stem and attaching it securely.

We'll explore the significance of selecting a stem that fits our pumpkin's size and how to use hot glue or a strong adhesive to guarantee a strong bond.

Picking the Perfect Stem

We scour the local pumpkin patches and farmer's markets for the perfect stem, knowing that a sturdy, curved stem will add a touch of authenticity to our terra cotta pumpkins. To achieve a natural look, we're particular about the stems we choose. Here's what we look for:

  • Sturdy stems that can hold their own against the terra cotta pumpkin's weight
  • A curved shape that mimics the natural curve of a real pumpkin stem
  • Freshness – we avoid wilted or rotten stems that can compromise the overall appearance
  • A natural color that blends seamlessly with the terra cotta pumpkin
  • A stem that's free of debris or dirt, ensuring a clean attachment to our pumpkin

Attaching the Stem Securely

With our perfect stem in hand, we're ready to attach it securely to our terra cotta pumpkin. To guarantee a strong bond, we'll use hot glue or a strong adhesive, making sure the pumpkin stem is clean and dry before attaching it.

We'll apply the adhesive to the base of the stem and press it firmly onto the pumpkin, holding it in place for a few minutes to allow the adhesive to set and bond effectively.

As we attach the stem, we'll make sure it's centered and even, ensuring our terra cotta pumpkin looks natural and realistic. Once the stem is securely attached, we'll let it dry completely before handling or displaying our beautiful terra cotta pumpkin.

Age the Pumpkin With Powder

speed up pumpkin aging

We dust our terra cotta pumpkins with a light layer of powder to introduce an air of vintage charm. This simple technique adds a realistic, weathered look to our creations, giving them a unique and rustic appeal.

To achieve this aged texture, we sprinkle white flour or baby powder on the almost dry paint. Using a small paintbrush, we lightly distribute the powder, adjusting the amount based on the level of aging we desire.

Advertisement

Here are the benefits of aging our terracotta pumpkins with powder:

  • Enhances the overall appearance of the pumpkin, giving it a unique and rustic charm
  • Adds a realistic, weathered look to the terracotta surface
  • Creates a beautiful, vintage-inspired texture
  • Allows for customization of the aging level to suit individual tastes
  • Is a simple and easy technique to master, even for beginners

Seal Your Masterpiece (Optional)

create with optional flair

To guarantee our terracotta pumpkins remain vibrant and protected, consider applying a fixatif spray to seal in the paint and texture. This optional step will make sure our masterpieces stay fresh and intact. When choosing a sealant, avoid using clear matte acrylic sealer, as it may not provide the desired finish.

Sealant Options Characteristics
Fixatif Spray Protects paint and texture, multiple light coats recommended
Mod Podge Acrylic Sealant Alternative option for added protection
Clear Matte Acrylic Sealer Not recommended, may not provide desired finish
Multiple Coats Necessary for adequate coverage, especially on textured areas
Drying Time Allow fixatif spray to fully dry before handling or displaying

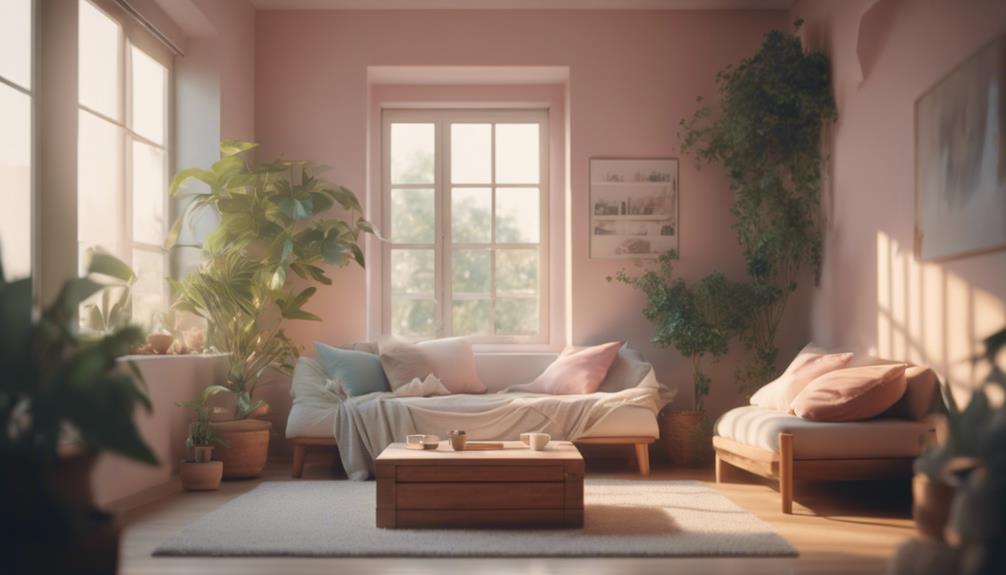
Display Your Terra Cotta Pumpkin

terra cotta pumpkin decoration

Now that our terra cotta pumpkins are complete, let's creatively arrange them to create a festive fall display that showcases our handiwork.

We've put in the effort to create these easy DIY terra cotta pumpkins, and now it's time to show them off!

Here are some ways to display our masterpieces:

  • Place your terra cotta pumpkins on a mantle or shelf for a charming display.
  • Group different sized pumpkins together for visual interest.
  • Mix in real or faux fall foliage for a festive touch.
  • Add twinkling string lights around your pumpkins for a cozy ambiance.
  • Incorporate other fall decor elements like acorns or pine cones to enhance the seasonal theme.

Tips for Styling Your Pumpkins

decorate pumpkins with flair

By creatively arranging our terra cotta pumpkins, we can craft a visually appealing display that showcases our handiwork. To add some depth and dimension to our DIY Halloween decorations, we can mix and match different sizes and shapes of pumpkins. By using different shades of terracotta paint, we can create a unique and eye-catching arrangement.

To give our pumpkins a more realistic look, we can add a touch of white paint or flour to achieve a weathered and aged appearance. Displaying our pumpkins in terracotta pots or rustic containers can further enhance the overall theme. For an extra touch of authenticity, we can experiment with incorporating real pumpkin stems into our design. This won't only add a natural element to our decoration but also create a unique conversation piece.

Frequently Asked Questions

How to Make Plastic Pumpkins Look Like Terracotta?

We're wondering how to make plastic pumpkins look like terracotta, and we're in luck! We can mix craft paint to achieve a terracotta color, add flour for texture, and sprinkle more flour on top for a realistic look.

Advertisement

How to Make Terracotta Jack O'lantern?

We're excited to create terracotta jack-o'-lanterns! We'll transform plastic pumpkins by mixing paint colors to achieve a terracotta shade, adding flour for texture, and sprinkling flour on almost dry paint for an aged look.

How to Paint a Pumpkin With Baking Soda?

"Painting a pumpkin with baking soda is like adding a secret ingredient to a recipe – it elevates the entire experience! We mix acrylic paint with baking soda to create a textured, realistic terracotta look that's uniquely ours."

How to Make Faux Pumpkins?

We're making faux pumpkins, and we're excited! We start with foam or ceramic bases, then add texture and color with craft paint and flour or baby powder to achieve a realistic, aged look.
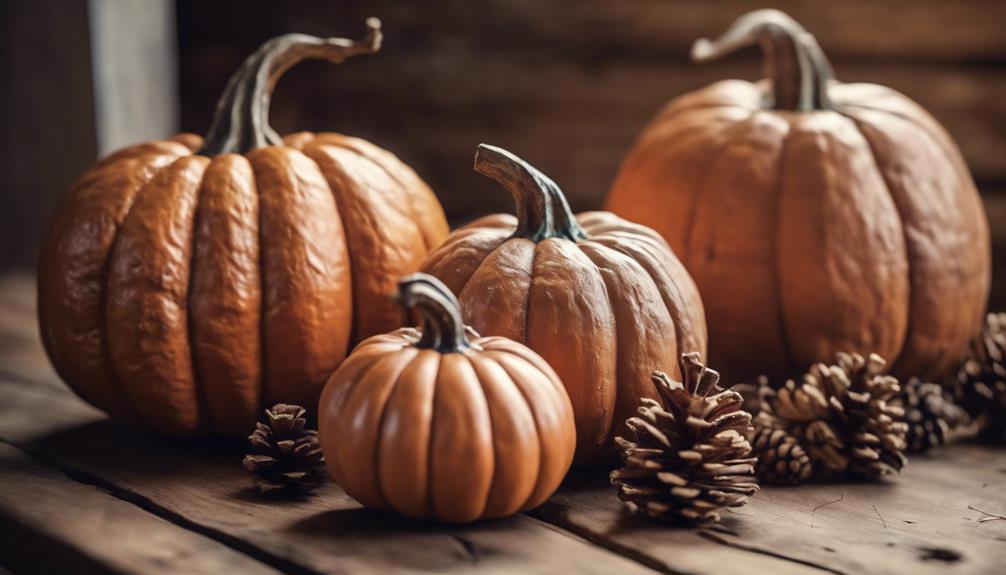
Conclusion

As we step back to admire our handiwork, the warm, earthy tones of our terra cotta pumpkins seem to glow with a soft, autumnal light.

The textures, the colors, the subtle distressing – it all comes together to evoke the feeling of a rustic, vintage find.

Advertisement

And the best part? These little treasures are entirely our own creation, born from a few simple supplies and a dash of creativity.

Continue Reading
Advertisement

Alfresco

What Does Alfresco Life Mean? Explore the Lifestyle!

Mingle with nature and design as you discover the allure of alfresco living, transforming your outdoor spaces into havens of relaxation and socializing.

Published

on

By

alfresco living lifestyle exploration

Embrace an alfresco life by immersing yourself in outdoor living, creating spaces for relaxation, dining, and socializing. Enhancing your well-being and quality of life, alfresco living promotes mental health through nature exposure and personalized design choices. Consider weather-resistant furniture like teak and wicker to elevate style and functionality in outdoor spaces. Create inviting dining areas with essential elements like tables, chairs, and lighting, perfect for intimate gatherings or large social events. Strategic lighting choices, seating arrangements, and incorporation of natural elements further enhance your alfresco lifestyle. Discover the endless possibilities of alfresco living for a fulfilling outdoor experience.

Key Takeaways

  • Alfresco living entails spending time outdoors for relaxation and socializing.
  • Immersing in nature boosts well-being and happiness.
  • Outdoor living reduces stress and enhances mental health.
  • Customizing outdoor spaces reflects personal style and creates inviting environments.
  • Embracing alfresco living improves quality of life and provides a sanctuary for unwinding.

Benefits of Alfresco Living

Embrace the benefits of alfresco living by enjoying outdoor spaces for relaxation, dining, and socializing.

Alfresco living, a lifestyle that encourages spending time outdoors, offers a myriad of advantages. By immersing yourself in nature and fresh air, you can cultivate a deeper connection with the environment, leading to increased happiness and well-being.

Studies have shown that outdoor living can have a positive impact on mental health, boosting mood and reducing stress levels. Moreover, outdoor spaces can be customized to reflect your personal style and preferences, creating a unique and inviting environment for relaxation and social gatherings.

Embracing alfresco living not only enhances the quality of life but also provides a sanctuary for unwinding and enjoying the beauty of the outdoors. So, step outside, breathe in the fresh air, and reap the numerous benefits that alfresco living has to offer.

Designing Outdoor Spaces

creating beautiful outdoor environments

Design your outdoor spaces to maximize comfort and functionality for relaxation and entertainment. Outdoor living areas can serve as extensions of your indoor rooms, seamlessly blending indoor and outdoor styles to create a cohesive and inviting atmosphere.

By accessorizing your outdoor spaces with items like lanterns, torches, and candles, you can't only provide lighting but also enhance the ambiance for a more enjoyable experience. Gardens play an important role in outdoor living, offering both decorative elements and functional spaces for relaxation amidst nature's beauty.

Advertisement

Planning your outdoor spaces ahead of warmer months is essential as it allows you to explore various vendors for furniture and accessories, ensuring you create a space that meets your needs and preferences. Whether you're looking to create a cozy corner for reading or a vibrant area for entertaining guests, thoughtful design and strategic placement of elements can transform your outdoor living spaces into inviting retreats that cater to your lifestyle.

Essential Alfresco Furniture

perfect patio furniture picks

To create inviting outdoor living spaces that cater to your lifestyle, it's important to carefully select weather-resistant and durable alfresco furniture that enhances both style and functionality.

When choosing outdoor furniture, choose materials like teak, wicker, or metal, as they offer durability against the elements.

Comfortable seating is essential for alfresco relaxation; explore options such as loungers, sofas, and dining sets for best comfort.

To elevate your alfresco experience, accessories like cushions, throws, and outdoor rugs can add a touch of coziness and style to your outdoor oasis.

Creating Outdoor Dining Areas

enhancing spaces for dining

When setting up outdoor dining areas, consider incorporating essential elements like tables, chairs, umbrellas, and lighting to enhance the overall dining experience.

Al Fresco dining in your outdoor space provides an opportunity to enjoy meals in the fresh air, whether in a backyard, patio, or garden.

Advertisement

To create a welcoming outdoor dining area, think about adding elements like plants, flowers, and table decor. These can enhance the ambiance and make your dining experience more enjoyable.

Whether you're designing for small intimate gatherings or larger social events, proper planning and attention to detail can greatly elevate the alfresco dining experience.

Enhancing Outdoor Lighting

improving outdoor lighting solutions

When it comes to enhancing outdoor lighting, brightening outdoor spaces is essential for creating a welcoming atmosphere.

Choosing the right light fixtures can greatly influence the ambiance of your alfresco setting, whether it's string lights for a cozy feel or solar lanterns for an eco-friendly touch.

Brightening Outdoor Spaces

Enhancing outdoor lighting is essential for creating a vibrant and inviting atmosphere in your outdoor spaces. To brighten your outdoor areas effectively, consider the following:

  1. String Lights: These versatile lights can be hung across trees, fences, or pergolas to add a whimsical and enchanting touch to your outdoor space. They provide a warm and cozy ambiance perfect for gatherings or quiet evenings outdoors.
  2. Solar Lanterns: Environmentally friendly and easy to install, solar lanterns are an excellent choice for illuminating pathways or accentuating garden features. Their soft glow creates a serene atmosphere ideal for relaxation under the stars.
  3. Candles: Whether in decorative lanterns or placed strategically on tables, candles offer a romantic and intimate lighting option for outdoor dining or lounging areas. Their flickering light adds a touch of elegance and charm to your alfresco setting, enhancing the overall outdoor experience.

Choosing Light Fixtures

Consider incorporating a variety of light fixtures to enhance the outdoor lighting in your alfresco living space. Outdoor lighting fixtures play an essential role in creating the right ambiance and functionality for your alfresco living area.

When choosing light fixtures, you have a range of options to explore, such as string lights, solar lanterns, and LED fixtures, each offering unique lighting effects that can elevate your outdoor space. By strategically placing these fixtures, you can create a warm and inviting atmosphere that's perfect for evening gatherings and spending quality time outdoors.

Advertisement

It's important to strike a balance between decorative lighting and functional illumination to highlight key areas within your alfresco living space. By incorporating a mix of lighting sources, you can ensure that you can enjoy your outdoor space not just during the day but also well into the night, enhancing your alfresco living experience.

Setting the Ambiance

To set the ambiance and enhance your outdoor lighting, explore a mix of string lights, solar lanterns, and candles for a warm and inviting atmosphere.

  1. String Lights: Hang these delicate lights along fences, pergolas, or trees to create a soft, enchanting glow that illuminates your outdoor space beautifully.
  2. Solar Lanterns: Place these eco-friendly lanterns strategically around your patio or garden to add a touch of elegance while also being environmentally conscious.
  3. Candles: Dot your outdoor dining area with candles in hurricane lamps or floating candles in water features for a romantic and intimate setting as the evening unfolds.

Incorporating Natural Elements

incorporating natural design elements

Adding plants, flowers, and herbs to your alfresco living space can effortlessly bring a touch of nature into your outdoor oasis. Consider allocating time to choose the right greenery that suits your outdoor setting, whether it's a cozy patio or a spacious garden.

Placing a variety of plants on your coffee table can create an invigorating atmosphere while adding a hint of color. Introducing a new garden can be a rewarding experience, providing both aesthetic pleasure and a space for relaxation. Flowers and greenery not only enhance the beauty of your alfresco living area but also contribute to a calming ambiance.

To further elevate this natural feel, you can incorporate lanterns, torches, and candles to add both light and a cozy touch to your outdoor space. These elements work harmoniously to create a warm and inviting atmosphere, making your alfresco area a sanctuary for relaxation and escape.

Maximizing Outdoor Comfort

creating a cozy backyard

Enhancing your outdoor experience involves prioritizing comfort through thoughtful furniture choices and strategic seating arrangements. To maximize outdoor comfort, consider the following:

  1. Weather-Resistant Furniture with Plush Cushions and Throws: Opt for furniture designed to withstand the elements, paired with soft cushions and cozy throws to keep you warm during cooler evenings.
  2. Ample Seating Options: Guarantee there are enough seating choices available to accommodate guests comfortably. This encourages social interaction and makes outdoor gatherings more enjoyable.
  3. Strategic Seating Arrangements: Arrange your seating in a way that promotes conversation and interaction. Consider placing seating around a central focal point like a fire pit to create a cozy atmosphere in your outdoor spaces.

Balancing Relaxation and Entertainment

finding leisure activities balance

Creating a harmonious blend of relaxation and entertainment is essential for embracing the alfresco lifestyle. To achieve this balance, guarantee your outdoor space offers comfortable seating options where you can spend time socializing or unwinding.

Incorporating greenery and florals not only adds aesthetic appeal but also creates a tranquil atmosphere for relaxation. Whether it's enjoying a book in the shade of a tree or hosting a barbecue with friends, the presence of nature enhances the alfresco experience.

Advertisement

Moreover, setting the scene with essential lighting is vital for smoothly moving from daytime to evening entertainment seamlessly. From string lights to lanterns, the right illumination can create ambiance and functionality for various activities.

Dining al fresco is another popular aspect of outdoor living, emphasizing well-set tables and durable outdoor-friendly tableware for enjoyable meals under the open sky. By striking a balance between comfort, greenery, and lighting, you can create an alfresco space that caters to both relaxation and entertainment needs.

Frequently Asked Questions

What Is Alfresco Lifestyle?

Living the alfresco lifestyle means enjoying the outdoors, dining under the sky, and connecting with nature. It involves creating seamless indoor-outdoor spaces, promoting relaxation, socializing, and enhancing overall well-being through outdoor living experiences.

What Does Alfresco Mean in Slang?

Alfresco in slang means enjoying the great outdoors. Picture this: you, under a canopy of stars, savoring a meal in the crisp night air. It's about embracing nature, finding peace, and making memories outside.

What Does an Alfresco Mean?

Alfresco means enjoying the outdoors. It's about dining, relaxing, and socializing outside. Embrace nature and outdoor living. Make the most of your time in the open air for a invigorating and revitalizing experience.

Advertisement

What Is the Concept of Al Fresco?

Living al fresco means embracing nature, dining outdoors, and enjoying the fresh air. It promotes well-being and relaxation through outdoor activities. Create inviting outdoor spaces for meals, socializing, or simply unwinding in the beauty of the outdoors.

Conclusion

To sum up, embracing the alfresco life can greatly enhance your outdoor living experience, providing a seamless blend of relaxation and entertainment.

By carefully designing your outdoor spaces, selecting the right furniture, incorporating natural elements, and maximizing comfort, you can create a truly inviting environment for family and friends to enjoy.

As the saying goes, 'outdoor living isn't just a lifestyle, it's a way of life.'

So why not make the most of it and savor every moment in the great outdoors?

Advertisement

Continue Reading

Home Decor

A Simple Winter Wonderland Tray

Step into the magic of winter with a simple yet enchanting tray design that transitions seamlessly from holiday to winter decor.

Published

on

By

winter decor diy project

We create a winter wonderland scene on a tray by curating decorative elements in whites, greens, and golds, and strategically designing the layout to smoothly shift from holidays to winter. We opt for a sturdy, elegant tray base, incorporating faux snow and white cotton balls for a snowy texture. Miniature winter elements like snow-covered houses and animals add depth, while candles create a warm ambiance. Natural winter accents like pinecones and evergreen branches infuse the space with coziness. As we balance heights and textures, our winter wonderland tray comes alive. Now, let's explore more ideas to bring this magical scene to life.

Key Takeaways

• Start with a sturdy, elegant tray base, such as white marble, and add felt pads to prevent scratching.

• Add a snowy texture with faux snow or white cotton balls, and layer with faux fur, feathers, or sparkly snowflakes.

• Create a focal point with a beautifully crafted candle holder or a standout decorative piece, like a snowglobe or miniature winter scene.

• Incorporate natural winter accents like pinecones, evergreen branches, and birch logs to infuse warmth and coziness.

Advertisement

• Balance heights and textures with a curated selection of winter-themed decorations, such as snow globes, ceramic houses, and holiday figurines.

Building a Winter Wonderland Scene

As we start constructing our winter wonderland scene, we'll begin by curating a selection of decorative elements that evoke a sense of snowy serenity. We're talking whites, greens, golds, and snowglobes – all the classic winter wonderland colors that exude 'cozy' and 'inviting'.

Our winter wonderland tray will be a haven of tranquility in our home, a place where we can escape the chaos of everyday life.

To craft this winter wonderland, we'll choose items that flow seamlessly from the holidays to a winter decor, ensuring our decor stays fresh and exciting even after the festive season.

A standout piece, like a unique ornament or glass cannister, will serve as a focal point, drawing the eye and adding visual interest to our scene. We'll experiment with textures, heights, and elements like figurines, trees, or candles to create a visually appealing centerpiece.

Advertisement

And, of course, a glass cannister filled with sugar will add a touch of whimsy, recreating the magical feeling of snowfall in our own home.

Choosing the Perfect Tray Base

selecting the ideal tray

We'll anchor our winter wonderland scene with a sturdy, elegant base that sets the tone for the serene and magical atmosphere we want to create. For our winter tray decor, we need a base that complements the wintery theme. A perfect tray base should be sturdy, elegant, and easy to move around.

Here are three essential considerations for choosing the perfect tray base:

  1. Material: A white marble tile makes an excellent base, providing a clean and sophisticated look for our winter tray decor.
  2. Practicality: Add felt pads to prevent the tile from scratching against the surface it's placed on.
  3. Handles: While handles can be helpful for moving the tray, they're not necessary for a winter decor setup.

A sparkly or icy design can add a touch of winter wonder to our base. Ultimately, the perfect tray base should evoke a sense of serenity and magic, setting the tone for our winter wonderland scene.

Adding Snowy Texture and Depth

enhancing winter scenes creatively

Let's create a winter wonderland scene that's both visually appealing and inviting by incorporating a variety of textures and elements that evoke a sense of snowy serenity.

To add snowy texture and depth to our Winter Wonderland Tray, we can incorporate several elements. Faux snow or white cotton balls can create a snowy texture on the tray. We can also layer different textures like faux fur, white feathers, or sparkly snowflakes for depth. Additionally, white or silver ornaments can add a frosty touch to the decor.

Element Texture Effect
Faux Snow Soft, Fluffy Snowy Texture
Faux Fur Soft, Velvety Depth
White Feathers Light, Airy Whimsical Touch
Sparkly Snowflakes Shiny, Iridescent Frosty Accent
White Ornaments Smooth, Glossy Winter Wonderland Feel

Incorporating Miniature Winter Elements

creating tiny winter scenes

Now that our tray has a snowy foundation, we're ready to populate it with miniature winter elements that bring the scene to life. To create a cozy winter village, we can incorporate miniature snow-covered houses or cottages, adding a touch of whimsy to our winter wonderland tray.

We can also add small figurines of animals like deer, birds, or polar bears for an extra whimsical touch.

Here are three essential miniature elements to include:

Advertisement
  1. Tiny trees: These can be placed strategically around the tray to create a sense of depth and dimension.
  2. Snowmen and sleds: These miniature winter elements add a playful touch to our winter wonderland scene.
  3. Miniature animals: Adding figurines of animals like deer, birds, or polar bears creates a sense of movement and life in our winter wonderland.

Creating a Focal Point With Candles

enhancing ambiance with candles

As we move on to creating a focal point in our winter wonderland tray, a beautifully crafted candle holder takes center stage. We opt for a pillar candle holder in champagne-colored mercury glass, which adds a touch of elegance and sophistication to our winter wonderland theme.

By placing it towards the back of the tray, we guarantee height without overpowering the other decor pieces. The sparkly and lightweight design of the candle holder adds a level of charm and refinement to our tray decor. We make sure the candle holder remains in place after adding other items, creating a cohesive and visually appealing arrangement.

Incorporating candles into our winter tray decor creates a warm and inviting ambiance for the season. The soft glow of the candles adds a cozy touch, making our winter wonderland tray a welcoming centerpiece for any room.

Bringing in Natural Winter Accents

embracing winter s rustic charm

As we turn our attention to bringing in natural winter accents, we're excited to explore the beauty of winter elements inside and nature's winter beauty.

We'll incorporate natural winter accents like pinecones, evergreen branches, and birch logs on the tray, which will instantly evoke the feeling of winter wonderland.

Winter Elements Inside

We bring the outdoors in by incorporating natural winter elements into our winter wonderland tray, infusing the space with the warmth and coziness of the season.

To create a cozy winter atmosphere, we focus on bringing in natural winter elements inside. This can be achieved by incorporating elements like:

Advertisement
  1. Pinecones and evergreen branches to add a touch of the outdoors to our tray.
  2. Frosted berries to give a pop of color and festive feel.
  3. Faux snow to mimic a snowy landscape and add a touch of sparkle.

Nature's Winter Beauty

By incorporating natural winter accents, we bring the serene beauty of winter landscapes into our homes, evoking a sense of coziness and tranquility.

To create a winter wonderland atmosphere, we incorporate natural elements like pinecones, twigs, and evergreen branches, which add a rustic feel to our cozy decor.

We can also use white and silver accents to mimic the look of snow and frost, further enhancing the winter wonderland theme.

To bring warmth and a touch of nature to our decor, we opt for textures like faux fur, burlap, and wood.

Candles with scents like pine or cinnamon can evoke the essence of a winter forest, making our space feel cozier.

By mixing in metallic accents like silver or gold, we can enhance the magical and enchanting atmosphere of a winter wonderland.

Advertisement

Adding Sparkle With Ornaments and More

deck the halls creatively

As we continue to craft our winter wonderland tray,

we're excited to explore the importance of strategically placing ornaments and decorations to create a visually stunning centerpiece.

We'll examine the art of winter ornament placement, considering factors like balance, texture, and height to create a cohesive look.

By incorporating sparkling centerpiece ideas,

we can add an extra layer of magic to our winter wonderland tray.

Winter Ornament Placement

To add a touch of magic to our winter wonderland tray, we strategically place ornaments that catch the light and sparkle, drawing the eye to the festive arrangement. By doing so, we create a visually appealing display that exudes festive charm. When it comes to winter ornament placement, we consider a few key factors to achieve a balanced look.

Advertisement

Here are three essential tips to keep in mind:

  1. Mix and match ornaments: Combine different sizes, shapes, and materials to add visual interest to our winter wonderland tray.
  2. Group or scatter ornaments: Experiment with clustering ornaments together or spreading them out to create a balanced arrangement.
  3. Experiment with height and depth: Hang ornaments from branches or incorporate them into the decor arrangement to add depth and dimension.

Sparkling Centerpiece Ideas

We craft a dazzling centerpiece for our winter wonderland tray by combining ornaments, candles, and decorative elements that shimmer and shine.

To create a beautiful, sparkling centerpiece, we start by incorporating metallic bells and ornaments in a footed bowl for a festive touch. A champagne-colored branch adds a sparkly and Wonderland-like effect, while a gold leaf ribbon enhances texture and sparkle on the tray.

For elegance, we place a pillar candle holder in champagne-colored mercury glass. To create a balanced composition, we vary the heights and textures of the elements, ensuring a visually appealing centerpiece.

These sparkling centerpiece ideas bring our Winter Wonderland tray to life, filling our space with warmth and festive cheer. By combining these elements, we create a stunning centerpiece that's sure to be the focal point of our winter decor.

With these beautiful, sparkling elements, we've crafted a Winter Wonderland that's truly magical.

Advertisement

Displaying Treasured Winter Keepsakes

preserving winter memories creatively

We curate a winter wonderland tray filled with treasured keepsakes that spark joy and nostalgia. As we arrange our favorite winter decorations, we're reminded of the magic and love that fills our homes during this special time of year.

To create a visually appealing display, we balance heights and textures by incorporating a mix of items such as:

  1. Snow globes that add a whimsical touch
  2. Ceramic houses that evoke a sense of winter wonder
  3. Holiday figurines that bring a touch of nostalgia

Finishing Touches for a Cozy Atmosphere

creating a warm home

With a foundation of treasured winter keepsakes established, we're now ready to add the finishing touches that will transform our winter wonderland tray into a cozy and inviting atmosphere.

To achieve this, we'll incorporate elements that evoke warmth and magic. A faux fur throw or blanket adds a tactile sense of coziness, while LED candles or fairy lights cast a warm, soft glow, creating a warm ambiance that's perfect for a winter wonderland.

Adding a small snow globe or winter-themed figurine injects a touch of whimsy, while a scented candle with notes of pine, cedar, or cinnamon fills the air with a festive aroma.

Finally, using a mirrored tray to reflect light adds a shimmering effect, amplifying the overall magic of our winter wonderland decor.

Styling Your Winter Wonderland Tray

winter tray decoration tips

As we immerse ourselves in styling our winter wonderland tray, a symphony of whites, greens, and golds sets the tone for a serene and enchanting atmosphere. We're not just creating a decorative piece, we're crafting an experience that transports us to a winter wonderland.

To achieve this, we'll incorporate a mix of textures, colors, and shapes that evoke the magic of the season.

Advertisement

Here are three essential elements to include in our winter wonderland tray:

  1. Ceramic houses and trees: These add a charming touch, transporting us to a whimsical winter wonderland.
  2. Glass cannister filled with sugar: This creates a snowy effect, adding depth and visual interest to our tray.
  3. Unique ornaments or figurines: These become the focal point of our winter wonderland tray, drawing the eye and sparking imagination.

Frequently Asked Questions

How to Decorate a Room Like Winter Wonderland Quick?

We're excited to transform our space into a winter wonderland quickly! We'll start with a calming color scheme, add magical touches like snowflakes and twinkling lights, and cozy up with plush throws and candles for a warm winter ambiance.

How to Turn Your Garden Into a Winter Wonderland?

We're transforming our garden into a winter wonderland by incorporating white and silver decorations, string lights, and faux snow, adding cozy elements like a fire pit and evergreen trees to create a magical atmosphere.

Conclusion

As we step back to admire our winter wonderland tray, we're reminded that the beauty of the season lies in the details. By thoughtfully selecting elements that evoke a sense of wonder, from the snowy texture to the soft glow of candles, we've created a vignette that whispers 'winter magic.'

As decorative stylist, Amy Chalmers, notes, 'It's all about creating a mood, not just a display.'

Our winter wonderland tray is now ready to be the perfect centerpiece for our holiday gatherings, inviting all to pause and revel in the season's splendor.

Advertisement

Continue Reading

Alfresco

What Does Alfresco Dining Mean? Everything You Need to Know!

Lure your senses with the fascinating world of alfresco dining, where culinary delights and outdoor ambiance combine for a dining experience like no other.

Published

on

By

alfresco dining explained fully

Step into the world of alfresco dining, where the art of enjoying a meal outdoors intertwines with culinary excellence. Originally a luxury for the wealthy, this practice evolved from medieval pre-hunt feasts. 'Al fresco,' an Italian phrase, meaning 'in the cool air,' reflects dining outside for a unique experience. Outdoor dining offers a 10-15% sales boost, enhances social distancing, and adds health benefits. To create an ideal alfresco space, include diverse areas, comfortable seating, and weather protection. Incorporating themed menus and proper staff training elevates customer satisfaction. Explore candlelit dinners, buffet-style service, and cozy fire pits for a memorable experience, enticing you to discover more.

Key Takeaways

  • Originated as a medieval pre-hunt feast for the wealthy.
  • 'Al fresco' means 'in the cool air' in Italian.
  • Offers enhanced dining experience, social distancing, and sales increase.
  • Includes diverse outdoor dining areas with weather protection.
  • Integrates special menus, staff training, and social media promotion.

Origins of Al Fresco Dining

Al Fresco Dining originated as a pre-hunt feast in medieval times, initially exclusive to the wealthy. This dining style, with its roots in medieval traditions, has evolved over the centuries to become a popular choice for many.

The term 'al fresco,' derived from Italian, meaning 'in the cool air,' perfectly encapsulates the essence of dining outdoors. In medieval times, the wealthy would indulge in lavish meals in their al fresco dining areas before heading out for a hunt, enjoying the fresh air and nature around them.

As time progressed, outdoor dining became more accessible to all social classes, with the Victorian Era marking a shift towards inclusivity. Restaurants began catering specifically to alfresco dining, offering dishes suitable for enjoying outdoors.

Today, millions of people worldwide partake in this culinary experience daily, with the COVID-19 pandemic further fueling its popularity. Al fresco dining has truly stood the test of time, blending tradition with modernity in a delightful culinary fusion.

Benefits of Outdoor Dining

advantages of al fresco dining

Outdoor dining provides a range of benefits that enhance the overall dining experience and contribute to customer satisfaction. When dining outdoors, whether it's referred to as alfresco dining, patio dining, or al fresco dining, patrons can enjoy a relaxing atmosphere that's often not replicated indoors. Studies have shown that businesses typically experience a 10-15% increase in sales after introducing outdoor dining options. Additionally, al fresco dining promotes social distancing, an important aspect in today's context, and can lead to increased customer retention due to the enhanced experience.

Customers also appreciate the health benefits of breathing in fresh air while enjoying their meals outdoors. This unique experience of dining alfresco not only sets businesses apart but also offers a pleasant change of scenery for patrons, contributing significantly to their overall satisfaction. As a result, the benefits of outdoor dining extend beyond just the culinary experience, making it a valuable addition to any dining establishment.

Advertisement

Setting Up Al Fresco Spaces

creating outdoor dining areas

Creating inviting outdoor dining spaces involves thoughtful design and strategic placement of seating areas to maximize customer comfort and enjoyment. When setting up al fresco spaces, consider the following key aspects:

  1. Variety of Outdoor Dining Areas: Include a mix of patios, rooftops, gardens, and outdoor terraces to offer customers diverse dining experiences.
  2. Comfortable Seating: Customize the dining area with comfortable seating options to guarantee guests can relax and enjoy their meals.
  3. Weather Protection: Install umbrellas or other weather protection to shield diners from sun, rain, or wind, ensuring the outdoor dining experience pleasant in various weather conditions.
  4. Regulatory Compliance: Ensure compliance with local regulations, including obtaining a pavement license if necessary, to legally operate your outdoor dining area and provide a safe environment for customers.

Integrating Al Fresco Into Restaurants

outdoor dining trend continues

How can restaurants effectively incorporate alfresco dining to boost sales and enhance customer experience?

Integrating al fresco dining into restaurants can greatly increase sales, with an average boost of 10-15%. To successfully integrate outdoor dining, restaurants must have sufficient outdoor space, provide weather protection, and guarantee comfortable seating for guests.

Offering special al fresco menus and organizing themed outdoor events can further enhance the dining experience, attracting more customers and increasing revenue.

Moreover, staff training for outdoor service is essential in maintaining high-quality customer interactions and efficient operations. Educating employees on outdoor seating protocols, serving in outdoor environments, and adapting to changing weather conditions is vital for a seamless al fresco dining experience.

Additionally, promoting outdoor dining on social media platforms can help attract a wider audience and boost overall visibility for the restaurant.

Al Fresco Dining Ideas

outdoor dining inspiration provided

When planning your al fresco dining experience, consider different setups to enhance the ambiance.

Creative menu options tailored for outdoor dining can elevate the overall experience for your guests.

Advertisement

Outdoor Dining Setups

Enhance your alfresco dining experience with creative outdoor dining setups that elevate your guests' enjoyment.

  1. Candlelit Dinners: Set a romantic ambiance with flickering candles placed strategically around the outdoor dining area.
  2. Buffet Style: Opt for buffet setups to efficiently serve a large group of diners in an al fresco setting, allowing them to choose from a variety of dishes.
  3. Afternoon Tea Elegance: Impress guests with an elegant afternoon tea setup, complete with dainty teacups, savory finger foods, and sweet pastries.
  4. Fire Pits for Coziness: Install fire pits to provide warmth and a cozy atmosphere, perfect for chilly evenings or adding a rustic touch to outdoor dining events.

Menu for Open-Air Dining

Craft a delicious and seasonal menu for open-air dining experiences, featuring a variety of summer-inspired dishes and invigorating beverages. When planning your outdoor dining menu, consider incorporating summer dishes like vibrant salads, flavorful grilled seafood, and invigorating beverages that complement the warm weather.

To enhance the social aspect of outdoor dining, offer shareable plates or picnic-style baskets for a communal experience. Include seasonal fruits, light desserts, and chilled beverages to provide a well-rounded and revitalizing dining experience. Emphasize the use of fresh, local ingredients in your dishes to highlight the outdoor dining ambiance and support local producers.

Additionally, adapt your menu to include portable and easy-to-eat options such as sandwiches, wraps, and charcuterie boards, ideal for enjoying in open-air spaces. By curating a menu that celebrates the flavors of summer and embraces the alfresco dining setting, you can create a memorable and enjoyable outdoor dining experience for your guests.

Enhancing Al Fresco Ambiance

al fresco dining ambiance

Create an inviting outdoor dining atmosphere by incorporating soft outdoor lighting and natural elements like potted plants and flowers.

To enhance your al fresco ambiance, consider the following:

  1. Outdoor Lighting: Utilize string lights or lanterns to create a cozy and welcoming environment that encourages relaxation and enjoyment.
  2. Natural Elements: Integrate potted plants, flowers, or succulents to infuse your outdoor space with a lush and invigorating feel, bringing nature closer to your dining experience.
  3. Outdoor Furniture: Choose comfortable chairs, tables, and cushions to provide a relaxing setting for your guests, ensuring they can fully immerse themselves in the outdoor dining experience.
  4. Background Music: Set the mood with carefully selected background music or ambient sounds, enhancing the overall ambiance of your al fresco dining area and creating a pleasant auditory backdrop for your guests to enjoy.

Al Fresco Dining Experience

outdoor dining under stars

When considering the al fresco dining experience, it's important to highlight the benefits of dining outdoors.

The natural setting not only enhances the ambiance but also provides a relaxing atmosphere for patrons.

Advertisement

Outdoor dining allows for a connection to nature while enjoying the health benefits of fresh air.

Outdoor Dining Benefits

Embracing alfresco dining introduces a myriad of advantages, particularly in enhancing your dining experience through the enjoyment of fresh air and sunlight. When you choose to dine in an outdoor space, you not only savor your meal but also reap the benefits of being surrounded by nature. Here are some key benefits of outdoor dining:

  1. Health Benefits: Al fresco dining offers a relaxing atmosphere with the health benefits of fresh air and sunlight, contributing to an overall sense of well-being.
  2. Increased Sales: Businesses typically see a 10-15% increase in sales with the addition of outdoor dining spaces, making it a profitable choice for restaurant owners.
  3. Enhanced Dining Experience: Customers enjoy a unique dining experience with enhanced satisfaction and a deeper connection to nature, elevating the enjoyment of their meal.
  4. Social Distancing: Al fresco dining promotes social distancing, contributing to customer retention and safety, providing a comfortable and safe dining environment for all.

Setting the Ambiance

Enhance your alfresco dining experience by establishing a relaxed and inviting outdoor ambiance. To create the perfect setting, consider incorporating elements such as string lights, candles, or lanterns to add a warm glow to the surroundings.

Opt for comfortable seating and well-placed table arrangements to promote a cozy dining atmosphere where you can relax and enjoy your meal. Adding natural elements like plants, flowers, or even a small water feature can further enrich the ambiance, providing a soothing and peaceful environment for your dining experience.

Additionally, don't underestimate the power of music in setting the mood for your alfresco dining. Whether it's live music or soft background tunes, the right soundtrack can elevate the overall ambiance and make your outdoor setting feel even more inviting.

Frequently Asked Questions

What Is the Meaning of Alfresco Dining?

Alfresco dining means enjoying your meal outdoors or in the open air, creating a unique and pleasant experience. It connects you with nature, offers a variety of dining options, and has a rich historical background dating back to medieval times.

Advertisement

What Does Al Fresco Slang Mean?

Al fresco slang means dining or socializing outdoors. It's about enjoying meals in the open air. This term, originating from Italian, signifies being in the fresh air. It's a trendy way to dine globally.

What Is the Quote About Al Fresco Dining?

When you ponder the quote on al fresco dining, it resonates with the bliss of savoring meals outdoors. It captures the essence of joy in relishing food amidst nature's embrace, offering a invigorating dining experience.

What Does "Served Al Fresco" Mean?

When dining 'served al fresco,' you're experiencing a meal outdoors, often in a garden or patio. It offers a special dining atmosphere with fresh air and a natural setting. This Italian phrase means 'in the cool air.'

Conclusion

To sum up, alfresco dining offers a unique experience that combines the joys of dining with the beauty of the outdoors. With the origins of this practice dating back centuries, the benefits of outdoor dining are evident in the relaxed atmosphere it creates.

By creatively setting up al fresco spaces and enhancing the ambiance, restaurants can elevate the dining experience for their customers. Embracing this trend can truly transform any meal into a memorable occasion.

Advertisement

Continue Reading

Trending