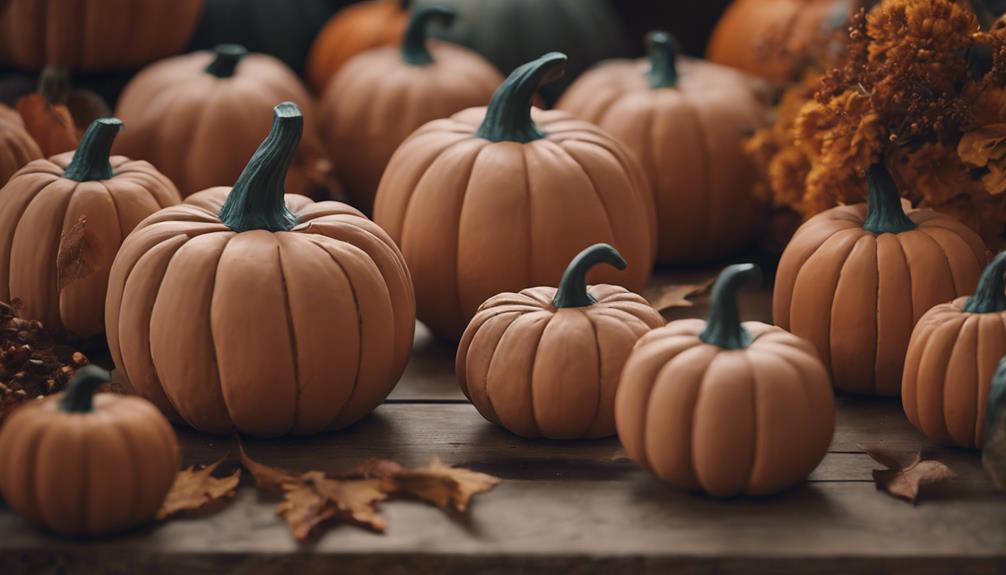
Crafting simple terra cotta pumpkins in 7 easy steps is achievable! Gather ceramic pumpkins, terra cotta paint, baking soda, a paintbrush, and primer. Mix orange, white, and brown paint for a custom terracotta hue. Clean pots, apply primer, and paint in two coats. Stack them creatively, secure with adhesive, and add a stem. Enhance with white details. Display your creation on mantels, as centerpieces, or in wreaths. Tiered trays and fall vignettes work well too! These steps set you on the path to beautiful autumn décor.
Key Takeaways
- Mix orange, white, and brown paint for terracotta color.
- Paint clean pots with terra cotta paint in two coats.
- Stack painted pots creatively for a realistic look.
- Attach a small wood piece or dried stem as a stem.
- Display on mantels, as centerpieces, in wreaths, or tiered trays.
Gather Supplies
Let's start by gathering the supplies needed for making these Simple Terra Cotta Pumpkins. For this DIY project, you'll require ceramic pumpkins, terra cotta paint, baking soda, a paintbrush, and primer if needed.
Thrift stores can be a great place to find affordable ceramic pumpkins perfect for this craft. To achieve an authentic terracotta color look, we recommend using Pueblo color terra cotta paint.
Before painting, it's crucial to clean the pumpkins thoroughly with a mixture of vinegar and water. This step guarantees that the paint adheres properly to the surface. If your pumpkins have a shiny finish, applying primer beforehand can help the paint adhere better and result in a more polished final look.
Once you have all your supplies gathered and prepped, you'll be ready to move on to the next steps in creating these charming terra cotta pumpkins.
Mix Paint Colors
Mixing paint colors for simple terra cotta pumpkins involves combining orange, white, and brown craft paint in a bowl to create a custom terracotta color mix. Start by squeezing a generous amount of orange paint into the bowl, followed by a smaller amount of white paint. The white helps lighten the orange, moving it towards the desired terracotta shade.
Then, add a touch of brown paint to deepen the color, adjusting the proportions until you achieve the perfect terracotta hue for your pumpkins.
Experiment with different ratios of orange, white, and brown to customize the color mix to your liking. For added texture when painting the pumpkins, consider mixing in a bit of flour with the paint. This can give your pumpkins a more realistic terracotta look.
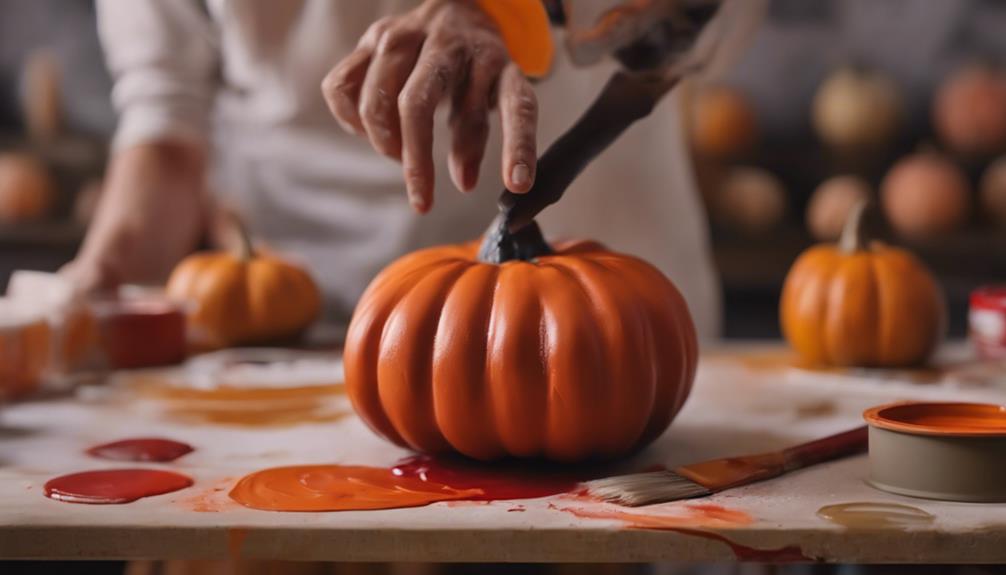
Paint Terracotta Pots
Before painting terracotta pots, it's crucial to clean them thoroughly with a mixture of vinegar and water. This step guarantees that the paint adheres well to the surface. If the pots have a shiny finish, applying a primer beforehand can further enhance the paint's durability.
When selecting paint colors for your DIY Halloween project, opt for terra cotta paint in two coats to achieve a vibrant and authentic look. To add texture and dimension to your painted pots, experiment with different painting techniques such as stippling or dry brushing.
For a unique touch, consider incorporating white details using baking soda. This method can create a weathered and aged appearance, perfect for achieving a rustic or vintage vibe in your decor.
Whether you're crafting simple terra cotta pumpkins or other seasonal decorations, painting terracotta pots can be a fun and creative way to personalize your space.
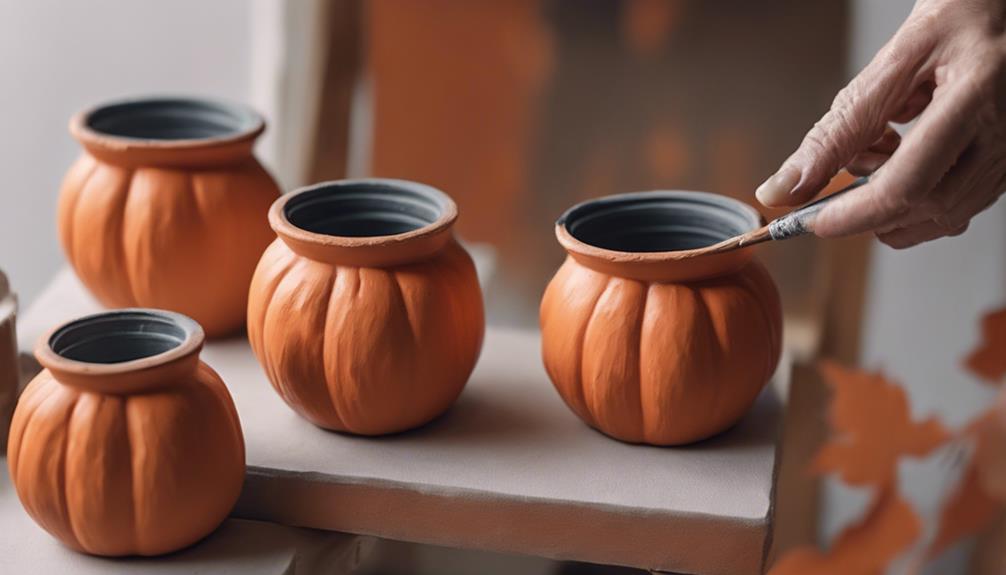
Stack Painted Pots
When stacking painted terra cotta pots to create pumpkin-like shapes, it's crucial to stack pots creatively using various sizes for a realistic look.
Choose paint colors that mimic traditional pumpkin hues like orange, yellow, and green for a festive touch.
Secure the stacked pots with a strong adhesive to guarantee they stay in place and form a stable structure.
Stack Pots Creatively
Let's ignite our creativity by stacking painted terra cotta pots in imaginative arrangements to elevate our fall decor. To start, paint the pots in vibrant autumn colors like orange, brown, and yellow to capture the essence of the season.
Adding texture to the pots using techniques such as distressing or weathering can enhance their visual appeal. Experiment with different painting methods like dry brushing or sponging to achieve a rustic finish that complements the fall aesthetic.
When stacking the painted pots, consider mixing sizes to create a dynamic display. Try arranging them in a pyramid shape or staggering them for a visually interesting centerpiece.
By playing with the placement and orientation of the pots, you can craft a unique and eye-catching design that evokes the spirit of autumn.
Embrace your artistic side and let your imagination run wild as you stack pots creatively to add a touch of charm to your fall decorations.
Choose Paint Colors
Opting for terra cotta paint colors like Pueblo can lend an authentic touch to your stacked painted pots. When choosing paint colors for your terracotta pumpkins, consider mixing orange and yellow hues to achieve that classic terracotta pot appearance.
Experiment with different shades to find the perfect pumpkin color that suits your taste and style. To create texture on your stacked painted pots, apply the paint in thick coats using vertical strokes. This technique helps to mimic the natural texture of terracotta clay, enhancing the overall look of your pumpkin display.
Secure With Glue
To create the pumpkin shape, securely stack the painted terra cotta pots using a strong adhesive. The glue is important in holding the pots together, ensuring your pumpkin remains intact. It's essential to align the pots evenly to achieve a symmetrical pumpkin appearance.
Once stacked and glued, consider adding a stem or other embellishments to give your terra cotta pumpkin a personalized touch. These extra details can enhance the overall look of your creation.
Allow sufficient time for the glue to dry completely before moving or displaying your terra cotta pumpkin. This step is necessary to prevent any disassembly or damage to your finished project.
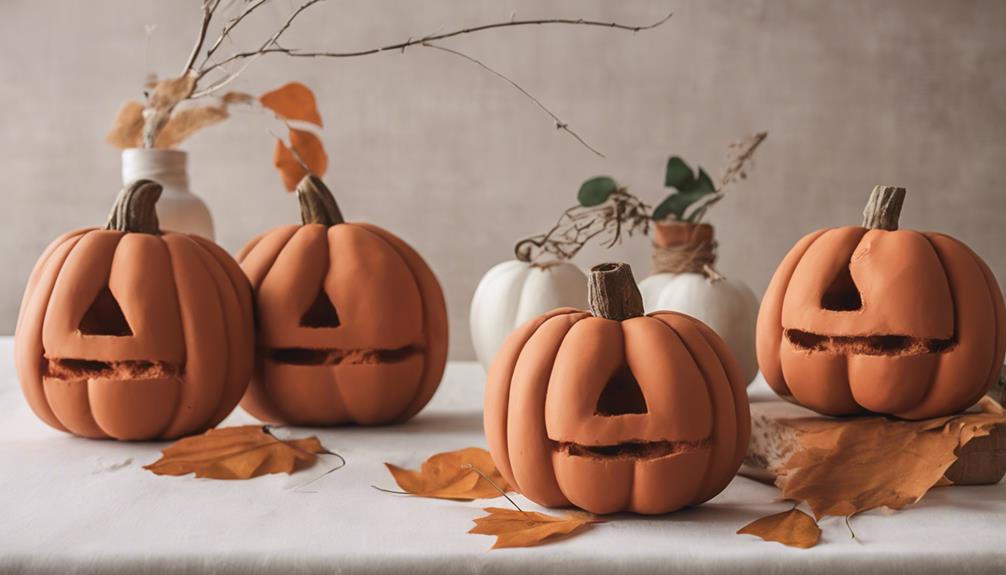
Add Stem

For adding the stem to your terra cotta pumpkin, carefully select a small piece of wood or a dried stem to achieve a realistic look. Once you have chosen the perfect stem, it's time to attach it to the top of your pumpkin. Using a strong adhesive or hot glue, carefully secure the stem in place, ensuring it's centered and firmly attached. This step is essential in completing the overall appearance of your pumpkin.
After attaching the stem, allow the adhesive to dry completely before handling the pumpkin to prevent any accidental detachment.
The stem not only adds a touch of authenticity but also enhances the visual appeal of your terra cotta pumpkin. By following these simple steps, you can create a charming and lifelike pumpkin decoration that will impress your family and friends.
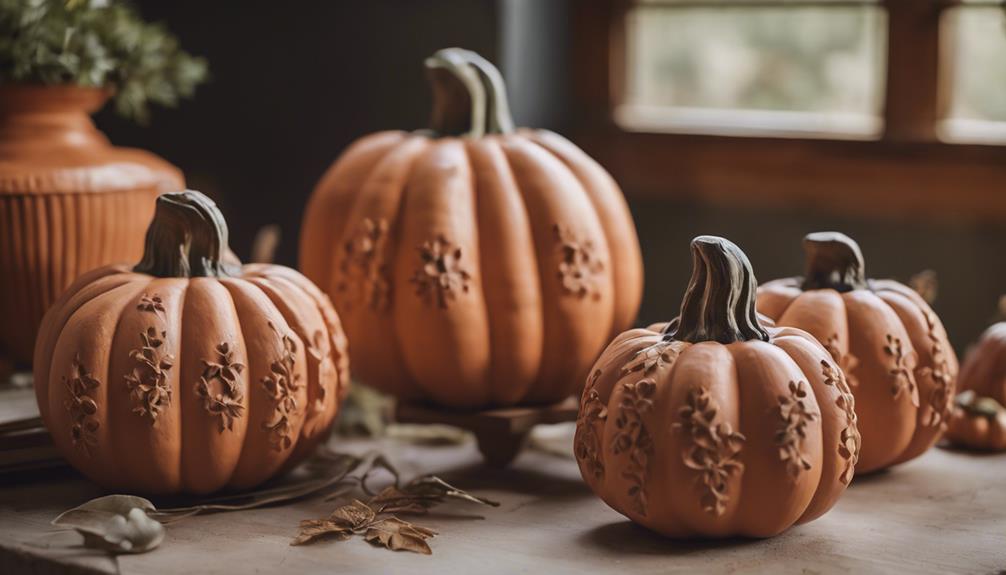
Decorate Pumpkin
After attaching the stem with a realistic appearance, the next step is to decorate the terra cotta pumpkin by painting it to achieve the desired color and texture.
For this Halloween DIY project, start by cleaning the ceramic pumpkin with vinegar and water to guarantee a smooth surface for painting. If the pumpkin has a shiny finish, applying primer beforehand can help the paint adhere better.
Utilize terra cotta paint in two coats to get the color and texture you want. To add a touch of realism, mix white detail with baking soda for an authentic terracotta appearance.
Don't be afraid to get creative with different paint colors, brush sizes, and patterns to personalize your DIY terracotta pumpkins. Remember, the beauty of this project lies in your ability to experiment and make each pumpkin unique.
Display Your Creation
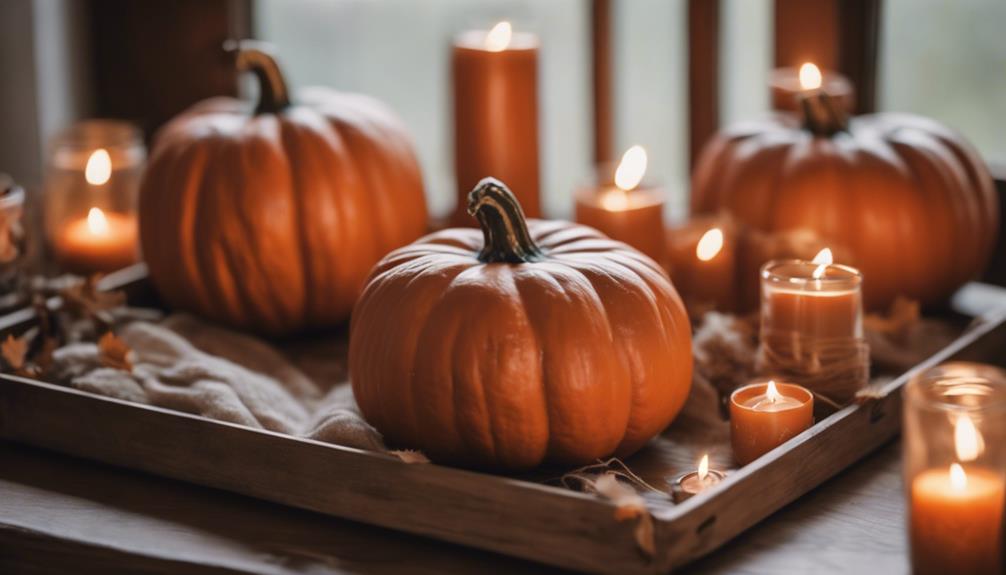
When displaying your terra cotta pumpkins, consider arranging them on a mantel, shelf, or tabletop for a festive touch. Get creative by incorporating candles and other fall decorations to craft a seasonal centerpiece.
For a unique twist, hang your pumpkins on a wreath or garland to add a touch of autumn charm to your space.
Pumpkin Placement
To showcase your terra cotta pumpkins, consider placing them on a mantel or shelf for a charming display. Here are some creative ideas for pumpkin placement:
- Create a centerpiece:
Arrange your terra cotta pumpkins with candles or other fall decor items to make a striking centerpiece for your dining table or coffee table.
- Hang them on a wreath:
Add a twist to your Halloween decor by hanging your terra cotta pumpkins on a wreath for a unique and creative decoration that will surely impress your guests.
- Display in a tiered tray:
Showcase your terra cotta pumpkins in a tiered tray to create a visually interesting arrangement that adds depth and dimension to your fall-themed vignette.
- Incorporate into a fall-themed vignette:
Integrate your pumpkins into a fall-themed vignette with other autumn elements like leaves, acorns, and seasonal flowers for a cohesive look that captures the essence of the season.
Seasonal Decor Ideas
Let's explore various creative ways to showcase your DIY terra cotta pumpkins as part of your seasonal decor.
To infuse your space with fall charm, consider placing your pottery barn terracotta pumpkins on a mantel or shelf. This simple addition can instantly transform your surroundings into a cozy autumn retreat.
For a festive touch, create a centerpiece by pairing candles with your terra cotta pumpkins. This arrangement not only adds warmth but also elevates the overall ambiance of your space.
To add a unique twist to your decorations, hang terra cotta pumpkins on a wreath. This unconventional approach can make a striking statement and set your decor apart.
For a visually appealing setup, arrange your terra cotta pumpkins in a tiered tray. This layered display adds depth and texture to your fall-themed vignette, creating a cohesive and seasonal look.
Frequently Asked Questions
How to Terra Cotta Pumpkin?
To terra cotta a pumpkin, follow these steps:
Clean the pumpkin with vinegar and water.
Apply two coats of terra cotta paint in vertical strokes for texture.
Add white details using baking soda for an authentic look.
Experiment with different painting techniques and colors for a personal touch.
Seal the paint with fixatif spray or Mod Podge to protect it.
This process will give your pumpkin a unique and stylish terra cotta finish.
How to Make Terracotta Jack O'lantern?
We can make terracotta jack o'lanterns by starting with plastic pumpkins or jack-o-lanterns as our base.
Mixing orange, white, and brown craft paint helps create a custom terracotta color for painting.
Sprinkling flour over the dried paint adds texture and realism.
Protecting the work surface and applying flour generously gives a varied effect.
This DIY project transforms plastic pumpkins into expensive-looking decor easily.
What Color Paint for Terracotta Pumpkin?
When choosing paint colors for a terracotta pumpkin, consider blending terra cotta, earthy rose, raw sienna, and white hues. This mix creates a realistic terracotta appearance.
Experiment with different color ratios to achieve the desired shade. Adding a white wash on top can enhance depth and texture.
Layering paint and adding subtle details can further elevate the terracotta effect on your pumpkin.
Conclusion
In just 7 easy steps, you can create simple terra cotta pumpkins that will add a festive touch to your fall decor.
This project is as easy as pie, like carving a pumpkin on Halloween night.
So grab your supplies, mix your paint, and get crafting!
Before you know it, your adorable pumpkins will be ready to display and impress your guests.
Get ready to wow everyone with your DIY skills!

Sterling – Your Customer Champion Sterling is your customer champion, dedicated to providing exceptional support and assistance whenever needed. With his friendly demeanor and commitment to your satisfaction, he ensures that your experience with Perfect Fit Living is excellent.