Connect with us

Home Decor

Remarkable Hallway Makeover

Witness the transformation of a mundane hallway into a stunning focal point, and discover the creative secrets behind this remarkable makeover.

Published

on

stunning transformation of hallway

As we started on our remarkable hallway makeover, we transformed this often-overlooked space into a stunning focal point through careful planning, meticulous execution, and creativity. We initiated the transformation with prep work, selecting the perfect paint swatch, Evergreen Fog SW 9130, and a satin finish for a cohesive look. Clever sticker removal techniques and personalized decor and artwork added a unique touch. Thoughtful arrangement of artwork and decor created harmony, while mixing sizes, styles, and unconventional items added visual interest. To achieve a balanced look, we considered size, color, and style, and our hard work paid off, resulting in a beautiful, inviting space that showcased our personal style – and that's just the beginning of our remarkable hallway makeover journey.

Key Takeaways

• A remarkable hallway makeover begins with prep work, paint swatches, and clever sticker removal techniques for a fresh start.

• Selecting a cohesive paint color scheme, such as Evergreen Fog SW 9130, sets the tone for a bright and welcoming space.

• Personalized decor and artwork, including unique displays and custom pieces, add a touch of whimsy and visual interest to the hallway.

• Thoughtfully arranging artwork and decor, considering size, color, and style, creates harmony and visual appeal in the space.

Advertisement

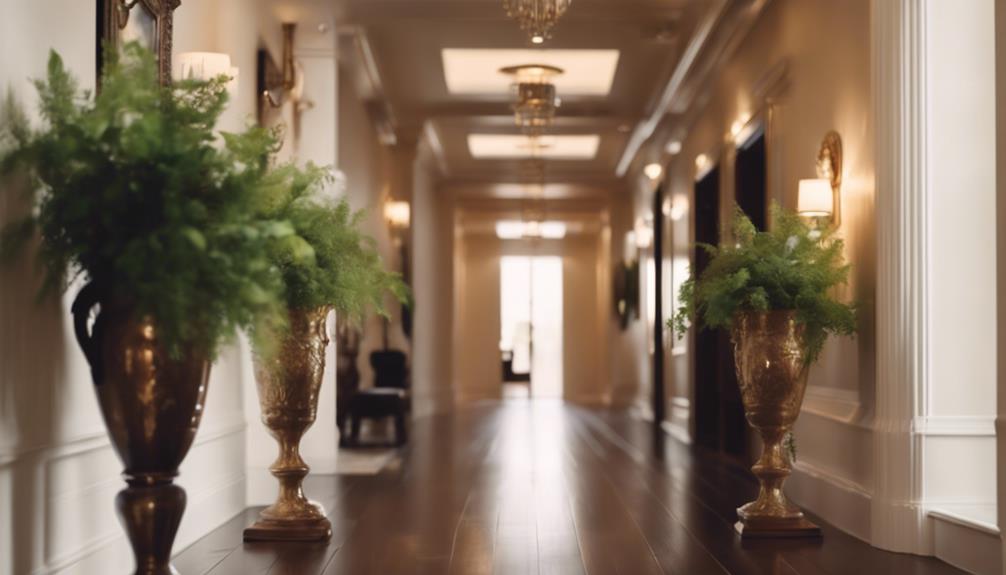
• Final touches, such as pendant lights and mirrors, enhance the ambiance, create the illusion of more space, and add a sense of glamour.

Hallway Transformation Journey Begins

We started our hallway transformation journey by tackling the necessary prep work, scrubbing the walls, washing the trim, and safeguarding the floors to guarantee a smooth makeover process. This essential step paved the way for a successful hallway transformation.

Next, we delved into the exciting task of selecting paint swatches, carefully choosing the perfect hues to bring our vision to life. However, we soon realized that removing stickers from the walls was no easy feat. We employed clever sticker removal techniques, soaking rags in vinegar, scraping off stickers, and using an electric sander for stubborn residue.

After overcoming this hurdle, we strategically hung our beloved artwork collections, personalizing the space with decor and adorning doors with new designs. As we approached the final touches, we took a moment to appreciate the beautiful transformation unfolding before our eyes.

With a sense of achievement, we celebrated with pizza and a series finale, basking in the glorious outcome of our hallway transformation journey.

Advertisement

Painting and Decorating Essentials

perfecting the art form

As we move forward with our hallway makeover, we're now focusing on the essential aspects of painting and decorating.

When it comes to selecting a color scheme, we need to take into account the overall aesthetic we want to achieve, factoring in the natural light, furniture, and decor that will complement our chosen hues.

Color Scheme Selection

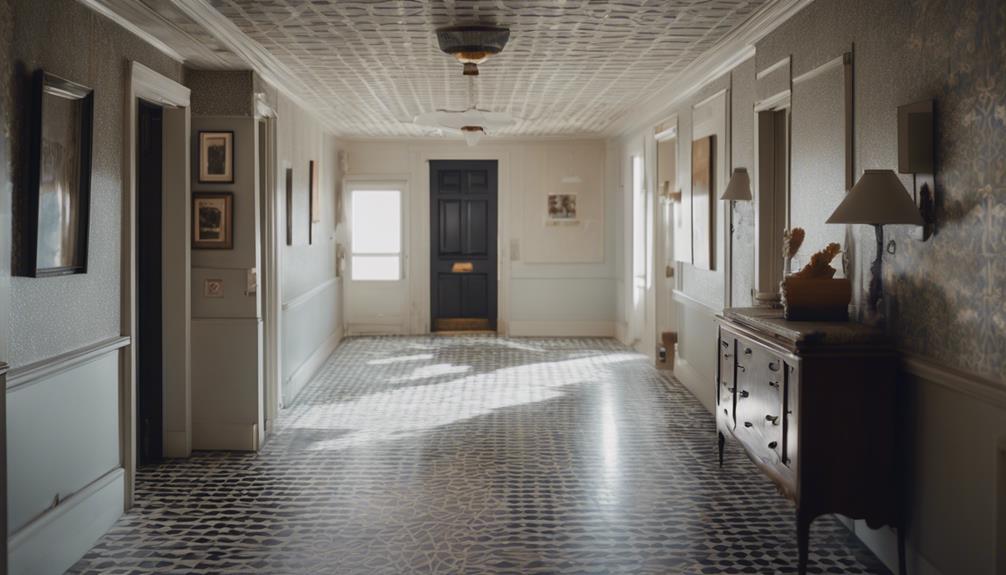
How do we create a harmonious color scheme that not only complements the adjacent bold and vibrant wallpapered rooms but also transforms the narrow hallway into a bright and welcoming space?

We opted for Evergreen Fog SW 9130 from Sherwin-Williams, the 2022 Color of the Year, as our paint color of choice. To enhance the brightness and create a cohesive look, we chose a satin finish for the paint. By painting the hallway ceiling with Evergreen Fog, we can carry light farther down the hall, making it feel more spacious.

Personalization and style were key factors in selecting a color scheme that complements the adjacent rooms. We collaborated with Minted to design a gallery wall that adds a visually appealing touch to the hallway. The resulting color scheme isn't only harmonious but also reflects our personal style.

As we wanted the hallway to feel bright and welcoming, we made sure to select a color scheme that would achieve this goal. By incorporating our personal style and preferences, we were able to create a unique and inviting space that sets the tone for the rest of the house.

Advertisement

Decorating Accent Walls

By incorporating accent walls into our hallway design, we can strategically draw attention to specific areas, add visual interest, and create a sense of depth. Accent walls can transform a space by adding depth and visual interest through contrasting colors or textures.

Painting an accent wall can create a focal point in a room, drawing attention to architectural features or artwork.

Here are three ways to elevate the design of an accent wall:

  1. Stripes and patterns: Add a touch of sophistication with stripes, geometric patterns, or textured finishes.
  2. Bold colors: Make a statement with bold, contrasting colors or metallic paints for a dramatic effect.
  3. Unique materials: Incorporate wallpaper, wood paneling, or tile to create a one-of-a-kind accent wall that complements the room's decor.

Unveiling Hidden Designs

revealing intricate architectural blueprints

We began by removing old stickers from the doors, which revealed hidden designs that added a personal touch to our hallway makeover.

To remove the stickers, we utilized the vinegar method, soaking rags in vinegar and applying them to the stickers. This loosened the adhesive, making it easier to scrape them off. For more stubborn residue, we used electric sanders to smooth out the surface. We treated both sides of the doors with the vinegar method to guarantee complete sticker removal.

The result was astonishing – the hidden designs on the doors added a fresh and personalized touch to our hallway makeover. By removing the old stickers, we uncovered a unique aspect of our doors that complemented our design aesthetic. This subtle detail elevated our hallway makeover, making it truly remarkable.

Advertisement

As we worked on this project, we realized that sometimes, it's the smallest details that make the biggest impact.

Adding Personal Touches

crafting a cozy space

As we move on to adding personal touches to our hallway makeover, we're excited to explore the various ways to make this space truly reflective of our style and personality.

From showcasing unique artwork displays to creating a personalized photo gallery, we'll discover how incorporating meaningful decor pieces can elevate the overall aesthetic of our hallway.

Unique Artwork Displays

Incorporating unique artwork displays into our hallway makeover allows us to put our personal stamp on the space. By doing so, we can create a visually appealing and inviting atmosphere that reflects our personality and style.

Here are three ways we can make our hallway makeover stand out with unique artwork displays:

  1. Mix and match sizes and styles: Combining different frame sizes, shapes, and styles adds visual interest to our gallery wall.
  2. Incorporate unconventional items: Using vintage mirrors, upcycled decor pieces, or other unexpected items adds a touch of whimsy to our hallway decor.
  3. Opt for custom artwork: Commissioning a custom piece or creating our own DIY artwork allows us to add a truly one-of-a-kind touch to our hallway makeover.

Personalized Photo Gallery

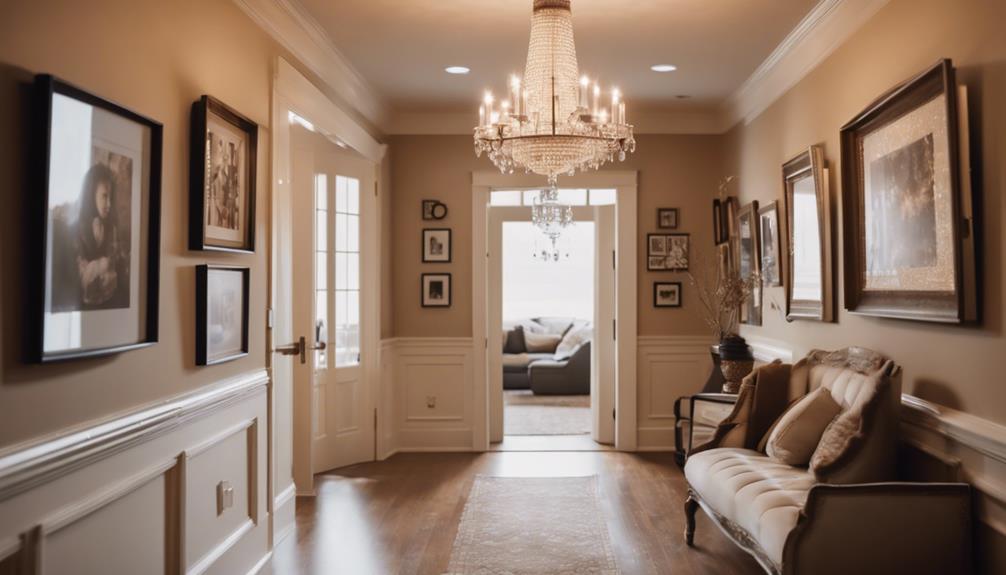
A personalized photo gallery wall adds a unique and sentimental touch to our hallway makeover, allowing us to curate a visually appealing display of cherished memories. By incorporating family photos, we create a focal point in the hallway, making it a constantly evolving space that reflects our individual style preferences.

We can mix and match prints and mementos on a gallery wall to showcase our personal memories and experiences, making it a true reflection of who we are. This personalized approach to hallway design allows us to customize the space to our liking, making it feel truly our own.

Advertisement

As we curate our photo gallery, we're not just hanging pictures – we're telling our story. By incorporating personal photos, we're able to put our own spin on the traditional hallway makeover, making it a space that's truly one-of-a-kind.

As a result, our hallway makeover is transformed into a warm and inviting space that's bursting with personality.

Meaningful Decor Pieces

We take our hallway makeover to the next level by adding meaningful decor pieces that reflect our personality, interests, and experiences. These personal touches not only make our hallway unique but also create a warm and inviting atmosphere.

Here are a few ways to incorporate meaningful decor pieces into our hallway makeover:

  1. Family heirlooms: Adding antiques or family heirlooms can infuse our hallway with history and nostalgia.
  2. Personalized art: Displaying meaningful artwork or crafts created by family members can enhance our hallway's personalization.
  3. DIY projects: Customizing decor elements with DIY projects or handmade items can showcase our creativity and personal style.

Balancing Artwork and Decor

finding harmony in design

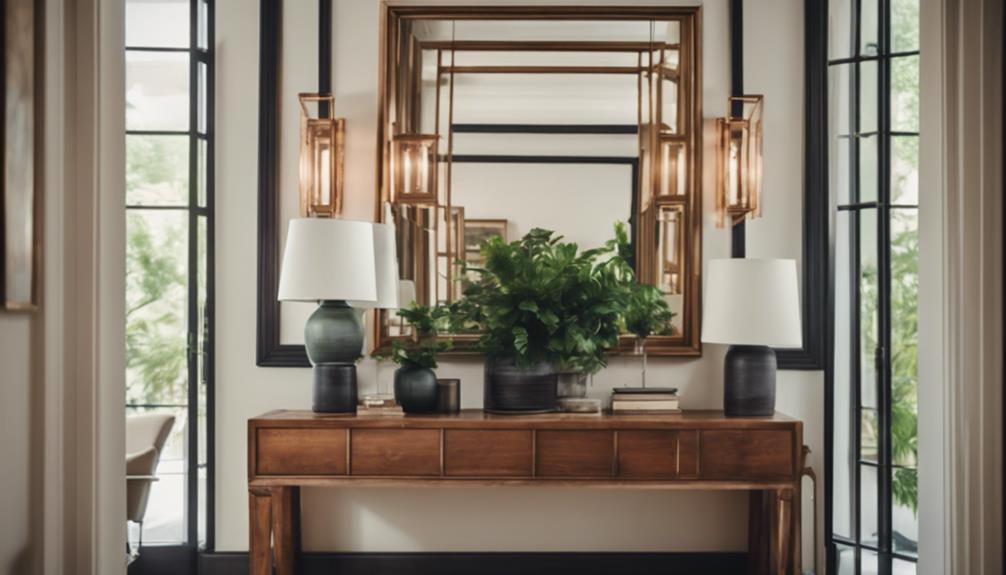
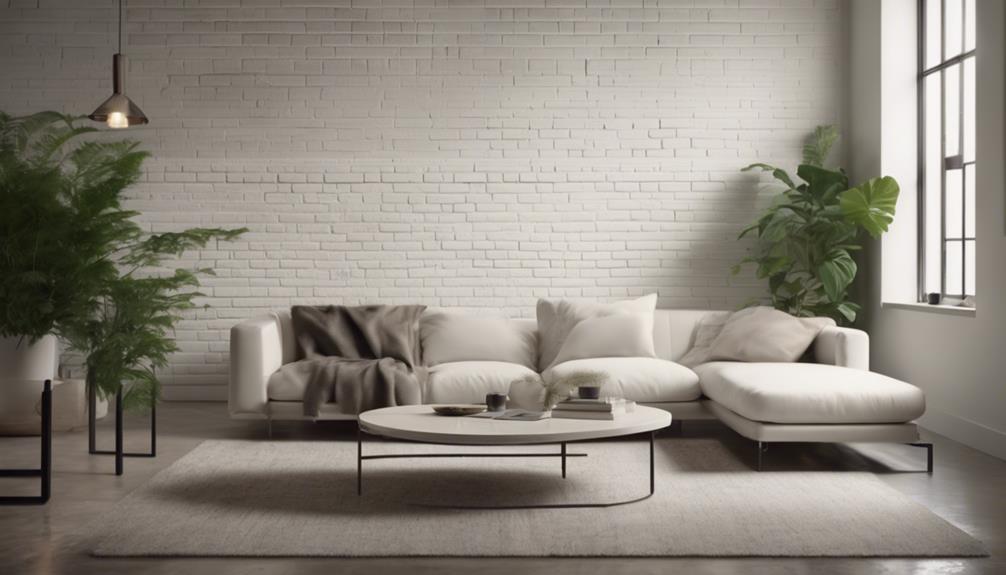
By thoughtfully arranging artwork and decor, we can create a visually appealing hallway that showcases our personal style. When it comes to balancing artwork and decor, the key is to create harmony and visual interest. We consider the size, color, and style of artwork to complement the hallway's design. Mixing and matching different types of art, like photography, paintings, and prints, adds dynamism to the display.

Decor Element Placement Tips Visual Interest
Artwork Group similar pieces together Creates a focal point
Mirrors Hang opposite windows for natural light Adds depth and brightness
Lighting Fixtures Install above or beside artwork Highlights the piece
Furniture Place at the end of the hallway for a sense of arrival Creates a sense of warmth

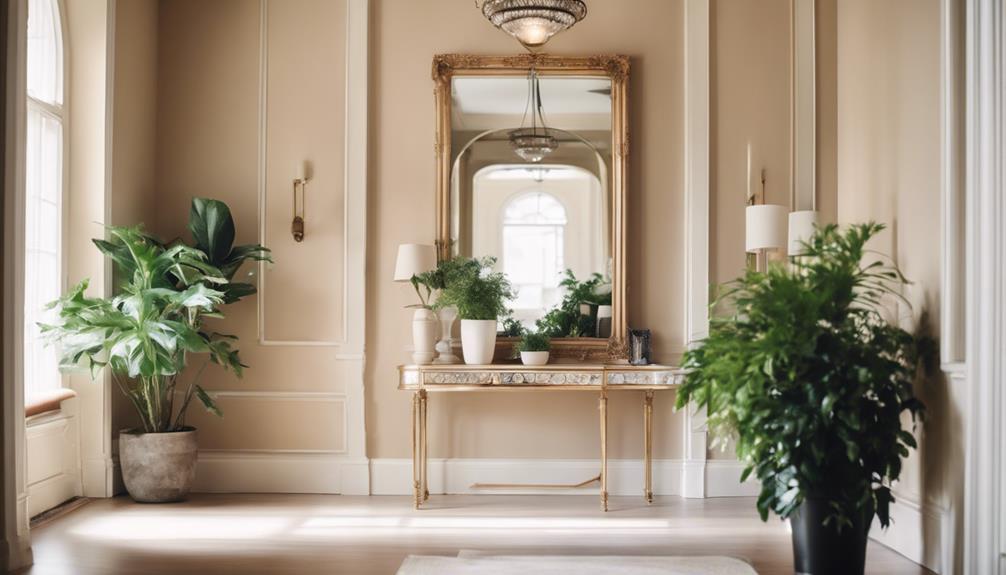
Final Touches and Reveals

adding last minute details

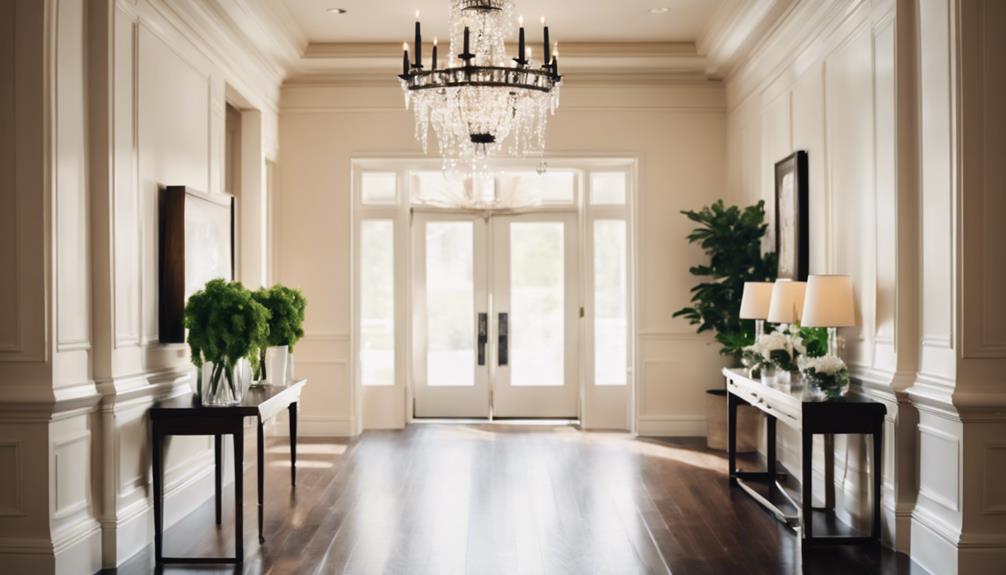
Now that our hallway's artwork and decor are thoughtfully arranged, it's time to put the finishing touches on our remarkable makeover. We're excited to add those final flourishes that will make our hallway look great. To add visual interest, we're incorporating a few key elements to elevate the space.

Here are a few of the details that will take our hallway to the next level:

Advertisement
  1. Collections of paintings: We're grouping a few of our favorite pieces together to create a cohesive look that adds depth and visual appeal.
  2. Pendant lights: These stylish fixtures won't only provide ample lighting but also add a touch of sophistication to our wide hallway.
  3. Large mirror: By placing a large mirror at the end of the hallway, we'll create the illusion of even more space and add a touch of glamour to the overall design.

With these final touches in place, we can't wait to stand back and admire our handiwork. Our hallway looks great, and we're thrilled with the results of our remarkable makeover.

Celebrating a Job Well Done

recognizing hard work success

After a year-long renovation process, we're thrilled to stand back and admire our remarkable hallway makeover, reveling in the dramatic transformation from dark and outdated to light and airy. It's a moment to celebrate, and we're doing just that – celebrating a job well done.

The final touches, including personalization with decor and furniture, have enhanced the hallway's aesthetic appeal, making it a true showstopper. We're proud of the hard work that went into this hallway makeover, and it's evident in the enjoyment of the beautiful new decor and ambiance.

To mark the project's completion, we treated ourselves to a celebratory pizza and some well-deserved relaxation in our newly transformed space. As we gaze upon our handiwork, we can't help but feel a sense of accomplishment, knowing that our efforts have paid off.

This hallway makeover is more than just a renovation – it's a reflection of our perseverance and dedication.

Enjoying the New Ambiance

adapting to a change

We're savoring every moment in our freshly renovated hallway, where the soft glow of new lighting and the soothing hue of fresh paint envelop us in a sense of serenity. The transformation is nothing short of remarkable, and we're thrilled to be enjoying the fruits of our labor.

Here's what we're loving about our new hallway space:

  1. Cozy atmosphere: The combination of fresh paint color, enhanced lighting, and personalized touches has created a warm and inviting ambiance that makes us feel right at home.
  2. Functional storage solutions: Our clever use of shelves and cabinets has maximized storage space, keeping clutter at bay and making it easy to find what we need.
  3. Personalized decor: From the gallery wall to the stylish accessories, every element has been carefully curated to reflect our personal style and make the space truly our own.

As we indulge in a well-deserved treat, we can't help but feel a sense of pride and accomplishment at the successful completion of our remarkable hallway makeover.

Frequently Asked Questions

How Can I Make My Hallway Look Good?

We're wondering how to make our hallway look good, and we're considering a few tricks to create a more inviting space – adding mirrors, a gallery wall, and some stylish lighting to make it feel more spacious and stylish.

Advertisement

How to Modernise a Hallway?

As we step into our humble abode, we envision a sleek, modern oasis, a far cry from the drab, cramped hallways of yesteryear. To modernize our hallway, we'll swap outdated fixtures for sleek, minimalist designs and infuse the space with vibrant hues and clever storage solutions.

How to Make a Long Hallway More Interesting?

We're tired of our long hallway feeling dull, so we're adding visual interest with a mix of art pieces, bold runners, and strategically placed mirrors to create a more engaging space that reflects our style.

How to Decorate Awkward Hallways?

As we navigate life's twists and turns, we often find ourselves stuck in awkward hallways, but we're not lost, we're just redirecting – we'll cleverly use mirrors, bold art, and stylish lighting to turn these spaces into grand entrances.

Conclusion

As we step back to admire our remarkable hallway makeover, we can't help but feel a sense of pride and accomplishment.

One potential concern, 'Will a bold design choice overwhelm the space?' is alleviated by the clever balancing of artwork and decor. According to interior design expert, Sarah Taylor, 'A well-curated mix of textures, colors, and patterns creates visual interest without overwhelming the senses.'

Advertisement

Our transformed hallway is now a warm, inviting space that showcases our personal style.

Continue Reading
Advertisement

Alfresco

Is It Al Fresco or Alfresco? Proper Usage Explained!

Wondering about the distinction between 'al fresco' and 'alfresco'? Delve into the proper usage to enrich your outdoor experiences and linguistic finesse.

Published

on

By

al fresco or alfresco

When deciding between 'al fresco' and 'alfresco,' it's crucial to recognize the nuanced distinctions to refine your portrayal of outdoor pursuits and dining occasions. Originating from Italian, 'al fresco' translates to 'in the cool air,' infusing a sense of natural vitality into experiences. Both terms are interchangeable for outdoor endeavors, with 'alfresco' being more prevalent in American English and 'al fresco' in British English. Embracing the accurate usage aids in effectively conveying outdoor settings. Misconceptions about these terms persist, but knowing their true breadth adds depth to your appreciation of alfresco encounters. Further insights await, shedding light on the vast domain of outdoor experiences.

Key Takeaways

  • 'Al fresco' and 'alfresco' are interchangeable for outdoor activities.
  • 'Alfresco' is more common in American English; 'al fresco' in British English.
  • Both terms mean 'in the fresh air' or 'cool air' in Italian.
  • Understanding nuances aids in accurate conveyance of outdoor dining or events.
  • Use 'al fresco' for elegance in writing about outdoor experiences.

The Origin of Al Fresco

The term 'Al Fresco' originates from the Italian language, meaning 'in the cool air.' It has become a popular phrase in English, often associated with dining or spending time outdoors. Italians originally used 'Al Fresco' to describe time spent in jail, but over time, it evolved to represent activities in the open air.

In contemporary usage, the term is commonly linked with outdoor dining experiences, enhancing the enjoyment of food by immersing individuals in a natural setting.

Webster's dictionary defines 'Al Fresco' as being in the open air, emphasizing the connection between the term and outdoor environments. The concept of dining 'Al Fresco' isn't merely about the food but also about the ambiance and atmosphere created by nature.

Whether it's a picnic in the park or a meal on a restaurant patio, the experience of eating outdoors adds a revitalizing element to the culinary adventure.

Al Fresco Vs. Alfresco: Any Differences?

spelling difference in dining

When distinguishing between 'al fresco' and 'alfresco,' it's crucial to take into account their meanings, regional variations, and common usage examples.

While both terms are used interchangeably to describe outdoor activities, 'alfresco' specifically translates to 'in the fresh air' in Italian.

Advertisement

Understanding these nuances can help accurately convey the context of outdoor dining or events held outside.

Meaning of Terms

Distinguishing between 'al fresco' and 'alfresco' may not be necessary as both terms share a similar meaning in describing outdoor activities or dining. In Webster's dictionary, 'alfresco' is defined as taking place or located in the open air. Both words originate from Italian and convey the idea of being 'in the cool air.' While 'alfresco' is more commonly used in American English, 'al fresco' is popular in British English. Understanding the distinction between the two can enhance your communication skills and vocabulary proficiency.

Term Definition Usage
Al Fresco Originates from Italian, meaning 'in the cool air' British English
Alfresco Defined as taking place or located in the open air American English

Knowing the nuances between 'al fresco' and 'alfresco' can help you accurately express the idea of outdoor activities or dining in your conversations or written communication.

Regional Variations

Understanding the regional variations between 'al fresco' and 'alfresco' can enhance your grasp of language nuances.

In different English-speaking regions, the choice between 'al fresco' and 'alfresco' may vary, with each spelling taking place or located outdoors in daily activities. Here are some key points to keep in mind:

Advertisement
  • The term 'al fresco' originates from Italian, while 'alfresco' is the English adaptation.
  • 'Al fresco' is more commonly used in British English, while 'alfresco' is preferred in American English.
  • Personal preference and adherence to specific style guides can influence the spelling choice.
  • Knowing regional differences, like 'al fresco' in British English and 'alfresco' in American English, aids in proper usage.
  • Both spellings are used interchangeably, but understanding the regional variations can help you employ the correct term in your writing or conversations every day.

Common Usage Examples

In everyday usage, you may wonder if there are any noticeable differences between 'al fresco' and 'alfresco' when describing outdoor activities or events. Both terms are widely accepted and essentially interchangeable, conveying the same meaning of outdoor experiences. The choice between using 'al fresco' or 'alfresco' typically comes down to personal preference, as they both refer to activities or events conducted outside, especially in pleasant weather conditions.

To provide a clearer understanding, let's take a look at some common usage examples:

Common Usage Examples
Enjoying a meal al fresco on the patio
Hosting a party alfresco in the backyard
Painting a landscape al fresco in the park

These instances showcase how 'al fresco' and 'alfresco' can be seamlessly integrated into everyday language when describing outdoor settings or events. Remember, whether you choose 'al fresco' or 'alfresco,' both terms are correct and convey the same idea of outdoor enjoyment.

Common Misconceptions About Al Fresco

outdoor dining myths debunked

Many people mistakenly associate al fresco solely with outdoor dining, overlooking its broader applications in open-air settings. Despite common misconceptions, al fresco doesn't exclusively refer to dining outside but encompasses various activities conducted in open-air environments.

Here are some key points to clarify misconceptions about the term:

  • Al fresco and alfresco are interchangeable spellings, originating from Italian and anglicized versions.
  • Al fresco extends beyond dining to include activities like painting, performances, and social gatherings outdoors.
  • The term is versatile and can denote any event or experience taking place in the open air, not limited to just meals.
  • While al fresco dining is prevalent, the concept of al fresco encompasses a wide array of outdoor experiences.
  • Understanding the true scope of al fresco can enhance appreciation for open-air activities in diverse settings.

When to Use Al Fresco in Writing

al fresco writing tips

When deciding when to use 'al fresco' in your writing, consider the context in which you're discussing outdoor activities or dining.

Remember that 'al fresco' is the traditional Italian term meaning 'in the cool air,' often used to evoke a sense of open-air enjoyment.

In English writing, both 'al fresco' and 'alfresco' are acceptable choices, so opt for the one that aligns best with your personal style or adherence to traditional spelling conventions.

Advertisement

Meaning of Al Fresco

To convey the experience of outdoor dining or activities, consider using 'al fresco' in your writing. The term 'al fresco' originates from Italian, meaning 'in the cool air,' and it's commonly used in English to describe activities conducted in outdoor settings.

Both 'al fresco' and 'alfresco' are accepted variations in English, with the latter also conveying the same meaning. When writing about outdoor events, using 'al fresco' can add a touch of elegance and specificity to your descriptions.

  • 'Al fresco' is the correct Italian term for outdoor activities.
  • The term is widely used in English to describe dining or activities done outdoors.
  • 'Alfresco' is an accepted variant of 'al fresco' in English.
  • Both 'al fresco' and 'alfresco' can be used interchangeably to refer to outdoor experiences.
  • Using 'al fresco' in your writing can enhance the clarity and sophistication of your descriptions of outdoor events.

Usage in Context

Consider incorporating 'al fresco' in your writing to add a touch of elegance and specificity when describing outdoor dining or activities. The term 'al fresco' originates from Italian and conveys a sense of dining or enjoying the outdoors in a cool and invigorating manner.

In formal writing or when discussing Italian culture, it's more appropriate to use 'al fresco' to maintain authenticity and cultural relevance. However, in casual or everyday English, 'alfresco' is widely accepted as an anglicized version of the term.

While 'alfresco' is often used interchangeably with 'al fresco,' purists may prefer the original Italian term for its specific meaning and cultural connotations. Understanding the distinction between 'al fresco' and 'alfresco' can enhance your communication skills and demonstrate cultural awareness in different contexts.

Alfresco Dining: Tips for Success

outdoor dining success tips

For successful alfresco dining, make sure you have the right utensils, plates, and drinks readily available. When dining outdoors, the experience can be greatly enhanced by paying attention to the details. Here are a few tips to guarantee your alfresco dining is a success:

  • Opt for durable and lightweight dishware: Choose plates and utensils that are sturdy enough to withstand outdoor conditions but also easy to handle.
  • Bring appropriate drinkware: Consider using insulated cups for beverages to keep them at the desired temperature for longer periods.
  • Pack essential condiments: Don't forget to bring salt, pepper, and any other seasonings you may need to enhance the flavor of your meal.
  • Prepare for potential weather changes: Have a backup plan in case the weather shifts unexpectedly, such as bringing along a portable canopy or umbrella.
  • Don't forget the essentials: Remember to bring napkins, wet wipes, and trash bags to keep your dining area clean and tidy throughout the meal.

Exploring Synonyms for Al Fresco

synonyms for outdoor dining

Explore various synonyms for 'al fresco' to expand your vocabulary and better convey outdoor experiences. When discussing dining or activities conducted in the open air, you can use terms like open-air, out-of-door, out-of-doors, outdoor, and outdoors interchangeably with 'al fresco.' These synonyms serve to clarify the setting and ambiance of outdoor experiences, aiding in precise communication.

Understanding and incorporating these alternative expressions can enrich your language skills by providing nuanced ways to describe outdoor settings and events. By utilizing a variety of synonyms for 'al fresco,' you can add depth and vibrancy to your descriptions, painting a more vivid picture for your audience.

Advertisement

Enhancing your vocabulary with these synonyms not only diversifies your language repertoire but also guarantees that your outdoor-related narratives are rich in detail and imagery. Embrace these synonyms to elevate your descriptions of outdoor escapades and capture the essence of nature-infused moments with eloquence.

Cultural Insights: Al Fresco Around the World

global dining traditions explored

When it comes to cultural insights on al fresco experiences around the world, the term 'al fresco' holds distinct meanings and significance across various countries and traditions.

In Italy, 'al fresco' carries a rather unexpected connotation, as it refers to spending time in jail, diverging from the English meaning of dining or engaging in activities outdoors.

Alfresco dining experiences span a wide spectrum, from intimate picnics to grand outdoor events like wedding receptions.

Throughout history, alfresco settings have served as inspiration for renowned artists such as Thomas Cole and Edward Hopper.

Alfresco film screenings, concerts, and art parks have become favored ways to savor outdoor entertainment.

Advertisement

The concept of alfresco dining and social gatherings boasts a rich legacy, tracing back to the early 19th century.

Al Fresco Etiquette: Dos and Don'ts

outdoor dining dos and don ts

When dining al fresco with proper etiquette, ensure you use suitable outdoor dinnerware and utensils. It's essential to bring insect repellent and sunscreen for protection during your outdoor meal.

When dining al fresco, avoid engaging in loud music or disruptive behavior that may disturb others enjoying the outdoor ambiance. Respect the environment by cleaning up after your al fresco dining experience, leaving the outdoor space as pristine as you found it.

Additionally, it's wise to contemplate the weather conditions and have a backup plan in case of sudden changes, ensuring your al fresco meal remains enjoyable regardless of unforeseen circumstances.

Frequently Asked Questions

Is It Alfresco or Al Fresco?

When asking about using 'alfresco' or 'al fresco,' remember both terms are correct, but 'alfresco' is more common in English. Use 'alfresco' for outdoor activities. Knowing this helps you communicate clearly about your outdoor experiences.

How Do You Use the Word Alfresco?

When dining outdoors, remember to use "alfresco" to describe your delightful experience in the open air. Enjoy the fresh breeze and delicious food, but watch out for pesky bugs and bring necessary utensils.

Advertisement

Is Eating Outside Called Al Fresco?

Eating outside is commonly referred to as "al fresco." Whether you choose "al fresco" or "alfresco," both terms mean dining in the open air. So, next time you dine outdoors, remember it's called "al fresco."

Do Italians Say "Al Fresco"?

When in Italy, Italians indeed say "al fresco." This term paints a picture of enjoying life in the fresh air. Understanding these cultural nuances enriches your experience and interactions, fostering a deeper connection with the local lifestyle.

Conclusion

To sum up, the debate between 'al fresco' and 'alfresco' may seem trivial, but understanding the correct usage can make a significant impact on your writing.

Like a well-prepared dish served under the open sky, choosing the right term can enhance the overall experience for your readers.

So, next time you dine outdoors or describe a scene in your writing, remember to use 'al fresco' for that touch of elegance and sophistication.

Advertisement

Continue Reading

Home Decor

Make Quick and Simple Terra Cotta Pumpkins

Gain a head start on autumn decor with this easy guide to creating stunning, realistically textured terra cotta pumpkins in just a few simple steps.

Published

on

By

craft terra cotta pumpkins

We'll kick start our terra cotta pumpkin project by gathering ceramic pumpkins, craft paint, and natural stems for an authentic look. Next, we'll mix terracotta paint colors by blending orange, white, and brown hues, experimenting with ratios for unique shades. Adding flour to the paint will give our pumpkins a textured look, while precision painting and chip brush strokes will create a professional finish. After layering on flour for a realistic texture, we'll distress our pumpkins with sandpaper and add an aged look with powder. Finally, we'll seal our masterpiece with fixatif spray, and with these simple steps, we'll have created stunning terra cotta pumpkins that exude autumnal charm – and with more techniques to explore, our creativity will flourish.

Key Takeaways

• Blend orange, white, and brown craft paint to create unique terracotta shades for your pumpkin.

• Use a small paintbrush or chip brush to apply paint with precision for a professional finish.

• Add flour to paint for a chunky texture or sprinkle it on almost dry paint for a realistic look.

• Sand edges and corners to distress and age your pumpkin, focusing on areas prone to natural wear and tear.

Advertisement

• Seal your masterpiece with fixatif spray, applying multiple light coats for adequate coverage and protection.

Gather Your Supplies

We'll need a few essential items to get started on our terra cotta pumpkin project. To create these DIY terracotta pumpkins, we'll gather ceramic pumpkins in various sizes and shapes. These will serve as the base for our decorative pumpkins.

Next, we'll need a selection of craft paint in autumnal shades, such as Spiced Pumpkin, Burnt Sienna, Honey Brown, Oyster Beige, and Khaki Tan, to give our pumpkins a warm, seasonal look. A small paintbrush or chip brush will come in handy for applying the paint evenly.

To add an aged texture to our pumpkins, we can use white flour or baby powder. For an authentic touch, consider using natural pumpkin stems to complete the look.

With these basic supplies, we'll be well on our way to creating beautiful, rustic terra cotta pumpkins that will add a cozy ambiance to our homes.

Advertisement

Mix Terracotta Paint Colors

playful terracotta paint hues

Mixing the perfect terracotta color requires a blend of orange, white, and brown craft paint. This can be achieved by combining these hues in a bowl and adjusting the proportions to suit our desired shade.

We can experiment with different ratios of orange to white to brown to create a unique terracotta color that complements our pumpkins. For a more textured look, we can add a pinch of flour to the paint mixture. This will give our pumpkins a more rustic, earthy feel.

By adjusting the amount of flour, we can achieve varying levels of texture, from subtle to dramatic. Once we're happy with our terracotta color, we can use a brush to evenly paint our pumpkins, transforming them into beautiful, autumnal decorations.

With a little practice, we can achieve a range of different terracotta shades, each one unique and eye-catching. By mixing and matching our paints, we can create a collection of pumpkins that add a touch of warmth and coziness to any room.

Paint Your Foam Pumpkin

creative halloween craft idea

As we continue to transform our foam pumpkins into terra cotta masterpieces, we'll focus on the essential steps to achieve a realistic, earthy look.

Now that we've mixed our terracotta paint colors, it's time to explore the various paint color options that will give our pumpkins depth and character, as well as the brush stroke techniques that will add texture and visual interest.

Paint Color Options

We're spoiled for choice when it comes to craft paint colors that evoke the warm, earthy tones of terracotta, with options like Spiced Pumpkin, Burnt Sienna, Honey Brown, Oyster Beige, and Khaki Tan offering a great starting point. These colors provide a solid foundation for achieving a realistic terracotta finish on our DIY foam pumpkin.

Advertisement

Of course, we can always mix and match colors to create a unique shade that suits our taste. By experimenting with different color combinations, we can personalize our pumpkin and make it truly one-of-a-kind. Remember, the key to a convincing terracotta look lies in selecting the right paint colors.

With a small paintbrush or chip brush, we can apply the paint with precision, ensuring a professional-looking finish. Whether we're going for a vibrant, orange-hued pumpkin or a more muted, earthy tone, the right paint colors can make all the difference. By choosing the perfect shades, we can create a beautiful, terracotta-inspired pumpkin that's perfect for our fall decor.

Brush Stroke Techniques

With our chosen paint colors in hand, let's pick up a chip brush and start applying thick, textured strokes to our foam pumpkin. We love the look of a rustic, handmade terracotta pumpkin, and the right brush stroke techniques can make all the difference.

To achieve this, we'll use long vertical brush strokes with our chip brush, applying thickened paint to our foam pumpkin. As we brush up and down, we'll create a textured finish that adds depth and visual interest to our pumpkin. We'll let the paint dry naturally, maintaining those beautiful brush strokes for a realistic look.

Experimenting with different painting techniques is key to achieving the desired terracotta effect on our foam pumpkin. By mixing orange and yellow paint in a 1.5:1 ratio, we can create a custom terracotta color that's uniquely our own.

Advertisement

With practice and patience, we can master these brush stroke techniques and make a stunning, one-of-a-kind terra cotta pumpkin that we'll love displaying in our home.

Sealant Application Tips

Applying a sealant is essential to protecting our painted foam pumpkin from wear and tear, and choosing the right one is critical to preserving its texture and color. As we search for the perfect sealant, it's important to experiment with different options to find the one that works best for our project.

Here are some valuable tips to keep in mind for sealant application:

  • Use a fixatif spray as a gentle sealant for your painted foam pumpkin.
  • Apply multiple light coats of fixatif spray for heavier flour areas.
  • Avoid using clear matte acrylic sealer on your painted foam pumpkin.
  • Experiment with different sealant options like Mod Podge acrylic sealant for best results.
  • Allow the fixatif spray to dry completely before handling your painted foam pumpkin.

Add Texture With Flour

enhancing dishes with flour

As we explore the next step in creating realistic terra cotta pumpkins, we're going to discuss how adding flour can elevate our design.

We'll examine the benefits of using flour as a thickener, the advantages of incorporating flour texture, and some valuable tips for mixing flour into our paint.

Flour as Thickener

We add a pinch of creativity to our terra cotta pumpkins by incorporating flour as a thickener, which brings an intriguing texture to our decorative pieces. This DIY technique allows us to achieve a unique, realistic look that mimics the natural texture of terracotta.

Advertisement

To get started, we can add flour to our paint to create a thick, chunky texture. For a more subtle effect, we can sprinkle flour onto almost dry paint, which helps create a realistic terracotta look.

Here are some tips to keep in mind:

  • Distribute flour on different areas of the pumpkin for a varied texture.
  • Use a dry paint brush to help evenly spread the flour on the surface.
  • Experiment with the amount of flour used to achieve different textures and effects on your pumpkins.
  • Flour can be used to create a raised, bumpy texture or a smooth, even one, depending on how it's applied.
  • Don't be afraid to experiment and try out different flour-to-paint ratios to achieve the desired effect.

Flour Texture Benefits

By incorporating flour into our painting process, we can reveal a range of unique textures that add depth and visual interest to our terra cotta pumpkins.

The flour texture benefits are undeniable, as it allows us to achieve a textured finish that elevates our pumpkins from basic to exceptional. By sprinkling flour on almost dry paint, we can create an aged and realistic look that's perfect for autumnal decorations.

To achieve a natural texture, we can use a dry paint brush to distribute the flour evenly, ensuring a subtle yet striking effect. The best part? We can adjust the amount of flour to our liking, depending on how much texture we desire.

Experimenting with flour can lead to different levels of texture, resulting in unique pumpkin designs that showcase our creativity. With flour, we can transform our terra cotta pumpkins into stunning centerpieces that exude warmth and character.

Advertisement

Flour Mixing Tips

Mixing flour with paint is a simple process that reveals a world of textures, enabling us to create unique terra cotta pumpkins that stand out from the crowd.

When it comes to adding texture to our pumpkins, we've found that flour is an excellent addition to our paint. But how do we get the most out of this combination? Here are some flour mixing tips to help us achieve the perfect texture:

  • Sprinkle flour on the almost dry paint to create a textured look that's simply stunning
  • Distribute flour on different parts of the pumpkin for a realistic finish that mimics the natural texture of a real pumpkin
  • Use a dry paint brush to help spread the flour evenly and avoid clumps
  • Experiment with the amount of flour used to achieve your desired texture – more flour means a more textured look, while less flour results in a smoother finish
  • Mix flour with paint in small increments, as it's easier to add more flour than it's to remove excess

Distress the Terracotta Pot

distressed terracotta pot image

To achieve a weathered, vintage look, we're distressing the painted terracotta pot by gently sanding away the edges and corners, where natural wear and tear would occur over time. This process, referred to as light distressing, helps create a worn-out appearance that adds character to our pumpkin.

When using sandpaper, we're focusing on the areas that would naturally wear out first, such as the edges and corners. By gently rubbing the sandpaper in circular motions, we're able to create a subtle, aged look. Ensuring not to over-distress is crucial, as we aim to strike a balance between an aged and clean aesthetic.

Experimenting with different grits of sandpaper allows us to achieve the desired level of distressing. Remember, the goal is to create a subtle, weathered look, not to completely wear away the paint.

With a little patience and practice, we can achieve a beautifully distressed terracotta pot that adds a touch of rustic charm to our pumpkin decoration.

Advertisement

Add a Real Pumpkin Stem

incorporate real pumpkin stem

As we move forward with adding a real pumpkin stem to our terra cotta pumpkin, we'll need to focus on two important points: picking the perfect stem and attaching it securely.

We'll explore the significance of selecting a stem that fits our pumpkin's size and how to use hot glue or a strong adhesive to guarantee a strong bond.

Picking the Perfect Stem

We scour the local pumpkin patches and farmer's markets for the perfect stem, knowing that a sturdy, curved stem will add a touch of authenticity to our terra cotta pumpkins. To achieve a natural look, we're particular about the stems we choose. Here's what we look for:

  • Sturdy stems that can hold their own against the terra cotta pumpkin's weight
  • A curved shape that mimics the natural curve of a real pumpkin stem
  • Freshness – we avoid wilted or rotten stems that can compromise the overall appearance
  • A natural color that blends seamlessly with the terra cotta pumpkin
  • A stem that's free of debris or dirt, ensuring a clean attachment to our pumpkin

Attaching the Stem Securely

With our perfect stem in hand, we're ready to attach it securely to our terra cotta pumpkin. To guarantee a strong bond, we'll use hot glue or a strong adhesive, making sure the pumpkin stem is clean and dry before attaching it.

We'll apply the adhesive to the base of the stem and press it firmly onto the pumpkin, holding it in place for a few minutes to allow the adhesive to set and bond effectively.

As we attach the stem, we'll make sure it's centered and even, ensuring our terra cotta pumpkin looks natural and realistic. Once the stem is securely attached, we'll let it dry completely before handling or displaying our beautiful terra cotta pumpkin.

Age the Pumpkin With Powder

speed up pumpkin aging

We dust our terra cotta pumpkins with a light layer of powder to introduce an air of vintage charm. This simple technique adds a realistic, weathered look to our creations, giving them a unique and rustic appeal.

To achieve this aged texture, we sprinkle white flour or baby powder on the almost dry paint. Using a small paintbrush, we lightly distribute the powder, adjusting the amount based on the level of aging we desire.

Advertisement

Here are the benefits of aging our terracotta pumpkins with powder:

  • Enhances the overall appearance of the pumpkin, giving it a unique and rustic charm
  • Adds a realistic, weathered look to the terracotta surface
  • Creates a beautiful, vintage-inspired texture
  • Allows for customization of the aging level to suit individual tastes
  • Is a simple and easy technique to master, even for beginners

Seal Your Masterpiece (Optional)

create with optional flair

To guarantee our terracotta pumpkins remain vibrant and protected, consider applying a fixatif spray to seal in the paint and texture. This optional step will make sure our masterpieces stay fresh and intact. When choosing a sealant, avoid using clear matte acrylic sealer, as it may not provide the desired finish.

Sealant Options Characteristics
Fixatif Spray Protects paint and texture, multiple light coats recommended
Mod Podge Acrylic Sealant Alternative option for added protection
Clear Matte Acrylic Sealer Not recommended, may not provide desired finish
Multiple Coats Necessary for adequate coverage, especially on textured areas
Drying Time Allow fixatif spray to fully dry before handling or displaying

Display Your Terra Cotta Pumpkin

terra cotta pumpkin decoration

Now that our terra cotta pumpkins are complete, let's creatively arrange them to create a festive fall display that showcases our handiwork.

We've put in the effort to create these easy DIY terra cotta pumpkins, and now it's time to show them off!

Here are some ways to display our masterpieces:

  • Place your terra cotta pumpkins on a mantle or shelf for a charming display.
  • Group different sized pumpkins together for visual interest.
  • Mix in real or faux fall foliage for a festive touch.
  • Add twinkling string lights around your pumpkins for a cozy ambiance.
  • Incorporate other fall decor elements like acorns or pine cones to enhance the seasonal theme.

Tips for Styling Your Pumpkins

decorate pumpkins with flair

By creatively arranging our terra cotta pumpkins, we can craft a visually appealing display that showcases our handiwork. To add some depth and dimension to our DIY Halloween decorations, we can mix and match different sizes and shapes of pumpkins. By using different shades of terracotta paint, we can create a unique and eye-catching arrangement.

To give our pumpkins a more realistic look, we can add a touch of white paint or flour to achieve a weathered and aged appearance. Displaying our pumpkins in terracotta pots or rustic containers can further enhance the overall theme. For an extra touch of authenticity, we can experiment with incorporating real pumpkin stems into our design. This won't only add a natural element to our decoration but also create a unique conversation piece.

Frequently Asked Questions

How to Make Plastic Pumpkins Look Like Terracotta?

We're wondering how to make plastic pumpkins look like terracotta, and we're in luck! We can mix craft paint to achieve a terracotta color, add flour for texture, and sprinkle more flour on top for a realistic look.

Advertisement

How to Make Terracotta Jack O'lantern?

We're excited to create terracotta jack-o'-lanterns! We'll transform plastic pumpkins by mixing paint colors to achieve a terracotta shade, adding flour for texture, and sprinkling flour on almost dry paint for an aged look.

How to Paint a Pumpkin With Baking Soda?

"Painting a pumpkin with baking soda is like adding a secret ingredient to a recipe – it elevates the entire experience! We mix acrylic paint with baking soda to create a textured, realistic terracotta look that's uniquely ours."

How to Make Faux Pumpkins?

We're making faux pumpkins, and we're excited! We start with foam or ceramic bases, then add texture and color with craft paint and flour or baby powder to achieve a realistic, aged look.

Conclusion

As we step back to admire our handiwork, the warm, earthy tones of our terra cotta pumpkins seem to glow with a soft, autumnal light.

The textures, the colors, the subtle distressing – it all comes together to evoke the feeling of a rustic, vintage find.

Advertisement

And the best part? These little treasures are entirely our own creation, born from a few simple supplies and a dash of creativity.

Continue Reading

Alfresco

Is Frenchic Alfresco Waterproof? Learn More!

Harness the power of Frenchic Alfresco paint's waterproof properties for your outdoor projects – discover its durability and protection against the elements here!

Published

on

By

frenchic alfresco waterproof details

Frenchic Alfresco paint is highly water-resistant, offering excellent moisture protection for outdoor surfaces. With self-sealing and self-priming properties, it provides durability against varying weather conditions. This paint's weatherproof nature enhances its performance, safeguarding against elements like rain and sun exposure. Ideal for projects like garden furniture and front doors, it boasts UV resistance and a range of colors for a professional finish. Curing for at least 3 weeks in favorable climates guarantees longevity by creating a strong protective layer. Routine cleaning and inspection maintain its vibrant appearance. Discover more about Frenchic Alfresco's waterproof features for your outdoor endeavors.

Key Takeaways

  • Frenchic Alfresco paint is highly water-resistant with excellent moisture protection.
  • Offers weatherproof properties due to self-sealing and self-priming features.
  • Provides durable UV resistance for outdoor projects.
  • Full curing for at least 3 weeks enhances waterproofing.
  • Regular maintenance ensures long-lasting waterproofing qualities.

Properties of Frenchic Alfresco Paint

Frenchic Alfresco paint offers a range of durable and weatherproof properties suitable for various indoor and outdoor surfaces. Being water-based, it provides excellent resistance to UV rays, making it ideal for projects exposed to sunlight.

This self-priming and self-sealing paint not only simplifies application but also guarantees a smooth and professional finish. Additionally, its algae-resistant feature minimizes the risk of mold growth, particularly important for outdoor applications.

The wide color palette of 26 best-selling colors, including limited editions, allows you to choose the perfect shade for your project. Whether you're painting wood, laminate, UPVC, composites, metal, render, or brick, Frenchic Al Fresco paint caters to a diverse range of surfaces.

With its exceptional durability and weatherproof characteristics, this paint stands out as a versatile option for both interior and exterior use, promising long-lasting results that maintain their quality over time.

Water-Resistance Vs. Waterproofing

understanding water protection levels

What distinguishes water-resistance from waterproofing in paint products?

When considering the water-resistance of Frenchic Al Fresco paint for exterior projects, it's important to grasp the distinction between water-resistance and waterproofing.

Advertisement
  1. Water-resistance: Frenchic Al Fresco paint offers high water-resistance, being durable, weatherproof, and UV resistant. This means it can withstand exposure to elements like rain and sun without significant damage.
  2. Moisture Protection: While not completely waterproof, the paint provides excellent moisture protection, preventing issues like flaking and peeling due to water exposure.
  3. Surface Durability: Designed for exterior projects, Al Fresco paint ensures a long-lasting finish on surfaces exposed to varying weather conditions, enhancing overall surface durability.
  4. Weatherproof: The self-sealing and self-priming properties of the paint not only reduce maintenance needs but also contribute to its weatherproof characteristics, further improving water-resistance.

Suitable Applications for Alfresco Paint

alfresco paint for outdoors

Al Fresco paint is best suited for a variety of outdoor projects, ranging from garden furniture to front doors, due to its durable and weather-resistant properties. The Al Fresco Range offers a versatile solution for enhancing the appearance of your outdoor spaces.

Whether you're looking to revamp your garden furniture or add a fresh coat to your front door, this water-based paint is designed to withstand the elements while maintaining a vibrant finish. Its self-priming and self-sealing nature make it a convenient choice for UPVC doors and various surfaces such as wood, laminate, composites, and metal.

The weatherproof and durable characteristics of Al Fresco paint guarantee long-lasting results, providing a protective layer that can endure outdoor conditions. With its UV resistance and ability to create a low, flat finish, this paint is ideal for both indoor and outdoor applications, offering a professional look that lasts.

Curing Process for Longevity

preserving meat through curing

Ensuring proper curing of the paint is essential for maximizing its longevity and waterproofing capabilities. When dealing with Frenchic Al Fresco, the curing process plays an important role in creating a durable and weatherproof protective layer.

Here are some key points to keep in mind for the curing process:

  1. Allowing the paint to fully cure for at least 3 weeks is necessary for enhancing its durability and longevity.
  2. Best results are achieved when curing takes place in a warmer and drier climate.
  3. Proper curing helps the paint form a strong protective layer, making it more resistant to the elements.
  4. Following the instructions provided on the tin for the curing process is crucial to ensuring the paint's waterproofing properties are fully realized.

Maintenance Tips for Alfresco Paint

outdoor paint care guide

To maintain the durability and weatherproof qualities of Frenchic Alfresco paint, regular cleaning and inspection are crucial. Frenchic paints, especially those from the Al Fresco Inside/Outside Range, are designed to withstand outdoor conditions, but proper maintenance can prolong their lifespan.

For outdoor furniture coated with this water-based, weatherproof paint, wiping down surfaces with a mild detergent and water solution every few months can help remove dirt and debris that may accumulate. Additionally, inspecting the painted wood for any signs of wear or damage allows for timely touch-ups, preventing further deterioration.

UV resistance in Frenchic paints minimizes color fading, but it's still advisable to keep items protected from prolonged sun exposure. By following these maintenance tips, you can guarantee that your outdoor projects retain their vibrant appearance and protective qualities for years to come.

Advertisement

Conclusion: Is Frenchic Alfresco Waterproof?

frenchic alfresco waterproof testing

Frenchic Alfresco paint is indeed waterproof, providing long-lasting protection for your outdoor projects. This durable and weatherproof Al Fresco paint is specifically crafted for outdoor use, offering a reliable shield against the elements for your exterior surfaces.

Here are four key points reinforcing its waterproof qualities:

  1. UV Resistant: Frenchic Al Fresco paint is formulated to withstand the harmful effects of UV rays, preventing discoloration and fading over time.
  2. Self-Sealing and Self-Leveling: The paint's self-sealing properties help establish a protective barrier, while its self-leveling feature ensures a smooth and even finish that enhances its waterproof capabilities.
  3. Versatile Application: Suitable for various surfaces like wood, laminate, UPVC, composites, and metal, this paint adapts well to different materials, increasing its effectiveness in outdoor settings.
  4. Algae and Mould Resistance: Frenchic Al Fresco is designed to resist algae and mould growth, reducing the need for frequent maintenance and preserving the integrity of your exterior surfaces.

Frequently Asked Questions

Is Frenchic Alfresco Waterproof?

Yes, Frenchic Al Fresco paint is waterproof. It's designed for outdoor use, with excellent weather resistance, UV protection, and algae/mould inhibitors. It works on various surfaces, making it ideal for outdoor projects like furniture, fences, and sheds.

Can You Water Down Frenchic Alfresco Paint?

You can water down Frenchic Al Fresco paint if desired for a smoother application or a wash effect. However, diluting the paint may impact coverage and durability, so it's essential to adhere to recommended guidelines for best results.

Do You Need to Seal Frenchic Alfresco?

You don't need to seal Frenchic Al Fresco paint. It's self-sealing, water-based, and designed to be weatherproof and UV resistant. The paint is self-priming with a durable finish, eliminating the need for additional sealing products.

What Is so Special About Frenchic Paint?

Frenchic paint is renowned for its water-based, durable, and weatherproof properties, making it ideal for both indoor and outdoor projects. With self-levelling technology, easy application, and a range of vibrant colors, it stands out for its versatility and eco-friendly nature.

Conclusion

To sum up, Frenchic Alfresco paint offers excellent water resistance properties, making it suitable for outdoor applications. While it may not be completely waterproof, proper curing and maintenance can guarantee its longevity in various weather conditions.

Advertisement

By following the recommended guidelines for application and upkeep, you can enjoy the beauty and protection of Frenchic Alfresco paint for years to come. Remember, a little care goes a long way in preserving the quality and durability of your outdoor surfaces.

Continue Reading

Trending