Connect with us

Home Decor

Sea Glass Beach Decor That You Can Make for 15

Inspire your coastal vibes with a stunning sea glass beach decor piece, crafted with ease and affordability, in just a few simple steps.

Published

on

diy sea glass projects

We can create stunning sea glass beach decor pieces that evoke the serene beauty of the ocean's coastline, all for under $15. With essential materials like sea glass pieces, Aleene's tacky glue, plastic wrap, a craft bowl, and sandpaper, we can get creative. By sorting and organizing sea glass pieces by color and shape, applying Aleene's Tacky Glue, and layering pieces carefully, we can achieve a realistic beachy look. With tips on balancing, sanding, and shaping sea glass, we can avoid common mistakes and create a unique, frosted appearance. Now, let's dive deeper into the techniques and variations that will make our masterpiece truly special.

Key Takeaways

• Use Aleene's Tacky Glue to adhere small, lightweight sea glass pieces to a craft bowl, creating a strong bond for a beach-inspired decor.

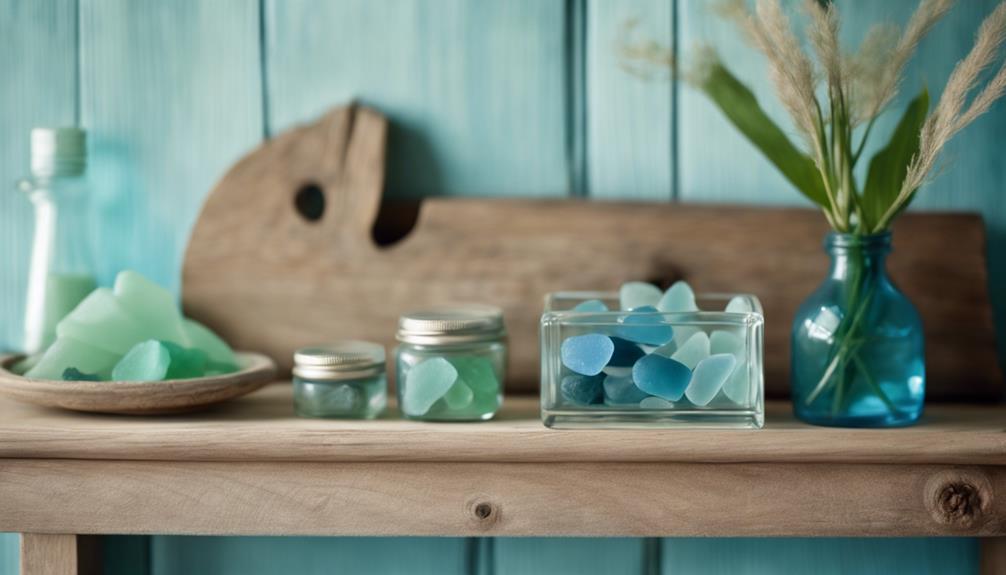
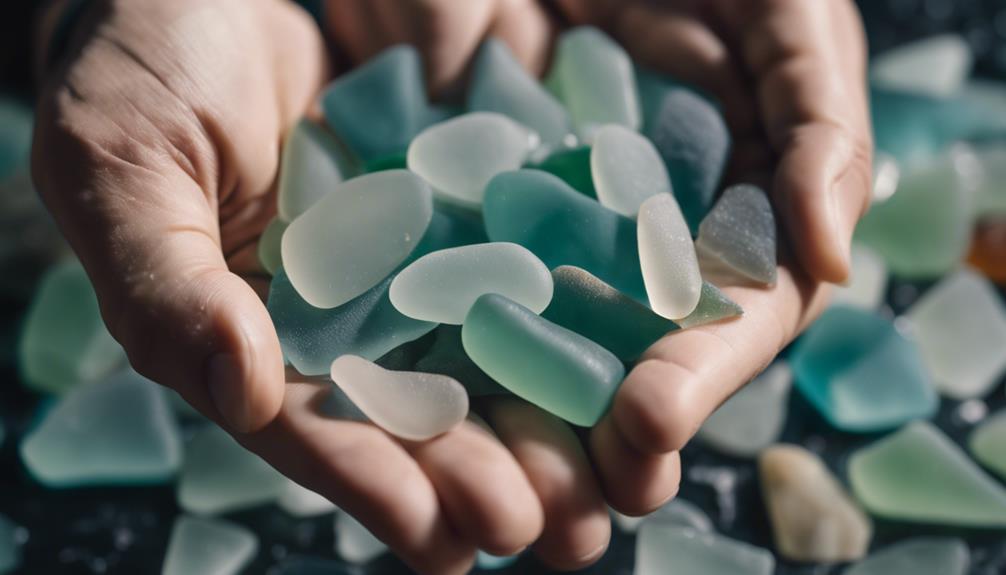
• Sort and organize sea glass pieces by color, shape, and size to create a visually appealing and cohesive design.

• Experiment with layering and arranging sea glass pieces to achieve a unique, beachy look, and use fine grit sandpaper to smooth edges.

• Add beachy elements like seashells or sand to enhance the decor, and mimic glass weathering effects for a frosted appearance.

Advertisement

• Display your masterpiece in a prominent spot with natural light, complementary decorative accents, and a simple, uncluttered display area.

Gather Essential Materials

We'll start by gathering the essential materials needed for our sea glass beach decor project, which include sea glass pieces, glue, plastic wrap, a craft bowl, and sandpaper.

For a strong bond, we recommend using Aleene's tacky glue, which dries clear and provides durability to our DIY sea glass decor. When it comes to preparing the surfaces for gluing, we'll use fine to medium grit sandpaper to guarantee a smooth finish.

We can use either real or craft simulated sea glass for our project, and add some extra decoration with seashells, buttons, or beads. To achieve a professional look, we'll make sure to stack our glass pieces from the bottom up, using plenty of glue that dries clear.

Remember to avoid getting glue on the outer edges of the bowl to maintain a frosted look. With all our materials in hand, we're ready to move on to the next step of preparing our craft bowl.

Advertisement

Prepare the Craft Bowl

craft bowl food preparation

Now that we've our materials ready, let's prepare our craft bowl by giving it a thorough cleaning and drying to guarantee a strong bond between the bowl and our sea glass arrangement.

A clean and dry bowl is essential for a successful project, ensuring our sea glass pieces adhere properly. We recommend choosing a bowl that fits our desired arrangement, considering factors like size, shape, and material. A transparent or frosted bowl can enhance the sea glass effect, adding an extra layer of visual appeal to our project.

To make removal easier once our project is complete, we can place plastic sandwich wrap inside the bowl. This fun project is a great way to get creative and showcase our favorite sea glass pieces. If you have any questions or need further guidance, feel free to email us at [insert email address].

With our bowl prepared, we're one step closer to creating a stunning sea glass beach decor piece that will be the envy of all who see it.

Sort Sea Glass Pieces

collecting sea glass treasures

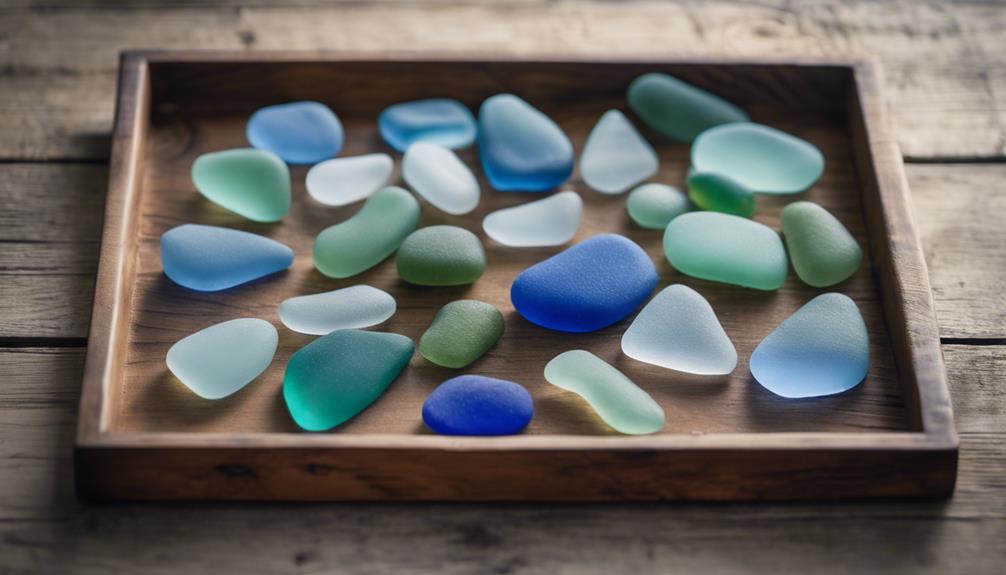
As we sort our sea glass pieces, we're not just organizing pretty objects – we're revealing the nuances of our collection.

We're about to explore how the colors and shapes of our sea glass pieces can enhance our beach decor, and it all starts with recognizing the significance of sorting by color and shape.

Sea Glass Colors Matter

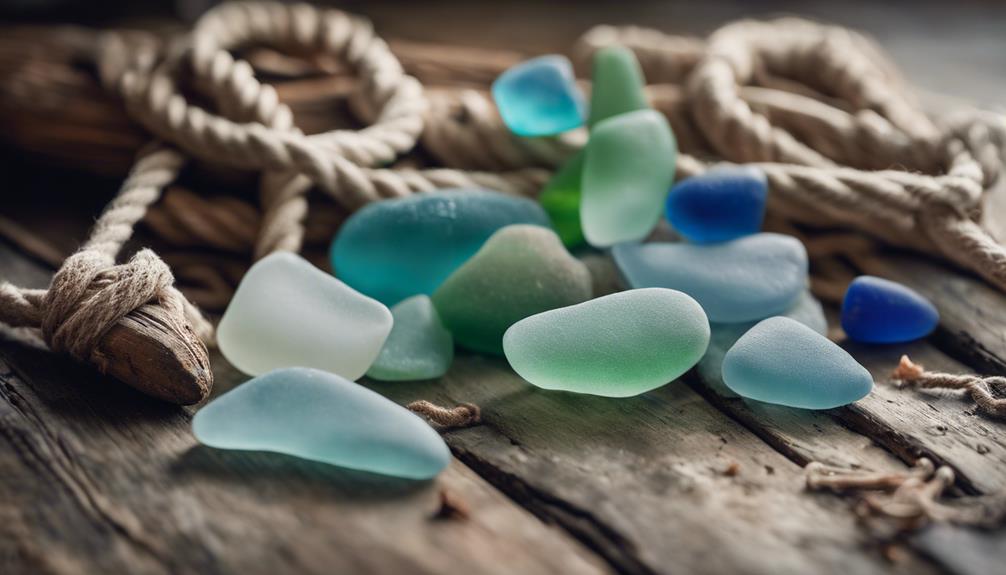
When it comes to creating stunning beach decor, sorting sea glass pieces by color is essential for evoking the desired mood and theme in our projects. We can't wait to get started on our DIY beach-inspired crafts, and one of my favorite parts is organizing the sea glass by color.

Advertisement

Required fields are marked *, and we're eager to get started! Different sea glass colors like green, blue, and clear can evoke different moods and themes in our projects. By sorting our sea glass pieces by color, we can easily match pieces for a cohesive look in our decorations.

Having a variety of sea glass colors adds depth and interest to our DIY projects, allowing us to create stunning patterns and designs. We're excited to experiment with different color combinations to achieve the perfect look for our beach decor.

Whether we're going for a calming, natural vibe or a bold, statement piece, sorting our sea glass by color is the first step in bringing our vision to life.

Sorting by Shape

We categorize our sea glass pieces by shape to reveal a world of creative possibilities in our beach-inspired crafts. By sorting our sea glass by shape, we believe it would be easier to plan and execute specific projects.

For instance, round shapes can be used to create beautiful mosaics, while triangular shapes can add a unique touch to wind chimes. Sorting by shape allows us to think outside the box and come up with innovative designs. It's amazing how different shapes like square, triangle, and irregular can offer a variety of design possibilities.

Advertisement

By organizing our sea glass by shape, we can streamline the crafting process and enhance the final aesthetic. This approach also enables us to create visually appealing arrangements and patterns in our sea glass art. As we sort through our sea glass collection, we're excited to see the creative possibilities unfold.

Apply Aleenes Tacky Glue

craft with precision and care

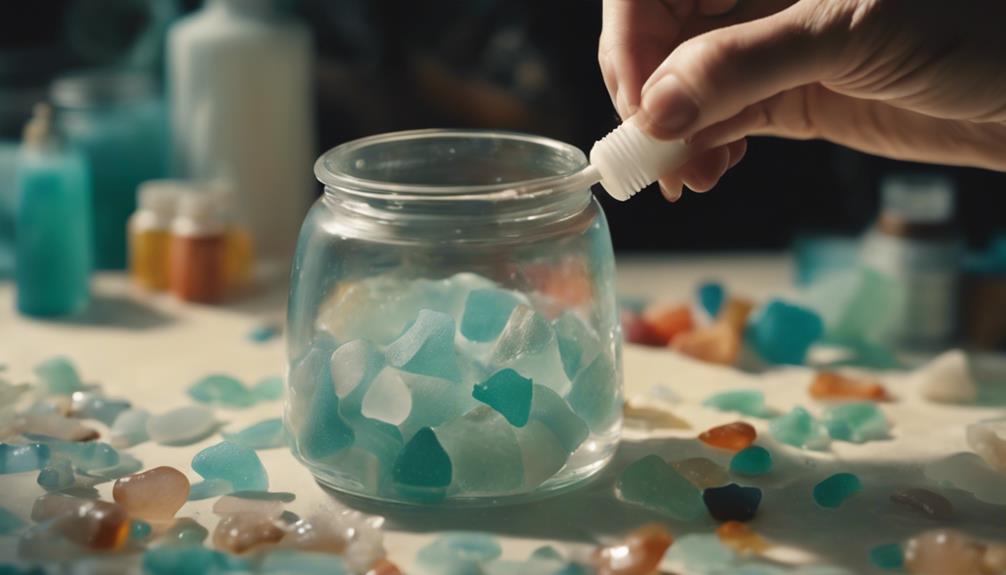
We apply a generous amount of Aleenes Tacky Glue to the surface where we'll be attaching the sea glass pieces. This strong adhesive is perfect for securing our treasures in place, and its clear drying property guarantees that it won't distract from the beauty of the sea glass.

To create durable crafts, we make sure to apply an ample amount of glue, strategically avoiding the outer edges to achieve a frosted effect. As we work, we find that using plastic sandwich wrap helps shape and smooth the sea glass pieces as we adhere them with the glue.

With Aleenes Tacky Glue, we can confidently attach our sea glass pieces, knowing they'll stay in place. This reliable adhesive is a game-changer for our DIY project, allowing us to focus on the fun part – creating stunning beach-inspired decor.

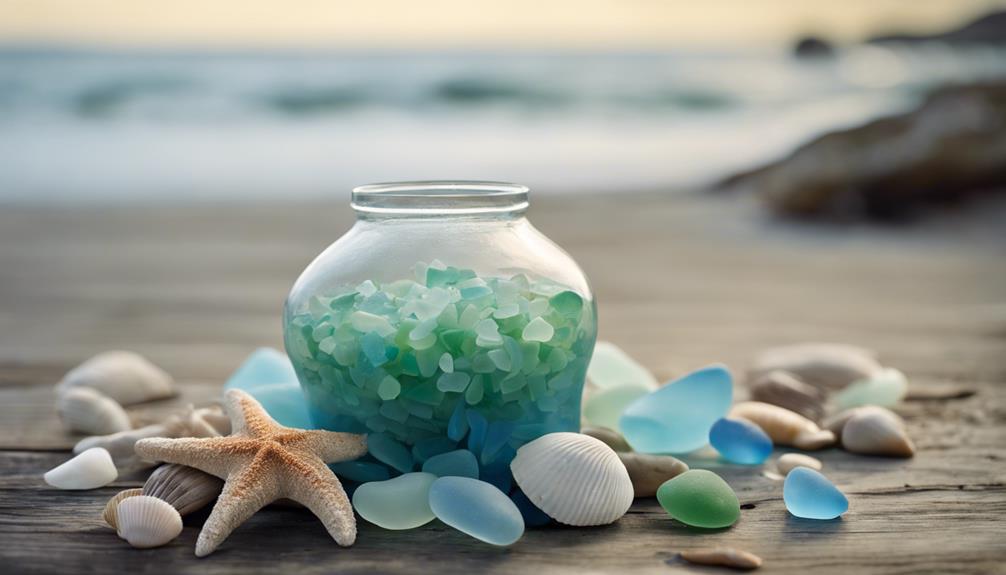
Create the First Layer

build a solid foundation

Applying a generous amount of Aleenes tacky glue to the inside bottom of a craft bowl, we start building our sea glass masterpiece by creating the first layer. For this initial layer, we opt for small, lightweight sea glass pieces that will provide a sturdy foundation for our decorative bowl.

We carefully stack these pieces from the bottom up, ensuring an even and sturdy layer. To maintain a clean, frosted look, we take care to avoid getting glue on the outer edges of the glass. Moreover, we apply plenty of glue between the sea glass pieces to guarantee durability.

This careful attention to detail will ultimately result in a beautiful, long-lasting decorative piece that showcases the beauty of sea glass. By taking the time to craft this initial layer with care, we set the stage for a truly stunning finished product.

Advertisement

Add Sea Glass Pieces Gradually

incorporate sea glass pieces

As we move forward with adding sea glass pieces gradually, we'll need to focus on selecting the right pieces that complement our design. This involves creating a focal point that draws the eye and balancing the arrangement to achieve visual harmony.

Selecting the Right Pieces

By incorporating sea glass pieces gradually, you'll create a balanced and visually appealing design that captivates the eye and sparks the imagination. As we select the right pieces, we want to guarantee our design is harmonious and engaging. To achieve this, we'll follow a few key guidelines.

Here are some essential tips to keep in mind:

  1. Start with a focal point piece: Choose a statement piece that sets the tone for your design, and build around it with smaller pieces.
  2. Mix and match: Combine different colors, shapes, and sizes of sea glass to create visual interest and variety.
  3. Create movement and flow: Arrange your sea glass pieces in a way that guides the viewer's eye through your design.
  4. Experiment with layouts: Try out different layouts before securing your pieces in place to make sure the best design.

Creating a Focal Point

We begin building our sea glass beach decor by adding a few carefully chosen pieces to a central point, gradually expanding outward to create a balanced and cohesive look. By doing so, we can establish a focal point that draws the eye and captures attention.

To accomplish this, we experiment with various patterns and layouts, finding the most appealing design for our beach decor. We use different sizes and colors of sea glass to create visual interest and depth, arranging them in a harmonious way to create a sense of harmony.

As we add more pieces, we make certain that the design remains balanced and cohesive, avoiding clutter and chaos. By gradually expanding the design outward, we create a sense of movement and energy, drawing the eye through the arrangement.

Balancing the Arrangement

We carefully add sea glass pieces to our arrangement, one by one, to maintain a delicate balance of colors, shapes, and sizes. As we build our arrangement, we keep in mind the importance of balance and harmony. To achieve this, we follow a few key guidelines.

Advertisement

Here are some tips to help us balance our arrangement:

  1. Start with a focal point: Begin with a few larger, statement pieces and build around them.
  2. Distribute pieces evenly: Spread sea glass pieces throughout the display to create visual interest.
  3. Experiment with shapes and colors: Mix and match different shapes and colors to add depth to our arrangement.
  4. Step back and assess: Periodically take a step back to evaluate our arrangement and make adjustments as needed.

Use Fine Grit Sandpaper

refine with fine grit

As we work on refining our sea glass pieces, fine grit sandpaper becomes an indispensable tool in our arsenal, allowing us to smooth out rough edges and achieve a polished finish. This vital step guarantees that our sea glass beach decor projects exude a refined, professional look. By using fine grit sandpaper, we can confidently handle our creations, knowing they're safe and comfortable to hold.

Benefits Description Importance
Smooth Edges Eliminates rough spots Enhances visual appeal
Polished Finish Achieves a refined look Elevates overall aesthetic
Safe Handling Ensures comfortable grip Prevents injuries
Preserves Beauty Maintains natural sea glass charm Authenticates creations

Fine grit sandpaper is essential for maintaining the natural beauty of sea glass while enhancing its aesthetic appeal. By incorporating this tool into our creative process, we can take pride in our sea glass beach decor projects, knowing they're both visually stunning and safe to handle.

Shape the Sea Glass Edge

polishing sea glass jewelry

How do you achieve a beautifully rounded edge on your sea glass pieces without chipping or breaking them? We've all been there, carefully handling those delicate treasures, worried that one wrong move will ruin the entire project. But fear not, with the right techniques, you can achieve a stunning, smooth edge that will elevate your sea glass decor to the next level.

Here's how we do it:

  1. Start with the right grit: Use a fine to medium grit sandpaper to shape the edges of your sea glass.
  2. Gentle touch: Gently sand the edges to create a smooth and rounded finish. Avoid applying too much pressure, which can cause chipping or breaking.
  3. Customize the look: Shape the edges to your desired look, whether it's completely smooth or slightly textured.
  4. Take your time: Work carefully and patiently to achieve the perfect edge for your sea glass project.

Add Decorative Accents

incorporate floral arrangements creatively

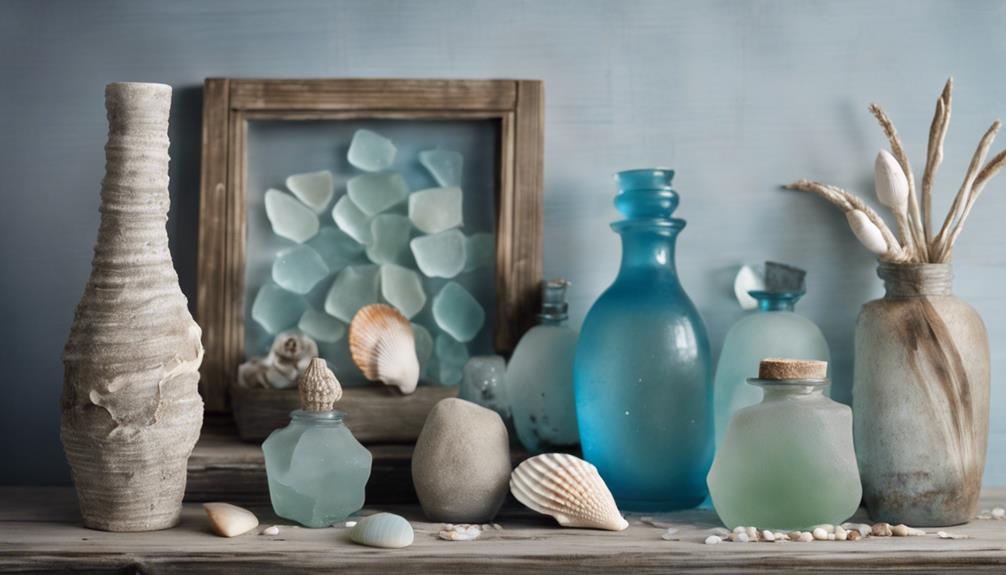
By incorporating decorative accents, such as charms, beads, or wire wraps, we can elevate our sea glass creations into stunning pieces of beach-inspired art. These accents not only add a touch of elegance but also create a visually appealing contrast to the frosted, recycled glass.

For instance, we can thread sea glass beads onto a wire wrap to create a beautiful mobile or wind chime that catches the light. Alternatively, we can use charms shaped like seashells or anchors to add a whimsical touch to our creations.

When selecting decorative accents, we should consider the color palette of our project and choose accents that complement the hues of our sea glass. By doing so, we can create a cohesive and harmonious design that exudes the tranquility of the beach.

Advertisement

With a little creativity, we can transform our sea glass projects into breathtaking pieces of art that evoke the serenity of the ocean.

Use Faux Sea Glass Alternatives

faux sea glass options

As we explore the world of sea glass beach decor, we're excited to discuss the benefits of using faux sea glass alternatives.

We'll examine the various faux glass options available, from recycled glass to tumbled and polished pieces, offering consistency in size and color.

We'll also explore creative glass paint techniques that can transform plain glass into stunning, ocean-inspired masterpieces that rival the real thing.

Faux Glass Options

We often turn to faux sea glass alternatives when we want to achieve the look of genuine sea glass without the hassle of searching for or collecting it. Fortunately, these alternatives are readily available at craft stores and online, offering a budget-friendly option for our beach-themed decor projects.

Here are some benefits of using faux sea glass alternatives:

Advertisement
  1. Variety of options: Faux sea glass beads come in various shapes, sizes, and colors, allowing for creative and customizable craft projects.
  2. Convenience: We don't need to search for or collect real sea glass, making it a convenient option for our decor projects.
  3. Budget-friendly: Faux sea glass alternatives are a cost-effective way to achieve the look of genuine sea glass without breaking the bank.
  4. Creative freedom: With faux sea glass beads, we can incorporate them into jewelry making, mosaics, wind chimes, and other beach-themed decor projects, giving us the freedom to express our creativity.

Glass Paint Techniques

Using glass paint techniques, we can create a convincing faux sea glass look by layering different colors and textures to mimic the weathered, matte finish of genuine sea glass. By experimenting with various shades and textures of paint, we can achieve unique and vibrant faux sea glass creations. This method allows for a cost-effective and customizable way to incorporate the beauty of sea glass into our DIY projects.

Paint Technique Description Result
Layering Building up layers of transparent paint Deep, rich colors
Glazing Applying multiple thin coats of paint Smooth, glossy finish
Texturing Adding texture with specialized paint or mediums Matte, weathered look

Glass paint can provide a smooth, glossy finish that resembles authentic sea glass, making it an excellent alternative for those on a budget or seeking a specific aesthetic. By mastering these techniques, we can reveal a world of creative possibilities for our beach-inspired decor projects. As we continue to explore the world of faux sea glass, we'll discover even more innovative ways to capture the essence of the ocean in our DIY creations.

Get Inspired by Pinterest

browse pinterest for ideas

When searching for sea glass beach decor inspiration, we often find ourselves scrolling through Pinterest, where a vast array of creative DIY projects and stunning visuals await. As a popular platform for discovering creative DIY projects, Pinterest offers a wealth of ideas and tutorials to get us started. From decorative vases to coastal-themed wall art, the possibilities are endless.

Here are some ways Pinterest can inspire our sea glass beach decor:

  1. Browsing through boards: We can explore boards dedicated to sea glass decor, where users share their favorite projects and ideas.
  2. Discovering new tutorials: Pinterest is a treasure trove of step-by-step guides and video tutorials that teach us new skills and techniques.
  3. Saving and organizing ideas: We can save our favorite projects to virtual boards, making it easy to revisit and organize our ideas later.
  4. Exploring unique themes: From nautical to coastal chic, Pinterest offers a wide range of themes and styles to inspire our sea glass beach decor.

Tips for a Realistic Look

achieving a lifelike appearance

As we endeavor to create an authentic sea glass beach decor, we need to focus on the details that make it look realistic.

We'll explore the importance of using a range of sea glass colors, adding weathering effects to give our pieces a worn, beachy look, and incorporating other beach elements like shells and sand to enhance the overall aesthetic.

Sea Glass Colors

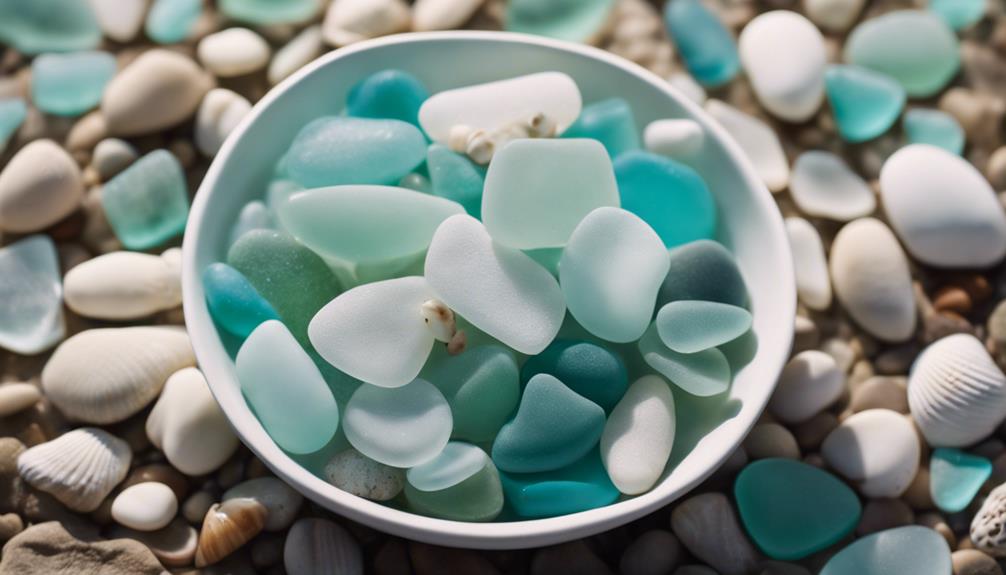
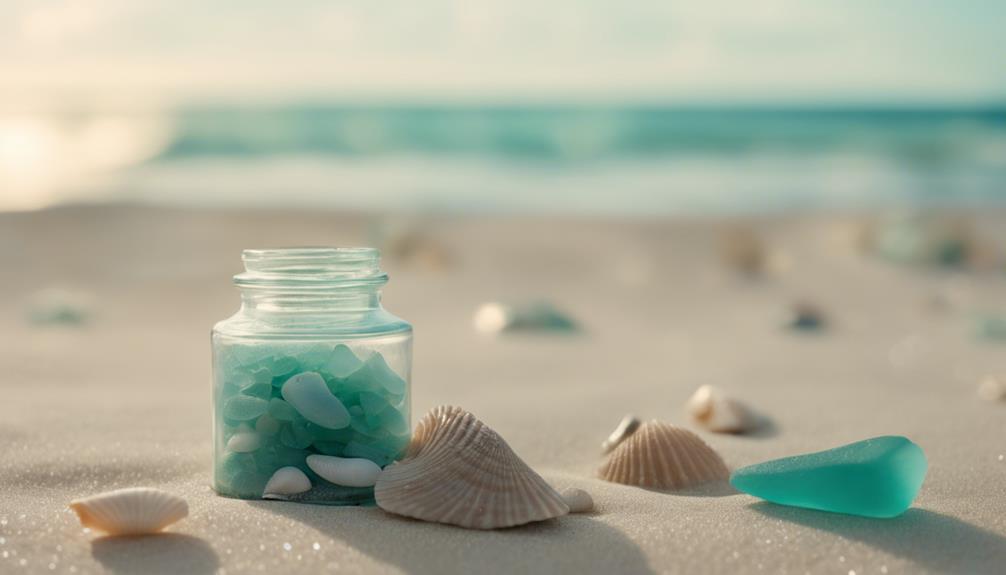
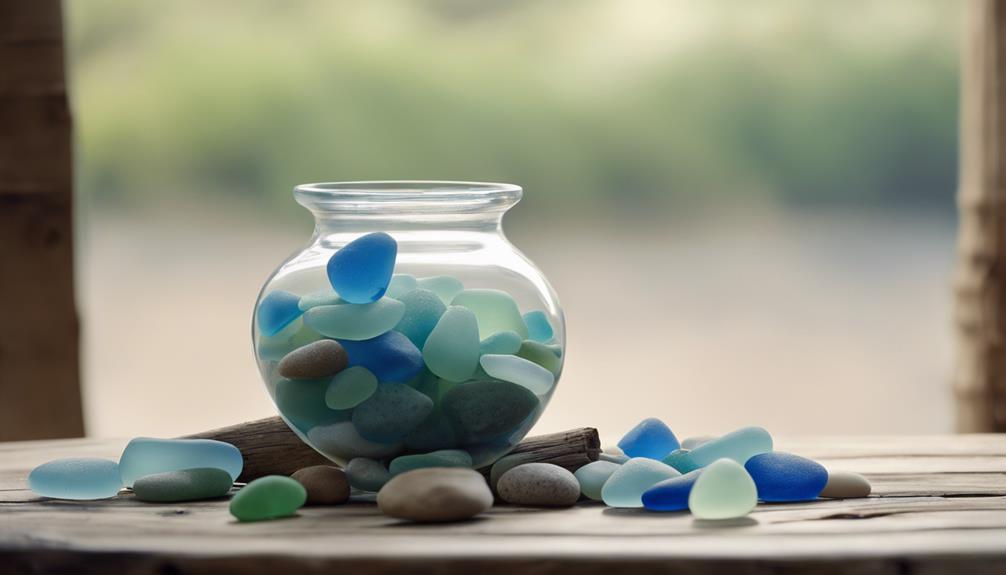
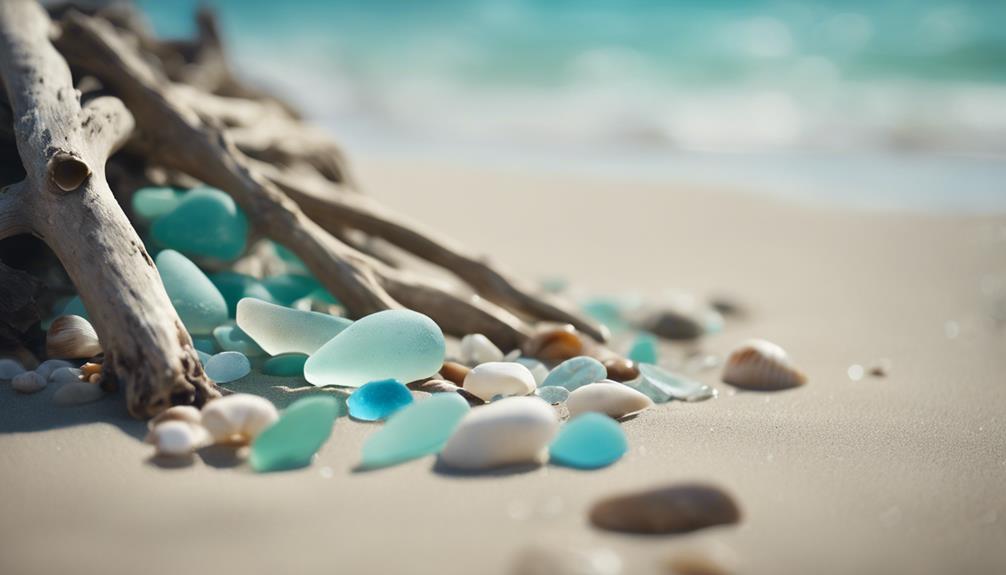
We find that incorporating a mix of green, blue, and clear sea glass into our decor creates a realistic beachy look that immediately transports us to the coast. To achieve this authentic look, we've discovered that incorporating a variety of sea glass colors, shapes, and sizes is crucial. By doing so, we can mimic the natural beach finds that have been weathered by the ocean.

Here are some tips to keep in mind when selecting sea glass for your decor:

Advertisement
  1. Mix and match colors: Combine green, blue, and clear sea glass for a realistic beachy look.
  2. Vary the sizes and shapes: Incorporate different sizes and shapes of sea glass to mimic natural beach finds.
  3. Experiment with layering: Layer the sea glass to create depth and texture in your decor.
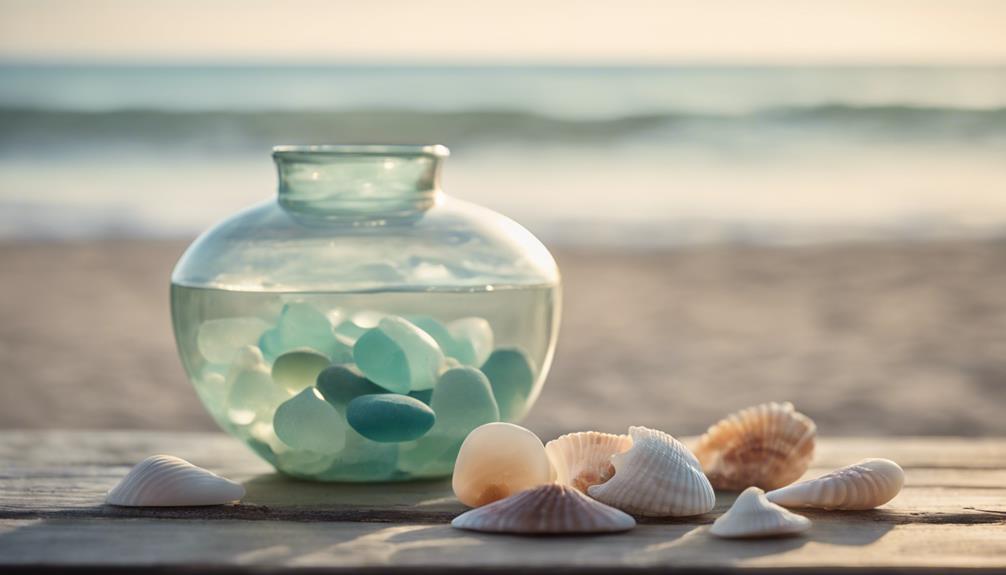
  4. Add beachy elements: Incorporate other beach elements like seashells or sand to enhance the coastal theme.

Glass Weathering Effects

To replicate the authentic look of sea glass, we mimic the natural weathering process by using a combination of sand, saltwater, and rocks to create a frosted appearance on the glass. This process, which can take years to achieve naturally, involves exposure to ocean waves and sand, which helps create a frosted appearance on the glass.

The saltwater and minerals in the ocean also contribute to the smooth texture of sea glass over time. We've learned that authentic sea glass is highly sought after for its unique appearance and history of being tumbled by the sea. By replicating this process, we can achieve a realistic look that's reminiscent of the real thing.

To get the desired effect, we mix sand, saltwater, and rocks to create a textured, weathered appearance on the glass. This process allows us to create a frosted, smooth finish that's similar to authentic sea glass.

Beachy Texture Additions

By incorporating beachy textures, we can elevate our sea glass decor to a whole new level of realism. The right textures can transport us to the coast, surrounded by the soothing sounds of waves and the warmth of the sun on our skin. To achieve this, we can employ a few clever tricks.

Here are some beachy texture additions to contemplate:

  1. Frosted sea glass: Use fine to medium grit sandpaper to create a realistic frosted look on your sea glass pieces.
  2. Stacked sea glass: Stack small, lightweight sea glass pieces in a craft bowl for a textured effect that adds depth to your decor.
  3. Secure adhesion: Apply Aleenes tacky glue generously to contemplate the sea glass pieces adhere securely, but avoid getting glue on the outer edges for a frosted appearance.
  4. Alternative textures: Contemplate using faux sea glass, seashells, buttons, or beads for alternative texture options in your DIY projects.

Avoid Common Mistakes

great suggestion for improvement

When crafting a stunning sea glass beach decor, most of us have fallen prey to common mistakes that can quickly turn our masterpiece into a mess. We've learned the hard way that using low-quality materials or rushing through the process can lead to a subpar result.

To guarantee these mistakes, we make sure to start with the right materials. For instance, we opt for small, lightweight sea glass pieces to easily stack and create a cohesive design. We also consider using faux sea glass, seashells, buttons, or beads as alternative materials if real sea glass isn't available.

Advertisement

During the assembly process, we're meticulous about applying plenty of Aleenes tacky glue when stacking the sea glass in the bowl for a sturdy and durable finish. Additionally, we take care to avoid getting glue on the outer edges of the sea glass bowl to maintain a frosted appearance.

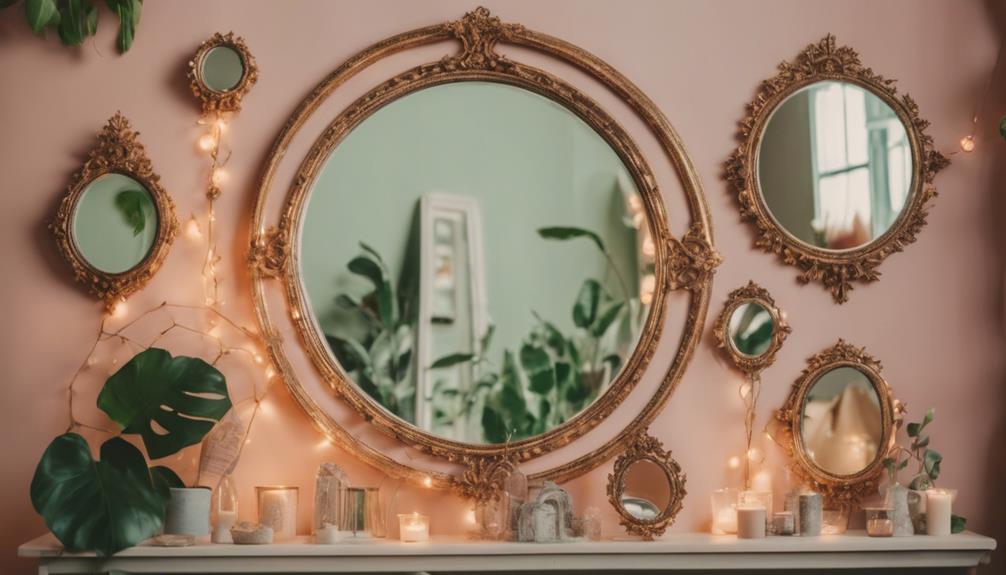
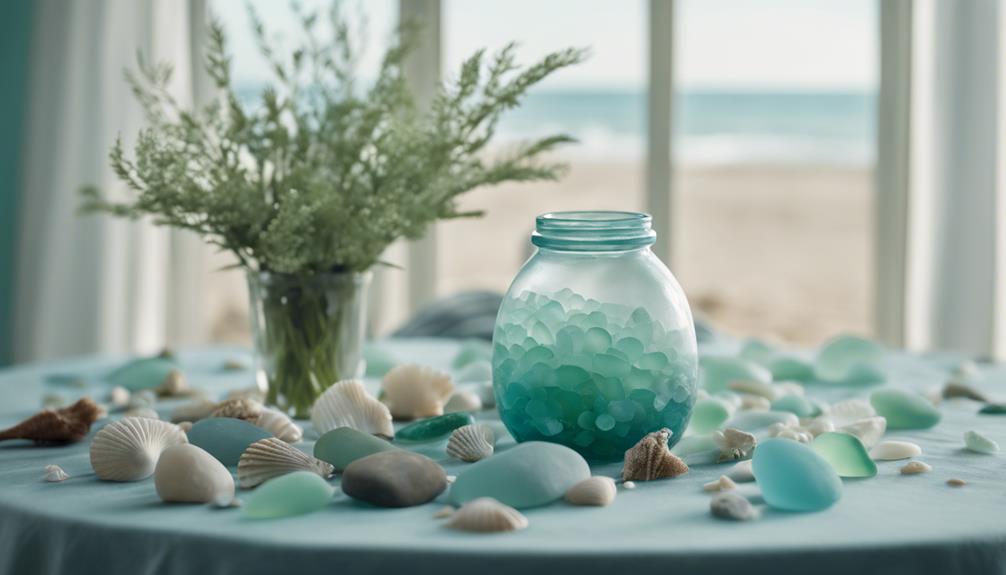
Display Your Masterpiece

artistic creation on exhibit

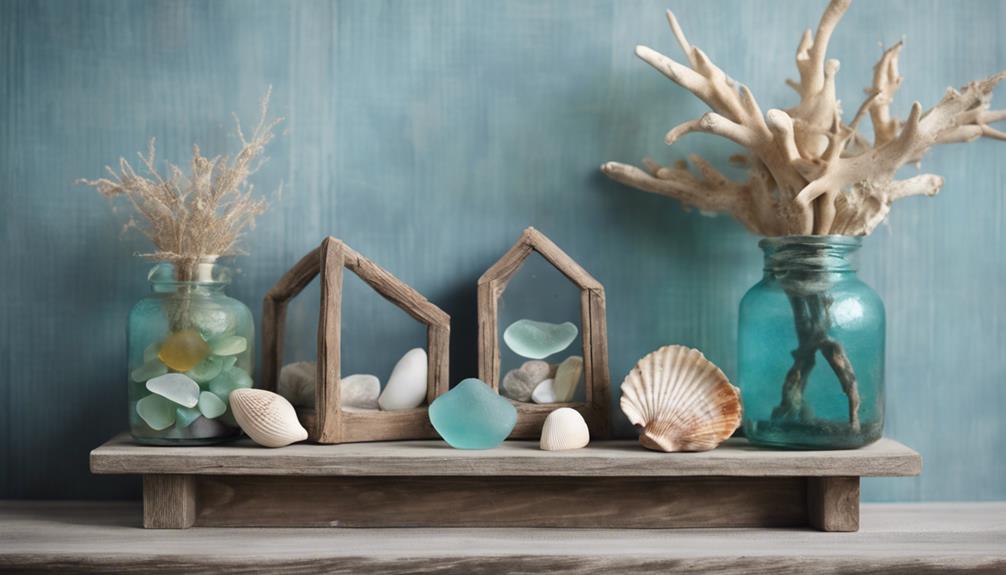
We proudly display our stunning sea glass masterpiece on a decorative shelf or mantle, where it can catch the light and showcase our creativity.

After carefully crafting our sea glass arrangement, we want to highlight its beauty in a way that complements our home decor.

Here are some tips to keep in mind when presenting our masterpiece:

  1. Choose a focal point: Select a prominent spot in our living room or entryway to draw attention to our artwork.
  2. Take into account the lighting: Position our display near a window or use spotlights to highlight the colors and textures of the sea glass.
  3. Add decorative accents: Surround our sea glass arrangement with complementary decorative items, such as seashells, starfish, or driftwood, to create a cohesive coastal look.
  4. Keep it simple: Avoid cluttering the surrounding area to allow our sea glass masterpiece to take center stage.

Get Creative With Variations

creative variations in writing

Let's break free from traditional designs and inject some personality into our sea glass decor by experimenting with unique variations.

We can start by playing with different colors of sea glass to create a one-of-a-kind look. For instance, combining turquoise and amber hues can evoke a warm, sunny feel, while a palette of soft blues and greens can bring a calming ambiance to a room.

We can also mix and match different shapes and sizes of sea glass to create visually appealing patterns. Why not combine sea glass with other beachy elements like shells or driftwood for a coastal vibe? Alternatively, we can pair sea glass with materials like wood or metal for a modern twist.

Advertisement

To take our decor to the next level, we can even add hand-painted designs or patterns to give it a personal touch. By experimenting with these variations, we can create truly unique pieces of sea glass decor that reflect our individual styles.

Frequently Asked Questions

What to Make With Sea Glass Easily?

We're excited to create something beautiful with sea glass! Since we're short on time, we're looking for easy projects that still showcase its unique charm.

How to Make Glass Look Like Sea Glass?

We easily achieve a sea glass look on clear glass bottles by applying a light coat of Krylon Sea Glass Spray in Aqua or Seafoam, adding more coats for a darker effect, and customizing with decorations.

How to Make a Sea Glass Mirror?

We're excited to create a stunning sea glass mirror! We'll arrange pieces around a round mirror's edge, securing them with clear adhesive or silicone glue, and let it dry before hanging our beautiful coastal-inspired decor.

Conclusion

As we step back to admire our handiwork, our sea glass beach decor glistens like a treasure trove of memories, each piece a symbol of the ocean's secrets and stories waiting to be unearthed.

Advertisement

Like the tides, our creativity ebbs and flows, shaping something beautiful from the fragments of the past.

With every glance, we're reminded that even the most ordinary materials can be transformed into something extraordinary, a validation of the power of imagination and the allure of the sea.

Continue Reading
Advertisement

Home Decor

Creative Corbel Shelf Ideas

Unlock the secret to transforming any room with unique corbel shelf designs that add a touch of elegance and sophistication.

Published

on

You can enhance any room's decor with creative corbel shelf designs that add sophistication and elegance while providing a unique storage solution. Whether you're looking to create a cozy reading nook or showcase decorative items, corbel shelves are a stylish and functional choice. From customizable designs to whimsical displays, the possibilities are endless. You can mix and match materials to create a one-of-a-kind look or utilize vertical space in small areas. With corbel shelves, you can transform even the most mundane spaces into stunning areas. As you explore further, you'll discover how to maximize the full potential of corbel shelves to create a space that truly reflects your personal style.

Key Takeaways

• Corbel shelves can be customized to fit different spaces and design aesthetics, offering a perfect blend of form and function.

• Mixing corbels with other materials, such as metal, reclaimed wood, resin, and glass, creates a unique, personalized look.

• Corbel shelves can be transformed into whimsical displays with creative staining and painting techniques, like VooDoo Gel Stain and Chalk Mineral Paint.

• In small spaces, corbel shelves provide a space-saving design, utilizing vertical space and adding character to the room.

Advertisement

• Corbel shelves can serve as a unique side table or display stand, ideal for showcasing decorative items like vases or books.

Elevating Decor With Corbel Shelves

By incorporating corbel shelves into your decor, you can add a touch of sophistication and elegance to any room, effortlessly elevating your space's overall aesthetic. Not only do they provide a stylish storage solution, but they can also serve as a unique side table or display stand.

Imagine placing a decorative vase or a few favorite books on a corbel shelf in your living room, adding a touch of personality to the space. In the bedroom, a corbel shelf can hold a few favorite novels or a decorative box, creating a cozy reading nook.

Corbel shelves are incredibly versatile, and their functionality knows no bounds. You can install them in your kitchen to hold cookbooks or spices, or in your office to display awards or framed photos. Whatever the purpose, corbel shelves are sure to add a touch of elegance and sophistication to any room.

Unique Corbel Shelf Designs

creative corbel shelf ideas

As you explore the world of corbel shelves, you'll discover that unique corbel shelf designs can take your decor to the next level, offering a perfect blend of form and function. These shelves can be customized to fit different spaces and design aesthetics, allowing you to add a personal touch to your home.

From vintage-inspired to modern minimalist, there are endless design possibilities for corbel shelves. You can find unique corbel shelf designs at stores like Home Depot, where you can browse through various styles and materials to find the perfect fit for your space.

Advertisement

Unique corbel shelf designs feature intricate carvings and ornate details for a decorative touch. These shelves offer a blend of functionality and style, adding character to any room. By incorporating unique corbel shelf designs, you can elevate the overall look and feel of your home decor.

With customization options available, you can create a one-of-a-kind piece that reflects your personal style. Whether you're looking to add a touch of elegance or a pop of color, unique corbel shelf designs can help you achieve the look you want.

Corbel Shelves in Small Spaces

efficient storage for small spaces

One of the biggest advantages of corbel shelves is that they're perfect for small spaces, where every inch counts. You can mount them in tight areas like narrow hallways or small bathrooms, adding storage without taking up valuable floor space. This is especially useful in compact living areas, where every small detail can make a big difference.

By utilizing vertical space, corbel shelves provide a stylish solution for displaying items, and their decorative design adds character to the room. Plus, they can be customized in size and finish to complement the aesthetics of any small room. Whether you're looking to add a touch of elegance to a tiny bathroom or create a cozy reading nook in a small bedroom, corbel shelves are an excellent choice.

With their space-saving design and versatility, they're an ideal solution for making the most of limited space. By incorporating corbel shelves into your small space, you can create a functional and stylish area that's perfect for relaxing or entertaining.

Mixing Corbels With Other Materials

blending corbels in design

You can take your corbel shelves to the next level by combining them with other materials to create a unique, personalized look that reflects your style. By mixing and matching different materials, you can create a one-of-a-kind design that elevates your space.

For instance, you can incorporate metal corbels with reclaimed wood for an industrial look that adds a touch of edginess to your dining room.

Advertisement

Alternatively, you can pair resin corbels with glass shelves for a contemporary style that exudes sleek sophistication. If you're going for a luxurious feel, consider pairing cast iron corbels with marble shelves for a dramatic, high-end aesthetic.

Or, for a classic look, combine bronze corbels with stone shelves for a timeless, elegant feel. The possibilities are endless, and the key is to experiment with different materials to create a look that's uniquely yours.

Whimsical Corbel Shelf Displays

whimsical shelf decorations displayed

Your mini corbel shelves are ready to be transformed into a whimsical display that adds a touch of personality to your space. With a little creativity, you can create an amazing display that showcases your unique style. To get started, you'll need 16 pine boards pre-cut to your desired length for the shelves. Add keyhole fasteners for easy installation, and then it's time to get creative with the finish.

Finish Option Description
VooDoo Gel Stain Achieve a rich, dark color with this gel stain
Chalk Mineral Paint Add a soft, vintage vibe with this paint
Black Wax Create a chippy, aged look with this wax

Use a combination of VooDoo Gel Stain and Chalk Mineral Paint to create a unique, two-toned finish. Then, apply Black Wax to achieve a chippy, aged look that adds depth and character to your shelves. With these simple steps, you'll have an amazing whimsical display that adds a touch of personality to your space.

Frequently Asked Questions

How to Style a Corbel?

When it comes to styling a corbel, you'll want to start by considering the overall aesthetic you're going for. Think about the room's color scheme and choose decorative items that complement it.

Then, mix and match different textures and heights to create visual interest. Don't be afraid to experiment with different arrangements and swap out items seasonally to keep the display fresh.

Advertisement

What Can You Do With One Corbel?

You're probably wondering what you can do with just one corbel. Well, surprisingly, a single corbel can be incredibly versatile.

You can use it as a decorative shelf bracket in kitchens, living rooms, or bedrooms, or even as a unique bookend or sconce to add decorative flair.

It can also support a small display shelf or a wall-mounted nightstand, or be repurposed as a hanging lamp or shelf below a mirror.

The possibilities are endless!

How Much Weight Can a Corbel Support?

When it comes to determining how much weight a corbel can support, you need to take into account the material and size. Typically, a corbel's weight capacity ranges from 20 to 100 pounds.

Advertisement

Solid wood corbels tend to be stronger, while resin or lightweight materials are less sturdy. Be sure to follow the manufacturer's guidelines for weight limits and take into consideration the distribution of weight, using proper mounting hardware for added support.

What Is the Ratio of Corbel to Shelf?

When constructing a shelf, you're basically building a bridge, and just like a bridge, it needs proper support.

Speaking of support, have you ever wondered what the ideal ratio of corbel to shelf depth is? Well, you're in luck! The recommended ratio is at least 2/3, ensuring your shelf can hold its own weight, literally.

This ratio provides the necessary stability, so your shelf doesn't become a leaning tower of, well, whatever you're storing.

Conclusion

As you've explored the world of creative corbel shelf ideas, remember that these architectural wonders are more than just decorative accents – they're bridges between form and function.

Advertisement

Like the subtle yet sturdy support they provide to walls, corbel shelves hold up your unique style, suspending it beautifully between the ordinary and the extraordinary.

So, go ahead, build your own creative bridge, and watch your space transform into a masterpiece of elegance and whimsy.

Continue Reading

Alfresco

Does Floor Area Include Alfresco? Understand the Calculations!

Uncover the mystery of whether floor area includes alfresco spaces, crucial for accurate property valuation and complying with building regulations.

Published

on

By

alfresco inclusion in calculations

When considering if floor area includes alfresco, it hinges on local regulations and building codes. Alfresco spaces vary in type, influencing floor area calculations. Specific criteria must be met to accurately include them. This impacts property valuation greatly and understanding guidelines is essential. Exclusion affects valuation and appeal, making clarity important. Measurement complexity arises from differing regulations, necessitating precise techniques. Professional consultation clarifies ambiguities and aligns with regulations for accurate calculations. Seek guidance on building codes and partner with experts for detailed insights into floor area calculations. For further details on this important aspect of property assessment, there's a wealth of information to explore.

Key Takeaways

  • Floor area calculations may or may not include alfresco spaces, subject to local regulations.
  • Alfresco areas impact property valuation but are typically excluded from official floor area measurements.
  • Understanding guidelines for including alfresco areas is crucial for accurate property valuation.
  • Consultation with professionals or local authorities helps navigate complexities in floor area calculations.
  • Building consultants assist in measuring and accounting for alfresco spaces to align with regulations.

Definition of Floor Area

When calculating floor area with Alfresco, understanding the definition of floor area is vital. In real estate, floor area typically encompasses the Gross Floor Area of a property, including enclosed and habitable spaces within a building. This measurement is important for determining the total living space available in a property and plays a significant role in property valuations and assessments.

Alfresco areas, which are outdoor living spaces often attached to a property, may or may not be included in the floor area calculation, depending on local regulations. In some jurisdictions, alfresco areas under the main roof are considered part of the Gross Floor Area. Additionally, fully enclosed and habitable alfresco areas may also be included in the floor area measurement, further impacting the total living space of a property.

To accurately calculate floor area with Alfresco, it's essential to check local building codes and definitions to ascertain whether alfresco areas are to be included in the measurement. This guarantees transparency and compliance with regulations regarding property assessments and valuations.

Types of Alfresco Spaces

outdoor living and design

To further understand the calculation of floor area with Alfresco, it's important to explore the different types of Alfresco spaces available in residential properties. Alfresco spaces can vary in their design and integration with the main structure of a building.

Those under the main roofline are typically included in the gross floor area calculation, contributing to the total square footage of the property. Fully enclosed alfresco areas that seamlessly blend with the main structure are usually counted in the floor area measurement. However, separate structures or alfresco spaces not under the main roofline may not be included in the gross floor area calculations.

Therefore, it's essential to grasp the nuances of how alfresco spaces are designed and connected to the main building to accurately determine the total floor area of a property. Understanding these distinctions is pivotal in ensuring precise calculations of the floor area that includes alfresco spaces.

Advertisement

Criteria for Inclusion

criteria for text inclusion

When considering the inclusion of alfresco areas in floor area calculations, various criteria must be met to guarantee accuracy. Factors such as the space being fully enclosed with walls and a roof play a vital role in determining its inclusion.

Understanding these criteria is essential for property evaluation and compliance with building regulations.

Alfresco Space Considerations

Consider the specific criteria for including alfresco spaces in floor area calculations to guarantee accuracy in measurements. Alfresco areas are typically not incorporated into gross floor area calculations, but there are exceptions based on local regulations. Fully enclosed alfresco spaces under the roof line might be included in the total floor area, while those with significant open sides, resembling carports, are usually excluded. To help you grasp these considerations better, let's look at a comparison table below:

Alfresco Area Type Inclusion in Floor Area Calculations
Fully Enclosed Alfresco May be included
Open-Sided Alfresco (e.g., Carport) Usually excluded
Covered Alfresco with Three Open Sides Typically not included
Alfresco with Roof Extension Considered in some cases

Understanding these distinctions will aid in accurately determining the square footage of a property, ensuring compliance with relevant regulations.

Alfresco Area Calculation

Understanding the criteria for including alfresco areas in floor area calculations is essential for accurately evaluating property square footage. Alfresco areas, typically considered outdoor living spaces, may not be included in the indoor floor space calculation if they're under the roof line.

However, fully enclosed alfresco areas with heating or cooling systems may be counted in the gross floor area square footage. The key factor determining the inclusion of alfresco areas in floor space calculations is whether they're enclosed and conditioned.

Advertisement

To guarantee accuracy, it's important to adhere to the specific criteria outlined by local regulations. By following these guidelines, you can determine whether the alfresco area contributes to the overall floor space of the property.

Impact on Property Valuation

property value fluctuations explained

The exclusion of alfresco areas from the gross floor area calculation can directly influence the valuation of your property. While alfresco areas can enhance the appeal and value of a property, they're typically not included in the official floor area measurement.

This means that when appraisers or real estate agents assess the value of your property, they wouldn't consider the alfresco area as part of the total square footage. However, they may still highlight the presence of an alfresco area as a desirable feature that could potentially increase the property's overall worth.

Understanding this distinction is important as it may impact how potential buyers perceive the value of your property. By comprehending what's included in the floor area calculation, you can better evaluate your property's worth and make informed decisions regarding its valuation.

Guidelines for Measurements

accurate measurements are crucial

When determining floor area measurements that factor in alfresco spaces, it's vital to adhere to specific guidelines to guarantee accuracy in property valuation.

Alfresco areas are commonly excluded from gross floor area calculations in residential properties unless they meet certain criteria.

The key factor in deciding whether an alfresco area should be included in floor area calculations is if it's under the main roofline and enclosed.

Advertisement

Enclosed alfresco spaces with features such as walls and a roof may be considered part of the gross floor area, while open outdoor spaces are typically left out.

It's essential to understand the definitions and guidelines related to alfresco areas to ensure precise floor area calculations in building projects.

Appraiser's Perspective

valuing property with precision

Considering alfresco areas in property valuation, appraisers typically factor in their design and functionality to determine their inclusion in the total square footage. These outdoor spaces, especially if integrated into the main living area, can have a substantial impact on the property's valuation and how it's perceived in the market. Appraisers carefully evaluate the alfresco areas that fall under the main roof line, analyzing their usability and design aesthetics.

Building Code Considerations

construction requirements and standards

Understanding how building codes classify alfresco areas is essential for accurate floor area calculations and regulatory compliance. Building code considerations can have a notable impact on whether alfresco spaces are included in the total floor area calculations.

Here are some key points to keep in mind:

  • Building codes may vary, but alfresco areas under the main roof line are often included in the total floor area calculation.
  • Local regulations and definitions play a key role in determining whether alfresco areas are included in the total floor area calculations.
  • Alfresco areas that are enclosed or integrated with the main living space may be counted as part of the gross floor area.
  • Alfresco areas that are separate structures or not under the main roof line are typically excluded from the gross floor area calculations.
  • The classification of alfresco areas can impact the overall square footage and compliance with regulations, so it's essential to be aware of the specific guidelines in your area.

Challenges in Calculation

complex mathematical problems tackled

When calculating floor area with alfresco spaces, challenges arise due to the need for clarification on whether to incorporate these areas in the gross floor area.

The complexity of the calculation increases when distinguishing between indoor and outdoor living spaces, necessitating meticulous attention to detail.

Understanding the nuances of alfresco inclusion is crucial to guarantee accurate and consistent square footage measurements.

Advertisement

Alfresco Inclusion Clarification

One potential challenge in calculating floor area arises when determining the inclusion of alfresco spaces in the total measurement for granny flats in NSW. Understanding whether alfresco areas under the roof line count towards the 60sqm limit is essential for accurate floor area calculations.

Including an alfresco area can provide additional living space beyond the allowance, impacting the overall size of the granny flat. Carports, typically not counted in the 60sqm calculation due to having three open walls, add complexity to the measurement process.

Strategic design adjustments play a key role in optimizing alfresco areas for added functionality within the total floor area. To navigate these challenges effectively, it's vital to grasp the regulations and council guidelines governing the inclusion of alfresco spaces in floor area calculations.

Calculation Complexity Overview

Understanding the complexities of calculating floor area with alfresco spaces can present challenges due to differing regulations and definitions across jurisdictions. Jurisdictions vary in whether they include alfresco areas in floor area calculations, leading to confusion for property owners and developers.

The heart of the issue lies in the need for precise measurement techniques to determine the inclusion of alfresco spaces in floor area calculations accurately. It's essential to grasp the nuances of local building codes and definitions to ascertain the impact of alfresco areas on floor area calculations definitively.

Advertisement

To navigate this intricate landscape, seeking guidance from professionals or local authorities is paramount. Consulting with experts can provide clarity on whether alfresco areas should be considered in the floor area calculation, ensuring compliance with the specific regulations governing the property.

Professional Consultation Benefits

professional guidance advantages highlighted

Seeking professional consultation when calculating floor area with alfresco spaces provides valuable benefits in ensuring accuracy and compliance with regulations. Building professionals offer expertise that can have a substantial impact on the calculation process.

Here are five key reasons why consulting with experts is essential:

  • Clarity: Professionals can clarify ambiguous definitions and guarantee a clear understanding of what constitutes alfresco space.
  • Guidance: Expert advice can lead you through the intricate web of local regulations, preventing costly mistakes and ensuring compliance.
  • Precision: Building consultants assist in accurately measuring and accounting for alfresco areas, minimizing errors in floor area calculations.
  • Compliance: Professional consultation ensures that your calculations align with regulations, reducing the risk of non-compliance and associated penalties.
  • Confidence: By consulting with experts, you can have trust in the accuracy and reliability of your floor area calculations, providing peace of mind during property assessments.

Frequently Asked Questions

What Is Included in Floor Area Calculation?

In floor area calculations, indoor spaces like bedrooms, living rooms, and kitchens are typically included. Alfresco areas may or may not be part of the calculation, depending on local rules. Check with authorities for specific property details.

What Is Not Included in Gfa?

You know what's not included in GFA calculations? Outdoor spaces like alfresco areas. GFA zeroes in on enclosed habitable spots, excluding non-enclosed areas. So, alfresco spaces are typically left out when crunching building measurements.

How Do You Calculate Flooring Area?

To calculate flooring area, measure the interior living spaces excluding outdoor areas like alfresco zones. This approach guarantees an accurate representation of usable space within the property. Understanding these distinctions is essential for evaluating the true square footage.

What Areas of the Structure Are Not Included in the Square Footage Calculation?

When calculating square footage, remember alfresco areas, garages, and carports are excluded. Understanding what's not included helps assess usable living space accurately. Focus on enclosed, habitable spaces to determine the structure's square footage.

Advertisement

Conclusion

In summary, when determining the floor area of a property, it's important to carefully consider whether alfresco spaces are included.

While these areas can enhance the overall value of a property, their inclusion in floor area calculations can vary depending on specific criteria.

Consulting with a professional appraiser or real estate agent can provide clarity and guarantee accurate measurements are taken.

Understanding the nuances of floor area calculations, including alfresco spaces, is essential for accurate property valuation.

Advertisement

Continue Reading

Home Decor

The Perfect Party Garden Creation

Learn the secrets to crafting an unforgettable outdoor gathering with warm ambiance, entertainment, and comfort in the perfect party garden.

Published

on

creating a dream garden

To create the perfect party garden, start by setting the scene with warm outdoor lighting, cozy seating areas, and a designated beverage station. Next, incorporate entertainment features like outdoor cooking stations, sound systems, and games. Don't forget to prioritize comfort with shaded areas, plush furniture, and heating lamps. To make your party truly unforgettable, incorporate edible flowers, decorative elements, and strategic lighting to guide guests. With these essentials in place, you'll be well on your way to crafting an unforgettable outdoor gathering – and there's still more to explore to take your party to the next level.

Key Takeaways

• Create a warm ambiance with outdoor lighting, string lights, and lanterns to set the tone for a magical night.

• Divide the outdoor space into distinct zones for dining, lounging, and entertainment to ensure a smooth flow of activities.

• Incorporate shaded areas, cozy blankets, and heating lamps to ensure guest comfort throughout the party.

• Use pathways, luminaries, and strategic lighting to guide guests and create visual interest in the garden.

Advertisement

• Add fresh flowers, scented candles, and outdoor artwork to elevate the party decor and create a unique atmosphere.

Setting the Scene

To create an enchanting party garden, start by setting the tone with outdoor lighting that casts a warm glow, making your guests feel like they're walking into a whimsical wonderland. You can achieve this by hanging string lights or lanterns around the garden, creating a magical ambiance that sets the mood for a memorable night.

Next, consider the comfort of your guests by setting up seating areas and shaded areas, providing a cozy retreat from the sun or heat. A designated beverage station is also a great idea, allowing guests to grab a drink and mingle with ease. This thoughtful touch will make your party garden feel like a luxurious retreat.

Essential Elements for Entertainment

captivating content diverse offerings

With entertainment in mind, you'll want to incorporate outdoor cooking stations, BBQ areas, and entertainment features like sound systems and games to elevate the party experience and keep your guests engaged. This will create a lively atmosphere that encourages socializing and fun.

Outdoor Games:

Set up designated areas for outdoor games, such as cornhole or giant Jenga, to keep guests entertained.

Advertisement

Floor Cushions:

Add floor cushions around the garden to create cozy seating areas perfect for lounging and socializing.

Heating Lamps:

Install heating lamps to extend the party into the evening, keeping guests warm and comfortable.

Additionally, consider incorporating a designated bar area with interactive setups for guests to craft custom drinks, adding a fun and engaging element to the party.

Advertisement

A beautifully set Dining Table surrounded by potted plants will also create a stunning focal point in your party garden.

Comfort and Ambiance Essentials

cozy and welcoming atmosphere

By thoughtfully incorporating shaded areas, you'll create a comfortable retreat for your guests to escape the sun or relax in style.

As you design your outdoor space, remember that comfort and ambiance are key to making your guests feel special. To accomplish this, consider providing proper lighting, heating lamps, and cozy blankets to guarantee a warm and inviting atmosphere.

Music can also play a significant role in setting the tone for your garden party. By incorporating seating options, such as plush sofas and chairs, you'll create a cozy ambiance that encourages socializing and relaxation.

If you're planning a daytime gathering, consider setting up outdoor games or board games to keep guests entertained. As the sun sets, illuminate pathways with luminaries and strategically placed lighting sources to add a magical touch to the space.

Garden Party Layout Strategies

garden party planning tips

As you envision your ideal garden party, cleverly dividing your outdoor space into distinct zones for dining, lounging, and entertainment will help create a seamless flow of activity and conversation. By doing so, you'll create a sense of intimacy and make it easy for guests to move around and socialize.

Consider incorporating edible flowers or other decorative elements to add a pop of color and whimsy to each zone.

Advertisement

To guide guests between areas, use pathways and strategic lighting to create a sense of flow. Anchor different areas with natural focal points like trees or water features to create visual interest.

Don't forget to include ample seating options, such as benches, chairs, and outdoor sofas, to provide comfort and convenience for your guests. Make sure to leave enough space between seating areas to allow for easy movement and socializing during the party.

Final Touches for Perfection

perfecting the last details

To put the finishing touches on your garden party, incorporate a few carefully chosen decorative elements that will elevate the ambiance and create a lasting impression on your guests. Adding fresh flowers and greenery to the tables and around the garden can enhance the party atmosphere. Consider incorporating scented candles or diffusers to create a pleasant fragrance in the outdoor space.

Decorative Element Purpose Tips
Fresh Flowers Enhance party atmosphere Choose seasonal blooms for Spring and summer parties
Scented Candles/Diffusers Create pleasant fragrance Select calming scents to promote relaxation
Colorful Tablecloths Elevate party decor Match with napkins and place settings for a cohesive look
Outdoor Artwork Add personal touch Hang on fences or walls to create a unique setting
Outdoor Rugs/Cushions Create cozy seating area Choose weather-resistant materials for durability

Make sure to incorporate lawn games and other activities that take advantage of the beauty of nature in your Perfect Garden. By incorporating these elements, you'll create a memorable and inviting space that your guests will cherish.

Frequently Asked Questions

How to Create a Garden Party?

When creating a garden party, you'll want to start by selecting a suitable outdoor space that can accommodate your guests comfortably.

Consider the overall aesthetic you want to achieve, from lighting and table settings to seasonal flowers and decor.

Advertisement

Next, plan your menu, choosing seasonal and local produce to impress your guests.

What Does Garden Party Theme Mean?

Just like a painter envisions a masterpiece, you envision a perfect garden party. But, what's the fundamental concept that sets the tone for your celebration? That's where the garden party theme comes in.

Fundamentally, it's an overarching idea that guides your decisions on decorations, food, and activities. Think of it as the thread that weaves together the entire event. It could be a seasonal inspiration, a color scheme, or even a personal preference – the possibilities are endless!

How to Throw a Fun Garden Party?

You're excited to throw a fun garden party, and you're wondering where to start.

First, decide on a theme and color scheme that fits the season.

Advertisement

Next, set up designated areas for drinks and food, and provide ample seating in cozy conversation areas.

Add some entertainment like lawn games, and don't forget to incorporate seasonal blooms and repurposed decor items to create a festive atmosphere.

With these elements in place, you'll be well on your way to hosting an unforgettable garden party.

What Food Do You Serve at a Garden Party?

When planning the menu for your outdoor gathering, you'll want to serve light and invigorating dishes that complement the warm weather. Consider offering fruit skewers, caprese salad, and cucumber sandwiches to keep your guests satisfied.

You can also provide a variety of finger foods, such as mini quiches, bruschetta, and cheese platters, alongside grilled items like kabobs and sliders.

Advertisement

Conclusion

As you stand back to admire your handiwork, you'll feel like the master chef of outdoor entertaining, having whipped up a party garden that's the perfect recipe for a memorable bash.

The scene is set, the essentials are in place, and the ambiance is electric. You've struck the right chord, and your guests will be singing your praises long after the party's over.

Your garden party is the whole shebang, the cat's pajamas, the bee's knees – and it's sure to be the talk of the town for seasons to come.

Continue Reading

Trending