Connect with us

Home Decor

Elevate Your Home Decor With Topiary Ball Decorating Ideas

Give your home a sophisticated makeover with topiary balls, and discover the endless decorating possibilities that await you.

Published

on

topiary ball decor tips

You can instantly elevate your home decor with topiary balls, adding a touch of elegance and sophistication to any space. Create a stunning centerpiece, add a pop of greenery to your outdoor space, or group them together for a unique conversation piece. Topiary balls are low-maintenance, versatile, and can be used in various settings, from indoor decor to outdoor spaces. By incorporating them into your decor, you can enhance the ambiance of your home and create a warm, inviting atmosphere. From monochromatic schemes to seasonal decor ideas, explore the endless possibilities to transform your space.

Key Takeaways

• Topiary balls create a warm and inviting atmosphere in any room, and come in various sizes to fit different spaces and decor.

• Mixing topiaries with fresh flowers adds a pop of color and vibrancy, and can be easily customized to fit personal style and seasonal changes.

• Showcasing topiary balls in decorative planters enhances their visual impact and adds a touch of elegance to any room.

• Adding string lights around topiary balls creates a warm and enchanting ambiance, perfect for indoor or outdoor spaces.

Advertisement

• Customizing topiaries with seasonal accents and decorations allows for quick and cost-effective updates to reflect the current time of year or special occasions.
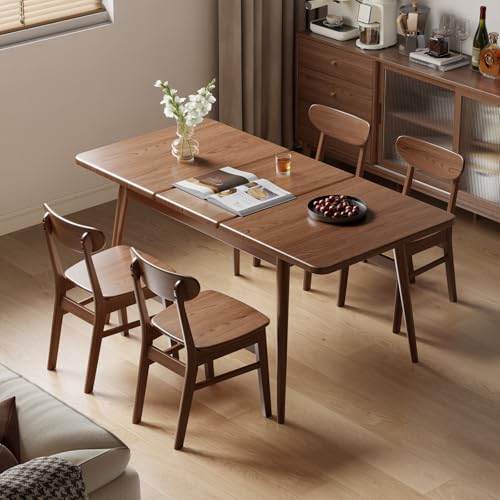
Entranceway Elegance With Topiary Balls

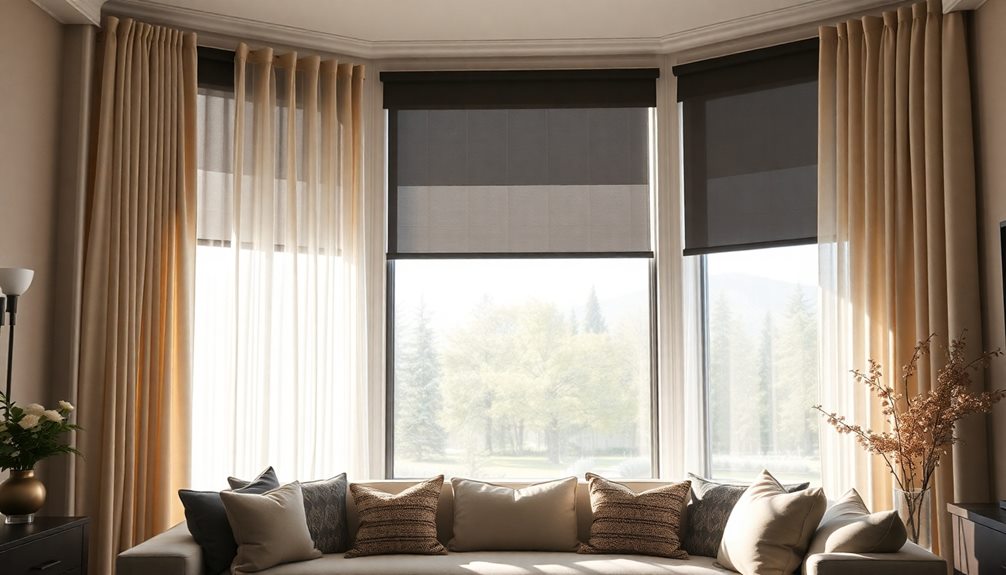
As you step into your home, a beautifully arranged topiary ball in the entranceway sets the tone for a warm and inviting atmosphere. This elegant decor piece instantly elevates your home decor, creating a sense of sophistication and charm.

With topiary balls available in various sizes, you can choose the perfect fit for your entranceway, whether it's a grand foyer or a cozy living room. Plus, their low-maintenance requirement means you can enjoy their beauty without the hassle of upkeep.

To enhance their visual impact, consider placing them in decorative planters or urns, which can be easily found through affiliate links.

Patio Decor Inspiration With Spheres

elegant patio decor ideas

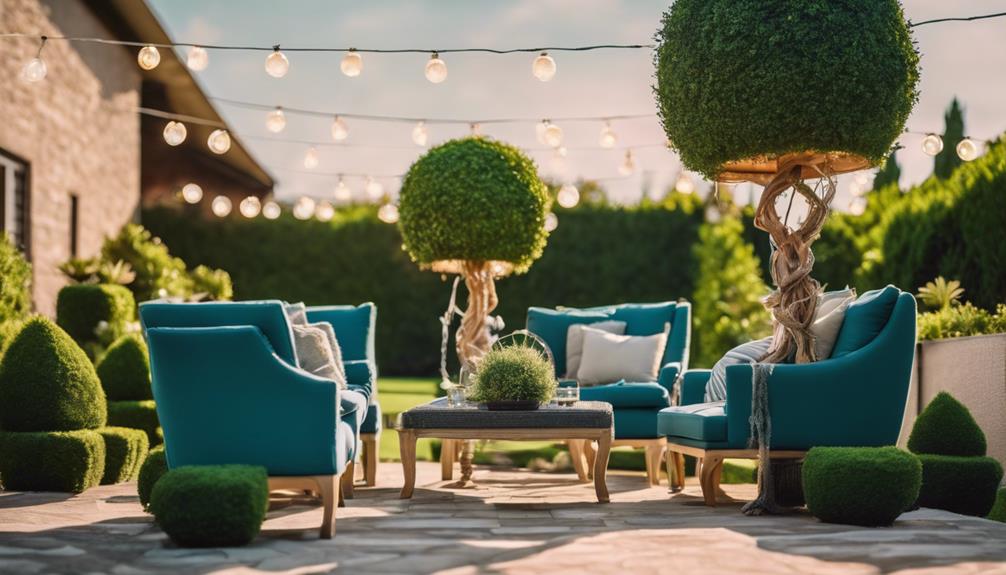
You can extend the warm welcome of your home to the outdoors by incorporating topiary ball spheres into your patio decor, creating a seamless flow of elegance from entranceway to outdoor living space.

Topiary ball spheres add a touch of sophistication to any patio setting, and their low-maintenance feature makes them perfect for outdoor use. With various sizes available, you can easily find the perfect fit for your space.

Advertisement

Here are some tips to keep in mind when incorporating topiary ball spheres into your patio decor:

  1. Strategic Placement: Place topiary ball spheres strategically to create a focal point or enhance existing decor.
  2. Mix and Match: Combine topiary ball spheres of different sizes to add visual interest to your patio.
  3. Play with Texture: Pair topiary ball spheres with plants or other decorative elements to add texture and depth to your patio decor.

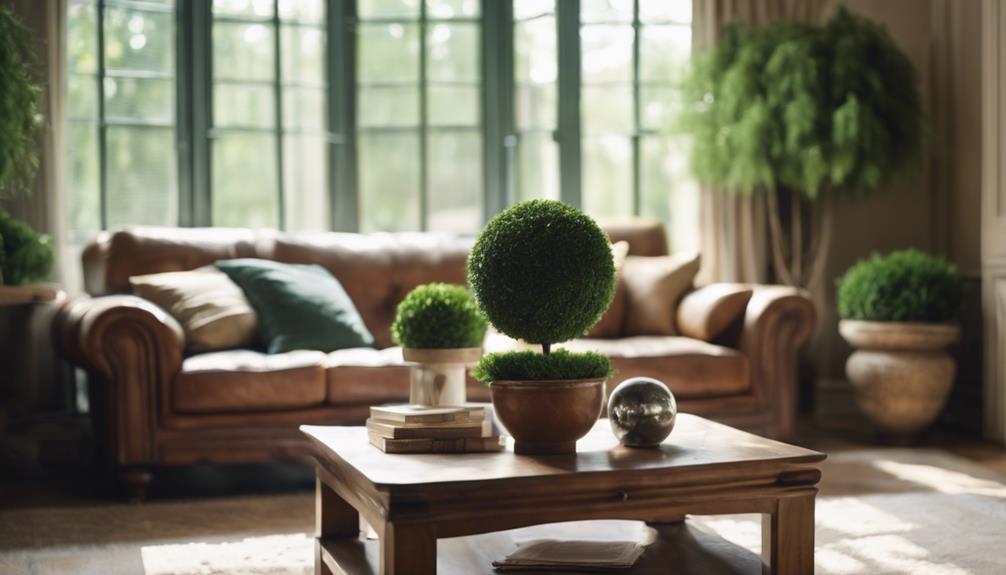
Topiary Ball Centerpieces for Tables

elegant table decorations available

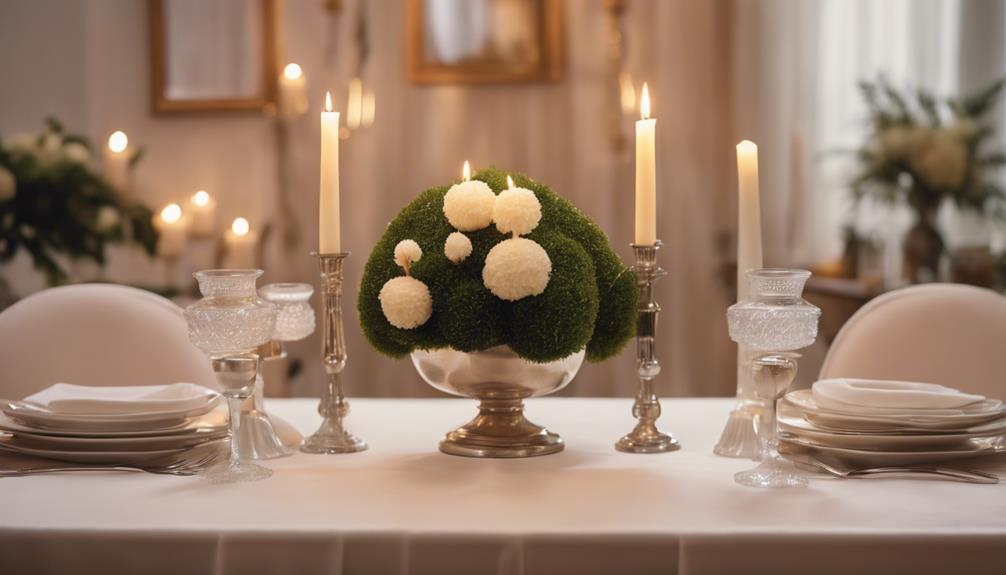
As you explore topiary ball centerpieces for tables, you'll discover that adding fresh flower accents can elevate the elegance of your decor.

You can also experiment with vase fillers galore, mixing and matching different textures and colors to create a unique look.

To take your centerpiece to the next level, consider incorporating seasonal themes, switching up your decor to reflect the changing seasons and adding a touch of personality to your table setting.

Fresh Flower Accents

By adding fresh flower accents to your topiary ball centerpieces, you can create a stunning visual display that elevates your table setting and adds a pop of color to your dining experience. This is especially perfect for special occasions or everyday use to elevate your table settings.

You can customize your topiary ball centerpieces with different foliage options, making them versatile for various table sizes and styles, enhancing any dining experience.

Advertisement

To take your topiary ball centerpieces to the next level, consider the following:

  1. Choose seasonal flowers that complement the colors and theme of your dining setting.
  2. Experiment with different flower sizes to create a visually appealing arrangement.
  3. Don't be afraid to mix and match different flower types and foliage to create a unique look.

Vase Fillers Galore

With fresh flowers adding a pop of color to your topiary ball centerpieces, now it's time to explore the versatility of vase fillers in elevating your table decor.

You can choose from a wide range of vase fillers to complement your topiary balls, adding texture, color, and depth to your centerpieces. Topiary balls come in different sizes, making it easy to create custom centerpieces that fit your style and theme.

Pairing them with other vase fillers, such as pebbles, marbles, or decorative stones, can enhance the visual appeal of your table decor. Additionally, you can easily customize your centerpieces to match any theme or color scheme, making them perfect for special occasions or everyday decor.

Seasonal Theme Switch

You can effortlessly switch up your topiary ball centerpieces to match any seasonal theme or occasion, simply by swapping out a few key elements. This versatility is what makes topiary balls a fantastic addition to your table decor. With a timeless and classic look, they complement various styles and can be easily customized to fit your desired aesthetic.

To give your topiary ball centerpiece a seasonal twist, try these easy swaps:

Advertisement
  1. Seasonal flowers: Replace the usual foliage with flowers that match the current season, such as poinsettias for Christmas or sunflowers for summer.
  2. Themed ribbons: Update the ribbon wrapping the topiary ball to match your theme, like a red and green plaid for winter or pastel colors for spring.
  3. Decorative accents: Add seasonal ornaments, like mini pumpkins for fall or Easter eggs for spring, to give your centerpiece a festive touch.
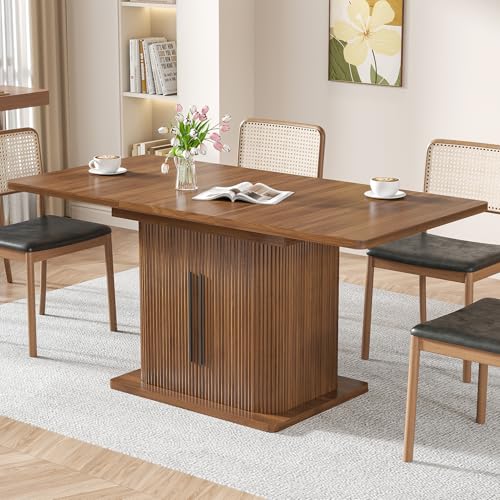
Mixing Topiaries With Fresh Flowers

garden party with elegance

Adding fresh flowers to your topiary arrangements can instantly elevate your decor, creating a stunning visual contrast that draws the eye. By combining these two elements, you're creating a dynamic and vibrant addition to your space.

The mix of artificial topiaries with real flowers creates a visually striking contrast, with the timeless elegance of topiaries enhanced by the freshness of the flowers. This combination of textures and colors creates a visually appealing centerpiece that's sure to impress.

One of the best things about mixing topiaries with fresh flowers is the versatility it offers. You can customize the look to fit your personal style and the aesthetic of your space. Plus, it's easy to switch out the flowers to match the seasons or your mood.

Whether you're looking to add a pop of color or create a sophisticated ambiance, mixing topiaries with fresh flowers is a great way to take your decor to the next level.

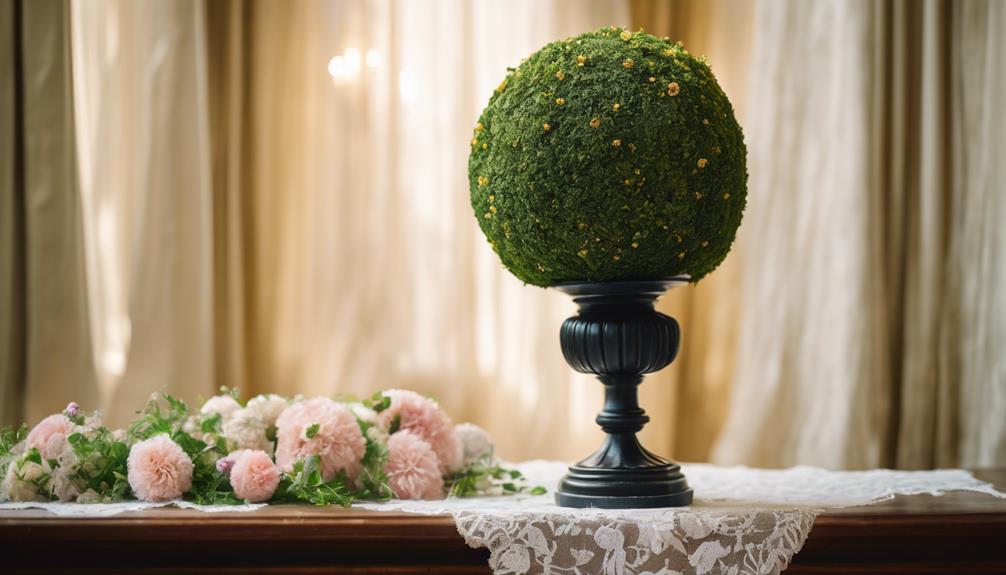
Topiary Balls in Decorative Planters

stylish outdoor decorations abound

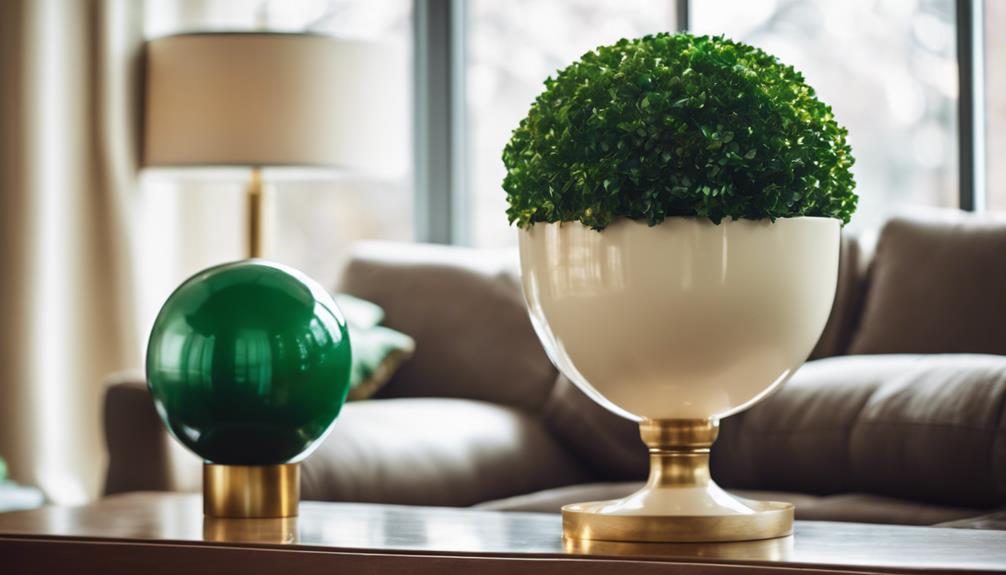
Elevate your topiary balls by showcasing them in decorative planters that not only enhance their visual appeal but also complement the surrounding decor. By doing so, you'll create a stylish and cohesive look that adds sophistication to any room.

With planters coming in various styles, sizes, and materials, you can easily find one that matches your home's aesthetic.

Here are three tips to keep in mind when selecting a planter for your topiary ball:

Advertisement
  1. Choose a planter that complements the room's color scheme to create a cohesive look.
  2. Select a planter that provides a stable base for your topiary ball, ensuring it remains upright and secure.
  3. Consider the material and style of the planter to make sure it blends seamlessly with your existing decor.

Adding Ambiance With String Lights

creating cozy outdoor spaces

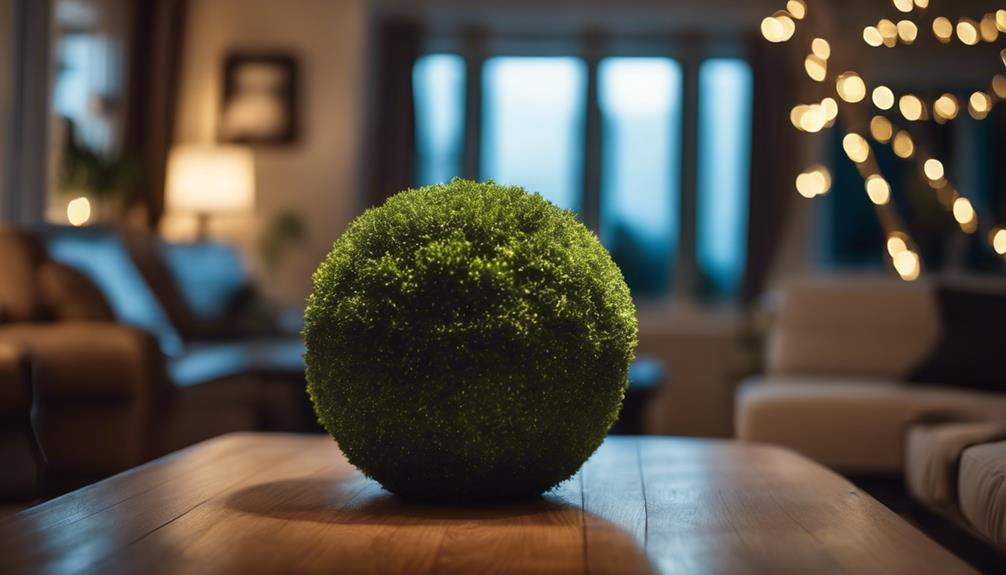
By wrapping string lights around your topiary balls, you can instantly create a warm and enchanting ambiance that's sure to captivate onlookers.

As the sun sets, the soft illumination from the lights will complement the lush greenery of your topiary balls, transforming any area into a charming display. Whether you're decorating your outdoor patio or indoor living space, string lights will add a magical touch to your topiary ball arrangements.

As you string the lights around the topiary balls, you'll notice how they enhance the beauty of the greenery, especially in the evening. The warm glow of the lights creates an inviting atmosphere, perfect for cozying up with family and friends or hosting a romantic dinner party.

Topiary Balls in Monochromatic Schemes

sculpted greenery in harmony

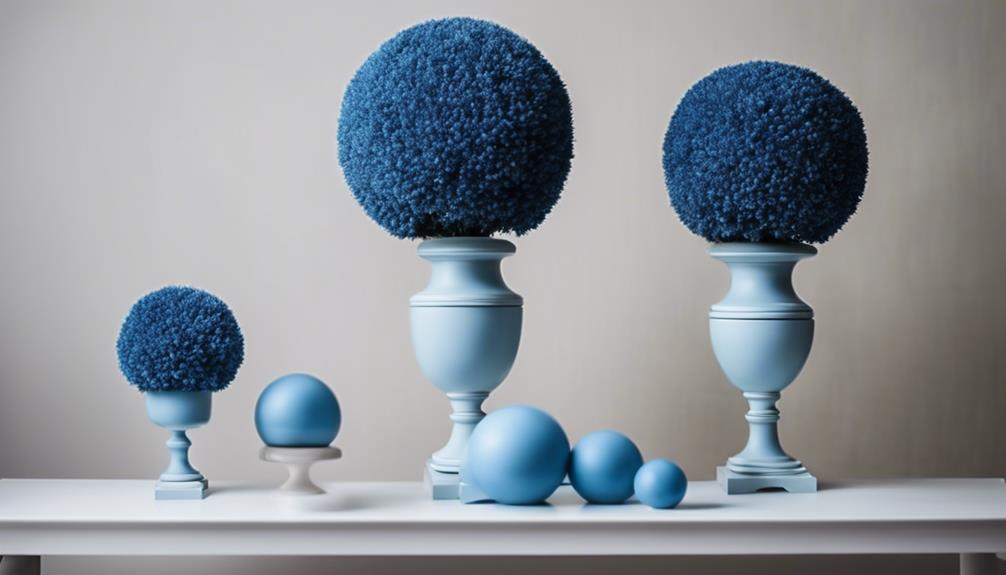
You can create a cohesive and elegant look by using topiary balls in a single color palette, which adds a touch of sophistication to your decor. By choosing a single color scheme, you'll create a harmonious and refined atmosphere that ties the entire space together. This monochromatic approach eliminates visual clutter, allowing your topiary balls to take center stage.

Here are three benefits of using topiary balls in monochromatic schemes:

  1. Visual Unity: A consistent color scheme creates a sense of continuity, tying together different elements in the room.
  2. Sophisticated Aesthetic: Monochromatic topiary balls exude a clean, modern vibe that elevates your decor.
  3. Refined Ambiance: This cohesive look enhances the overall ambiance of the room, adding a touch of refinement and elegance.

Seasonal Topiary Decor Ideas

festive garden topiary designs

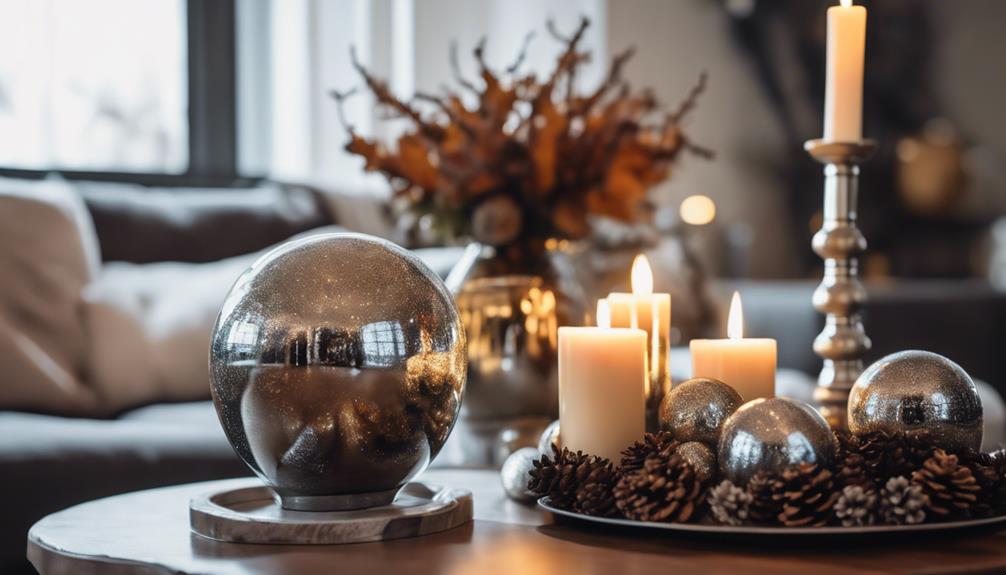
As the seasons change, your topiary decor can too, with a few simple swaps that breathe new life into your space. By incorporating seasonal elements, you can create a festive and inviting atmosphere that reflects the current time of year.

Topiaries can be easily customized with seasonal accents like ribbons, ornaments, or flowers, allowing you to update your decor without breaking the bank.

Switching out seasonal topiary decorations is a quick and cost-effective way to refresh your space. You can tailor your decor to holidays, seasons, or special occasions, adding a personalized touch to your home. For example, you could add red and green ribbons for Christmas, pastel-colored flowers for Easter, or autumn leaves for Thanksgiving.

Advertisement

The possibilities are endless, and the best part is that you can easily swap out decorations as the seasons change. With seasonal topiary decor ideas, you can keep your home feeling fresh and festive all year round.

Frequently Asked Questions

How to Decorate With a Topiary Ball?

When it comes to decorating with a topiary ball, you're likely wondering where to start. Begin by choosing a decorative pot or planter that complements your home's style.

Next, decide whether you want to place it indoors or outdoors, as topiary balls can thrive in both settings.

Consider grouping multiple balls of varying sizes for a visually appealing display, and don't be afraid to get creative by adding string lights or other decorative elements to elevate the look.

Are Topiaries Still in Style?

You might be wondering, are topiaries still in style?

Advertisement

The answer is a resounding yes! Despite their long history, topiaries remain a popular choice in interior decor. Their versatility, elegance, and ability to bring a touch of nature indoors have guaranteed their enduring popularity.

In fact, topiaries have been a staple in home decor for centuries, and their appeal shows no signs of fading.

What to Put Decorative Balls In?

When deciding what to put decorative balls in, you have several options to achieve the desired aesthetic.

You can place them in glass vases or bowls for a sleek look, or opt for woven baskets for a rustic feel.

Alternatively, consider decorative trays or plates for a polished arrangement, or clear acrylic containers for a minimalist vibe.

Advertisement

Feel free to mix and match balls of varying sizes and colors to add visual interest to your decor.

Where to Put Topiary?

You've got a million possibilities when it comes to where to put your topiary! Seriously, the options are endless.

Indoors, you can place them in entranceways, hallways, or even on a shelf.

Outdoors, they thrive in patios, balconies, or gardens. Consider using them as centerpieces or focal points in residential or commercial spaces.

The key is to choose a spot that complements their style and size, and don't be afraid to get creative with your placement!

Advertisement

Conclusion

You've made it to the final chapter of your topiary ball decorating journey, and we're willing to bet your home's never looked better.

Ironically, the simplicity of these spherical wonders is what makes them so versatile and easy to incorporate into your decor.

From elegant entranceways to whimsical patio decor, topiary balls have proven to be the ultimate chameleon of home decor.

So, go ahead, get creative, and watch your space transform into a stunning masterpiece that's uniquely yours.

Advertisement

Continue Reading
Advertisement

Home Decor

How to Make Burlap Autumn Placemats Using Cake Boards

Incorporating rustic charm into your fall gatherings has never been easier with this simple DIY project using upcycled cake boards and burlap fabric.

Published

on

By

diy burlap autumn placemats

We're creating a seasonal tablescape with a rustic twist by upcycling round cake boards into charming burlap autumn placemats, perfect for adding a touch of warmth and coziness to our fall gatherings. To start, gather round cake boards, burlap fabric, scissors, and additional decorations like leaves, acorns, or ribbon. Then, cut out burlap leaf shapes using stencils, applying Mod Podge to prevent fraying. Next, add vibrant fall colors with acrylic paints and arrange the leaves on the cake boards, securing them with hot glue. Finally, embellish with fall-themed decorations and inspect for perfection. Now, let's get creative with our placemat designs!

Key Takeaways

• Use round cake boards as a base and cover them with burlap fabric for a rustic autumn look.

• Cut out burlap leaves using stencils and a cutting tool, and apply Mod Podge to prevent fraying.

• Add color and detail to the burlap leaves using acrylic paints, metallic accents, and embellishments like faux leaves and acorns.

• Arrange and secure the burlap leaves on the cake boards using hot glue, overlapping them for a natural look.

Advertisement

• Finish the placemats by adding ribbons, twine, or fabric pumpkins, and inspect them for any imperfections or loose elements.

Gather Materials and Supplies

We'll start by collecting the necessary materials, including round cake boards, burlap fabric, scissors or a cutting tool, and any additional decorations we want to incorporate into our autumn-themed placemats.

We'd love to add some personal touches to make our placemats truly unique. Before we begin, we must make certain our cake boards are clean and free of any residue, providing a smooth surface for our burlap fabric. Having a clean slate will allow us to focus on the creative process without any obstacles.

We'll also prepare our burlap fabric, scissors or cutting tool, and any additional decorations, such as leaves, acorns, or ribbon, to enhance the autumn theme. With all our materials gathered, we can start transforming our cake boards into beautiful, rustic placemats that will add a touch of autumn charm to our tables.

Cut Out Burlap Leaf Shapes

crafting with burlap leaves

With our materials prepared, we're ready to add some autumn flair to our placemats by tracing and cutting out burlap leaf shapes.

To achieve this, we'll use leaf stencils as a guide to trace the leaf shapes onto the burlap. We'll use a Sharpie pen to outline the shapes, ensuring precision and accuracy.

Advertisement

Next, we'll carefully cut out the leaf shapes using scissors, taking care to maintain clean edges. As we cut, we'll make sure to apply gentle pressure to prevent the burlap from fraying or tearing.

Once we've cut out the leaves, we'll set them aside for now, ready to be used in the next stage of our placemat-making process.

Prevent Fraying With Mod Podge

protect fabric edges easily

As we progress with our burlap autumn placemats, we'll need to address the issue of fraying, which can quickly ruin the appearance of our project.

To guarantee this, we're going to apply Mod Podge around the edges of our traced leaf shapes, a technique that seals the burlap and keeps it from unraveling.

Mod Podge Application Tips

We apply a significant amount of Mod Podge around the edges of the traced leaf shapes on the burlap fabric to prevent fraying. This is an essential step in guaranteeing that our placemats turn out beautifully.

The Mod Podge will act as a sealant, preventing the burlap from fraying when cut. We allow the Mod Podge to fully dry before cutting out the leaf shapes to ensure maximum protection against fraying.

Advertisement

To apply the Mod Podge evenly, we use a brush or sponge to distribute it along the edges of the leaf stencils. This creates a barrier that keeps the burlap fibers intact, making it easier to work with and achieve a clean, professional finish.

Sealing Burlap Edges

We seal the burlap edges by applying a thin, even layer of Mod Podge around the traced leaf shapes, establishing a protective barrier that keeps the fabric intact. This vital step prevents fraying, which can ruin the appearance and durability of our burlap placemats.

Mod Podge dries clear, providing an invisible shield that safeguards the burlap edges from wear and tear. We make sure to let the Mod Podge dry completely before handling the burlap leaves to guarantee its effectiveness.

Sealing the edges with Mod Podge is a simple yet necessary technique for a successful burlap placemat project. By doing so, we maintain the neat appearance and durability of our placemats. As a result, our burlap placemats will remain vibrant and intact for a longer period.

Add Fall Colors With Paint

enhancing autumn aesthetics creatively

As we move on to add the vibrant hues of autumn to our burlap placemats, we'll focus on selecting a palette of rich fall colors, such as red, orange, yellow, and brown, to create a warm and inviting atmosphere.

To achieve a realistic look, we'll explore various paint application techniques, including dry brushing and stippling, to add texture and depth to our burlap leaves.

Advertisement

Fall Color Palette

Let's infuse our burlap placemats with the warmth of autumn by selecting a vibrant fall color palette that echoes the season's cozy atmosphere. To achieve this, we'll choose a combination of warm hues like red, orange, yellow, and brown, which are synonymous with the season.

We can use acrylic paints in shades like pumpkin orange, cranberry red, mustard yellow, and chestnut brown to create a vibrant autumn look. To add depth and dimension, we can blend colors to achieve a gradient effect on the edges of the burlap leaves, giving them a more realistic and colorful appearance.

For a touch of elegance, we can experiment with metallic paints or glitter accents in gold or copper tones. Once we've applied the paint, we'll let it dry completely to make certain the colors stay vibrant and don't smudge during assembly.

Paint Application Tips

With our fall color palette in mind, we immerse ourselves in adding those vibrant hues to our burlap leaves using acrylic paints. We opt for small brushes or sponges to apply the paint, focusing on the edges of the burlap leaves for a realistic autumn look. To achieve a natural gradient effect, we blend different colors together, creating a beautiful ombre effect on the edges of the leaves.

Paint Application Tips Description
Edge Painting Focus on the edges of the burlap leaves for a realistic autumn look
Color Blending Blend different colors together to create a natural gradient effect
Metallic Accents Add metallic or glitter paints for a festive and eye-catching finish
Drying Time Allow the paint to fully dry before using the placemats to prevent smudges or color transfer

Arrange Leaves on Cake Boards

decorate cake boards creatively

We lay out the cake boards flat on a work surface to begin arranging the burlap leaves.

This is where our creativity shines, as we position the leaves on top of the cake boards, ensuring they fit well and cover the surface evenly. We experiment with different leaf placements to create a visually appealing design on each cake board.

Advertisement

To add some depth and texture to our placemats, we consider overlapping the leaves slightly. This technique allows us to create a layered, dimensional look that adds to the autumnal feel of our placemats.

As we arrange the leaves, we take our time, making sure each one is placed thoughtfully to create a beautiful, organic design. By taking the time to carefully arrange our leaves, we set ourselves up for success in the next step of securing them onto the cake boards.

Secure Leaves With Hot Glue

hot glue for leaves

As we move forward, our carefully arranged leaves are now ready to be permanently secured to the cake boards using hot glue.

To do this, we'll apply a thin bead of hot glue along the edges of the burlap leaves, taking care not to apply too much glue that might seep out from the edges.

Next, we'll press the leaves firmly onto the cake boards, making sure they're securely attached to prevent them from coming loose. It's vital to guarantee the leaves are properly attached, as this will ensure our placemats remain intact.

Once we've secured all the leaves, we'll let the hot glue dry completely before handling the placemats. This step is important, as it allows the glue to set properly, creating a strong bond between the leaves and the cake boards.

Advertisement

Add Embellishments and Details

enhancing with intricate details

Let's add some personality to our autumn placemats by incorporating embellishments that evoke the warmth and coziness of the season. We can consider adding faux fall leaves, acorns, or pinecones to enhance the autumn theme. Using a hot glue gun, we can securely attach these embellishments to the burlap placemats.

Embellishment Description
Faux Fall Leaves Adds a pop of color and autumn flair
Acorns Brings a natural, earthy feel to the placemat
Pinecones Evokes the scent and feel of a crisp autumn morning

When adding embellishments, we can experiment with different placements and arrangements to create a visually appealing design. We can also incorporate elements like ribbons, twine, or small fabric pumpkins for a personalized touch. However, we must make sure that the added embellishments are firmly attached to prevent them from coming loose during use. By adding these embellishments, we can create unique and inviting autumn placemats that set the tone for a cozy and intimate gathering.

Finish and Inspect Placemats

placemat completion and inspection

With our embellishments securely attached, our placemats are ready for a thorough once-over to ensure every detail is perfect.

We carefully inspect each placemat, checking for any loose edges or unsecured leaves that might need a little extra attention. A pair of scissors comes in handy here, as we trim any excess burlap or glue strings for a clean finish.

Next, we double-check that all leaves are securely attached and the overall design is cohesive – after all, we want our placemats to be a beautiful addition to our autumn table setting. We also keep an eye out for any smudges or paint drips that need to be corrected.

With a final inspection complete, we can't help but admire our completed burlap autumn placemats. Before we realize it, they'll be adding a touch of rustic charm to our dinner table. 'The devil is in the details,' as the saying goes, and we're thrilled to have nailed every last one.

Frequently Asked Questions

Can I Use a Hot Glue Gun Without a Low-Temperature Setting?

We're wondering if we can use a hot glue gun without a low-temperature setting. Honestly, it's possible, but we risk damaging materials or creating a mess, so we'll exercise caution and consider alternatives for a smoother crafting experience.

Advertisement

Will Mod Podge Damage or Discolor the Burlap Fabric?

Like a gentle summer rain, we approach the delicate dance of adhesives and fabrics. Will Mod Podge damage or discolor the burlap fabric? Fortunately, Mod Podge is a gentle partner, and we've found it to be safe for burlap, preserving its natural texture and color.

How Do I Prevent Paint From Seeping Under the Burlap Leaves?

We're worried about paint seeping under the burlap leaves, so we'll apply a thin layer of Mod Podge to the back of each leaf before painting to create a seal and prevent any paint from bleeding underneath.

Can I Use a Different Type of Fabric Instead of Burlap?

"As we weave our autumnal magic, we ponder, can we swap burlap for another fabric? Absolutely, we can! Cotton, linen, or even canvas will work beautifully, adding unique textures to our seasonal creations."

Are Cake Boards Reusable After Making the Placemats?

"We're happy to report that cake boards are reusable after making placemats, as long as they're carefully cleaned and dried. We've successfully reused ours multiple times without any issues, and we're sure you can too!"

Conclusion

As we put the finishing touches on our burlap autumn placemats, we step back to admire the fruits of our labor, and the rustic charm that now adorns our tablescape.

Advertisement

The soft rustle of burlap, the vibrant hues of autumn, and the delicate dance of leaves come together in perfect harmony, evoking the gentle whisper of fall's arrival.

And as we set our tables, we're reminded that, indeed, 'autumn shows us how beautiful it's to let things go.'

Continue Reading

Home Decor

Creative Corbel Shelf Ideas

Unlock the secret to transforming any room with unique corbel shelf designs that add a touch of elegance and sophistication.

Published

on

You can enhance any room's decor with creative corbel shelf designs that add sophistication and elegance while providing a unique storage solution. Whether you're looking to create a cozy reading nook or showcase decorative items, corbel shelves are a stylish and functional choice. From customizable designs to whimsical displays, the possibilities are endless. You can mix and match materials to create a one-of-a-kind look or utilize vertical space in small areas. With corbel shelves, you can transform even the most mundane spaces into stunning areas. As you explore further, you'll discover how to maximize the full potential of corbel shelves to create a space that truly reflects your personal style.

Key Takeaways

• Corbel shelves can be customized to fit different spaces and design aesthetics, offering a perfect blend of form and function.

• Mixing corbels with other materials, such as metal, reclaimed wood, resin, and glass, creates a unique, personalized look.

• Corbel shelves can be transformed into whimsical displays with creative staining and painting techniques, like VooDoo Gel Stain and Chalk Mineral Paint.

• In small spaces, corbel shelves provide a space-saving design, utilizing vertical space and adding character to the room.

Advertisement

• Corbel shelves can serve as a unique side table or display stand, ideal for showcasing decorative items like vases or books.

Elevating Decor With Corbel Shelves

By incorporating corbel shelves into your decor, you can add a touch of sophistication and elegance to any room, effortlessly elevating your space's overall aesthetic. Not only do they provide a stylish storage solution, but they can also serve as a unique side table or display stand.

Imagine placing a decorative vase or a few favorite books on a corbel shelf in your living room, adding a touch of personality to the space. In the bedroom, a corbel shelf can hold a few favorite novels or a decorative box, creating a cozy reading nook.

Corbel shelves are incredibly versatile, and their functionality knows no bounds. You can install them in your kitchen to hold cookbooks or spices, or in your office to display awards or framed photos. Whatever the purpose, corbel shelves are sure to add a touch of elegance and sophistication to any room.

Unique Corbel Shelf Designs

creative corbel shelf ideas

As you explore the world of corbel shelves, you'll discover that unique corbel shelf designs can take your decor to the next level, offering a perfect blend of form and function. These shelves can be customized to fit different spaces and design aesthetics, allowing you to add a personal touch to your home.

From vintage-inspired to modern minimalist, there are endless design possibilities for corbel shelves. You can find unique corbel shelf designs at stores like Home Depot, where you can browse through various styles and materials to find the perfect fit for your space.

Advertisement

Unique corbel shelf designs feature intricate carvings and ornate details for a decorative touch. These shelves offer a blend of functionality and style, adding character to any room. By incorporating unique corbel shelf designs, you can elevate the overall look and feel of your home decor.

With customization options available, you can create a one-of-a-kind piece that reflects your personal style. Whether you're looking to add a touch of elegance or a pop of color, unique corbel shelf designs can help you achieve the look you want.

Corbel Shelves in Small Spaces

efficient storage for small spaces

One of the biggest advantages of corbel shelves is that they're perfect for small spaces, where every inch counts. You can mount them in tight areas like narrow hallways or small bathrooms, adding storage without taking up valuable floor space. This is especially useful in compact living areas, where every small detail can make a big difference.

By utilizing vertical space, corbel shelves provide a stylish solution for displaying items, and their decorative design adds character to the room. Plus, they can be customized in size and finish to complement the aesthetics of any small room. Whether you're looking to add a touch of elegance to a tiny bathroom or create a cozy reading nook in a small bedroom, corbel shelves are an excellent choice.

With their space-saving design and versatility, they're an ideal solution for making the most of limited space. By incorporating corbel shelves into your small space, you can create a functional and stylish area that's perfect for relaxing or entertaining.

Mixing Corbels With Other Materials

blending corbels in design

You can take your corbel shelves to the next level by combining them with other materials to create a unique, personalized look that reflects your style. By mixing and matching different materials, you can create a one-of-a-kind design that elevates your space.

For instance, you can incorporate metal corbels with reclaimed wood for an industrial look that adds a touch of edginess to your dining room.

Advertisement

Alternatively, you can pair resin corbels with glass shelves for a contemporary style that exudes sleek sophistication. If you're going for a luxurious feel, consider pairing cast iron corbels with marble shelves for a dramatic, high-end aesthetic.

Or, for a classic look, combine bronze corbels with stone shelves for a timeless, elegant feel. The possibilities are endless, and the key is to experiment with different materials to create a look that's uniquely yours.

Whimsical Corbel Shelf Displays

whimsical shelf decorations displayed

Your mini corbel shelves are ready to be transformed into a whimsical display that adds a touch of personality to your space. With a little creativity, you can create an amazing display that showcases your unique style. To get started, you'll need 16 pine boards pre-cut to your desired length for the shelves. Add keyhole fasteners for easy installation, and then it's time to get creative with the finish.

Finish Option Description
VooDoo Gel Stain Achieve a rich, dark color with this gel stain
Chalk Mineral Paint Add a soft, vintage vibe with this paint
Black Wax Create a chippy, aged look with this wax

Use a combination of VooDoo Gel Stain and Chalk Mineral Paint to create a unique, two-toned finish. Then, apply Black Wax to achieve a chippy, aged look that adds depth and character to your shelves. With these simple steps, you'll have an amazing whimsical display that adds a touch of personality to your space.

Frequently Asked Questions

How to Style a Corbel?

When it comes to styling a corbel, you'll want to start by considering the overall aesthetic you're going for. Think about the room's color scheme and choose decorative items that complement it.

Then, mix and match different textures and heights to create visual interest. Don't be afraid to experiment with different arrangements and swap out items seasonally to keep the display fresh.

Advertisement

What Can You Do With One Corbel?

You're probably wondering what you can do with just one corbel. Well, surprisingly, a single corbel can be incredibly versatile.

You can use it as a decorative shelf bracket in kitchens, living rooms, or bedrooms, or even as a unique bookend or sconce to add decorative flair.

It can also support a small display shelf or a wall-mounted nightstand, or be repurposed as a hanging lamp or shelf below a mirror.

The possibilities are endless!

How Much Weight Can a Corbel Support?

When it comes to determining how much weight a corbel can support, you need to take into account the material and size. Typically, a corbel's weight capacity ranges from 20 to 100 pounds.

Advertisement

Solid wood corbels tend to be stronger, while resin or lightweight materials are less sturdy. Be sure to follow the manufacturer's guidelines for weight limits and take into consideration the distribution of weight, using proper mounting hardware for added support.

What Is the Ratio of Corbel to Shelf?

When constructing a shelf, you're basically building a bridge, and just like a bridge, it needs proper support.

Speaking of support, have you ever wondered what the ideal ratio of corbel to shelf depth is? Well, you're in luck! The recommended ratio is at least 2/3, ensuring your shelf can hold its own weight, literally.

This ratio provides the necessary stability, so your shelf doesn't become a leaning tower of, well, whatever you're storing.

Conclusion

As you've explored the world of creative corbel shelf ideas, remember that these architectural wonders are more than just decorative accents – they're bridges between form and function.

Advertisement

Like the subtle yet sturdy support they provide to walls, corbel shelves hold up your unique style, suspending it beautifully between the ordinary and the extraordinary.

So, go ahead, build your own creative bridge, and watch your space transform into a masterpiece of elegance and whimsy.

Continue Reading

Alfresco

Does Floor Area Include Alfresco? Understand the Calculations!

Uncover the mystery of whether floor area includes alfresco spaces, crucial for accurate property valuation and complying with building regulations.

Published

on

By

alfresco inclusion in calculations

When considering if floor area includes alfresco, it hinges on local regulations and building codes. Alfresco spaces vary in type, influencing floor area calculations. Specific criteria must be met to accurately include them. This impacts property valuation greatly and understanding guidelines is essential. Exclusion affects valuation and appeal, making clarity important. Measurement complexity arises from differing regulations, necessitating precise techniques. Professional consultation clarifies ambiguities and aligns with regulations for accurate calculations. Seek guidance on building codes and partner with experts for detailed insights into floor area calculations. For further details on this important aspect of property assessment, there's a wealth of information to explore.

Key Takeaways

  • Floor area calculations may or may not include alfresco spaces, subject to local regulations.
  • Alfresco areas impact property valuation but are typically excluded from official floor area measurements.
  • Understanding guidelines for including alfresco areas is crucial for accurate property valuation.
  • Consultation with professionals or local authorities helps navigate complexities in floor area calculations.
  • Building consultants assist in measuring and accounting for alfresco spaces to align with regulations.

Definition of Floor Area

When calculating floor area with Alfresco, understanding the definition of floor area is vital. In real estate, floor area typically encompasses the Gross Floor Area of a property, including enclosed and habitable spaces within a building. This measurement is important for determining the total living space available in a property and plays a significant role in property valuations and assessments.

Alfresco areas, which are outdoor living spaces often attached to a property, may or may not be included in the floor area calculation, depending on local regulations. In some jurisdictions, alfresco areas under the main roof are considered part of the Gross Floor Area. Additionally, fully enclosed and habitable alfresco areas may also be included in the floor area measurement, further impacting the total living space of a property.

To accurately calculate floor area with Alfresco, it's essential to check local building codes and definitions to ascertain whether alfresco areas are to be included in the measurement. This guarantees transparency and compliance with regulations regarding property assessments and valuations.

Types of Alfresco Spaces

outdoor living and design

To further understand the calculation of floor area with Alfresco, it's important to explore the different types of Alfresco spaces available in residential properties. Alfresco spaces can vary in their design and integration with the main structure of a building.

Those under the main roofline are typically included in the gross floor area calculation, contributing to the total square footage of the property. Fully enclosed alfresco areas that seamlessly blend with the main structure are usually counted in the floor area measurement. However, separate structures or alfresco spaces not under the main roofline may not be included in the gross floor area calculations.

Therefore, it's essential to grasp the nuances of how alfresco spaces are designed and connected to the main building to accurately determine the total floor area of a property. Understanding these distinctions is pivotal in ensuring precise calculations of the floor area that includes alfresco spaces.

Advertisement

Criteria for Inclusion

criteria for text inclusion

When considering the inclusion of alfresco areas in floor area calculations, various criteria must be met to guarantee accuracy. Factors such as the space being fully enclosed with walls and a roof play a vital role in determining its inclusion.

Understanding these criteria is essential for property evaluation and compliance with building regulations.

Alfresco Space Considerations

Consider the specific criteria for including alfresco spaces in floor area calculations to guarantee accuracy in measurements. Alfresco areas are typically not incorporated into gross floor area calculations, but there are exceptions based on local regulations. Fully enclosed alfresco spaces under the roof line might be included in the total floor area, while those with significant open sides, resembling carports, are usually excluded. To help you grasp these considerations better, let's look at a comparison table below:

Alfresco Area Type Inclusion in Floor Area Calculations
Fully Enclosed Alfresco May be included
Open-Sided Alfresco (e.g., Carport) Usually excluded
Covered Alfresco with Three Open Sides Typically not included
Alfresco with Roof Extension Considered in some cases

Understanding these distinctions will aid in accurately determining the square footage of a property, ensuring compliance with relevant regulations.

Alfresco Area Calculation

Understanding the criteria for including alfresco areas in floor area calculations is essential for accurately evaluating property square footage. Alfresco areas, typically considered outdoor living spaces, may not be included in the indoor floor space calculation if they're under the roof line.

However, fully enclosed alfresco areas with heating or cooling systems may be counted in the gross floor area square footage. The key factor determining the inclusion of alfresco areas in floor space calculations is whether they're enclosed and conditioned.

Advertisement

To guarantee accuracy, it's important to adhere to the specific criteria outlined by local regulations. By following these guidelines, you can determine whether the alfresco area contributes to the overall floor space of the property.

Impact on Property Valuation

property value fluctuations explained

The exclusion of alfresco areas from the gross floor area calculation can directly influence the valuation of your property. While alfresco areas can enhance the appeal and value of a property, they're typically not included in the official floor area measurement.

This means that when appraisers or real estate agents assess the value of your property, they wouldn't consider the alfresco area as part of the total square footage. However, they may still highlight the presence of an alfresco area as a desirable feature that could potentially increase the property's overall worth.

Understanding this distinction is important as it may impact how potential buyers perceive the value of your property. By comprehending what's included in the floor area calculation, you can better evaluate your property's worth and make informed decisions regarding its valuation.

Guidelines for Measurements

accurate measurements are crucial

When determining floor area measurements that factor in alfresco spaces, it's vital to adhere to specific guidelines to guarantee accuracy in property valuation.

Alfresco areas are commonly excluded from gross floor area calculations in residential properties unless they meet certain criteria.

The key factor in deciding whether an alfresco area should be included in floor area calculations is if it's under the main roofline and enclosed.

Advertisement

Enclosed alfresco spaces with features such as walls and a roof may be considered part of the gross floor area, while open outdoor spaces are typically left out.

It's essential to understand the definitions and guidelines related to alfresco areas to ensure precise floor area calculations in building projects.

Appraiser's Perspective

valuing property with precision

Considering alfresco areas in property valuation, appraisers typically factor in their design and functionality to determine their inclusion in the total square footage. These outdoor spaces, especially if integrated into the main living area, can have a substantial impact on the property's valuation and how it's perceived in the market. Appraisers carefully evaluate the alfresco areas that fall under the main roof line, analyzing their usability and design aesthetics.

Building Code Considerations

construction requirements and standards

Understanding how building codes classify alfresco areas is essential for accurate floor area calculations and regulatory compliance. Building code considerations can have a notable impact on whether alfresco spaces are included in the total floor area calculations.

Here are some key points to keep in mind:

  • Building codes may vary, but alfresco areas under the main roof line are often included in the total floor area calculation.
  • Local regulations and definitions play a key role in determining whether alfresco areas are included in the total floor area calculations.
  • Alfresco areas that are enclosed or integrated with the main living space may be counted as part of the gross floor area.
  • Alfresco areas that are separate structures or not under the main roof line are typically excluded from the gross floor area calculations.
  • The classification of alfresco areas can impact the overall square footage and compliance with regulations, so it's essential to be aware of the specific guidelines in your area.

Challenges in Calculation

complex mathematical problems tackled

When calculating floor area with alfresco spaces, challenges arise due to the need for clarification on whether to incorporate these areas in the gross floor area.

The complexity of the calculation increases when distinguishing between indoor and outdoor living spaces, necessitating meticulous attention to detail.

Understanding the nuances of alfresco inclusion is crucial to guarantee accurate and consistent square footage measurements.

Advertisement

Alfresco Inclusion Clarification

One potential challenge in calculating floor area arises when determining the inclusion of alfresco spaces in the total measurement for granny flats in NSW. Understanding whether alfresco areas under the roof line count towards the 60sqm limit is essential for accurate floor area calculations.

Including an alfresco area can provide additional living space beyond the allowance, impacting the overall size of the granny flat. Carports, typically not counted in the 60sqm calculation due to having three open walls, add complexity to the measurement process.

Strategic design adjustments play a key role in optimizing alfresco areas for added functionality within the total floor area. To navigate these challenges effectively, it's vital to grasp the regulations and council guidelines governing the inclusion of alfresco spaces in floor area calculations.

Calculation Complexity Overview

Understanding the complexities of calculating floor area with alfresco spaces can present challenges due to differing regulations and definitions across jurisdictions. Jurisdictions vary in whether they include alfresco areas in floor area calculations, leading to confusion for property owners and developers.

The heart of the issue lies in the need for precise measurement techniques to determine the inclusion of alfresco spaces in floor area calculations accurately. It's essential to grasp the nuances of local building codes and definitions to ascertain the impact of alfresco areas on floor area calculations definitively.

Advertisement

To navigate this intricate landscape, seeking guidance from professionals or local authorities is paramount. Consulting with experts can provide clarity on whether alfresco areas should be considered in the floor area calculation, ensuring compliance with the specific regulations governing the property.

Professional Consultation Benefits

professional guidance advantages highlighted

Seeking professional consultation when calculating floor area with alfresco spaces provides valuable benefits in ensuring accuracy and compliance with regulations. Building professionals offer expertise that can have a substantial impact on the calculation process.

Here are five key reasons why consulting with experts is essential:

  • Clarity: Professionals can clarify ambiguous definitions and guarantee a clear understanding of what constitutes alfresco space.
  • Guidance: Expert advice can lead you through the intricate web of local regulations, preventing costly mistakes and ensuring compliance.
  • Precision: Building consultants assist in accurately measuring and accounting for alfresco areas, minimizing errors in floor area calculations.
  • Compliance: Professional consultation ensures that your calculations align with regulations, reducing the risk of non-compliance and associated penalties.
  • Confidence: By consulting with experts, you can have trust in the accuracy and reliability of your floor area calculations, providing peace of mind during property assessments.

Frequently Asked Questions

What Is Included in Floor Area Calculation?

In floor area calculations, indoor spaces like bedrooms, living rooms, and kitchens are typically included. Alfresco areas may or may not be part of the calculation, depending on local rules. Check with authorities for specific property details.

What Is Not Included in Gfa?

You know what's not included in GFA calculations? Outdoor spaces like alfresco areas. GFA zeroes in on enclosed habitable spots, excluding non-enclosed areas. So, alfresco spaces are typically left out when crunching building measurements.

How Do You Calculate Flooring Area?

To calculate flooring area, measure the interior living spaces excluding outdoor areas like alfresco zones. This approach guarantees an accurate representation of usable space within the property. Understanding these distinctions is essential for evaluating the true square footage.

What Areas of the Structure Are Not Included in the Square Footage Calculation?

When calculating square footage, remember alfresco areas, garages, and carports are excluded. Understanding what's not included helps assess usable living space accurately. Focus on enclosed, habitable spaces to determine the structure's square footage.

Advertisement

Conclusion

In summary, when determining the floor area of a property, it's important to carefully consider whether alfresco spaces are included.

While these areas can enhance the overall value of a property, their inclusion in floor area calculations can vary depending on specific criteria.

Consulting with a professional appraiser or real estate agent can provide clarity and guarantee accurate measurements are taken.

Understanding the nuances of floor area calculations, including alfresco spaces, is essential for accurate property valuation.

Advertisement

Continue Reading

Trending