Connect with us

Home Decor

7 Stunning Topiary Design Ideas for Your Garden

Yearning for a show-stopping garden?

Published

on

topiary design ideas garden

Transform your outdoor space with these 7 stunning topiary design ideas for your garden! Revive classic shapes like spheres, cubes, and cones, or reveal whimsical animal designs like elephants and birds. Geometric patterns inspired by nature will create visually striking features, while framed masterpieces will elevate your garden's visual appeal. Modern twists on traditional designs and elegant entranceways with topiary will showcase your personal style. With a little creativity, you can create a captivating garden that boosts your home's curb appeal. As you explore these ideas, discover how to balance harmony and structure, and take your garden to the next level.

Key Takeaways

• Revive traditional topiary shapes like pyramids and spirals to enhance garden harmony and balance.

• Use wire frames to create whimsical animal designs, such as elephants, giraffes, and birds, adding charm to gardens.

• Incorporate geometric patterns and shapes, like spheres and cones, to create visually striking features in your garden.

• Conceal wire templates with foliage to create framed masterpieces, elevating garden visual appeal with creative shapes.

Advertisement

• Modernize topiary designs by incorporating fresh geometric shapes, unique plant choices, and contemporary twists on classic styles.

Classic Topiary Shapes Revived

As you stroll through modern gardens, you'll notice classic topiary shapes like spheres, cubes, and cones making a stylish comeback, adding structure and elegance to outdoor spaces. These timeless shapes aren't only aesthetically pleasing but also provide a sense of symmetry and balance in the garden. By incorporating classic topiary shapes into your design, you can create a focal point and add visual interest to your outdoor space. Reviving traditional topiary forms like pyramids and spirals can also enhance the harmony and refinement of your garden.

Classic topiary shapes are versatile and can complement various garden styles, from modern to traditional. They can be used as standalone pieces or combined with other design elements to create a unique look. When selecting a topiary shape, consider the overall aesthetic you want to achieve and the style of your garden.

With a little creativity, you can use classic topiary shapes to create a stunning outdoor space that reflects your personal style. By embracing these timeless design ideas, you can elevate your garden's beauty and create a welcoming atmosphere for years to come.

Whimsical Animal Designs Unleashed
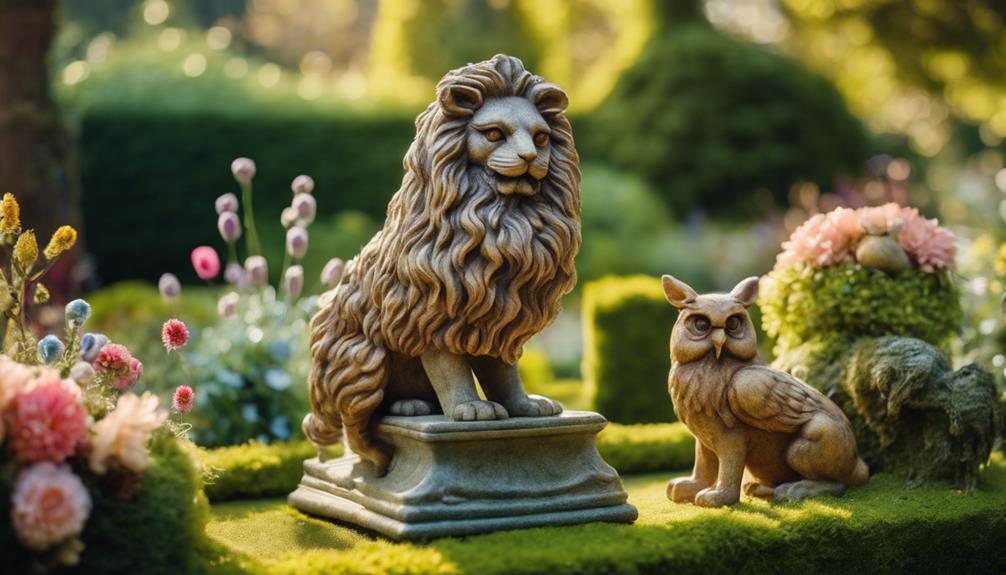
animal themed art collection released

As you explore the domain of whimsical animal designs, you'll discover a world of creative possibilities. From wire-framed wonders to feathered friends and woodland creatures, these topiary designs will transport you to a fantastical world.

Let's explore the points of Whimsy in Wire Frames, Feathered Friends Forever, and Woodland Creatures Abound, and uncover the secrets to bringing these enchanting designs to life in your garden.

Advertisement

Whimsy in Wire Frames

With wire frames, you can ignite your creativity and bring a touch of whimsy to your garden by shaping plants into fantastical animal forms that seem to spring to life. These wire frames provide a structured foundation for shaping plants into recognizable animal forms, allowing you to spark your creativity and bring a sense of enchantment to your garden. Popular animal designs include:

Animal Design Description Plant Type
Elephant Majestic and gentle, adding a touch of sophistication Boxwood or Holly
Giraffe Tall and playful, perfect for a whimsical touch Ivy or Clematis
Peacock Vibrant and colorful, adding a pop of color Flowering plants like Petunias or Geraniums
Monkey Mischievous and fun, great for a playful garden Trailing plants like Creeping Jenny or Sweet Potato Vine
Dragon Fierce and mythical, perfect for a dramatic statement Succulents like Aloe or Echeveria

Feathered Friends Forever

Take your topiary design to new heights with feathered friends that add a touch of personality to your garden, from majestic birds of paradise to playful parakeets, all waiting to be shaped and pruned into whimsical wonders.

In a topiary garden, these feathered friends can bring a sense of charm and whimsy, adding a playful touch to your landscape. To achieve these lifelike forms, careful pruning and shaping are essential.

You can feature a single, show-stopping topiary animal or scatter them throughout your garden for a fun surprise. Popular feathered friends in topiary design include peacocks, which can add a regal touch to your garden.

By incorporating these whimsical designs into your topiary garden, you'll create a unique and enchanting outdoor space that's sure to delight. So why not give your garden a personality boost with these charming feathered friends?

Advertisement

With a little creativity and pruning know-how, you can bring these topiary animals to life and make your garden a true showstopper.

Woodland Creatures Abound

You can create a whimsical woodland world in your garden by incorporating topiary designs featuring playful rabbits, mischievous squirrels, and curious birds that seem to come to life amidst your lush greenery.

With the help of a skilled topiary specialist, you can craft large topiary woodland creatures that will transport your visitors to an enchanted land.

Imagine strolling through your garden, surrounded by a menagerie of woodland creatures, each one meticulously sculpted from boxwoods, yews, or hollies. These whimsical animal topiaries can serve as focal points or accents in your garden, enchanting visitors with their intricate forms.

By incorporating these charming designs, you'll transform your outdoor space into a magical woodland paradise that delights both young and old.

Advertisement

Whether you're looking to add a touch of fantasy or simply want to create a unique conversation starter, woodland creatures abound in your topiary garden, bringing a sense of wonder and enchantment to your outdoor oasis.

Geometric Patterns in Nature
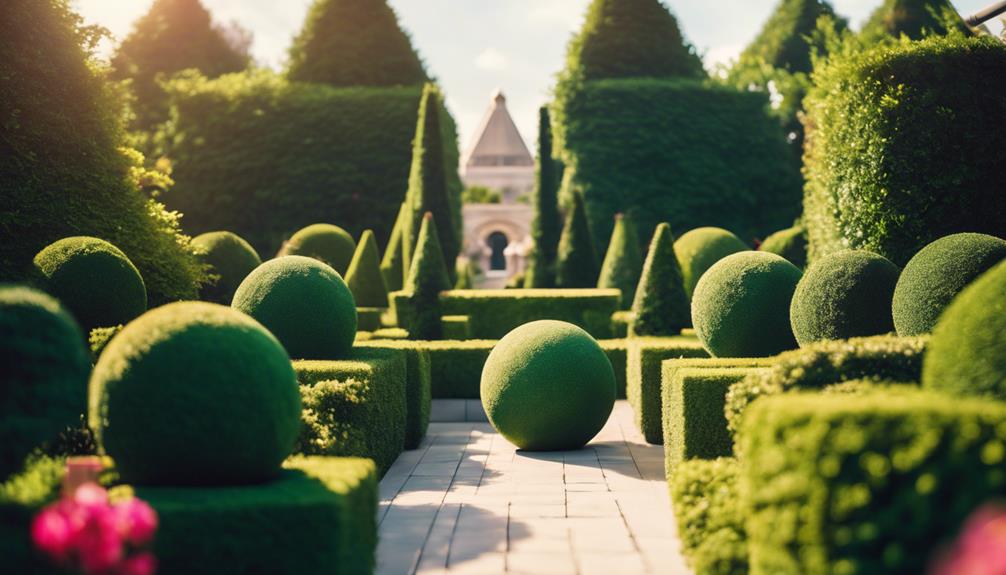
symmetry in natural designs

Nature's intricate designs inspire topiary artists to replicate geometric patterns, echoing the harmony of cubes, spheres, and cones found in the natural world. By incorporating these shapes into your garden design, you can create a visually striking and unique feature. Topiary offers a way to create visual contrast in your garden with simple geometric shapes, adding depth and interest to your outdoor space.

Here are some ways to incorporate geometric patterns into your topiary design:

  • Use frames to guide plants into creative shapes, with wire templates hidden inside the topiary for intricate designs.
  • Plant clipped evergreens in geometric shapes, such as spheres or cones, to mimic the Oriental shaping found in traditional Japanese gardens.
  • Create a topiary forest by planting a mix of various geometric shapes, creating a unique and dramatic garden feature.
  • Experiment with different geometric shapes, such as cubes or pyramids, to add visual interest to your garden.
  • Combine geometric shapes with other design elements, such as water features or statues, to create a cohesive and stunning garden design.

Topiary Forests for Dramatic Impact

topiary forest artistry display

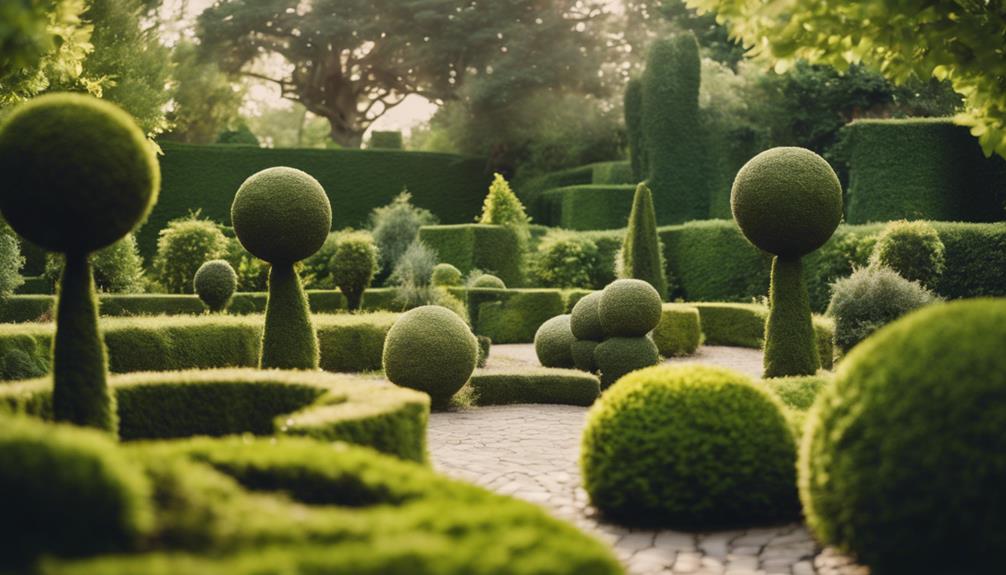
By grouping multiple geometric topiary shapes together, you can create a visually stunning topiary forest that adds depth, texture, and whimsy to your garden. These topiary forests can feature a mix of shapes and sizes, creating a mesmerizing impact that transforms your outdoor space.

Imagine a cluster of spiral-shaped trees alongside cylindrical and conical ones, forming a visually striking landscape that's sure to impress. By incorporating different geometric shapes, you can add texture and depth to your garden design, making it a unique and enchanting oasis.

You can arrange the topiary trees in patterns or clusters, further enhancing the aesthetic appeal of your garden. With a topiary forest, you can create a whimsical atmosphere that invites exploration and relaxation. By grouping these geometric shapes together, you can create a dramatic and alluring garden that's sure to become a focal point of your outdoor space.

Framed Masterpieces in the Garden
artistic display in nature

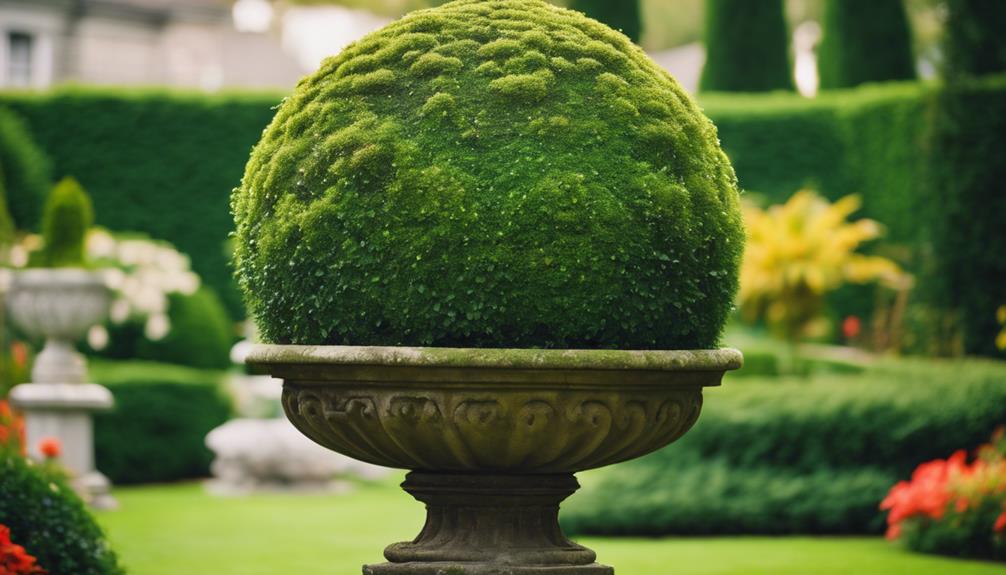
To elevate your garden's visual appeal, incorporate framed topiary masterpieces that cleverly conceal wire templates within the foliage, allowing you to craft creative shapes that become instant focal points. By using frames, you can create stunning topiary designs that add a touch of elegance to your formal gardens. Evergreen shrubs, like boxwood or yew, are ideal for framing, as they can be easily shaped and maintained.

Here are some ideas to get you started:

Advertisement
  • Design a topiary hedge atop a privacy hedge for a unique and decorative look in your garden.
  • Use lollipop bay trees, box topiary balls, and pompom conifers to add charm and elegance to your garden.
  • Replicate Oriental shaping by incorporating clipped evergreens in Japanese gardens for a touch of traditional and serene beauty in your outdoor space.
  • Create a topiary forest with various geometric shapes to add depth and dimension to your garden while showcasing your creativity and style.
  • Experiment with different frame shapes and sizes to create a one-of-a-kind topiary masterpiece that reflects your personal style.

Modern Twists on Traditional Designs
innovative fusion of styles

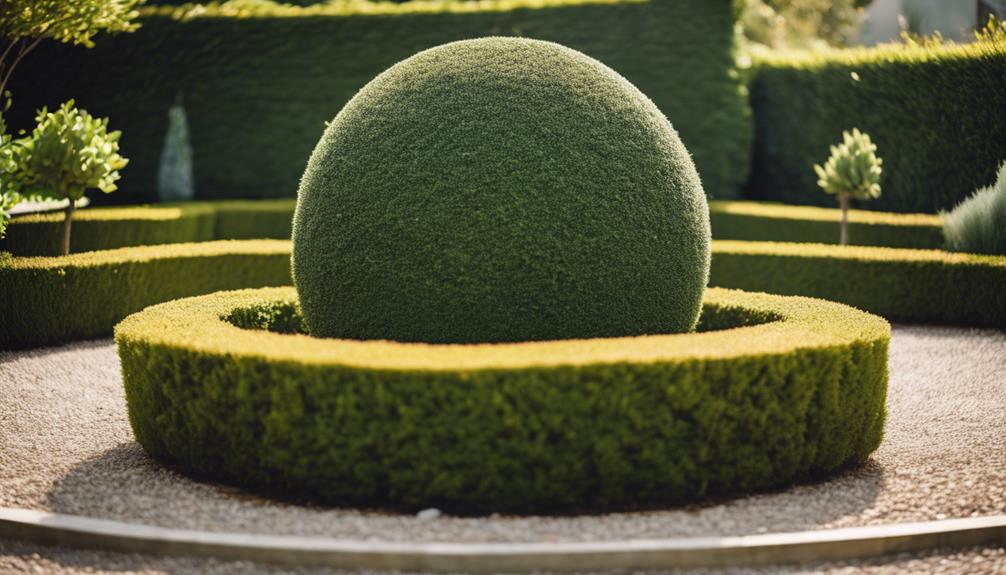
You can modernize traditional topiary designs by incorporating fresh, geometric shapes and unique plant choices that add a contemporary spin to classic styles. As a garden designer, you can experiment with modern twists like lollipop bay trees, box topiary balls, and pompom conifers to create a fresh take on traditional designs.

To add visual contrast in your garden, try using simple shapes such as cubes, spheres, or cones to add interest and dimension. You can also replicate oriental shaping with clipped evergreens in Japanese gardens to bring a touch of zen to your outdoor space.

For a whimsical and enchanting element, plant a topiary forest with various geometric shapes. Use frames for creative shapes, utilizing wire templates hidden inside topiary to achieve unique and intricate designs in your garden.

Cloud pruning, a technique that involves pruning plants to create soft, cloud-like shapes, can also add a modern touch to your topiary designs. By incorporating these modern twists, you can create a unique and captivating garden that showcases your creativity and style.

Elegant Entranceways With Topiary

beautiful topiary at entrance

Create a stunning first impression by placing topiary at your entranceway, where it can elegantly flank your doorway and guide visitors' eyes towards your home's main entrance. This thoughtful touch will elevate your garden ideas and add structure to your outdoor space.

By incorporating topiary in containers at your entry points, you'll create a welcoming and stylish touch that sets the tone for your entire garden. Here are some tips to keep in mind:

  • Use topiary to create symmetry by flanking your doorway, enhancing the architectural features of your home.
  • Choose shrubs that match the style of your home, whether traditional or modern.
  • Consider using topiary as a focal point to draw visitors' attention to your main entrance.
  • Don't be afraid to experiment with different shapes and sizes to add visual interest.
  • Topiary can be tailored to fit your personal style, from formal to whimsical.

Frequently Asked Questions

How to Design a Topiary Garden?

When designing a topiary garden, you'll want to start by choosing a style that suits your taste, whether it's classic, modern, or themed. Consider popular themes like animal sculptures or geometric shapes for a unique look.

Next, decide on an approach: will you use frames to guide plant growth or opt for a more natural look?

Advertisement

How Can I Make My Garden Look Amazing?

You want to make your garden look amazing, but where do you start? Begin by creating visual contrast with simple shapes like cubes, spheres, or cones to add interest and beauty to your outdoor space.

Don't be afraid to get creative with unique topiary designs that reflect your personal style. By incorporating stunning topiary elements, you'll be well on your way to crafting a garden that's truly show-stopping.

What Plant Makes the Best Topiary?

When selecting the best topiary plant, you'll want to contemplate the shape and structure you envision.

Yew is great for tall, spiraling creations, while boxwood is perfect for defined 3-D shapes.

Bay trees work well for stemmed pieces that bush out at a specific height.

Advertisement

Bayberry, with its dense foliage, is ideal for intricate designs.

Ultimately, the right plant for you'll depend on the unique look you're going for.

How Do I Make My Garden Aesthetically Pleasing?

As you commence on crafting an aesthetically pleasing garden, envision a masterpiece where every element harmonizes in perfect symphony.

You'll want to balance textures, colors, and shapes to create visual interest. Start by incorporating a mix of plants with varying heights, widths, and bloom times to add depth and visual appeal.

Then, use topiary designs to add a touch of whimsy and sophistication, drawing the eye to focal points in your garden.

Advertisement

Conclusion

As you incorporate these stunning topiary design ideas into your garden, remember that topiary art has been a staple of landscaping for centuries. In fact, did you know that topiary has been a part of European garden design since the 16th century?

By embracing both classic and modern designs, you'll create a unique outdoor space that's sure to impress. Whether you opt for whimsical animals or elegant entranceways, your topiary creations will unquestionably become the focal point of your garden, elevating its beauty and sophistication.
Continue Reading
Advertisement

Home Decor

10 Creative Ideas for Repurposed Planters

Magically transform discarded items into unique planters that showcase your personal style and add whimsy to your outdoor or indoor space.

Published

on

repurposed planters innovative ideas

You can breathe new life into old items by repurposing them as quirky planters. Transform boots, wine bottles, and toolboxes into charming planters that add personality to your garden or indoor spaces. Upcycle vintage items, like wheelbarrows and galvanized tubs, for a unique touch. Get creative with hanging planters made from colanders, baseball hats, and jeans. Even old fabrics like jeans can be repurposed into planters. With a little imagination, you can turn trash into treasure and showcase your personal style in your outdoor or indoor space. And that's just the beginning – there are even more innovative ideas waiting to be discovered.

Key Takeaways

• Transform old boots, wine bottles, and toolbox into quirky planters that add personality to gardens and reduce waste.

• Mix and match galvanized planters for visually appealing arrangements that add rustic charm to outdoor spaces.

• Upcycle old fabrics like jeans into hanging planters that add a whimsical touch to gardens and indoor spaces.

• Add personal touches to planters with embroidery or appliques to showcase creativity and personality in outdoor spaces.

Advertisement

• Repurpose vintage items like wheelbarrows and crates into unique planters that add enchantment and elegance to gardens and patios.

Boot Up Your Garden Style

Transform your old boots into quirky planters that add a pop of color and personality to your garden, and give your outdoor space a unique style that reflects your green thumb.

By repurposing old boots as planters, you're not only reducing waste but also adding a whimsical touch to your garden decor. Brightly colored rain boots, for instance, can match your garden's color scheme while showcasing your favorite plants. This sustainable approach to gardening is a great way to reuse old footwear and add visual appeal to your outdoor space.

You can fill your repurposed boot planters with flowers, herbs, or succulents, depending on your personal style and the overall aesthetic you want to achieve. With a little creativity, old boots can be transformed into charming planters, making them a fun and creative way to introduce greenery and personality to your garden.

Turning Trash Into Treasure

upcycling plastic waste creatively

By repurposing discarded items as planters, you'll not only reduce waste but also infuse your garden with a touch of personality and whimsy. This creative approach to gardening is all about turning trash into treasure, giving new life to items that would otherwise end up in landfills.

A repurposed garden isn't only eco-friendly but also offers a unique way to express your personal style. With a little creativity, you can transform everyday objects into charming planters that add character to your outdoor space.

Advertisement

Think beyond traditional planters and explore the possibilities of upcycled materials. Old boots, wooden crates, and even plastic bottles can be transformed into functional and visually appealing plant containers.

Whimsical Wine Bottle Planters

whimsical upcycled wine planters

As you explore the world of whimsical wine bottle planters, you'll discover that the key to creating unique and eye-catching containers lies in the details.

You'll need to select the perfect wine bottle, add a personal touch with paint and decorations, and finish it off with a rustic flair using twine and ribbon embellishments.

Wine Bottle Selection

You can turn your favorite wine bottles into charming planters that add a touch of personality to your garden or indoor space. By upcycling wine bottles, you'll not only reduce waste but also create a unique container for your plants.

When selecting wine bottles for repurposing, consider the following:

  1. Bottle shape and size: Look for bottles with interesting shapes or unique labels that will add visual appeal to your planter.
  2. Material: Opt for bottles made from eco-friendly materials or those with a unique texture that will add character to your planter.
  3. Color: Choose bottles with a color that complements your outdoor or indoor decor, or those that will provide a pop of color to your space.

Painting and Decorating

Reveal your creativity and turn your wine bottle planters into one-of-a-kind pieces of art by expressing your imagination with paint and decorations.

As you design your repurposed planter, remember that the possibilities are endless. You can paint your wine bottle planters in vibrant colors or patterns to enhance their visual appeal.

Advertisement

For a more personalized touch, decorate your planters with designs such as flowers, patterns, or labels that reflect your personal style.

Upcycling wine bottles into planters isn't only budget-friendly and eco-friendly but also allows you to add a touch of creativity to your garden or indoor space.

By painting and decorating your wine bottle planters, you can create unique pieces that showcase your artistic side.

Whether you're a seasoned artist or a DIY enthusiast, the process of transforming a discarded wine bottle into a beautiful repurposed planter is both fun and rewarding.

Twine and Ribbon Embellishments

Wrap twine or ribbon around your repurposed wine bottle planter to infuse a touch of whimsy, creating a charming, eclectic look that adds character to your garden or indoor space. This simple yet effective embellishment can elevate your container gardens, making them stand out from the ordinary.

Advertisement

With twine and ribbon available in a wide range of colors and textures, you can easily match them to your planter's style and theme.

Here are some benefits of using twine and ribbon embellishments:

  1. Easy to apply: Simply wrap the twine or ribbon around the bottle neck or body, securing it with glue or a knot.
  2. Versatile: Choose from a variety of colors and textures to match your planter's style and theme.
  3. Adds character: Twine and ribbon embellishments can add a touch of personality to your repurposed wine bottle planters, making them truly unique.

Toolbox Blooms and Beauty

garden tools in bloom

As you explore the world of toolbox planters, you'll want to take into account a few essential factors to make sure your blooms thrive. First, you'll need to arrange your toolbox planter to maximize space and accessibility, which is where our toolbox organization tips come in handy.

Next, selecting the right plants for your toolbox planter is essential, and we'll guide you through the process with our expert advice on toolbox plant selection.

Toolbox Organization Tips

You can breathe new life into an old toolbox by converting it into a planter that not only adds a touch of vintage charm to your garden but also helps you get creative with your storage. By repurposing an old toolbox, you're not only giving new life to a discarded item but also creating a unique planter that adds character to your outdoor space.

To guarantee your toolbox planter remains organized and functional, here are a few tips to keep in mind:

Advertisement
  1. Clean and prepare the toolbox: Before adding soil and plants, make sure to clean the toolbox thoroughly and add a layer of pebbles or rocks for proper drainage.
  2. Choose the right plants: Select low-maintenance plants like succulents that thrive in containers with built-in drainage.
  3. Add a personal touch: Consider adding a coat of paint or decorative hardware to give your toolbox planter a personalized look.

Toolbox Plant Selection

With a few carefully selected blooms, your toolbox planter can burst with vibrant color and charming appeal. As you choose your flowers, consider low-maintenance options that thrive in well-draining soil, which is essential for preventing wood rot in your repurposed toolbox.

Succulents, herbs, and flowering annuals like petunias or pansies are great choices, as they require minimal watering and care. These plants won't only add a pop of color to your outdoor space but also create a stunning visual contrast against the rustic toolbox. By selecting plants that complement the weathered charm of your toolbox, you'll create a unique and engaging display that showcases your creativity and flair for upcycling.

Toolbox Drainage Hacks

Your toolbox planter's drainage system is crucial to preventing waterlogged soil and wood rot, so make sure to drill holes in the bottom of the box to create a well-functioning drainage system. This simple step will guarantee that your plants thrive and your toolbox remains in great condition. By allowing excess water to escape, you'll prevent water from accumulating in the soil and causing damage to the wood.

To take your toolbox drainage to the next level, consider these hacks:

  1. Add a layer of small rocks or pebbles at the bottom of the toolbox to improve drainage and prevent soil from washing away.
  2. Line the toolbox with a breathable material, such as landscape fabric or coconut coir, to help excess water escape and prevent it from accumulating in the soil.
  3. Elevate the toolbox by placing it on blocks or feet to improve airflow and allow water to drain more easily.

Vintage Chic in the Garden

charming garden party aesthetic

Embracing the charm of bygone eras, vintage items can be transformed into one-of-a-kind planters that infuse your garden with a nostalgic ambiance. You can repurpose antique toolboxes, chicken feeders, and farmhouse sinks into unique plant containers that add character to your outdoor space. These salvaged items not only reduce waste but also bring a touch of history to your garden design.

Vintage Item Planter Idea
Old Boots Plant a small succulent or herb in each boot for a whimsical display
Whiskey Barrels Transform into a self-watering planter for a lush herb garden
Metal Antiques Use as a statement piece for a small shrub or flower arrangement
Coffee Mugs Create a mini garden in each mug for a charming centerpiece

Galvanized Glamour Planters

shiny metal flower pots

Galvanized planters, with their distressed, vintage charm, can add a touch of rustic sophistication to your outdoor space, perfect for those seeking a more laid-back, country-inspired garden style. These planters aren't only visually appealing but also durable and long-lasting, making them an ideal choice for both cottage and modern gardens.

Whether you're looking to create a whimsical or elegant atmosphere, galvanized planters can adapt to your style.

To elevate your garden's aesthetic, consider the following ideas:

Advertisement
  1. Mix and match: Combine galvanized planters of varying sizes and shapes to create a visually appealing arrangement.
  2. Add a pop of color: Incorporate brightly colored flowers or greenery to contrast with the planters' rustic charm.
  3. Get creative with containers: Repurpose old wheelbarrows or galvanized tubs as planters to add a unique touch to your garden.

Wheelbarrow Wonders Unveiled

exploring ancient civilizations tools

As you explore the world of repurposed planters, you'll discover that wheelbarrows can be transformed into charming garden features that add a touch of enchantment to your outdoor space.

By restoring vintage charm and incorporating them into your garden decor, you can create a unique and alluring atmosphere.

With a little creativity, you can turn an old wheelbarrow into a beautiful planter that showcases your favorite flowers and plants.

Vintage Charm Restored

You can breathe new life into vintage wheelbarrows by transforming them into whimsical planters that add a touch of nostalgia to your outdoor space. By repurposing these old gardening tools, you'll not only reduce waste but also create a unique conversation starter for your garden or patio.

The vintage charm of these planters lies in their rustic, distressed look, which adds character to your outdoor decor.

Here are some tips to keep in mind when creating your wheelbarrow planter:

Advertisement
  1. Clean and prepare the wheelbarrow: Give it a good scrub to remove any dirt or debris, and consider adding a coat of protective sealant to preserve the metal.
  2. Choose the right plants: Select plants that thrive in containers, such as herbs, succulents, or flowering plants.
  3. Add drainage and stability: Fill the bottom of the wheelbarrow with pebbles to ensure good drainage and stability.

Whimsical Garden Decor

Transform your outdoor space into a whimsical oasis by turning a vintage wheelbarrow into a stunning floral display that showcases your creativity and adds a touch of personality to your garden.

A wheelbarrow garden is a creative and charming way to display an abundance of vibrant flowers, overflowing with color and life. Take inspiration from photos by Jacquelyn McGilvray, which beautifully arrange plants in a repurposed wheelbarrow.

Fill the wheelbarrow with an abundance of flowers, creating a stunning and eye-catching garden feature that's sure to impress. By upcycling an old wheelbarrow, you'll not only add a unique touch to your garden but also reduce waste and create a visually appealing display.

This whimsical garden decor is perfect for those who want to think outside the box and create a one-of-a-kind outdoor space. So, get creative and turn that old wheelbarrow into a beautiful work of art that reflects your personality and style!

Hanging Gardens of Delight

glorious babylonian garden paradise

Elegance descends from above with hanging gardens that suspend beauty in mid-air, inviting you to reimagine the ordinary as extraordinary planters. You can create stunning displays that defy gravity and add a touch of whimsy to your outdoor or indoor space.

Here are a few creative ideas to get you started:

  1. Upcycled Colanders: Fill colanders with coco liner, rocks, soil, and plants, then hang them with twine for a unique planter.
  2. Hanging Hat Gardens: Transform old baseball hats into flower pot covers by cutting holes for plant stems, adding a touch of quirkiness to your decor.
  3. Jean Pocket Planters: Upcycle old jeans to display petunias, filling the pockets with unamended dirt or packing peanuts for a charming display.

Sewing Up Some Greenery

stitching together green beauty

As you've explored the whimsical world of hanging gardens, now turn your attention to upcycling old fabrics, where the humble sewing kit can become a powerful tool for creating unique planters.

One creative way to repurpose old fabrics is by transforming old jeans into hanging planters for petunias. Simply cut the legs of the jeans into desired shapes, sew the bottoms shut, and fill with potting soil and your chosen plants. You can also get creative with embroidery or appliques to add a personal touch to your planter.

Advertisement

This is a great way to give new life to old clothes and reduce waste. By sewing up some greenery, you can create a beautiful and eco-friendly planter that showcases your creativity and love for nature.

Rustic Charm in a Planter

chic vintage plant display

Dig into your storage shed or scour local flea markets to uncover hidden gems that can be repurposed into planters with a dash of rustic charm. These unique containers can add a touch of character to your garden or indoor space. Look for old metal items like toolboxes, tubs, or wheelbarrows that can be transformed into planters.

Here are a few ideas to get you started:

  1. Vintage wheelbarrows: Fill an old wheelbarrow with flowers, herbs, or succulents for a charming display.
  2. Distressed wooden crates: Add a touch of rustic charm to your patio or porch with a planter made from an old wooden crate.
  3. Old metal benches: Upcycle an old metal bench into a planter, perfect for showcasing a small herb garden or a few potted plants.

When choosing your repurposed planter, consider the style and material that fits your garden's aesthetic. With a little creativity, you can turn an old, discarded item into a beautiful planter that adds rustic charm to your outdoor space.

Frequently Asked Questions

How to Repurpose Old Planters?

When you're wondering how to repurpose old planters, start by giving them a thorough cleaning to remove dirt and residue.

Then, get creative! You can paint or decorate them to match your garden decor, turn them into hanging planters or vertical gardens, or use them as storage containers for garden tools.

You can even transform them into unique water features or bird baths. The possibilities are endless, and with a little imagination, you can breathe new life into those old planters.

Advertisement

What Can You Do With Planters Besides Plants?

You might be surprised to know that 75% of households have unused planters lying around. Now, you're wondering what to do with them besides plants. Well, the possibilities are endless!

You can transform them into unique decorative pieces, functional items like candle holders or storage containers, or even outdoor seating. Get creative and think beyond the garden – you can repurpose planters to add a personal touch to your home and outdoor spaces.

How to Upcycle Plant Pots?

When upcycling plant pots, you're not limited to their original purpose. You can transform old items into unique planters.

Look for containers with adequate drainage to guarantee your plants thrive.

Sand, paint, or seal your repurposed planters to safeguard them from the elements and enhance their appeal.

Advertisement

Be cautious of containers that may leach harmful chemicals into the soil.

What Can I Do With Old Plastic Planters?

As you stand amidst the remnants of last season's garden, surrounded by worn-out plastic planters, you wonder what to do with them.

Don't toss them just yet! You can breathe new life into those old planters. You can repurpose them as storage containers, compost bins, or even bird feeders.

Get creative and give them a makeover with a fresh coat of paint or decorations. The possibilities are endless, and with a little imagination, you can turn trash into treasure.

Conclusion

As you've explored these 10 creative ideas for repurposed planters, you've likely envisioned your own garden transformed into a unique oasis. Imagine strolling through your yard, surrounded by vibrant blooms and eclectic planters, each with its own story to tell.

Advertisement

The rusty wheelbarrow, now overflowing with flowers, whispers tales of summers past, while the wine bottle planters sparkle like tiny jewels, reflecting the beauty of creative reuse.

Continue Reading

Alfresco

How Much to Tile Alfresco? Budgeting Tips!

Prepare your alfresco tiling budget with expert tips to save money and enhance your outdoor space – discover cost-effective strategies here!

Published

on

By

estimating alfresco tiling costs

To budget for tiling your alfresco, calculate based on square footage, tile type, installation complexity, labor, and extra materials. Consider factors like tile material cost, installation intricacy, and long-term maintenance for efficient budgeting decisions. Different types of outdoor tiles vary in price and quality, ranging from ceramics to natural stones. Labor costs and complexity impact overall expenses considerably, requiring detailed planning and contractor engagement. Prioritize quality materials for durability, reducing maintenance costs over time. To save money, opt for larger standard tiles, compare labor quotes, and plan layouts wisely. For more detailed insights into cost-efficient alfresco tiling, explore further.

Key Takeaways

  • Choose cost-effective materials like concrete or ceramic tiles to stay within budget.
  • Consider labor costs and complexity for installation to avoid unexpected expenses.
  • Factor in additional costs for grout, sealants, and substrate preparation in your budget.
  • Opt for larger, standard tiles and simple layouts to reduce material and labor expenses.
  • Research, plan wisely, and compare quotes to find a balance between quality and affordability.

Alfresco Size Considerations

When tiling your alfresco, take into account the size of the area as it directly impacts your overall budget for materials and installation. The square footage of your alfresco plays an important role in determining the cost of tiling. Larger spaces will require more tile, increasing both material expenses and labor costs.

Additionally, when considering the design of your alfresco, intricate patterns or custom layouts can escalate installation expenses. Opting for outdoor tile materials such as natural stone or porcelain may also impact your budget, as these materials generally cost more than ceramic tiles.

Furthermore, don't forget to include additional expenses like substrate preparation, grout, sealants, and any necessary repairs or adjustments in your budgeting calculations. By carefully evaluating the size of your alfresco and factoring in these cost considerations, you can effectively plan your tiling project within your financial constraints.

Types of Outdoor Tiles

outdoor tile variety guide

Thinking about outdoor tiles for your alfresco project? There are three popular types to choose from: ceramic, concrete, and natural stone.

Ceramic tiles offer a wide range of prices, from $14 to $83 per square foot, depending on quality. Concrete tiles, priced between $5 to $15 per square foot, provide durability at a lower cost. Natural stone tiles like slate or travertine boast a luxurious appearance but come with a higher price tag, ranging from $20 to $50 per square foot.

When selecting outdoor tiles for your alfresco area, key factors to take into account include water absorption rating, slip resistance, and abrasion resistance. These factors will impact the durability and maintenance requirements of your outdoor tiles, ensuring they're suitable for the specific conditions of your alfresco space.

Advertisement

Installation Complexity Factors

factors affecting installation complexity

Installing tiles in an alfresco area can vary in complexity based on factors such as outdoor exposure, surface preparation, and pattern intricacy.

The outdoor exposure of the area plays an important role in determining the level of weatherproofing and durability required for the tiles, adding to the installation complexity.

Adequate surface preparation is essential to establish a stable foundation for the tiles, especially in outdoor environments prone to temperature fluctuations and moisture.

Moreover, intricate tile patterns demand a higher level of expertise and precision from contractors, increasing the overall complexity of the installation process.

Proper planning and communication with contractors are crucial to address these complexities effectively.

Labor Costs Breakdown

in depth analysis of expenses

When examining the breakdown of labor costs for tiling an alfresco area, it's crucial to grasp the overview of labor expenses and the factors that impact these costs. Factors such as project complexity, material selection, outdoor installation requirements, and design intricacies all play a role in determining the final labor expenses.

Analyzing these cost factors will help you develop a thorough budget that accurately reflects the labor component of your alfresco tiling project.

Advertisement

Labor Expenses Overview

Labor costs for tiling an alfresco typically range from $5 to $14 per square foot, with variations based on project complexity and location. When considering labor expenses for your alfresco tiling project, understanding the breakdown of these costs is crucial:

  1. Labor Rates: The rates charged by tiling labor can greatly impact your overall labor budget. Factors such as experience, demand, and even the time of year can influence these rates.
  2. Additional Costs: Besides the base labor rates, you might need to budget for other expenses like substrate preparation, grouting, and sealing the tiles. These additional costs can add up quickly and shouldn't be overlooked in your tiling budget.
  3. Local Contractors: Engaging with multiple local contractors to obtain labor quotes and estimates can provide valuable insights into the labor expenses associated with your alfresco tiling project. It's advisable to compare these quotes carefully to make an informed decision while budgeting for labor costs.

Cost Factors Analysis

Properly understanding the breakdown of labor costs is essential when budgeting for tiling an alfresco area. Labor costs for tiling an alfresco area typically range from $5 to $14 per square foot. Labor costs for tile installation can vary from $30 to $120 per hour. Additional costs for tile removal can average $2 to $4 per square foot. Backer board installation can add $5 to $8 per square foot to the total labor costs. Proper budgeting for labor costs is vital to guarantee a successful tiling project within your financial means. To help you visualize the breakdown of labor costs, here is a table summarizing the key cost factors to take into account:

Labor Costs Average Rates Additional Costs
Tile Installation $5 – $14/sq ft Tile Removal
Hourly Rates $30 – $120/hr Backer Board Install

Additional Material Costs

increased costs for materials

When considering the budget for tiling your alfresco, keep in mind the additional material costs that may impact your expenses.

Factors such as material quality and labor expenses play a significant role in determining the overall cost of your tiling project.

Understanding these points will help you make informed decisions and plan your budget effectively for a successful alfresco tiling endeavor.

Material Quality

Investing in higher quality materials for tiling your alfresco area can greatly impact the total cost due to the additional expenses associated with premium options. When considering material quality for outdoor tiling, it's important to prioritize durability and longevity.

Here are some key points to keep in mind:

Advertisement
  1. Premium Materials: Opting for natural stone or porcelain can elevate the appearance of your alfresco area but may come at a higher price point ranging from $14 to $83 per square foot for outdoor tiling.
  2. Additional Costs: Beyond the tile itself, don't overlook the costs of quality sealants, grout, and substrates. These elements play a significant role in ensuring the longevity and resistance of your outdoor tiling.
  3. Long-Term Savings: While investing in premium materials may increase the initial cost, the durability and resistance they offer can lead to long-term savings by reducing maintenance and replacement expenses. Prioritizing quality now can pay off in the future.

Labor Expenses

For tiling your alfresco area, labor expenses play a significant role as they typically range from $5 to $14 per square foot, in addition to factoring in costs for substrate, grout, and sealants. The complexity of the project and the type of tile pattern chosen can impact labor expenses by 10% to 20%. Proper preparation of the outdoor area, including land grading and substrate installation, can incur additional expenses. It is important to obtain quotes from local contractors to accurately budget for labor costs when tiling your alfresco space.

Factors Impact on Labor Expenses
Tile Pattern 10% to 20% variation
Project Complexity Increased labor costs
Substrate Prep Additional expenses

Budget-Saving Tips

frugal financial management tips

To save on costs when tiling your alfresco, consider opting for cost-effective materials such as ceramic or porcelain tiles. These options are durable and come in various styles to suit your aesthetic preferences while being budget-friendly.

Here are three key budget-saving tips to keep in mind:

  1. Use Standard Tile Sizes: Choosing standard tile sizes helps minimize cutting and waste, reducing overall material expenses greatly.
  2. Plan Your Layout Wisely: Avoid intricate patterns that can lead to increased labor costs during installation. A simple layout can save you both time and money.
  3. Compare Contractor Quotes: Obtain quotes from multiple contractors to make sure you're getting a competitive price for your alfresco tiling project. This comparison can help you find the best deal without compromising on quality.

Frequently Asked Questions

How Much Should I Budget for Tile Installation?

For tile installation, budgeting varies based on material and labor costs, ranging from $14 to $83 per square foot. Factor in additional expenses like old tile removal and substrate prep to plan effectively.

How Much Does It Cost to Tile a 20X20 Room?

To tile a 20×20 room, costs range from $4,400 to $14,080. Labor rates, material types like ceramic or natural stone, and added expenses for complex patterns or grout selection impact the overall budget considerably.

How Much Does It Cost to Lay 1000 Sq Ft of Tile?

Laying 1000 sq ft of tile can cost between $14,000 to $83,000, depending on materials and labor. Factors like complexity and preparation can increase expenses by 10-20%. Proper planning and communication with contractors are key.

How Much to Tile 500 Square Feet?

Tiling 500 square feet can cost between $7,000 and $14,000, depending on materials and labor. Labor rates range from $5 to $14 per square foot. Factors like tile type and installation complexity impact the total cost.

Conclusion

To sum up, budgeting for a tiled alfresco involves careful consideration of various factors such as:

Advertisement
  • Size
  • Tile types
  • Installation complexity
  • Labor costs
  • Additional materials

By following these budget-saving tips, you can guarantee that your alfresco tiling project stays within your financial means.

Remember, proper planning and research are key to achieving a beautifully tiled outdoor space that enhances the overall aesthetics and functionality of your home.

Continue Reading

Home Decor

DIY Rustic Coat Rack in 7 Easy Steps

Create a unique and functional rustic coat rack in just 7 easy steps, and discover the secrets to making it truly exceptional.

Published

on

rustic coat rack tutorial

You're about to create a rustic coat rack that exudes charm and functionality in just 7 easy steps. First, gather essential supplies like sturdy wood, durable hooks, and screws. Next, prepare the wood surface by sanding, cleaning, and stripping away any old finish. Then, assemble the frame, attach the hooks securely, and add a decorative touch with unique knobs or monograms. Mount the coat rack safely using heavy-duty hooks and anchors, and finally, inspect and refine your creation. By following these steps, you'll have a one-of-a-kind coat rack that complements your home's rustic charm – and with a little more effort, you'll uncover the secrets to making it truly exceptional.

Key Takeaways

• Choose the right wood and durable hooks to ensure a sturdy and visually appealing coat rack.

• Sand and clean the wood thoroughly to create a smooth surface for a rustic finish.

• Assemble the frame by cutting and joining wood boards, and pre-drill holes for hooks and screws.

• Attach hooks evenly spaced and securely, testing stability with varying weights for peace of mind.

Advertisement

• Mount the coat rack to the wall using heavy-duty hooks, anchors, and locating wall studs for strength.

Gather Essential Supplies

What essential supplies will you need to create a rustic coat rack that's both functional and visually appealing? To get started, you'll need a few key materials.

First, choose a sturdy and visually appealing wood that fits your rustic design. This will serve as the backbone of your coat rack, so select a type that's both durable and aesthetically pleasing.

Next, you'll need some durable hooks that complement your rustic design. These will be responsible for holding your jackets, hats, and bags, so make sure they're up to the task.

You'll also need screws to attach the hooks to the wood. Be sure to select screws that are the correct size for secure attachment.

Advertisement

Additionally, you'll need a drill to make the necessary holes for the screws, as well as a measuring tape to guarantee accurate measurements.

With these essential supplies in hand, you'll be well on your way to creating a beautiful and functional rustic coat rack.

Prepare the Wood Surface

sand and smooth wood

As you prepare the wood surface, you'll need to focus on sanding, cleaning, and removing any old finishes to guarantee a smooth, even base for your rustic coat rack.

You'll want to sand the wood smooth, removing any rough edges or imperfections, and then thoroughly clean the surface to eliminate dust and debris.

Sand the Wood Smooth

With your DIY coat rack project underway, you'll need to sand the wood smooth to prepare the surface for staining or painting. This important step guarantees a uniform and polished finish for your rustic wood coat rack.

To begin, grab a piece of fine-grit sandpaper and start smoothing out any rough spots or imperfections on the wood surface. Remember to sand in the direction of the wood grain to avoid creating scratches or marks on the surface. Be meticulous and sand all edges and corners evenly, making sure to cover every inch of the wood.

Advertisement

Once you've finished sanding, wipe down the wood with a tack cloth or damp cloth to remove any dust or debris. Properly sanding the wood will create a clean canvas for staining or painting in the next steps of your DIY project.

Remove Old Finish Completely

You'll need to strip away any existing finish or imperfections on the wood surface to ensure a successful stain or paint job, so grab your sanding tools and get to work. Sanding the wood surface thoroughly is essential to remove any old finish, ensuring a smooth surface for your new coat. Use a sanding block or orbital sander to efficiently remove the old finish, and don't forget to sand all corners and edges to create a seamless surface.

Sanding Tool Effectiveness
Sanding Block 8/10
Orbital Sander 9/10
Hand Sanding 6/10
Electric Sander 8.5/10

Clean the Surface Thoroughly

Clean the wood surface thoroughly with a damp cloth or a mild cleaning solution to remove any residues or contaminants that might impact the finish. This important step guarantees the wood is free of dust, dirt, and debris, allowing the stain to adhere evenly and preventing imperfections in the finish. You'll be surprised at how a simple cleaning can make a huge difference in the final result.

After cleaning, take a few minutes to lightly sand the wood surface. This will smooth out any rough patches or imperfections, giving your coat rack a professional-looking finish. Remember, properly preparing the wood surface is key to achieving a smooth, flawless finish.

Assemble the Coat Rack Frame

constructing a coat rack

Measure and cut the wood boards to the desired length for the coat rack frame, taking care to guarantee the pieces fit together seamlessly.

As you assemble the coat rack frame, it's crucial to make sure the boards fit together securely, creating a sturdy structure that can hold the weight of your coats and accessories. To do this, join the boards using screws or wood glue, making sure they're level and straight by using a level during assembly.

Advertisement

Consider adding additional support or braces for extra stability, depending on the size of your coat rack.

As you work on your DIY project, remember to predrill holes before attaching the hooks or mounting hardware to prevent splitting the wood.

Attach Rustic Hooks Securely

hang towels with care

With your coat rack frame assembled, it's time to add the rustic hooks that will hold your outerwear, and it's important to attach them securely to guarantee they can bear the weight of your coats and accessories.

To do this, you'll need to pre-drill pilot holes in the wood to prevent splitting when attaching the rustic hooks. This step is essential, as it will make sure the hooks hold firmly and don't damage the wood.

Place the hooks evenly spaced on the front of the coat rack for a balanced look. When attaching the hooks, make sure the screws are long enough to secure them firmly to the wood.

Once the hooks are attached, test the stability of the coat rack by hanging items of varying weights to make sure the hooks are securely attached. This will give you peace of mind, knowing your coat rack can hold everything from light scarves to heavy coats.

Advertisement

Add a Decorative Touch

enhancing with decorative elements

Add a personal touch to your rustic coat rack by incorporating decorative elements that reflect your personal style and complement your home's aesthetic. You can enhance the aesthetic appeal of your coat rack with decorative elements like rustic hooks or unique knobs. Consider adding a shelf above the coat rack for additional storage and display space.

Decorative Elements Description
Rustic Hooks Add a touch of rustic charm to your coat rack
Shelf Provide additional storage and display space
Monogrammed Hooks Personalize your coat rack with customized hooks
Mirror Add a functional and decorative touch
Distressed Finish Achieve a unique, weathered look

You can also personalize the coat rack with monogrammed hooks or painted designs for a unique look. Experiment with different finishes, such as distressed paint or weathered wood, to achieve a desired decorative effect. By incorporating these decorative elements, you can create a rustic coat rack that not only serves a functional purpose but also adds a touch of personality to your home's decor.

Mount the Coat Rack Safely

secure coat rack installation

Now that your rustic coat rack is complete, it's time to securely attach it to the wall.

You'll want to explore wall anchor options that fit your specific needs, and master secure mounting techniques to guarantee your coat rack doesn't become a safety hazard.

Wall Anchor Options

You'll need to select the appropriate wall anchor to guarantee your DIY rustic coat rack stays securely mounted on your drywall. A sturdy wall anchor is essential to prevent your coat rack from crashing to the floor, taking your coats, hats, and bags with it.

When choosing a wall anchor, take into account the weight capacity of your coat rack. Here are three common wall anchor options to ponder:

  1. Plastic Expansion Anchors: Suitable for light to medium weight items, these anchors provide a secure hold without damaging the drywall.
  2. Toggle Bolts: Ideal for heavier items, toggle bolts can support more weight and are a great option for coat racks with multiple hooks.
  3. Molly Bolts: Providing strong support, molly bolts are versatile and can be used on various wall types, making them a great choice for your DIY project.

Remember to check the weight capacity of the wall anchors to make sure they can hold your coat rack securely. By selecting the right wall anchor, you'll enjoy a sturdy and reliable coat rack that will serve you well for years to come.

Secure Mounting Techniques

With your wall anchor chosen, it's time to focus on secure mounting techniques to make sure your DIY rustic coat rack stays firmly in place. You want to guarantee that your coat rack can hold the weight of your jackets, hats, and accessories without falling off the wall. To achieve this, it's important to follow some essential mounting techniques.

Advertisement
Mounting Technique Description Importance
Use heavy-duty hooks Provides stability and support High
Locate wall studs Adds strength and durability High
Pre-drill holes Prevents wall damage and ensures secure attachment Medium

When mounting your coat rack, make sure to pre-drill holes in the wall for screws to prevent damage and ensure a secure attachment. It's also important to check the weight capacity of the mounting hardware to ensure it can support the coat rack. If wall studs are not available for mounting, consider using anchors for additional support. By following these mounting techniques, you can rest assured that your rustic DIY coat rack will remain securely in place.

Final Touches and Inspection

final inspection before completion

Sand the assembled boards thoroughly to achieve a smooth and even surface for staining, making sure that every inch of the wood is prepared for the rustic look you're aiming for.

Now, it's time to add the final touches to your DIY rustic coat rack project.

Next, apply a coat of your preferred stain color evenly to enhance the rustic look of the coat rack. Consider adding multiple coats of stain for a darker finish or to achieve the desired color depth.

Here are some important final steps to keep in mind:

  1. Install rustic hooks onto the front of the coat rack with even spacing for hanging items, such as coats, hats, and bags.
  2. Confirm that the coat rack is securely mounted to the wall using heavy-duty mounting hooks for stability and safety.
  3. Double-check that all parts are securely attached and the coat rack is level.

With these final touches, your DIY rustic coat rack is now complete and ready to hold your favorite coats, hats, and accessories.

This project is a great example of how DIY projects can add a personal touch to your home decor, and with a little creativity, you can create a unique coat hanger that reflects your personal style.

Advertisement

Frequently Asked Questions

How Can I Make My Own Coat Rack?

You're looking to create your own coat rack from scratch. That's a great DIY project!

To get started, decide on the design and material you want to use. Measure and cut the wood to the desired length, then pre-drill holes for the screws that will attach the hooks.

Choose rustic hooks for a farmhouse-style look, and don't forget to install heavy-duty mounting hooks for stability.

What Wood to Use for a Coat Rack?

When choosing wood for your coat rack, you're spoiled for options. Did you know that reclaimed barn wood is a top pick, with 70% of DIYers opting for its unique, weathered charm?

Consider oak, pine, or cedar for their durability and aesthetic appeal. Make sure the wood is thick enough to support the weight of coats and items, and don't forget to treat or seal it to prevent warping or damage over time.

Advertisement

How to Make Wooden Coat Hooks?

When creating wooden coat hooks, you'll want to select sturdy wood, like oak or maple, to guarantee durability. Use a drill to create evenly spaced holes for the hooks, then securely attach them using screws or nails.

Consider adding a protective finish, like varnish or lacquer, to prevent damage. You can also customize the hooks by staining or painting them in a color that complements your design, adding a personal touch to your project.

What Is the Spacing for Coat Rack Hooks?

When determining the spacing for your coat rack hooks, you'll want to take into account a few factors. Typically, hooks should be spaced between 5-7 inches apart to accommodate different sizes of coats and accessories.

This range allows for a balanced and visually appealing look, while also ensuring efficient organization and easy access to your belongings.

Conclusion

As you step back to admire your handiwork, the rustic coat rack's distressed finish and rugged hooks seem to transport you to a cozy cabin in the woods. Coincidentally, the exact same atmosphere you envisioned when you started this DIY project.

Advertisement

With every coat and hat hung neatly, the rustic charm is undeniable. You've not only created a functional piece but also a conversation starter.

Give yourself a pat on the back – you've successfully transformed a few wooden planks into a one-of-a-kind masterpiece.

Continue Reading

Trending