When combining chalk paint and antiquing wax, we carefully prepare our furniture piece by cleaning and sanding it, then prime if necessary. We stir chalk paint well for consistency and apply it in thin, even layers. After it's fully dry, we use a natural bristle brush to apply antiquing wax, experimenting with layering, blending, and highlighting techniques. We enhance details with wax, accentuating intricate spots and blending for a seamless look. By following these steps and avoiding common mistakes, we achieve a beautiful, matte finish that adds depth and character to our refinished furniture piece – and that's just the beginning.
Key Takeaways
• Clean and prepare the furniture surface before applying chalk paint for better adhesion and a smooth finish.
• Apply chalk paint in thin, even layers, allowing each layer to dry before adding the next for a desired finish.
• Use a natural bristle brush to apply antiquing wax, blending and layering for a rich, aged appearance.
• Accentuate intricate details with wax, applying over soft wax for a blended look, and buffing off excess for a smooth finish.
• Ensure chalk paint is fully dry before applying antiquing wax, and avoid overlapping wax layers to prevent a tacky finish.
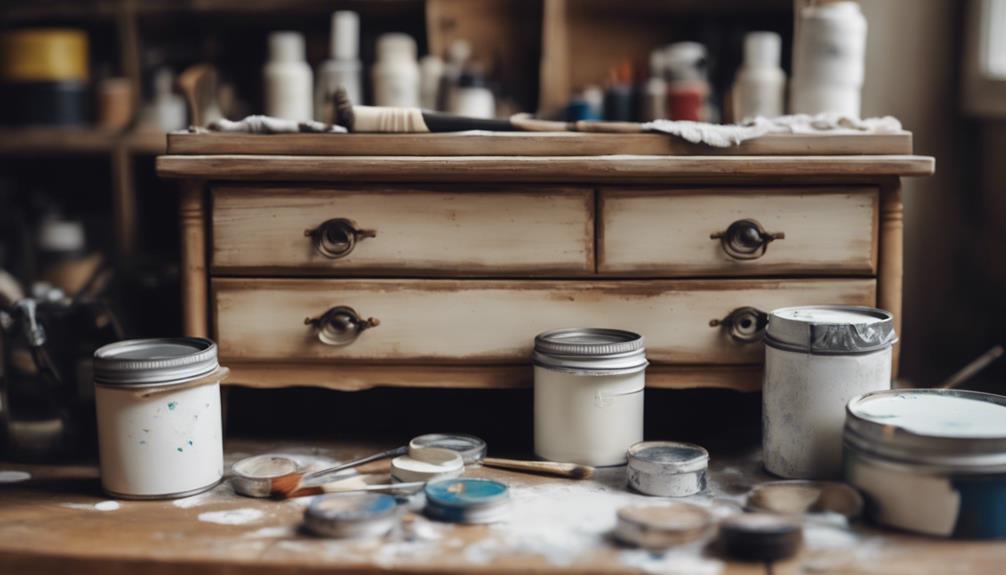
Preparing Your Furniture Piece
We start by giving our furniture piece a thorough cleaning, wiping away dirt and grime with a mixture of hot water, dish soap, and vinegar to guarantee a strong bond between the surface and our chalk paint. This vital step ensures our paint adheres properly, resulting in a beautiful, long-lasting finish.
Next, we inspect the furniture for any rough spots, sanding them down to create a smooth surface. If necessary, we apply a primer to further enhance paint adhesion.
With our surface prepped, we're ready to stir our chalk paint, making sure to mix it well for a consistent finish. We choose a high-quality brush, such as an Annie Sloan brush, to apply our paint, working in a well-ventilated area to prevent inhaling fumes.
As we apply each coat, we allow it to dry for 20-30 minutes, ensuring a smooth, even application. By following these preparatory steps, we set ourselves up for success, paving the way for a stunning, dark-finished piece that will showcase our antiquing wax beautifully.
Applying Chalk Paint Basics
As we start applying Chalk Paint, we'll focus on the essential steps to guarantee a successful transformation of our furniture piece.
First, we'll prep the surface to create an ideal canvas for painting, and then we'll apply the Chalk Paint, working from top to bottom to prevent drips and unevenness.
Prep the Surface
Before applying chalk paint, we clean the surface thoroughly to establish a strong bond between the paint and the material. We mix hot water, dish soap, and vinegar to create a solution that effectively removes dirt and grime. This guarantees our Chalk Paint adheres smoothly and evenly.
Next, we sand any rough spots to create a smooth surface, and if needed, apply a primer to ensure a top-notch painting experience. According to Annie Sloan, proper surface preparation is crucial to achieve a professional finish.
We also remember to stir our Chalk Paint well before using it to ensure a consistent color and texture. By following these surface prep steps, we set ourselves up for success and a beautiful, long-lasting finish. With our surface ready, we're now ready to move on to the next step in our Chalk Paint project.
Paint It On
With our surface properly prepared, we grab our Chalk Paint and get ready to express our creativity. Applying Chalk Paint is a breeze, and we love the versatility it offers. We can use it on various surfaces, from wood to metal to plastic, without needing to prime or sand beforehand. The paint dries quickly, allowing us to achieve a layered, opaque finish with ease.
To get started, we simply dip our brush into the paint and apply it to our piece of furniture using smooth, even brush strokes. We can choose from a range of colors and finishes, from soft pastels to rich, dark hues. For a more distressed look, we can layer the paint and then sand it down to reveal the underlying layers.
Here are some tips to keep in mind:
- Work in thin, even layers to achieve the desired color and finish.
- Use a high-quality brush to minimize streaks and ensure smooth coverage.
- Don't be afraid to experiment with different techniques and finishes – that's the beauty of Chalk Paint!
Antiquing Wax Techniques Explained
We'll explore three primary techniques for applying antiquing wax to achieve a rich, aged look: layering, blending, and highlighting.
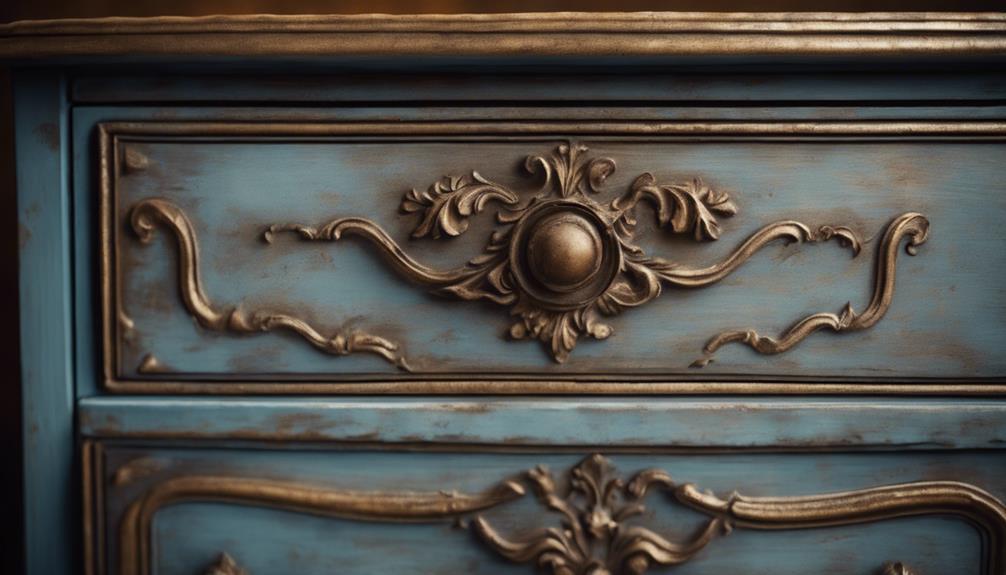
When using Chalk Paint and antiquing wax, we can create a beautiful, vintage-inspired finish on our furniture. To apply antiquing wax, we use a natural bristle brush to reach intricate spots and create a unique, aged appearance. The key to success lies in buffing off excess wax and applying it carefully to achieve a smooth, authentic antique finish.
We can also experiment with layering dark wax over Chalk Paint to create a deeper, richer look. By blending the wax into the paint, we can create a seamless, aged appearance. Highlighting specific details with antiquing wax adds depth and character to our furniture pieces.
With practice and patience, we can master the art of using antiquing wax for furniture refinishing, achieving a truly unique and beautiful result.
Enhancing Details With Wax
How do we draw attention to the intricate details of our furniture pieces and add depth to their overall appearance? By using antiquing wax, we can highlight the intricate details and add depth to our furniture pieces. This is especially true when paired with chalk paint, which provides a beautiful, matte finish.
To achieve the best results, we need to apply the wax correctly. Here are a few tips to keep in mind:
- Use a natural bristle brush to reach and accentuate the intricate spots of the furniture.
- Apply wax over soft wax to create a blended and textured look in the nooks and crannies of the furniture.
- Buff off excess wax after application to achieve a smooth and polished finish.
Common Mistakes to Avoid
When exploring the world of chalk painting, it's important to avoid common mistakes that can compromise the final result. One of the most critical errors is applying too much antiquing wax, which can lead to a dark, splotchy finish. Make sure to apply the dark wax in moderation, as excessive application can ruin the entire piece.
Using chalk paint, we must make sure the paint is fully dry before applying the wax to prevent smudging. Additionally, overlapping wax layers excessively can cause a sticky or tacky feel on the furniture. Brush every section thoroughly to avoid uneven coverage, and avoid using low-quality brushes that can leave streaks.
Finishing Touches and Tips
As we progress to the final stages of our project, we're excited to share our expertise on the finishing touches and tips that will enhance our chalk paint and antiquing wax creations.
From mastering wax application techniques to achieving the desired patina and ensuring sealing and protection, we'll explore the essential details that make all the difference.
Wax Application Techniques
We take our wax application to the next level by mastering the techniques that bring out the best in our chalk paint creations. When it comes to wax application, we need to get it just right to achieve that perfect finish.
To get started, we apply a thin layer of Clear Wax or Dark Wax, depending on the desired effect, using a clean cloth or buffing pad. Then, we use circular motions to buff the wax, ensuring an even distribution and a smooth finish.
Here are some key wax application techniques to keep in mind:
- Use buffing pads for efficient wax application and blending
- Opt for less abrasive materials like pads to prevent damaging the painted surface
- Finish with a quick wipe down using a clean rag to remove any excess wax
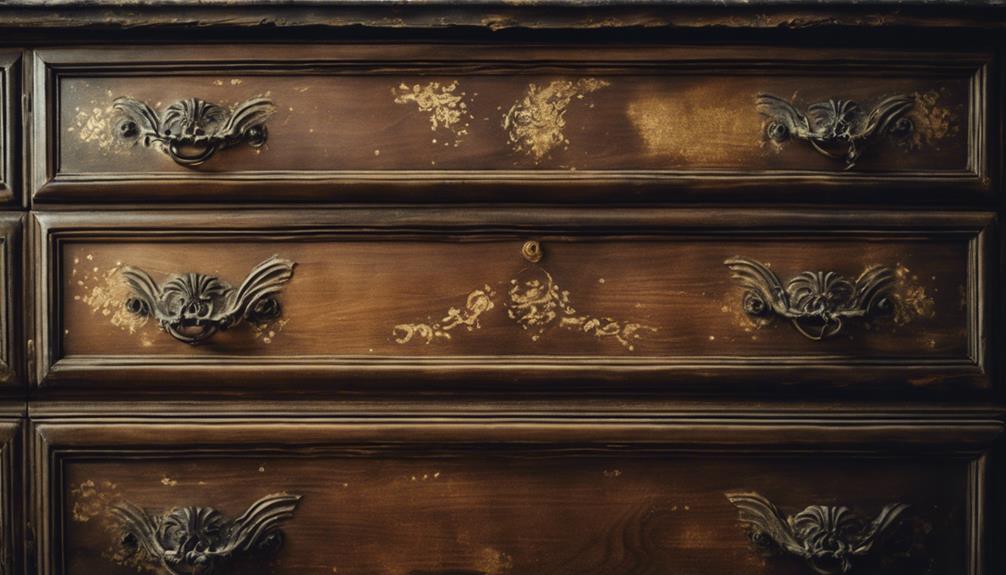
Achieving Desired Patina
By combining the right techniques and materials, we can achieve a beautiful, authentic patina that adds depth and character to our chalk paint creations.
When using chalk paint, we can elevate our pieces to the next level by incorporating antiquing wax. To achieve a natural, aged look, we apply a thin layer of dark wax over clear wax, allowing us to customize the level of antiquing to our liking.
We then use a lint-free cloth to wipe back excess dark wax, focusing on corners, edges, and details to create a subtle, matte finish. This technique allows us to replicate the natural aging effect that occurs on painted furniture over time.
Sealing and Protection
Finishing touches are essential, and sealing our chalk paint creations with the right products guarantees they remain protected and beautiful for years to come.
When it comes to sealing and protection, we need to take into account the curing period of Chalk Paint Wax, which takes up to 2 weeks to fully cure, although it dries in 24 hours. During this time, we should use it cautiously to prevent damage.
Here are some key points to keep in mind:
- Use Chalk Paint Wax for durability and easy maintenance once fully cured.
- Explore Chalk Paint Lacquer for extra protection on high-traffic surfaces.
- Annie Sloan Stockists can supply all necessary materials for our sealing and protection needs.
When painting furniture, sealing is vital to ensure our creations withstand the test of time. We can choose between Clear Wax and Dark Chalk Wax, depending on the desired finish.
Frequently Asked Questions
How to Use Antique Wax With Chalk Paint?
We're thrilled to immerse ourselves in the world of antiquing! When it comes to using antique wax, we're wondering how to achieve that perfect, aged look – do we apply it all over or just on details?
Can You Antique Over Chalk Paint?
Like master chefs adding the perfect spice, we ask, can you antique over chalk paint? Absolutely! We can apply antiquing wax to add depth, character, and a vintage flair to our beautifully painted pieces.
Can You Mix Chalk Paint With Wax?
We don't recommend mixing chalk paint with wax as it can alter the paint's texture and adhesion, affecting the finish and durability; instead, we apply wax over dry chalk paint in thin coats for a professional look.
When to Use Dark Wax on Chalk Paint?
We typically use dark wax on chalk paint when we want to add depth, dimension, and an aged look to our furniture, carefully applying it to highlight details and achieving a vintage vibe.
Conclusion
As we conclude our journey through the world of chalk paint and antiquing wax, it's astonishing to realize that the very same techniques used by professionals can be mastered by anyone willing to learn.
'The key to a great finish isn't the product, but the process,' notes furniture restoration expert, Amy Howard. By following these guidelines, we've successfully transformed a piece of furniture into a stunning work of art, and so can you.