Connect with us

Wall Art and Decor

How Much Does It Cost Paint Interior House

Fascinated by the idea of painting your home's interior? Dive into the varying costs per square foot and room size to make an informed decision.

Published

on

interior house painting cost

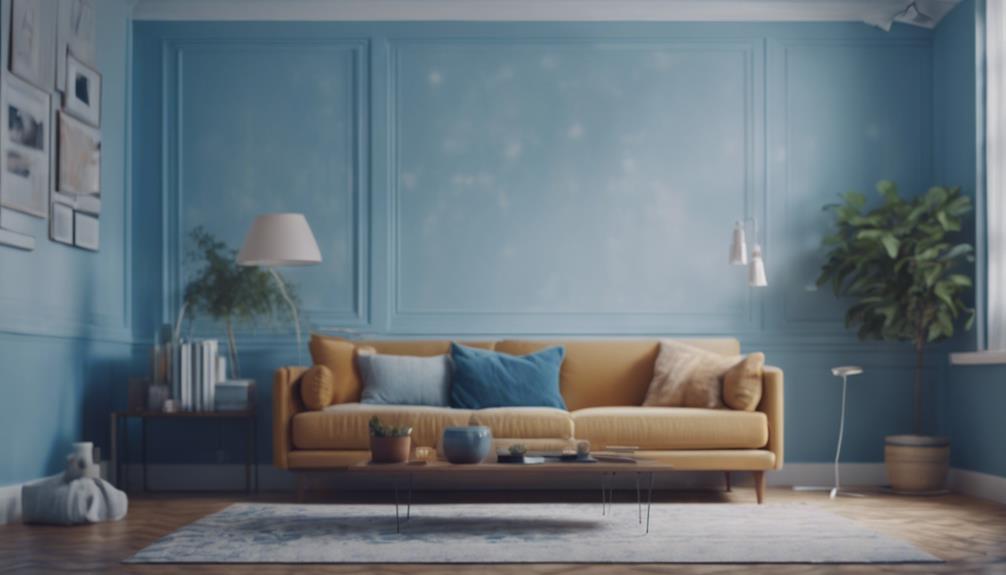
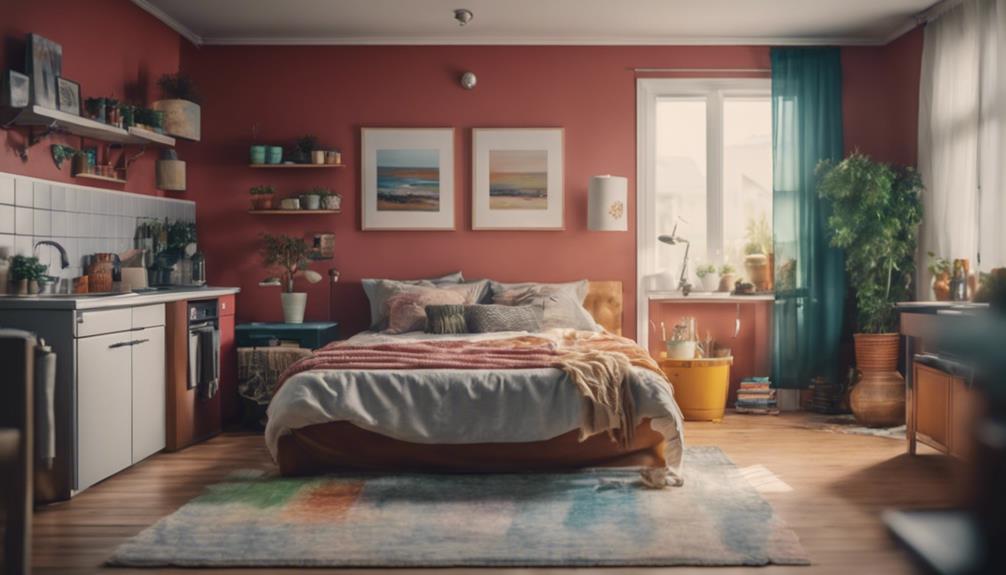
To paint the interior of your house, costs can vary. The average cost per square foot is $2.75, increasing to around $4.69 for professional work. Factors like room height, repairs, and your location influence the overall cost. DIY projects start at $300 for supplies, while professionals charge $20 to $50 per hour. Room size and complexity play a role in pricing: small rooms from $50 to $150, with larger areas like dining rooms ranging from $600 to $1,000. Many considerations can impact the total cost, so make effective planning to manage expenses wisely.

Key Takeaways

  • Average cost: $2.75 to $4.69 per sq ft
  • Factors: room size, repairs, painting quality
  • DIY vs. professional: labor vs. time costs
  • Room variations: small to large rooms
  • Additional costs: materials, labor, prep work

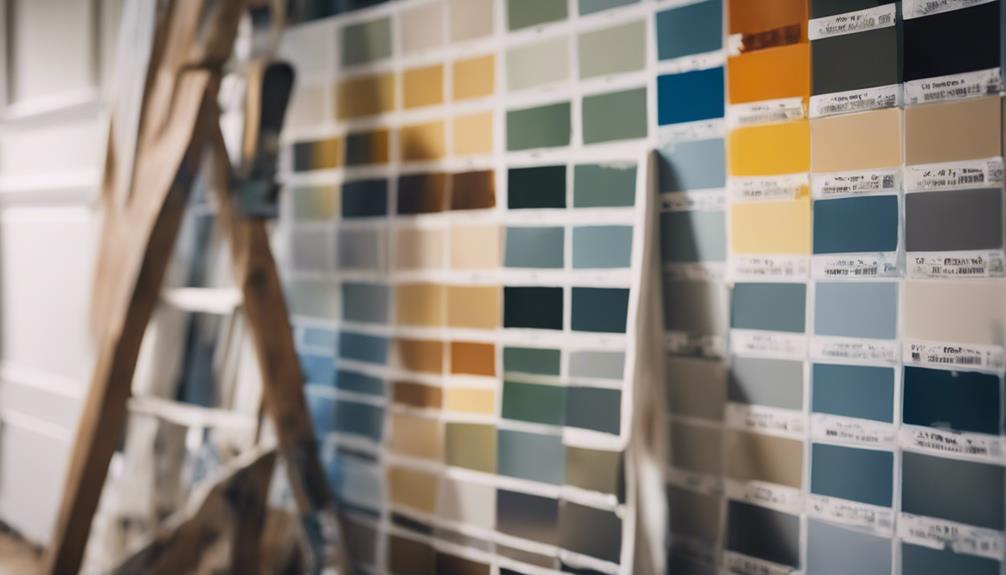
Average Interior Painting Cost by Square Foot

interior painting cost breakdown

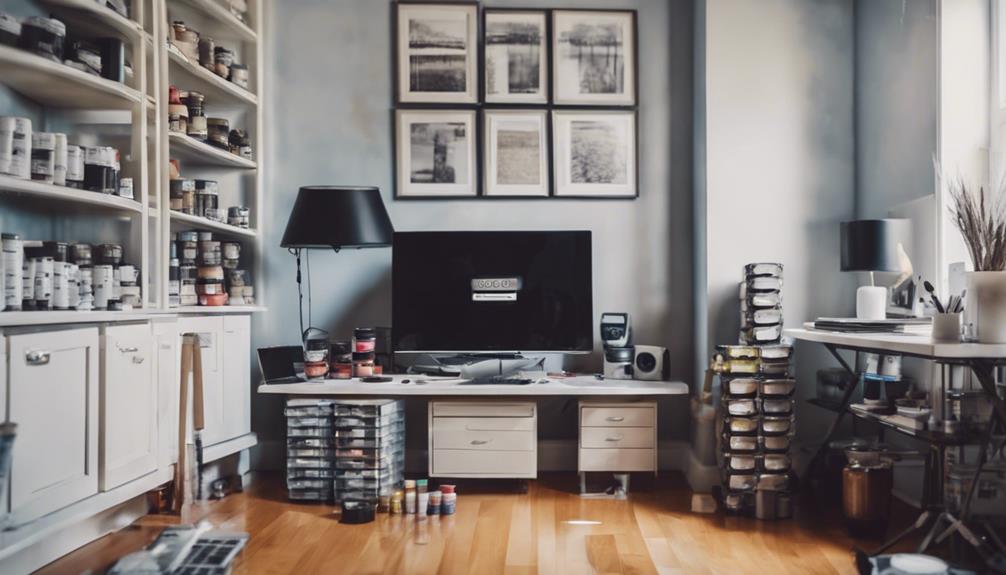
When painting the interior of a house, the average cost per square foot is $2.75. This cost includes painting walls, trim, and ceilings. Factors such as room height and ease of access can influence the overall cost of the project. If repairs are needed before painting, this can also increase the total cost.

Keep in mind that prices for interior painting can vary depending on different markets and regions. Hiring a professional for interior painting may raise the cost to around $4.69 per square foot, but it guarantees a high-quality finish. Professionals have the expertise to handle various challenges that may arise during the painting process. They can also offer advice on the best paint options for different rooms in your house.

Consider these factors when budgeting for your interior painting project to achieve the desired results within your financial means.

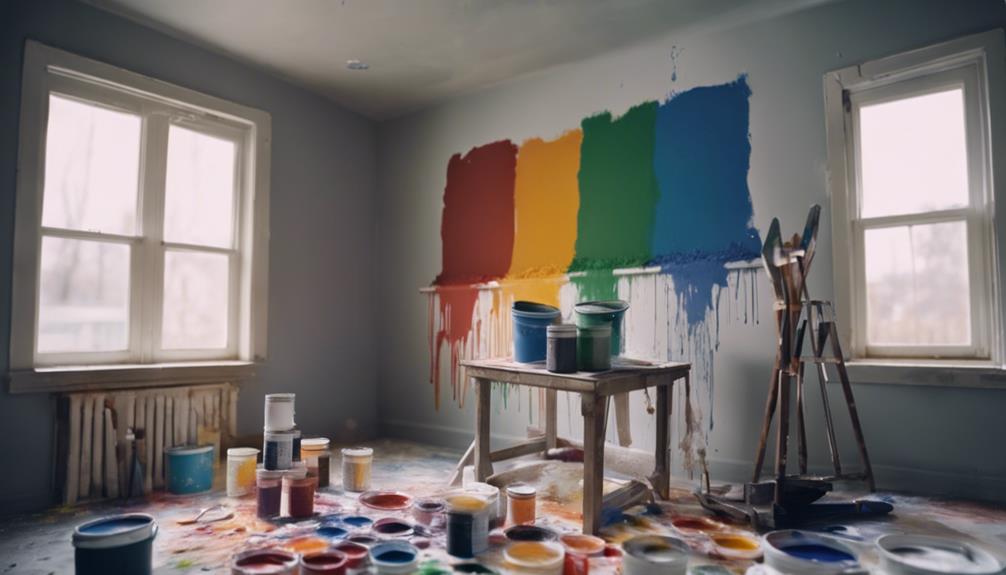
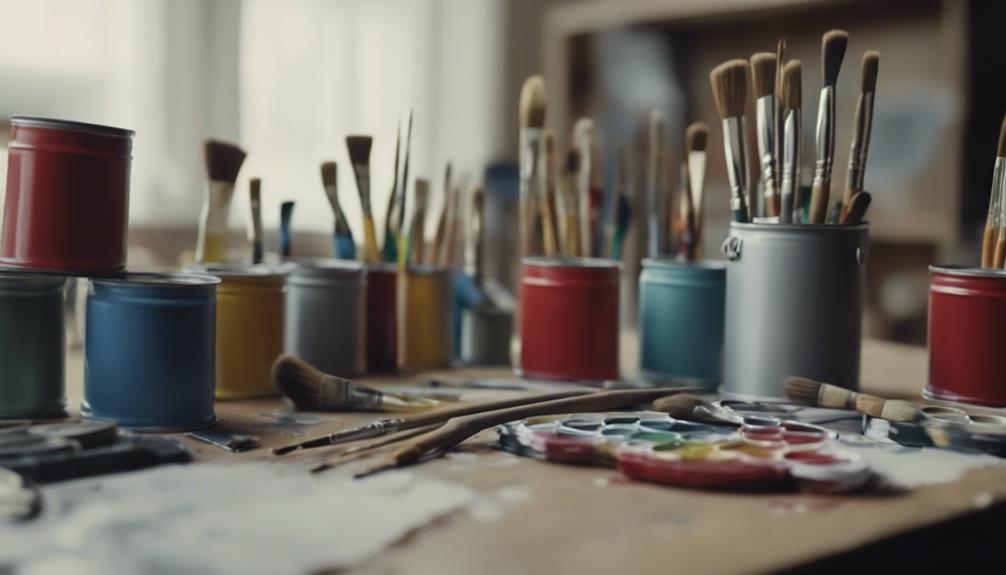
DIY Vs. Professional Painting Costs

painting cost comparison guide

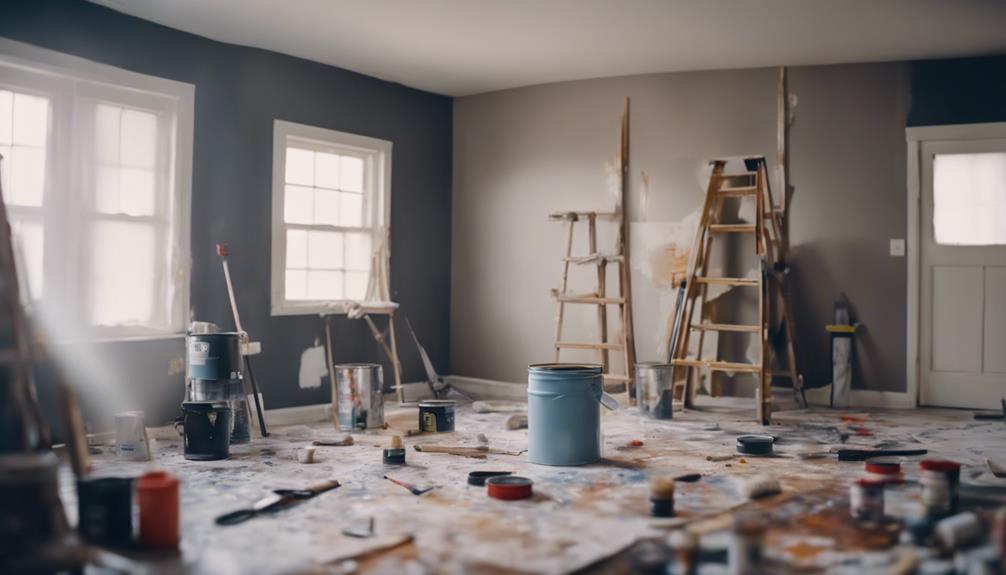
When considering DIY vs. professional painting costs, it's crucial to weigh the upfront savings of doing it yourself versus the potential benefits of hiring a professional. DIY projects can be more cost-effective, starting as low as $300 for supplies, while professionals may offer expertise and quality results but at a higher price point.

Understanding the cost differences and what each option entails will help you make an informed decision for your interior painting project.

DIY Cost Comparison

Comparing the costs between DIY painting and hiring a professional involves considering factors like labor costs and supply expenses.

Advertisement

DIY interior painting can be as low as $200 to $300 for supplies, while a professional painter typically charges $20 to $50 per hour. Contractors may help with paint purchases, leading to potential savings. It's recommended to repaint every 3 to 10 years for maintenance purposes.

Keep in mind that specialized painters may have higher rates for unique or complex projects. By opting for a DIY approach, you can save on labor costs but need to allocate time for the task. Consider these aspects when deciding between DIY and hiring a professional for your painting project.

Benefits of Professionals

Choosing professional painting services over a DIY approach can significantly enhance the quality and longevity of your interior house paint job. Professional painters possess the skills to handle diverse surfaces and textures, delivering top-notch results. They can suggest the most suitable paint products and customized techniques to achieve a refined finish that aligns with your taste. Although opting for a DIY painting project might appear cost-effective at first, the efficiency and time-saving advantages of engaging professionals surpass the initial expenses.

The expertise of professional painters leads to a more refined outcome, elevating the overall aesthetics of your living space. Investing in professional interior house painting services can yield a durable and visually pleasing result that enhances the ambiance of your home.

Factors Affecting Interior Painting Cost

interior painting cost factors

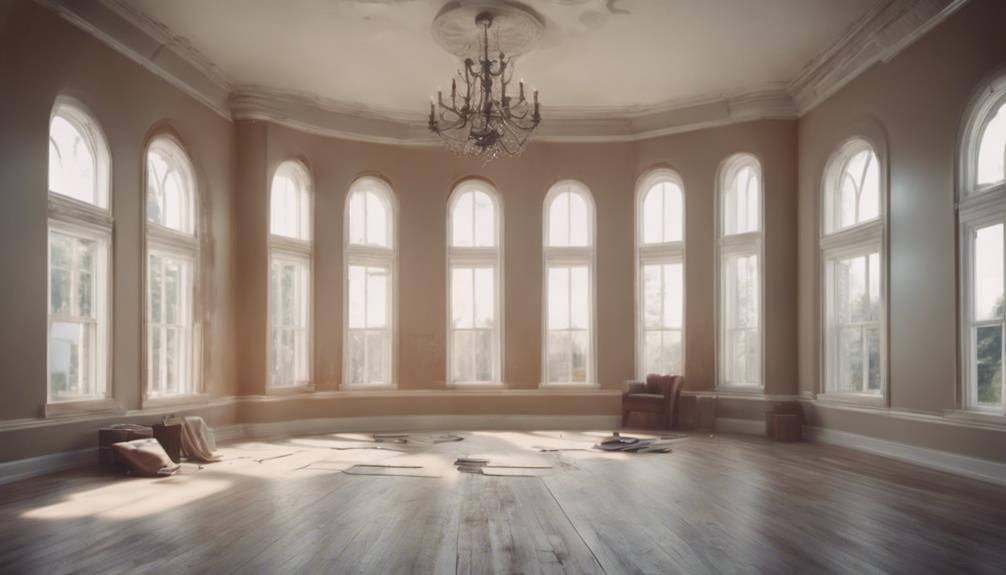
Understanding the various factors that influence the cost of painting the interior of your house is essential for budgeting effectively. Several elements contribute to interior painting costs, such as square footage, high ceilings, local labor rates, wall repairs, quality of materials, regional pricing differences, wall height, and ease of access.

The size of your home, including the number of rooms and their layout, can impact the overall cost. High ceilings taller than 10 feet may require additional resources, increasing the expenses. Local labor rates and material costs vary, affecting the total expenditure. Wall repairs before painting and the quality of materials used also play an important role in determining the final cost.

Advertisement

Additionally, regional pricing differences can influence how much you'll need to spend on interior painting. Consider these factors carefully when planning your interior painting project to make sure you budget appropriately.

Cost to Paint Different Room Sizes

estimate painting costs per room

Painting different room sizes in your house comes with varying costs depending on the size and specific features of each room. Small rooms like bathrooms can cost between $50 to $150, while larger master bathrooms may range from $350 to $650.

Bedrooms, on the other hand, typically range from $300 to $800 for an average 132 sq ft room, with larger master bedrooms costing up to $1,500.

If you're looking to freshen up your dining room, be prepared to spend between $600 to $1,000, depending on the size, which usually ranges from 300-400 sq ft.

Hallways and entryways, due to their high-traffic nature, usually fall in the range of $300 to $1,000.

Kitchens, especially those with appliances taking up wall space, can cost anywhere from $200 to $750 to paint. Consider these costs when planning to give each room a fresh coat of paint.

Advertisement

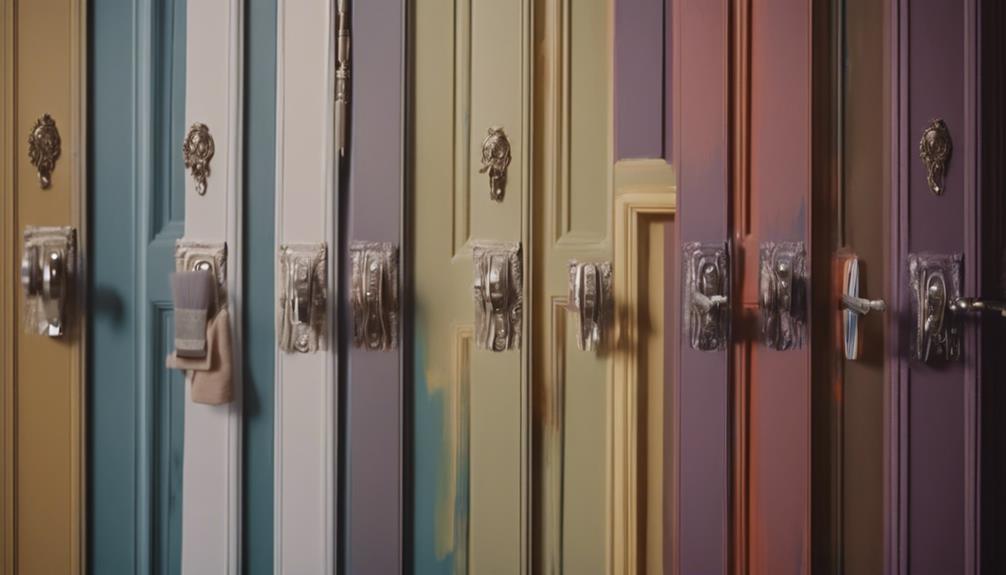
Interior Surface Painting Cost Breakdown

cost breakdown for interior painting

When looking at the breakdown of interior surface painting costs, you'll find that different factors influence the overall pricing for walls, ceilings, trim, and additional features within your home. Below is a breakdown of the costs per square foot for various components of an interior paint job:

Interior Surface Cost per Square Foot
Walls $1 – $2
Ceilings $1 – $2
Trim $1 – $3

Factors like accent walls, high ceilings, and intricate trim details can impact these costs. Additionally, there may be extra expenses for painting doors, cabinets, countertops, or floors within the interior space. Understanding these cost breakdowns can help you budget effectively for your interior painting project. Keep in mind that the condition of the surfaces, the complexity of the job, and any special requirements will all play a role in determining the final cost of your interior paint job.

Labor Costs for Interior Painting

estimating interior painting expenses

Labor costs for interior painting can vary depending on factors such as the project's size, complexity, and the level of prep work required. Here are some key points to ponder regarding interior painting labor costs:

  1. Professional painters typically charge between $30 to $60 per hour for their services.
  2. Specialty projects or complex jobs may demand higher rates, reaching $75 or more per hour for professional painters.
  3. The total labor costs can fluctuate based on the project's size and the extent of prep work needed.

It's essential to grasp that while opting for a do-it-yourself approach can reduce labor expenses, it requires time, patience, and the right materials. Labor costs may also increase for intricate details or hard-to-reach areas during interior painting projects. By contemplating these factors and understanding the hourly rates for painters, you can better estimate the labor expenses involved in your interior painting project.

Considerations for DIY Painting Projects

diy painting project tips

To start a successful DIY painting project, careful consideration of various factors is essential for achieving desired results within budget constraints. DIY interior painting can cost as low as $300 for supplies, offering potential savings compared to hiring a professional.

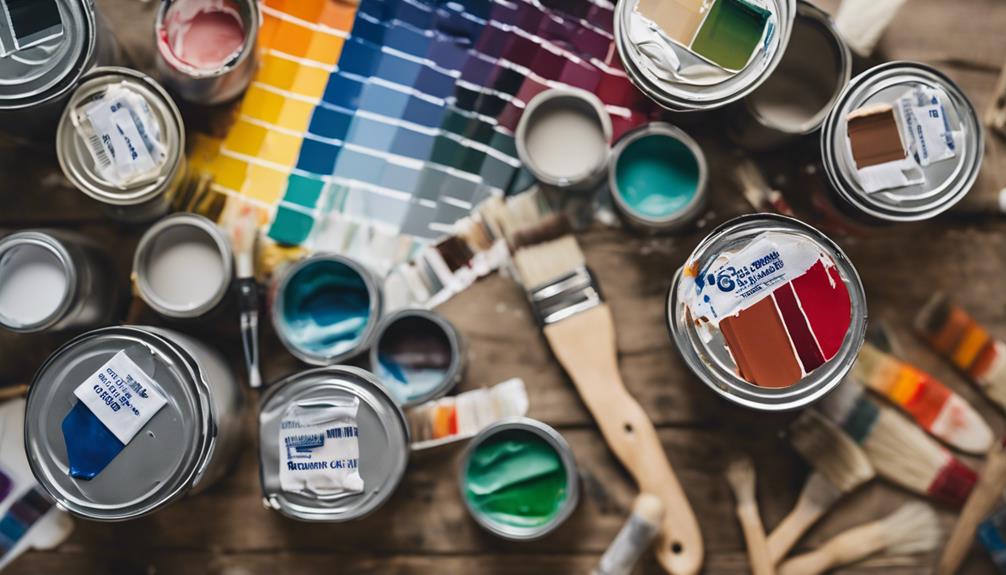
Calculating the cost of paint materials is vital for budgeting a DIY painting project. Choosing the right paint quality impacts the overall cost of a DIY interior painting project. Additional costs for supplies and equipment such as ladders, brushes, rollers, drop cloths, and tape should be considered for DIY painting.

Proper preparation, including priming walls, is essential for a successful and cost-effective DIY interior painting project. By investing time in preparation and selecting the right paint supplies, you can maintain quality while saving money on your DIY interior painting endeavor. Be mindful of these considerations to ensure a smooth and budget-friendly painting project.

Saving Money on Interior Painting

budget friendly interior painting tips

Consider maximizing your savings on interior painting by exploring off-season opportunities and opting for cost-effective paint products. Here are three strategies to help you save money on your interior painting project:

  1. Off-Season Painting: Schedule your project between November and February to take advantage of lower labor rates and potentially discounted material prices during the off-season.
  2. Low-VOC or No-VOC Paint: Opt for environmentally friendly and cost-effective low-VOC or No-VOC paint products. These options not only save money but also promote better indoor air quality.
  3. Adequate Ventilation: Ensure proper ventilation during your interior painting projects, especially in winter, to reduce paint fumes and associated costs. Good ventilation can also help the paint dry faster and more evenly.

Additional Costs to Consider

factors impacting total expenses

When preparing for interior house painting, keep in mind that materials and labor costs can vary based on room size and complexity. Larger rooms or areas with unique features may require more paint and additional time for completion.

Understanding these variations can help you plan and budget accordingly for your interior painting project.

Material and Labor

When painting the interior of your house, material and labor costs are important factors to take into account in your overall budget. Here are some key points to keep in mind:

Advertisement
  1. Material costs for interior house painting typically range from $200 to $300 on average, including items like primer.
  2. Labor costs vary between $20 to $50 per hour for professional painters, impacting the total expenses significantly.
  3. Additional costs such as prepping the area before painting can add between $0.50 to $0.75 per square foot to your budget.

Remember that location can also have a notable impact on the overall cost of painting your interior walls.

Room Size Variations

Incorporate the size of each room into your budget as you calculate additional costs for painting, ranging from $50 to $1,000 depending on the room's dimensions and complexity. Small rooms like bathrooms can cost $50 to $150, while larger rooms such as master bedrooms can range from $300 to $800. The average cost to paint a dining room of 300-400 sq ft falls between $600 to $1,000. Hallways and entryways, high-traffic areas, can cost $300 to $1,000 to paint. Kitchens with appliances taking up wall space may cost between $200 to $750 to paint. Cabinets can range from $900 to $3,500 for a full kitchen or $3 to $8 per sq ft for smaller projects.

Room Average Cost Range
Small Rooms $50 – $150
Large Rooms $300 – $800
Dining Room $600 – $1,000

Conclusion and Final Thoughts

wrapping up the text

As we conclude our discussion on the cost to paint the interior of a house, it's essential to take into account all the factors that contribute to the overall painting expenses. Here are three key points to consider:

  1. Total Cost: The total cost of painting the interior of a house typically ranges from $2.75 to $4.69 per square foot, covering walls, trim, and ceilings. Factors like room size, surface type, and extra materials can influence this cost.
  2. Hiring a Painter: Hiring a professional painter can incur extra costs but ensures a high-quality finish. Labor rates, experience of the painter, and the complexity of the job can impact the overall expenses.
  3. Extra Costs: Additional expenses may arise for tasks like painting interior trim, repairing damaged surfaces, or applying multiple coats of paint. It's important to budget for these extras to avoid surprises during the painting process.

Considering these factors can help you plan and budget effectively for your interior painting project.

Frequently Asked Questions

How Much Paint Do I Need for a 2000 Square Foot House Interior?

To paint a 2000 square foot house interior, you'll likely need 8-10 gallons of paint. The amount can vary based on factors like the number of coats and paint quality.

Consider walls, ceilings, trim, and doors when calculating. Professionals usually estimate paint quantities accurately.

Texture, color, and coverage efficiency also affect how much paint you'll need.

How Much Should I Charge to Paint the Inside of a House?

When painting the inside of a house, make sure your pricing reflects the project's scope and your expertise. Consider factors like room size, complexity, and any necessary repairs. A fair rate typically ranges from $2.75 to $4.69 per square foot, accounting for walls, ceilings, and trim.

Advertisement

Remember that regional pricing variations, labor costs, and materials will impact your final quote. Your attention to detail and quality workmanship will determine what you should charge.

How Much Does It Cost to Paint a 12X12 Room and Ceiling?

To paint a 12×12 room, expect to pay between $350 to $850. This cost covers labor, materials, and preparation. Painting the ceiling in the same room can add an extra $150 to $300.

Factors like location, paint quality, and extra services may influence the final price. Make sure to consider ceiling height, texture, and condition for accurate cost estimates when planning your project.

How Long Does It Take to Paint a 1500 Sq Ft House Interior?

Painting a 1500 sq ft house interior can take 3 to 4 days with a team of 3 painters. Factors like project complexity and coats needed can influence the timeline.

Prep work, drying time, and room layout also play a role. Efficient planning and teamwork help streamline the process.

Advertisement

Hiring experienced pros guarantees a timely, excellent job.

Conclusion

To sum up, when it comes to painting the interior of your house, it's crucial to take into account factors like square footage, room size, and whether you opt to hire professionals or do it yourself.

Remember, 'you can't judge a book by its cover,' but a fresh coat of paint can certainly transform a space.

By understanding the costs involved and making smart choices, you can give your home a whole new look without breaking the bank.

Advertisement

Continue Reading
Advertisement

Wall Art and Decor

Why Paint Interior Doors Black

Wondering how painting interior doors black can transform your space into a sophisticated haven? Discover the elegance and allure it brings!

Published

on

By

interior doors painted black

When you paint interior doors black, you add elegance and sophistication to your space. The bold contrast with light walls creates a striking look. Black doors stand out as focal points and hide fingerprints well. Choosing high-quality semi-gloss black paint with a durable finish is key. Regular dusting and gentle cleaning maintain their allure. Pairing them with brass hardware or art pieces enhances their appeal. Black doors can elevate your home decor effortlessly. More insights await on how black doors impact your space.

Key Takeaways

  • Adds elegance and sophistication to room decor.
  • Creates striking contrast with light-colored walls.
  • Helps doors stand out as a focal point.
  • Camouflages fingerprints and dirt marks better.
  • Adds a touch of drama to the space.

Benefits of Painting Doors Black

enhancing doors with black

Painting your interior doors black instantly adds elegance and sophistication to your room's decor. The deep black hue creates a striking contrast with light-colored walls, elevating the visual appeal of your space. This contrast not only adds a touch of drama but also helps to make your doors stand out as a focal point in the room. Additionally, black doors have a practical advantage as they can camouflage fingerprints and dirt marks better than lighter colored doors, making maintenance easier.

Moreover, the trend of painting interior doors black has been shown to increase the resale value of a house. The bold choice of black conveys a sense of power, strength, and luxury, enhancing the overall ambiance of a room. By opting for black interior doors, you aren't only following a modern design trend but also adding a touch of sophistication and luxury to your living space.

Interior Door Color Trends

interior design door colors

When considering interior door color trends, it's important to take into account popular door colors and their impact on the ambiance of your space.

The color you choose can greatly influence the overall feel of a room, whether you opt for a bold statement or a more subtle, complementary hue.

Understanding how different door colors interact with your decor can help you create a cohesive and visually appealing environment.

Popular Door Colors

Think about updating your interior space with a trendy door color that reflects your style and personality.

Advertisement

While black doors are a popular choice for their elegance and ability to create contrast, there are other popular door colors to contemplate. Shades like navy blue, deep green, and charcoal grey are gaining popularity for their versatility and modern appeal.

Soft pastel hues like blush pink and light blue can add a touch of warmth and whimsy to your space. Bold colors such as red, yellow, or teal make a statement and can infuse energy into a room.

When selecting a door color, think about how it complements your overall design aesthetic and creates the ambiance you desire.

Impact on Ambiance

Black interior doors exude a sense of sophistication and luxury, transforming the ambiance of a room with their dramatic presence. When considering the impact on ambiance, here are some key points to keep in mind:

  • Black interior doors can create a dramatic and sophisticated ambiance in a room.
  • The color black evokes feelings of power, strength, and luxury, enhancing the overall mood.
  • Black doors can add a sense of intimacy and coziness to a space, making it feel more inviting.
  • When paired with light-colored walls, black doors visually expand the room and create a striking contrast.

With these factors in mind, painting your interior doors black can truly elevate the overall atmosphere of your living space.

Choosing the Right Black Paint

black paint selection tips

For the best finish on your interior doors, prioritize selecting a high-quality semi-gloss black paint specifically designed for this purpose. A high gloss finish not only adds durability but also makes cleaning easier, perfect for high-traffic areas like doors.

When choosing black paint color for your interior doors, look for paints explicitly labeled for interior use. Testing the paint on a small area first guarantees it matches your desired aesthetic and complements the room's overall look.

Advertisement

Opting for a paint finish that enhances the elegance and sophistication of black interior doors can greatly impact the room's ambiance. By selecting the right black paint, you can elevate the overall look and feel of your space, creating a sleek and modern design that's both timeless and stylish.

Maintenance Tips for Black Doors

maintaining black painted doors

To keep black doors looking their best, remember to dust and wipe them regularly to prevent dirt buildup.

Prevent scratches and scuffs by being mindful of how you handle and use the doors.

If you notice any paint chips, touch them up with matching paint to maintain the doors' appearance.

Cleaning Black Door Surfaces

Regularly dusting and wiping down your black doors is crucial to keep them clean and free of dirt and grime while maintaining their appearance. To guarantee your black door surfaces stay looking their best, follow these maintenance tips:

  • Use a mild soap solution and a soft cloth for deeper cleaning when needed.
  • Avoid using abrasive cleaners or harsh chemicals that can damage the paint finish.
  • Touch up any scratches or chips with matching paint to maintain a seamless look.
  • Periodically check and tighten door hardware for smooth operation and longevity.

Preventing Scratches and Scuffs

To maintain your black interior doors free from scratches and scuffs, it's important to implement preventive maintenance measures. Regularly dusting and wiping down the doors can help guarantee scratches and maintain their appearance.

For deeper cleaning, use a mild soap solution and a soft cloth to remove scuffs and dirt without damaging the paint. Avoid abrasive cleaners and harsh chemicals that could harm the black doors.

Advertisement

Additionally, check and tighten door hardware periodically to make sure smooth operation and prevent unnecessary wear on the doors.

Touching up Paint Chips

For precise coverage when touching up paint chips on black doors, utilize a small brush.

When maintaining your black doors, follow these tips:

  • Match the paint color exactly to blend in the touch-up seamlessly.
  • Apply thin layers of paint to avoid buildup and maintain a smooth finish.
  • Use a steady hand and take your time when touching up paint chips on black doors.
  • Regularly inspect and touch up any paint chips to keep your black doors looking fresh and well-maintained.

Styling Tips for Black Doors

enhance your home s aesthetics

When styling black doors, pairing them with brass or gold hardware can create a luxurious and elegant look. The combination of black door paint with brass elements adds a touch of sophistication to your space.

Consider adding statement artwork or mirrors on black doors to enhance visual interest and customization. To make the black doors stand out even more, opt for light-colored walls and trim to create a bold contrast.

Incorporating natural elements like wood or plants can soften the overall aesthetic of black doors and bring a sense of balance to the room. Experiment with different door styles and textures to match your interior design theme and achieve a cohesive look throughout your home.

Advertisement

Impact of Black Doors on Home Value

black doors increase value

Pairing black doors with brass or gold hardware can't only enhance the aesthetic appeal of your home but also potentially increase its overall value and sophistication. When considering the impact of black doors on home value, several factors come into play.

  • Complementing Interior Design Styles: Black doors can seamlessly blend with a variety of interior design styles, such as modern, industrial, or even traditional settings, adding a touch of elegance to the space.
  • Enhancing Visual Appeal: The bold contrast created by black doors against light-colored walls can draw the eye and create a focal point in a room, potentially increasing the perceived value of your home.
  • Creating a Stylish Statement: Dark doors can make a stylish statement and add a sense of luxury to your living space, appealing to potential buyers looking for a sophisticated touch.
  • Reflecting Personal Style: The choice of painting your doors black is a personal one that can reflect your unique taste and style, ultimately influencing how your home is valued by others.

Consider these aspects when deciding to paint your doors black, as they can have a significant impact on your home's overall value and appeal.

Frequently Asked Questions About Black Doors

faqs for black doors

Selecting the right black color to choose is crucial when considering black doors for your interior spaces. You should pick a shade that complements your existing decor and personal style. Another common question is how black doors pair with white trim. Black doors can create a striking contrast against white trim, adding a modern touch to your home.

Many wonder about the maintenance of black doors. Surprisingly, black doors can hide fingerprints and dirt marks better than white doors, making them a practical choice for high-traffic areas. Additionally, black doors can add elegance and sophistication to any room, enhancing the overall aesthetic of your space. If you're contemplating a home renovation or aiming to increase your home's resale value, painting your doors black might be a stylish and wise choice.

Frequently Asked Questions

Should You Paint Interior Doors Black?

If you want to enhance the elegance and sophistication of a room, painting interior doors black can be a stylish choice. The striking contrast with light walls and the ability to conceal fingerprints make black doors a popular option.

Additionally, black doors can add a touch of luxury and modernity to your space. Consider painting your interior doors black to create a bold design statement and potentially increase your home's resale value.

What Does It Mean When You Paint a Door Black?

When you paint a door black, it signifies elegance, sophistication, and a bold choice in design. Black doors can introduce drama and luxury to a room, creating a powerful and modern ambiance.

The color black can evoke feelings of strength and add a striking contrast to light-colored walls or decor. It offers versatility, complementing various interior styles and color schemes.

Advertisement

Are Black Interior Doors Still Popular?

Black interior doors remain a popular choice among homeowners. They add elegance and sophistication to any space, creating a timeless design that stands out against light-colored walls.

Their ability to hide fingerprints and dirt marks makes them a practical option for busy households. Additionally, black doors can enhance the resale value of a house, evoking feelings of power, strength, and luxury.

Consider black interior doors to elevate your home's aesthetic appeal.

Are Black Doors in Style in 2024?

Yes, black doors are definitely in style in 2024. They remain a timeless and sophisticated choice that can elevate the look of any room.

Adding a touch of elegance, black doors create a striking contrast with light-colored walls, enhancing the overall aesthetic of your space.

Advertisement

Their modern appeal can also increase the resale value of your home. So, if you're looking for a chic and stylish design trend, black doors are a great choice.

Conclusion

To sum up, painting interior doors black can add a touch of elegance and sophistication to your home.

By following the latest color trends and selecting the right shade of black paint, you can create a modern and stylish look.

Remember to maintain your black doors by cleaning them regularly and consider incorporating them into your overall home decor for a cohesive and chic aesthetic.

The impact of black doors on your home's value can be significant, making it a worthwhile investment for any homeowner.

Advertisement

Continue Reading

Wall Art and Decor

Where to Paint Interior Wall

Need advice on where to paint your interior wall? Find out the key factors for a successful paint job in a well-lit room with good ventilation.

Published

on

By

choosing interior wall paint

When painting your interior wall, choose a well-lit room with good ventilation. Opt for a space with minimal furniture and smooth walls for easier painting. Utilize painter's tape for precise edges. Lighting impacts color perception, so aim for natural or LED lighting. Ventilation aids paint drying and reduces odors. Make sure spacious, clutter-free areas with access to windows for ventilation and light. Protect furniture with plastic sheets and clear the room. Prepare walls by repairing imperfections and removing dust. Ideal painting conditions involve clean surfaces, proper temperature, and ventilation. Follow these tips for a successful paint job.

Key Takeaways

  • Choose a well-lit room with good ventilation.
  • Opt for a space with minimal furniture.
  • Select a room with smooth walls.
  • Consider using painter's tape for precision.
  • Ensure proper ventilation for paint drying and air circulation.

Ideal Room Selection

ideal room selection process

When selecting the ideal room for painting your interior walls, opt for a well-lit space with good ventilation to guarantee a smooth and efficient painting process. A well-lit room will help you see the true colors of the paint and make sure you don't miss any spots. Good ventilation is key for the paint to dry properly and for you to breathe easily.

Choose a room with minimal furniture to make moving around easier and to protect your belongings from accidental paint splatters. Pick a room with smooth walls and few imperfections to achieve a clean and professional-looking finish. Consider using painter's tape to protect areas you don't want to paint, like the ceiling or trim.

Opt for a room with a neutral color palette to make shifting between colors simpler. Prioritize rooms with windows or doors for easy access to natural light and fresh air while painting.

Importance of Good Lighting

key to interior design

Good lighting is essential when painting interior walls as it allows you to accurately see colors and finishes. Without proper lighting, you might make mistakes in color selection and application, impacting the final outcome of your project.

Natural light and high-quality artificial lighting can greatly enhance the appearance of painted walls.

Natural Light Benefits

Enhancing the ambiance of a room, natural light plays a crucial role in creating a welcoming and spacious environment. Good natural light not only boosts mood and productivity but also highlights architectural details and wall colors, enhancing the overall design.

Advertisement

Exposure to natural light is linked to better sleep patterns and improved well-being. By utilizing natural light effectively, you can reduce the need for artificial lighting, leading to increased energy efficiency and lower electricity costs.

Incorporating more natural light into your space can help you feel more energized, focused, and connected to the outdoors. Embrace the benefits of natural light to transform your room into a vibrant and uplifting sanctuary.

Artificial Lighting Options

To accurately perceive paint colors on your interior walls, it's essential to take into account the options available for artificial lighting. LED lights are a great choice for illuminating painted walls, offering brightness and energy efficiency. Warm white LEDs can enrich warm paint colors, while cool white LEDs complement cooler tones.

Adjustable lighting fixtures provide the flexibility to highlight different wall colors throughout the day. By choosing the right lighting, you can showcase the texture and finish of your painted walls, enhancing the overall aesthetic of your room.

Consider how different lighting options can affect the way colors appear on your walls and create the ambiance you desire in your living space.

Advertisement

Enhancing Color Perception

When considering the importance of good lighting for enhancing color perception in your living space, remember that the appropriate light source can greatly impact how paint colors appear on your interior walls. To enhance color perception effectively, follow these steps:

  1. Utilize Natural Light: Assess paint samples in natural light to see true undertones without artificial distortion.
  2. Understand Light Sources: Different bulbs, like incandescent or LED, can alter how colors are perceived.
  3. Consider Light Direction: North-facing rooms offer cooler light, while south-facing rooms provide warmer light, affecting color perception.
  4. Test Samples: Experiment with paint samples throughout the day to observe how they adapt to varying lighting conditions in your space.

Ventilation Considerations

ventilation for indoor activities

When painting interior walls, keep in mind the importance of proper ventilation for air circulation. Opening windows and using fans can greatly benefit the ventilation in the room.

Make sure you have the right methods in place to promote a healthier painting environment.

Air Circulation Importance

Ensuring proper air circulation while painting your interior walls is vital for optimizing the drying process and achieving a professional finish. Here are some key points to keep in mind:

  1. Speed Up Drying: Good air circulation helps paint dry faster, allowing for efficient application of multiple coats.
  2. Healthier Indoor Environment: Proper ventilation reduces paint fumes, creating a healthier space for you and your family.
  3. Consistent Paint Application: Adequate air circulation ensures even drying of the paint on the walls, maintaining a uniform finish.
  4. Reducing Strong Odors: Opening windows and using fans during painting can decrease strong paint odors, improving the overall air quality in the room.

Ventilation is essential for ensuring that painted surfaces dry evenly and completely, resulting in a professional-looking outcome.

Window Opening Benefits

To optimize your painting process and create a healthier indoor environment, consider the benefits of opening windows for improved ventilation during the painting of your interior walls. Proper ventilation is essential to prevent paint fumes from building up, aiding in faster drying and reducing strong odors. Improved air circulation through window openings helps maintain a comfortable environment while working. This ventilation also minimizes health risks associated with inhaling paint fumes and expels excess moisture, promoting quicker wall drying. Ensuring that your workspace has adequate ventilation by utilizing window openings will not only make the painting process more efficient but also create a safer and more pleasant atmosphere for you to work in.

Benefits of Window Opening
Prevents paint fumes accumulation Aids in faster drying
Reduces strong odors Maintains comfortable environment

Proper Ventilation Methods

Consider utilizing various ventilation methods to maintain a healthier indoor environment while painting your interior walls.

Advertisement
  1. Open windows and use fans to improve air circulation and reduce fumes and odors.
  2. Maintaining a warm room temperature aids in paint drying for a smoother finish.
  3. Allow sufficient time for the paint to dry completely before closing windows or turning off fans.
  4. Adequate ventilation helps prevent moisture build-up, reducing the risk of mold growth on freshly painted walls.

Spacious Area Requirements

sounds good

For ensuring smooth and efficient painting, make sure there's ample space around the walls for easy movement and accessibility to all sections. When painting interior walls, having a spacious area is essential for a comfortable painting experience and to achieve even coverage. Aim for a minimum clearance of 3 feet around the walls to prevent accidental spills and allow for hassle-free maneuvering. Consider removing or covering large furniture to create an unobstructed painting space, reducing the risk of splattering paint on your belongings.

Adequate lighting is vital for accurate color perception and ensuring a uniform finish on the walls. Additionally, proper ventilation is key to managing paint fumes and facilitating the drying process, ultimately leading to a smoother paint job. By preparing a well-ventilated, well-lit, and clutter-free space, you can enhance your painting experience and achieve professional-looking results.

Access to Windows

limited access to windows

Ensuring that windows are easily accessible is essential for proper ventilation and natural light during the interior wall painting process. Here's why having access to windows is vital:

  1. Ventilation: Windows provide a way for fresh air to circulate, helping to reduce paint fumes and speeding up the drying process.
  2. Natural Light: Having windows nearby allows you to see colors more accurately and aids in applying paint evenly across the walls.
  3. Spills Cleanup: Easy access to windows makes it convenient to clean up any accidental spills or splatters that may occur during painting.
  4. Imperfections Detection: Natural light coming through the windows helps you spot any imperfections or missed areas on the walls, ensuring a more professional finish.

Furniture Clearing and Protection

furniture protection and care

Clear furniture from the room to provide a spacious work area for painting the interior walls. Protect your furniture from paint splatters and drips by using plastic sheets or moving them to another room. Cover delicate items like electronics and decor with plastic wrap or relocate them to a safe spot. Utilize drop cloths to shield floors from paint spills, making cleanup easier post-painting.

Prioritize safeguarding valuable furniture and belongings to prevent any damage during the painting process. By moving furniture out of the room or covering it appropriately, you'll create a more open space for painting without the risk of accidental spills or splatters damaging your belongings. Remember to secure fragile items and make sure your floors are well-protected before starting the painting project. Taking these precautions will help you maintain the condition of your furniture and belongings while you refresh your interior walls.

Wall Preparation

wall painting instructions detail

To guarantee a smooth and professional paint finish on your interior walls, start by thoroughly cleaning the surfaces to remove dust, dirt, and grease. Here's a simple guide to prepare your walls for painting:

  1. Repair Imperfections: Fill in any cracks, holes, or stains on the walls using spackle. After applying spackle, sand the area for a smooth surface ready for painting.
  2. Remove Dust Completely: Wipe the walls with a tack cloth after sanding to make sure all dust is eliminated. This step is essential to prevent any paint defects from occurring during the painting process.
  3. Spot Prime Repaired Areas: Before painting, spot prime the repaired areas with a primer. This helps in achieving uniform color and coverage on the wall, especially over repaired spots.
  4. Apply Painter's Tape: Use painter's tape to protect trim, baseboards, and adjacent surfaces from accidental paint splatters. It also guarantees clean and sharp edges once the painting is done.

Dust and Debris Removal

clearing up dust particles

Before painting, make sure to thoroughly clean your walls to remove dust and debris. Use a clean microfiber cloth to wipe down surfaces and a vacuum with a soft brush attachment to eliminate loose dirt and cobwebs.

Consider using a mild detergent solution for stubborn dirt or grease buildup.

Prep for Painting

Make sure your walls are free of dust and debris by meticulously wiping them down with a damp cloth before you begin painting. To prep for painting, follow these steps:

  1. Apply painter's tape to protect areas you don't want to paint.
  2. Clean the surface by vacuuming walls with a soft brush attachment.
  3. Use a Tack cloth to pick up any remaining dust for a smooth finish.
  4. Get your paint supplies ready, including paint rollers and interior paint for a professional finish.

Removing dust and debris helps the paint adhere better, leading to a polished look. Remember, thorough prep work is key to a successful painting project.

Clean Walls Thoroughly

Clean your walls thoroughly by using a wet cloth to wipe down and remove any dust, dirt, and debris before beginning the painting process. Ensuring your walls are free of dust and debris is vital to achieving a smooth finish and helping the paint adhere properly.

Advertisement

By cleaning the walls, you're preparing them for the paint job and ultimately contributing to the longevity of the paint. Don't forget to clear out any cobwebs and hard-to-reach corners using a broom. This step is essential for the overall cleanliness of the walls.

Taking the time to properly clean your interior walls will set a solid foundation for a successful painting project.

Use Protective Covers

After thoroughly cleaning your walls, the next step is to use protective covers such as drop cloths or plastic sheets to shield floors, furniture, and fixtures from dust and debris during the painting process. To prep the walls effectively, follow these steps:

  1. Remove dust and debris: Wipe down walls with a damp cloth or vacuum with a brush attachment.
  2. Clean surfaces: Make sure baseboards and window sills are clean for proper paint adhesion.
  3. Use mild cleaning solution: Wash walls with a dishwashing liquid solution if greasy for a smooth finish.
  4. Eliminate hidden debris: Clear cobwebs and sweep corners for a flawless paint application on interior walls.

Optimal Painting Conditions

ideal painting environment needed

For the finest results when painting interior walls, aim to create ideal painting conditions within the room. Make sure temperatures are between 50-85°F for best paint application and drying. Keep humidity levels around 40-70% to prevent issues like blistering or cracking.

Essential ventilation is vital for paint to dry correctly and to avoid strong fumes building up. Avoid direct sunlight on the walls during painting to prevent uneven drying and color discrepancies. Choose a time when the room won't be disturbed to allow for uninterrupted painting and drying time.

Professional Finish Tips

expert painting techniques guide

To achieve a professional finish when painting interior walls, prioritize using high-quality paint for best coverage and durability. Here are some tips to help you achieve a flawless look:

  1. Choose the Right Tools: Opt for premium brushes and rollers to guarantee a smooth and even application of paint on your interior walls.
  2. Proper Lighting is Key: Use work lights to illuminate the area you're painting. This will help you spot imperfections and guarantee a professional finish.
  3. Consider a Paint Sprayer: For efficiency and a consistent coat of paint, think about using a paint sprayer on your interior walls.
  4. Use Painter's Pyramids: These handy tools can help you dry painted items without smudging the finish, maintaining a professional look.

Frequently Asked Questions

What Is the Best Way to Paint Interior Walls?

To paint interior walls effectively, start by preparing the surface with cleaning, patching imperfections, and applying primer. Use quality brushes and rollers, and consider using painter's tape for clean lines.

Apply paint in a W shape from top to bottom, allowing each coat to dry. Choose colors based on the room's mood and lighting, opting for low-VOC paints.

Advertisement

Finish by removing tape carefully, allowing paint to dry completely, and adding finishing touches.

What Is the Correct Order to Paint a Room?

Start painting a room by tackling the ceiling first, then move on to the walls, and finish up with the trim and baseboards. Working from the top down helps prevent drips on freshly painted areas. Make sure to complete each section fully before moving on for a seamless look.

Utilize painter's tape to protect edges while you paint different parts of the room. Allow ample drying time between coats for the best results and to avoid imperfections.

What Is the Best Direction to Paint a Wall?

To paint a wall, start from the top and work your way down to the baseboards. Use long, vertical strokes for a smooth finish.

Work in sections, overlapping each stroke slightly for full coverage. Follow the room's natural flow and paint in the same direction as the light source to minimize brush marks.

Advertisement

This method helps prevent streaks and guarantees a professional look.

Where Do You Start Painting Walls?

Start painting walls by preparing the area and choosing the right tools. Begin at the top with the ceiling to avoid drips on fresh paint. Work from a corner outwards in small sections for control.

Focus on one wall at a time, ensuring even coverage and allowing coats to dry. Use a brush for edges and corners, then a roller for larger areas.

Finish with trim for a polished look.

Conclusion

Choose the ideal room with good lighting and ventilation to paint your interior walls. Guarantee a spacious area with access to windows for best painting conditions. Proper wall preparation, including dust and debris removal, is crucial for a professional finish.

Advertisement

Did you know that 90% of professional painters recommend painting in well-lit rooms to achieve the best results? Make sure to follow these tips for a successful interior painting project.

Continue Reading

Wall Art and Decor

When to Paint Interior Walls

Mysterious signs indicate it's time to paint your interior walls, uncover the secrets to transforming your space with a fresh coat of paint.

Published

on

By

interior wall painting tips

When to paint interior walls is when you notice fading, cracking, or holes. Dark colors lose vibrancy over time, and personal style changes can prompt a refresh. Repair scuffs and holes before painting. Repainting before selling can increase house value. Benefits include rejuvenating the room instantly, hiding imperfections, and reflecting your style. Choose low-VOC paints for air quality, and prepare by cleaning walls and using drop cloths. Paint in the morning for best results. Consider wall condition for the number of coats needed. If you want to learn more, consider the right paint type and enhancing space with accent walls.

Key Takeaways

  • Fading, scuffs, style changes signal repaint need.
  • Refresh walls before selling for increased home value.
  • Repaint to hide imperfections and reflect style changes.
  • Consider weather for ideal drying and paint type.
  • Start in morning for best results, smooth finish.

Signs It's Time to Repaint

time for a repaint

If you notice fading paint, cracking, or damage like scuffs and holes, it's important to repaint your interior walls to maintain a fresh and appealing look. The color of your walls can lose its vibrancy over time, especially dark shades that tend to fade more noticeably. Cracking paint not only looks unsightly but also indicates that a new coat is necessary to prevent further damage and maintain the integrity of your walls. Additionally, changing personal style preferences may prompt a repaint to update the aesthetics of your house and keep it looking modern and inviting.

When damage such as scuffs, chips, or holes is present on your walls, it's crucial to repair and repaint them. Doing so not only enhances the overall look and appeal of your interior but can also increase the value of your house, especially if you're considering selling it. Repainting before selling can attract more buyers, improve the house's appearance, and potentially speed up the selling process.

Benefits of Repainting Interior Walls

enhancing interiors with paint

Repainting your interior walls can instantly rejuvenate the look and feel of a room, hiding imperfections and providing a fresh, clean aesthetic. A fresh coat of paint not only updates the ambiance but also modernizes the space, making it more inviting.

Sunlight fade can dull walls over time, but a new paint job can restore vibrancy. Changing the paint color reflects personal style changes and keeps up with design trends, enhancing the overall aesthetic. Additionally, addressing damage like scuffs and holes by repainting can greatly increase the room's appeal.

Apart from the visual benefits, repainting can also contribute to your health by minimizing potential concerns like mold growth or other issues associated with damaged walls. By giving your walls a new look, you can improve the comfort and atmosphere of your living space, making it a more pleasant environment to relax and unwind.

Choosing the Right Paint Type

selecting the perfect painting

When choosing the right paint type for your interior walls, consider factors like finish options and color selection tips.

Opt for low-to-zero VOC paints to improve indoor air quality, and select water-based acrylic paints for easy cleaning and durability.

Advertisement

Consulting with a paint professional can help determine the best paint type for your specific wall surface and desired aesthetic.

Paint Finish Options

Choose the right paint finish for your interior walls by considering the desired look, maintenance needs, and room functionality. Options include flat, eggshell, satin, semi-gloss, and high-gloss.

Flat paint provides a matte finish, hiding imperfections, but is less durable and harder to clean. For a subtle sheen and washability, eggshell and satin finishes strike a balance between matte and glossy.

Semi-gloss and high-gloss paints offer a shiny finish, are easy to clean, and are more durable. Your choice of paint finish will depend on the look you want to achieve, how much maintenance you're willing to do, and the purpose of the room.

Consider these factors to select the most suitable paint finish for your interior walls.

Advertisement

Color Selection Tips

For a well-rounded interior wall project, make sure you consider the right paint type by focusing on color selection tips that match your desired ambiance and functionality requirements. Choose low-to-zero VOC paint to minimize indoor air pollution. Opt for washable finishes like satin or semi-gloss in high-traffic areas for easy cleaning.

Select warm neutral colors for a cozy feel or bold tones for accent walls. Test paint samples on walls to see how lighting affects colors throughout the day. Consult color psychology principles to set the mood in each room.

Preparing Walls for Painting

surface prep before painting

Before you start painting, make sure that the walls are thoroughly cleaned with a tack cloth to remove any dust or debris. This step is essential to guarantee a smooth finish.

Use drop cloths to protect your furniture and floors from any potential paint splatter during the preparation process. Employ masking film and masking paper to cover detailed areas like trim and edges for precise painting.

When mixing paint, consider using a 5-gallon bucket to maintain a consistent color throughout the painting process.

To achieve an efficient workflow, start painting with the ceiling, then move on to the walls, and finish with the trim. This systematic approach will help you work effectively and cover all areas without missing any spots.

Advertisement

Weather Considerations for Painting

painting in changing weather

Taking into account weather conditions is essential when planning to paint interior walls, ensuring ideal drying times and successful outcomes. In the winter season, cooler temperatures and dry air can lead to faster drying times, making it an ideal time for interior painting projects. Choosing low-to-zero VOC paints specifically designed for cold weather conditions is vital for achieving the best results.

It's important to monitor indoor humidity levels during winter painting to prevent issues like poor adhesion or slow drying. For best results, consider painting during the morning hours between 8 a.m. and 12 p.m. in the winter, as this can help the paint dry more efficiently.

Reputable painting companies prioritize safety and well-being by selecting the right paints for cold weather conditions, ensuring both the quality of the finish and the health of those in the space. By paying attention to these weather considerations and selecting the appropriate paint, you can enhance the success of your winter interior painting project.

Best Time of Day for Painting

ideal painting conditions described

Consider starting your painting project in the morning for the best results.

Painting interior walls during the morning hours, typically between 8 a.m. and 12 p.m., can lead to excellent outcomes. The lower humidity levels in the morning allow the paint to dry better and faster, resulting in a smoother application process.

Additionally, natural light exposure during this time aids in accurate color perception, ensuring the colors appear as intended on the walls. By choosing the morning for painting, you set yourself up for successful and efficient outcomes.

The combination of faster drying, smoother application, and proper color perception contributes to a job well done. So, take advantage of the lower humidity levels and the natural light available in the morning to paint your interior walls for the best possible finish.

Advertisement

How Many Coats of Paint?

counting layers of paint

Start by evaluating the condition of your interior walls to determine how many coats of paint are necessary for a professional finish. In most cases, painting walls requires two coats of paint to achieve the desired results.

However, some high-quality paints might cover well with just one coat, especially if you're using lighter colors. On the other hand, darker colors typically need multiple coats to guarantee full coverage and richness. To achieve a smooth and even finish, it's recommended to apply several thin coats rather than one thick coat.

The number of coats needed can also be influenced by factors such as the condition of the walls, your color choice, and the type of paint you're using. By considering these aspects, you can make sure that your interior walls look flawless and vibrant once the painting is complete.

Drying Paint in High Humidity

slow drying paint problem

In high humidity, paint drying slows down, potentially causing issues like drips and longer drying times.

To speed up the drying process, consider using dehumidifiers or fans to improve air circulation.

Maintaining indoor humidity levels between 40-60% can help guarantee a smooth finish and timely completion of your painting project.

Impact of Humidity

Humidity greatly influences the drying process of paint on interior walls, affecting its quality and appearance. In high humidity, paint drying is slowed down, leading to extended drying times. Excessive moisture in the air can cause the paint to remain tacky, making it prone to attracting dust and debris.

Advertisement

Additionally, paint may not cure properly in high humidity, impacting its durability and finish. The presence of moisture can also result in paint drips and sags, affecting the overall look of the painted surface. To combat these issues, using a dehumidifier or air conditioner can help regulate humidity levels, promoting ideal paint drying conditions for a smoother and more durable finish.

Speeding up Drying

To expedite the drying process of paint in high humidity conditions, consider utilizing fans or dehumidifiers to reduce moisture levels in the air. High humidity slows down paint drying, leading to potential issues like dripping or smudging.

Important ventilation is vital for faster curing and to prevent a tacky finish in humid environments. Avoid painting in excessively humid areas to guarantee a smooth, professional-looking result.

Ideal humidity levels for efficient paint drying range between 40-50%, creating the best environment for proper curing. By using fans or dehumidifiers, you can help speed up the drying process and achieve a well-finished paint job in spite of the challenges posed by high humidity.

Painting Over Oil-Based Paint

covering oil based paint effectively

To achieve successful painting over oil-based paint, make sure to thoroughly clean the surface to remove dirt and grease before applying a bonding primer designed for adhesion. Here are some key steps to guarantee a smooth finish and professional result:

  1. Sand the surface lightly to help the new paint adhere better to the oil-based paint.
  2. Use a high-quality latex paint that's compatible with oil-based paint for durability.
  3. Apply a bonding primer that's specifically formulated to adhere to oil-based paint.
  4. Allow ample drying time between coats to make certain the paint sets properly and lasts longer.

Enhancing Space With Accent Walls

accent walls in space

Considering ways to enhance your space, accent walls offer a creative and impactful solution to transform a room's look and feel. By creating a focal point, accent walls draw attention and add visual interest to your space. Opting for bold or contrasting colors can make a room feel larger or cozier, depending on your desired effect. To add depth and dimension, consider incorporating textures like stone, wood, or wallpaper on your accent wall.

Strategically placing accent walls can help define different areas in an open floor plan or highlight unique architectural features within your home. This design trend has gained popularity for its ability to add personality and style without overwhelming the entire space. Whether you want to make a statement or simply enhance the aesthetics of a room, accent walls can be a versatile and stylish choice to elevate your interior décor.

Advertisement

Frequently Asked Questions

What Is the Best Time of Year to Paint the Interior of Your House?

The best time of year to paint the interior of your house is during the spring and fall seasons. These months offer moderate temperatures and humidity levels, ideal for successful paint application. Avoid extreme heat or cold as they can affect the outcome.

Opt for dry weather to prevent issues like paint not adhering properly. Consider natural light exposure to perceive paint colors accurately. Choosing the right time can lead to better results and a more enjoyable painting experience.

When Should I Paint My Walls?

When painting your walls, keep an eye out for imperfections, fading, or cracking as signs it's time for a refresh. Changes in personal style or trends can also prompt a paint update.

Scuffs, chips, or missing paint detract from a room's appeal and signal the need for a fresh coat. Stay on top of maintenance to maintain the ambiance of your space.

What Is the Best Temperature to Paint Interior Walls?

To paint interior walls effectively, aim for temperatures between 50 to 85 degrees Fahrenheit. Extreme cold thickens the paint, making it tough to use, while excessive heat causes fast drying, leading to a poor finish. Consistent temperature control throughout the process guarantees a smooth, professional outcome.

Advertisement

Avoid extreme conditions for best paint adhesion and drying times. Maintaining a moderate temperature range between 50-85 degrees is crucial for successful interior wall painting.

How Often Should I Repaint Interior Walls?

To maintain a fresh look, repaint interior walls every 5-7 years. Factors like sunlight exposure and wear and tear determine the frequency. High-traffic areas may need more frequent touch-ups.

Regular repainting prevents issues like fading and peeling. Professionals suggest evaluating walls yearly to decide when to repaint. A consistent repainting schedule guarantees longevity and keeps your space looking its best.

Conclusion

To sum up, recognizing when to repaint your interior walls is essential for maintaining a fresh and vibrant living space. By understanding the signs of wear and tear, appreciating the benefits of repainting, and following the proper steps for preparation and application, you can transform your home with ease.

Remember, a fresh coat of paint can make a world of difference in enhancing the overall look and feel of your living space. So don't delay, grab a brush and start painting today!

Advertisement

Continue Reading

Trending