Connect with us

Home Decor

What Can You Do With an Old Metal Gazebo Frame?

Create a unique outdoor space by repurposing an old metal gazebo frame into a functional or decorative element that elevates your backyard experience.

Published

on

repurpose old metal gazebo

You can breathe new life into an old metal gazebo frame by repurposing it into a cozy outdoor room, lush vertical garden, or bird-friendly habitat. Convert it into a functional space like a rustic outdoor kitchen, whimsical playhouse, or greenhouse oasis. Alternatively, upcycle it into a decorative element like a garden arbor or chic outdoor bar. With a little creativity, you can transform an old metal gazebo frame into a unique and functional space that enhances your outdoor living experience. Explore the possibilities, and you might just discover a hidden gem waiting to be uncovered in your own backyard.

Key Takeaways

• Repurpose the metal gazebo frame into a cozy outdoor room with comfortable seating, curtains, and outdoor lighting for relaxation.

• Transform the frame into a lush vertical garden by attaching planters, selecting cascading plants, and ensuring proper sunlight and watering.

• Convert the frame into a bird-friendly habitat by adding bird feeders, nesting boxes, and plants that attract birds, and painting it with non-toxic paint.

• Use the frame to create a seasonal plant display by arranging potted plants, hanging baskets, and climbing vines thoughtfully, considering mature size and growing conditions.

Advertisement

• Repurpose the frame into a functional outdoor space, such as a rustic outdoor kitchen, whimsical playhouse, or greenhouse oasis, by incorporating functional elements and decorative touches.

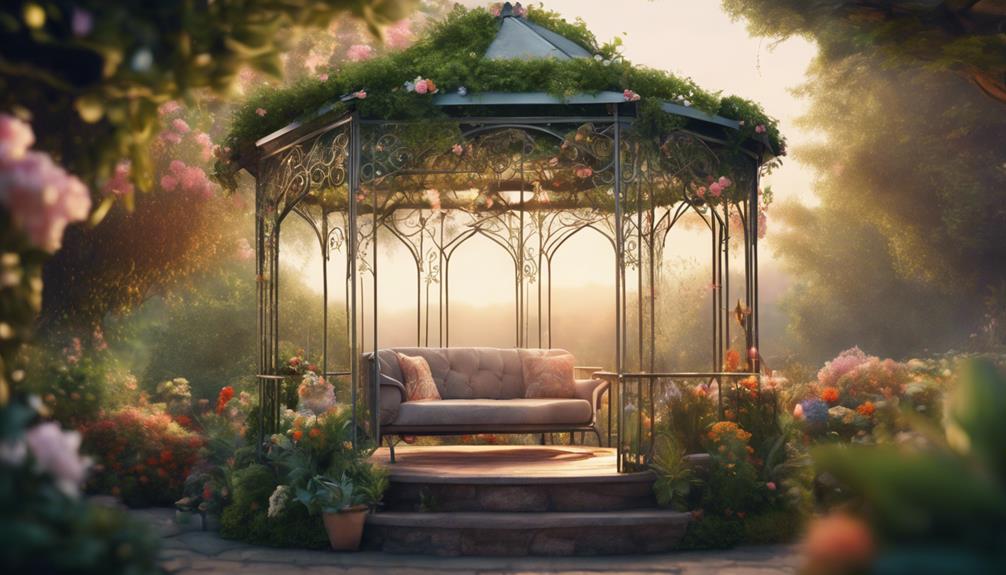
Transform Into a Cozy Outdoor Room

With a little creativity, you can convert your old metal gazebo frame into a cozy outdoor room that's perfect for relaxation and entertainment. By adding weather-resistant curtains and comfortable seating, you can transform the metal structure into a functional outdoor space that serves as an extension of your home.

To enhance the ambiance and comfort of this new outdoor room, consider installing outdoor lighting, rugs, and throw pillows that complement the existing décor. A small table or fire pit can also be added to make the area perfect for relaxing or entertaining guests.

As you design this cozy retreat, think about the function you want it to serve: will it be a private reading nook, a spot for meditation, or a place to enjoy the surrounding scenery? Whatever your vision, with a little creativity, your old metal gazebo frame can become a warm and inviting outdoor space that you'll love spending time in.

Create a Lush Vertical Garden

vertical garden with lush plants

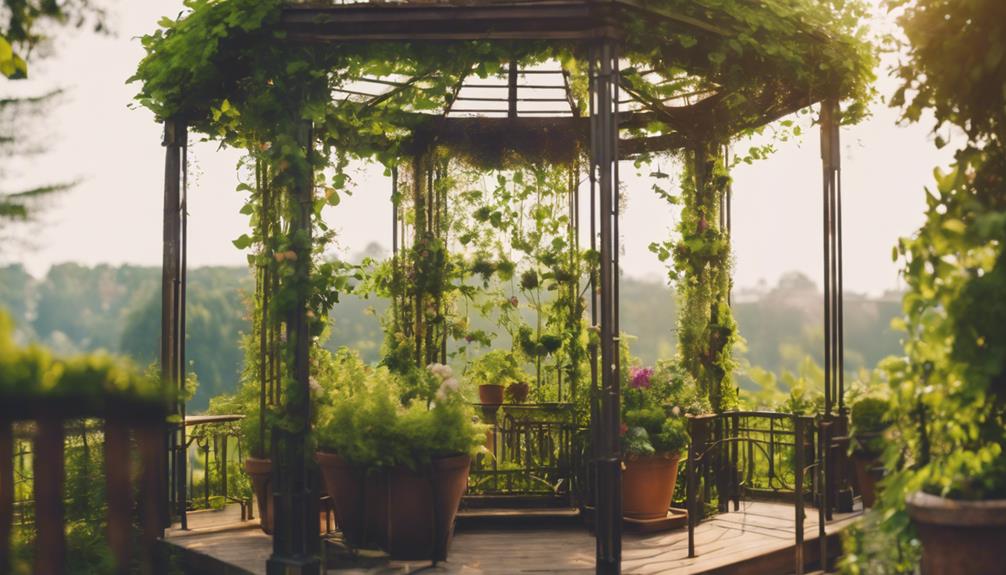
As you embark on creating a lush vertical garden using your old metal gazebo frame, you'll need to contemplate the types of plants that will thrive in this unique environment.

You'll want to select a mix of cascading plants, flowers, and herbs that will add color and texture to your garden, and then decide on a layout that showcases these plants to their fullest potential.

Advertisement

Plant Selection Guide

When creating a lush vertical garden, you'll want to curate a diverse selection of plants that thrive in vertically-stacked environments, such as succulents, ferns, herbs, and trailing vines. These plants are perfect for transforming your old metal gazebo frame into a stunning vertical garden.

Plant Type Benefits
Succulents Low maintenance, drought-tolerant, and add visual interest
Ferns Add a touch of greenery, thrive in shaded areas, and purify the air
Herbs Fragrant, edible, and can be used in cooking and herbal remedies
Trailing Vines Spill over the edges, add movement, and create a whimsical feel

As you select your plants, consider the amount of sunlight your vertical garden will receive. Make sure you have a proper watering and drainage system in place to keep your plants healthy. Research the specific care requirements for each plant to maintain a thriving vertical garden. By choosing the right plants and providing the necessary care, you'll be on your way to creating a lush and stunning vertical garden around your old metal gazebo frame.

Garden Layout Options

Transform your old metal gazebo frame into a stunning vertical garden by arranging plants in a way that maximizes visual appeal and functionality. You can attach planters or pots to the frame, incorporating a variety of plants such as herbs, flowers, and succulents to add color and texture to the vertical garden. To guarantee proper hydration, consider using a drip irrigation system or self-watering planters.

By utilizing the vertical space, you can grow a multitude of plants in a small area, making it ideal for urban or limited space gardens. Create a stunning visual display by arranging plants of different sizes and colors to create a vibrant and dynamic vertical garden. Take advantage of the gazebo's structure to create a unique and eye-catching display.

As you design your vertical garden, think about the overall aesthetic you want to achieve and choose plants that will thrive in the conditions provided by the gazebo. With a little creativity, your old gazebo frame can become a lush oasis that adds beauty and functionality to your outdoor space.

Advertisement

Build a Bird-Friendly Habitat

create a bird sanctuary

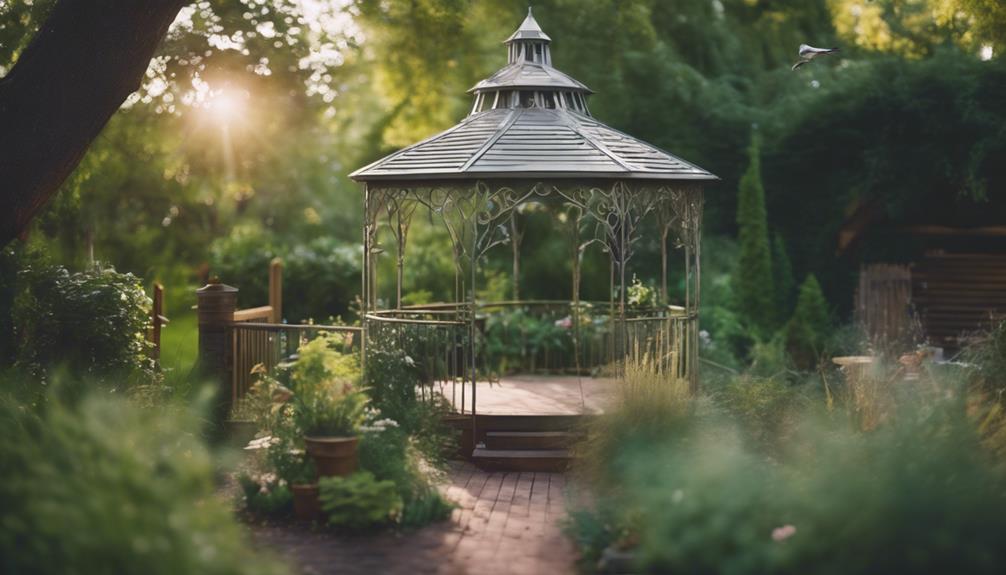
You can repurpose the old metal gazebo frame into a thriving habitat for birds by strategically hanging bird feeders and nesting boxes from its sturdy structure. This is a good idea, as it allows you to breathe new life into an old gazebo while creating a function that benefits local wildlife.

By utilizing the gazebo's structure, you can create a safe and welcoming environment for various bird species in your backyard. Consider enhancing the experience by adding bird baths, perches, and plants that attract birds to the repurposed gazebo frame.

You can even paint the frame with non-toxic paint to blend with the natural surroundings and attract more birds. By doing so, you'll create a peaceful and serene space for bird enthusiasts to enjoy observing and interacting with local avian wildlife.

With a little creativity, your old gazebo can become a haven for birds, providing a unique opportunity to connect with nature right in your own backyard.
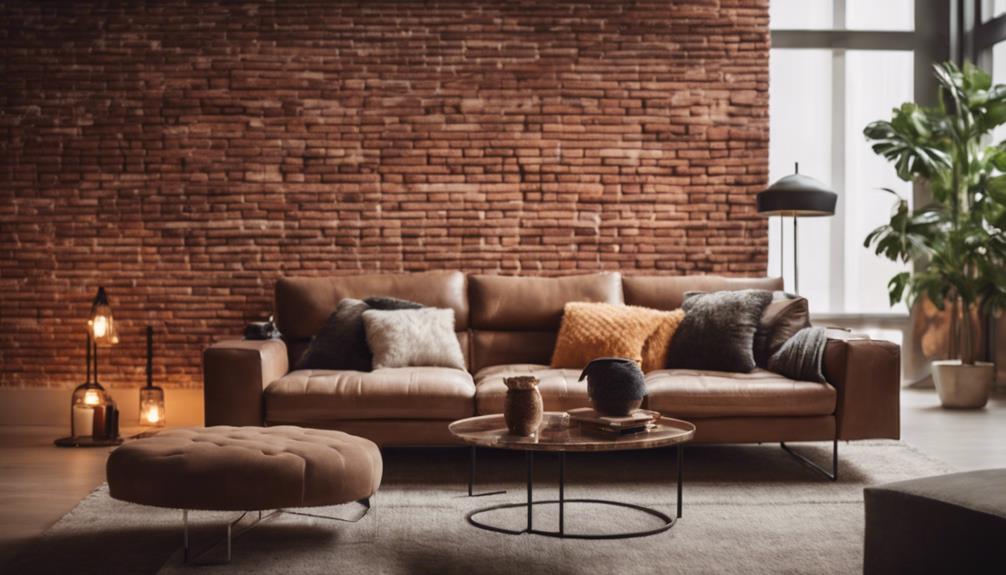
Make a Seasonal Plant Display

create a festive plant

As you transform your old metal gazebo frame into a seasonal plant display, remember that the key to creating a stunning visual impact lies in the details.

You'll want to carefully consider the types of plants you choose, arrange them thoughtfully, and add decorative elements to enhance the overall aesthetic.

Plant Selection Matters

With a little creativity, your old metal gazebo frame can become a stunning seasonal plant display, teeming with life and color. When selecting plants, consider the function you want your display to serve. Are you looking for a vibrant and colorful display? Choose seasonal plants like petunias, marigolds, and impatiens.

Advertisement

Want to add some texture and visual interest? Opt for trailing plants like sweet potato vines or ivy. If you're looking for a fragrant and functional addition, consider planting herbs like basil, mint, and rosemary.

Mixing and matching annuals and perennials will guarantee a long-lasting and ever-changing display. Don't forget to incorporate different textures and heights with plants like ornamental grasses, ferns, and coleus to create a dynamic arrangement.

Arrange With Care

By strategically positioning potted plants, hanging baskets, and climbing vines on the metal gazebo frame, you can create a stunning seasonal display that showcases your favorite flowers, foliage, and greenery. This arrangement will not only add a touch of elegance to your outdoor space but also highlight the beauty of your plants.

Here's a suggested arrangement plan to get you started:

Level Plant Type Example Plants
Top Hanging Baskets Ferns, Petunias, Fuchsias
Middle Potted Plants Hydrangeas, Succulents, Herbs
Bottom Climbing Vines Clematis, Wisteria, Honeysuckle

Consider the mature size of your plants, their growing conditions, and the amount of sunlight they require when selecting and arranging your plants. With careful planning, you can create a visually appealing display that changes with the seasons, adding beauty and interest to your outdoor area.

Advertisement

Add Decorative Touches

Transform your metal gazebo frame into a stunning seasonal display by adding decorative touches that reflect the current time of year.

You can repurpose the frame as a base for creating a vibrant plant display in your garden or outdoor space. Start by incorporating hanging baskets or pots filled with colorful flowers and lush greenery to add a decorative touch to the frame.

Consider showcasing seasonal plants like pumpkins, gourds, or festive decorations during holidays to keep your display fresh and engaging. Utilize the height and structure of the gazebo frame to create a visually appealing plant arrangement that changes with the seasons.

You can enhance the beauty of your outdoor area by repurposing the metal gazebo frame as a focal point for showcasing your favorite plants and seasonal decor. By doing so, you'll create a stunning display that will impress your friends and family, and add a personal touch to your outdoor space.

Design a Rustic Outdoor Kitchen

rustic outdoor kitchen design

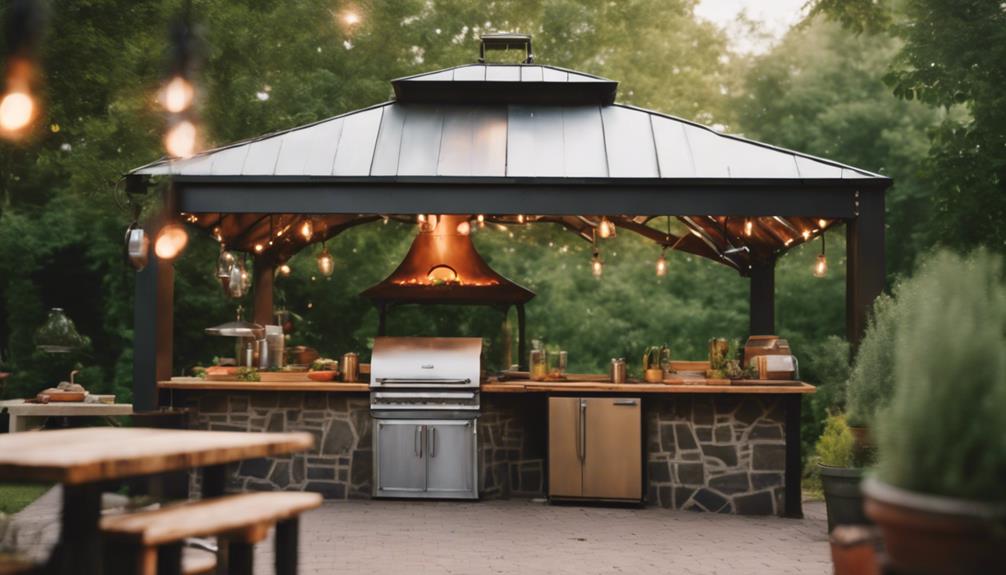
You can repurpose the old metal gazebo frame into a rustic outdoor kitchen by incorporating functional elements that blend seamlessly with the natural surroundings. To create a functional cooking space, add countertops, shelves, and a grill for cooking and entertaining.

Utilize the frame's sturdy structure to hang pots and pans, utensils, and lighting fixtures, maximizing storage and convenience. Consider incorporating a sink or water source for added practicality.

Advertisement

Seating areas for dining and socializing can also be integrated into the design. Customize the space with reclaimed wood, metal accents, and decorative elements to enhance the rustic charm.

Construct a Whimsical Playhouse

creative playhouse design project

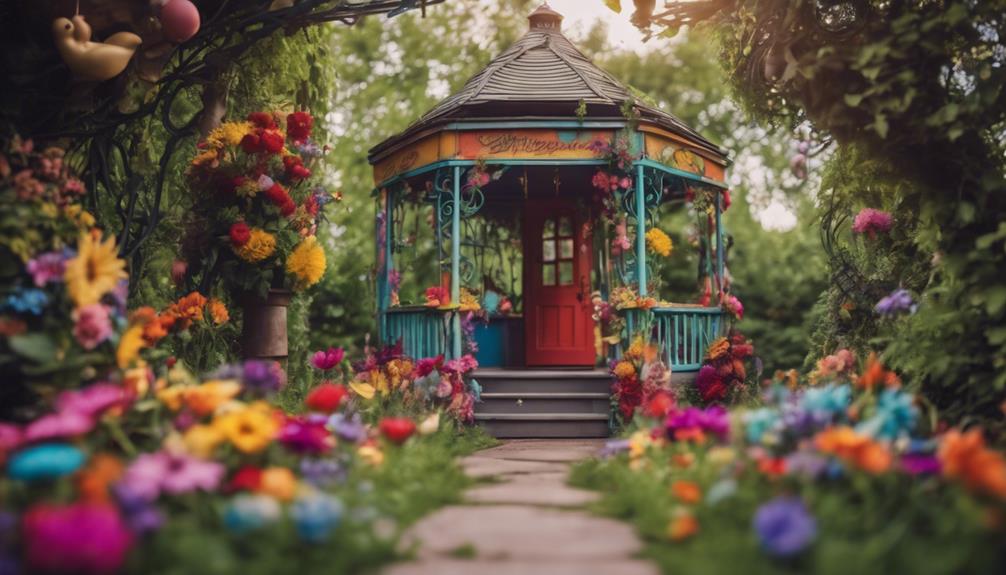
Repurpose the old metal gazebo frame as a whimsical playhouse where kids can let their imagination run wild. You can transform the frame into a magical space that sparks creativity and adventure in children. Start by adding walls, a roof, and fun elements that will make the playhouse a cozy and inviting spot.

Don't forget to enhance the playhouse with colorful paint, playful decorations, and interactive features that will capture kids' attention.

As you build the playhouse, prioritize safety and imagination. Create a space that encourages kids to explore, dream, and have fun. You can add features like windows, a door, and even a tiny mailbox to make the playhouse feel like a miniature home.

With a little creativity, you can turn the old gazebo frame into a charming and imaginative play area that kids will adore. By repurposing the frame, you'll not only give new life to an old structure but also create a unique and exciting space for kids to play and grow.

Turn Into a Greenhouse Oasis

transform space into paradise

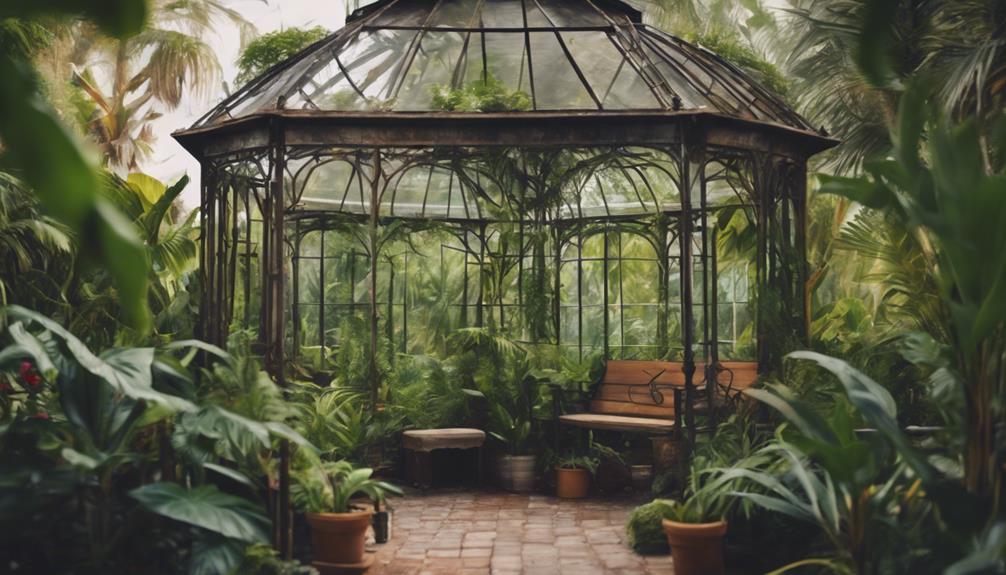
By cleverly utilizing the old metal gazebo frame, you can create a lush greenhouse oasis that brings a touch of serenity to your backyard.

To achieve this, you'll need to transform the frame using greenhouse plastic, shower curtain liners, and landscape fabric. Don't forget to take into account insulation needs, water drainage, and air tightness to make sure your greenhouse oasis remains cozy and functional.

Advertisement

Get creative and think outside the box – or in this case, the gazebo frame! Utilize recycled materials and innovative ideas, such as creating shade for temperature control, to make your greenhouse truly unique.

However, be prepared to overcome challenges like maintaining warmth, water resistance, and fungal issues during the conversion process. With some TLC and clever thinking, you'll be enjoying your tranquil greenhouse oasis in no time.

Just remember to stay focused on the task at hand, and don't be afraid to get your hands dirty!

Upcycle Into a Garden Arbor

reusing materials for gardening

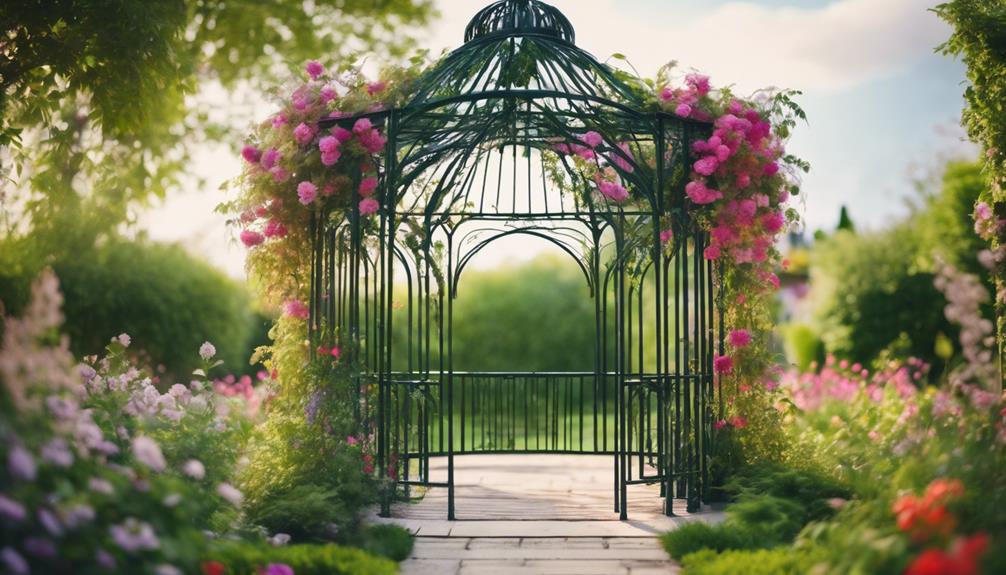
Transforming an old metal gazebo frame into a charming garden arbor can be a brilliant way to breathe new life into your outdoor space. By repainting it in a fresh color, you can give your garden a fresh new look.

You can use the arbor as a focal point in your garden to support climbing plants like roses, vines, or jasmine. This won't only add beauty to your garden but also create a sense of tranquility.

Here are a few ways you can make the most of your garden arbor:

Advertisement
  1. Create an entrance: Repurpose the frame to create a lovely entrance to your garden or a pathway through your yard.
  2. Add decorative elements: Consider adding hanging baskets, solar lights, or wind chimes to enhance the arbor's appeal.
  3. Use as a backdrop: Utilize the garden arbor as a picturesque backdrop for outdoor events, photo shoots, or intimate gatherings.

Craft a Chic Outdoor Bar

create a stylish outdoor bar

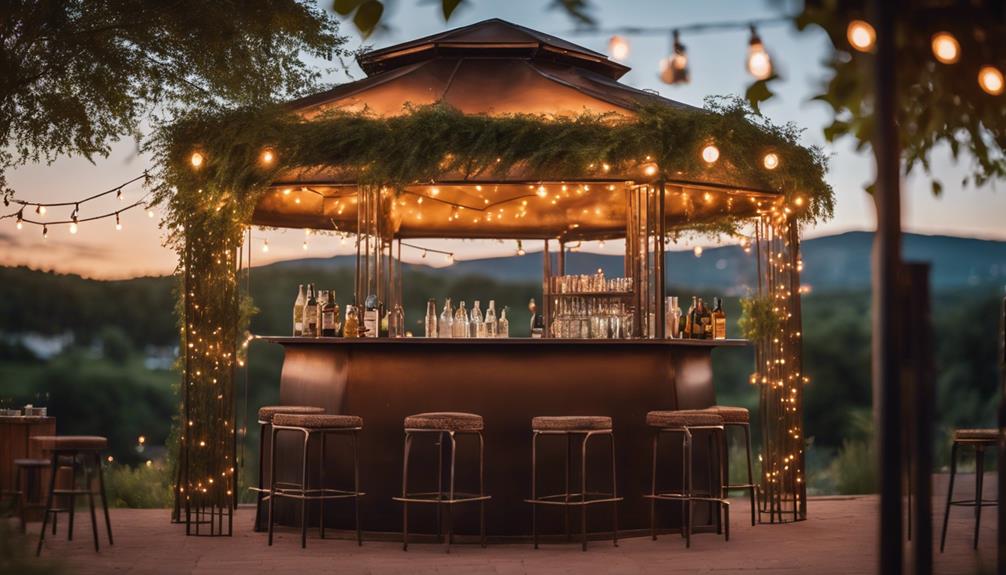
With a little creativity, you can convert your old metal gazebo frame into a chic outdoor bar that's perfect for hosting friends and family. By adding a counter, shelves, and storage for drinks and glassware, you can transform the frame into a functional and stylish bar.

Utilize the sturdy frame as a base for a bar top made from reclaimed wood, granite, or concrete for a rustic or modern look. To enhance functionality, incorporate features like a built-in cooler, wine rack, or hanging space for bar tools.

Don't forget to add some ambiance with string lights, outdoor bar stools, and outdoor decor to create a welcoming space. By repurposing the gazebo frame, you'll create a focal point for your outdoor entertainment area, perfect for gatherings and enjoying drinks with friends and family.

With a little creativity and some elbow grease, you can turn your old gazebo frame into a chic outdoor bar that's sure to impress.

Frequently Asked Questions

How to Upcycle a Gazebo?

When you're wondering how to upcycle a gazebo, you're probably thinking of creative ways to breathe new life into that old metal frame. You're not alone! Many people have successfully transformed their gazebos into unique outdoor features.

You can repurpose it as a plant trellis, outdoor seating area, or even a mini greenhouse. The possibilities are endless, and with a little creativity, you can turn that old gazebo into a stunning outdoor focal point.

Advertisement

How Long Will a Galvanized Steel Gazebo Last?

You're probably wondering, how long will a galvanized steel gazebo last? With proper maintenance and care, it can last up to 50 years.

The galvanized steel is resistant to rust and corrosion, which greatly extends its lifespan. Regular cleaning and protective coatings also play an important role in prolonging its durability.

However, harsh weather conditions can impact its longevity. Inspecting for signs of wear and addressing issues promptly can help maximize its lifespan.

Are Metal Gazebos Worth It?

You're wondering if metal gazebos are worth the investment, and the answer is yes! They offer durability and resistance to harsh weather conditions, requiring minimal maintenance compared to their wooden counterparts.

Their sturdy construction makes them a long-term investment, providing a modern and sleek aesthetic to your outdoor space. With proper care, they can last for many years, making them a valuable addition to your backyard.

Advertisement

Can I Paint a Metal Gazebo?

You're wondering if you can paint a metal gazebo, and the answer is yes, you can!

Before you start, make sure to prime the metal surface with a high-quality primer to guarantee better adhesion and durability.

Choose an outdoor metal paint that's designed to withstand the elements, and consider lightly sanding the surface for a smooth finish.

Conclusion

As you explore the possibilities of repurposing an old metal gazebo frame, remember that upcycling isn't only eco-friendly but also creatively fulfilling.

Did you know that, according to the Environmental Protection Agency, upcycling helps reduce the 12 million tons of metal waste generated in the US each year?

Advertisement

By transforming your old gazebo frame, you're not only giving new life to an old structure but also contributing to a more sustainable future.

Continue Reading
Advertisement

Home Decor

Bookcase on Top of Dresser: How to Stack a Bookcase on a Dresser

Finding the perfect storage solution, learn how to securely stack a bookcase on top of a dresser to maximize space and style.

Published

on

stacking bookcase on dresser

You're about to transform your dresser into a functional and stylish storage space by stacking a bookcase on top of it. To get started, make sure your dresser is sturdy and stable, and clear the top surface of any clutter. Choose a bookcase that matches your dresser's style and consider one with adjustable shelves. Measure the dresser top and bookcase carefully to guarantee a secure fit. By following these steps and taking necessary safety precautions, you'll be able to create a stable and visually appealing stacked bookcase and dresser. Now, discover the detailed steps to achieve a successful and secure assembly.

Key Takeaways

• Ensure the dresser is sturdy and stable to support the weight of the bookcase before stacking.

• Measure the dresser top dimensions and bookcase weight capacity to ensure a secure fit.

• Mark the dresser top for bookcase placement and double-check measurements to prevent errors.

• Securely attach the bookcase to the dresser using L-brackets and anti-tip straps for added stability.

Advertisement

• Distribute weight evenly on the dresser and bookcase to maintain balance and prevent tipping or leaning.

Preparing the Dresser for Stacking

Before you start stacking, make sure your dresser is sturdy and stable enough to support the weight of a bookcase on top. You don't want your entire storage unit to come crashing down due to a flimsy dresser. Take a closer look at your dresser's construction and verify it can handle the added weight. If you're unsure, try painting the dresser a new color to give it a fresh look and distract from any structural weaknesses.

Next, clear the top surface of the dresser to provide a flat and level base for the bookcase. Remove any clutter or items that might be obstructing the surface. You want a smooth, even surface for the bookcase to sit on. This will help keep things stable and secure.

Choosing the Right Bookcase

selecting the perfect bookshelf

When choosing the right bookcase to stack on your dresser, you'll want to take into account a few key factors to guarantee a stable and stylish combination.

You'll need to think about the bookcase's size, bearing in mind the dresser's dimensions, as well as its style, which should complement or match the dresser's design.

Bookcase Size Matters

You'll want to measure the dimensions of the dresser top to make sure the bookcase fits securely, as a bookcase that's too large can be unstable and even topple over. A bookcase that's too small, on the other hand, mightn't provide enough storage space. To find the perfect fit, consider the following:

Advertisement
  • Measure carefully: Take precise measurements of the dresser top to make certain the bookcase fits snugly.
  • Check the weight capacity: Make sure the dresser can support the weight of the bookcase and its contents.
  • Think about style: Choose a bookcase that complements the dresser in terms of style, color, and design.
  • Adjustability is key: Opt for a bookcase with adjustable shelves to accommodate books and items of varying heights.

Bookcase Style Fits

Now that you've found a bookcase that fits the dresser's dimensions, it's time to think about the style of the bookcase that will work best for your needs. You want a bookcase that not only looks great but also complements the dresser and meets your storage requirements.

When choosing a bookcase style, consider the following factors:

Feature Description
Adjustable Shelves Provides flexibility in organizing items on top of the dresser
Stable Base Guarantees stability when stacked on the dresser
Secure Attachment Prevents the bookcase from toppling over
Complementary Design Matches the dresser's style for a cohesive look
Weight Capacity Can hold the weight of your items without overloading

Measuring and Marking the Space

precise spatial measurements taken

Measure the width and depth of the top of the dresser carefully to guarantee a secure fit for the bookcase. You want to make sure the bookcase sits snugly on top of the dresser, without any wobbling or instability. Take out your tape measure and record the dimensions of the dresser top. Don't forget to take into account the weight of the bookcase and its contents when measuring and marking the space.

Here are some key things to keep in mind:

  • Use a tape measure to determine the height clearance above the dresser for the bookcase.
  • Mark the areas on the dresser where the bookcase will sit to guide the placement.
  • Double-check the measurements and markings before placing the bookcase on top of the dresser to prevent any misalignment.
  • Take into consideration the overall weight of the bookcase and its contents when measuring and marking the space.

Assembling the Bookcase Top

building furniture with precision

Place the bookcase top onto the uprights, making sure it fits snugly and evenly, with the pre-drilled holes aligning perfectly for a secure attachment.

Once you've verified the top is properly aligned, you can start attaching it to the uprights using the provided screws or bolts. Be sure to tighten them firmly, but avoid overtightening, which can damage the material.

As you assemble the bookcase top, double-check that it's level and stable, as any imbalance can affect the overall structure's stability.

Additionally, make sure the top is securely attached to the uprights to prevent it from shifting or collapsing under the weight of the books or decorations you plan to place on it.

Advertisement

Remember to consult the manufacturer's instructions if you're unsure about any part of the assembly process.

Securing the Bookcase to Dresser

anchoring furniture for safety

You'll need to take extra precautions to make sure the bookcase remains stable and secure when positioned on top of the dresser. After all, you've invested time and effort into assembling the bookcase, and you want to guarantee it stays upright and functional.

To achieve this, follow these essential steps:

  • Use L-brackets to secure the bookcase to the dresser for added stability.
  • Ensure the dresser is sturdy enough to support the weight of the bookcase.
  • Anchor the bookcase to the wall for further security, especially if it's tall.
  • Position the bookcase evenly on top of the dresser to distribute weight evenly.

Adding Decorative Touches

enhancing with decorative elements

Now that your bookcase is securely positioned on the dresser, it's time to get creative and add some decorative flair to make this combo piece truly stand out.

You can start by considering adding decorative molding or trim to the top of the bookcase to create a smooth shift between the dresser and shelving units.

Another idea is to use adhesive wallpaper or contact paper to add a pop of color or pattern to the back of the bookcase for a stylish touch.

If you want to add some modern functionality, incorporate LED strip lights underneath the bookcase for a sleek and functional lighting solution.

Advertisement

To enhance the overall look of the dresser-shelving combo, display decorative items like plants, figurines, or framed photos on top of the bookcase.

Finally, experiment with different styling options, such as arranging books in a mix of vertical and horizontal stacks or organizing items by color for a visually appealing display.

Final Assembly and Placement

final assembly and arrangement

Now that you've added those final decorative touches, it's time to focus on securing your bookcase on top of the dresser.

In this final assembly and placement stage, you'll need to:

  • Secure the bookcase top
  • Position the bookcase unit
  • Finalize the assembly to guarantee a sturdy and visually appealing combination.

Secure the Bookcase Top

With the bookcase positioned securely on top of the dresser, make certain its top is evenly aligned and firmly attached to prevent any shifting or tilting. You want to guarantee that the bookcase is stable and won't topple over, causing damage or injury.

To achieve this, follow these essential steps:

  • Use anti-tip straps or brackets to secure the bookcase to the wall for added support.
  • Make sure the dresser is level and sturdy to support the weight of the bookcase.
  • Test the stability of the bookcase on the dresser by gently pushing and pulling on it.
  • Leave some space between the bookcase and the wall for ventilation and easy access to the dresser drawers.

Position the Bookcase Unit

Place the bookcase unit on the dresser, making sure it's centered and aligned for maximum stability.

Double-check that the weight distribution is even on the dresser to support the bookcase's weight. You don't want the dresser to tip or the bookcase to slide off.

Advertisement

To prevent this, place non-slip pads or rubber feet under the bookcase to keep it firmly in place. Additionally, consider using anti-tip hardware to secure the bookcase to the wall, eliminating any risk of tipping hazards.

Before you start loading the bookcase with books or items, test its stability to confirm everything is secure. Give the bookcase a gentle push or pull to check that it doesn't wobble or shift.

If you're satisfied with the setup, you're ready to start loading your bookcase with your favorite books or decorative items. Remember to maintain a balanced weight distribution to keep your stacked bookcase and dresser combination stable and safe.

Finalize the Assembly

You've confirmed the stability of your stacked bookcase and dresser, so it's time to finalize the assembly by securely attaching the bookcase to the dresser and making any necessary adjustments for a balanced and visually appealing arrangement.

This is the final step in creating a sturdy and attractive storage solution.

Advertisement

To guarantee a safe and secure setup, remember to:

  • Attach the bookcase to the dresser using appropriate connectors for stability
  • Ensure even weight distribution to prevent tipping or leaning
  • Double-check all connections and fastenings to assure a safe and secure setup
  • Test the stability by gently nudging the bookcase to confirm the dresser can support the weight

Safety Precautions and Tips

safety first always prepared

Prior to stacking a bookcase on a dresser, verify that the dresser is sturdy and stable enough to support the weight of the bookcase to avoid any potential hazards. You don't want the entire structure to come crashing down, causing damage or even injury.

To guarantee your safety, take some essential precautions. First, use anti-tip straps to secure the bookcase to the wall, preventing it from tipping over. Next, distribute the weight evenly on the dresser and bookcase to maintain balance. Avoid overloading the shelves with heavy items, as this can put undue strain on the dresser. Finally, regularly check and tighten the connections between the dresser and bookcase for added safety.

Frequently Asked Questions

Can I Put a Bookshelf on Top of a Dresser?

You're wondering if you can put a bookshelf on top of a dresser. The short answer is yes, but with caution. Make sure your dresser is sturdy enough to support the weight of the bookshelf, and consider the overall height and aesthetics.

You'll also want to secure the bookshelf to the dresser to prevent sliding or tipping. With careful planning, you can create a functional and stylish storage solution.

How Do You Stack a Bookcase?

As you contemplate the challenging task of stacking a bookcase, imagine a Jenga tower teetering on the brink of collapse – a delicate balancing act that demands precision and patience.

Advertisement

To stack a bookcase, you'll need to guarantee stability and levelness, aligning the edges of the dresser and bookcase, and securing it with brackets or wall anchors.

Don't forget to check the weight capacity of both pieces to avoid a catastrophic collapse.

How to Attach Two Bookcases Together?

To attach two bookcases together, you'll need to secure them at the top and bottom using L-brackets or corner braces. Confirm they're level and aligned before attaching them.

Drill pilot holes for the screws to prevent splitting the wood, and choose the right screws or bolts for the material.

Can I Stack BILLY Bookcases?

You're wondering if you can stack BILLY bookcases? The answer is yes, you can! IKEA designed these bookcases to be stackable, and they even come with the necessary hardware to secure them together.

Advertisement

Just make sure you follow the assembly instructions and verify that the dresser can support the added weight and height.

Conclusion

By following these steps, you've successfully stacked your bookcase on top of your dresser, creating a unique and functional storage solution. This space-saving hack not only adds extra storage but also creates a visually appealing display for your favorite books and decorative items.

Remember to always prioritize safety and stability when stacking heavy furniture, and don't be afraid to get creative with your design choices.

Continue Reading

Home Decor

Creating Your Own Tropical Escape at Home

Witness the transformation of your backyard into a vibrant tropical oasis, complete with lush plants, soothing water features, and cozy seating areas.

Published

on

By

tropical paradise in home

We're bringing the tropical vacation vibe into our backyards, with over 70% of homeowners considering outdoor spaces essential, according to the National Association of Landscape Professionals. To create our own tropical escape at home, we consider sunlight, soil type, and climate zone for plant selection, factoring in care and maintenance needs. We design with water features for a lush landscape, aiming for a functional and sustainable tropical garden. By mixing different plant species, incorporating water features, and creating cozy seating areas, we can achieve a vibrant and tranquil oasis. As we explore further, we'll uncover even more secrets to crafting our ultimate tropical retreat.

Key Takeaways

• Consider sunlight, soil type, and climate zone when selecting plants for your tropical garden to ensure their survival and thrive.

• Incorporate a mix of foliage plants, flowering plants, and ground covers to create a lush and vibrant garden.

• Design your tropical landscape with layers of foliage, varying heights, and textures to create a balanced and diverse look.

• Incorporate water features, such as ponds or fountains, to add visual interest and create a tranquil atmosphere.

Advertisement

• Add natural elements, such as bamboo benches and rattan furniture, to create a cozy outdoor seating area that complements your tropical garden.

Planning Your Tropical Oasis

As we embark on creating our tropical getaway, we must first take into account the unique conditions of our yard, including climate, sunlight levels, and soil type to choose the perfect tropical plants that will thrive in our outdoor space.

When planning our tropical sanctuary, we need to factor in elements such as the climate zone we're in, as this will dictate which plants will flourish and which will struggle. We must also contemplate the care and maintenance needs of the plants we choose, ensuring we can provide the necessary attention to keep them healthy.

Designing a tropical backyard requires thoughtful consideration, incorporating water features and layers of tall trees, midsize shrubs, and low-lying plants to create a lush and diverse landscape. By taking these aspects into account, we can create a tropical paradise that transports us to a tropical state of mind.

As we plan our oasis, we must remember that 'a well-designed tropical garden isn't just visually appealing, but also functional and sustainable' (Tropical Garden Design). By keeping these elements in mind, we can create a truly unforgettable tropical escape.

Advertisement

Selecting the Right Plants

choosing the perfect garden

We'll start by choosing the stars of our tropical show, selecting plants that will thrive in our unique outdoor conditions and create a lush, vibrant atmosphere. When it comes to tropical landscaping, we want a mix of height, texture, and color to achieve a balanced and visually appealing design. For a lush and vibrant tropical garden, we'll choose tropical plants like palms, elephant ears, bird of paradise, and ginger.

Plant Type Description
Foliage Plants Provide lush, vibrant foliage, e.g., palms, elephant ears
Flowering Plants Add pops of color, e.g., orchids, bromeliads
Ground Covers Add texture and visual interest, e.g., liriope, mondo grass

Creating Layers of Foliage

artistic exploration of nature

By combining plants of varying heights, textures, and colors, we can create a lush, multi-dimensional landscape that transports us to a tropical paradise. When it comes to creating layers of foliage, we're not just limited to a single type of plant. We can mix and match different species to achieve a diverse look that's reminiscent of a tropical jungle.

For instance, tall trees like palms or bamboo provide a canopy, while midsize shrubs like hibiscus add color and structure. Meanwhile, low-lying plants such as ferns and ground covers fill in gaps and create a dense, jungle-like atmosphere. Large-leaf plants like elephant ears or philodendrons add visual interest and a tropical rainforest feel to the garden.

Incorporating Water Features

enhancing spaces with water

To take our tropical escape to the next level, we're incorporating water features that not only soothe our senses but also create a thriving ecosystem. Ponds, for instance, can be a serene addition to our tropical garden, especially when adorned with aquatic plants like water lilies and lotus.

Adding fish like koi or goldfish not only enhances visual interest but also contributes to the ecosystem of our tropical oasis. We're also considering incorporating cascading waterfalls, babbling brooks, or fountains to create movement and a sense of tranquility.

By designing our water features to provide a habitat for wildlife, we can attract birds and butterflies, adding dynamic elements to the space. Whether it's a small fountain or a large pond, water features can serve as focal points in our tropical garden, enhancing the overall tropical paradise experience with their beauty and sound.

Designing a Cozy Seating Area

creating a comfortable space

As we create our own tropical escape at home, we're excited to design a cozy seating area that's perfect for relaxation. To achieve this, we'll focus on three essential elements:

Cozy Corner Essentials

Comforting Fabric Choices

Advertisement

Soothing Color Palette

These elements will work together to create a tranquil atmosphere that invites lounging and socializing. By incorporating these elements, we'll be able to craft a seating area that's both functional and aesthetically pleasing, making our tropical oasis feel like a true retreat.

Cozy Corner Essentials

We craft our cozy corner's inviting atmosphere by incorporating natural elements, like bamboo benches and hammocks, which instantly evoke the warmth and tranquility of a tropical escape.

As we design our seating area, we want to create a space that transports us to a tropical garden oasis. To achieve this, we focus on incorporating essential elements that evoke a sense of relaxation and tranquility.

Here are a few must-haves for our cozy corner:

Advertisement
  • Accent pillows and cushions in bold colors or tropical patterns to add a pop of color.
  • Tables for drinks and snacks to enhance functionality.
  • A Tiki bar as a focal point for a tropical backyard oasis.

Comforting Fabric Choices

We're wrapping ourselves in comfort with fabric choices that evoke the warmth and serenity of a tropical haven. When designing a cozy seating area, we opt for cozy fabric options like cotton, linen, and velvet, which provide the perfect blend of softness and durability.

To guarantee our outdoor space remains comfortable and low-maintenance, we incorporate outdoor fabrics that are weather-resistant and easy to clean. Tropical patterns, such as palm leaves and floral prints, add a touch of whimsy and vibrancy to our seating area. We also choose upholstery with tropical motifs like pineapples, flamingos, or exotic flowers for a fun and playful touch.

To further enhance the comfort level, we add throw pillows and blankets made from soft materials. By selecting these fabrics, we create a comfortable seating area that invites relaxation and tranquility, perfect for a tropical escape at home.

Soothing Color Palette

To evoke the serene ambiance of a tropical haven, we select a soothing color palette that calms the senses, setting the tone for a cozy seating area that beckons relaxation. When it comes to creating a tranquil atmosphere, our color choices play a significant role.

We opt for a palette that combines soft blues, greens, and neutrals to create a calming ambiance. To add a touch of vibrancy, we incorporate pops of tropical colors like coral, turquoise, and yellow.

Some tips to keep in mind:

Advertisement
  • Choose a soothing color palette that calms the senses
  • Incorporate tropical colors like coral, turquoise, and yellow for a vibrant touch
  • Balance bold colors with natural materials like rattan, bamboo, or teak for a cozy tropical feel

Attracting Wildlife to Your Yard

garden for wildlife conservation

By incorporating plants like Mexican salvia and bulbine, we can transform our outdoor space into a vibrant oasis that beckons in butterflies and hummingbirds. These specific plants are known to attract these beautiful creatures, creating a wildlife presence that enhances our outdoor space. To further attract butterflies, we can incorporate bright tropical colors in our garden, creating a cheerful ambiance that's perfect for a tropical escape.

Attracting Wildlife Tips
Butterflies Plant Mexican salvia, use bright tropical colors
Hummingbirds Plant bulbine, add tropical signs and bamboo wind chimes
Jungle-like atmosphere Incorporate specific plants, add Tiki masks

Adding Shade Options

customizing patio with awnings

Our tropical escape isn't complete without incorporating shade options to protect our plants and create a comfortable outdoor space. As we design our oasis, we need to ponder the importance of shade in creating a relaxing atmosphere. Not only does shade shield our plants from direct sunlight, but it also provides a comfortable spot to lounge and enjoy the outdoors.

To achieve this, we can integrate various shade options into our design. Here are a few ideas to get us started:

  • Adding a Palapa or thatch umbrella provides beauty and shade in our backyard, creating a perfect spot to relax.
  • Thatch umbrellas are movable and versatile, suitable for various areas in our tropical oasis.
  • Contemplate ordering an umbrella kit for convenience and easy assembly, allowing us to enhance our outdoor space with shade options.

Building a Focal Point

designing a striking architecture

We're now ready to create a show-stopping centerpiece that draws the eye and defines our tropical escape. A well-designed focal point can elevate our outdoor space, creating an unforgettable ambiance.

For us, this could be a stunning Tiki bar, complete with bamboo accents and thatched roofing, instantly transporting us to a tropical paradise. Alternatively, incorporating a fire pit adds a dramatic touch, perfect for cozying up on cool evenings.

To further enhance the ambiance, we can create natural stone pathways that lead to our focal point, such as a pool or outdoor kitchen. Adding shade with a Palapa or thatch umbrella not only provides comfort but also enhances the beauty of our backyard.

For a more hands-on approach, we can consider DIY projects like building a fire pit with stones, sand, and a steel ring for durability. By incorporating these elements, we can create a captivating focal point that becomes the heart of our tropical escape.

Designing Pathways and Walkways

creating outdoor walking areas

As we've crafted our focal point, let's now create inviting pathways that weave our tropical escape together, drawing visitors seamlessly from one enchanting area to the next.

To achieve this, we'll incorporate natural stone pathways that exude a magical and authentic tropical feel in our backyard. By leading these pathways to focal points like a Tiki bar or pool, we'll create a sense of unity and flow in our outdoor space.

Advertisement

To take it to the next level, we can:

  • Use native stones for our pathways to enhance the authenticity of our tropical oasis
  • Press coarse rock salt into wet concrete for a weathered look that adds character to our stone pathways
  • Link different areas of our yard with stone pathways to create a cohesive and inviting tropical escape

Completing the Paradise Look

creating a tropical paradise

To complete the transformation of our backyard into a tropical oasis, let's infuse it with the vibrant spirit of the islands by incorporating accents, décor, and unique elements that evoke a sense of paradise. We can create cozy seating areas with rattan furniture and vibrant accent pillows, perfect for a relaxing tropical retreat. To elevate the tropical oasis feel, we can incorporate tropical accents and décor like water features and tiki torches. For a more personalized touch, we can craft our own tropical décor, such as hand-carved masks and bamboo wind chimes, to create a festive atmosphere.

Element Description Benefit
Water Features Add a soothing sound to your oasis Creates a calming ambiance
Tiki Torches Illuminate your outdoor space Adds a warm, tropical glow
Rattan Furniture Comfortable seating for relaxation Defines cozy seating areas

Frequently Asked Questions

How to Create a Tropical Environment in Your Home?

"We're often asked how to create a tropical environment in our homes, and we're excited to share our tips, from choosing the right plants to incorporating natural materials and warm lighting, to transport ourselves to a tropical oasis."

How to Make Your Home Feel Tropical?

"We're craving a tropical vibe, so we're swapping heavy drapes for light, airy curtains and trading dark colors for bright hues to make our home feel like a sunny island getaway."

How to Make Your Backyard a Tropical Paradise?

We're turning our backyard into a tropical paradise by incorporating lush foliage, vibrant blooms, and soothing water features, creating an authentic oasis that's perfect for relaxation and attracting local wildlife.

How to Turn Your Backyard Into Paradise?

As we envision our backyard transforming into a haven, we'll turn it into a paradise by incorporating lush greenery, soothing water features, and cozy nooks, transporting us to a serene oasis, where our worries fade like morning dew.

Advertisement

Conclusion

As we conclude our journey to create a tropical escape at home, we've woven together the essential elements: lush plants, soothing water features, cozy seating areas, and meandering pathways.

By incorporating these design elements, we've crafted an oasis that transports us to a tranquil world. 'The key to a successful tropical garden is to create a sense of layers and textures,' notes landscape designer, Jamie Durie.

With these expert tips and a dash of creativity, our indoor or outdoor space has transformed into a serene retreat, perfect for relaxation and rejuvenation.

Continue Reading

Home Decor

10 Stunning Brick Wall Accent Wall Ideas

Yearning for a design element that adds texture and charm to your space?

Published

on

brick wall design inspiration

You're considering incorporating a stunning brick wall accent into your interior design. From exposed brick walls that add rustic charm to modern brick inlay designs that create visually appealing accents, there are numerous ways to inject texture, depth, and character into your space. Whitewashed brick walls can evoke a vintage-inspired charm, while industrial chic brick accent walls add a raw, urban vibe. Classic brick arch accent walls can elevate your space with timeless charm, and distressed brick accent walls can create a cozy, lived-in atmosphere. Each style offers a unique opportunity to make a statement – and there's more to discover as you explore the world of brick wall accent walls.

Key Takeaways

• Exposed brick accent walls inject rustic charm and industrial flair, elevating a room's character and creating a visual focal point.

• Rustic chic brick feature walls evoke warmth and character, adding a vintage charm and cozy focal point to a room.

• Modern brick inlay designs offer visually appealing accent walls with intricate designs that add depth and texture.

• Distressed brick accent walls add a weathered look charm to a room, creating a cozy, lived-in atmosphere with unique texture.

Advertisement

• Brick veneer accent walls provide a cost-effective solution with a realistic brick look, complementing interior design and creating unique focal points.

Exposed Brick Accent Wall Charm

Adding an exposed brick accent wall to your space injects a dose of rustic charm and industrial flair, instantly elevating the room's character. You'll love how this design element brings a unique blend of ruggedness and sophistication to your interior.

An exposed brick accent wall creates a striking visual interest, drawing the eye towards it and making it a natural focal point in the room. The industrial touch it adds works beautifully with various interior design styles, ensuring it will complement your existing décor.

What's more, you can customize your brick accent wall with different finishes and colors to achieve a personalized look that reflects your taste. Whether you're going for a rustic, industrial, or modern vibe, an exposed brick accent wall is an excellent way to add depth and character to your space.

Rustic Chic Brick Feature Wall

rustic charm modern design

You can evoke the warmth and character of a rustic hideaway by incorporating a rustic chic brick feature wall into your space. This design element adds a touch of vintage charm and character to modern interiors, creating a cozy focal point that draws the eye.

By incorporating a brick accent wall, you can easily enhance the ambiance and style of a room, making it feel more inviting and stylish.

Advertisement

Here are some ways to bring rustic chic charm to your space:

  • Imagine a whitewashed brick wall adding a soft, romantic glow to a bedroom or living room.
  • Picture a rough red brick wall creating a bold, industrial-chic statement in a modern loft or apartment.
  • Envision a brick accent wall dividing a large open-plan space, defining different areas for living and dining.
  • Visualize a brick feature wall adding warmth and texture to a minimalist space, creating a cozy retreat from the world outside.

Modern Brick Inlay Design

innovative brickwork techniques used

As you explore modern brick inlay design, you'll discover a world of possibilities for creating a unique and stylish accent wall. From choosing the perfect brick pattern to blending materials in innovative ways, you'll have plenty of options to make your design truly one-of-a-kind.

Now, let's take a closer look at the key points that will help you bring your modern brick inlay design to life:

brick pattern options,

unique material blends,

and inlay design variations.

Advertisement

Brick Pattern Options

Modern brick inlay designs offer a fresh, contemporary spin on traditional brick walls, allowing you to create a unique and visually appealing accent wall that elevates any room's style. With modern brick inlay designs, you can add a stylish touch to your space without sacrificing sophistication.

The intricate designs of modern brick inlay add depth and texture to the space, making it perfect for creating an accent wall.

Some popular brick pattern options include:

  • Herringbone patterns that create a sense of movement and energy
  • Chevron patterns that add a modern, edgy vibe
  • Alternating brick patterns that create a sense of rhythm
  • Interlocking brick patterns that add a touch of whimsy

These designs offer a contemporary twist on traditional brick walls, allowing you to create a one-of-a-kind accent wall that reflects your personal style.

Unique Material Blends

By blending traditional brick with materials like glass, metal, or reclaimed wood, unique material blends can add an extra layer of sophistication and visual interest to your modern brick inlay design. This fusion of old and new creates a striking focal point in your accent brick wall, perfect for making a statement in any room. With unique material blends, you can incorporate contemporary elements into your traditional brick walls, adding a personalized touch to your space.

Material Blend Visual Interest Design Flexibility
Brick + Glass Adds shine and reflection Can create a modern, sleek look
Brick + Metal Incorporates industrial chic Offers a rugged, edgy vibe
Brick + Reclaimed Wood Brings warmth and coziness Can evoke a rustic, natural feel

Inlay Design Variations

You can take your brick accent wall to the next level with inlay design variations that incorporate intricate patterns and geometric shapes, adding a contemporary touch to your space. These modern designs create visual interest and depth in a room, making your brick wall a stunning focal point.

Advertisement

With inlay designs, you can customize the patterns to fit your unique style, ensuring your space reflects your personality.

Here are some ideas to get you started:

  • Hexagonal patterns that add a touch of sophistication
  • Herringbone designs that create a sense of movement
  • Geometric shapes that add a pop of color
  • Nature-inspired patterns that bring the outdoors in

Distressed Brick Accent Wall Style

rustic brick wall decor

As you consider incorporating a distressed brick accent wall into your design, you'll want to think about the unique charm it can bring to a room.

The weathered look and rustic texture of distressed brick can add a level of character to your space that's hard to replicate with other materials.

Weathered Look Charm

Achieve a warm, inviting atmosphere in your home with a distressed brick accent wall, which instantly adds a weathered look charm that's both rustic and refined. This style of accent wall is perfect for creating a cozy, lived-in atmosphere that makes you feel like you're walking into a vintage retreat.

The distressed finish of the brick creates a sense of history and authenticity in the space, adding character and warmth to your interior.

Advertisement

Some of the key benefits of a distressed brick accent wall include:

  • A unique texture that adds depth and visual interest to your room design
  • A vintage aesthetic that adds character and warmth to your interior
  • A rustic appeal that creates a cozy, inviting atmosphere
  • An aged charm that makes your space feel like it's been lived in for years

Rustic Texture Accent

What's behind the enduring appeal of distressed brick accent walls, and how do they add a rustic texture to a room?

As you consider incorporating a brick wall into your design, you'll want to explore the distressed look, which brings a unique charm to any space.

The worn appearance of distressed brick creates a vintage and aged look that's perfect for industrial and farmhouse design themes.

This style of brick accent wall adds character and charm to the space, making it a popular choice for those seeking a one-of-a-kind focal point.

The texture of distressed brick provides a unique and eye-catching element in a room, drawing the eye towards its rustic beauty.

Advertisement

When you incorporate a distressed brick accent wall into your design, you'll be rewarded with a space that exudes warmth and personality.

Brick Veneer Accent Wall Ideas

enhancing interiors with bricks

By incorporating brick veneer accent walls into your design, you can instantly add a touch of sophistication and character to any room. This cost-effective solution offers a realistic brick look without the hefty price tag or structural modifications.

With a variety of colors, textures, and styles to choose from, you can easily find a brick veneer that complements your interior design.

Here are some inspiring ideas to get you started:

  • Create a modern, industrial-style kitchen with a white brick veneer accent wall that adds a touch of rustic charm.
  • Use brick veneer to add warmth and texture to a minimalist interior, creating a cozy atmosphere.
  • Incorporate brick veneer into your living room design to add character and create a unique focal point.
  • Pair brick veneer with sleek, modern furniture to create a striking contrast that elevates your interior style.

With brick veneer accent walls, the possibilities are endless, and the result is always a space that exudes style and sophistication.

Reclaimed Brick Decor Inspiration

brick wall revival ideas

Bring a touch of history into your home with reclaimed brick decor, which injects a dose of authenticity and uniqueness into your interior design.

By incorporating reclaimed brick accent walls, you'll add a rustic and authentic touch to your interior spaces. These walls are made from salvaged bricks with unique textures and colors, creating a warm and inviting atmosphere in any room.

Not only do they bring character to a space, but they're also sustainable and eco-friendly design elements. Incorporating reclaimed brick into your decor can add a sense of history and charm to your home, making it truly one-of-a-kind.

Advertisement

With reclaimed brick, you'll get a unique blend of rustic charm and modern style, perfect for creating a cozy retreat or a statement piece. So, why settle for ordinary walls when you can have a work of art that tells a story?

Get inspired by reclaimed brick decor and transform your space into a true masterpiece.

Thin Brick Wall Design Concepts

innovative thin brick ideas

As you explore thin brick wall design concepts, you'll discover the versatility of these accent walls lies in their ability to incorporate various brick patterns, which can add a unique visual flair to any room.

By combining different patterns, such as herringbone or running bond, you can create a one-of-a-kind design that showcases your personal style.

With thin brick accent walls, you can also experiment with texture, introducing an extra layer of visual interest to your space through the subtle variations in brick texture.

Brick Pattern Variety

You can create a one-of-a-kind accent wall by mixing and matching different brick patterns, such as herringbone, basket weave, and running bond, to add visual interest and texture to your interior space. With a brick pattern variety, you can achieve a unique accent wall that reflects your personal style.

Advertisement

Thin brick walls offer flexible design options, allowing you to experiment with different layouts to create a modern or traditional look.

Some popular brick patterns to consider include:

  • Herringbone: a classic pattern featuring alternating bricks that create a zigzag design
  • Basket weave: a pattern that resembles a woven basket, adding depth and texture to your wall
  • Running bond: a classic pattern featuring bricks laid in a staggered pattern
  • Stack bond or soldier course: modern patterns that add a sleek, contemporary touch to your space

Textured Visual Interest

Thin brick accent walls inject textured visual interest into interior spaces, offering an authentic brick look and feel that adds depth and character to any room. As you incorporate thin brick into your design, you'll notice the texture that will make your space feel cozier and more inviting.

The rustic charm of thin brick creates an ambience that's perfect for relaxed gatherings or intimate moments. By adding style to your interior, thin brick accent walls create a focal point that draws the eye and sparks conversation.

Plus, with a variety of colors and patterns available, you can customize your thin brick wall to suit your unique aesthetic. For a cool accent, consider a whitewashed brick wall that adds a touch of rustic elegance to your space. Alternatively, you can create a contrasting look by pairing thin brick with sleek, modern elements.

Whatever your design style, thin brick accent walls are sure to add style and visual interest to your space.

Advertisement

Industrial Chic Brick Accent Wall

modern urban style design

What kind of industrial chic vibe do you want to create in your space with an exposed brick accent wall?

With industrial chic brick accent walls, you can add a raw, urban vibe to any space. Exposed brick creates a visually striking and textural focal point in a room, making it a versatile design element suitable for modern, industrial, or eclectic styles.

Here are some ways to create an industrial chic brick accent wall:

  • Imagine a statement wall with exposed brick, contrasted with sleek, modern furniture for a striking contrast.
  • Envision a cozy reading nook surrounded by exposed brick, with plush armchairs and floor lamps.
  • Picture a spacious loft with an exposed brick accent wall, paired with industrial-chic lighting fixtures and reclaimed wood furniture.
  • Visualize a minimalist space with an exposed brick accent wall, complemented by monochromatic decor and sleek lines.

Whitewashed Brick Accent Wall Look

brick accent wall makeover

Whitewashing transforms brick into a charming, vintage-inspired accent wall that warms up any space with its soft, textured appeal. As you incorporate whitewashed brick into your design, you'll notice how it adds a touch of character to your room. The softening effect of whitewashing brick creates a warm and inviting atmosphere, perfect for cozying up your space.

Benefits Description
Adds Character Whitewashed brick accent walls offer a unique, vintage charm that adds character to any room.
Provides Texture The soft, textured appeal of whitewashed brick adds depth and visual interest to your space.
Versatile Backdrop Whitewashed brick provides a neutral, versatile backdrop that complements various design styles.
Fresh Twist Whitewashed brick accent walls offer a fresh and modern twist on traditional brick walls.
Warmth and Cozy Whitewashing brick softens its appearance, creating a warm and cozy atmosphere in your space.

Classic Brick Arch Accent Wall

brick arch accent wall

As you incorporate a classic brick arch accent wall into your design, you'll discover how its timeless charm and rustic appeal can elevate any space. This versatile design element can complement various interior styles, from industrial to farmhouse, adding a warm and inviting atmosphere to any room.

Here are some key benefits of incorporating a classic brick arch accent wall into your design:

  • Creates a focal point in the room, drawing attention and adding character
  • Adds a touch of rustic charm, perfect for creating a cozy atmosphere
  • Can be paired with traditional brick materials to create a cohesive look
  • Can be used to create a sense of warmth and intimacy in a large, open space

With its timeless design and rustic charm, a classic brick arch accent wall is sure to elevate any space. Whether you're looking to add a touch of industrial chic or cozy farmhouse charm, this design element is sure to impress.

Frequently Asked Questions

How Can I Make My Brick Wall More Attractive?

To make your brick wall more attractive, you'll want to highlight its natural texture and color variations. Consider incorporating lighting fixtures to showcase its unique features.

You could also add a pop of color by painting the brick in a bold or contrasting hue. Additionally, incorporate decorative elements like artwork, mirrors, or shelves to enhance the visual appeal.

Advertisement

How to Decorate a Brick Accent Wall?

As you stand before your brick accent wall, it's like a blank canvas waiting for your creative brushstrokes.

To decorate it, start by considering the room's style and theme. Add a statement piece, like a large piece of art or a mirror, to draw the eye towards the wall.

Then, balance it with complementary decor, such as vases, candles, or plants, to create a harmonious look that ties the room together.

How Do You Make a Stunning Accent Wall?

To create a stunning accent wall, you'll want to start by selecting a focal point, like a statement piece of art or a show-stopping light fixture.

Then, choose a color scheme that complements the room's overall aesthetic, and consider adding texture with materials like brick, wood, or fabric.

Advertisement

Don't be afraid to mix and match patterns, and don't forget to balance bold elements with neutral accents to avoid visual overload.

How to Modernize a Brick Wall?

As you start modernizing your brick wall, remember that 'Rome wasn't built in a day.'

Begin by painting the wall a neutral color to create a blank canvas.

Then, incorporate sleek shelving or artwork to introduce a contemporary flair.

Don't be afraid to mix materials, like wood and metal, to add depth and visual interest.

Advertisement

Conclusion

You've made it to the end of this brick-filled journey, and hopefully, you're not feeling like you've hit a wall (pun intended).

Ironically, the most challenging part of incorporating a brick accent wall into your design is probably deciding which stunning idea to choose from.

With these 10 striking concepts, you're bound to find the perfect blend of style and substance to elevate your space.

So, get ready to break out the bricks (or not, depending on your chosen design) and start building your dream space!

Advertisement

Continue Reading

Trending