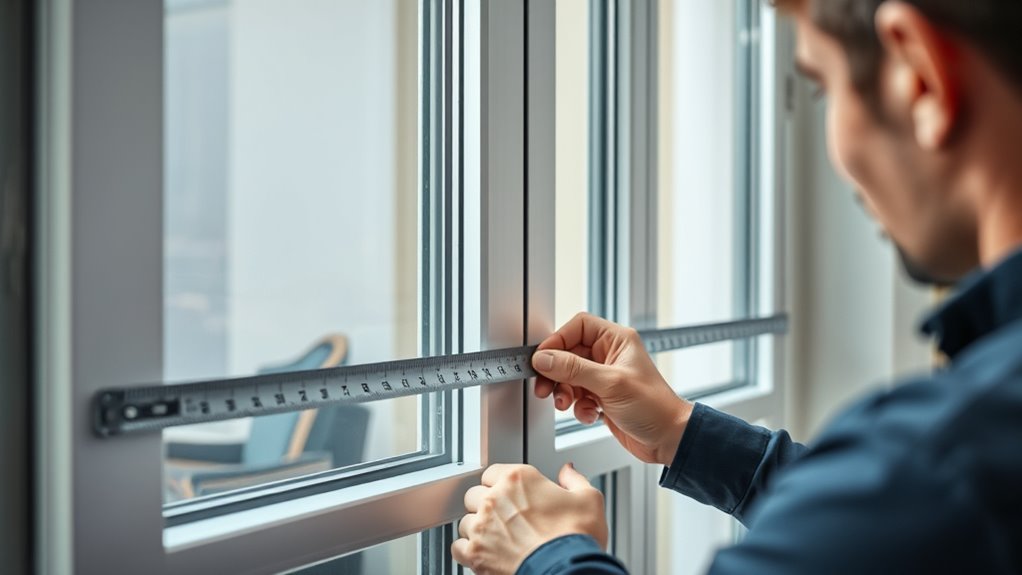

To measure windows like a pro, start by gathering your tools: a tape measure, level, and paper. Clear obstructions and measure the width at the top, middle, and bottom of the window, noting the smallest measurement. Do the same for the height at the left, center, and right sides, ensuring level use for accuracy. Double-check all measurements to prevent gaps, and if you want to master precise techniques, keep exploring for expert tips.
Key Takeaways
- Measure width and height at multiple points (top, middle, bottom) and record the smallest for a precise fit.
- Use a level or square to ensure measurements are straight and accurate.
- Double-check each measurement multiple times to confirm consistency and eliminate errors.
- Account for wall or window frame warping by measuring in various spots and choosing the most consistent size.
- Record all measurements carefully and verify they match style and installation requirements before proceeding.

Huepar Dual Laser Measuring Tool, 393Ft Green-Beam Bilateral Digital Laser Distance Measure 6 Units Ft/in/M, Rechargeable Laser Measurement Tool -Backlit LCD Display, Length/Area/Volume/Angle Sensor
【High Efficiency Dual Measurement Tool】Bilateral laser measure can do two-direction measurements simultaneously. Measure reference can be adjusted to…
As an affiliate, we earn on qualifying purchases.
As an affiliate, we earn on qualifying purchases.
Gather Your Tools and Prepare Your Space

Before you start measuring your windows, gather all the necessary tools and clear the area around each window. You’ll need measuring tools like a tape measure, a step ladder if your windows are high, and a pen and paper for notes. Make sure the space around your windows is free of furniture or curtains that could obstruct your measurements. Proper preparation helps you avoid errors and guarantees accurate results. Use measurement techniques such as measuring from edge to edge, and double-check your measurements before recording them. Taking your time to organize your tools and clear the workspace makes the process smoother and more precise. Additionally, understanding data privacy challenges associated with digital tools can help ensure your measurements are kept secure if you choose to record them digitally. With everything in place, you’ll be ready to measure confidently and get the perfect fit for your window treatments.

Laser Measure 50M/165ft,RockSeed Digital Laser Distance Meter with 2 Bubble Levels,Portable M/in/Ft Unit Switching Backlit LCD and Measuring Distance/Area/Volume/Pythagorean
★ HIGH ACCURACY & UNIT SWITCHABLE ★ With unique 2 Bubble Levels, providing more precise measurement compared to…
As an affiliate, we earn on qualifying purchases.
As an affiliate, we earn on qualifying purchases.
Measure the Widths at Multiple Points

To guarantee your window measurements are accurate, you should measure the width at multiple points across the window opening. Different window styles and framing materials can cause slight variations in width, so taking multiple measurements ensures you get the most precise size. Use a tape measure and measure at the top, middle, and bottom of the opening. Record the smallest measurement to ensure your new window fits snugly without gaps. Here’s a quick reference:
| Location | Measurement (inches) | Notes |
|---|---|---|
| Top | Check for warping | |
| Middle | Most consistent point | |
| Bottom | Watch for sagging | |
| Overall | Use the smallest value |
Measuring at multiple points guarantees a perfect fit, regardless of your window’s style or framing material. For added accuracy, consider cultural and regional breakfast traditions that might influence your window design choices, especially in areas with unique architectural styles.

Laser Level Line Tool, Multipurpose Laser Level Kit Standard Cross Line Laser leveler Beam Tool with Metric Rulers 8ft/2.5M for Picture Hanging cabinets Tile Walls by AikTryee.
【MULTIFUNCTION LASER LEVEL】Laser level tool cool gadgets for men Works For Indoor Designed for any situation where accurate…
As an affiliate, we earn on qualifying purchases.
As an affiliate, we earn on qualifying purchases.
Record the Height at Several Spots

Start by choosing several points along the window frame to measure the height reliably. Use a level to make certain your measurements stay straight and accurate. Record each height carefully, keeping the same points in mind for a reliable reading. Additionally, consider the self watering plant pots concept to ensure your measurements accommodate any potential water level variations in your window sill setup.
Select Multiple Measurement Points
Have you considered that measuring a window at just one point might not give an accurate reading? Different parts of the frame placement can vary, especially with certain window styles. To guarantee a perfect fit, measure the height at several spots—top, middle, and bottom—across each side. This helps identify any inconsistencies caused by warping or uneven walls. For example, a bay window or a decorative style might have slight variations that impact your measurements. Recording multiple points ensures you capture the most precise, thorough data. Don’t rely on just one measurement; instead, compare these readings to determine the smallest or most consistent height. This approach guarantees your new window treatments or replacements will fit perfectly, no gaps, no guesswork. Additionally, understanding measurement accuracy can help you avoid costly errors during installation.
Use Level for Accuracy
Using a level guarantees your measurements are accurate across multiple points. When measuring window heights, consistent readings matter for a professional fit. Using level tools helps you identify any variations in height, ensuring your measurements are precise. To maximize measuring accuracy:
- Place the level on each measurement spot to check for evenness
- Record the height at several points along the window frame
- Confirm that the level bubble remains centered for reliability
- Remember that eye patch benefits include improved accuracy and confidence in your measurements
This approach ensures you avoid gaps or uneven gaps later. By verifying that the level tools stay steady, you can trust your measurements across all spots. Accurate measurements lead to a perfect window fit and a clean finish, making the entire process smoother. Remember, a level is your best tool for precise, reliable window measurements.
Record Consistent Heights
To guarantee your window measurements are accurate, it’s essential to record the height at multiple points along the frame. Different frame styles, such as brick mold or flush mounts, may cause slight variations in height. Material considerations also matter; wood, vinyl, or aluminum can expand or contract with temperature changes, affecting measurements. Measure at the top, middle, and bottom of the frame, noting any discrepancies. If heights vary, use the smallest measurement to ensure your new window fits snugly without gaps. Taking multiple readings helps you account for irregularities caused by frame styles or material considerations. Being aware of material expansion and contraction is crucial for precise measurements, especially in varying climates. This careful approach ensures your measurements are consistent and reliable, preventing issues during installation and guaranteeing a perfect fit.
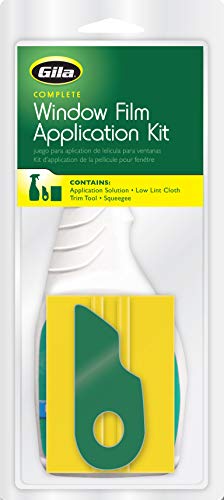
Gila RTK500 06008001427 Window Film Complete Installation Kit, 1-Pack ( Packaging May Vary )
WORKS WITH ANY RESIDENTIAL WINDOW FILM: Created for better results, whether you're working with longer lasting adhesive film…
As an affiliate, we earn on qualifying purchases.
As an affiliate, we earn on qualifying purchases.
Check and Confirm Your Measurements

Before installing your new windows, it’s essential to double-check your measurements to guarantee a perfect fit. Ensuring measurement accuracy and measurement consistency helps prevent costly mistakes. Take time to verify each measurement multiple times and compare them to avoid discrepancies. Confirm that all measurements are the same across different points, especially if the window frame isn’t perfectly square. Use a reliable tape measure and record your findings clearly. Double-check the width, height, and depth, making sure they match. Don’t rush this step—accuracy here saves you headaches later. Cookies used to enhance browsing experience can also help remember your measurement preferences for future projects.
Account for Mounting and Clearance Space

After confirming your measurements, it’s important to account for mounting and clearance space to guarantee your window fits properly and operates smoothly. Consider mounting considerations such as the type of frame, wall thickness, and whether you need extra space for hardware or trim. Clearance requirements are equally essential; you must leave enough room for the window to open fully without obstruction. Measure the distance between the window frame and any obstacles like sills, moldings, or hardware. Remember that some windows need extra clearance for handles or locks. Failing to factor in these elements can lead to a tight fit or difficulty opening the window. Additionally, space optimization ensures that your window installation will be both functional and aesthetically pleasing. By carefully planning for mounting considerations and clearance requirements, you’ll ensure a seamless installation and ideal window function.
Double-Check and Finalize Your Dimensions

Have you double-verified all your measurements to guarantee their accuracy? Now’s the time to finalize your dimensions. Double-check the frame thickness to ensure your new window fits snugly without gaps. Confirm your measurements across multiple points—top, middle, and bottom—to catch any inconsistencies. Be mindful of your window style, as different styles may require specific clearances or adjustments. To avoid the common issue of passive voice, review your instructions and descriptions to ensure clarity and directness.
Verify all measurements carefully to ensure a perfect, gap-free window fit.
To ensure precision:
- Re-measure height, width, and depth, accounting for frame thickness and any obstructions
- Cross-reference measurements against your window style requirements
- Use a level or square to verify that all dimensions are consistent and true
Taking these extra steps guarantees a perfect fit, preventing costly mistakes and ensuring your window installation looks sleek and professional.
Frequently Asked Questions
What Are the Best Tools for Precise Window Measurements?
You should use a steel tape measure or a laser distance measurer for the best measurement accuracy. Steel tapes are reliable and easy to compare against other tools, making them a solid choice. Laser measurers offer quick, precise readings and excel in tool comparison for difficult-to-reach spots. Both tools help make certain your window measurements are spot-on, preventing gaps or guesswork during installation.
How Do I Measure Irregularly Shaped or Non-Standard Windows?
To gauge an irregularly shaped or custom window, you need to take multiple measurements at different points. Use a flexible tape measure to carefully record each dimension, noting any curves or angles. Sketch the window and label each measurement. For complex shapes, consider dividing the window into smaller sections, measure each, and then combine the data. This ensures your custom window fits perfectly, with no gaps or guesswork.
Should I Measure Inside or Outside Mount Windows First?
Start with inside mount measurements to guarantee measurement accuracy and a seamless fit, then move to outside mount if needed for style or coverage. Inside mounts require precise measurement techniques, focusing on width, height, and depth, while outside mounts involve measuring the window’s total size and clearance. By prioritizing inside mount measurements first, you reduce errors and achieve a perfect, gap-free window treatment every time.
How Do I Handle Measurements for Custom or Unique Window Styles?
When measuring for custom window or unique styles, you should take precise measurements of width, height, and depth at multiple points to account for any irregularities. Always record the smallest width and height, and note any variations in the frame or opening. Use a steel tape measure for accuracy, and double-check your measurements. This guarantees your custom window treatments fit perfectly, even with distinctive or unconventional window designs.
What Common Mistakes Should I Avoid When Measuring Windows?
Don’t fall into the trap of rushing your measurements; that’s a common pitfall. Guarantee measurement accuracy by double-checking each dimension—mistakes here lead to gaps or ill-fitting blinds. Avoid using the wrong tools or ignoring window frame irregularities. Remember, precision matters more than speed. By paying close attention and verifying your measurements twice, you’ll sidestep costly errors and achieve perfect fits, transforming your windows from awkward to awesome.
Conclusion
Now that you’ve measured with precision, imagine the sunlight streaming through your perfectly fitted windows, casting warm, inviting patterns across your home. Feel the satisfaction of knowing every gap is sealed, every dimension just right. With your careful steps, you’ve transformed a simple task into a moment of pride. Your space is ready to embrace new curtains or blinds—beautifully tailored, gap-free, and truly yours. Enjoy the confidence that comes with knowing you’ve measured like a pro.